2. Project management
This week I worked on:
- Getting familiar Git, Gitlabs, and some Git commands
- Installing homebrew on my Mac
- Making a website
- Signing the student agreement
- Exploring the Fab website
Getting familiar Git, Gitlabs, and some Git commands
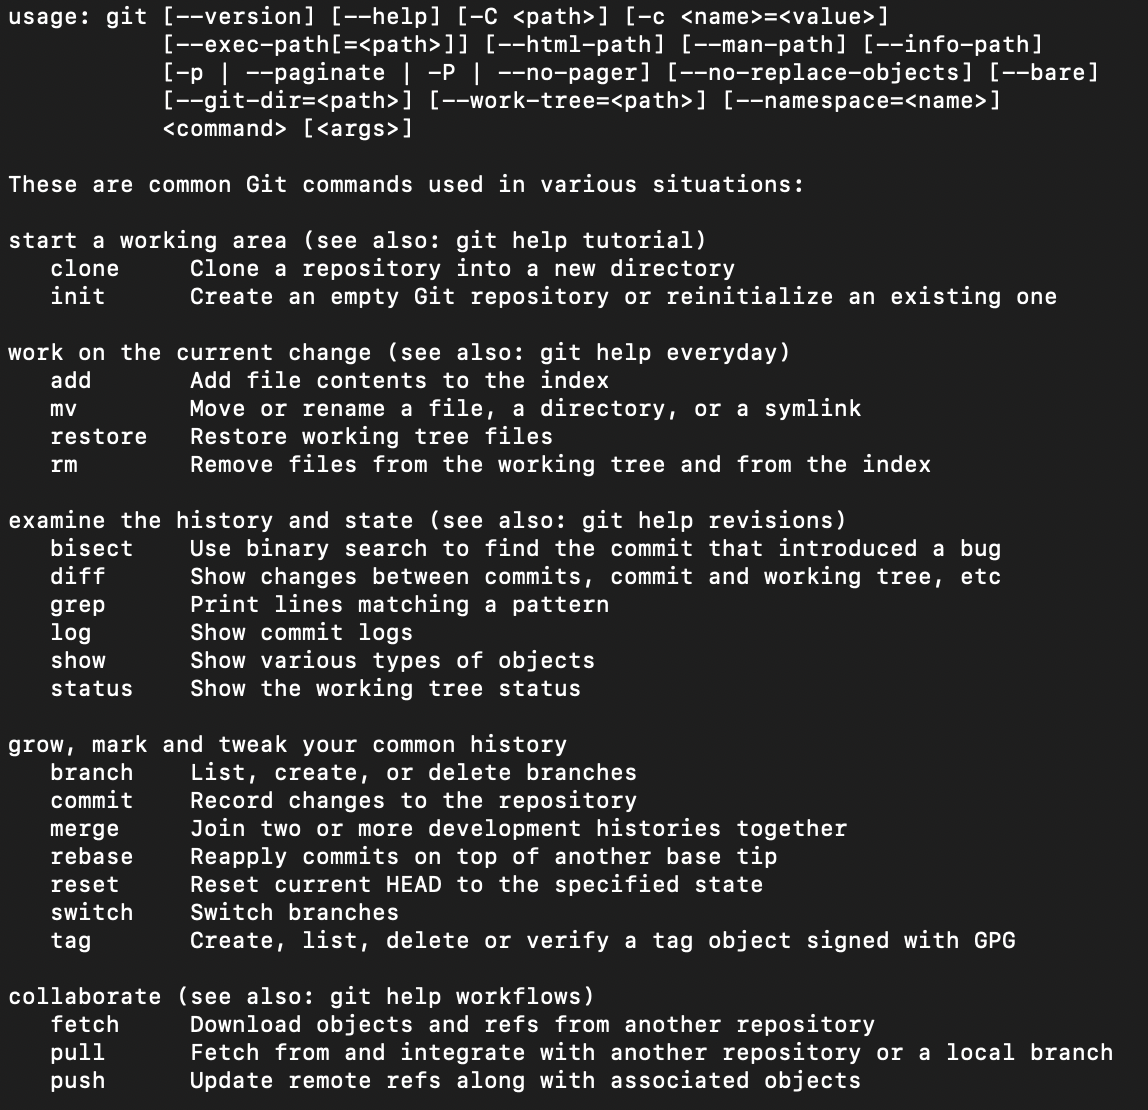
Due to my past job experience, I am already familiar with Git. Git is a widely used modern version control system in the world today, according to Atlassian. However, in the case my memory fails me when working with Git, I often use the Git Cheat Sheet to remember some of the commands I need in order to get Git working. The main commands I use when using Git, Github, or Gitlabs are:
git clone <repo>=> Clones the repo onto your local machine.git add <directory/file/all (.)>=> Stages the changes made in the directory or file for the next commit. FYI, adding.means add all the files that were changed.git commit -m "<message_goes_here>"=> Adds a message to the commit you’re making.git push=> Pushes the directories or files were the changes were made to the Github or Gitlab
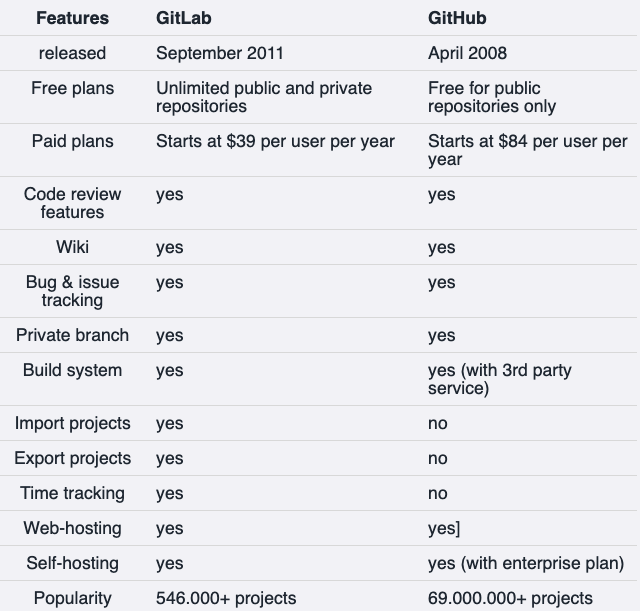
With Gitlab, there wasn’t much of a difference from Github, in regards to usage. However, you can learn more about the difference between Gitlab and Github on GitLab vs GitHub: Key differences & similarities. But, here is a snapshot of the difference.
In order for me to make a clone of my repo and have it on my local computer, I needed comfirm I had git installed on my computer. To do so, I needed to type the following command in my terminal:
git
The result was:
FYI: I am using a Macbook Pro.
The list of commands, git commands, comfirm that git is installed on my Macbook. In the case that is wasn’t, I would have to go through the documentation of installing Git onto my command. The result of Googling ‘How To Install Git On Mac’.
After installing Git, I needed to configure my Gitlab by having it associated with my computer. To do so, I generated an SSH key on my Macbook Pro and added the key to my GitLab. To Add an SSH Key correctly, I followed the gitlab tutorial: Generating a new SSH key pair
Installing Hombrew on my Mac
I installed Homebrew on my Macbook. Homebrew is a package manager for macOS. More information about Homebrew, including how to install in for Mac, can be found here: Homebrew Info
But, in short, to install Homebrew on Mac, I opened Mac’s terminal and insert the following code into the terminal:
/bin/bash -c "$(curl -fsSL https://raw.githubusercontent.com/Homebrew/install/HEAD/install.sh)"
To confirm if you have Homebrew, if you type brew into the terminal, you should see:
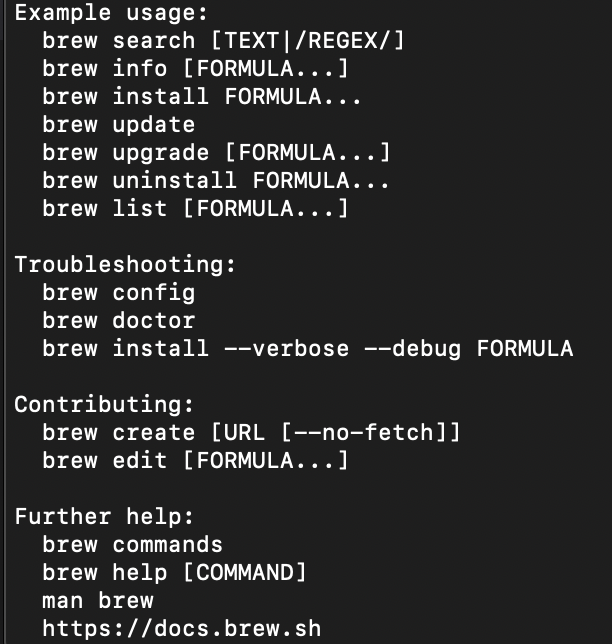
The image above illustrates all the commands you can do with brew.
Making a website
To make a website or configure the website that was already up and running, I needed to first decide if I want to create a website from scratch or if I wanted to use a template. I decided to use a template and stay with the following template, MKDoc. MKDoc is the default template and it is a free web application software that is easily manageable and deployable, allows you to create and manage online communities, publish materials in multiple language, and many more.
However, though I decided to stay with the default, I wanted to make some minor changes within the mkdocs.yml to make it my own. To do so, within the mkdocs.yml file, I changed:
- the site name
- the site description
- the site author
- the copyright
- the site url
- extra
- theme
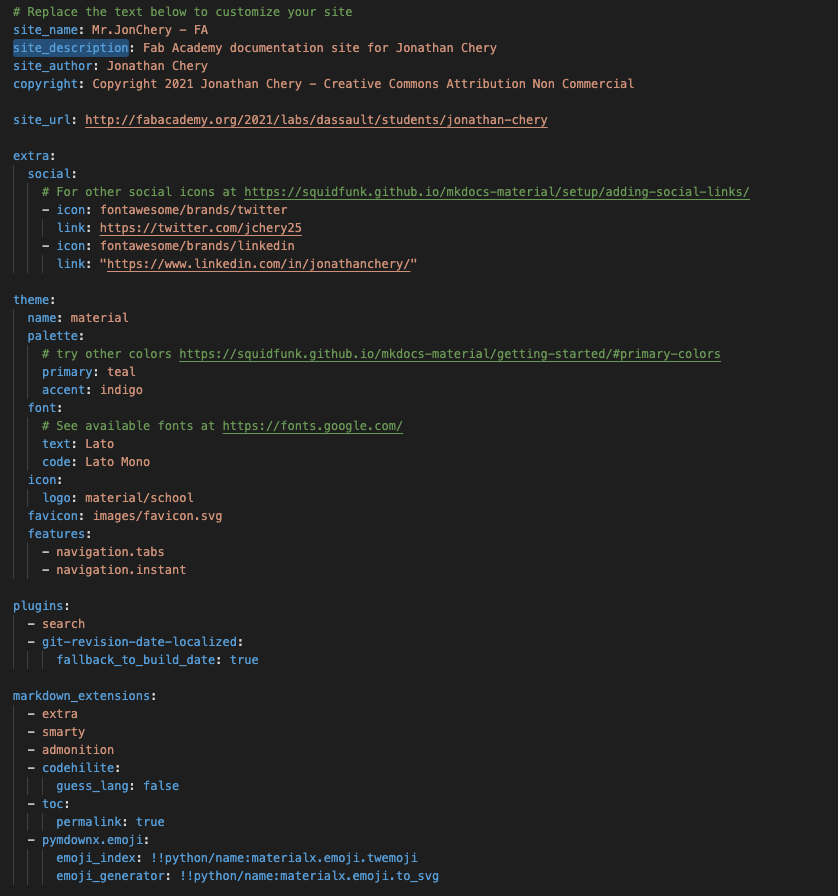
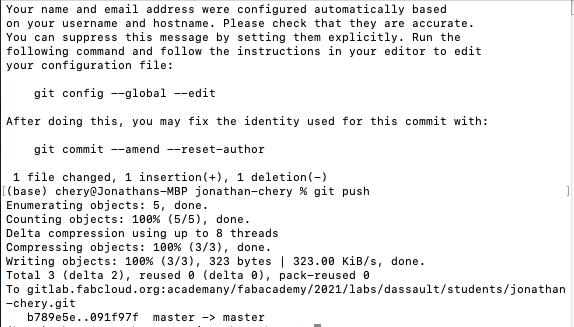
The changes illustrated above allowed to configure my site. After I made the changes within the mkdocs.yml, I pushed it onto Gitlab by doing the following commands:
git add mkdocs.yml
git commit -m 'Change the site details
git push
The result of the push lead to the below output in the terminal:
After the changes has ben pushed, I usually have to wait a few minutes before the changes takes effect and is updated on the website.
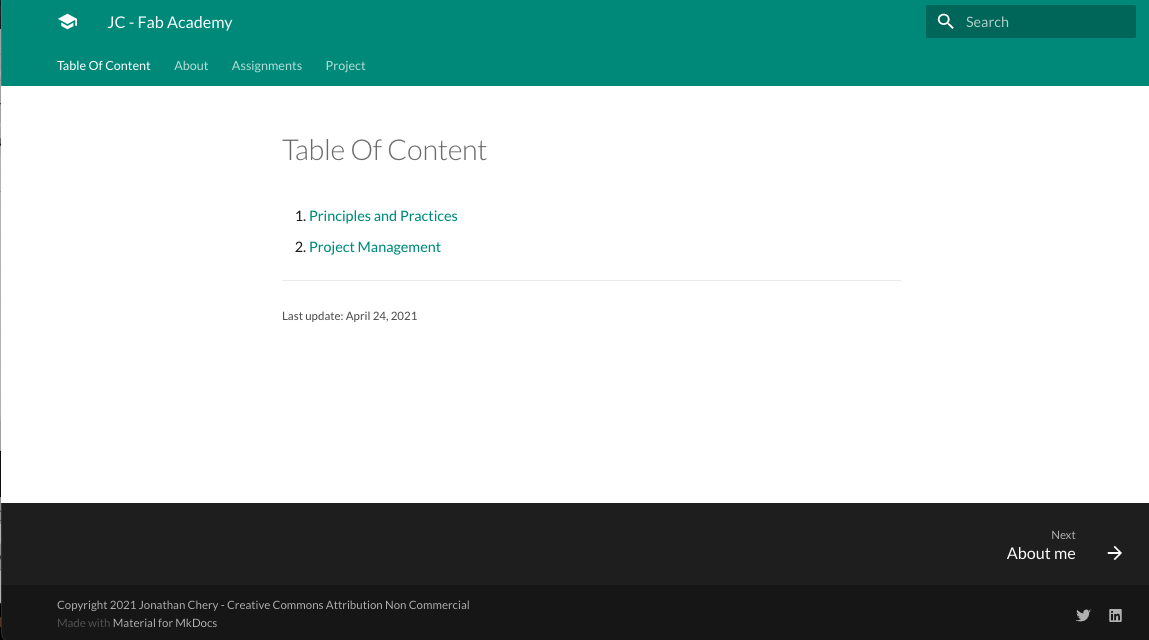
Now, my changes are live and personal.
NOTE: To learn and use mkdocs, the mkdocs documentation is extrememly helpful teaching you how to do Markdown language: mkdocs documentation
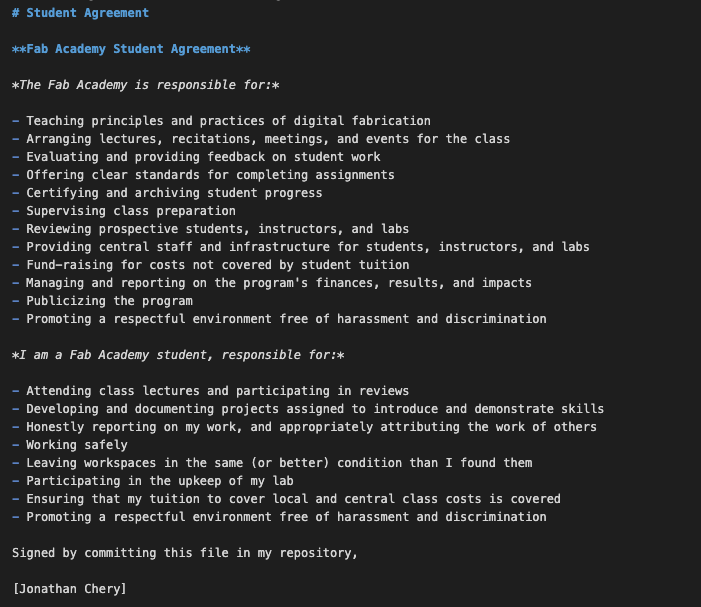
Signing the Student Agreement
I needed to sign the student agreement before continuing the program. TO access the student agreement, I navigated to the FabAcademy’s github and found the student agreement located here. I downloaded the agreement:
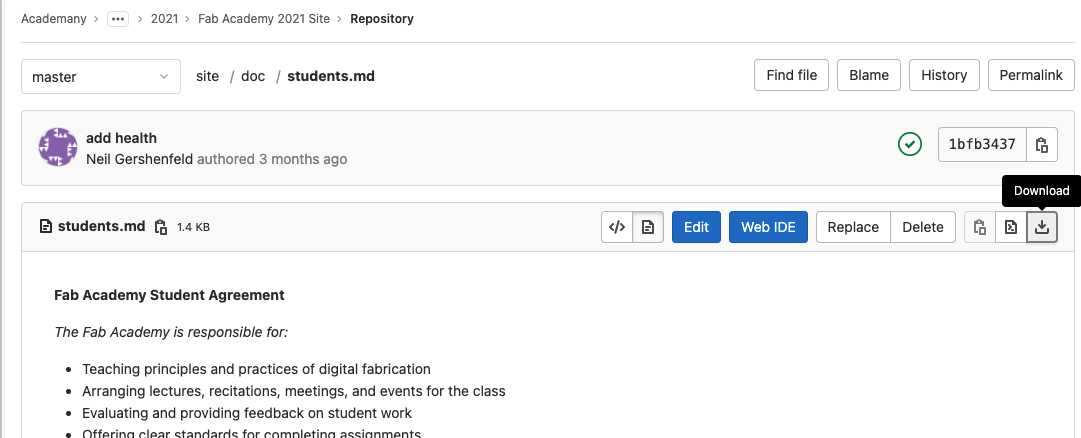
read through what was expected of me and signed it. Once I signed my agreement, I uploaded the agreement within my remote folder and placed it directly in the about folder.
From there, I pushed my local changes onto my Git by doing the following commands in the terminal within my remote directory.
git add /docs/about/agreement.md
git commit -m 'Added my agreement'
git push
The result of my push can be found here: Student Agreement
NOTE: Make sure you are in the remote directory. (The directory you cloned from Gitlab)
Uploading Images in Gitlab.
When it comes to uploading images, what I do is used the Macbook’s screenshot functionality. To do so, I do Shift + Command + 4. This allows me to choose the size of my screenshot. If the image is still too language, I use an online application that allows me to resize the image such as Simple Image Resizer.
Exploring the Fab website
Finally, I wanted to explore the FabAcademy’s website, specifically the content for the 2021 cohort. From my exploration, I noted that the important parts of this website for me are:
- Schedule => This is where I can find links to the notes, assignments, and videos
- Lab - The current lab I’m working in => Going back one will display all the labs but, the link added is a link to the Dassault Systemes lab
- Fab Academy 2021 Assignments and Assessments => This is where I find informaiton about what the assignment is for the week and how will it be assessed.
- The Fab Academy => This is the main page for the 2021 cohort. This page have a Search Engine where I can search for information or projects from past cohorts.
- The Fab Acadamy Inventory => This is the Fab Academy inventory list