About Me
![]()
Hey! I’m Teddy Warner, and at the time of writing this, I’m a sophomore in highschool enrolled at Charlotte Latin School (Class of 2023) in Charlotte, North Carolina. I have a great interest in modern fabrication technologies such as 3d printing & CNC machines. I love using these interests to benefit my community through volunteering. Before moving to Charlotte, I lived in Chicago and attended a small Catholic school. My interest in engineering was sparked during my time there as I participated on the robotics team, took a STEM course whenever I had the chance, and worked on soldering after school with my STEM teacher. Although my prior school’s STEM programs were great, coming to Charlotte Latin and having access to a Fab Lab has been incredible.
Visit this website to see some of my work 
Previous work
I believe that a great way to follow an introduction is to show prior experience. Below you’ll find a collection of some of the past projects that I documented along the way, or you can visit my personal porfolio, with documentation on projects and assignments done in my engineering classes.
Remote Learning Desk Project
This project was my favorite project during freshman year as I was able to use almost every tool that I had covered in my prior two engineering courses. At the start of 8th grade when I was learning Fusion360, I decided to upgrade my setup from an older pc to a brand new laptop and two 20 inch monitors to go along with it. The technological upgrade was great but resulted in my needing to upgrade my workspace. My previous computer had worked find with a desk my great grandfather built what had been passed down to me. However, using that desk with my brand new setup resulted in inadequate cable management. Facing this issue, I decided to design and build a desk for my room to accommodate my new laptop and monitors and solve the cable management issue. Below are the plans I drew for the desk.
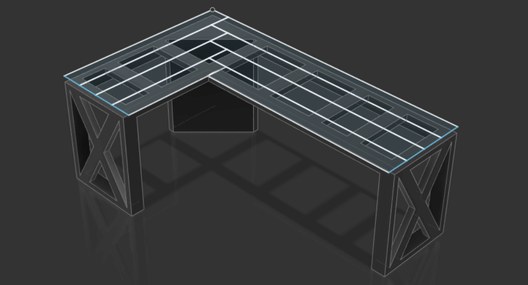
CAD Design
I proceeded to design a desk that fit all of my needs in Fusion360. My goals were to have a desk measured to fit perfectly in the corner of my room, with plenty of legroom so I would never hit my knees on it, and the best cable management imaginable. After a couple of different iterations, I came up with this model for the base. The desktop went through a couple more iterations after this, which is why it is only a sketch in this photo.
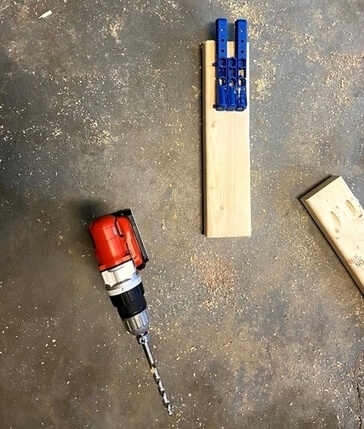
Lowes Trip and New Tool
Shortly after finishing up the CAD aspect of my desk project, Covid-19 caused our school to resort to online learning. This resulted in me not being able to access Charlotte Latin’s fab lab equipment. Fortunately, I have a lot of the tools we have in our lab at my house. I was determined to finish the desk, so just before everything closed down I took a trip to Lowe’s to pick up lumber and supplies. I settled on a frame and cabinet of 2x4s. I also bought plywood that I painted white. The top took some more thought, but I eventually decided to make the top out of cedar planks which I stained to match the stain of the wood floor in my room. Also, I bought a Kreg-Jig to drill pocket holes for the desk as I didn’t like the idea of screws being visible. It was my first time using a Kreg-Jig but it went super well as it’s a relatively simple jig to use.
Building Process
After prepping the wood, I started laying down the frame making sure the front 2x4 was flat and the back was upright (to give more leg space). I was very excited to get the whole thing together. Maybe a little too excited, because even though you can’t tell from the pictures above, I built the whole desk backward the first time by putting the corner on the wrong side. This was a huge setback to fix as it meant that I had to take the entire desk apart, use wood filler on all of the newly exposed holes, and build it back up the right way. I considered leaving the desk as I built it the first time and rearranging my room to match the flaw. However, I wanted my desk to be perfect and that meant fixing it according to my CAD model. So, I took the desk apart and did the laborious tasks listed above. I finished the frame of the desk the right way late that night. The next day I spent the whole day sawing, planning, and sanding the cedar. The following day I put the top together using the Kreg-Jig. I was very pleased with how the desk turned out despite the obstacles I faced building it and I’ve been really happy with the result as I’ve used the desk for nearly a year since completing it.

Assembling the Desk
As I said earlier the choice of wood for the surface of the desk took some thought, but I’m super glad I chose cedar. Originally I was planning on using oak, but the cost scared me away to a much better smelling and looking cedar. My only concern with this type of wood was how much it expands and contracts. I was concerned that screwing a cedar top to my frame would just wiggle itself loose over time and cause issues. I came up with a workaround to address this concern. Instead of attaching the cedar top directly to the frame, I designed 3d-printed mounts that allow the top to expand and contract a whole lot more without becoming loose.
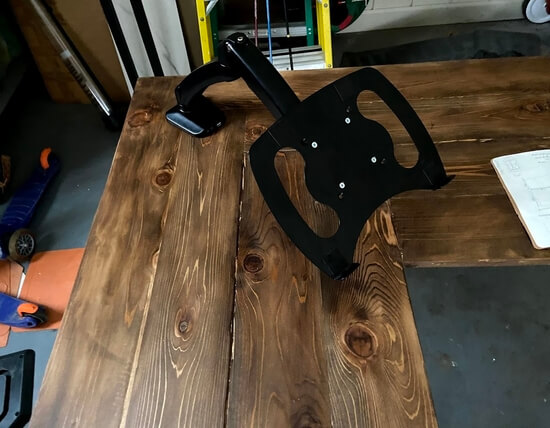
Cable Managment
Effective cable management was a huge part of the project as it’s one of the reasons I decided to build a new desk in the first place. After attaching the top of the desk to the frame, I threw on a great air-spring laptop mount that routs all of the cables from my laptop through a grommet in the top on the table down to the corner cabinet. The cables are routed through a hole in the back and run through 3d-printed cable clips on the back of the desk. The cable clips are exactly as long as the toe kick on the hardwood floor in my bedroom so they don’t push the desk off the wall any more than it needs to be. Finally, all of the power cables run back into the top of the corner cabinet and plug into a built-in power strip.
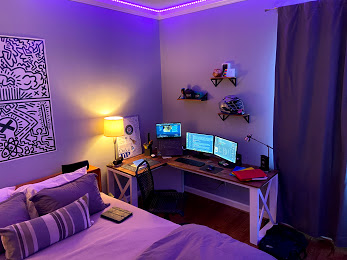
Final Thoughts
I love how my desk came out! It solves all of the unsightly cable issues I had with my old desk and it fits perfectly in the right corner of my room. Eventually, I’m planning on wall-mounting my monitors to give myself even more desk space. For now, the little corner piece serves as an adequate writing surface. After putting the desk in place, I felt that there was way too much space above it. After some browsing, I found some shelves on Amazon that use the same stain and match perfectly. I ordered and installed the shelves over the desk and I like the way it looks. This project went surprisingly smoothly despite Covid-19 challenges. Further, even with my building setbacks, it came out well.
Lithophane Experiments

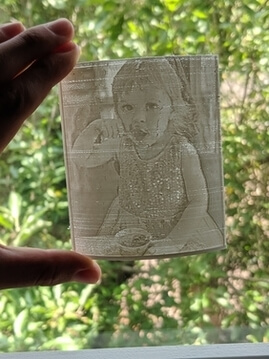 A lithophane is a piece of art made out of a thin translucent material designed to show an image in a “grisaille” color format when held up to a light. Over the Winter break of my freshman year in high school, I designed some lithophanes for the new 3d printer I had just built. I designed a couple of lithophanes ranging from one of Ironman for my little brothers to pictures of my family. My best result was a picture of my little cousin which is shown on the left. If I were to pick up experimenting with lithophanes again, I would spend time perfecting a profile for printing them because while my original lithophanes were readable they were a little grainy and had many horizontal breaks in the image.