12. Moulding & Casting
Group assignment
For this weeks group assignment we had to review the safety data sheets for our materials we were going to use.
As its important to know before you start, we needed to do this first.
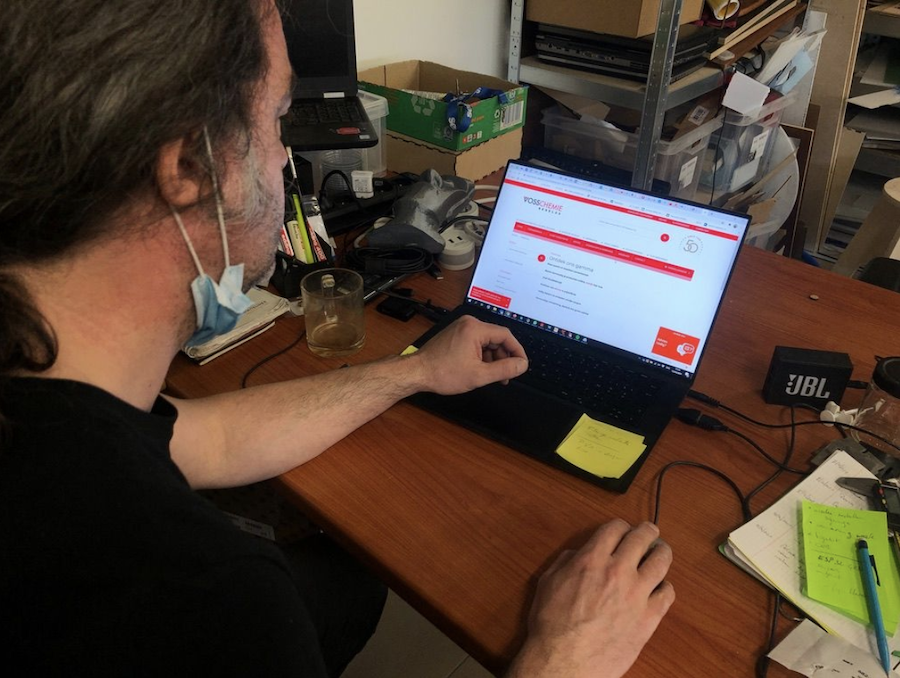
We use products from our partners of Vosschemie. As we were going to cast with silicone, this was the datasheet we were looking for.
We used the material before, so we know what to do next. As silicone is the only material we were both going to use, this was the datasheet we looked at together. The other moulding and casting materials are individual and are described in our own documentation.
Indiviual assignment
Designing of the mould: dog bone cookies
Kurt and I made the Mysa Automata during the machine building. So now it’s time to make the treats. Mysa likes her treats very much and Isabel likes cooking. Put one and one together and it only makes sense to bake Mysa’s cookies at home. Making a mould to to do is the next logical step and we have to learn how to this for the Fab Academy as well.
First we need to know how big the cookies Mysa likes are.

The bone itself was made in Tinkercad. After getting it right, it was printed multiple times at once.
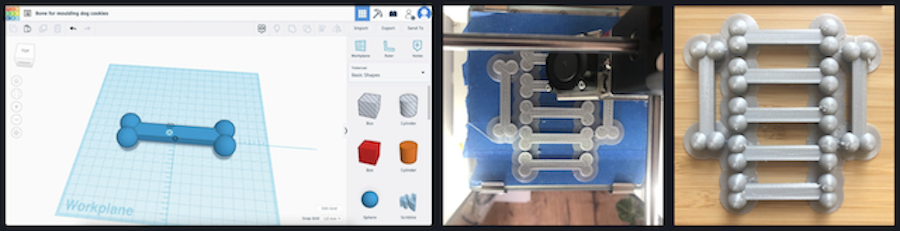
Once cleaned up, it’s time to use the vacuformer.
First steps:
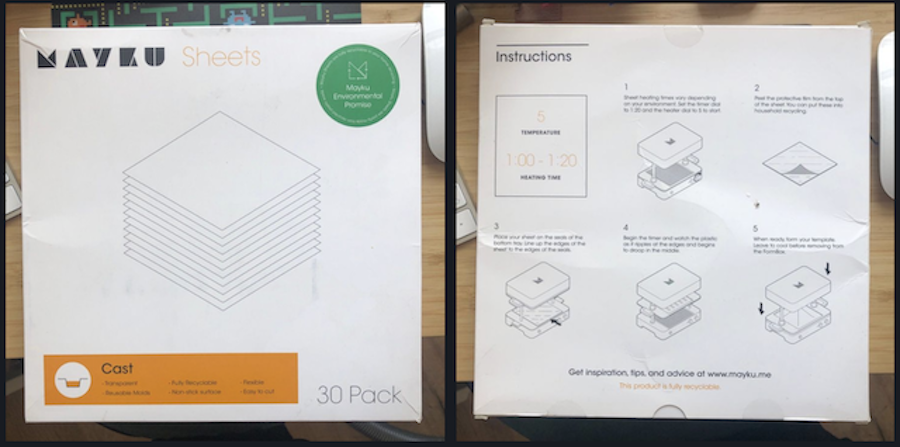
Attach the vacuum cleaner to the exhaust and turn it on!

Afterwards, turn on the machine and look on the material to find out about the settings you need to use for the temperature and the heating time.
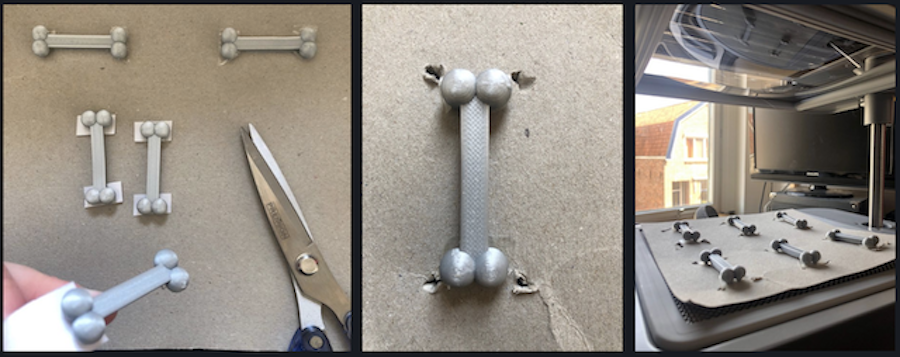
To make sure your pieces don’t move around while vacuforming, put them on a piece of cardboard with double sided tape and make small holes around each piece to make sure the air can be sucked out by the vacuformer.
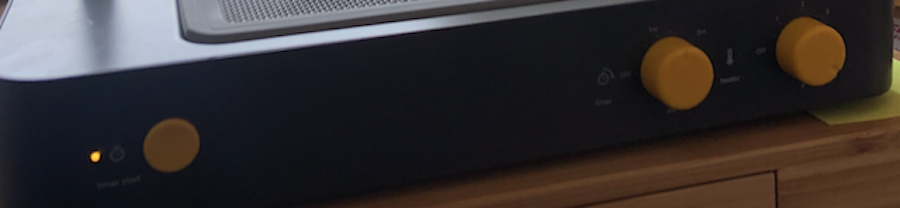
With the pieces loaded in the machine. Adjust the two yellow knobs on the right side of the machine to set the temperature and the heating time and hit the timer countdown button on the left.
Once the timer is done, you will see that the plastic had melted and the machine will let you know by making a sound.

Move down the plastic with the handles and let the vacuformer finish. Once the mould is done, turn off the vacuum cleaner and take the mould out of the machine. Remove the 3D-prints and ta-da you have a mould to make a silicone mould from.
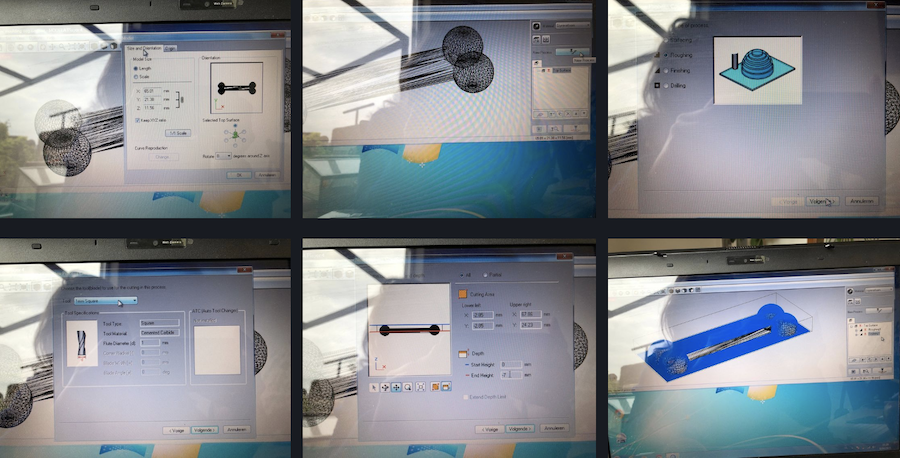
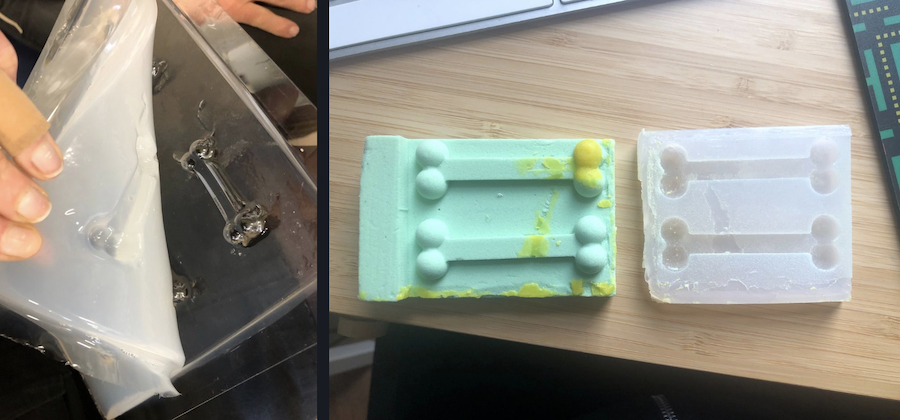
Milling the mold
Of course the assignment was to mill a mould. I took the same 3D-file to start from and ran it through the Roland Player 4 software. Exporting the files needed for the machine: surfacing, roughing and finishing. Setting the depth, the end bit, etc. As we used the software before to mill the PCB’s, this is all known from before.
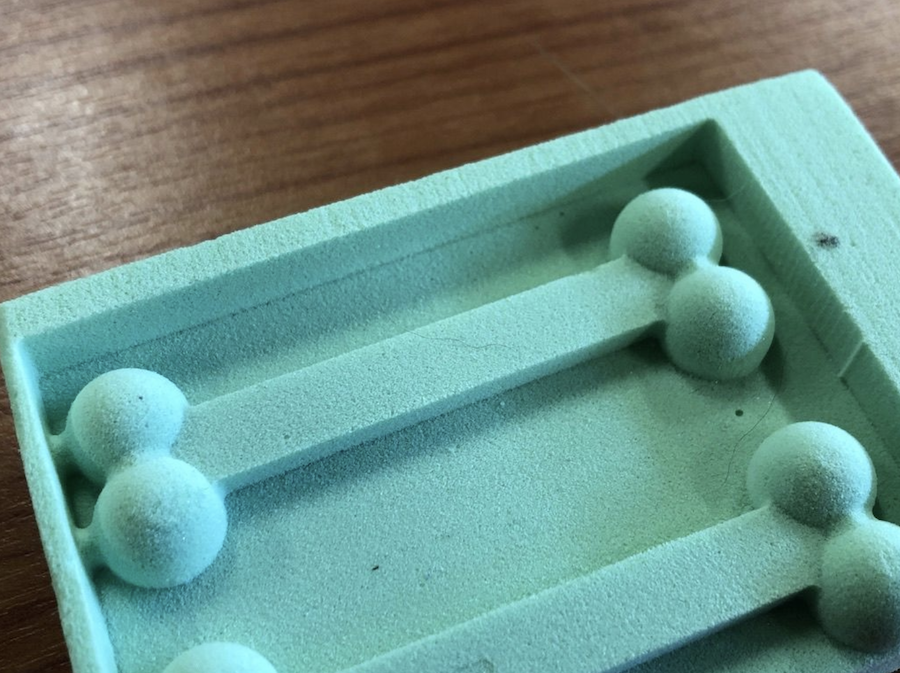
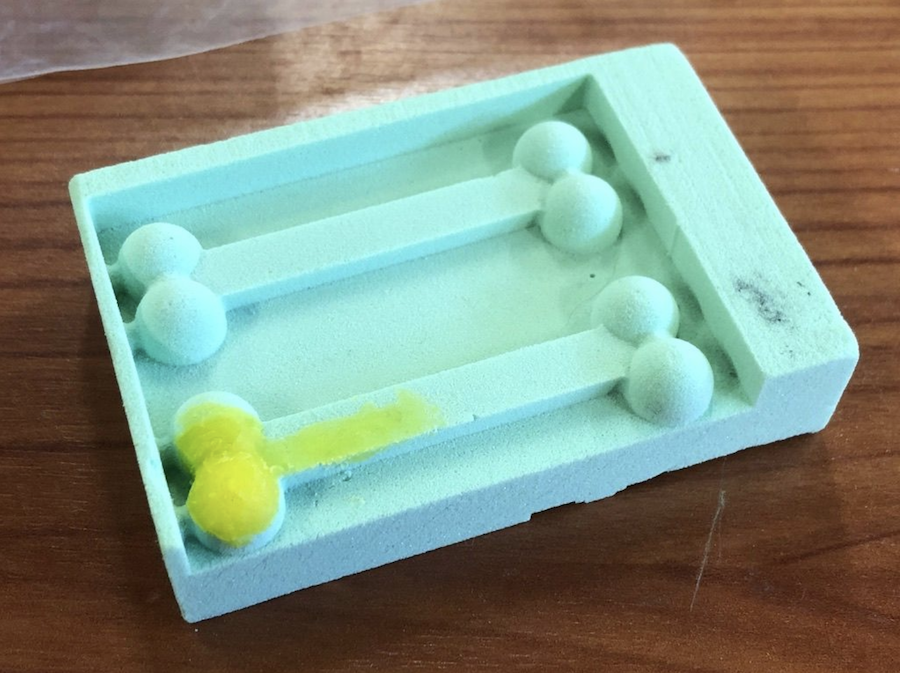
The iModela takes its time, but the result in the green foam came out beautiful.
The first bone was damaged as I used an older piece of foam I had at hand, thinking it would be okay and I didn’t want to throw it out. But thankfully I enjoy using plasticine and sculpting, so I moulded the part that needed repairing by hand.
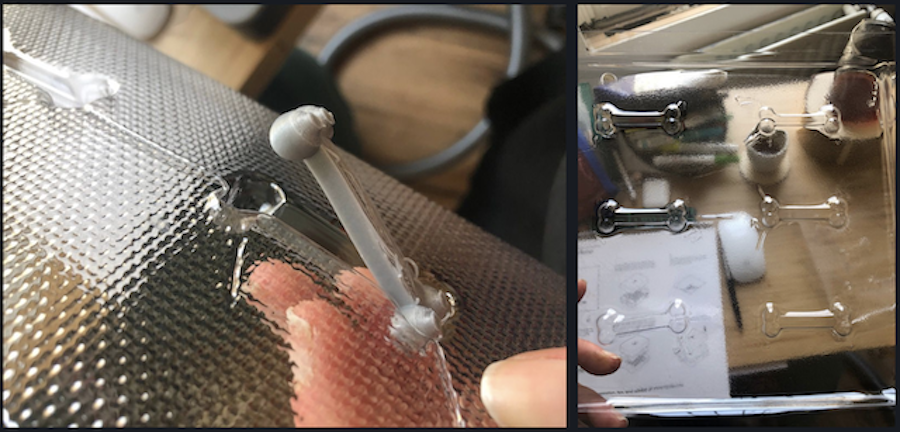
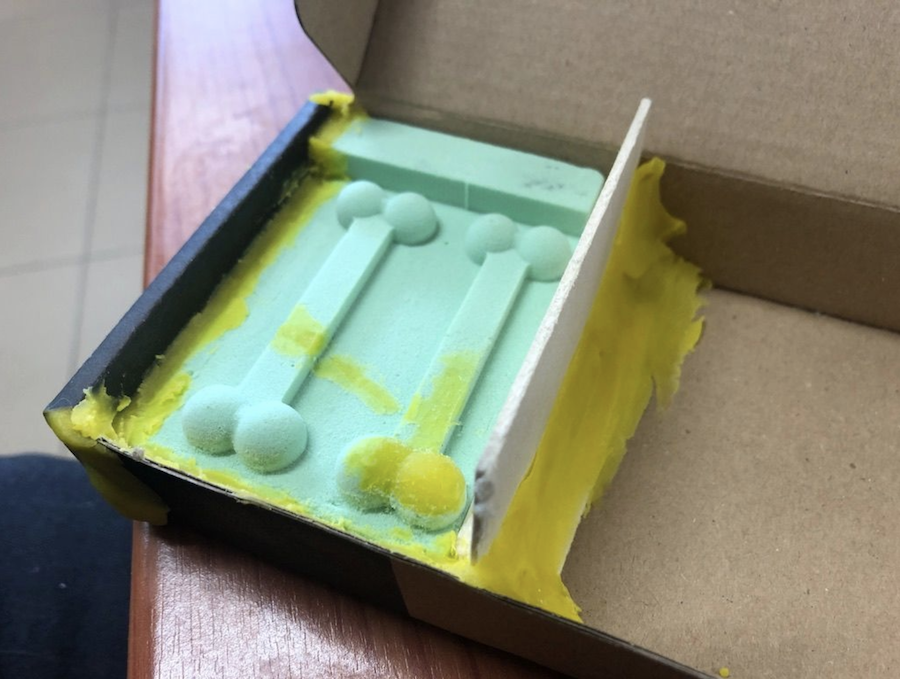
With the mould ready, it was time to prepare it for casting.
Casting
I used an old cardboard box that fitted the mould. Plasticine made sure that everything wat siliconeproof and that the silicone would stick to the mould and wasn’t going to drip all over the place.
We use a 2 part transparent silicone, that mixes in equal parts of base and catalyst.
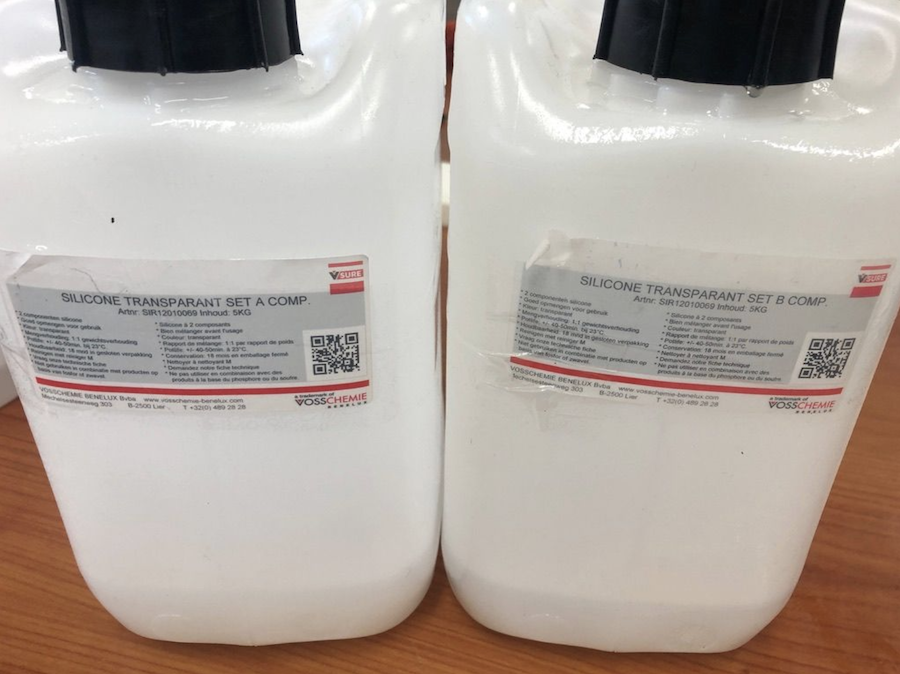
They need to be mixed 1/1. So careful measuring using a scale is vital to do this step properly.
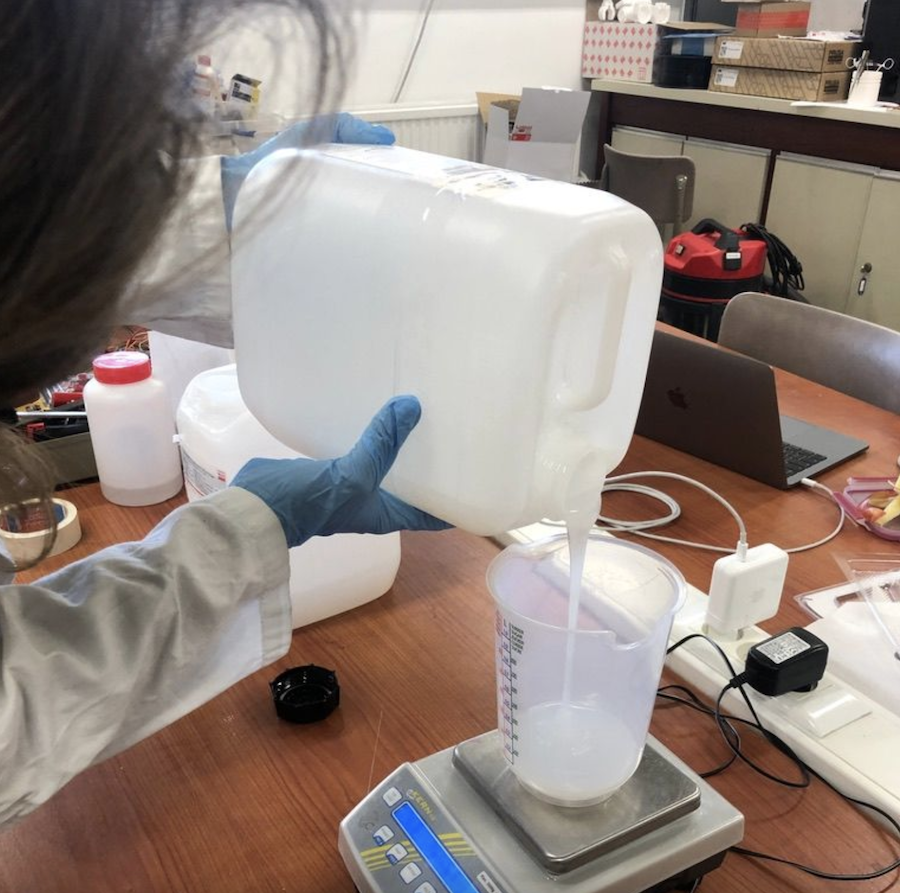
Once they are together, you need to stir them using a circle movement. No going up and down as that allows for air bubbles to get trapped inside and you want your silicone smooth 😉. After stirring, carefully tap the cup in order to let the air bubbles come to the surface. The less, the better!

Now it’s time to take the prepared moulds and start pouring. Try to have a steady small silicone stream. Don’t try to be super quick, but take your time. This will allow you to reduce the number of air bubbles as well.
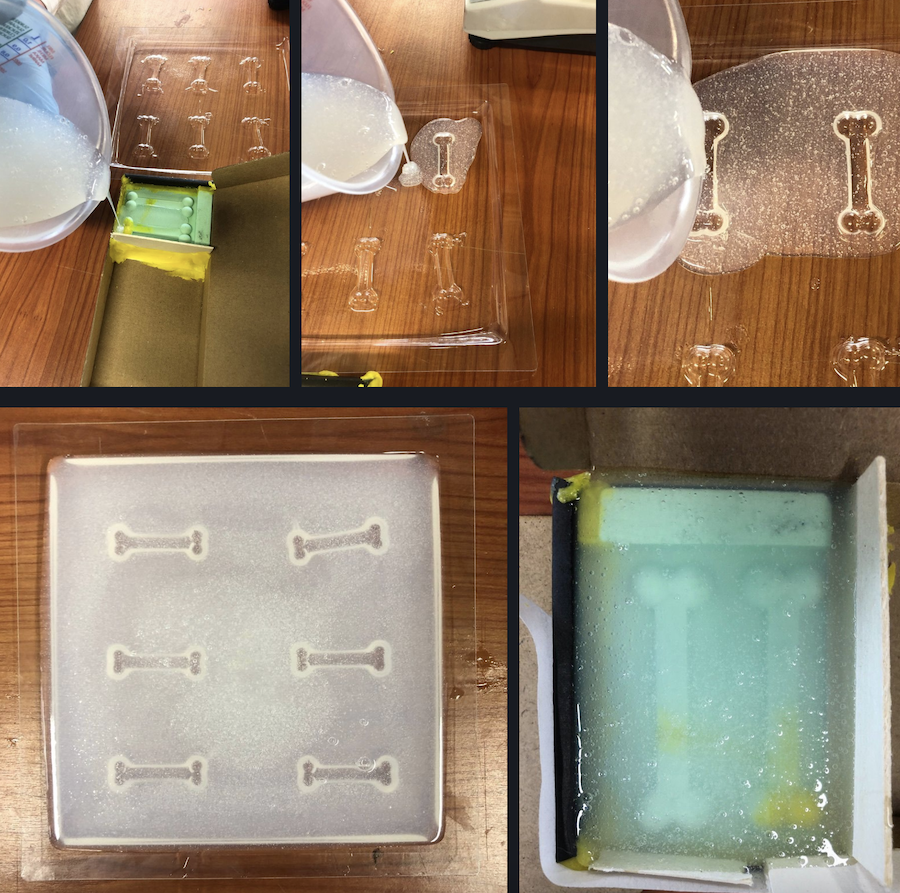
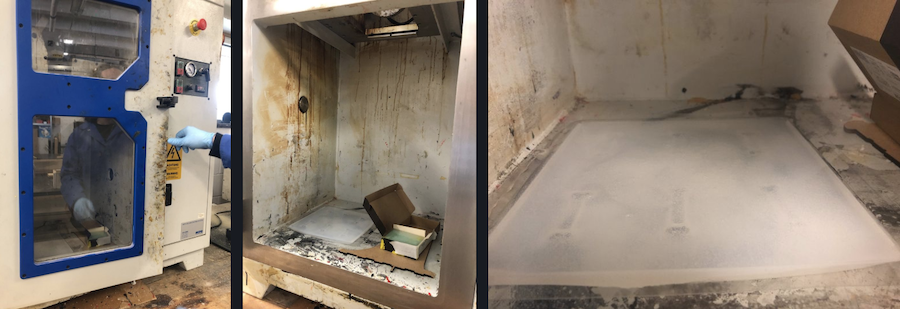
With the silicone in place, a good extra step is to put them in the vacuum machine for a bit. This will allow the silicone to settle and degas. Of course, only if you have such a cabinet. It’s ok to leave this step out.
After 15 minutes it’s time to take them out of the machine and let them dry. It usually takes about a day to let them dry properly.
With the negative moulds ready. It’s time to make Mysa her treats!
Casting the treats
I decided to make fruit candy based on blueberries using agar agar.
This is the recipe:
- 150g blueberries
- Optionally: 2 tablespoons of coconut sugar (not for dog candy!)
- 4g agar agar
First you measure the berries, you need about 150g of berries to make 12 candies. Put them on the stove with the sugar and let them boil in order for the juices to come out. Whisk them while bringing them to a boil, otherwise the mixtures burns super easily!
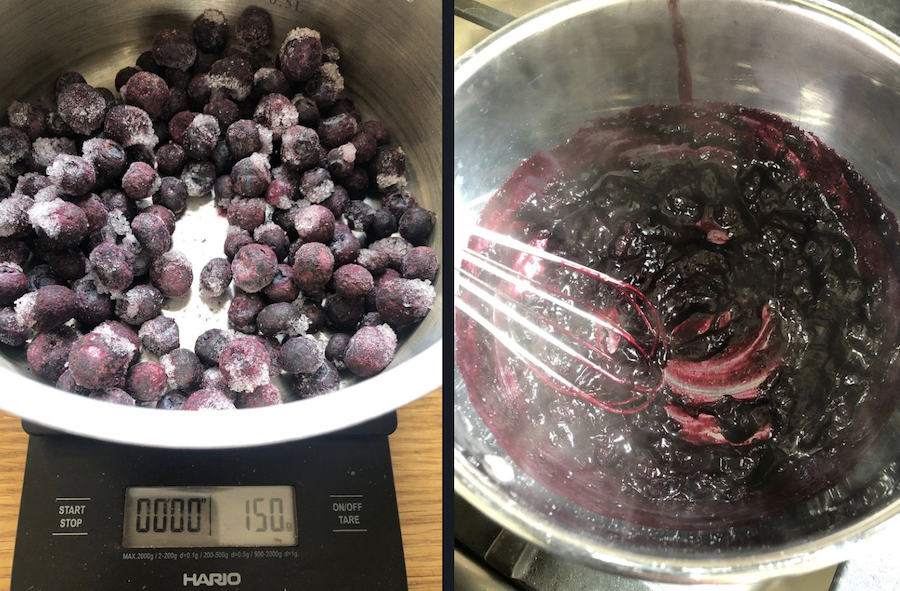
Measure the agar agar, you need about 4g.

Once the mixture boils, carefully add the agar agar while whisking. Continue to whisk for two minutes and than turn off the heath. Put the bloody mixture in the mould 😉

Leave it to settle in the refrigerator for about 2 hours. Take them out with care!

Make your own
Enjoy your candy! Good for the dog and for you 😉