Networking and communications
Group assignment
Individual assignment
Design, build, and connect wired or wireless node(s) with network or bus addresses.
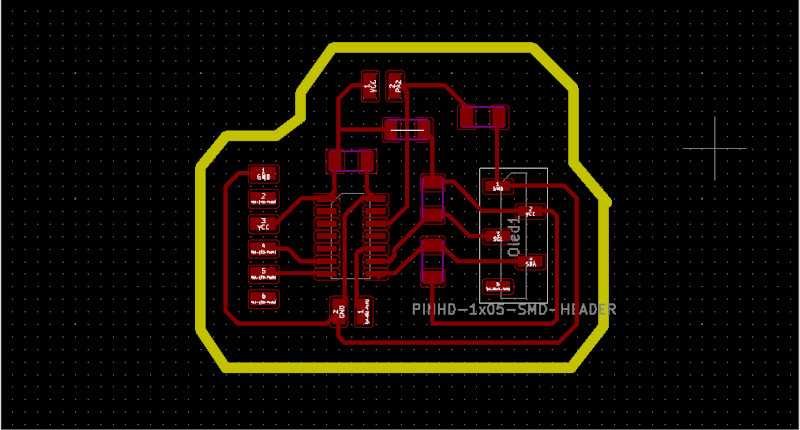
Since for my final project I will be using I2C as communication protocol, for this week I aimed to do an approximation of the network I’ll have in place. For the Output assignment I’ve already designed a board that uses I2C communication, with the connection for an Oled screen, so I did a second board with the same design to be used for this week.

Kicad project
For the first Iteration, I used the Master/Secondary examples that we worked with during our local class, using my Board and and Arduino UNO as the devices to communicate with each other.
For this examples, Arduino uses the default library Wire.h. Since it will be connecting to an ATTiny1614, I had to download the proper library (TinyWire libraries) for this micro controller.
Example 1: Master as receiver (information request)
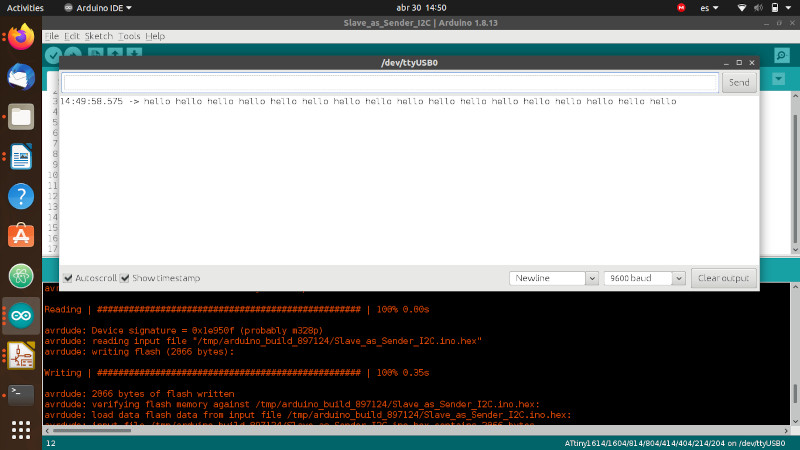
In this example, we will program the Arduino to be the sender and the ATTiny1614 as the receiver. The information is transmitted when the Master submits a request:
Sender:
	#include < Wire.h>

	void setup() {
	    Wire.begin(8);                // join i2c bus with address #8
	    Wire.onReceive(receiveEvent); // register event
	    Serial.begin(9600);           // start serial for output
	}

	void loop() {
	    delay(100);
	}

	// function that executes whenever data is received from master
	// this function is registered as an event, see setup()
	void receiveEvent(int howMany) {
	    while (1 < Wire.available()) { // loop through all but the last
	        char c = Wire.read(); // receive byte as a character
	        Serial.print(c);         // print the character
	    }
	    int x = Wire.read();    // receive byte as an integer
	    Serial.println(x);         // print the integer
	}
Receiver:
	#include < Wire.h>

	void setup() {
	    Wire.begin(8);                // join i2c bus with address #8
	    Wire.onRequest(requestEvent); // register event
	}

	void loop() {
	    delay(100);
	}

	// function that executes whenever data is requested by master
	// this function is registered as an event, see setup()
	void requestEvent() {
	    Wire.write("hello "); // respond with message of 6 bytes
	    // as expected by master
	}

Example 2. Master as sender:
In this second example, I’ve inverted the roles of the boards, having the Arduino as the receiver and the ATTiny1614 as the sender. Then I've tested with the same two example scenarios:
Sender:
	#include < Wire.h>

void setup() {
    Wire.begin(); // join i2c bus (address optional for master)
}

byte x = 0;

void loop() {
    Wire.beginTransmission(8); // transmit to device #8
    Wire.write("x is ");        // sends five bytes
    Wire.write(x);              // sends one byte
    Wire.endTransmission();    // stop transmitting

    x++;
    delay(500);
}
Receiver:
	#include < Wire.h>

void setup() {
    Wire.begin(8);                // join i2c bus with address #8
    Wire.onReceive(receiveEvent); // register event
    Serial.begin(9600);           // start serial for output
}

void loop() {
    delay(100);
}

// function that executes whenever data is received from master
// this function is registered as an event, see setup()
void receiveEvent(int howMany) {
    while (1 < Wire.available()) { // loop through all but the last
        char c = Wire.read(); // receive byte as a character
        Serial.print(c);         // print the character
    }
    int x = Wire.read();    // receive byte as an integer
    Serial.println(x);         // print the integer
}
Third iteration:
For this iteration, I included an Oled screen, the test was to connect in series the two micro controllers to it and use the Serial Monitor to give the input to what we want to be displayed in the screen.The first two iterations were simple tests, were just a few actions were defined:
- Register the event.
- Establish the connection.
- Define the message.
- Length of the message.
- Print the message.
So for this third iteration, I had to take a couple of steps (and errors) to be able to test correctly. First, find the correct library to setup the Oled, this was the main issue I encountered, the examples I previously used with the screen, are not compatible with the Wire.h library, after some research, I found the Tiny4kOLED library in the Arduino libraries manager, which was developed for ATTiny micro controllers and works with the Wire.h library.
The next step was to, based on the code from the two first examples, compile a code that includes the instructions that will make the Oled screen work, it was a mix of all three codes, plus including the instructions to be able to send the information from the Sender’s serial monitor:
Master as receiver:
		#include < Wire.h>

		#include < Tiny4kOLED.h>


		char lect[6] = "hola";

		void setup() {
		  //Wire.begin();        // join i2c bus (address optional for master)
		  Serial.begin(9600);  // start serial for output

		  oled.begin();

		  oled.setFont(FONT6X8);
		  oled.clear();
		  oled.setCursor(10, 1);
		  oled.print("01234");
		  oled.on();
		  Wire.begin();
		  delay(1000);

		}

		void loop() {
		  Serial.println("requesting");
		  Wire.requestFrom(8, 6);    // request 6 bytes from slave device #8
		  int x = 0;
		  while (Wire.available()) { // slave may send less than requested
		    char c = Wire.read();    // receive a byte as character
		    lect[x] = c;
		    x = x + 1;
		    Serial.print(c);         // print the character
		  }
		  Serial.println();

		  oled.clear();
		  oled.setCursor(10, 1);
		  oled.print(lect);
		  oled.on();

		  delay(500);
		}
Secondary as sender:
	#include < Wire.h>
char buff[6]="test  ";

void setup() {
  Serial.begin(9600);
  Wire.begin(8);                // join i2c bus with address #8
  Wire.onRequest(requestEvent); // register event
}

void loop() {
  while (Serial.available() > 0) {
    String lecture = Serial.readStringUntil('\n');
    lecture.toCharArray(buff, 6);
    Serial.println(buff);
  }
}

// function that executes whenever data is requested by master
// this function is registered as an event, see setup()
void requestEvent() {
  // as expected by master
  Wire.write(buff); // respond with message of 6 bytes
}
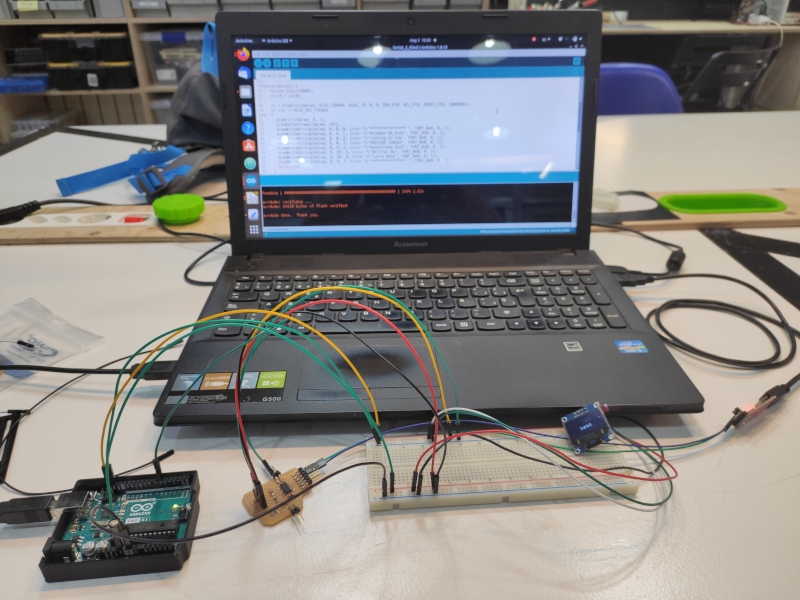
The messy, final result:

Takeaways
During this week I had the advantage of working with the pcb design from last assignment, this gave me more time to focus on the assignment at hand. Other positive outcome was, that the electronics design for my final project are very similar to this one, only with what I believe minor adds or tweaks to be done.
Regarding the programming, I believe this is the task that will be more challenging and time consuming for me during the final project. During these weeks of electronics I realized that creating (or finding) the proper code is just a relative small part of the process. Debugging, finding the proper libraries and examples and testing is what is more time consuming and requires a lot of attention into the details.