Assigment #8
Embedded Programming
The 9th assignment of the fab academy is embedded programing, where we will learn to program a controller to interact with components and actually do stuff!
1 – the parts
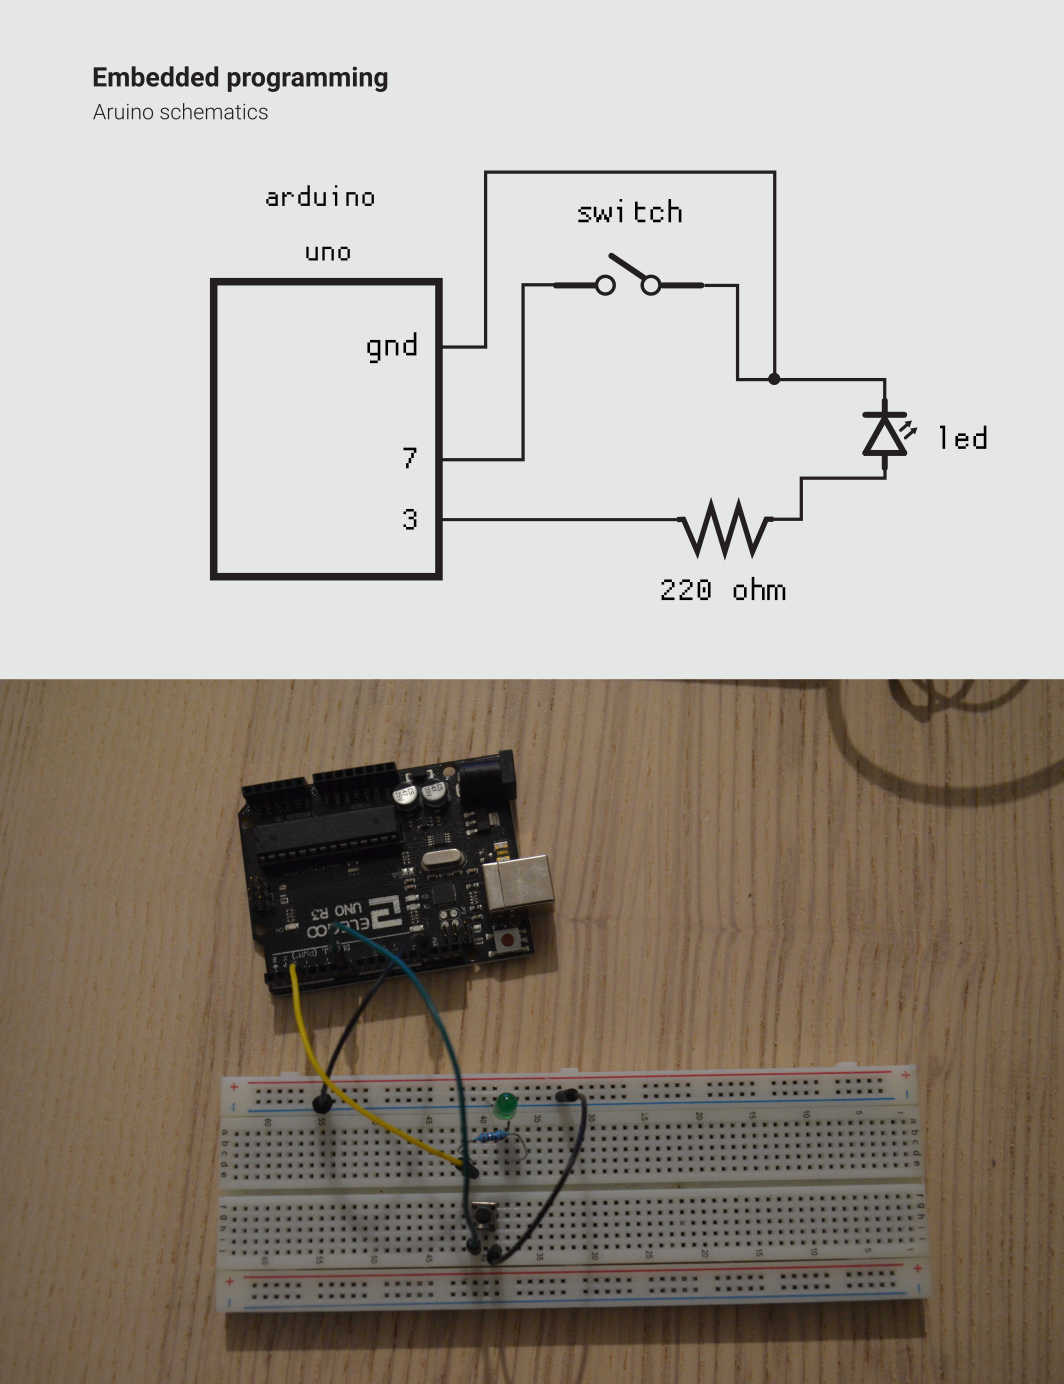
Due to the awful Corona Virus pandemic that is currently hitting hard on our planet it is really hard to access labs, and mine is no exception, and because of that i’ll be using an Arduino Uno (actually a clone called “Elegoo Uno”) to fulfill this assignment. So, the first thing I did was to buld on a breadboard a very simple circuit with a green LED, a 220 ohm resistor and a button switch. I followed the instructions I found on This tutorial
2 – The code
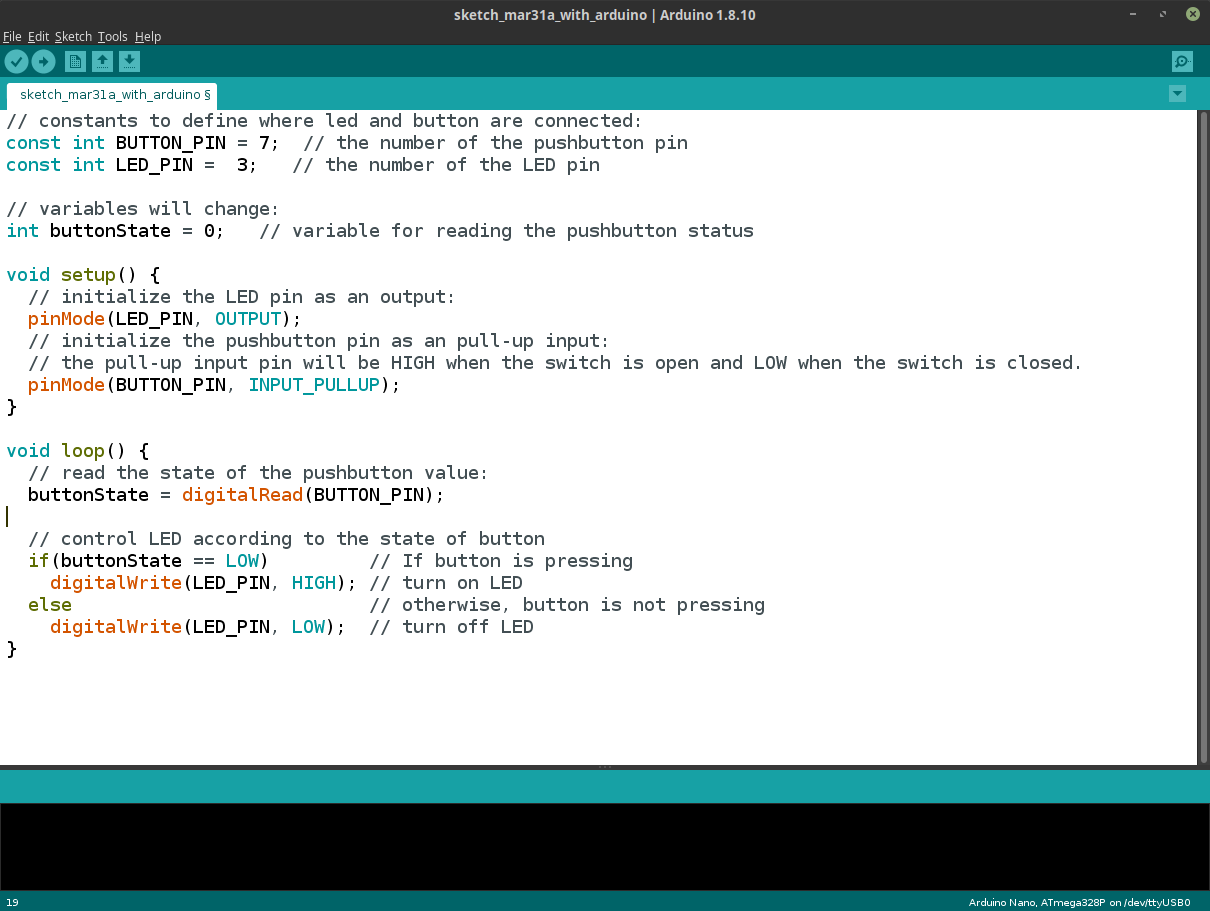
The code I made is very simple: when you push the button the led turns on, otherwise is off. To do that I had to “tell” to the board where the components are connected, and then I wrote some commands to define the two states of the button (pushed or released) Last thing was to program the LED to stay on or off accordingly with the state of the button:
// constants to define where led and button are connected:

const int BUTTON_PIN = 7;  // the number of the pushbutton pin

const int LED_PIN =  3;   // the number of the LED pin


// variables will change:

int buttonState = 0;   // variable for reading the pushbutton status


void setup() {

  // initialize the LED pin as an output:

  pinMode(LED_PIN, OUTPUT);

  // initialize the pushbutton pin as an pull-up input:

  // the pull-up input pin will be HIGH when the switch is open and LOW when the switch is closed.

  pinMode(BUTTON_PIN, INPUT_PULLUP);

}


void loop() {

  // read the state of the pushbutton value:

  buttonState = digitalRead(BUTTON_PIN);


  // control LED according to the state of button

  if(buttonState == LOW)         // If button is pressing

    digitalWrite(LED_PIN, HIGH); // turn on LED

  else                           // otherwise, button is not pressing

    digitalWrite(LED_PIN, LOW);  // turn off LED

}
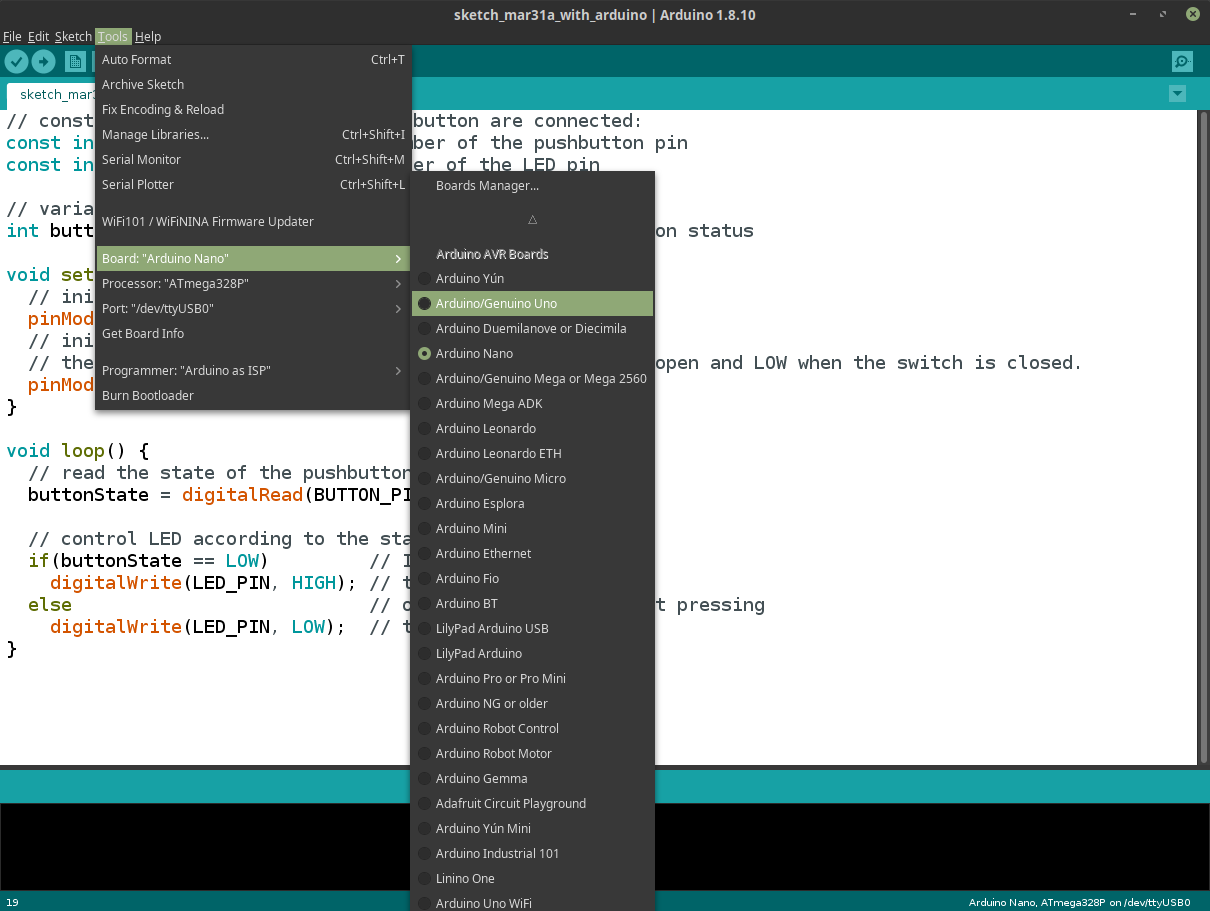
3 – Upload the code
To write and send the code to the board I used the Mighty Arduino IDE. I selected the board, and uploaded the code into the Arduino. Since I’m using Linux I had no issues with the clone’s drivers

4 – testing the code
Once the code was uploaded I tried to push the button, and fortunately everything went smooth…
5 – using the PCB I milled
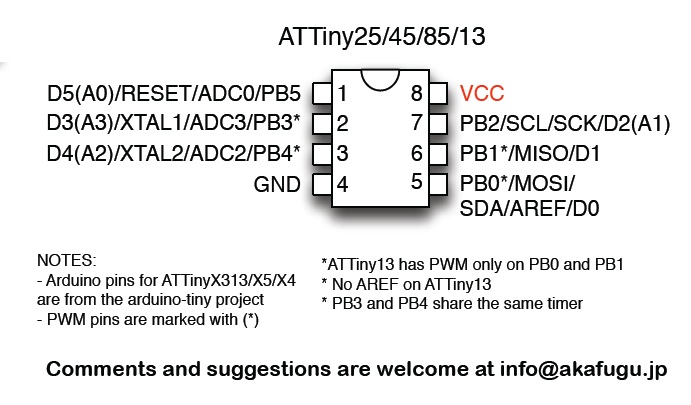
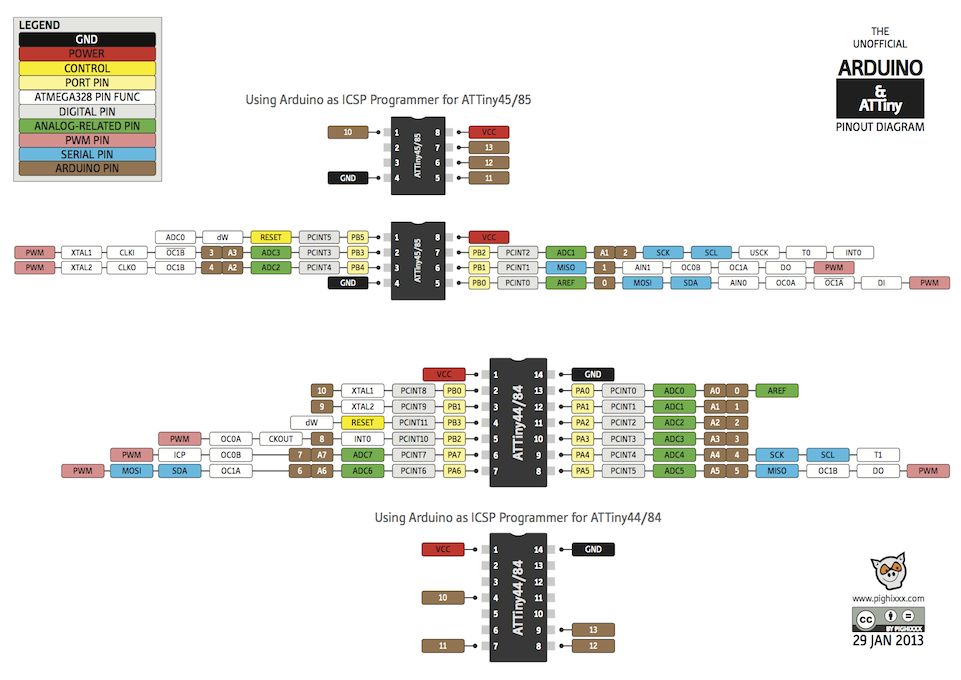
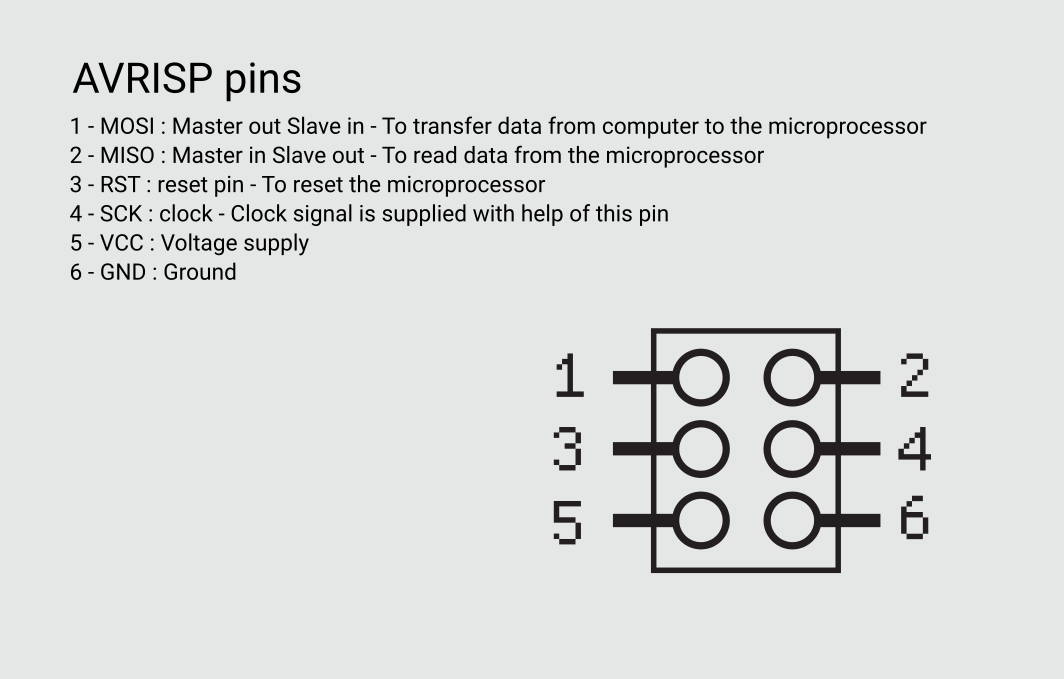
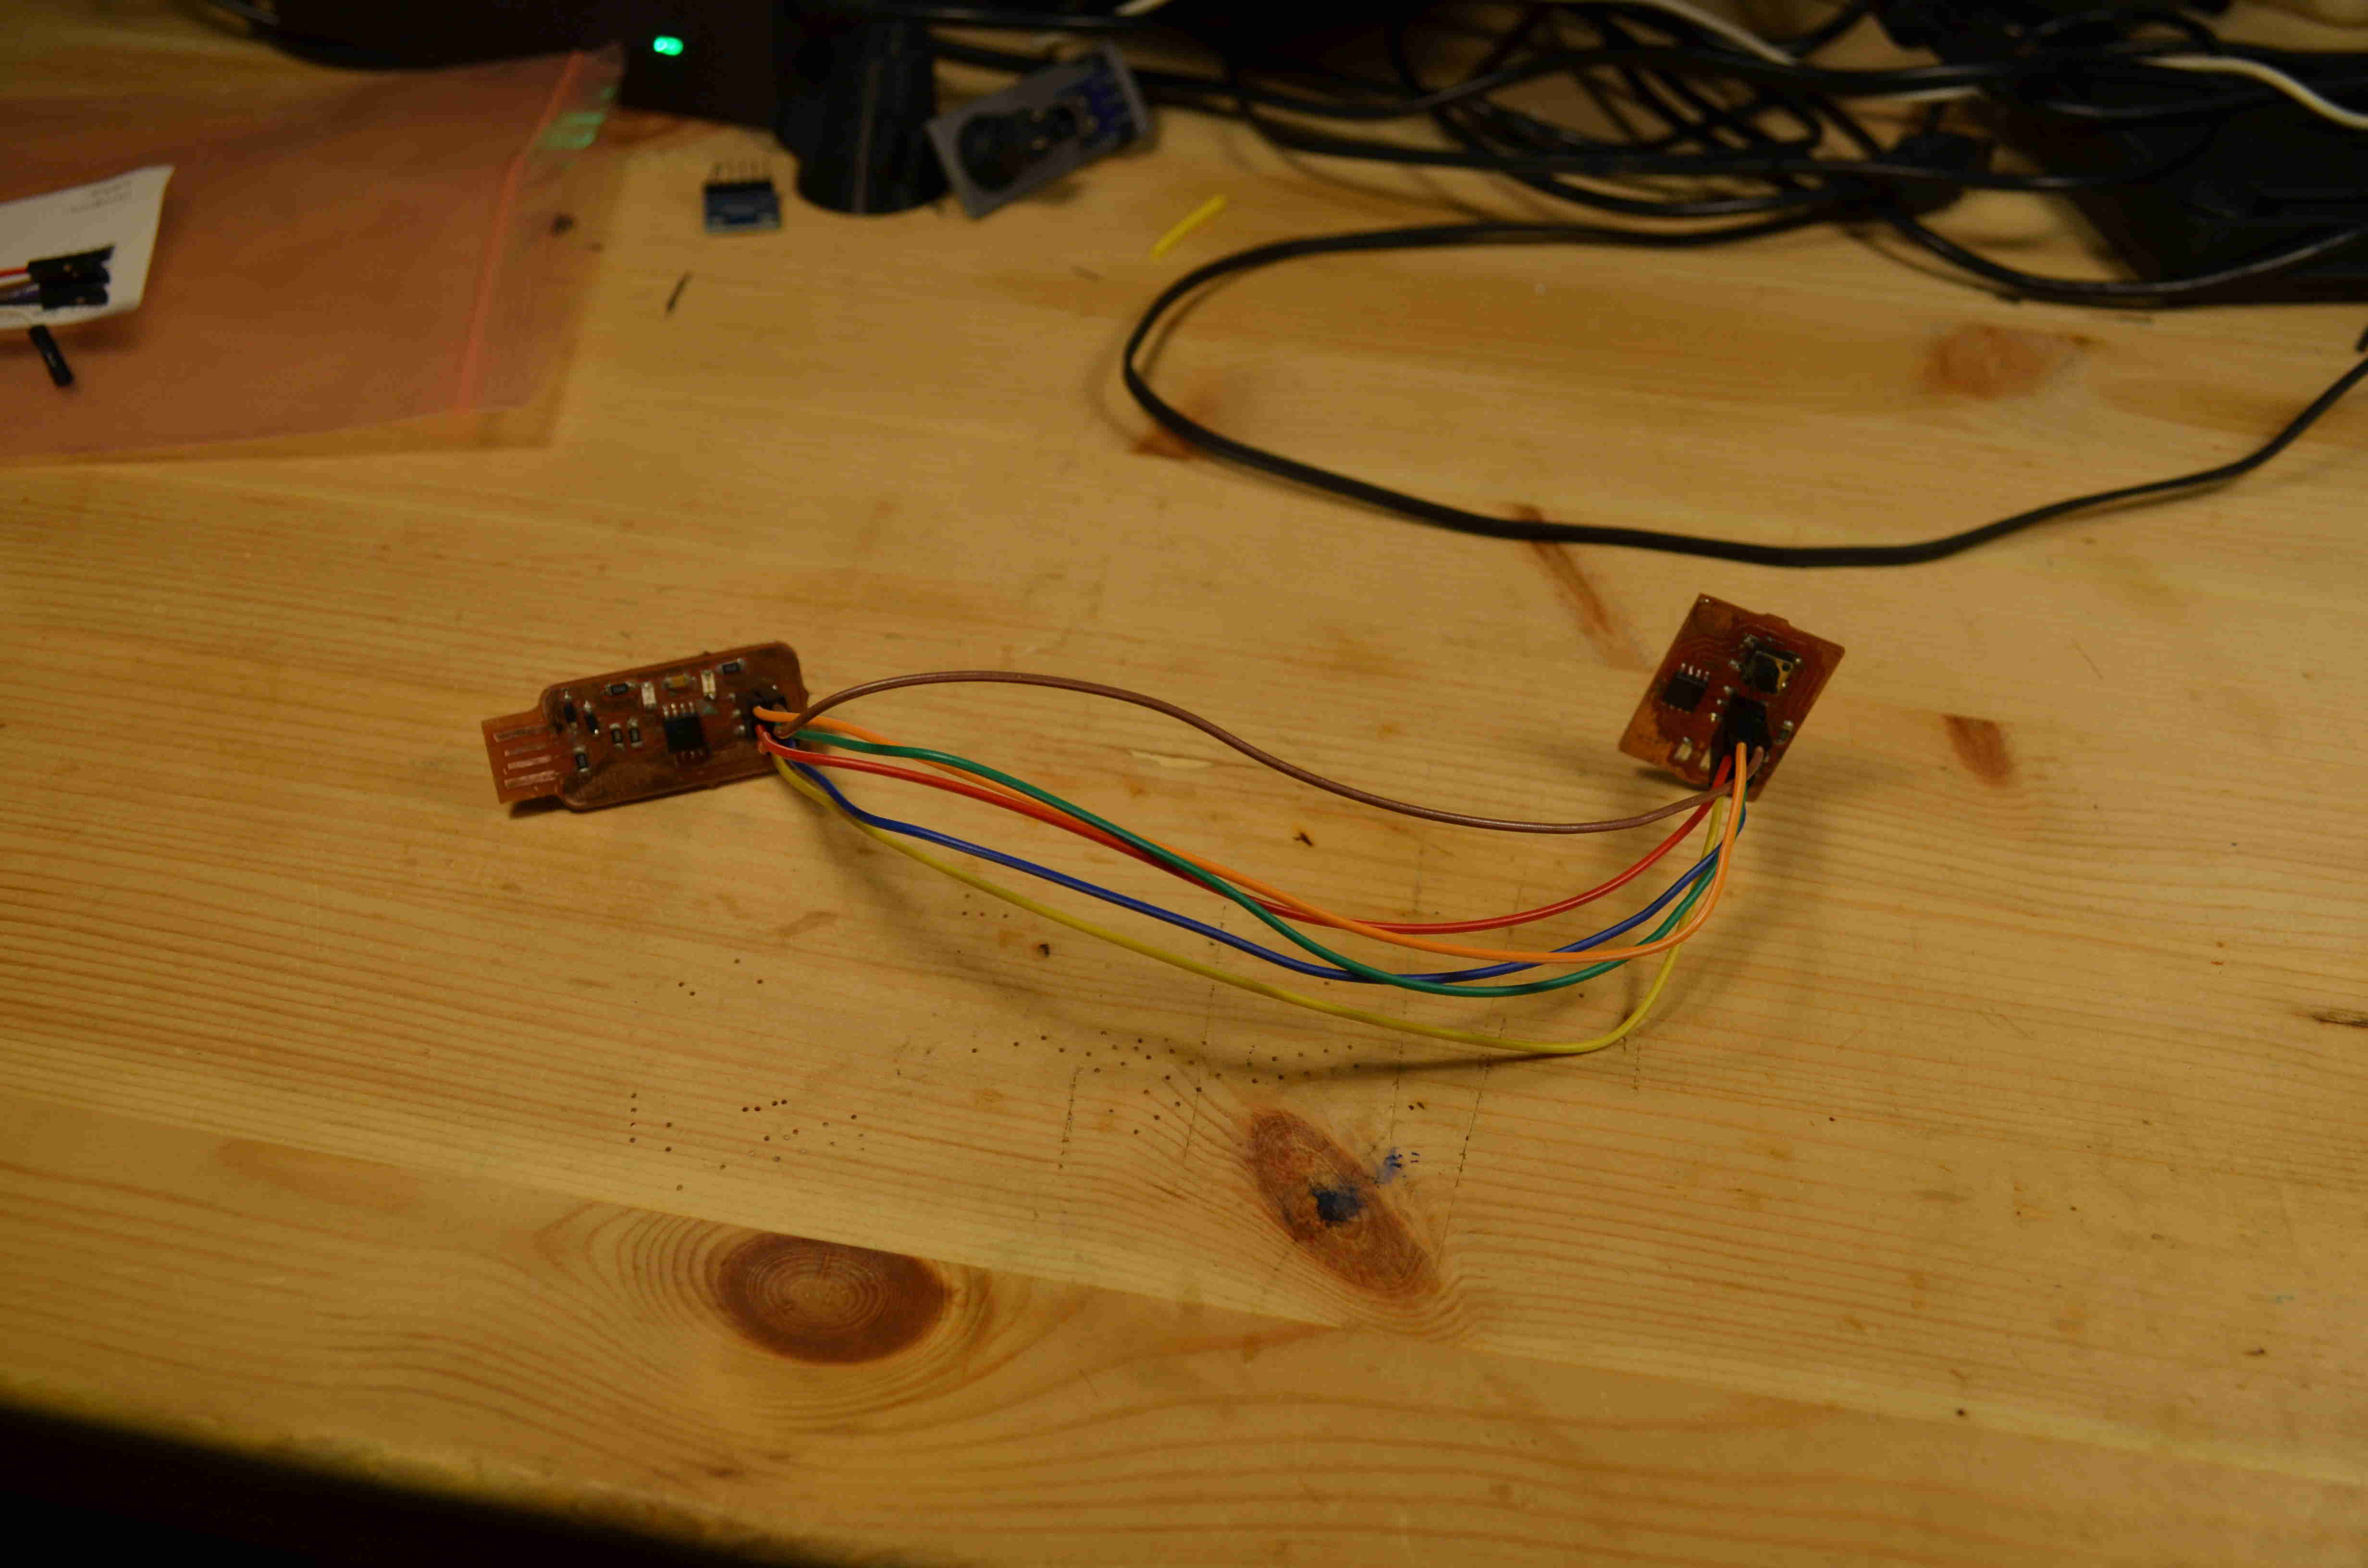
Then I'm going to upload this code into the board I did during the Electronics Design week. to do that I observed the datasheets of the Atmega45 controller that I used, and I also observed the AVRISP pins order to connect my board to the programmer I did during the Circuits Production week

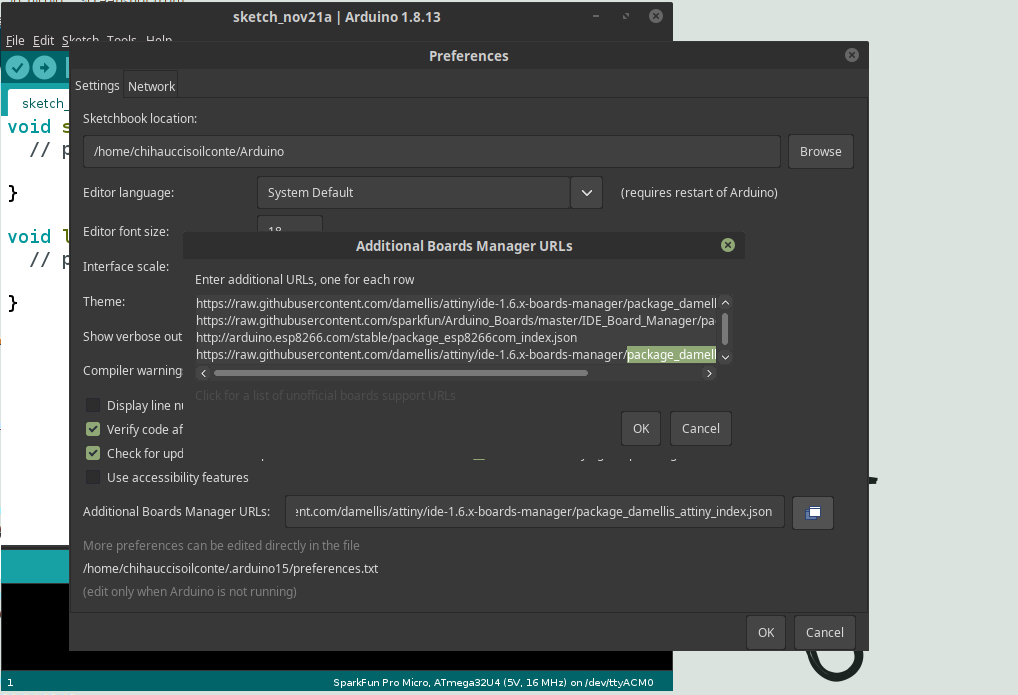
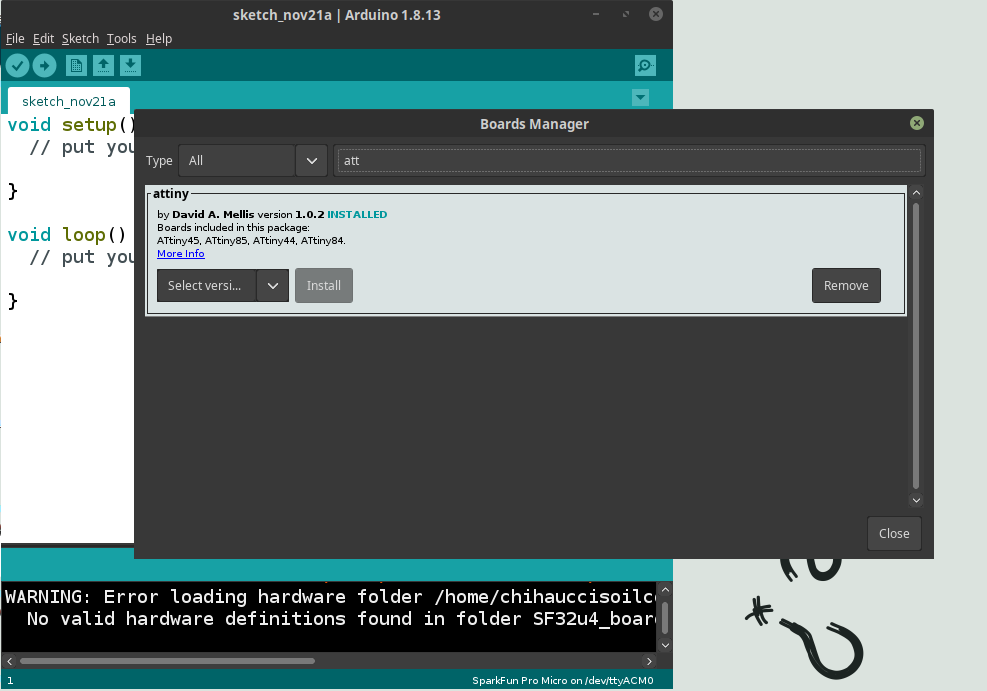
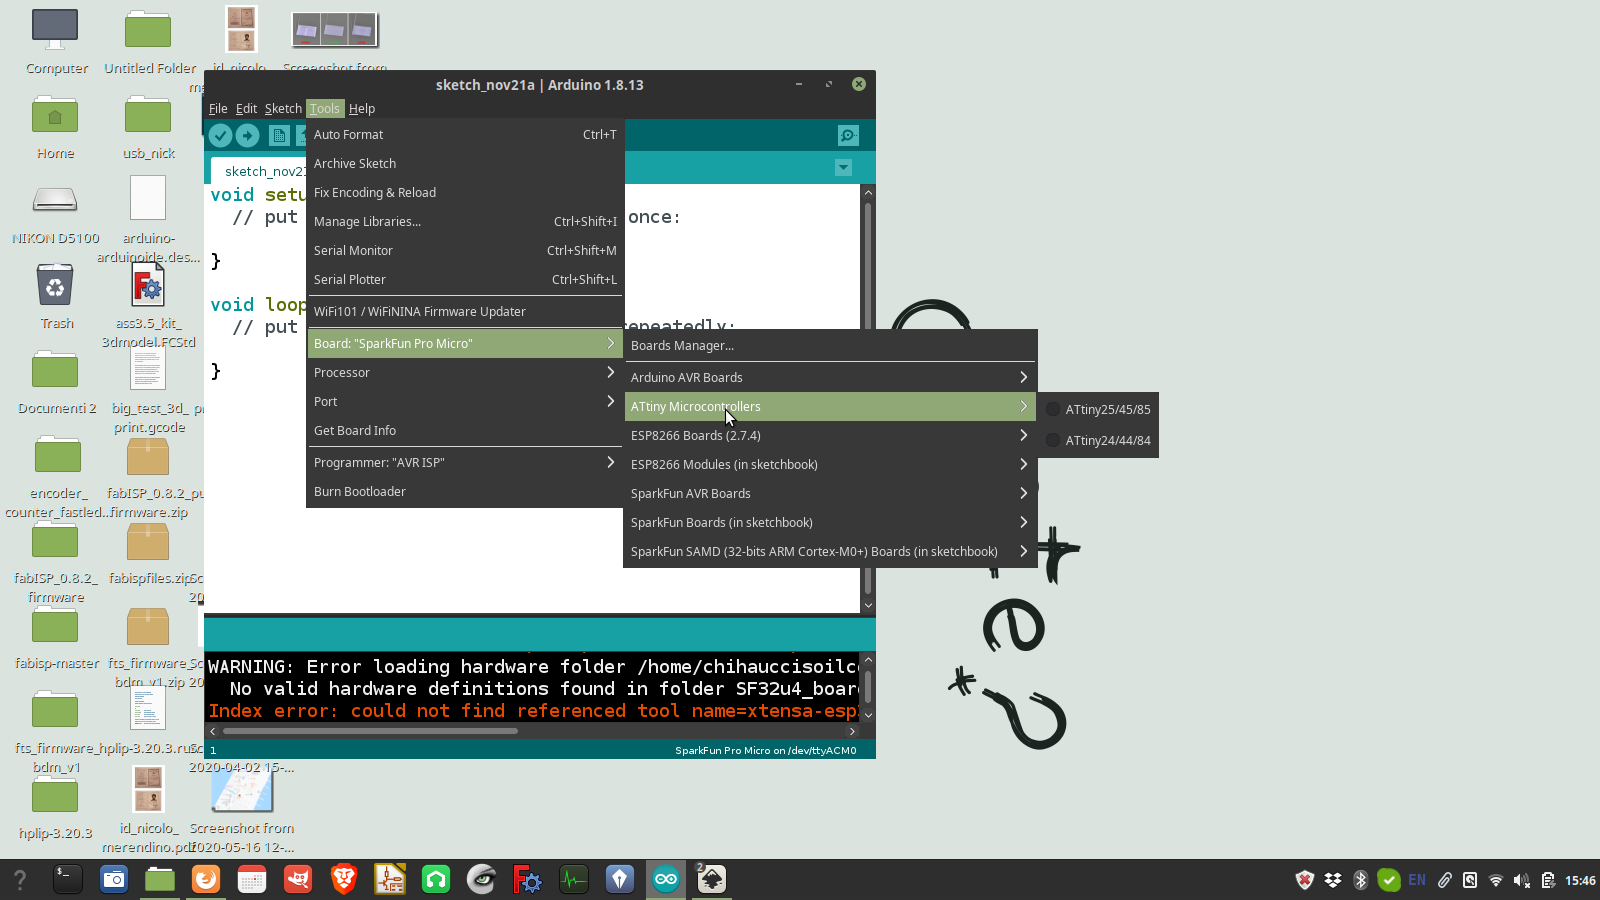
Then I opened the Arduino IDE to upload the code. To do that I need to add the attiny to the boards menu, by going into the preferences and adding the database where the boards are places, and then going to the board managet to add the controllers themselves
Then I uploaded the code (it's basically the same I used with the Arduino), and here it is
6 – AVR experiment
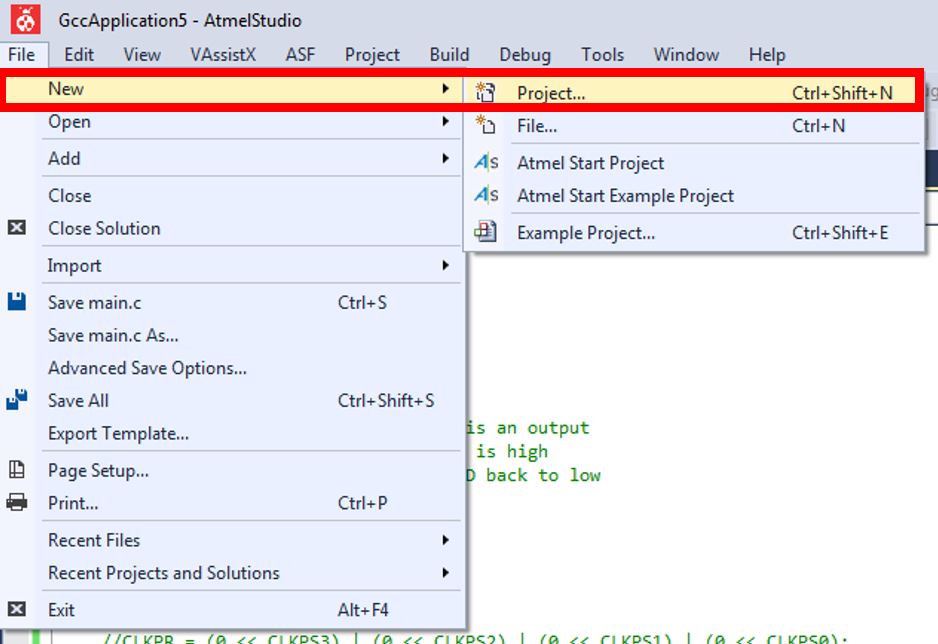
Once this was done I tried to load a code using ATMEL studio. To do that I checked what Yasir Shafiullah did. So, I moved to windows, installed the software, and followed the following steps: - Install and Open Atmel Studio 7- Start a new project goto File-->New-->Project
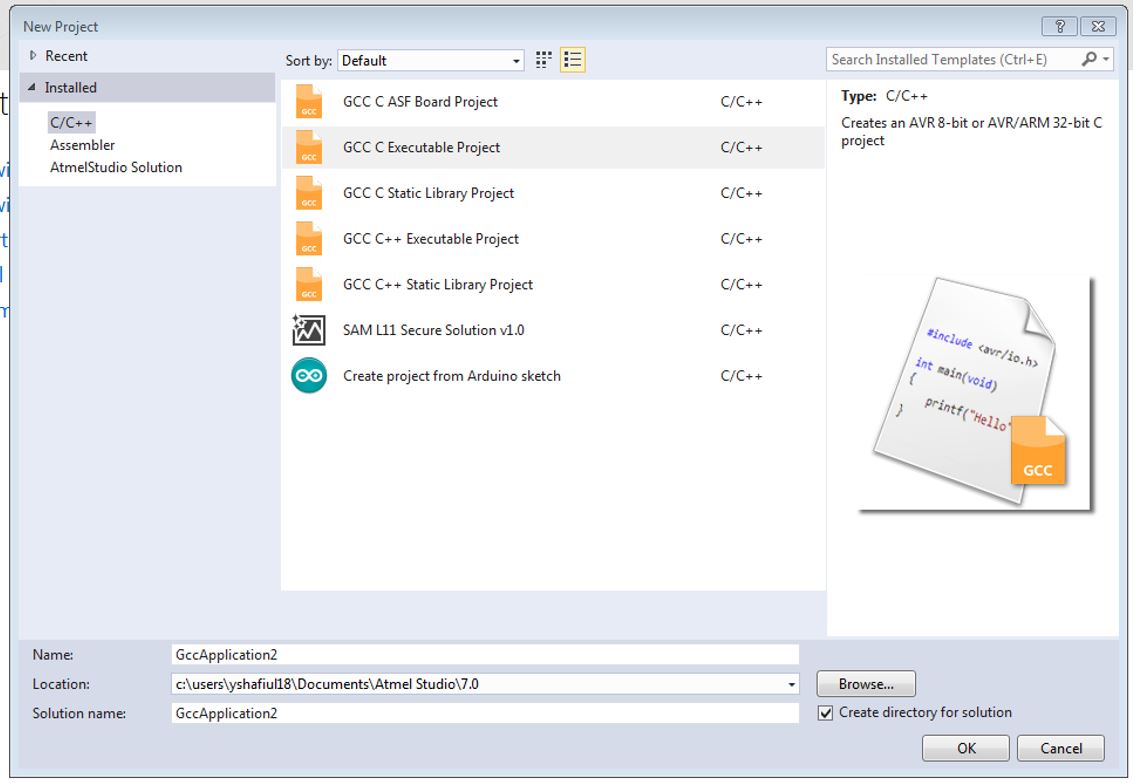
- In the window select C/C++ as language and select the second one from the selected list
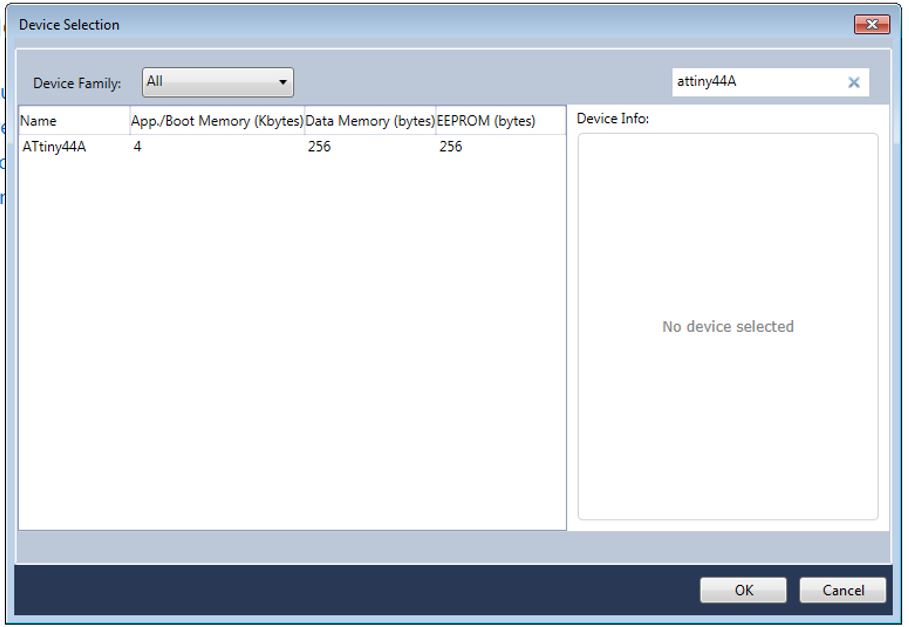
- Select Attiny as the device family and select Attiny44A from it and press OK.
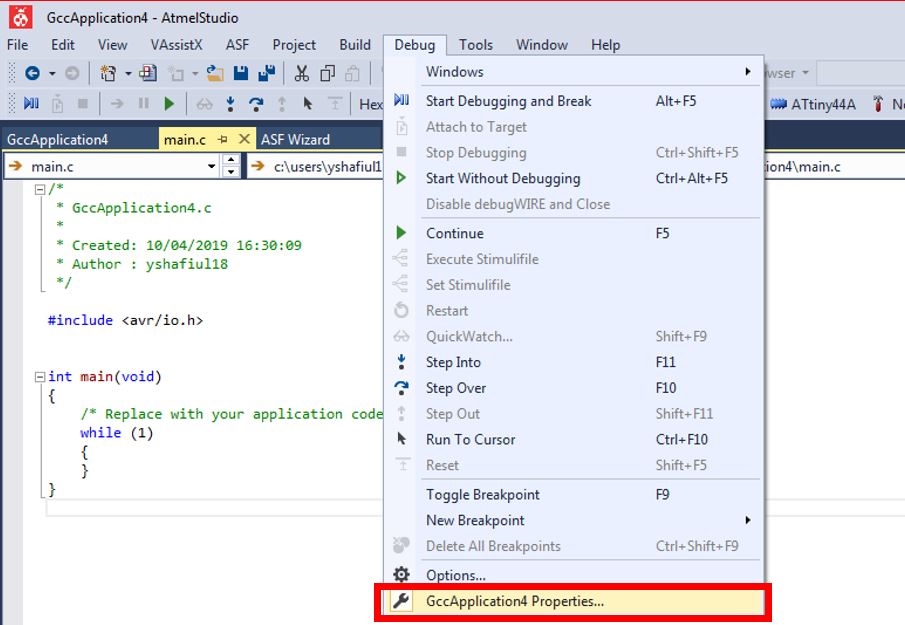
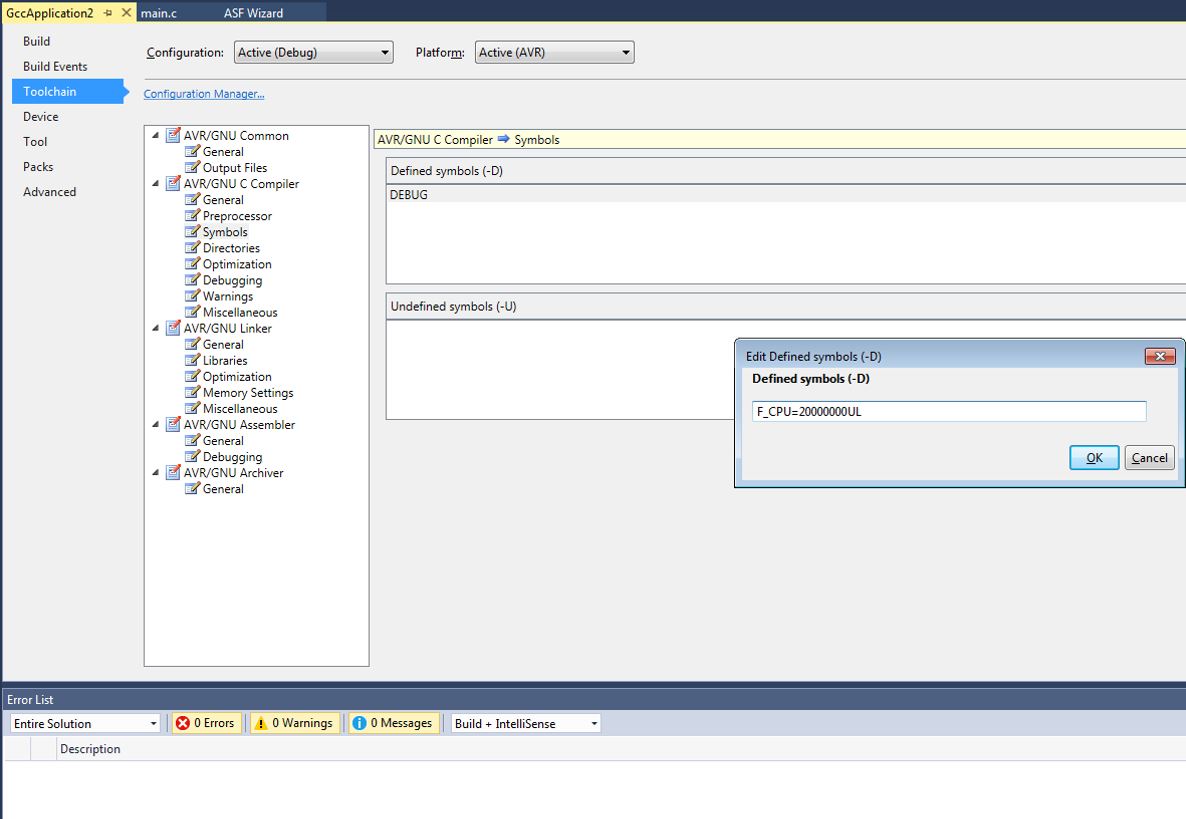
- Goto Debug-->GccApplication4 Properties, Define the External/Internal Clock i.e in my case External Clock : 20000000UL
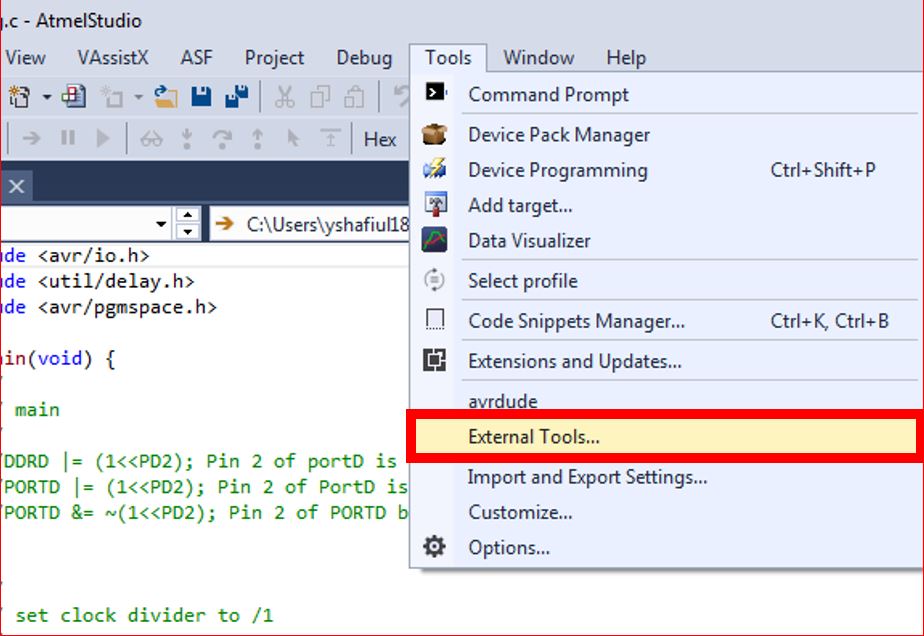
- add our programmer to our enviorment
- code and upload
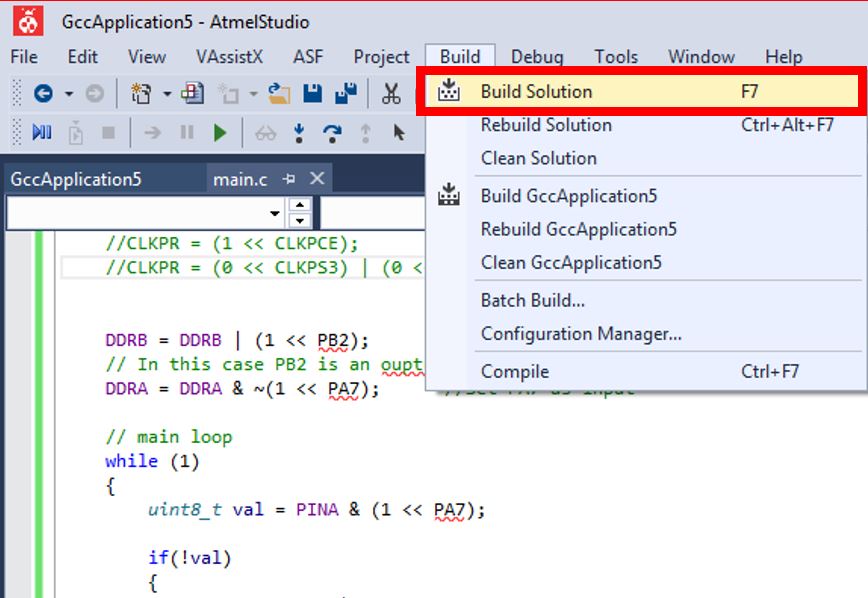
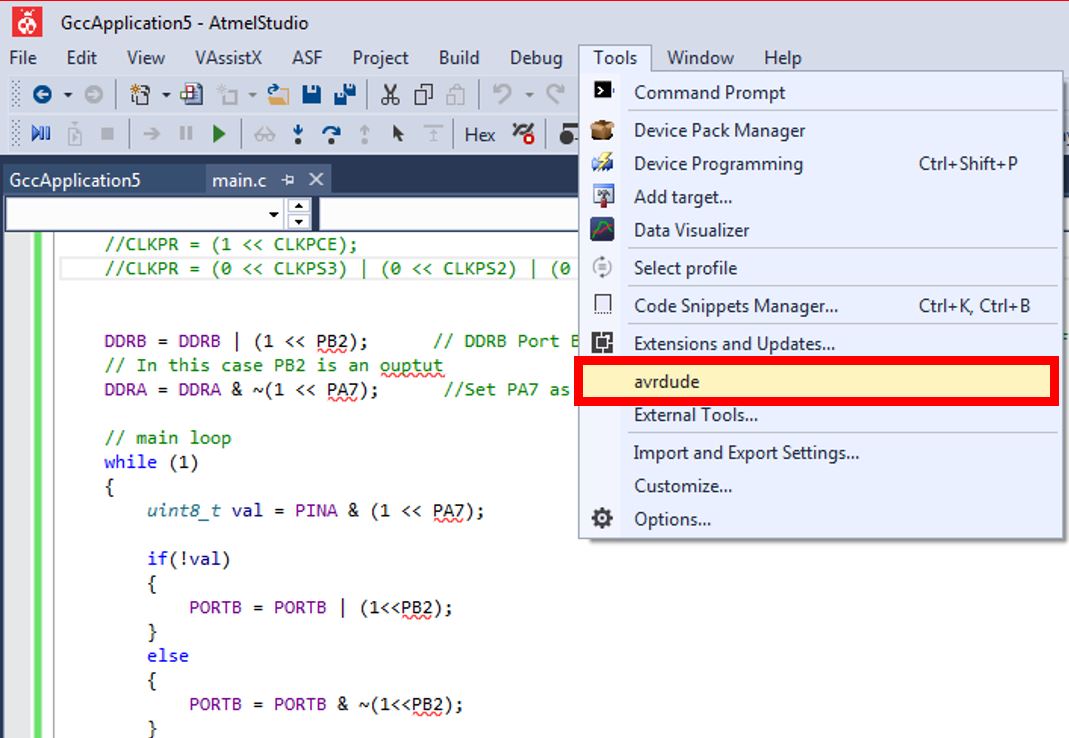
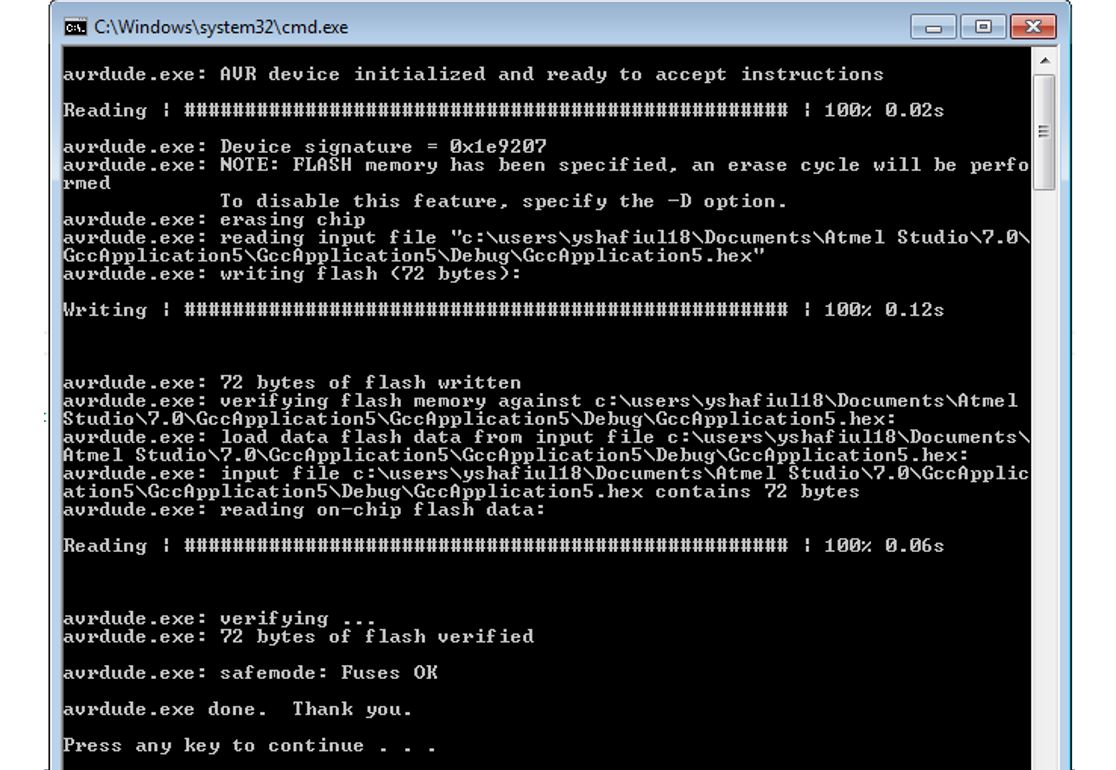 To use this workflow it's far more difficult then using arduino... here is the code: