5. Electronics production
Material and setup
We use the following PCB milling machine Bantam
The first thing is to install driver available here.
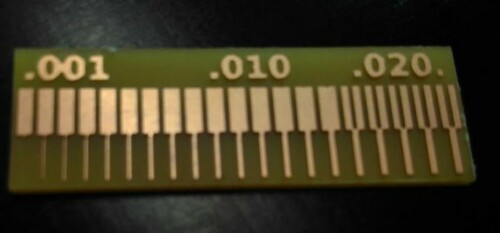
Traces width characterization
Getting an svg image
We use the pgn file provided by Neil. The software only accepts images in svg, so let’s play with image format!
- Test 1 (failed): using only Inkscape: Using only inkscape, the first step is to use the function trace bitmap to vectorize the image. The image can then be exported as svg. Problem: The image scale is lost between inkscape and the Bantam software.
- Test 2 (failed): reducing the image resolution with GIMP: Since the image has an extreme resolution (5000 ppp), we first reduce its resolution to 1200 ppp before vectorizing it on inkscape. Problem: The image scale is still different in every software.
- Test 3 (succeeded): Using a commercial Software We solved the problem using CorelDraw (bye bye open source…). The same process is used:
- Reduce the image resolution to 1200 ppp
- Vectorize the images (trace the bitmap). Be careful to remove the background, i.e. to have only one colour (black) which indicates the zone to be milled. Note that we also tried with Illustrator but it did not work. The problem is probably that the background was not remover for this test.
Here is the final svg file that worked.
Preparing the PCB milling machine
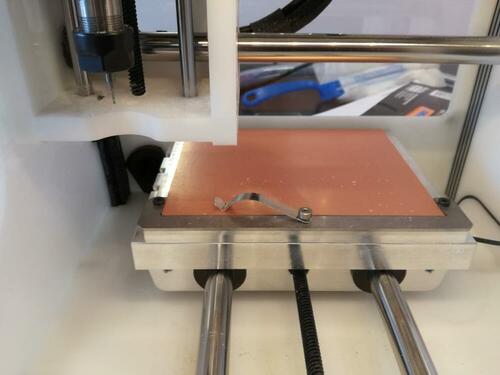
Placing the PCB
The PCB plate must first be placed in the machine. One important thing: fill the bottom side of the PCB with double-sided adhesive before to place it in the machine. This will allow the PCB to be fixed.
Calibrating the machine
There are nice wizards for the calibration:
1. Homing: just follow the wizards
1. Locate tool (measure its size): It will use an electrical contact to know when there is contact. You must make sure that the tool is placed above the metallic part of the plate, so that the electrical contact is good.
2. Height of the PCB: This wizard is a little be hidden (bitbreaker->probe material). It uses the same principle, but this time on the PCB. You have to make an electrical contact between the PCB and the plate using the little “jumper”. In this case, the height of material was recalibrated to 1.69 mm.
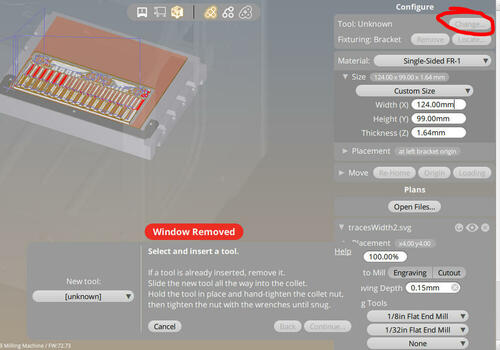
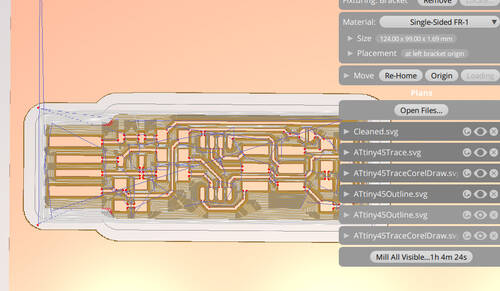
Configuring the Bantam software
The software has quite a nice interface. You just have to follow the process.
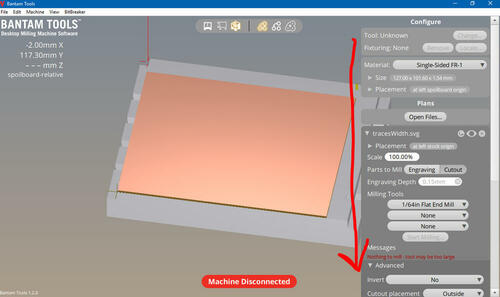
Machine parameter
Here are the parameters use for the support and the machine.
| parameter | Value |
|---|---|
| Material | Single-sided |
| Size | 124.00 mm x 99.00 mm x 1.64 mm |
The move options allow to move the plate. You can bring it close to the opening using the loading button.
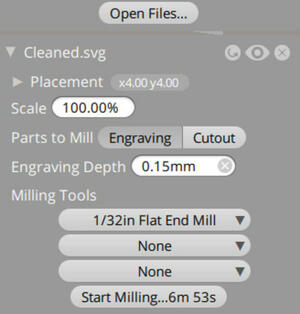
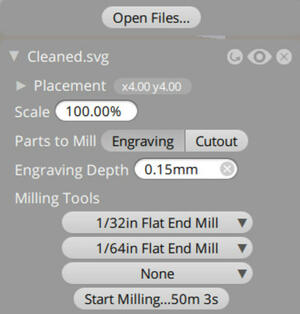
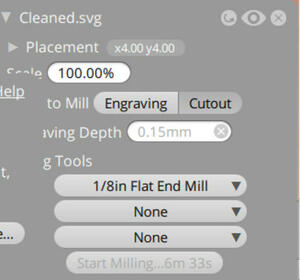
Job parameters
You can then import your svg file. The parameters are quite straightforward.
You can chose up to tree mill to be used for one job. The machine will use them from the smaller to the larger, and you will need to change it during the job.
We decided to do it in three steps to force the machine to use first the middle-sized tool. Be careful for the placement, every drawing must be perfectly superposed! Note taht we also tried with the default settings (i.e. from the thinner to the larger mill), and it gave the same result.
| Step 1 | Step 2 | Step 3 |
|---|---|---|
| 1/32in mill | 1/64in mill | 1/8 in mill |
 |
 |
 |
| Rough engraving | Thin engraving | Cutout |
| Full job | Cancel when you should change the tool | full job |
You have to remove the waste (by vacuum) and change tools between each step.
Launching the job
- Changing the tool: You first have to tell the machine you will make the change. Then, simply unlock the tool and place the new one using two wrenches. Be careful that the mill cannot fall, it could break!. The wizard will then automatically calibrate the tool height, you just have to make sure that the tool is placed above the metallic part of the plate.
- Let’s go: just press on the “Mill” button, and it starts!
| After step 1 | After step 2 | After step 3 |
|---|---|---|
 |
 |
 |
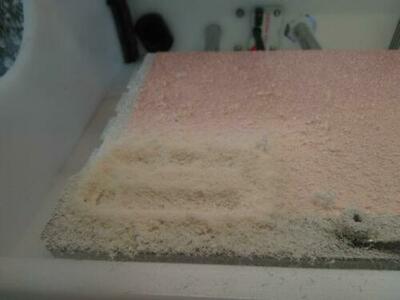
During the milling, you’ll have a lot of waste…, but a nice interface showing real-time the position of the mill.

Removing the PCBs
- Remove all the waste.
- Remove the prepared PCB. Use the loading button to bring the plate close. Leave the rest of the PCB in place, it will avoid you to redo all the calibration. You can use a screwdriver to remove it easily. Note: keep also the software on and do not remove the previous projects, it will allow to know which part of the PCB has already been used.
- Wash the PCB. Water and soap is good.
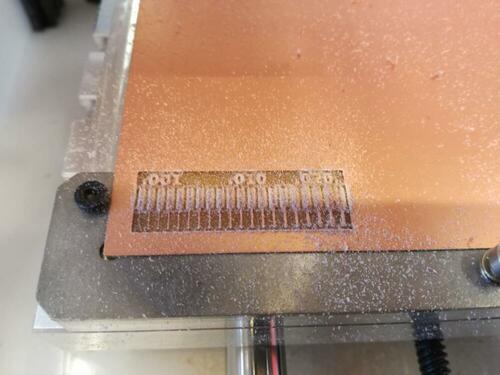
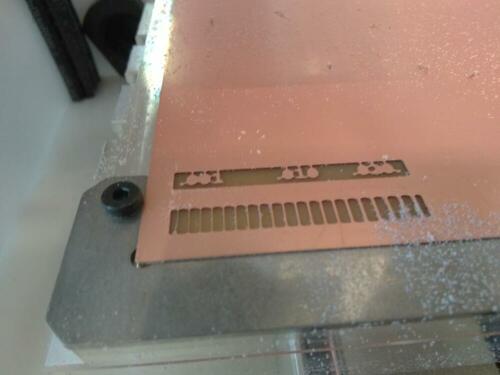
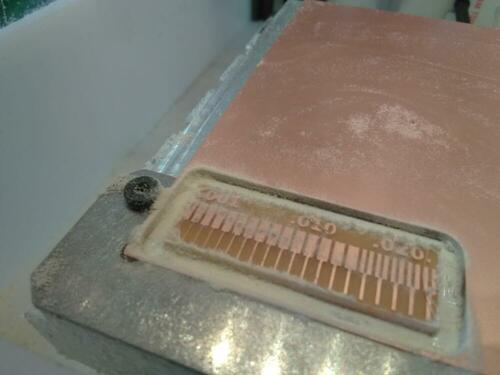
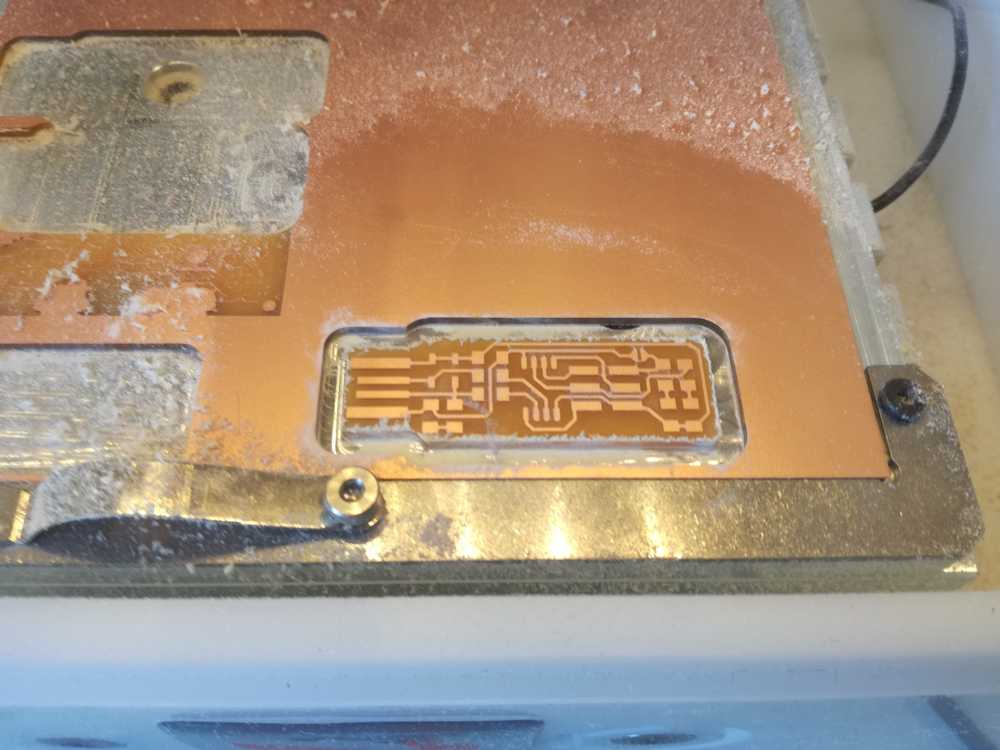
And here is the final result:
The result is good! It took however a lot of time. Only the thinnest line is gone, and the limit between two lines is around 0.15in.
Step 2: milling the PCBs
I will follow Brian’s tutorial
Here is the file i have used after transforming the png to .svg file
the trace and the outline do not fit perfectly so i have to adjust it manualy to have a perfect superposition
Shift of the outline:
* x + 1.25 mm
* y + 1.00 mm
it seems to Work :-) here the result.
Step 3: Welding the components
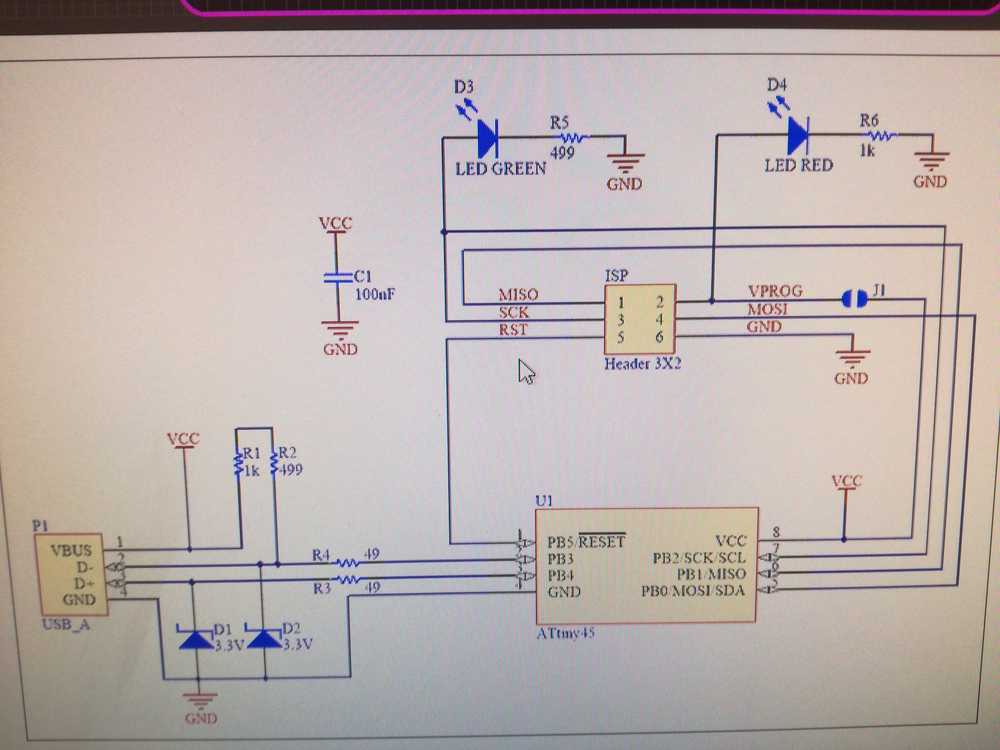
here is the electrical drawing of the card
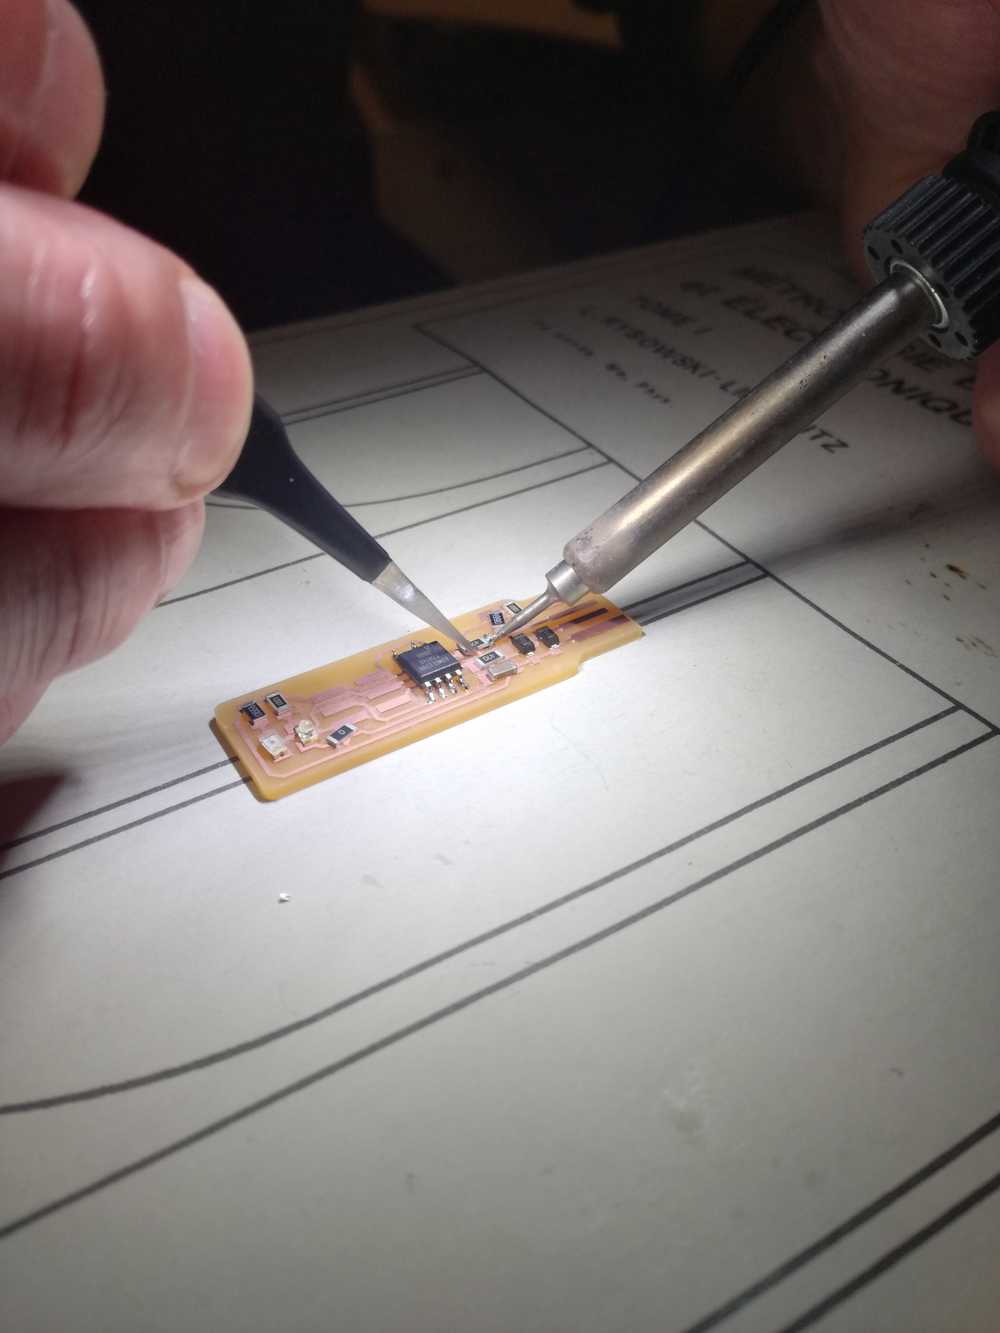
 and me occuped of welding
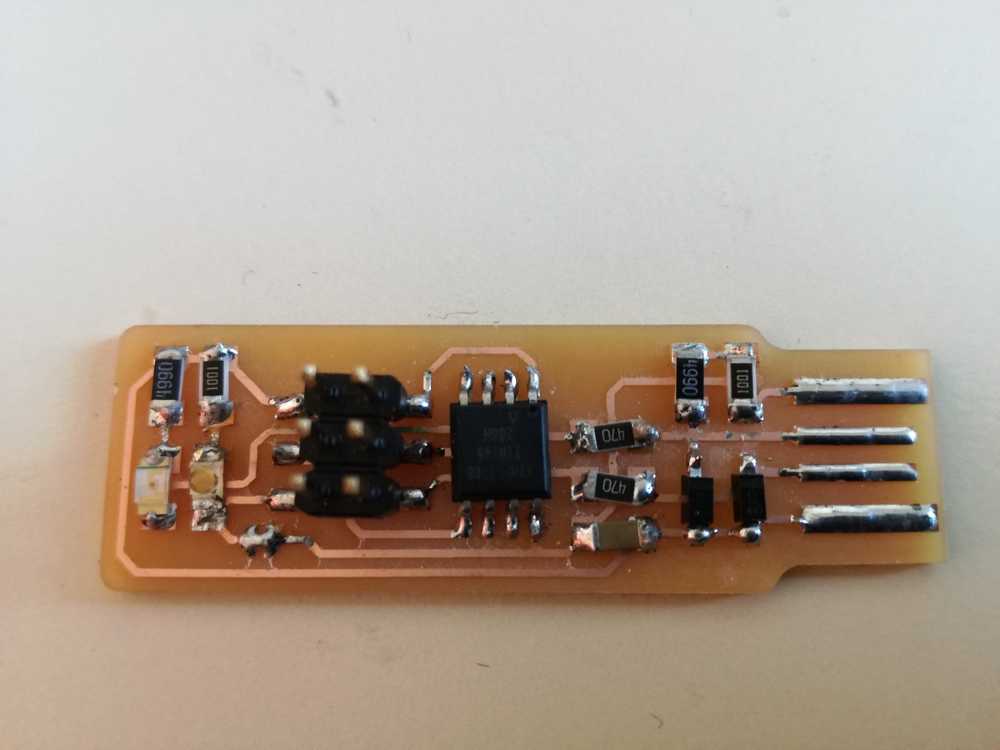
and the result (not so bad)
Step 4: Programming the ATtiny45
I will follow this tutorial to install all i need for programming the ATtini45
software
-
1 Arduino and if you want to install files for ATtiny45 in your arduino you could see that Tuto install ATtiny
-
3 win avr
-
4 tutorial how to install avrdude in win 10
-
5 And this other tutorial to use it in cmd tutorial 2
and i will folow axel cornu page thank you Axel
I could make the .hex file with my windows bash
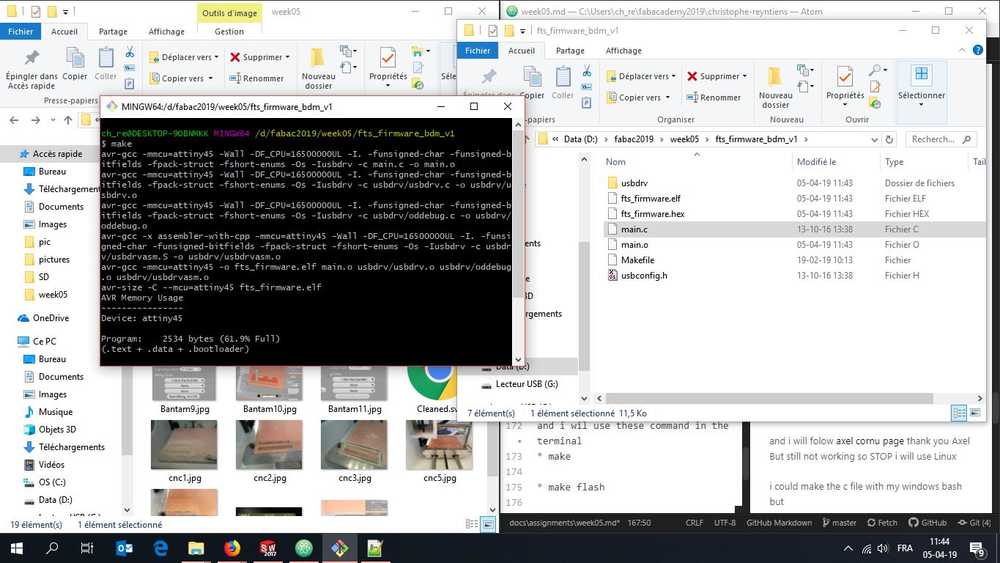
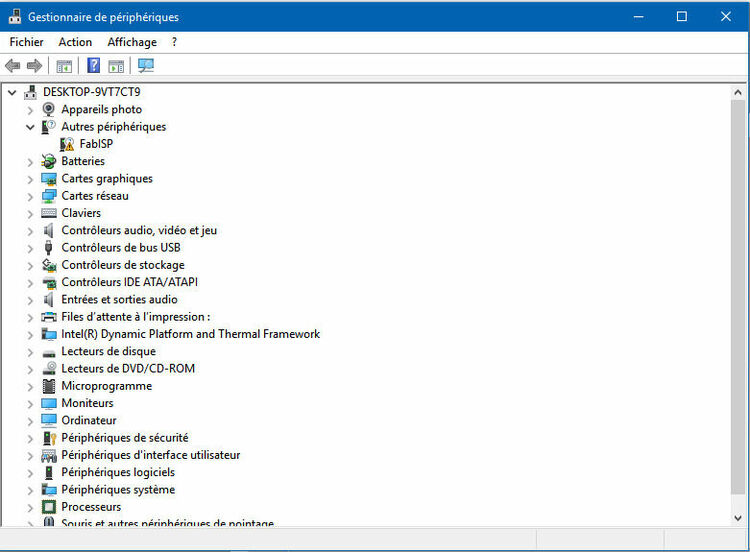
but when i will make flash it not reconise the usbtiny
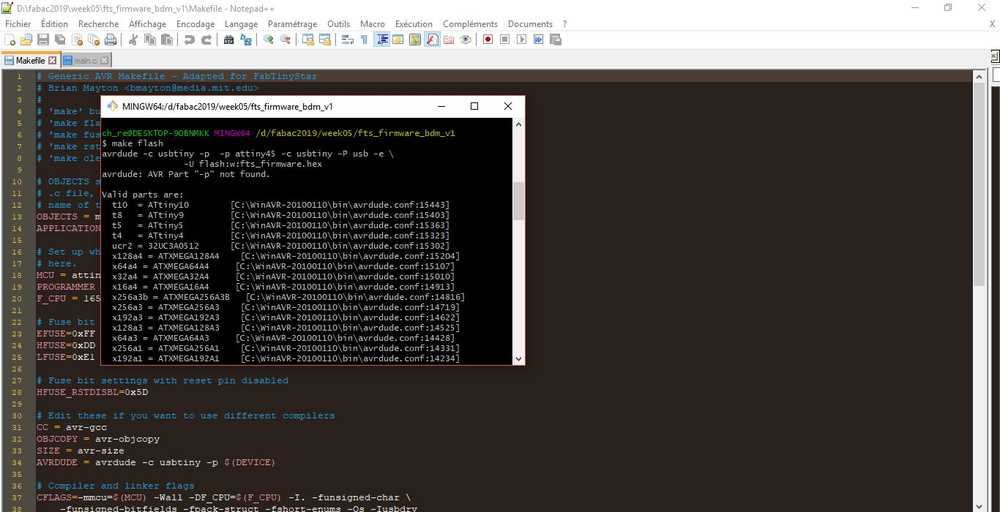
But still not working so STOP i will use Linux
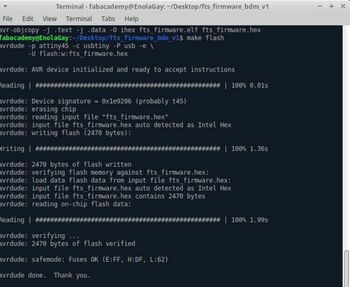
so here are the result
I will follow Brian tutorial to setup the Linux and i wil use these command in the terminal * make
-
make flash
-
make fuse
-
make rstdisbl
-
make clean


## And it is finished