8. Embedded Programming
• Group assignment: Compare the performance and development workflows for other architectures.
• Individual assignment: Read a microcontroller data sheet. Program your board to do something, with as many different programming languages and programming environments as possible.
Group assignment
Participants
Josep Marti, Felipe Santos, Alberto Lopez, Diar Amin, Gustavo Abreu, Juan Carlos, Eva Blsakova.
Setup
We chose some architectures to compare:
- Arduino UNO (ATmega328p);
- Arduino Leonardo (ATmega32u4);
- NodeMCU (ESP8266);
- ESP32 DEVKIT DOIT (ESP32);
Arduino UNO (ATmega328p)
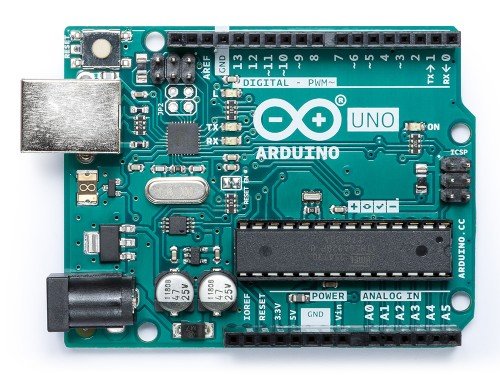
Arduino Uno is a microcontroller board based on the ATmega328P (datasheet). It has:
- CPU: ATmega32u4 (16MHz);
- 14 digital input/output pins (of which 6 can be used as PWM outputs); 6 analog inputs;
- 16 MHz quartz crystal,
- USB connection, power jack, ICSP header and reset button;
- Operating Voltage: 5V;
- Flash Memory: 32 KB (ATmega328P) of which 0.5 KB used by bootloader;
- SRAM: 2 KB (ATmega328P);
- EEPROM: 1 KB (ATmega328P).
Some special features of the board, according to the Arduino Official Website:
- Serial / UART: pins 0 (RX) and 1 (TX). Used to receive (RX) and transmit (TX) TTL serial data. These pins are connected to the corresponding pins of the ATmega8U2 USB-to-TTL serial chip;
- External interrupts: pins 2 and 3. These pins can be configured to trigger an interrupt on a low value, a rising or falling edge, or a change in value;
- PWM (pulse-width modulation): 3, 5, 6, 9, 10, and 11. Can provide 8-bit PWM output with the analogWrite() function;
- SPI (Serial Peripheral Interface): 10 (SS), 11 (MOSI), 12 (MISO), 13 (SCK). These pins support SPI communication using the SPI library;
- TWI (two-wire interface) / I²C: A4 or SDA pin and A5 or SCL pin. Support TWI communication using the Wire library;
- AREF (analog reference): Reference voltage for the analog inputs.
Arduino Leonardo (ATmega32u4)
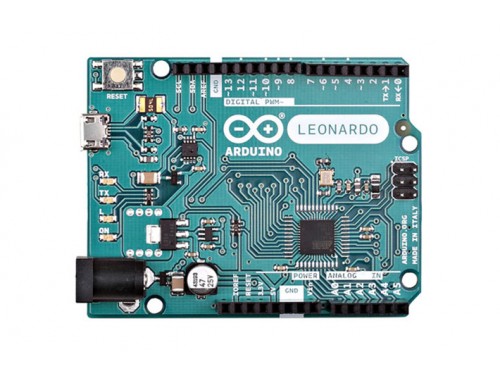
Arduino Leonardo is a microcontroller board based on the ATmega32u4 (datasheet. It has:
- CPU: ATmega32u4 (16MHz);
- 20 digital input/output pins (of which 7 can be used as PWM outputs and 12 as analog inputs);
- 16 MHz crystal oscillator;
- Micro USB connection, power jack, ICSP header and reset button;
- Operating Voltage: 5V;
- Flash Memory: 32 KB (ATmega32u4) of which 4 KB used by bootloader;
- SRAM: 2.5 KB (ATmega32u4);
- EEPROM: 1 KB (ATmega32u4).
Some special features of the board, according to the Arduino Official Website:
- Serial: 0 (RX) and 1 (TX). Used to receive (RX) and transmit (TX) TTL serial data using theATmega32U4 hardware serial capability. Note that on the Leonardo, the Serial class refers to USB (CDC) communication; for TTL serial on pins 0 and 1, use the Serial1 class;
- TWI: 2 (SDA) and 3 (SCL). Support TWI communication using the Wire library;
- External Interrupts: 3 (interrupt 0), 2 (interrupt 1), 0 (interrupt 2), 1 (interrupt 3) and 7 (interrupt 4). These pins can be configured to trigger an interrupt on a low value, a rising or falling edge, or a change in value.
- PWM: 3, 5, 6, 9, 10, 11, and 13. Provide 8-bit PWM output with the analogWrite() function;
- SPI: on the ICSP header. These pins support SPI communication using the SPI library.
NodeMCU (ESP8266)
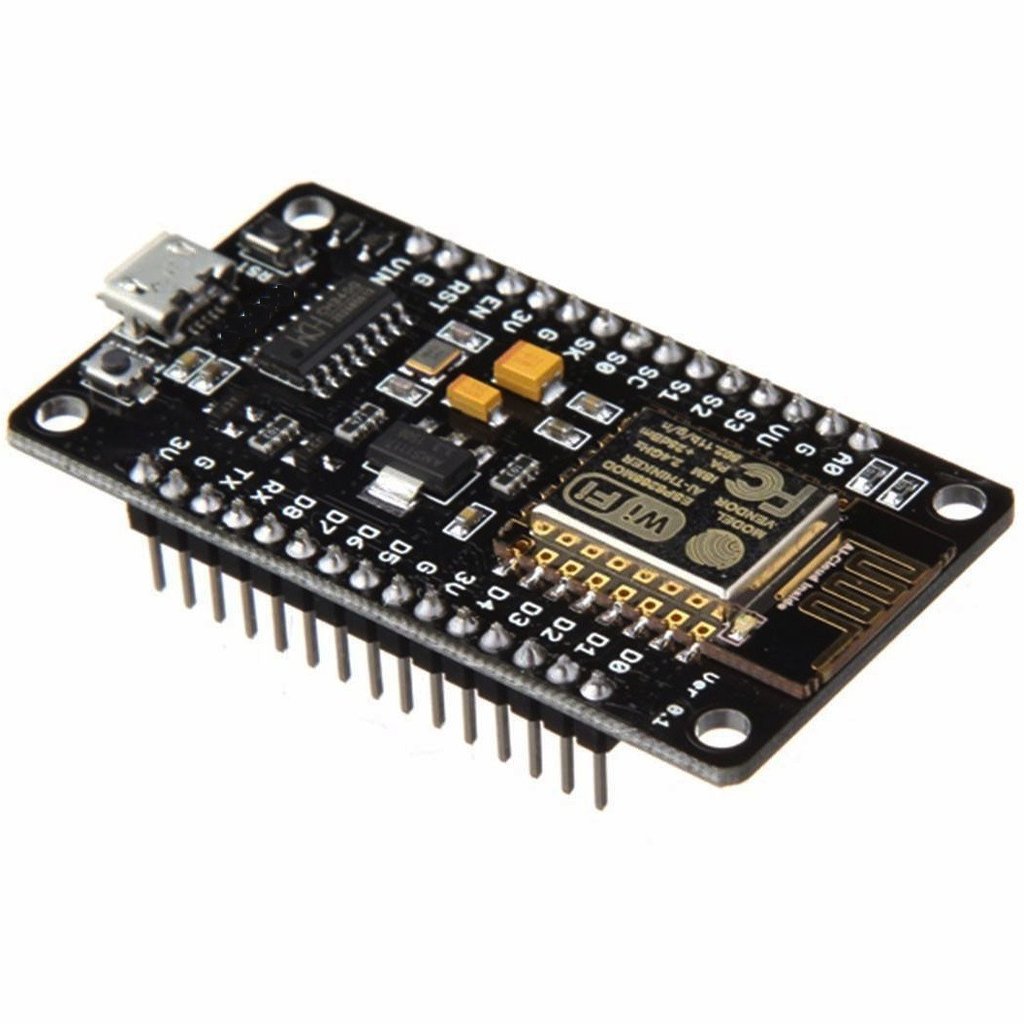
The NodeMCU board (v1.0) is based on the ESP8266 WiFi chip.
- CPU: ESP8266 12E (80MHz or 160MHz);
- Flash Memory: 128kBytes;
- Storage: 4 MBytes;
- micro USB port for power, programming and debugging;
- buttons for reset and flash;
- 10 GPIOs D0-D10, PWM functionality.
Special Features:
- IIC and SPI communication, 1-Wire and ADC A0;
- WiFi networking (can be used as access point and/or station, host a web server), connect to internet to fetch or upload data.
ESP32 DEVKIT DOIT (ESP32)
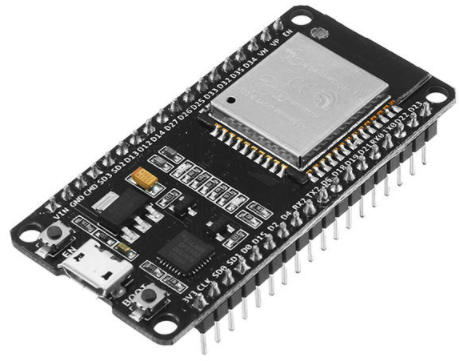
- CPU: ESP32 (Dual-Core 32-bit, 160 or 240MHz);
- ROM: 448 KB;
- SRAM: 520 KB;
- micro USB port for power, programming and debugging;
- buttons for reset and flash;
- 30 GPIOs.
Special Features:
- WiFi: 150.0 Mbps data rate with HT40;
- Bluetooth: BLE (Bluetooth Low Energy) and legacy Bluetooth;
- Low Power: ensures that you can still use ADC conversions, for example, during deep sleep;
- Peripheral Input/Output: peripheral interface with DMA that includes capacitive touch, ADCs (Analog-to-Digital Converter), DACs (Digital-to-Analog Converter), I²C (Inter-Integrated Circuit), UART (Universal Asynchronous Receiver/Transmitter), SPI (Serial Peripheral Interface), I²S (Integrated Interchip Sound), RMII (Reduced Media-Independent Interface) and PWM (Pulse-Width Modulation).
Comparison
They can all be programmed through the Arduino IDE and connected to the computer with an USP cable. Simple codes can be easily modified to run in all of this boards, more complex codes can be more specific, some examples can be:
- Arduino Leonardo: If you need a board that can simulate a Keyboard or a mouse;
- NodeMCU: If you need WiFi;
- ESP 32: If you need Bluetooth;
Performance-wise ESP32 should be the faster and most complete board of all, as it has a lot of features, better CPU and more memory. We found this comparison chart that took all of this CPUs into against each other on clock speed:
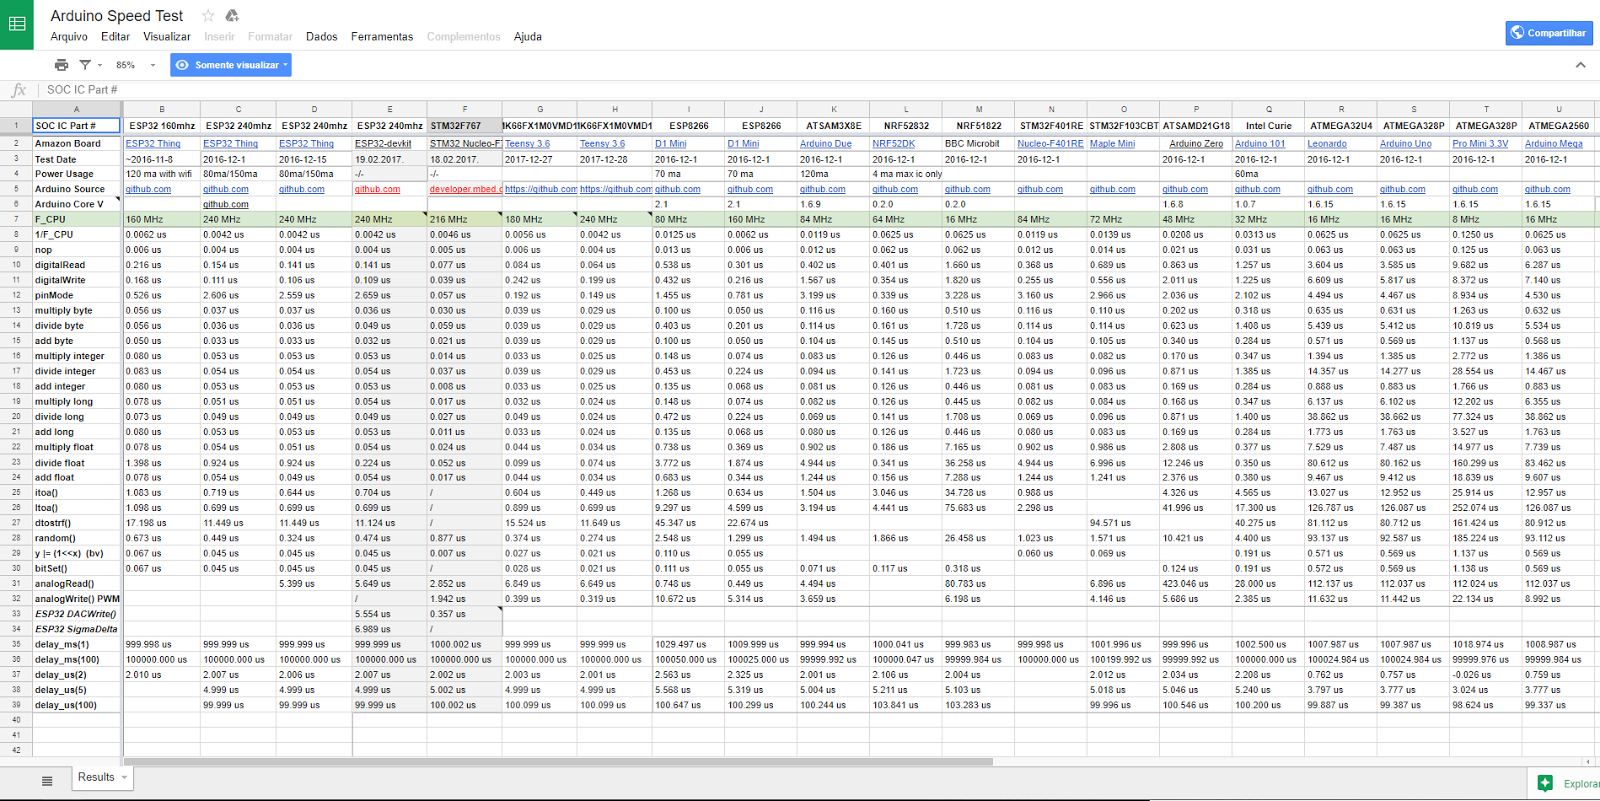
So the Arduino UNO and Leonardo runs at 16MHz, the ESP8266 at 80 or 160MHz and the ESP32 at 160 or 240MHz. We can see that with more power comes bigger energy consumption as the ESP32 presents picks around 150ma, ESP8266 on 70ma and the Arduinos around 25ma.
The costs also rise with the processing power:
- Arduino UNO (compatible): US$2.60
- Arduino Leonardo (compatible): US$3.60
- NodeMCU: US$4.40
- ESP32: US$5.00
Individual assignment
Reading the data sheet
For my Hello World board I used an ATtiny44 which have some interesting features as the datasheet highlighted. Here are some of them:
- High Performance, Low Power AVR® 8-Bit Microcontroller;
- Low Power Idle, ADC Noise Reduction, Standby and Power-Down Modes;
- Operating Voltage: 1.8v - 5.5v
- 4K byte On-chip In-System Reprogrammable Flash memory for program storage.
Besides the features the datasheet also brings information about the I/O pinout:
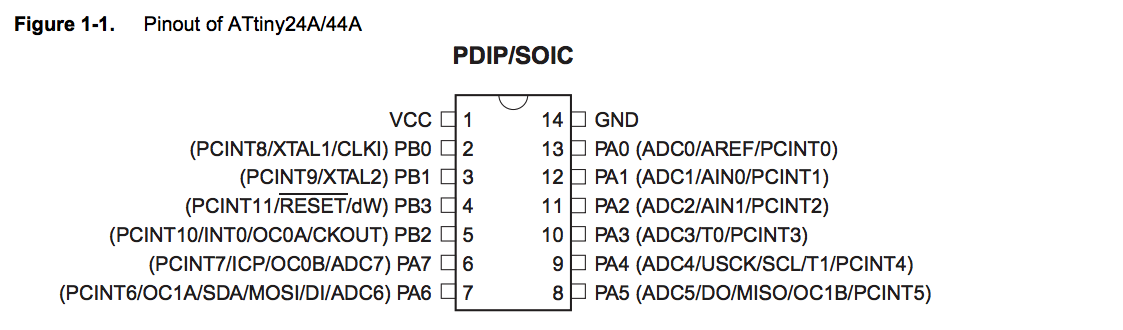
It also gives information about all the packages which the component can come, architectural overview, how it works and how it can be programmed.
In a nutshell the datasheet contains everything you need to start working with any component you like, most of them have a lot of information but the main ones are usually in the first 20 pages of any datasheet.
Programming
I’m using the Arduino IDE for the whole process because it’s really easy to operate and it has a lot of documentation online. All the setup and configuration is in an easy and friendly interface, besides, a lot of the processes come built in as presets, like burn the bootloader.
Connect the programmer and the FTDI cable to the board and to USB. I used my FabISP programmer for it.

As we are following this tutorial after connecting it all we can use the Arduino IDE to program our board.
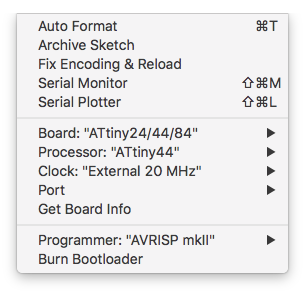
Check in the Tools Menu of the IDE if you can see (and choose) the following settings:
- Board: ATtiny24/44/84
- Processor: ATtiny44
- Clock: External 20MHz
- Programmer: USBTinyISP (or AVRISP mkII (or if you’re using the Atmel Programmer)
Keep in mind that the pins in ATtiny44 are not the same as in an Arduino, we have to use a chart to convert the pins:
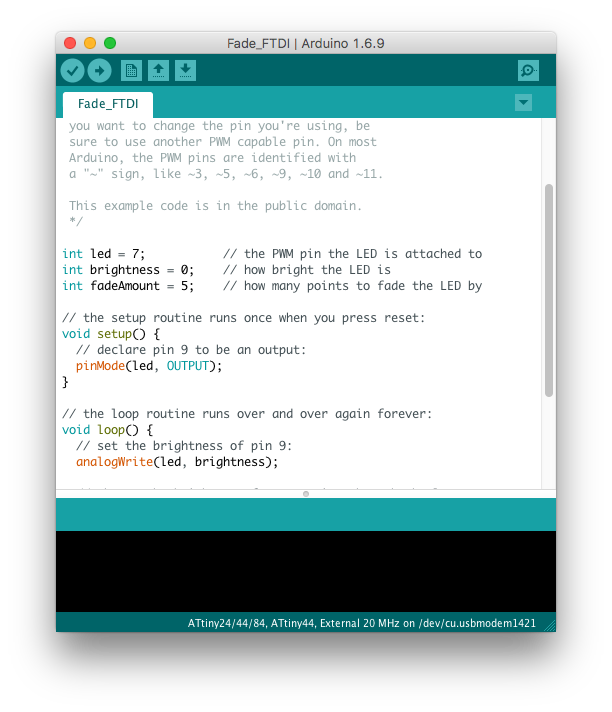
In this case I’m running the Fade example from the Arduino Example Library so I changed the LED pin from 13 to 7.
After that I uploaded the Button example just to test the switch and it worked fine too.
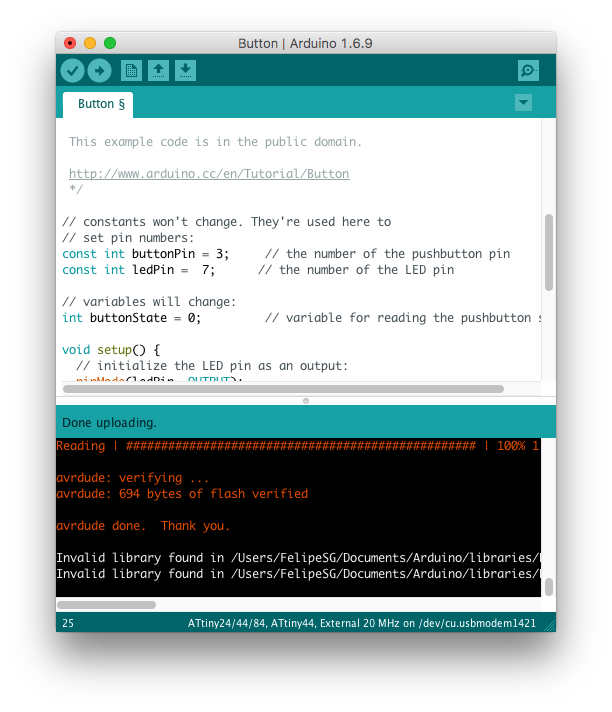
After that I wrote another code to press the button and blink the led while is pressed:
void setup()
{
  pinMode(3,INPUT); //switch pin
  pinMode(7,OUTPUT); // LED pin
}

void loop()
{

  while( digitalRead(3) == 1 ) //while the button is pressed
  {
    //blink
    digitalWrite(7,HIGH); //turn LED on
    delay(1000); //wait a second
    digitalWrite(7,LOW); //turn LED off
    delay(1000);
  }
}