PROCESS
I realized in my previous assignment that is very important to sketch in atoms our projects before modeling in bits.
From the beginning I decided to do in each assignment something that help to my final project.
So, in this case I decided to make a ROBOT (my original project) in a press fit construction kit.
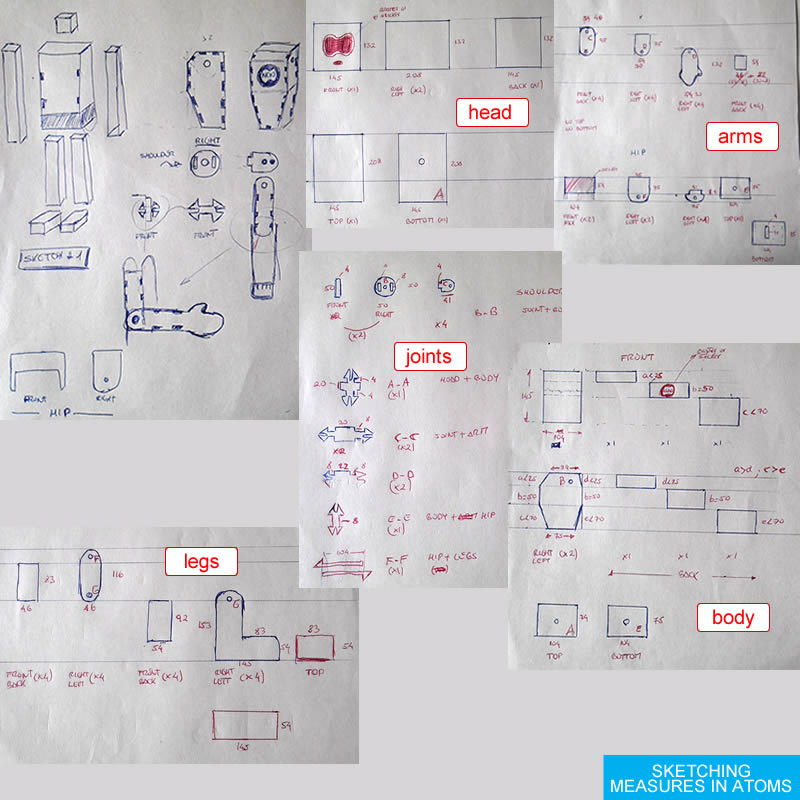
>>> SKETCHING THE ROBOT
For my original project one of my inspiration was the robot astronaut KIROBO. Next step was understand its dimensions (34cm x 18cm x 15cm) to calculate dimensions of my own robot.
I had a little limitation, the test shoulder that I printed had 50mm of diameter and after I sketched KIROBO, I realized its shoulder has only 30mm, so I transformed the scale and finally my robot will have 56 cm of height.


Next step was to sketch my robot with real dimensions, this was very important because I needed to explore the real dimensions, volumes and proportions of my own robot to optimize modeling.
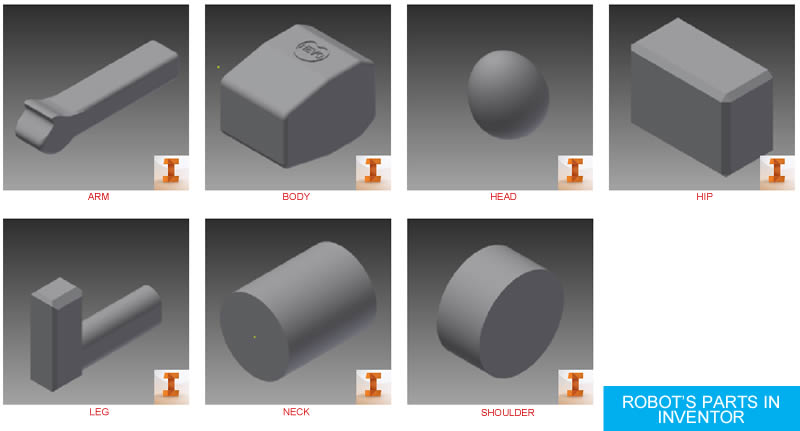
After made some test in Rhinoceros, I changed my mind and made all robot's parts in INVENTOR.
>>> PREPARING TO CUT
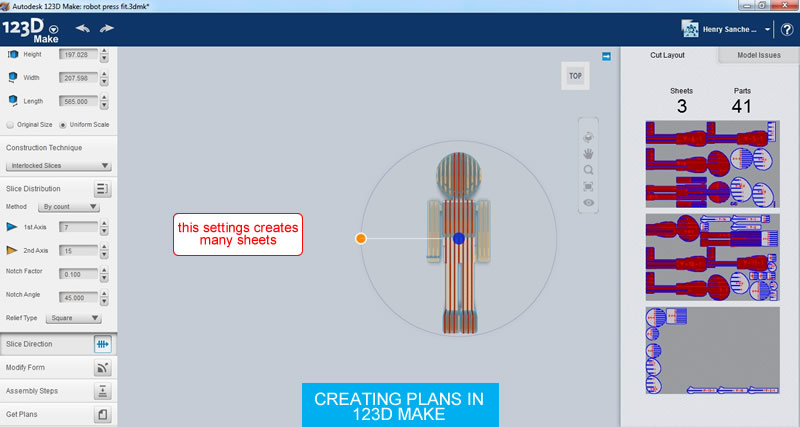
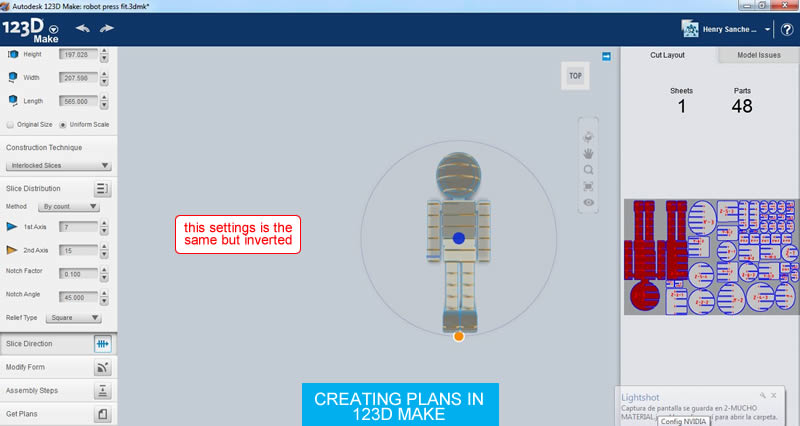
When I modeled in INVENTOR I was thinking of 123D MAKE too. So I exported the assembly as stl file and imported it in 123D MAKE and tested different settings.
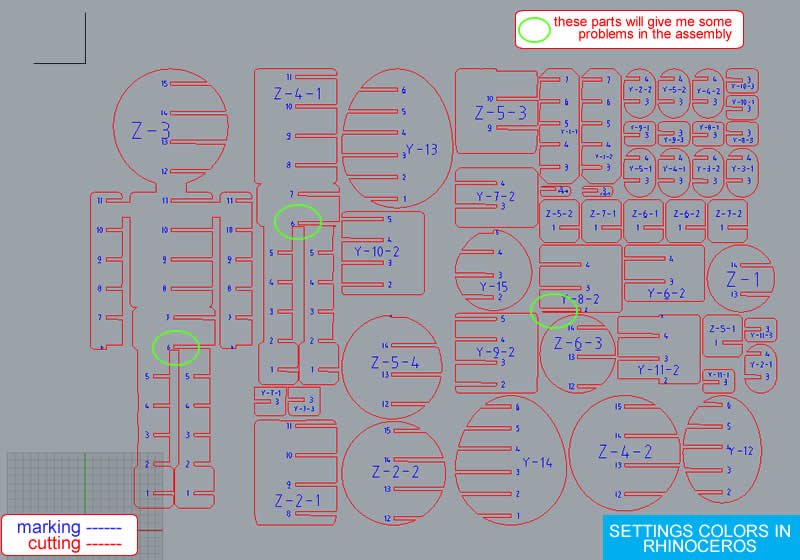
 Almost ready!. I was in digital world yet, so before I went to real world with the laser cut I needed to use rhinoceros to set the cutting and marking colors.
 >>> SENDING THE MODEL TO REAL WORLD
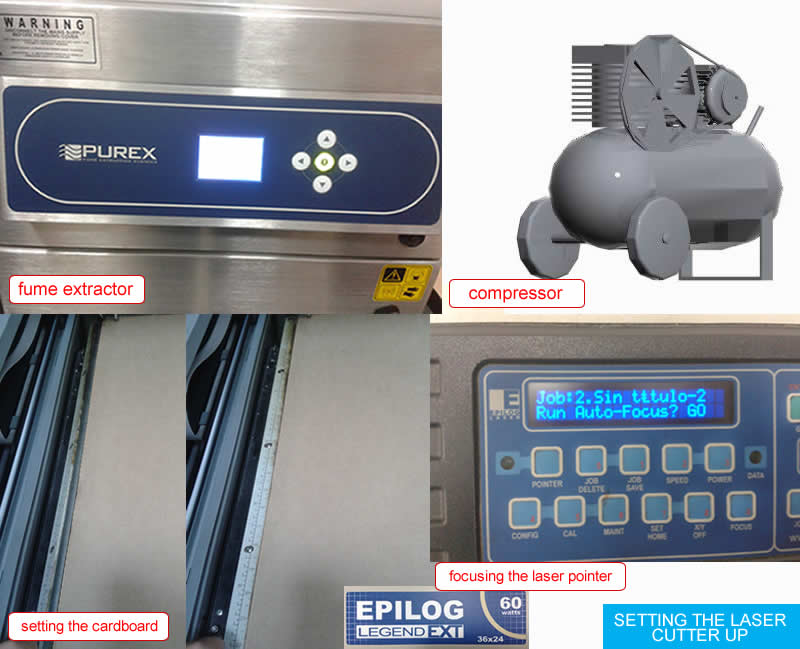
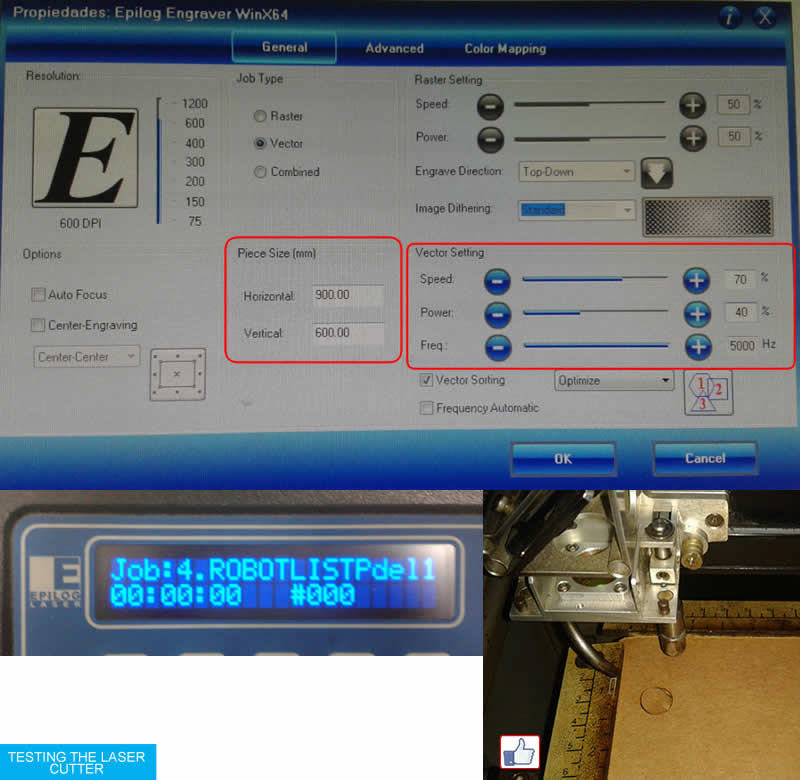
It was time to come back to real world again. Turning on the fume extractor, compressor, setting the cardboard and doing an auto focus, the material was ready to be cut.
My first test was the follow settings and it seems to work well.
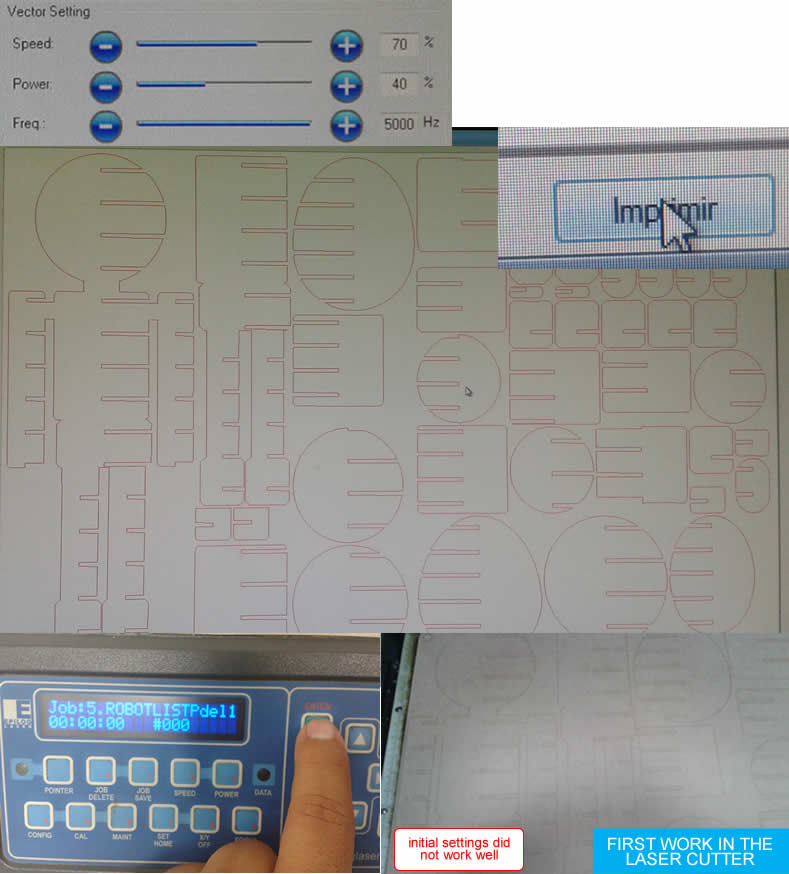
I was ready to cut, but my first setting did not work well. The cardboard was not cut totally.
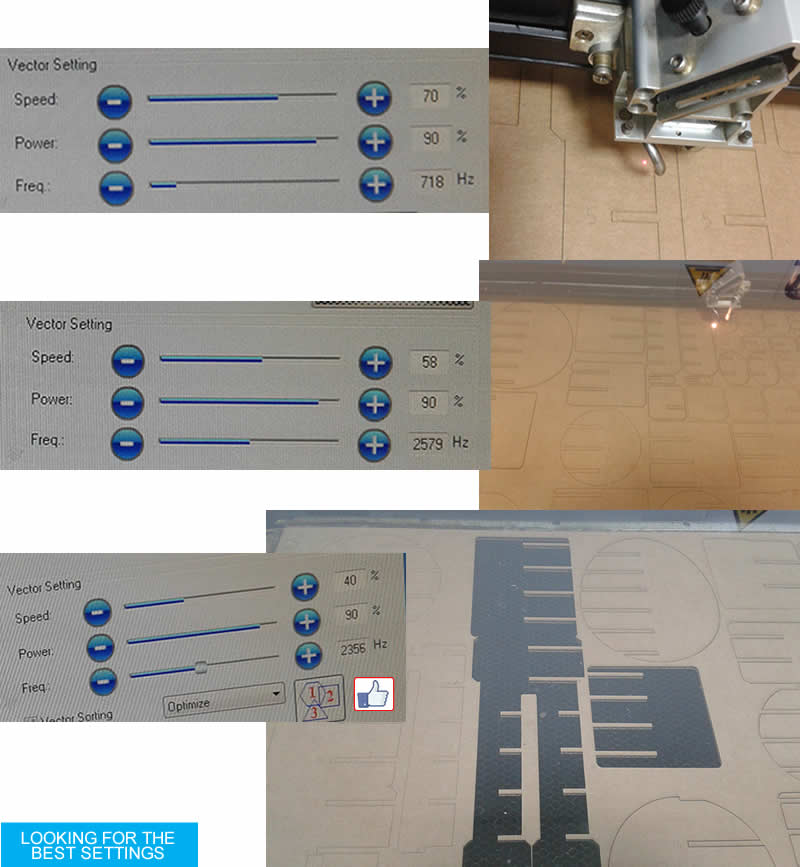
The power up 90% was increased and the frequency was decreased by recomendations of my friend Ricardo Torres, but after check it some seconds we stoped the machine and we realized lens was dirty, so after clean it and do a test with speed: 58%, power: 90% and freq: 2579hz, we finally sent the file with speed: 40%, power: 90% and freq: 2356hz. My cardboard had a thickness of 4.35mm.
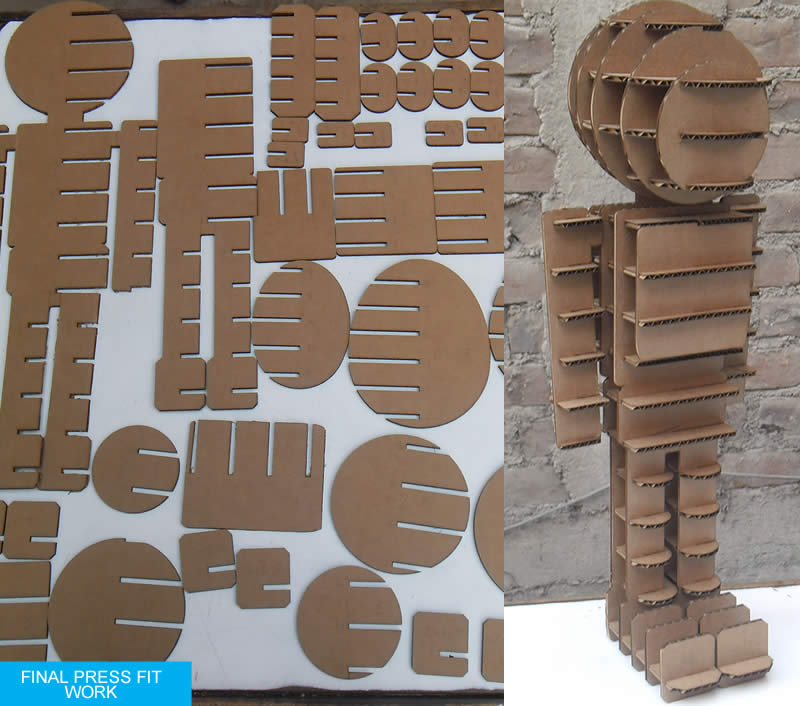
 The final work in the laser cutter.