

SEVENTH WEEK ASSIGNMENT
 |
 |
 |
 |
EMBEDDED PROGRAMMING
Assignment
Read a microcontroller data sheet
Program your board to do something, with as many different programming languages and programming environments as possible.
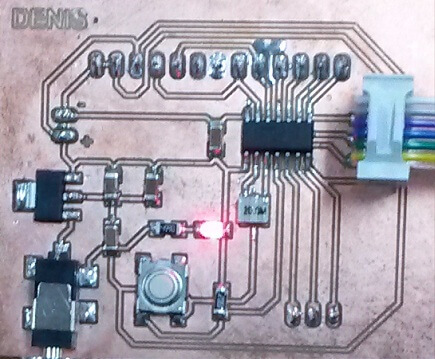
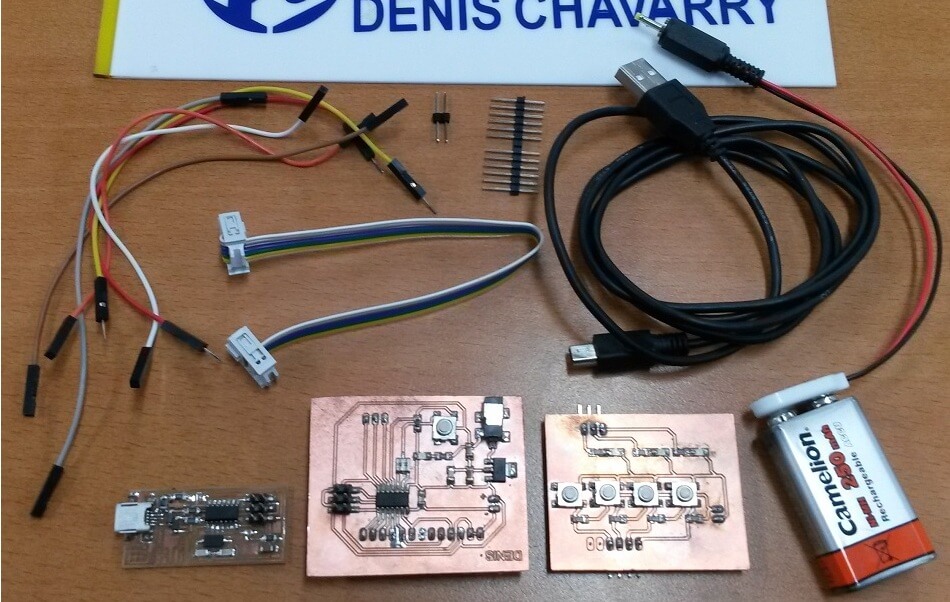
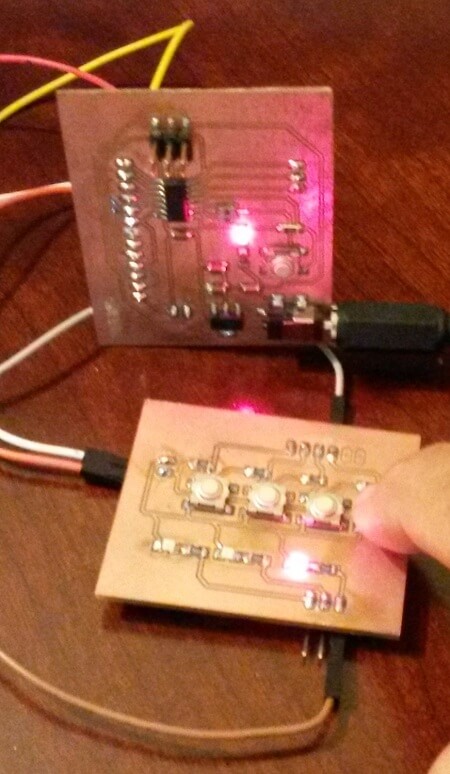
In week 6, I implemented two cards, one with the Attiny 44, with its vital components that can be used to test other applications in the future, and a second card with the input and output components.
INPUT/OUTPUTS has 4 buttons and 3 LEDs outputs. These INP / OUT can be connected where desired, and also I have used in my first steps with the arduino.
INPUT/OUTPUTS
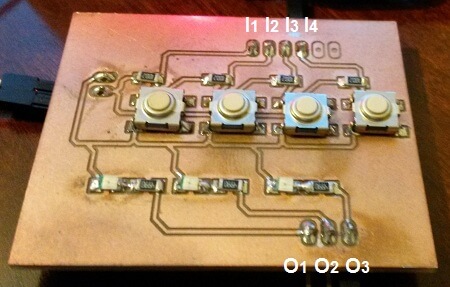
=====> I
<==== O
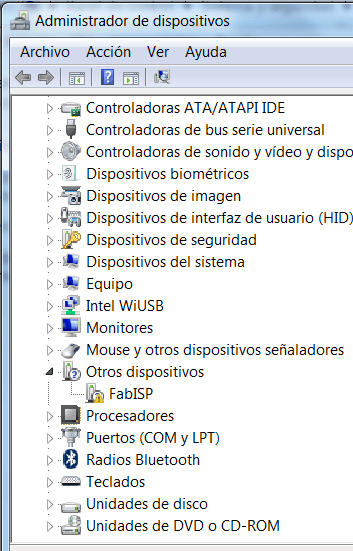
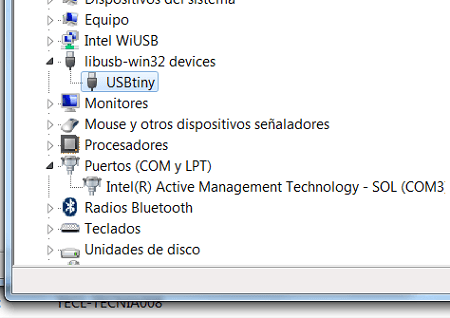
- Additionally, we have the FabISP we did in Week 4,
- Connection cable for the controller and the FabISP was implemented carefully to identifying the terminals.
- A connector for a 9V battery and a connector was prepared to feed the controller board.
Will develop this assignment with ARDUINO and ARDUBLOCK.
PROGRAMMING AN ATTINY WITH ARDUINO.
This tutorial shows you how to program an ATtiny45, ATtiny85, ATtiny44 or ATtiny84 microcontroller using the Arduino software http://highlowtech.org/?p=1695.
Download
- For Arduino 1.6: ide-1.6.x.zip
- For Arduino 1.0: ide-1.0.x.zip
- If you haven’t already, download the Arduino software, version 1.6.0. (The Arduino 1.0.x versions, like 1.0.6, will work too, just download the corresponding ATtiny zip file above.) Install the Arduino software, following the instructions for Windows.
- Download the ATiny zip file from the link above.
- Unzip the attiny zip file. It should contain an “attiny-ide.1.6.x” or “attiny-ide.1.0.x” folder that contains an “attiny” folder.
- Locate your Arduino sketchbook folder (you can find its location in the preferences dialog in the Arduino software).
- Create a new sub-folder called “hardware” in the sketchbook folder, if it doesn’t exist already.
- Copy the “attiny” folder (not the containing attiny-ide-1.6.x or attiny-1.0.x folder) from the unzipped ATtiny.zip to the “hardware” folder. You should end up with folder structure likeDocuments > Arduino > hardware > attiny > avr that contains the file boards.txt and another folder called variants. (For Arduino 1.0.x, the boards.txt and other files will be directly in the attiny folder, with no avr sub-folder.)
- Restart the Arduino development environment.
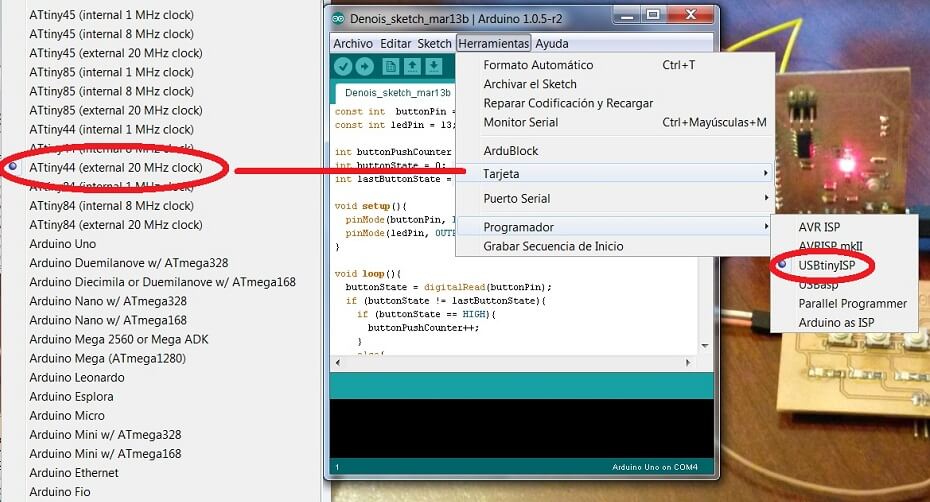
- You should see an ATtiny entry in the Tools > Board menu. When you select it, you should see additional Clock and Processor sub-menus in the Tools menu. These allow you to specify your ATtiny configuration. (In Arduino 1.0.x, you’ll see all the options in the main board menu instead.)
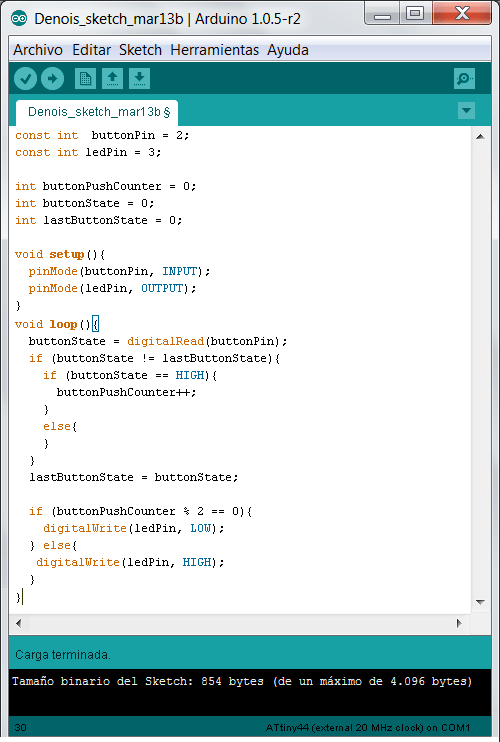
Here I show the code in Arduino and a Picture of the component already programed. VIDEO ATTACHED.
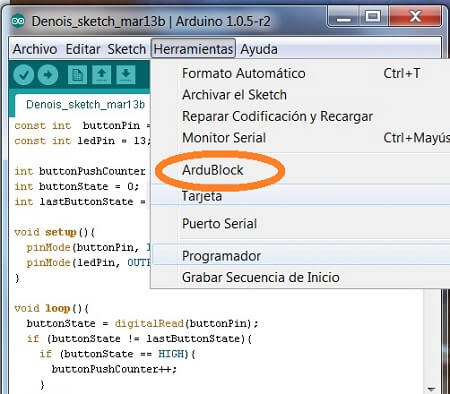
Ardublock programming system designed by MIT.
First download ArduBlock: http://cloud.github.com/downloads/taweili/ardublock/ardublock-all.jar
Include all.jar ardublock-file in the tools folder of the Arduino IDE ".../arduino-1.0.5-r2\tools\ArduBlockTool\Tool\ ardublock-all.jar"
You must create folders: ArduBlockTool\Tool\.
Be careful, the name of folder “ArduBlockTool” under tools folder is case sensitive. Start the Arduino IDE and find ArduBlock under the Tool menu.
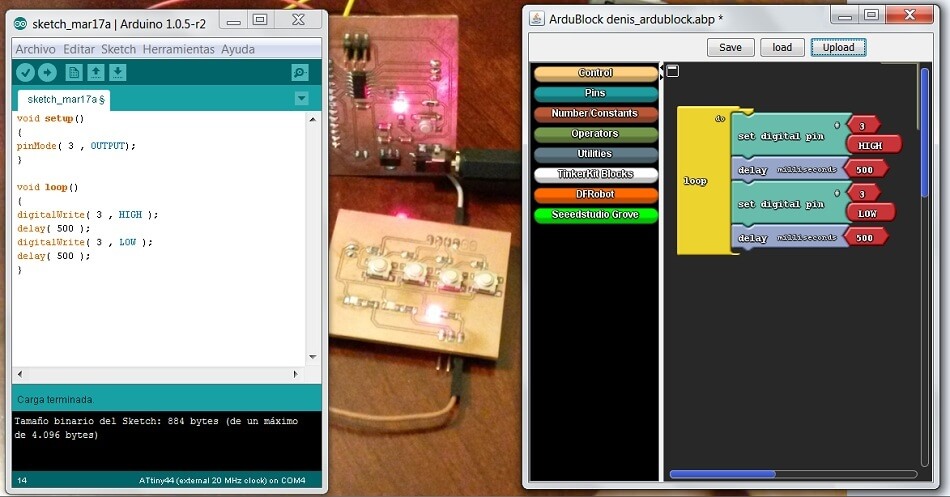
FLASHING OUT
The following application is the simplest of all and often serves to prove that things work. This is turn on and off the digital output set to the Pin 3.
Within the block "loop" that has always been placed on applications and eauivale block loop of the program that is written in a conventional manner on the IDE Arduino "void loop".
The blocks " set digital pin" serve to force the state of an output.
The block "delay" is to set a delay in milliseconds.
Once you have made the graphic scheme press the Upload button.
And the program is written in automatic way in the Arduino IDE and we can proceed to charge our card with 44 Attiny.

ASSIGNMENT COMPLETED
- Task accomplished.
- Finally, this is the beginning of the programming.
- I think, Ardublock is a good tool to teach beginners in programming. My youngest son (11) will be my first student.