
THIRD WEEK ASSIGNMENT
 |
 |
 |
 |
COMPUTER-CONTROLLED CUTTING
Design, make, and document a press-fit construction kit
- This week's assignment is to create a Press-Fit Construcction Kit using 2D computer comptroller cutting technique. Fab has defined that only cardboard would be used, with a predetermined dimension allowed by the laser cutter's capacity.
- Cut some stickers using the Fab's vinyl/plexiglass cutter modules.
MY PRESS-FIT
PROJECT
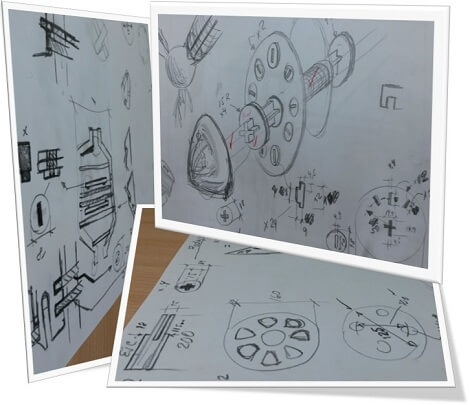
I have decided to model my wind generator final project on cardboard. The first step is to do sketches, then I would be adding details that would later be implemented on the proyect, as it is shown in the attached image..
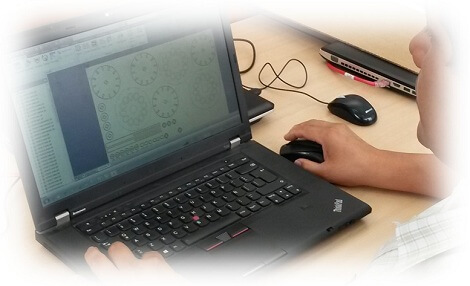
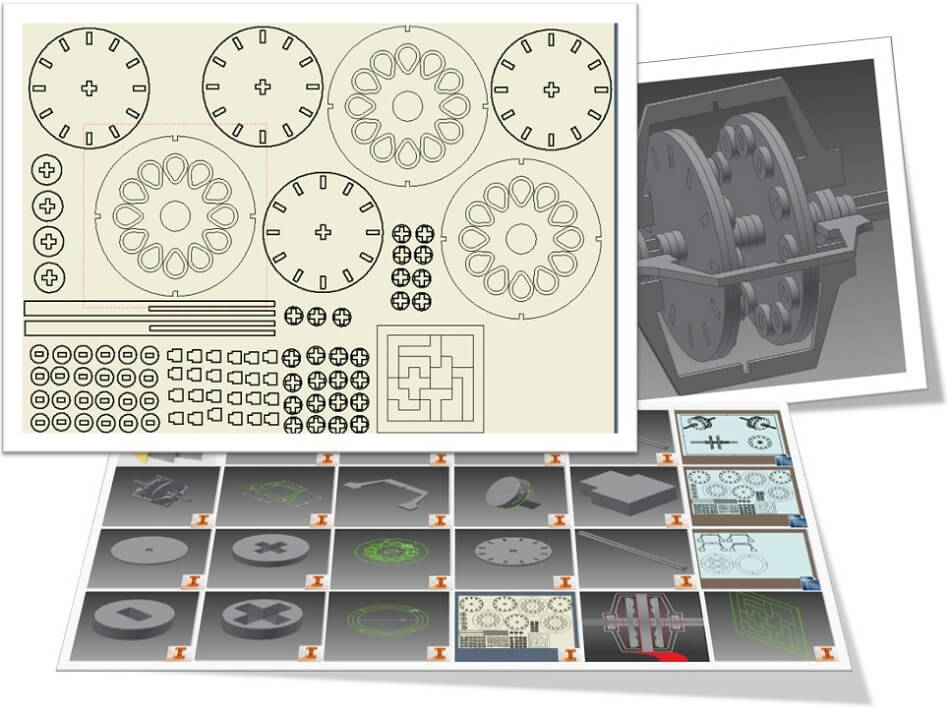
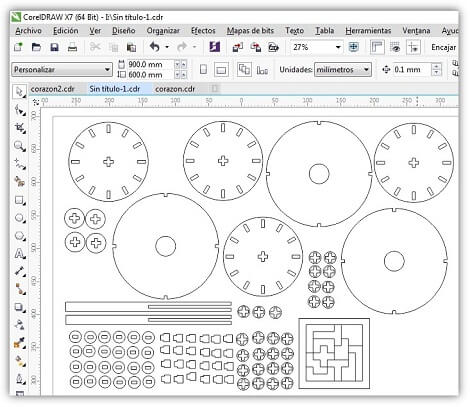
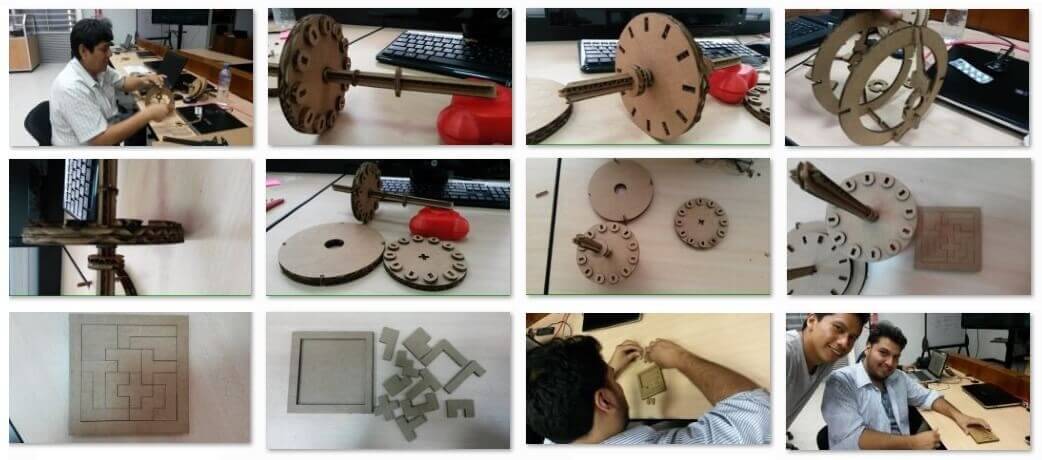
Once again I have decided to work with INVENTOR as a way to become proficient in the program. As it´s shown in the pictures, I have drawn each needed piece in order to transfer them to the cutter. The measurements are in millimeters.
CUTTING BY LASER
EPILOG LASER CUT, Legend 36 EXT, is the laser cutter machine used at Fab Lab TECSUP.
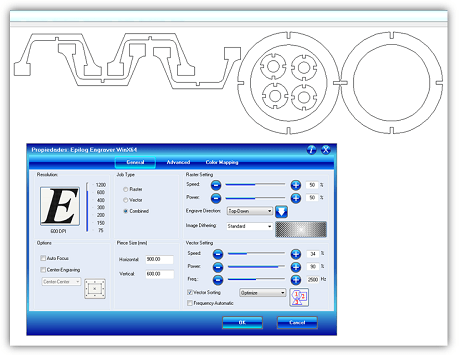
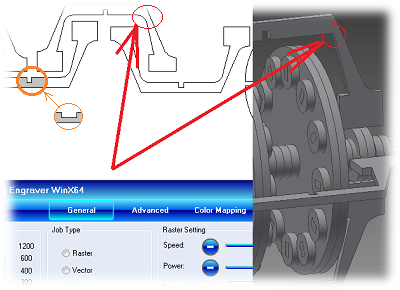
- A reference configuration table was explained. It is attached to the laser cutter. The terms of Power velocity and frequency were also explained.
- Necessity to be vigilant throughout the cutting process, checking any strange movement.
- Safety! Be careful. Avoid creating flames with the equipment.
- Do not stare at the laser.
- Watch out for any smoke produced during the process.
- Check the visibility of the lens and the nozzle. It is recommended to run an auto test.
- Verify that the
material stays in place. It should not curve. If this were the case,
the machine side rulers should be used to secure the material.
- Small tests should be made to ensure the quality of the cut, verifying the adjustment of the joint.
CUTTING
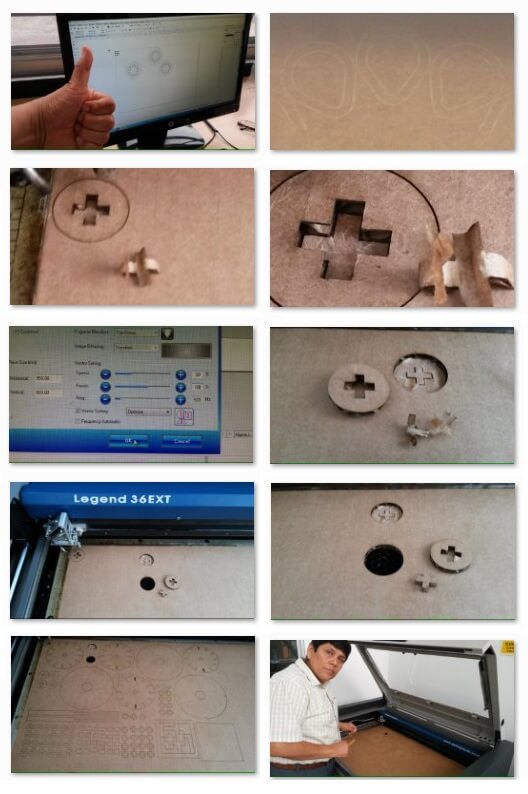
- Placed cardboard of 90 x 60 cm.
- A focus test was made.
- To verify the cut characteristics, first small tests were sent, as shown in the attached image; three different values were tested as well. Up to this point the cardboard was not entirely cut.
- The correct values were set at a power of 90%, and a speed off 34%.
- Great expectation to see the final cut.
THE ASSEMBLY
In a bigger model its sections could be numerically marked easing its montage.
There was a minor problem with the stator, which was immediately solved. This is the finished kit .
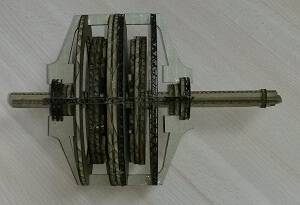
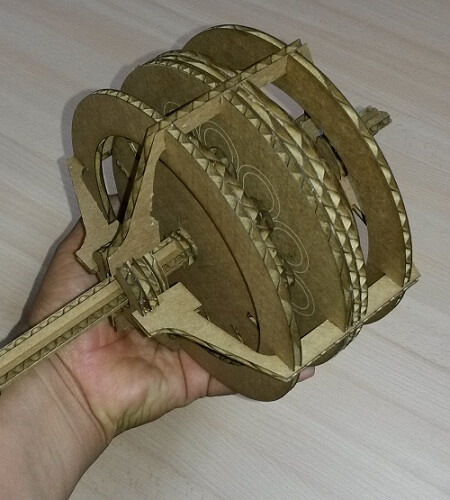
I visualized my project with INVENTOR, as a solid piece. Because of the cardboard composition its edges are irregular. I expect to be able to implement my design either in wood or in acrylic material.
After learning to cut, a 4.5 mm cardboard, using LASER CUTTER, and realizing that materials might be influenced by the tolerances and the variables. Not only can I begin to do research, but also test with different materials, for example I find 3D engraving in wood interesting.
Problems with the machine: some days ago we had a problem with the machine.
Problems with the operator: enthusiastic rookie can make mistakes.
Problems with the environment : Temperature changes have us sometimes either very hot during the day, breezy in the evenings, and with high humidity some other days. The cuts should be stored in an adequate place.
Problems with the material: Cardboard absorbes humidity, its
thickness is not uniform. Even though the cut was perfect in some areas, it was a bit disappointing in some other cut areas.
Problems with the design: it is worth adding some comments.
- The subject of tolerances, while in certain areas the parts were a bit too tight, in others they were too loose..... Oops!
- I made last minute adjustments in a section of the stator. I modified the cut of an straight angle to a curved angle.
- Developing problem in the groove of the stator within the wind turbine housing, it must be rethought.
Regarding the amount of coils it is necessary to increase the diameter to avoid having them too tight.
- The magnets plate needs a higher mechanical support... It may be too thin.
- If the electronic part goes in the interior, then the generator must be enlarged. And the size of the rotation system has to be rethought.
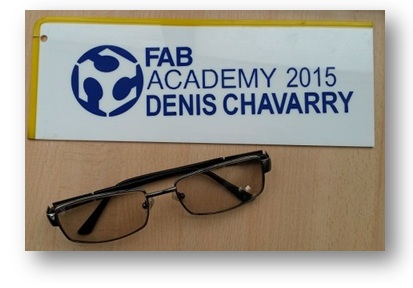
For this stage I chose to make the Fab Academy's logo, and my name as well. The file extension is "png".
Once the cut is done, the adhesive could be recovered by applying a bit of adhesive tape on top of it, which will allow its removal easily.