ESP8266 With The Arduino IDE
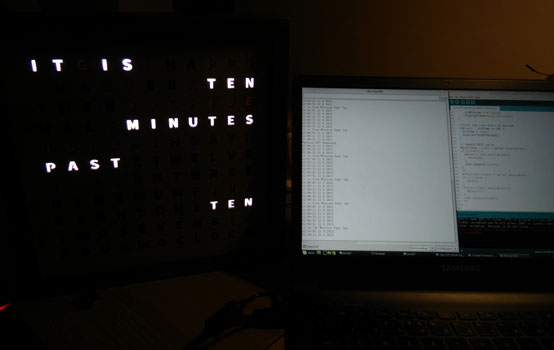
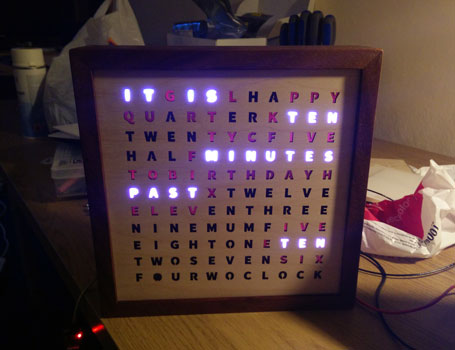
So I managed to get the basic functionality of the word clock working.

I'm using the Arduino IDE for the ESP8266, along with the following additional libraries:
- aRest: for the "RESTful" web interfacing.
- NeoPixelBus: by Makuna. It's based on the Adafruit NeoPixel library.
- Rtc: also by Makuna. For interfacing to the DS2331/DS3232.
- Time: by the amazing Paul Stoffregen.
- NTP: by moeur. He basically took the NTP example from Time library and packaged it up.
Overall I've found the Arduino IDE to be...OK. Like the Arduino IDE for use with an actual Arduino, it's great for getting up and running quickly. Unfortunately, I've also outgrown it rather quickly too. Some of the issues I've had:
-
The I2C library is a bit bang implementation, and so is the NeoPixelBus WS2812b protocol. I've been getting some funny interactions between the two. As far as I can tell, the I2C library bit banging relies on interrupts, but the WS2812b protocol is very timing sensitive so disables interrupts while it's running. Results? I get really inconsistent I2C for the RTC when also using the WS2812 LEDs. As a result, the RTC isn't active right now.
-
Syncing all the necessary tasks to keep the clock running is pretty cumbersome. I think the clock would be a great project to try my hands at an RTOS (Real Time Operating System) using the ESP8266 SDK.
-
The IDE is still under heavy development. I couldn't even get ANY I2C working under the 1.6.1-esp8266-1 release. I had to build the IDE from source.
A Quick Software Overview
I won't run through the whole program, but here's the main loop() function.
void loop() {

  //mDNS update
  mdns.update();

  // Output the time to the LEDs once per minute
  if(oldMinutes != minute()) {
      oldMinutes = minute();
      DisplayTime(hour(),minute());
  }

  // Print the time every 10 seconds
  if(now() - oldTime >= 10) {
    oldTime = now();
    digitalClockDisplay();
  }

  // Handle REST calls
  WiFiClient client = server.available();
  if (client) {
    while(!client.available()){
      delay(1);
    }
    rest.handle(client);
  }
}
The basic steps of the loop are:
-
Update the mDNS responder. This lets mDNS compatible systems connect to the clock using
http://wordclock.local, instead of having to find it's IP address. -
Check if it's a new minute. If it is, update the LEDs to show the time (and print the time in words to the serial port).
-
Check if 10s have elapsed. If so, print the current time to the serial port.
-
Handle any new clients using the aREST API.
The aREST API exposes a couple of functions to a connected user. They are:
-
http://wordclock.local/will return a list of variables exposed to the API and their current value. For example:{"variables": {"red": 3, "green": 64, "blue": 49},These variables can then be accessed on their own at any time. For example with
http://wordclock.local/red -
http://wordclock.local/idwill return some information about the clock. For example:{"id": "1", "name": "wordclock", "connected": true} -
http://wordclock.local/led?params=can be used to set/query the state of the LED on the control PCB. Sendingonas the parameter turns the LED on. Sendingoffturns the LED off. Sending anything else will return the current state of the LED -
http://wordclock.local/rgb?params=can be used to set the colour of the RGB LEDs. The format isR,G,B, whereR,G, andBare values from 0 to 255 for that colour. Note that there is not sanity checking of the input, so be careful!
aREST also gives direct control over pins, which I hate and can't easily turn off. In a future version of the code I plan to get rid of aREST and do it myself (or find a better library).
Current Problems
I've already mention the I2C/RTC problem. Some other bits of the code that need worked on are:
-
If the network goes down, the NTP check seems to hang the code somewhere. The only option at that point is a hard reset.
-
The WiFi SSID and password are hard coded.
-
Temperature based throttling of LED brightness using the temperature reading from the DS3232.
-
The time zone is currently hard coded, and the NTP library does DST compensation by default, but using the American dates.
Overall though, I've met all of my "must haves" that I specified in Week 15: Applications and Implications (AKA Pick A Final Project). I've also got a good start on some of the "nice to haves". I have a basic Android app for setting the LED colour, and in fact the ESP8266 will remember the last network it connected to my default!
How Bright? Too Bright!
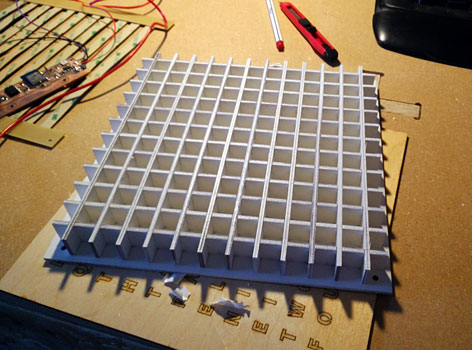
One annoying problem I've noticed is light leakage. I used some easier-to-laser poplar plywood to cut the internal grid, and it turns out it's not particularly opaque with the bright LEDs!

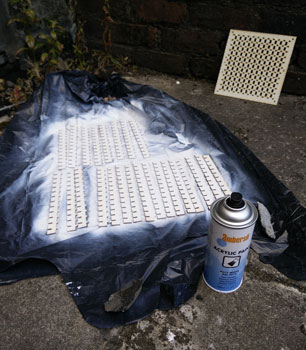
To try and mitigate the leakage, I took the grid apart and spray painted it white.


The result? Actually, it hardly made any difference at all! Instead, it's much easier to just limit the LED brightness. A white level of 60,60,60 it plenty bright in even a well lit room, and significantly reduces the amount of light leaking to surrounding letters. It should also help with reducing temperature build up inside the enclosure.
In the future, I'll make sure and stick to denser birch plywood for the exterior and interior of the clock.
But For Now...
...I'm basically done! The clock is far from finished, but it's more than enough for Fab Academy. All the future work will be done on my GitHub for the project.
Comments
comments powered by Disqus