Fab Lab Barcelona SuperNode /Fab Lab Sevilla /Jose Perez de Lama
hello.arduino.168 example and tutorial / part.03
[developed april/may 2014]
5./ System and software requirements & installation
This tutorial is written for Ubuntu 13.10 OS users. It should work as well for Ubuntu 12.04 LTS, and it doesn't work for Ubuntu 10.04 LTS (some further non-tirvial changes need to be made in the defualt gcc installation for 10.04 in order to work). The process can be performed on MacOs and Windows, but you would need to check other sources to implement it. Check the links above and you will find your way if you are using these OS's.
Software needed
(5.1) Fab Modules (with cad or png files by Neil Gershenfeld)
(5.2) Your favourite 2D design software (in my case Rhinoceros on Windows)
(5.3) I-Creator & I-Controller (to run the I-Modela, again on Windows)
(5.4) avr-gcc and avrdude
(5.5) Arduino IDE, with the following customizations:
(5.5.1) dialout group modification
(5.5.2) Arduino third party software installation (boards.txt file)
(5.1) Fab Modules
Fab Modules is the integrated software package developed by Neil Gershenfeld and team to manage cad-cam processes with various Fab Lab machines, including those to mill PCBs.
Installing Fab Modules for Ubuntu 13.10 is explained in the Fab Aacdeme page http://kokompe.cba.mit.edu/downloads.html
Steps include:
[1] Download software (fab.src.zip) from the former web page. You can download it in your home folder.
[2] Install dependencies (using terminal with the provided script):
sudo apt-get install python python-wxgtk2.8 python-dev python-pip gcc g++ libpng12-dev libgif-dev make bash okular libboost-thread-dev libboost-system-dev cmake
[3] Go to the fab modules directory. If you installed fab modules in home, type in the terminal:
cd fabmodules
(4) Type make fab, which compiles all executables and copies scripts into bin.
(5) Type make install to copy all executables and scripts to /usr/local/bin.
The tutorial by Anna Kaziunas at as220 can be used for detailed instructions. Doublecheck however that the list of dependencies is updated: http://academy.cba.mit.edu/content/tutorials/akf/install_fab_modules.html
Type fab to launch the program. You might have to go first to fab modules directory location.
(5.4) avrdude & gcc-avr installation
gcc-avr (to compile C code for avr microcontrollers)
avrdude (to bootload and program AVR microcontrollers)
If your are going to work only with the Arduino IDE you wouldn't have to install avrdude and gcc-avr by themeselves, as they get installed embedded in the Arduino IDE. So, you could skip this section.
The prosess is explained here by Anna Kaziunas France: http://academy.cba.mit.edu/content/tutorials/akf/programming_FabISP.html
[1] Open terminal and type:
sudo apt-get install flex byacc bison gcc libusb-dev avrdude
[2] Then type:
sudo apt-get install gcc-avr
- type Y (Yes) when asked to do so by your system
[3] Then type:
sudo apt-get install avr-libc
[4] Then type (may already be installed):
sudo apt-get install libc6-dev
(5.5) Arduino IDE installation and customization
Recommended Arduino IDE version to install is 1.0.5. It can be downloaded from the arduino web site at: http://arduino.cc/en/Main/Software#toc2. In my case I downloaded the Linux 64 bit version. The download is a tar.gz compressed file. I extracted it in my home folder. To open the Arduino IDE, enter the arduino-1.0.5 folder through the terminal typing, if you installed it in /home, cd arduino-1.0.5 (check name of your actual arduino folder) and then type arduino to launch the IDE. In Ubuntu 13.10 now i can type as well Arduino in the Unity searcher and launch it clicking the icon un the GUI; - but i am not completely sure how this got installed...
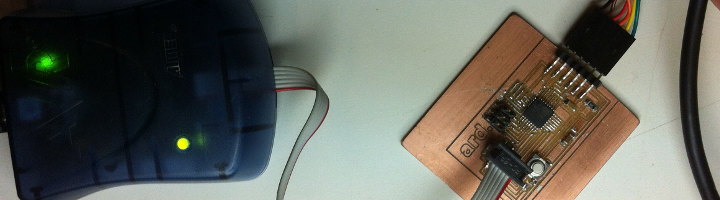
(5.5.1) In order to be able to bootload the firmware using the avrdude which is integrated in the Arduino IDE you have to make some changes in your system. I believe this has to do with group permissions to access the AVRISP mkII device.
Here I mix instructions from two different sets of instructions:
http://academy.cba.mit.edu/content/tutorials/akf/embedded_programming_arduinoIDE.html
where it is explained for Ubuntu 12.04, to which i incorporate some changes in the code to so that it works for Ubuntu 13.10. This second instructions come from this URL:
http://stackoverflow.com/questions/5412727/avrisp-mkii-doesnt-work-with-avrdude-in-linux
The consolidated version for Ubuntu 13.10 looks, then, like this:
[1] Install uisp (might be missing in Ubuntu 13.10)
sudo apt-get install uisp
Then you need to create a file called 60-avrisp.rules in the directory /etc/udev/rules.d
[2] Go to Deskstop by typing in the terminal:
cd ~/Desktop
[3] Then type:
nano 60-avrisp.rules
A blank file will opens up in a nano text editor.
[4] Enter the following text.
SUBSYSTEM!="usb", ACTION!="add", GOTO="avrisp_end"
# Atmel Corp. JTAG ICE mkII
ATTR{idVendor}=="03eb", ATTR{idProduct}=="2103", MODE="660", GROUP="dialout"
# Atmel Corp. AVRISP mkII
ATTR{idVendor}=="03eb", ATTR{idProduct}=="2104", MODE="660", GROUP="dialout"
# Atmel Corp. Dragon
ATTR{idVendor}=="03eb", ATTR{idProduct}=="2107", MODE="660", GROUP="dialout"
LABEL="avrisp_end"
To save in nano press Control O and hit the Enter key
Then type Control X to exit and go back to terminal.
[5] Move the file from the desktop to /etc/udev/rules.d by typing:
sudo mv 60-avrisp.rules /etc/udev/rules.d
[6] Then type:
sudo service udev restart
[7] Unplug all USB devices. Then plug them back in.
Now you should be able to burn the bootloader.
This did work for me! (Thanks Anna and Uberdaff @ stackoverflow)
(5.5.2) Installing third party hardware for bootloading with the Arduino IDE
This applies only if you are not incorporating the optional 8MHz crystal. You can always stuff it later and bootload again the corresponding (different) firmware. I favoured starting without the cristal (resonator) to make it simpler and easier to debug in case something would go wrong. However, the software part becomes a bit more complicated; - but not so much.
Instructions for this part are found here: http://fab.cba.mit.edu/content/projects/fabkit/
Further explanations on Arduino and third party hardware can be found here: https://github.com/arduino/Arduino/wiki/Arduino-IDE-1.5---3rd-party-Hardware-specification.
In our case you only need the boards.txt file, and not the platform.txt and programmers.txt files mentioned in the former page, which I assume are already in the IDE libraries for Atmega168, the microcontroller we are using in this tutorial.
Quoting from the fabkit page:
Setting up the IDE
This applies only if you are programming the bootloader using the ATmega168 internal resonator, - that is, without the external 8mhz resonator. You wouldn't need to do this if you were bootloading the hello.arduino168/328 board with the external 8MHz resonator. In that case you would be using an already available board firmware.
The built-in board configurations will not work with this setup, so you will have to use the custom boards.txt file (file and instructions provided by Dave Mellis).
The file should be placed in a sub-folder (e.g. fabduino) of a folder called hardware which needs to be created within a user's Arduino sketchbook folder (whose location can be found in the preferences dialog of the Arduino IDE). It should look something like this: .../sketchbook/hardware/fabduino/boards.txt
Ubuntu/Linux prompts for the sketchbook location. You need to tell the IDE where to place it. Make sure you type the full direction. Mine is /home/user/sketchbook/ - make sure you get this right when the IDE asks/prompts you to tell where you want to place it.
Once the boards.txt file is installed, restart the Arduino IDE if running. Once restarted, when you go to Tools/Boards in the Arduino IDE a new entry should appear: Fabduino/Fabkit w/ATmega168(internal clock) (see image below).

6./ BOM & equipment

Alphanumeric IDs according to the Fab Academy board.png file.
As mentioned before, Atmega 328P can be used as an alternative to ATmega 168A. In the 2013 & 2014 fab inventory the 328P has actually substituted the 168A. Of course, attention should be paid to select the right microcontroller/board when bootloading. (ATmega 168A @ digikey).
The 8MHz resonator is optional. This was the only non-fab-iventory piece in the board in 2013. The digikey part number for this component is 535-10004-1-ND.
From http://fab.cba.mit.edu/content/projects/fabkit/: "There is an optional 8mhz resonator (16mhz also works but requires different bootloader/fuse settings). It is similar to the 20mhz resonator in the fab inventory. This resonator is not needed for most applications but if you want to use servo motors or do faster serial communication, it will be necessary. You can always build the board without it and add it later."
Download BOM xlsx
Links
Part 01
0./ About this tutorial
1./ Description :: hello.arduino.168/328P
2./ Fab Academy reference files list and location
3./ Tutorials, info sources and URLs
Part 02
4./ Workflow & toolchain
Part 03
5./ System and software requirements & installation
6./ BOM (Bill of Materials) equipment and tools
Part 04
7./ Detailed fabrication process description
7.1/ Board preparation and milling
7.2/ Components soldering and debugging
7.3/ Bootloading firmware and uploading your first Arduino sketch (program)
Part 05
8./ Fabkit fabrication notes (files, ISP cables & connection)
jose_perezdelama @ Fab Academy 2013 final project
jose_perezdelama @ Fab Academy 2013 home page
License & credits
This work is a derivative of documentation collected in the Fab Academy classes and tutorial pages authored by Neil Gershenfeld, Anna Kaziunas/AS220 and Fab Academy collaborators and students as mentioned in the corresponding linked pages for each of the sections.
Unless otherwise stated, information in these pages is downloadable under a Creative Commons Attribution-Share A Like license; attribution for the tutorial reorganization: Jose Perez de Lama / Fab Lab Sevilla / Fab Academy 2013(14).