Fab Lab Barcelona SuperNode /Fab Lab Sevilla /Jose Perez de Lama
hello.arduino.168 example and tutorial / Part.01
[developed april/may 2014]
Index
Part 01 (in this page)
0./ About this tutorial
1./ Description :: hello.arduino.168/328P
2./ Fab Academy reference files list and location
3./ Tutorials, info sources and URLs
Part 02
4./ Workflow & toolchain
Part 03
5./ System and software requirements & installation
6./ BOM (Bill of Materials) equipment and tools
Part 04
7./ Detailed fabrication process description
7.1/ Board preparation and milling
7.2/ Components soldering and debugging
7.3/ Bootloading firmware and uploading your first Arduino sketch (program)
Part 05
8./ Fabkit fabrication notes (files, ISP cables & connection)
X./ Credits & license
0./ About this tutorial
This tutorial tries to put together the info of the whole process, - start to end -, of fabricating a hello.arduino.168 PCB. The information is already on line, most of it in the Fab Academy various web pages (referenced below), but it is scattered throughout different Fab Academy classes, tutorials and project pages. Here i will try to put it together, step by step, and oriented to beginners with no experience in electronics - such as i was when starting with the process. I will try to explain clearly those steps of the process where myself and colleagues got stacked at some moments. The process once mastered is easy and straightforward. However, with no previous experience, some assumptions made by more experience users might become obstacles difficult to overcome - as happened to us for some time.
The tutorial tries to explain, too, general background and concepts related to the process. You might want to skip some parts and go directly to sections 2./ to get the necessary files, section 5./ to install the software you are going to need, and section 6./ to follow the actual fabrication instructions.
1./ Description :: hello.arduino.168/328P PCB
Arduino (http://www.arduino.cc) is an open hardware Input/Output board that works together with a free software programming environment, the Arduino programming language, libraries and IDE, - which are based on Wiring (Hernando Barragán), Processing (Ben Fry and Casey Reas) and C (Ken Thompson and Dennis Ritchie...), among other software developments. The project was initiated and ist still lead by Massimo Banzi, David Cuartielles, David Mellis, Tom Igoe, Gianluca Martino and others.
The hello.arduino.168 I/O board is a simplfied version of an arduino board, - based on the ATmega 168A microcontoller -, that has been developed by several people around the Fab Academy, including Neil Gershenfeld, David Mellis and others.
Design and production of this PCB is one of the option of the Fab Academy "Embedded programming" class; see: http://academy.cba.mit.edu/classes/embedded_programming/index.html
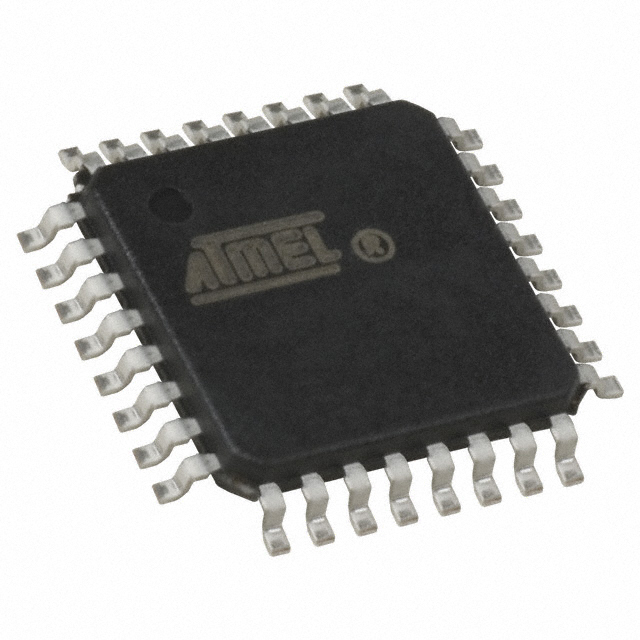
The board allows for input and output signals / devices management, using the Arduino IDE (or the avrdude & gcc toolchain). It provides 6/11 input/output pins. THis design doesn't use all the ATmega168 available pins (32 of them). The ctual versiomn explained here uses, as mentioned before the ATmega 168 micro and doesn't incorporate an optional 8MHz resonator (crystal). The resonator improves the board performance, and is necessary for certain applications such as controlling servo motors. The process would be analogous using the ATmega 328P microcontroller. Notice however, that it should be 328P and not just 328 (which is the one that used to be included in the Fab Inventory en 2013).
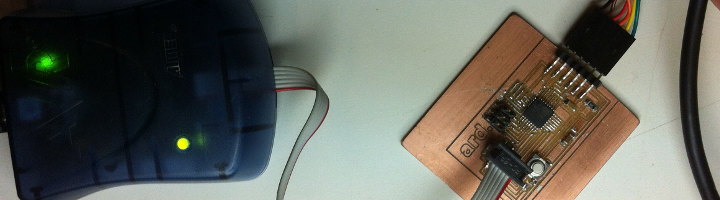
In order to program the hello.arduino board an FTDI (5V) cable is used to connect it to a computer (digikey part num. 768-1015-ND). In this tutorial the computer has an Ubuntu 13.10 OS. The process can be performed as well on Windows and MacOs, and you can refer to other Fab Academy tutorials to check this out. This is also useful for Ubuntu 12.04 LTS, but not for 10.04 LTS, which would need some extra work installing non-default versions of gcc (see later on).
The second piece of equipment to bootload the firmware is an In System Programmer. AVR-ISP mk II is the one used in this tutorial (digikey part num. ATAVRISP2-ND). You can learn about using other ISPs in other Fab Academy tutorials, most significantly the Fab-ISP. AVR-ISP communicates with the computer with gcc and avrdude. Gcc compiles C scripts into microcontroller language and avrdude bootloads the firmware onto AVR micros. Gcc and avrdude can be installed independently and managed through the terminal. They are as well integrated in the Arduino IDE.
Further (Fab Academy) developments of the hello.arduino.168/328P (aka Fabduino) board include hello.arduino168/328P with an 8MHz resonator, Anna's Fabduino (by Anna Kaziunas), Fabkit/Fabduino, Fabio, Barduino (by Luciano Betoldi)...
2./ Fab Academy reference files list and location
Reference
files location (Fab Academy / Neil Gershenfeld and collaborators): board, traces,
components; c and make files (avrdude), boards.txt (Arduino IDE). Sources:
http://academy.cba.mit.edu/classes/embedded_programming
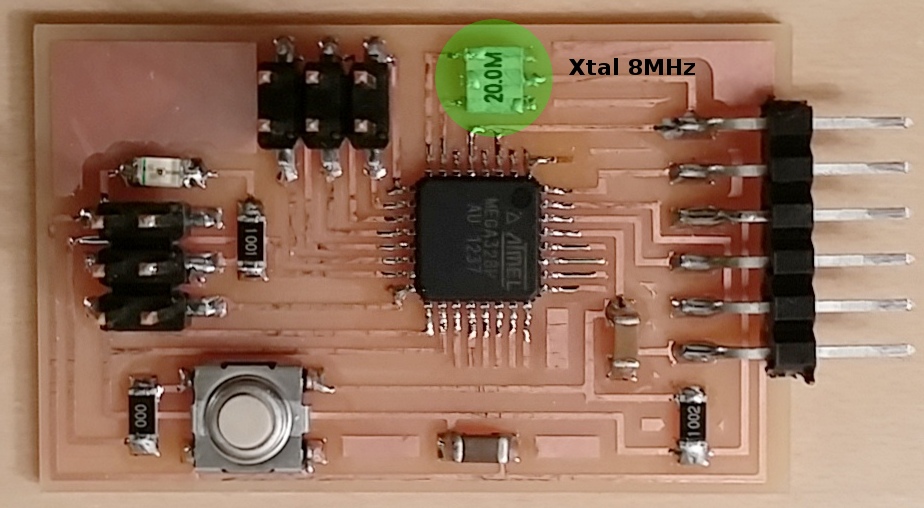
http://fab.cba.mit.edu/content/projects/fabkit/These are the original Fab Academy board and component files (you can click on the images to see them in a larger size:
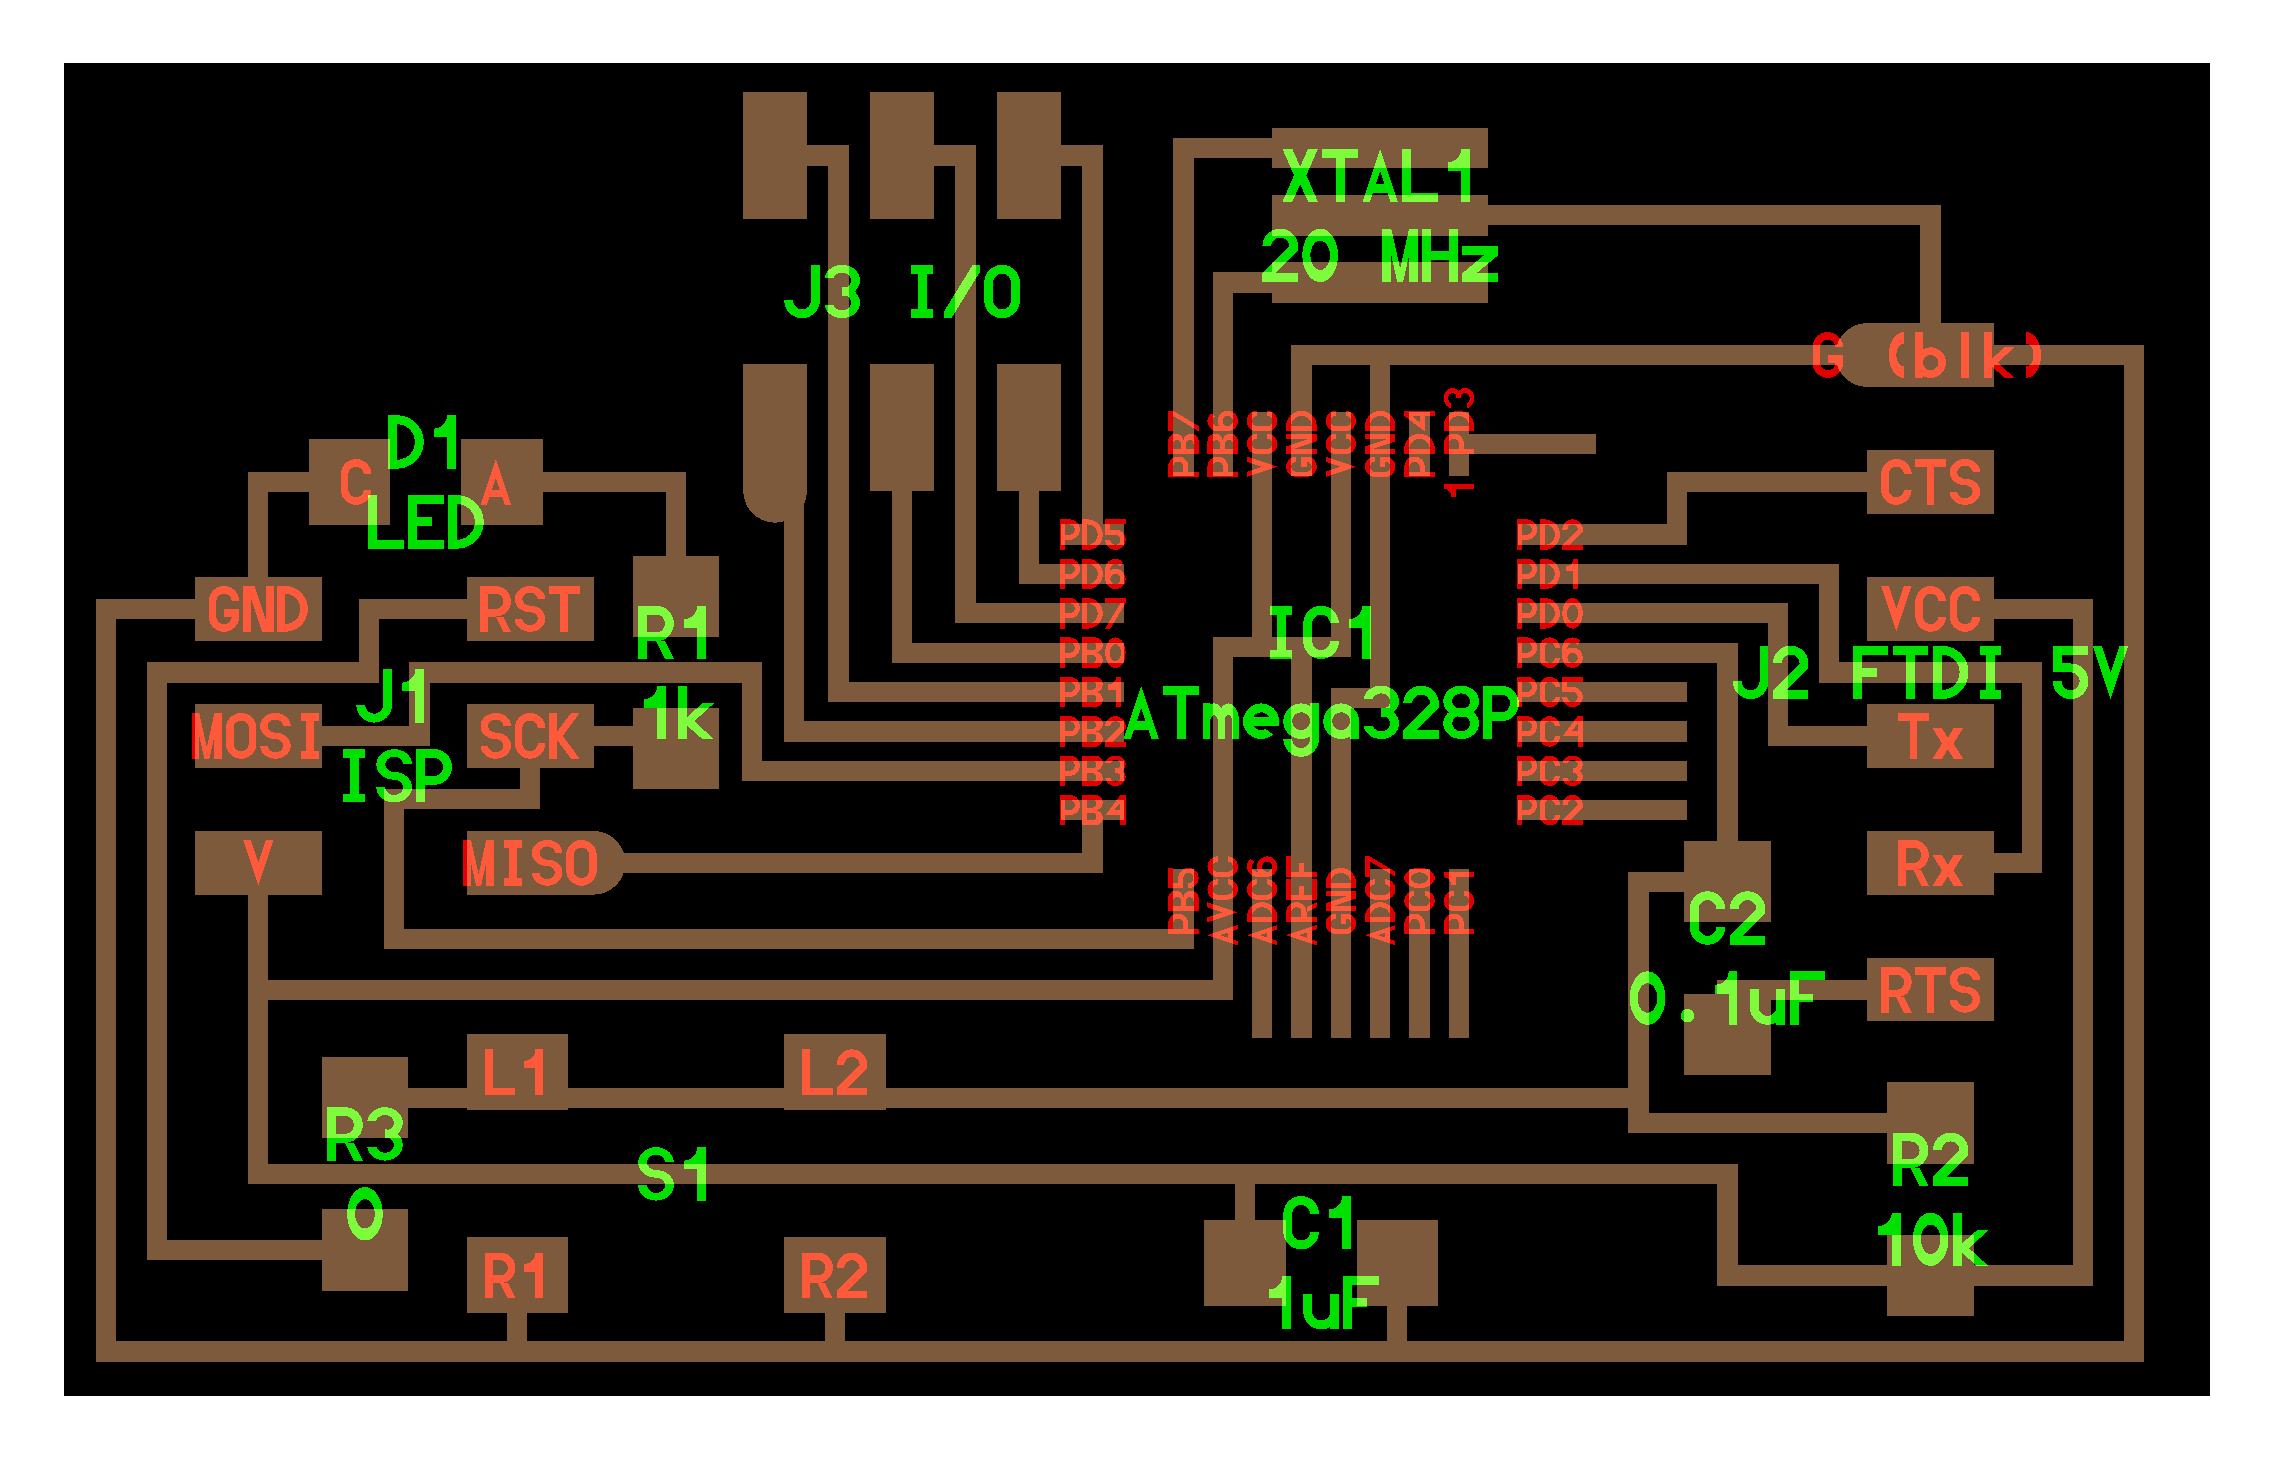
Note that even if the images show a 20MHz Crystal (resonator) the actual resonator to stuff the board with, as indicated below, is an 8MHz one. The board also works, with a lower performance capacity without the Crystal. I would also say that the RX/TX pins at the FTDI connector are plotted switched. However it's just the plot and it doesn't affect anything.
3./ Tutorials, info sources and URLs
Anna Kaziunas France's / AS220 hello.arduino tutorial page: http://academy.cba.mit.edu/content/tutorials/akf/hello_arduino.html
Fabduino/Fabkit page (including Fabkit Eagle and boards.txt files): http://fab.cba.mit.edu/content/projects/fabkit/
Fabio page : http://makeyourbot.wikidot.com/fabio-1-1 (soldering order)
Atmega
168A data sheet (to check microcontroller pins)
AVR Isp mkII User Guide (check here order of connector cables for Fabkit, p. 26)
Other sources:
AK's +
stackoverflow dialout group configuration (to use AVR isp mk II
programmer with Ubuntu 13.10):
http://academy.cba.mit.edu/content/tutorials/akf/embedded_programming_arduinoIDE.html#runAsSudo
http://stackoverflow.com/questions/5412727/avrisp-mkii-doesnt-work-with-avrdude-in-linux
Arduino
1.0.5 third party hardware (Arduino IDE bootloader configuration):
https://github.com/arduino/Arduino/wiki/Arduino-IDE-1.5---3rd-party-Hardware-specification
Links
Part 01
0./ About this tutorial
1./ Description :: hello.arduino.168/328P
2./ Fab Academy reference files list and location
3./ Tutorials, info sources and URLs
Part 02
4./ Workflow & toolchain
Part 03
5./ System and software requirements & installation
6./ BOM (Bill of Materials) equipment and tools
Part 04
7./ Detailed fabrication process description
7.1/ Board preparation and milling
7.2/ Components soldering and debugging
7.3/ Bootloading firmware and uploading your first Arduino sketch (program)
Part 05
8./ Fabkit fabrication notes (files, ISP cables & connection)
jose_perezdelama @ Fab Academy 2013 final project
jose_perezdelama @ Fab Academy 2013 home page
Credits & license
This work is a derivative of documentation collected in the Fab Academy classes and tutorial pages authored by Neil Gershenfeld, Anna Kaziunas/AS220 and Fab Academy collaborators and students as mentioned in the corresponding linked pages for each of the sections.
Unless otherwise stated, information in these pages is downloadable under a Creative Commons Attribution-Share A Like license; attribution for the tutorial reorganization: Jose Perez de Lama / Fab Lab Sevilla / Fab Academy 2013(14).