Assignment
Build a wired &/or wireless network with at least two nodes
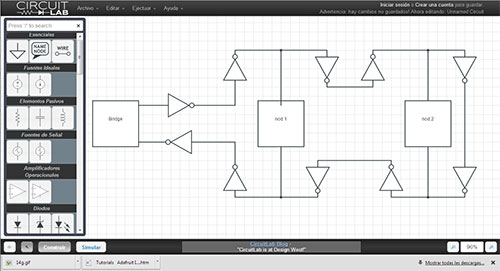
For this week assignment I made three boards and connect them with an asynchronous bus in a daisy-chain configuration using RS-232 protocol. I made one bridge or master and two nodes or slaves.
The bridge transmits on the bus, addressing each node individually via a node_ID.
I used Neil`s hello bus, taking the boards from the class site. Milling and stuffing went without a problem.
I programmed the boards using the code provided on the class website.
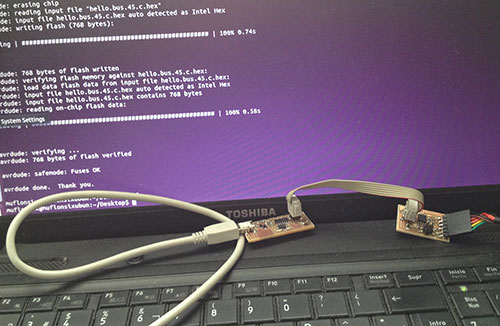
First I flash the bridge connecting it to the FabISP and the FTDI cable:
sudo make -f hello.bus.45.make program-usbtiny
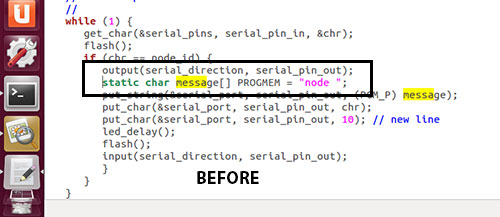
The hello.bus.45.c file has a bug.
avr-gcc -mmcu=attiny45 -Wall -Os -DF_CPU=8000000 -I./ -o hello.bus.45.out
hello.bus.45.c
hello.bus.45.c: In function ‘main’:
hello.bus.45.c:220:22: error: variable ‘message’ must be const in order to be put into read-only section by means of ‘__attribute__((progmem))’
make: *** [hello.bus.45.out] Error 1
|
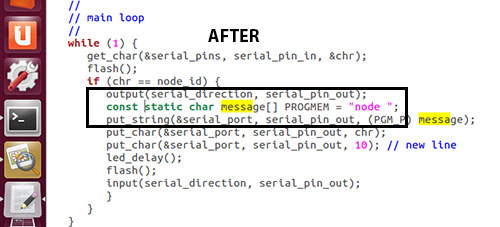
The variable message must be a constant.
I changed the code line 220 adding const.
Then I tried to flash the bridge again:
sudo make -f hello.bus.45.make program-usbtiny
This time it worked:
avr-gcc -mmcu=attiny45 -Wall -Os -DF_CPU=8000000 -I./ -o hello.bus.45.out hello.bus.45.c
avr-objcopy -O ihex hello.bus.45.out hello.bus.45.c.hex;\
avr-size --mcu=attiny45 --format=avr hello.bus.45.out
AVR Memory Usage
----------------
Device: attiny45
Program: 768 bytes (18.8% Full)
(.text + .data + .bootloader)
Data: 4 bytes (1.6% Full)
(.data + .bss + .noinit)
avrdude -p t45 -P usb -c usbtiny -U flash:w:hello.bus.45.c.hex
avrdude: AVR device initialized and ready to accept instructions
Reading | ################################################## | 100% 0.00s
avrdude: Device signature = 0x1e9206
avrdude: NOTE: FLASH memory has been specified, an erase cycle will be performed
To disable this feature, specify the -D option.
avrdude: erasing chip
avrdude: reading input file "hello.bus.45.c.hex"
avrdude: input file hello.bus.45.c.hex auto detected as Intel Hex
avrdude: writing flash (768 bytes):
Writing | ################################################## | 100% 0.74s
avrdude: 768 bytes of flash written
avrdude: verifying flash memory against hello.bus.45.c.hex:
avrdude: load data flash data from input file hello.bus.45.c.hex:
avrdude: input file hello.bus.45.c.hex auto detected as Intel Hex
avrdude: input file hello.bus.45.c.hex contains 768 bytes
avrdude: reading on-chip flash data:
Reading | ################################################## | 100% 0.58s
avrdude: verifying ...
avrdude: 768 bytes of flash verified
avrdude: safemode: Fuses OK
avrdude done. Thank you. |
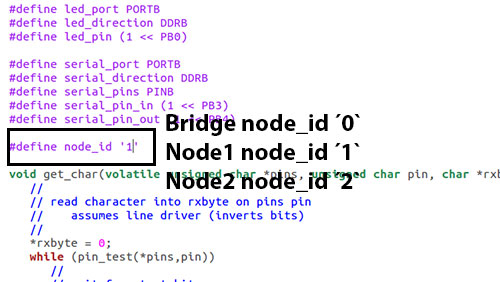
To program the nodes we need to modify the hello.bus file.
Each board needs to have a different nodeID.
I assigned nodeID number 0 to the bridge and changed the nodeID number to 1 and 2 for the two nodes.
After programming the nodes, I used Arduino serial monitor terminal interface to control the boards.
I type in a node number (0, 1 or 2) and leds on all boards light up, after that the board associated with the number light up again.
|