WEEK 03 - Computer Controlled Cutting - Lake Mac Libraries Fab Lab, Australia
Model and Software
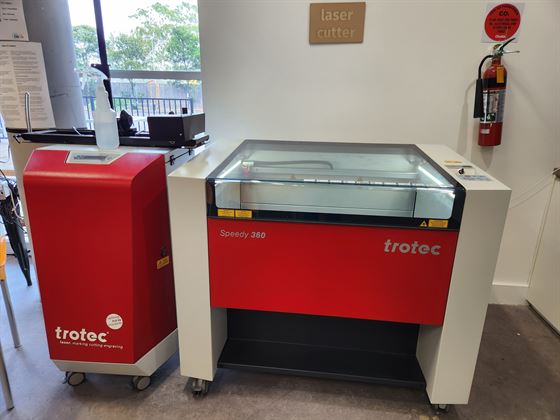
Model is a Trotec Speedy 360 CO2 80W
Software running the Speedy 360 is Trotec Ruby 2.5.0.29207
Bed size is 800mmx500mm
Testing
The material used for testing is 3mm MDF. Results will be different for if other materials are used.
Focus
Focus is set by ensuring the material is the correct distance from the laser. You may vary this in certain situations, for example:
- Engraving: By moving the laser further away you can get a softer, fuzzy edged look
- Engraving: When you have a harder material such as glass, you may want to move the laser closer if rasing power and slowing speed is not getting you the results you would like
- Cutting: For harder and thicker materials in order to reduce the power needed and increase speed, the laser may be moved closer to the material
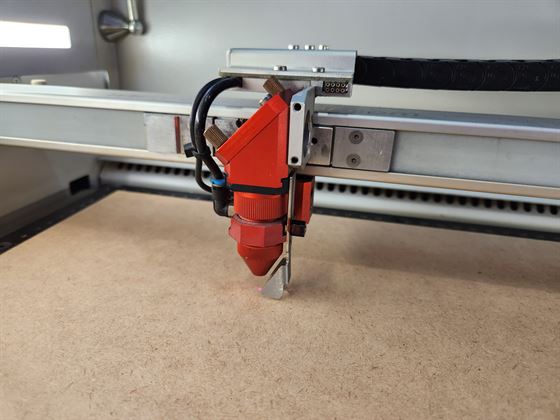
There are two ways to focus the Speedy 360, manually and automatically.
Manual Focus
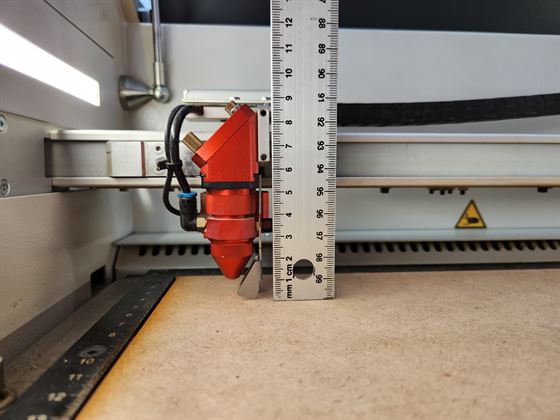
Manually you take the focusing gauge, which matches the lens you have in your laser, and place it on the step on the side of the lens holder. You then adjust the bed, with the material on it, up until the gauge touches the material (falls off). Make sure to use small movements when you get close to the gauge touching to not go too far.
Automatic Focus
Automatically, move the laser over the material on the bed and then click shift and up on the control panel. The laser will then automatically level itself. Note: that this technique does not always work the best with shiny or see-through materials and as such it is suggested to use the manual method for these. Also fo r odd shaped objects, to prevent the bed running into the lend holder, manual focusing should also be used. In other works, if in doubt about a material use the manual method.
The focal length was measured to be 9mm.
Laser Cut Setup and Testing Power and Speed
Login to Ruby.
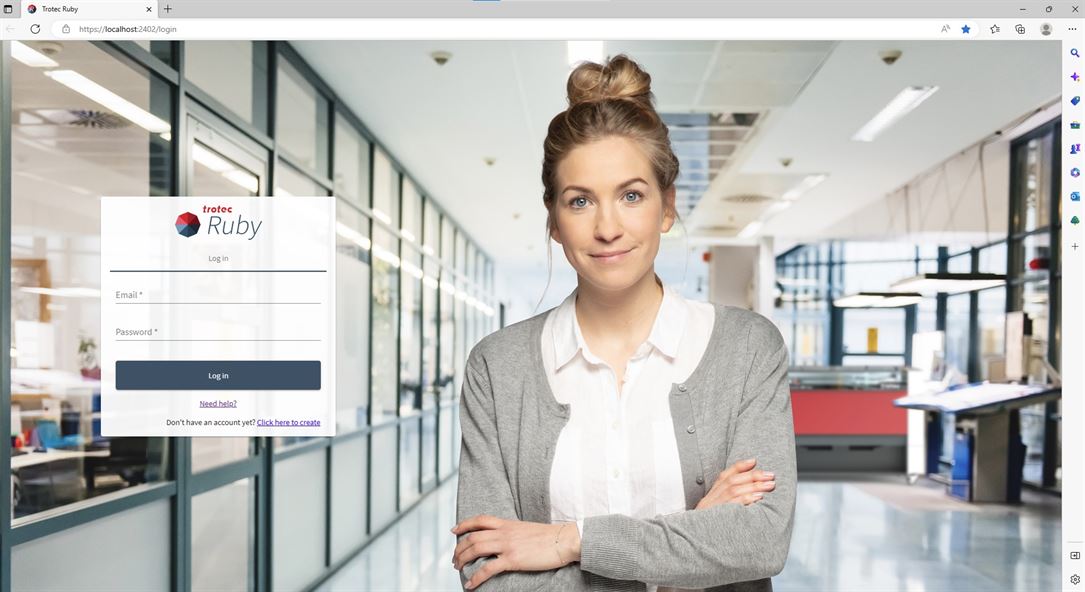
Ruby will open in the design screen.
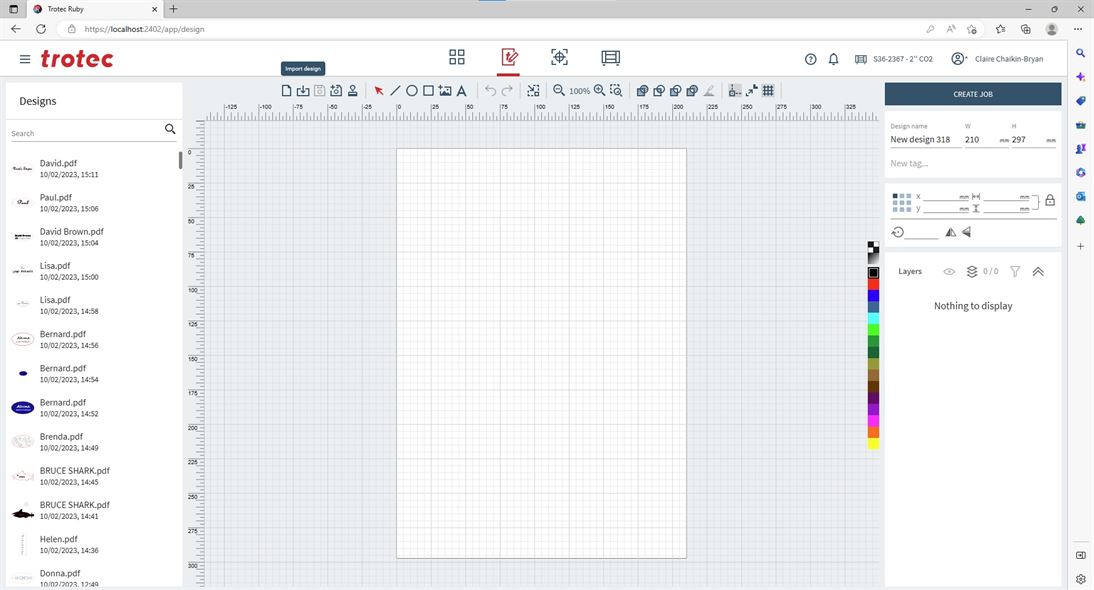
Import your design by selecting the second button from the left on the top menu.
Your design will now appear on the screen, if it does not it will be at the top of the list under designs on the left hand side of the screen. You can now edit the design before preparing the design for cutting/engraving.
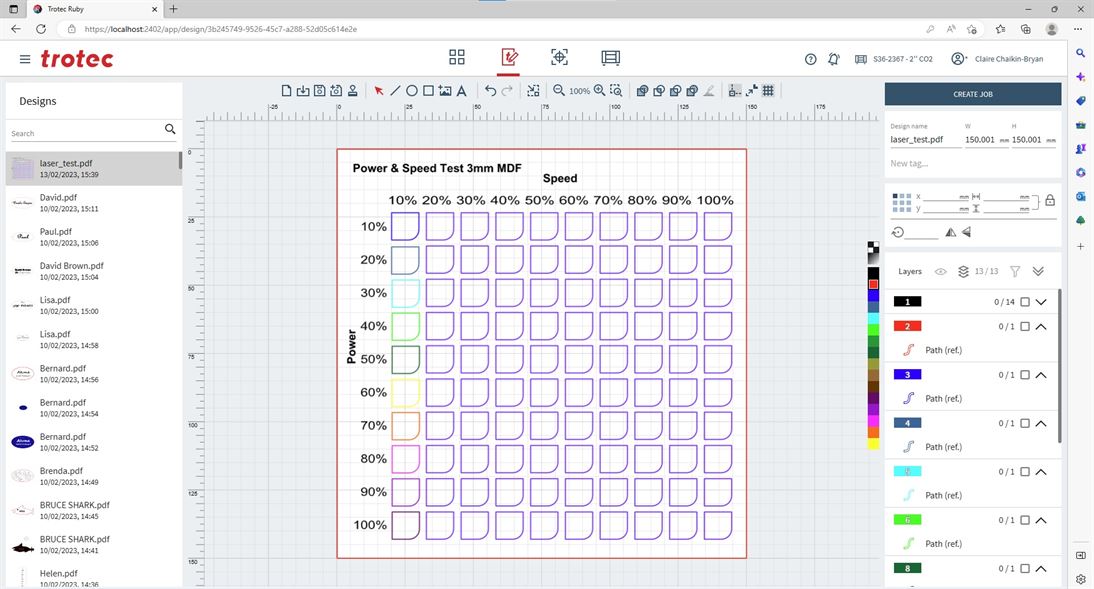
On the right hand side of the screen you can see the layers of the design. The laser uses layers to determine what setting to use on different parts of the design. Each layer is assigned a different colour (there are 16 available).
You can select elements in your design and then click on one of the colours on the right hand side, this will assign that layer to that element and the element’s colour will change on the screen.
Default layer settings are set via materials. If you want to see materials or make your own go to the materials menu by clicking on the hamburger menu next to the Trotec logo and select materials from the dropdown.
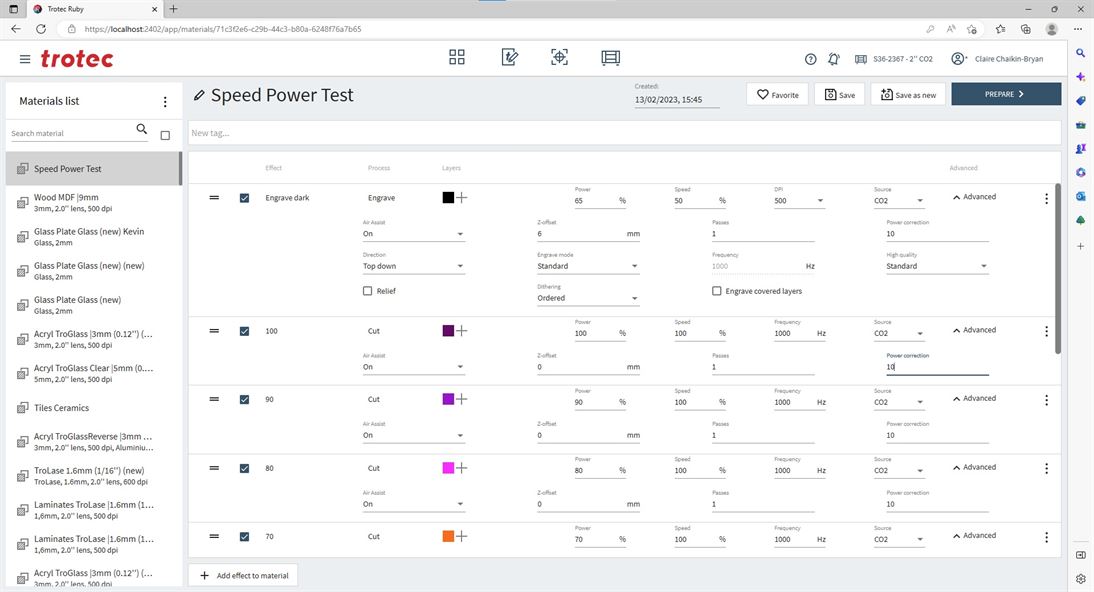
In materials click the three dots next to materials list to get the option to create a new material.
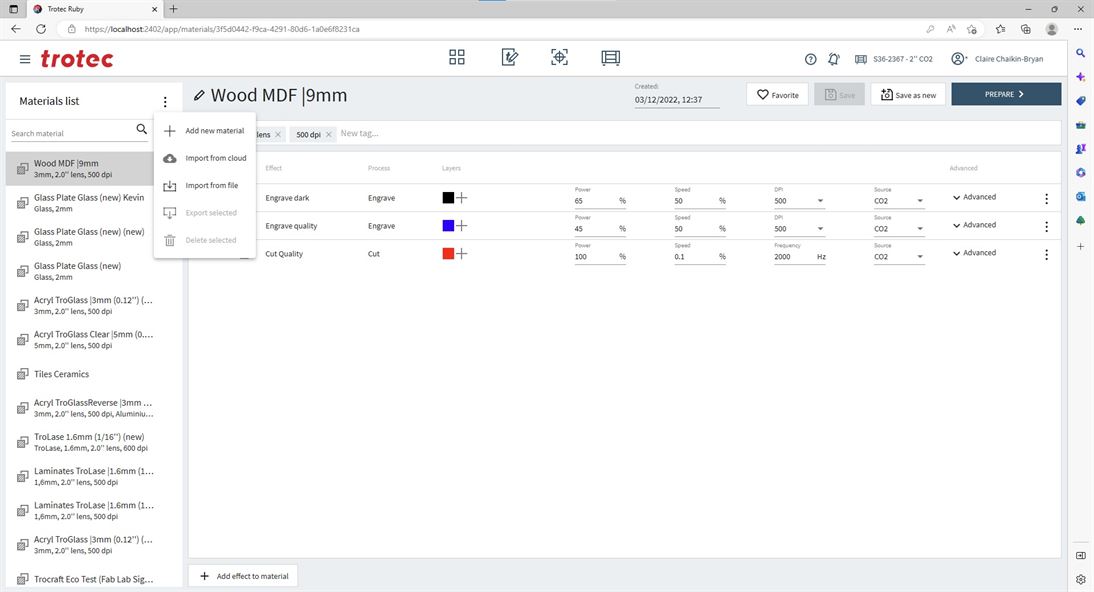
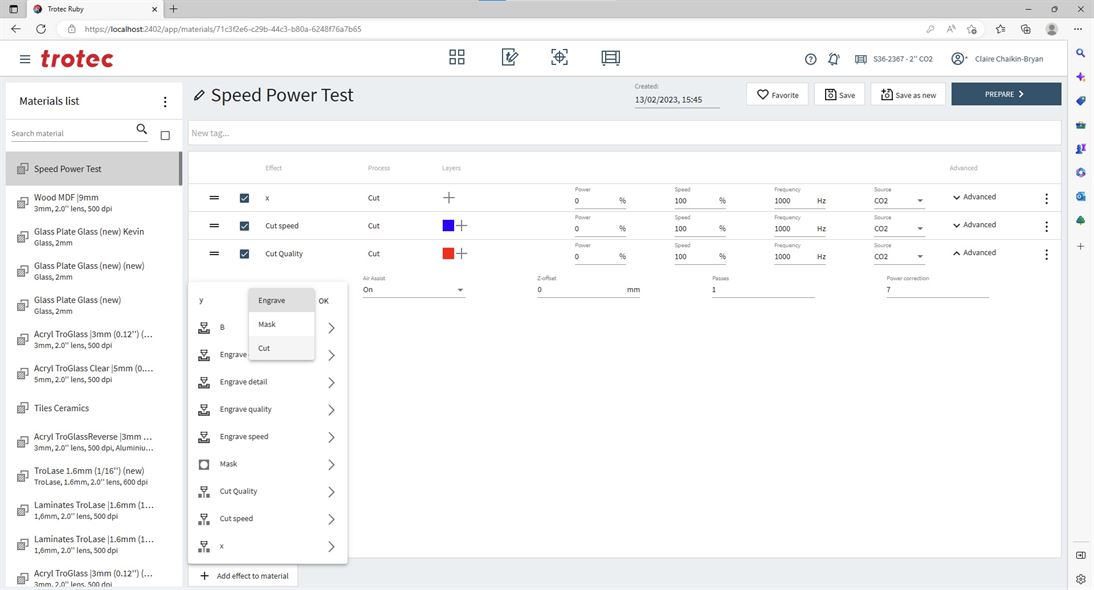
In your new material you can add a new effect (layer setting) by selecting “add effect to material” at the bottom of the screen.

New material is now setup for testing speed and power.
Now the material is setup, you can return to the design screen and select the create job button at the top right of the screen to push the design to laser preparation.
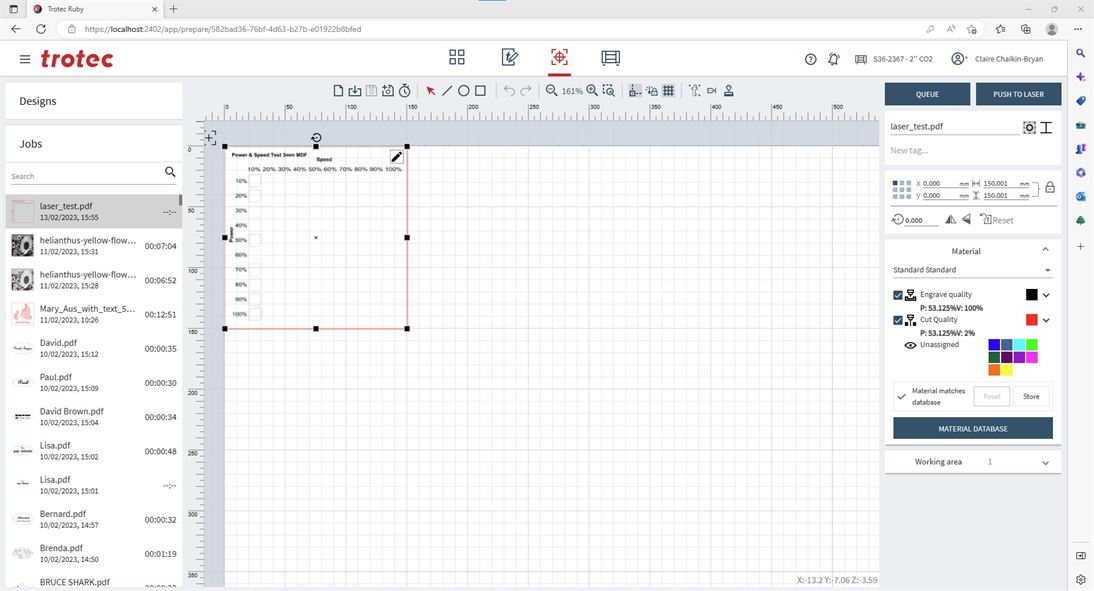
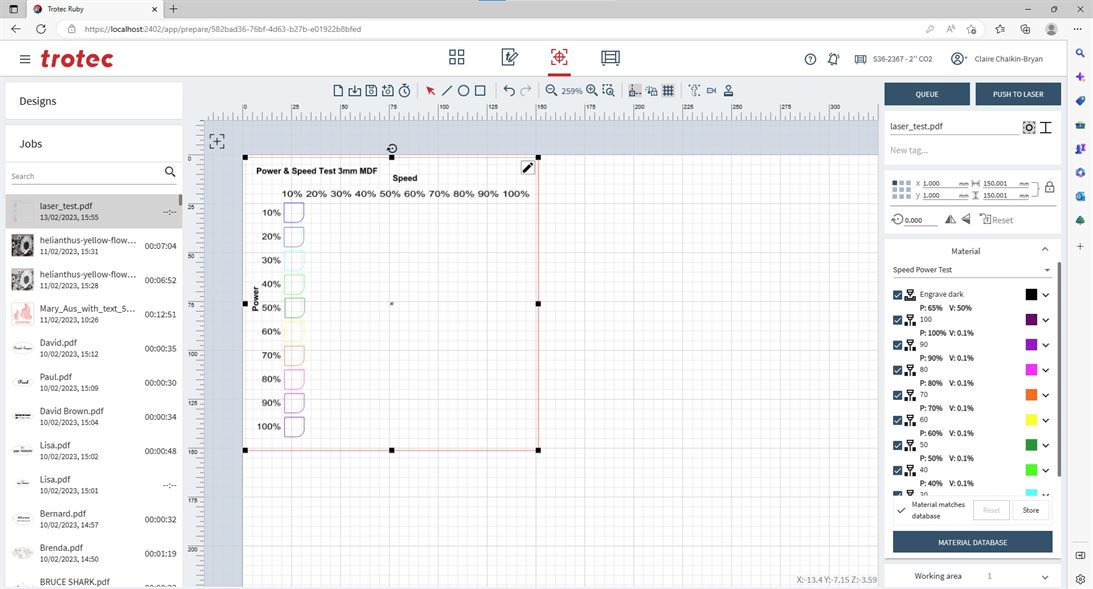
In the preparation screen the white grid area matches the bed in the laser cutter. You can also see the cross hairs which shows where the laser head is in relation to the bed. Is this screen you can also select the design and move its position and resize it by hand. You can also do this more accurately using the controls on the right hand side of the screen.
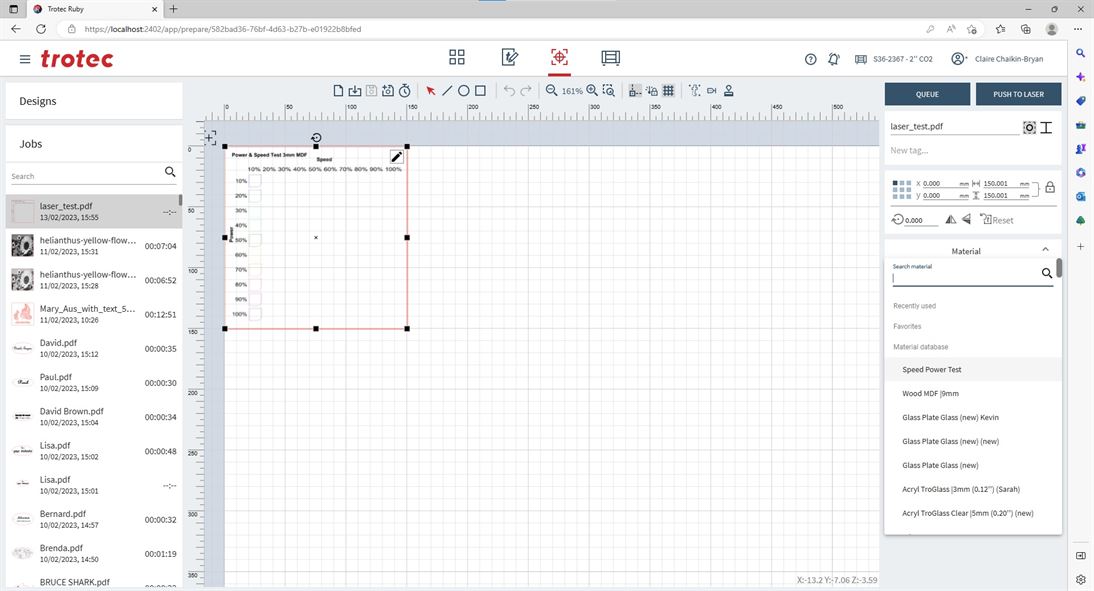
To get the right setting for your cut/engraving you need to select the material on the right hand side of the screen. You can edit the material settings in this screen by selecting the setting and changing it.
When ready click on push to laser. Note: when you push the job to the laser it will come up with a warning if you have changed any settings to check that you wan to proceed.
In the produce screen you can see the job about to be sent to the laser cutter. Click on sho all effects to see a pop up of all layer settings to check them.
Click play to send the job to the laser cutter.
Laser Cutter Checklist by Lake Mac Libraries Fab Lab
- Is the laser the correct distance from the material?
- Is the laser in the position where you want it to start from?
- Is your material in the position on the laser bed where you want it to be?
- Is everything in your design assigned to a colour recognised by Ruby e.g. Red, Black, Blue etc?
In the prepare screen:
- Is your design the right size to fit your material?
- Is your design placed in the correct spot relative to where the laser and material is on the bed?
- Have you selected the correct material?
- Are the engraving and cutting settings correct for what you want to do?
All good? Push to Laser!
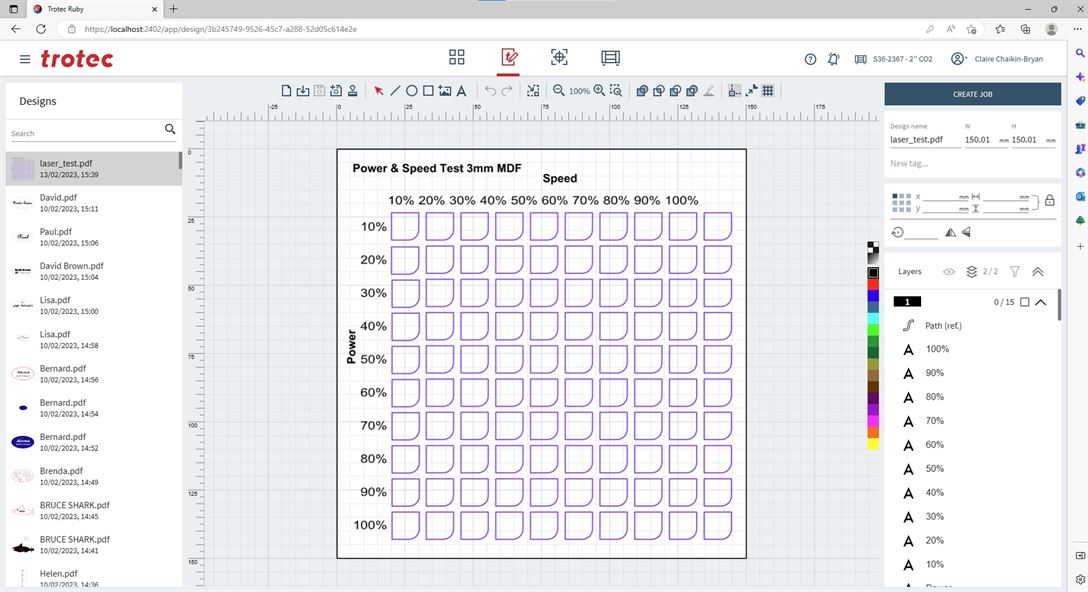
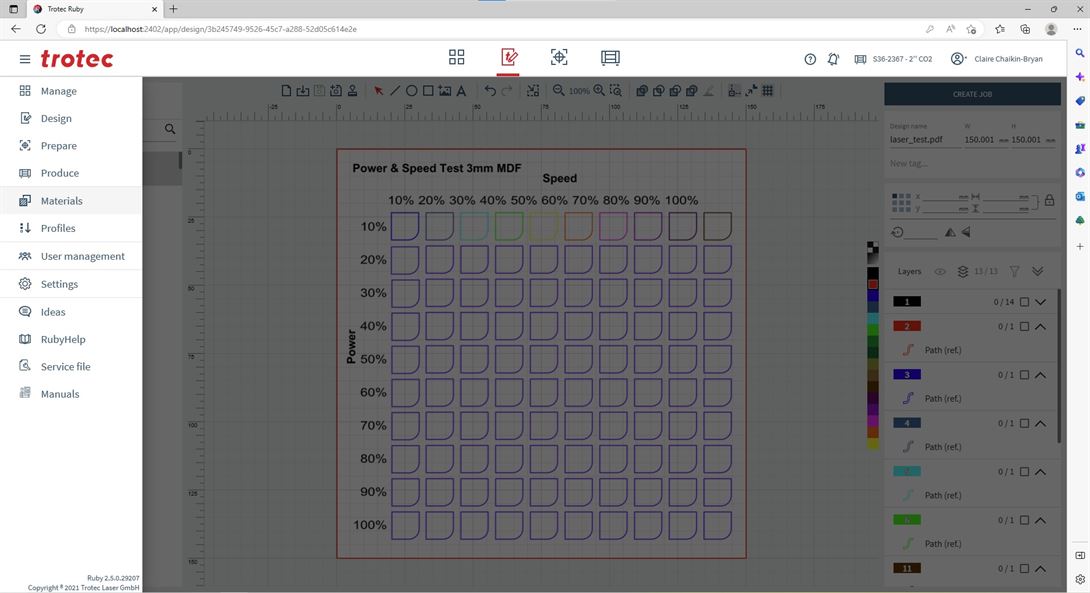
Speed and Power Test
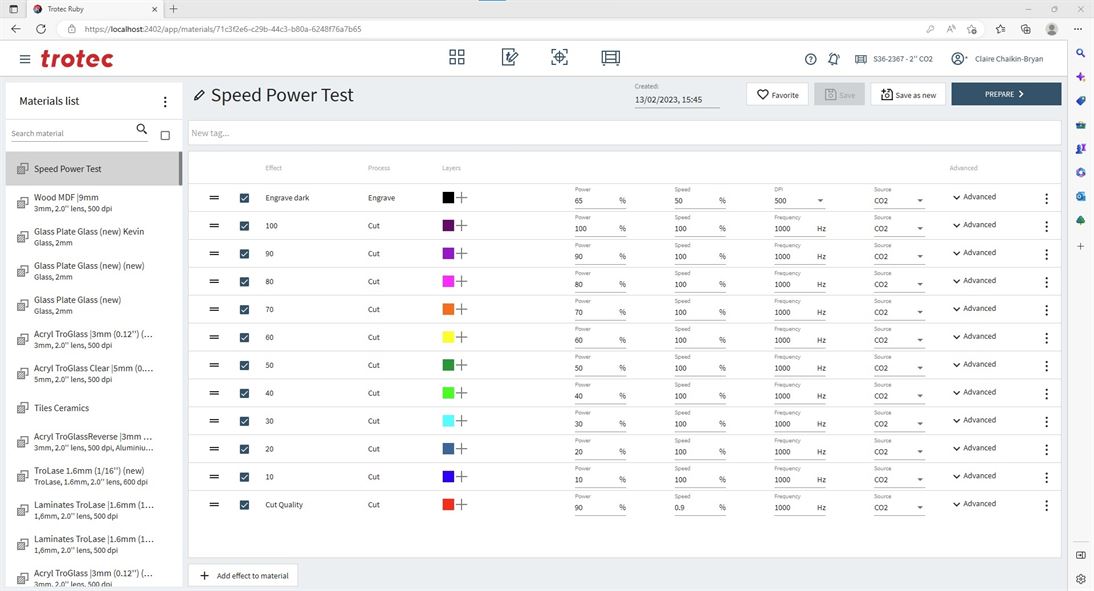
Decided to test both speed and power together. As there is a limit to the number of variables for each job you can run (16, based on the number of colors available), power was setup to vary during the job and then the job was run 10 times, each at a different speed. Note: For speed 100% is actually 1% in Trotec Ruby, so 90% is 0.9% and you need to right it this way for the speed to correctly vary.
Result
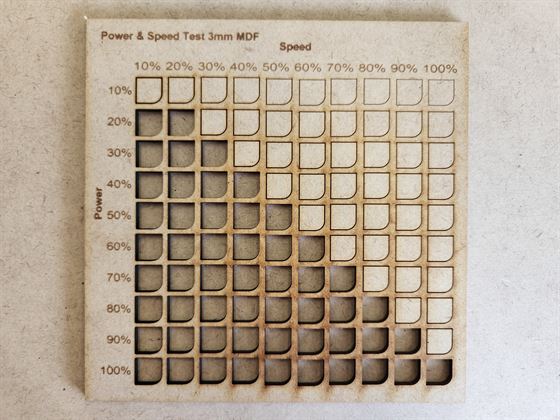
This test shows power and speed both make a significant impact on the outcome of cutting with the laser. For example, with cutting, if you do not get a cut all the way through a material, increasing power and decreasing speed will result in a deeper cut.
You can see that the darkness of burning changes with speed and power. The optimum setting selected from this test is 60% power and 0.5%(50%) speed.
Note: The laser will weaken over time due to use, so if you are able to complete a job using lower speed and power, you will be able to increase settings over time to account for the laser weakening.
Test design inspired by https://fabacademy.org/2022/labs/kamakura/assignments/week03_indonesia.html
Rate
Rate (frequency) is known as Hz in the settings on a Trotec laser cutter. It can impact the quality of cutting on the laser cutter.
Trotec Defition of Rate (Frequency)
During the cutting process, the Frequency parameter is recognised and displayed to you in Hz (Hertz). This specifies the number of laser pulses per second. Usually, for a CO2 laser, the value can be set within a rough range of 1,000 to 60,000 Hz. For example, if you wanted to achieve a smooth, polished edge when cutting acrylic, you’ll need to be using a higher temperature. That means the value needs to be set to at least 5,000 - 20,000 Hz. However, when cutting wood, a low frequency of something like 1000 Hz is necessary to achieve a bright, perfect cutting edge.
Source: https://www.troteclaser.com/en-au/learn-support/helpcenter/laser-parameters-definition
Using the optimum result that came out of the power (60%) and speed test (0.5%), different Hz were tested - 1000, 2000, 3000, 4000, 5000, 6000, 10000, 15000, 20000
From this test it is not clear that Hz makes a significant impact on the 3mm MDF. Going based on Trotec advice and also pre settings for 3mm MDF, best is to keep setting to 1000Hz.
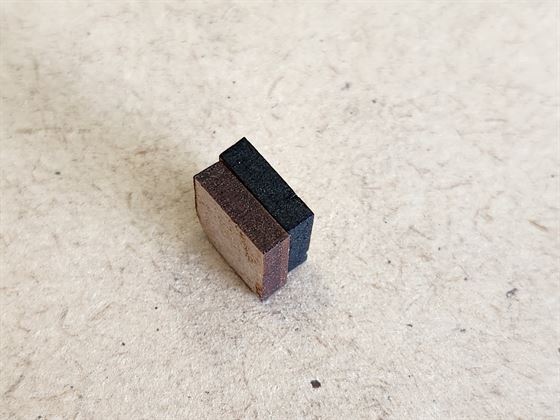
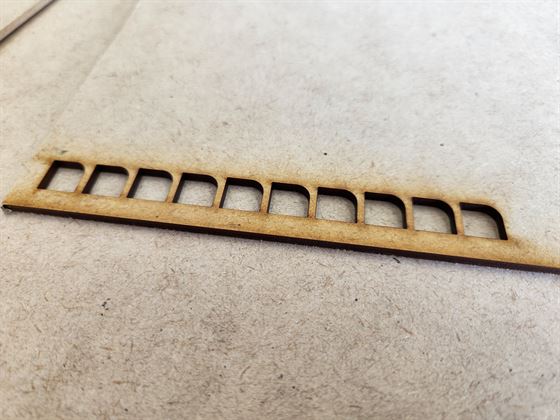
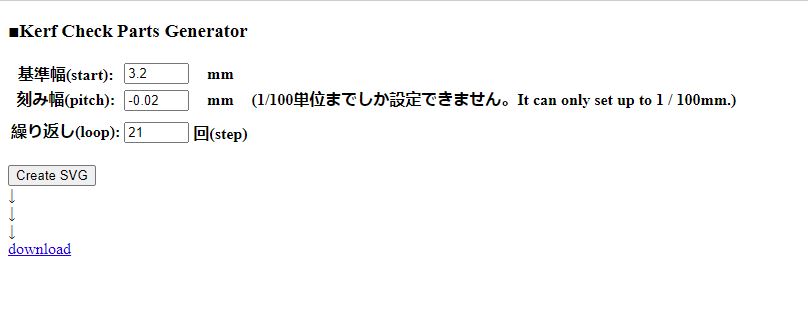
Joint Clearance and Kerf
Joint clearance is important to know when you either want to have a joint that moves smoothly or fits snugly together and does not fall out. On laser cutters kerf refers to the additional material that is burnt away when you do a cut and impacts the amoutn of space you leave for joints (Source)
Materials will not necessarily have the exact millimeter thickness they are described to have, that is 3mm MDF is not 3mm exactly. By testing kerf you can account for this variation in a piece of material.
To test kerf you can use the Kerf Check Part Generator to make the SVG file to use for the test.

Result
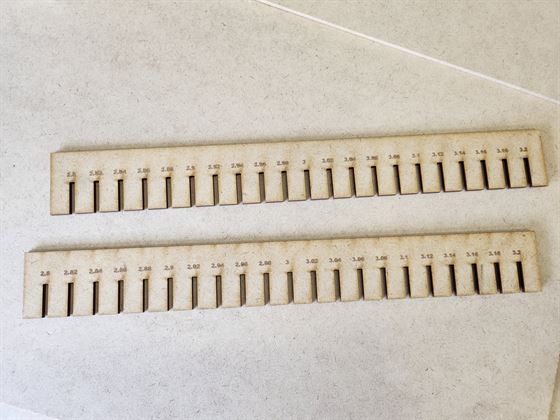
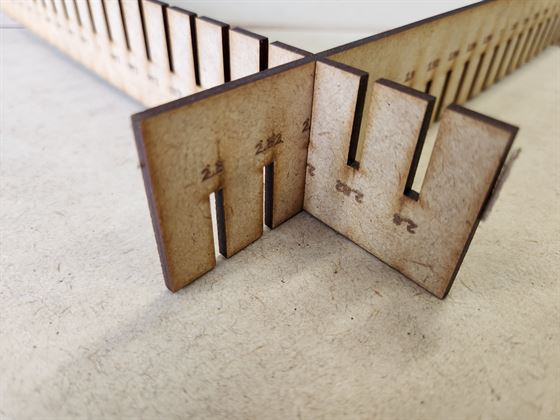
From this result 2.84mm was a little loose and 2.82mm was a little tight, therefore 2.83mm would be best.
Note: This will vary with different material batches even if it is the same material from the same manufacturer.
Conclusions/Results
For 3mm MDF the optimum settings are:
- Speed: 0.5% (50%)
- Power: 60%
- Hz: 1000Hz
- Kerf: 2.83mm (for the material in the Fab Lab on the day)
Comparison of results to standard 3mm MDF settings by Trotec
Trotec Ruby comes with standard setting for various materials and these provide a good starting place when trying to determine what settings to use for a particular material.
For 3mm MDF the settings for quality cutting are:
- Speed: 0.9% (90%)
- Power: 90%
- Hz: 1000Hz
This is more highly powered and faster than discovered to be needed in testing. Knowing this is great as if you can use lower settings you have more room to increase settings in the future as the laser strength weakens over time due to use.
Note: It was observed that using the lower power and speed settings results in less smoke when doing cutting.