WEEK14 - Networking and Communications
This week was networking and communications.
WEEK FOURTEEN ASSIGNMENT
- send a message between two projects
So the goal was to try and send a message or data between two projects
Local
As a local experiment we send just data between two boards at the table
We decided to send data over PiicoDev 915MHz radio transceivers between a Raspberry Pi 4 and a Xiao RP2040.
![]()
We decided to send a message from the Raspberry Pi that would then show up on an OLED connected to the Xiao RP2040.
Raspberry Pi Setup
Note the Raspberry Pi being used is running on the Raspbian operating system.
We had some initial trouble with the Raspberry Pi until we realised that we needed to enable I2c (instructions below).
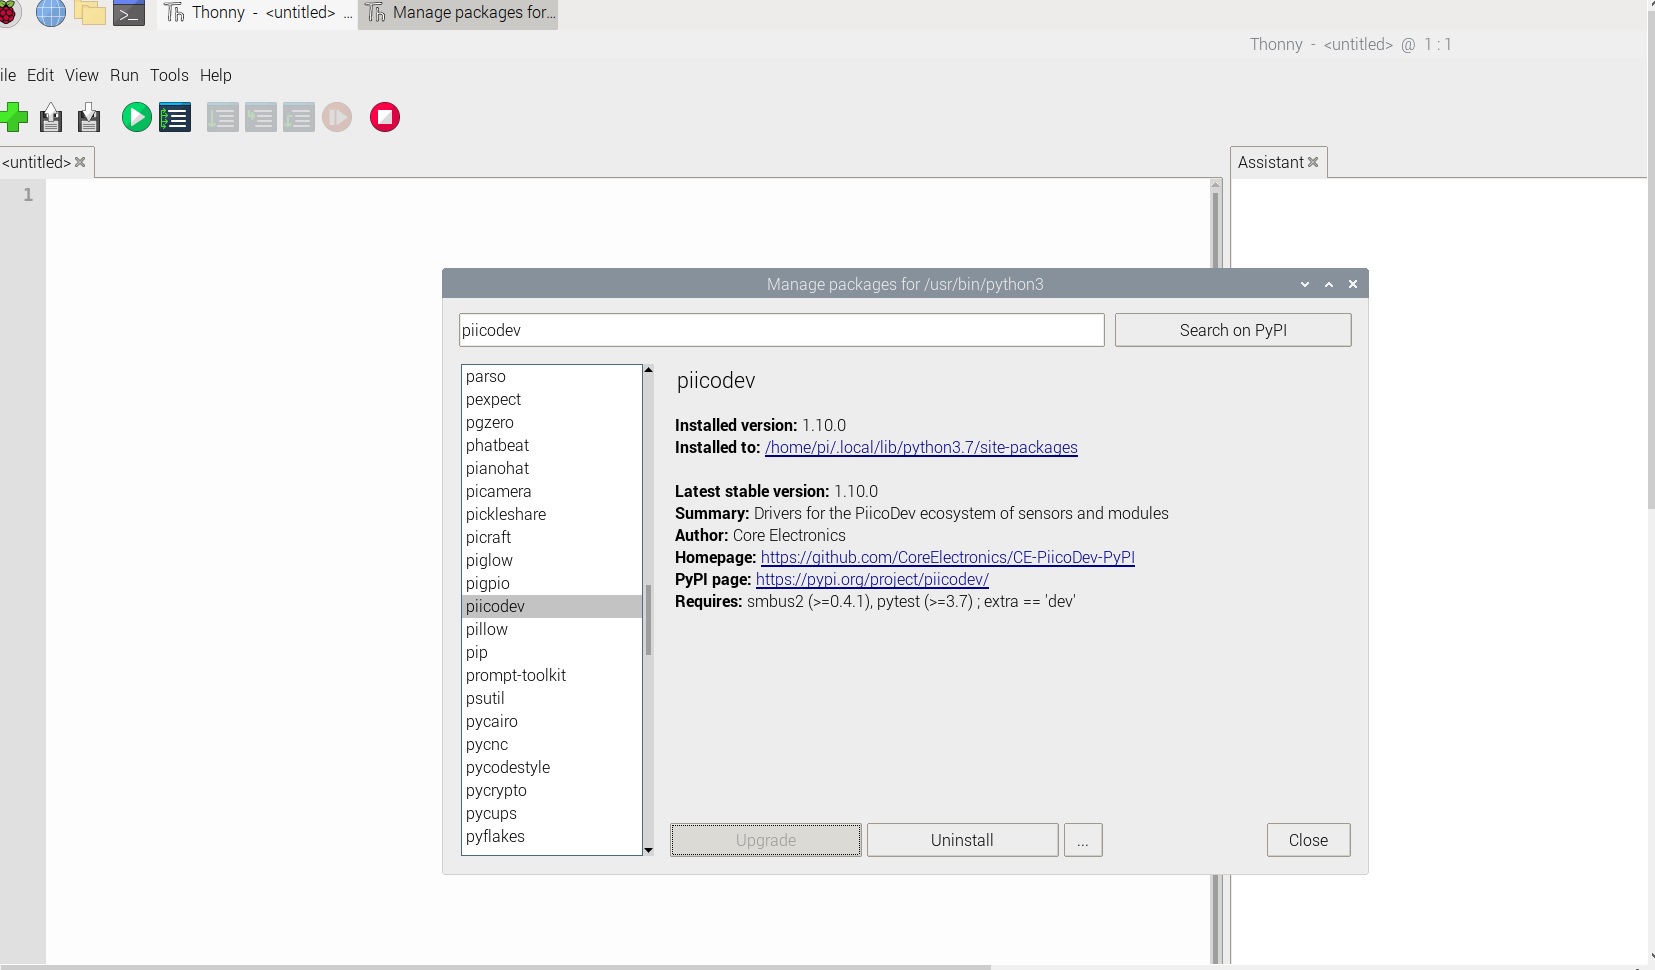
We need to install the PiicoDev library on Thonny on the Raspberry Pi.
Go to Manage Packages, search for piicodev and install it.
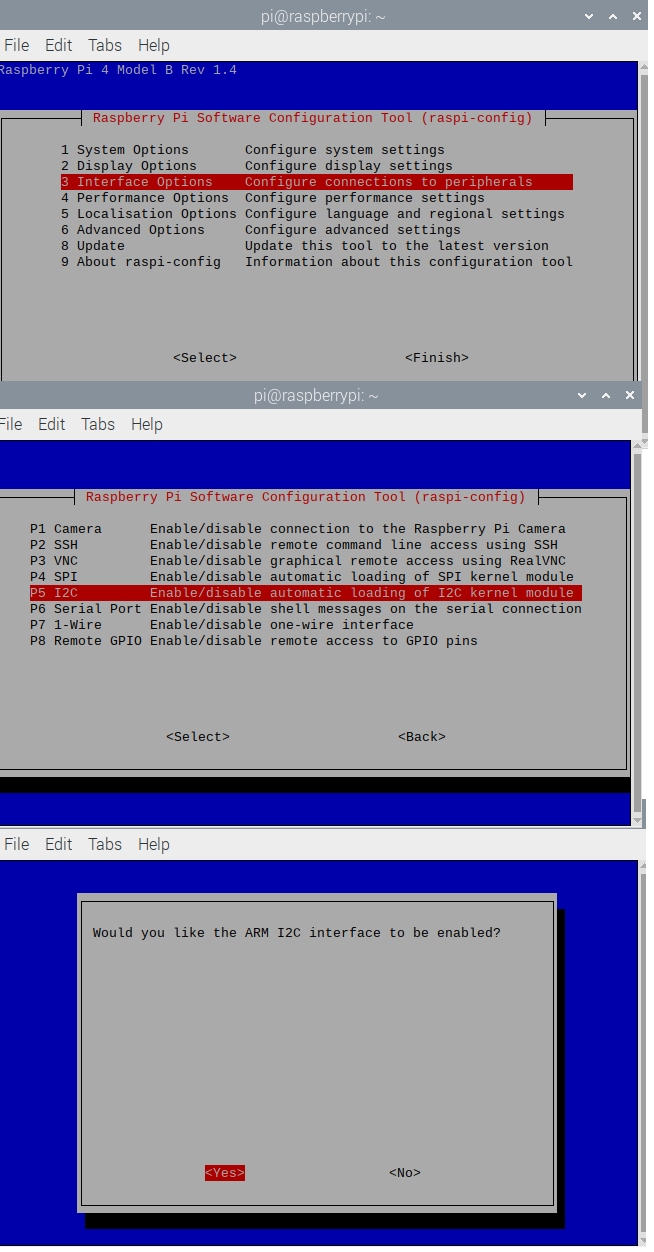
We also need to make sure I2C is enabled.
Open up the command line interface and type in:
sudo raspi-config
Go to Interface Options -> I2C -> Yes (to enable)
Shutdown the Pi.
Plug in the transceiver using the Piicodev jumper cable - Black to Ground (Pin 9) - Red to 3V (Pin 1) - Blue to SDA (Pin 3) - Yellow to SCL (Pin 5)
Turn the Pi back on.
Code
Original Sample Code from Core Electronics
# Demonstrate how to use the send() command
# send() will accept strings, values, and "named values" which
# are string,value pairs.

from PiicoDev_Transceiver import PiicoDev_Transceiver
from PiicoDev_Unified import sleep_ms

radio = PiicoDev_Transceiver()

# Text messages
radio.send("Hello, World!")
sleep_ms(1000)

# Numbers (integer or floating point)
radio.send(123)
sleep_ms(1000)

# Named Values
named_data = ('temperature[degC]', 25.0)
radio.send(named_data)
sleep_ms(100)

named_data = ('humidity[%]', 60.0)
radio.send(named_data)
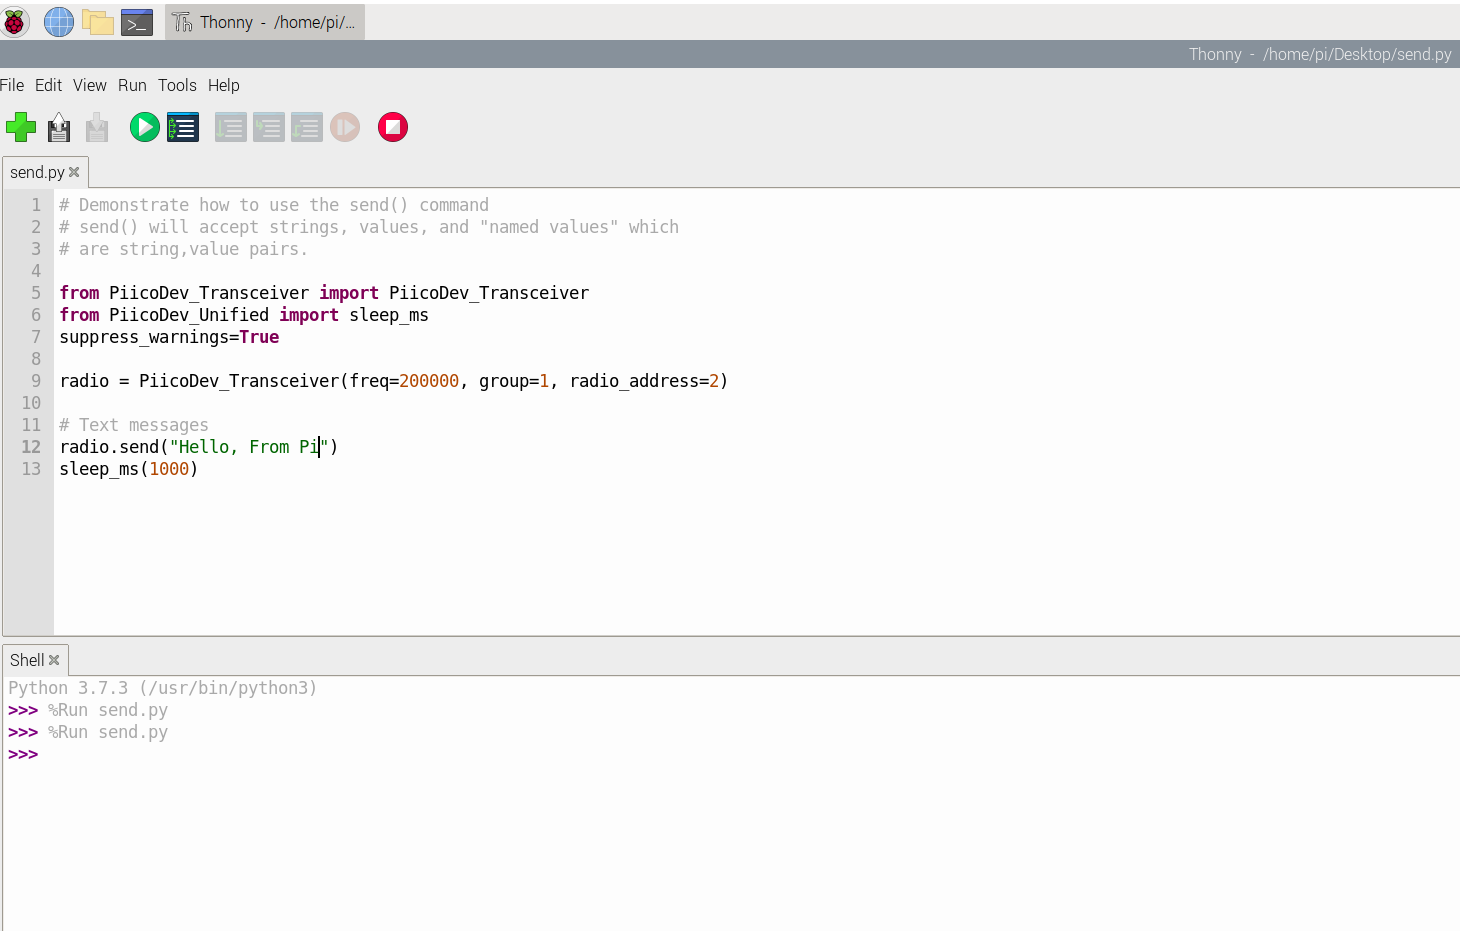
Final code used to transmit a message
# Original Code by Core Electronics 2023
# Modified by Claire Chaikin-Bryan May 2023
# Demonstrate how to use the send() command
# send() will accept strings, values, and "named values" which
# are string,value pairs.

from PiicoDev_Transceiver import PiicoDev_Transceiver
from PiicoDev_Unified import sleep_ms
suppress_warnings=True

radio = PiicoDev_Transceiver(freq=200000, group=1, radio_address=2)

# Text messages
radio.send("Hello, From Pi")
sleep_ms(1000)
Xiao RP2040 Setup
Install PiicoDev_Unified.py
Install PiicoDev_Transceiver.py
Install ssd1306.py
Connect the OLED using the PiicoDev jumper cable:
- Black for GND
- Red for Power (3V)
- Blue for SDA
- Yellow for SCL
Connect the OLED to the transceiver via a PiicoDev connection cable.
Code
Original Sample Code from Core Electronics for the transceiver
# Listen for LED control messages
# Valid messages set the state of the on-board LED

from PiicoDev_Transceiver import PiicoDev_Transceiver
from PiicoDev_Unified import sleep_ms

radio = PiicoDev_Transceiver()

while True:
    if radio.receive():
        message = radio.message
        print(message)
    sleep_ms(50)
Original Sample Code from Core Electronics for OLED
from PiicoDev_SSD1306 import *
display = create_PiicoDev_SSD1306()

myString = "this is me"
myNumber = 123.4567

display.text("Hello, World!", 0,0, 1) # literal string
display.text(myString, 0,15, 1) # string variable
display.text(str(myNumber), 0,30, 1) # print a variable
display.text("{:.2f}".format(myNumber), 0,45, 1) # use formatted-print
display.show()
The PiicoDev OLED has been found to have issues with the Xiao, so we need to use ssd1306.py instead of PiicoDev_SSD1306.py as a reference.
For both of the above we also need to add in a declaration of I2C Pins on the Xiao as PiicoDev_Unified.py does not have a built in reference for the Xiao RP2040.
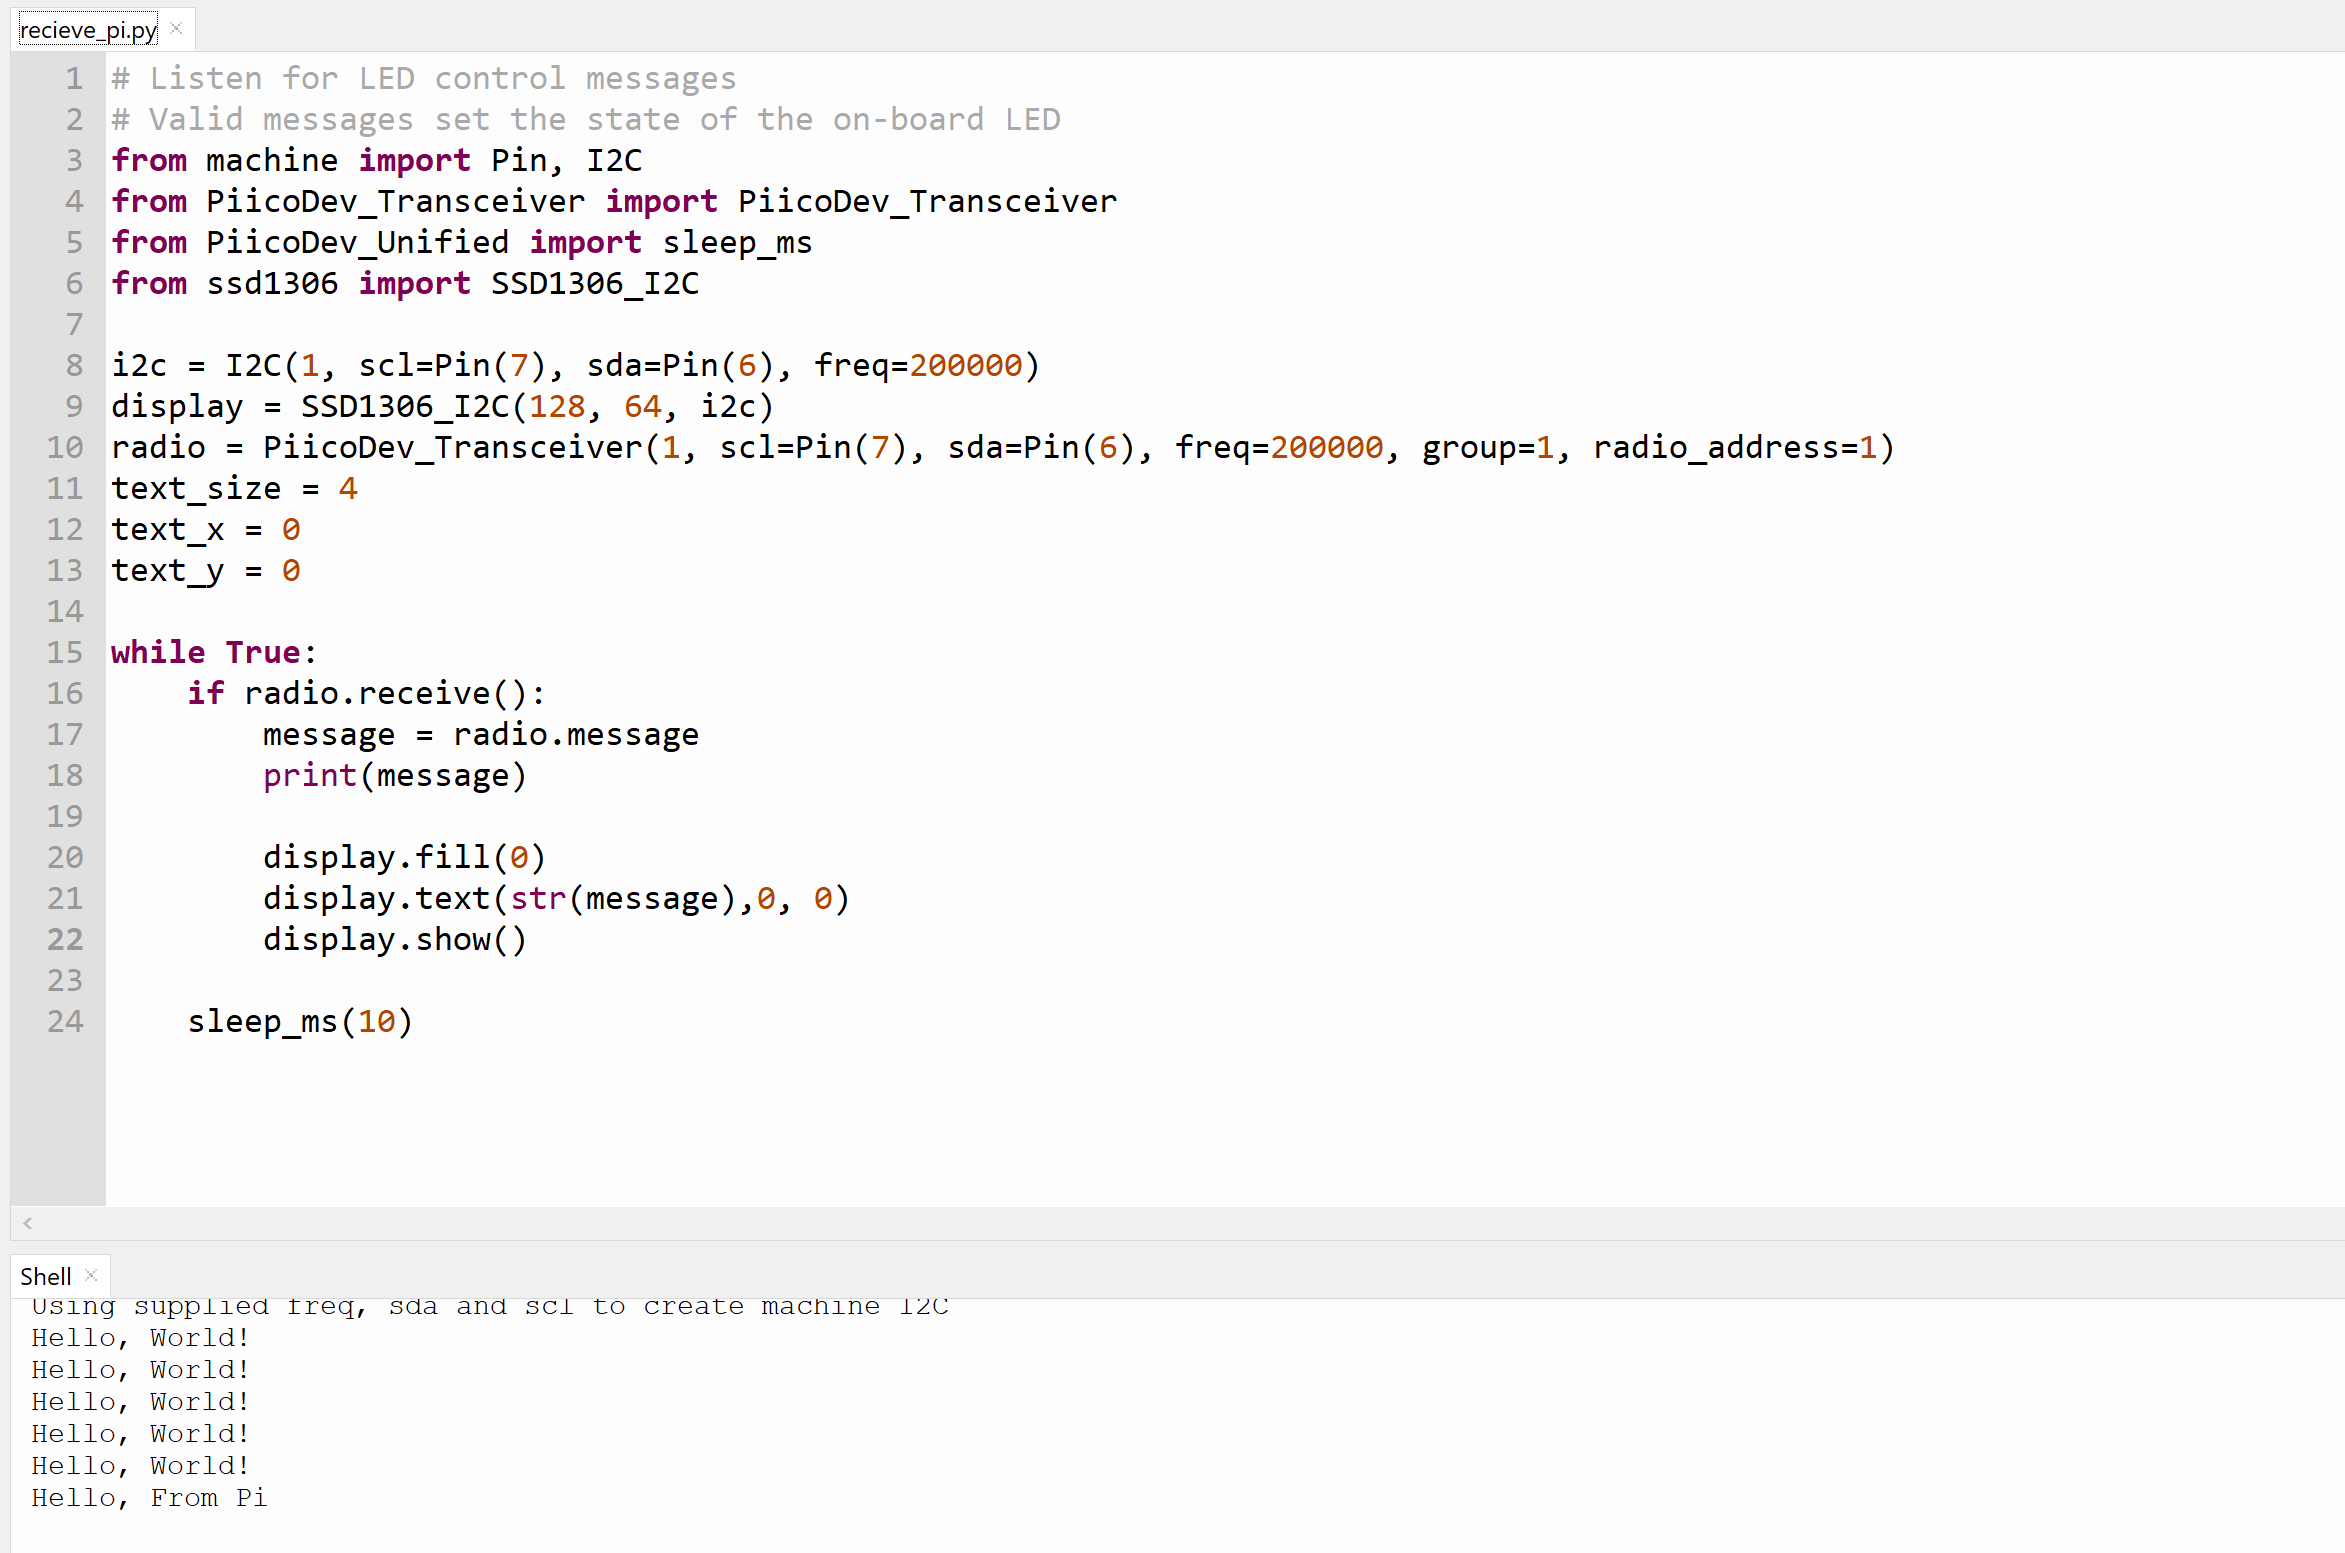
Final combined code to receive message and show on OLED
# Original Code by Core Electronics 2023
# Code Modifed by Claire Chaikin-Bryan May 2023
# Listen for LED control messages
# Valid messages set the state of the on-board LED
from machine import Pin, I2C
from PiicoDev_Transceiver import PiicoDev_Transceiver
from PiicoDev_Unified import sleep_ms
from ssd1306 import SSD1306_I2C

i2c = I2C(1, scl=Pin(7), sda=Pin(6), freq=200000)
display = SSD1306_I2C(128, 64, i2c)
radio = PiicoDev_Transceiver(1, scl=Pin(7), sda=Pin(6), freq=200000, group=1, radio_address=1)

while True:
    if radio.receive():
        message = radio.message
        print(message)

        display.fill(0)
        display.text(str(message),0, 0)
        display.show()

    sleep_ms(10)
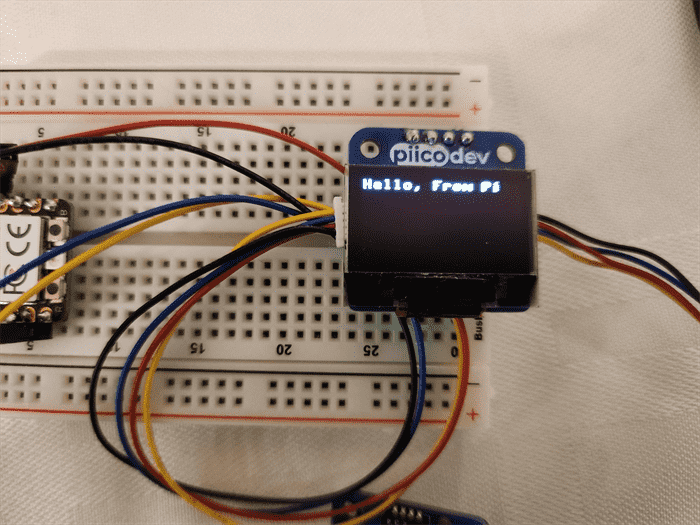
Sending a Message
We were able to successfully send a message from the Raspberry Pi and have it show up on the OLED connected to the Xiao RP2040
Raspberry Pi
Xiao RP2040