Week 11 Molding and Casting
Welcome to this page about molding and casting! In the summary below, you can jump directly to topics.
Summary
The manufacturing method we’re exposed to this week is molding and casting. This is a 7,000-year-old process used for making weaponry, tools, religious objects and artifacts. Nowadays we use this process for making almost anything, from uniform technical components to household products. First, a mold is created with the negative of the design. Usually this is done with materials like clay, metal, ceramics and plastics. The desired shape is then created by pouring in a liquid material. This is the cast and can be made from metals, ceramics and plastics, to name a few. The intended material properties of the end-product inform the type of material for the mold.
Assignments
Group task
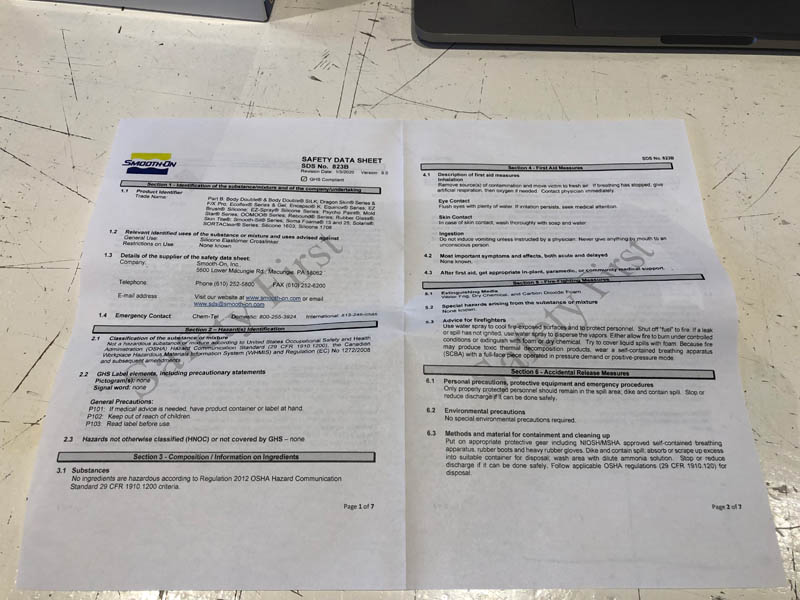
- Review the safety data sheets for each of your molding and casting materials
- Make and compare test casts with each of them
Individual task
- Design a 3D mold around the stock and tooling that you’ll be using, mill it (rough cut + (at least) three-axis finish cut), and use it to cast parts.
Learning outcomes
- Design appropriate objects within the limitations of 3 axis machining
- Demonstrate workflows used in mold design, construction and casting
Project management
In preparation of this week’s task, I’m planning the following steps in spiral development:
| Spiral | Tasks | Time |
|---|---|---|
| 1 | Group assignment | 8 hours |
| 2 | Parametric design of the mold | 16 hours |
| 3 | Documentation of group assignment | 4 hours |
| 4 | 3-axis machining of the mold | 2 hours |
| 5 | Post-processing mold | 1 hour |
| 6 | Casting part 1: the mold | 4 hours |
| 7 | Casting part 2: the cast | 2 hours |
| 7 | Documentation | 5 hours |
Let’s get started!
This week’s results
During the group assignment on Thursday, I started feeling unwell. My lungs hurt, I almost fainted a couple of times and my nose started bleeding spontaneously. This was caused by the toxic smells released by products like Smooth-On’s PMC™-121 30/WET mold rubbers. According to the data sheet the Health Hazards include:
- H302 + H312 + H332: Harmful if swallowed, in contact with skin or if inhaled
- H315: Causes skin irritation
- H319: Causes serious eye irritation
- H335: May cause respiratory irritation
- H351: Suspected of causing cancer
This product has two GHS warning labels, the ! for being acutely toxic and the icon of a human with respiratory problems for being a carcinogen. An overview of all GHS Labels and Dangerous Goods labels is shown in the picture below, by ChemSafetyPRO.

Because of health issues caused by these materials, I was not able to finish my individual assignment within this week. I believe the Fab Academy should strive to avoid exposure to highly toxic materials like this at all times. The reality is that proper ventilation and PPE is not available in all distributed labs. At the same time, there are better alternatives available. For example, Ferdinand Meier showed a beautiful mold made with a simple glycerine and gelatin-based recipe. I believe bio-based materials are the future for certain applications. Both for the health of Fab Academy students and the planet, it should be incorporated into this week’s curriculum as an option alongside petroleum-based materials.
I completed this week with a cast of a serviette ring holder that also can be used as a piece of jewelry. Here are the results:
Group assignment
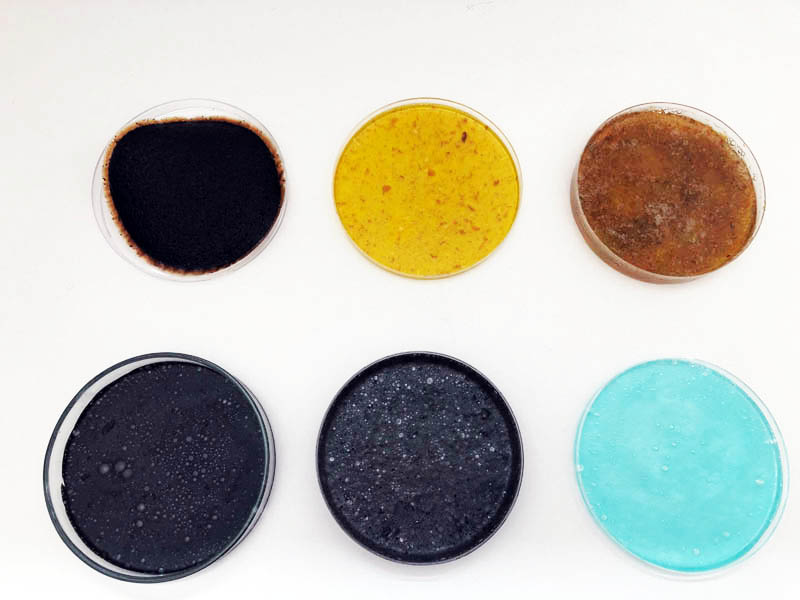
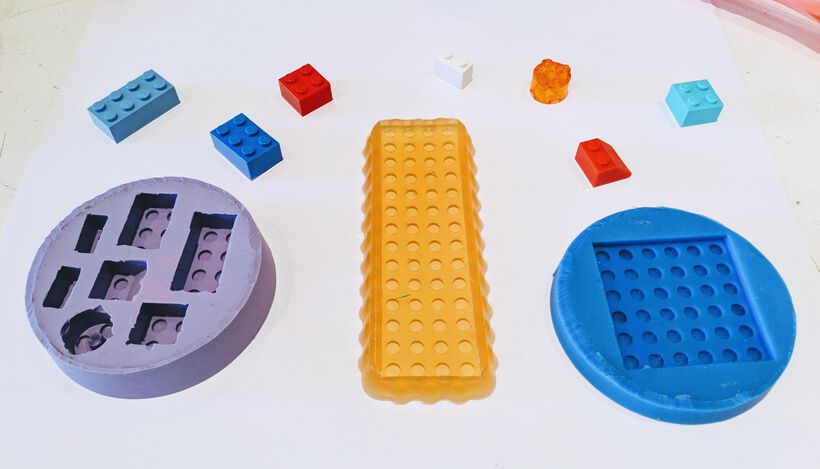
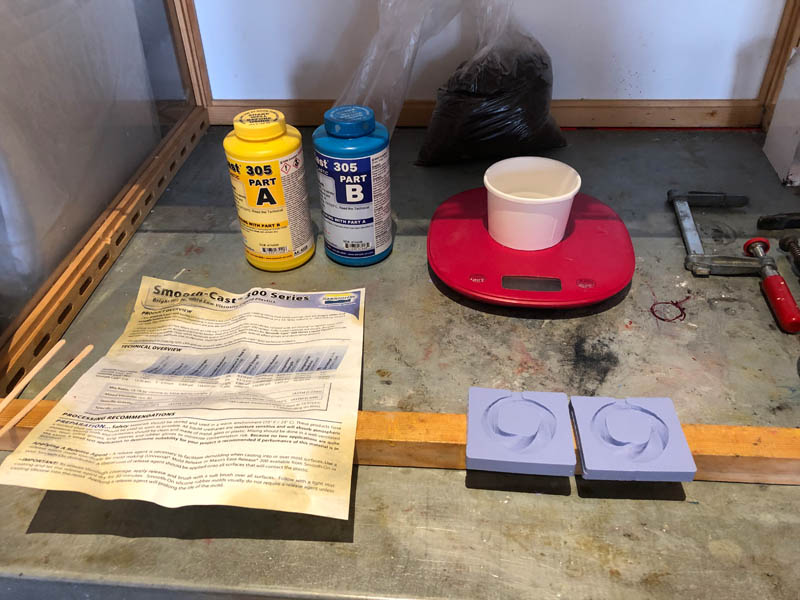
This week, our group assignment is to review the safety data sheets for each of the molding and casting materials we’ll be using. The second task is to make and compare test casts with each of them. Before we started, Nadieh and I sorted all materials provided by Henk and Michelle. The spray in the middle is for taking out the cast from the mold more easily.
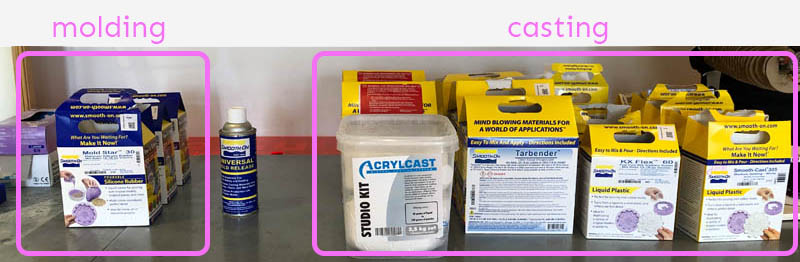
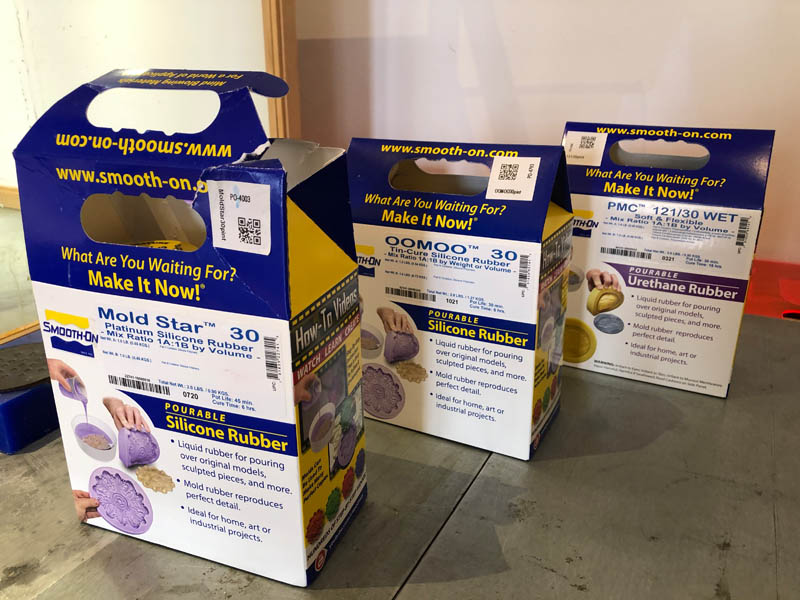
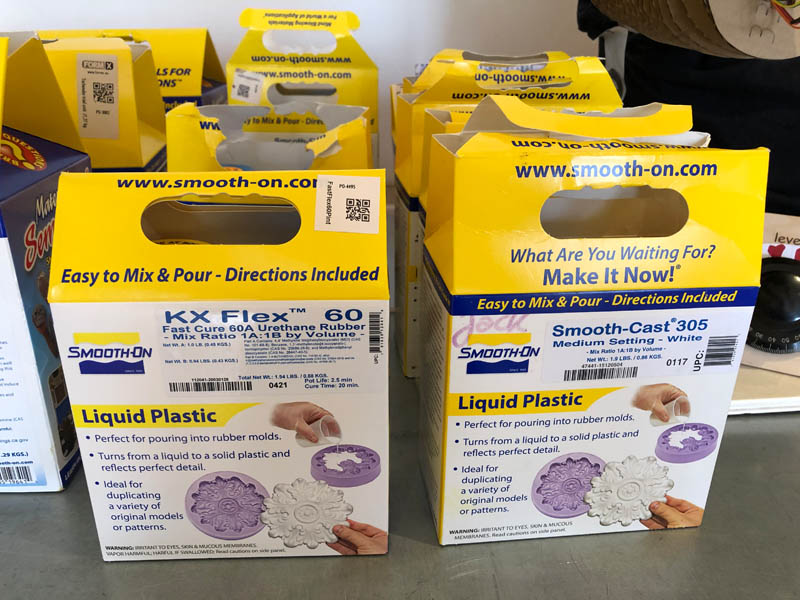
There are three types of molding products available to us: two types of pourable silicone rubber and one type of urethane rubber.
For casting, we have a lot more options. These include Acrylcast, two types of Smooth-On Crystal Clear, Tarbender and a couple of options for Liquid Plastic.

The method for creating test casts is as follows:
- Take a mold from previous years or pick a small object and place this in a paper cup.
- Measure the amount of casting material needed, by pouring water in the cup or the mold. For the cup, make sure to fill it with enough water to cover the entire object including about 0,5 - 1 cm space on top.
- Calculate the amount of molding or casting material needed based on the amount of water. 1 gram of water has a volume of 1 milliliter (mL). Make sure to add a little more.
- Read the safety data sheet and mix the materials accordingly. An important word to look out for is pot life. This tells you how long you have for mixing before the substance solidifies.
- Cast it in the mold and wait for it to dry.
- Carefully remove your cast from the mold.
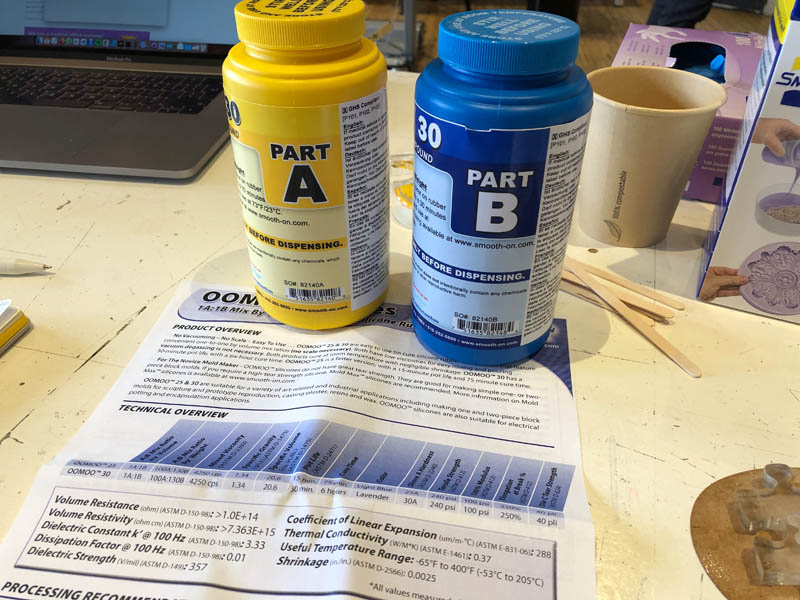
The materials tested during this group assignment are: Oomoo 30 Tin-Cure Silicone Rubber, Acrylcast, Crystal Clear 202 EU and Liquid Plastic.
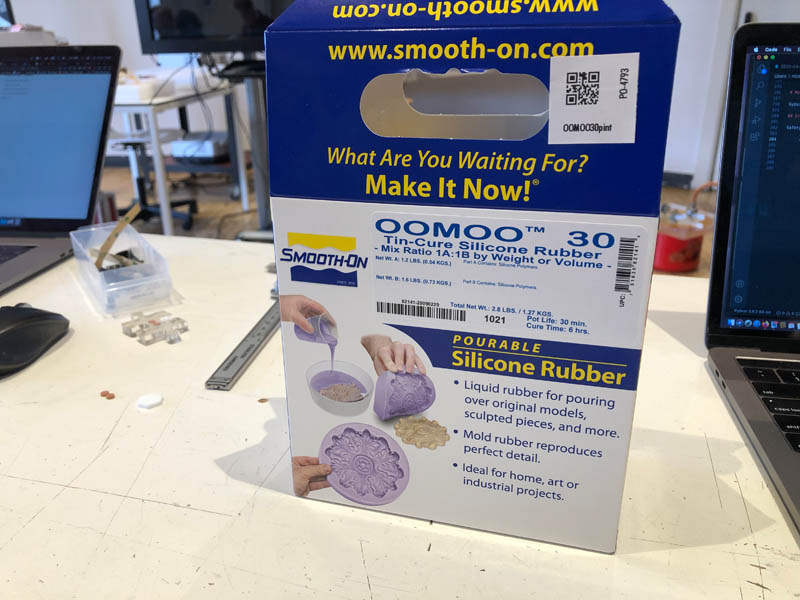
1. OOMOO 30 Tin-Cure Silicone Rubber
We team up and get started with making test molds and casts. Together with Nadieh, the first material we experimented with is Smooth-On’s OOMOO 30. This is a flexible silicone rubber material used for making molds.
We start with reading the safety sheet. The digital safety data sheet from this product can be found here.
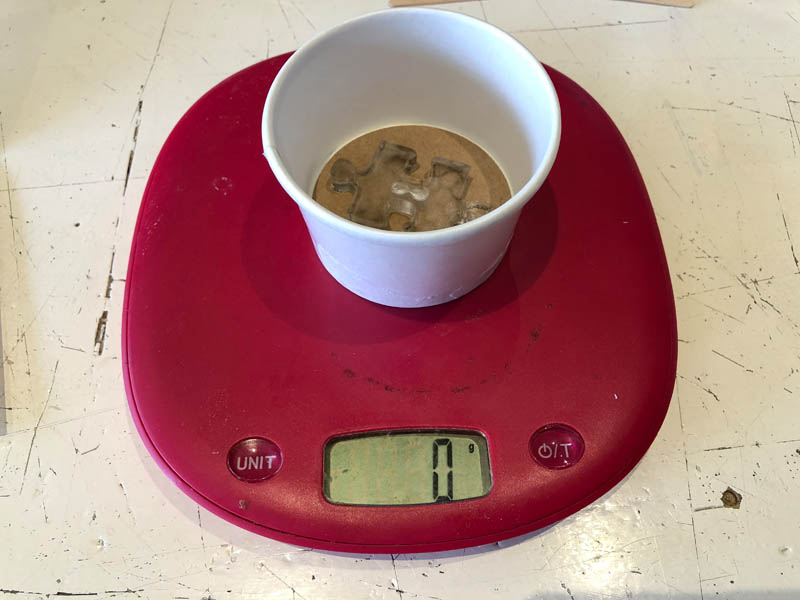
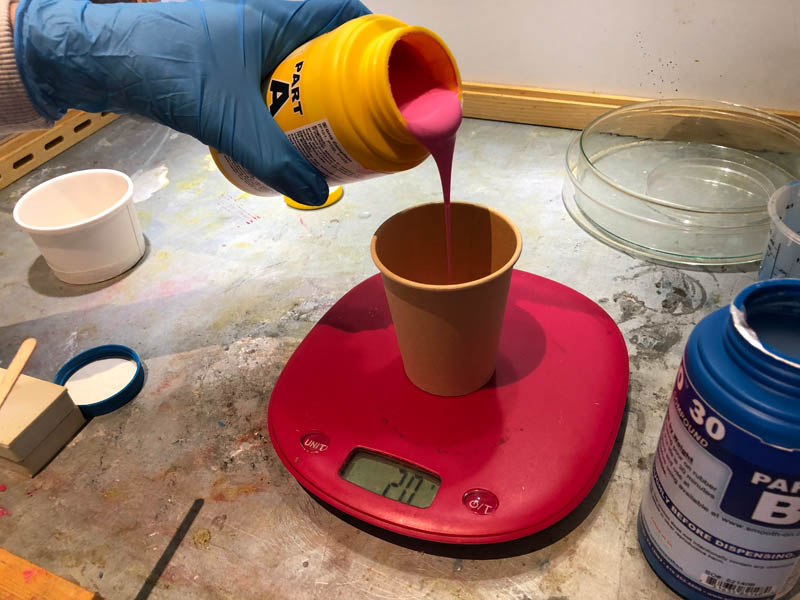
Then we collect our casting items and choose an object to make a mold for. This is a lasercut puzzle piece from Nadieh. We place this on a scale and zero it.
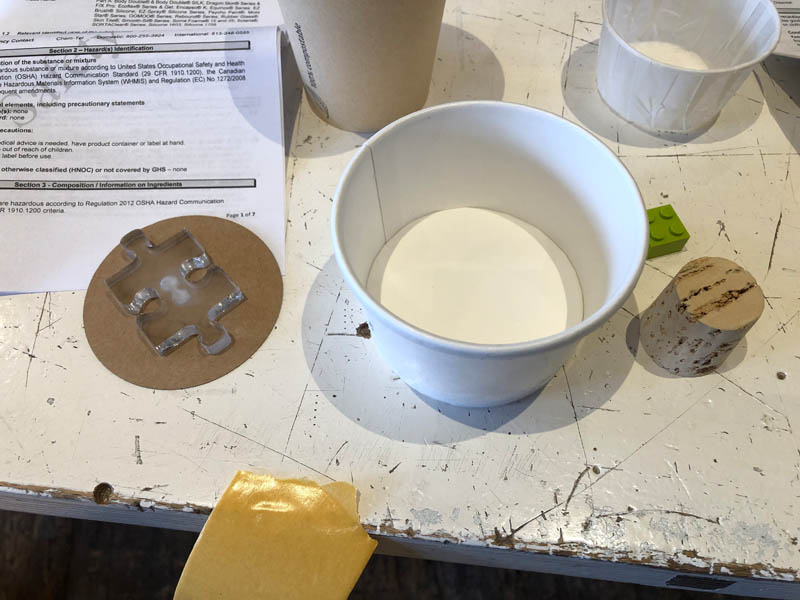
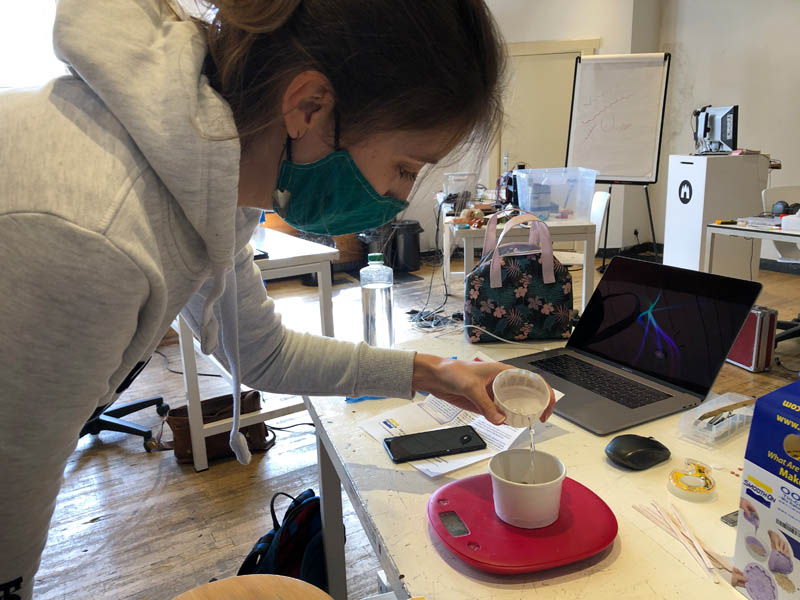
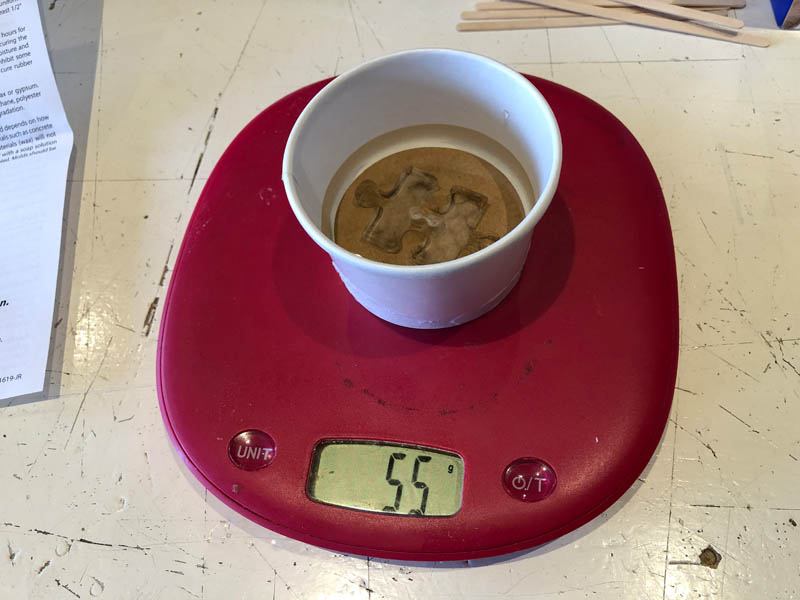
Nadieh then adds water, until it covers the entire puzzle piece plus some extra for the bottom. We measure 55 grams of water in total.
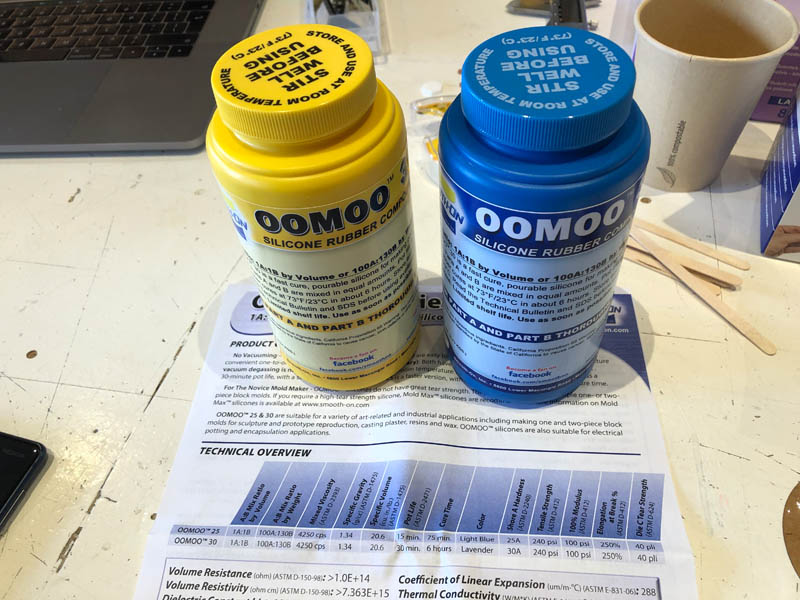
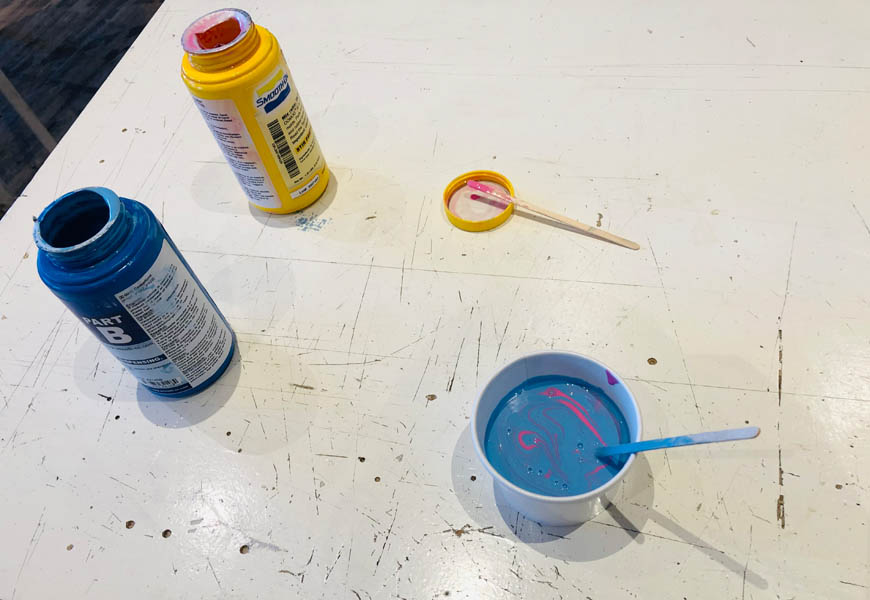
In the instructions, there are two types of silicone products: OOMOO 25 and 30. We have OOMOO 30. This means we have a mix ratio by volume of 1:1 and 100:130 by weight. Our pot life is 30 minutes and the cure time is 6 hours. The yellow pot is part A and the blue one part B. We need 24 grams of part A and 31 grams of part B to get 55 grams of material in total.
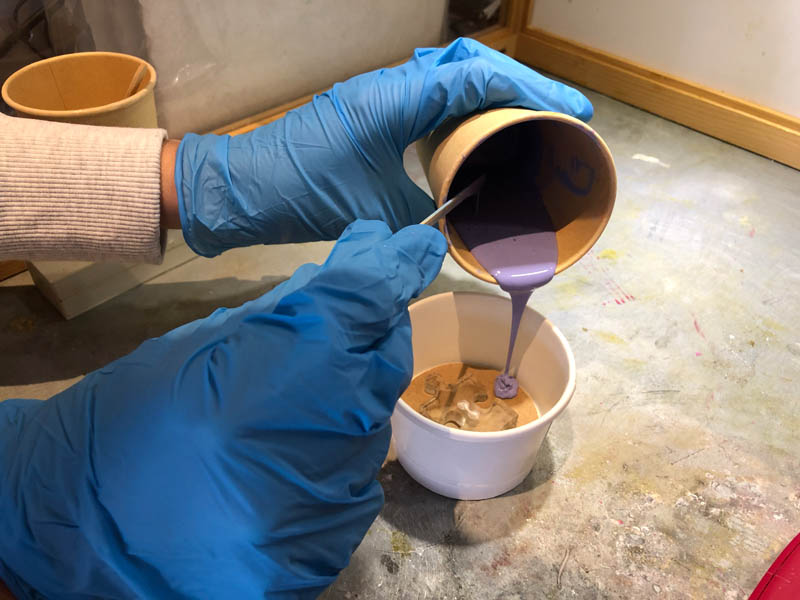
First add part A, then part B.
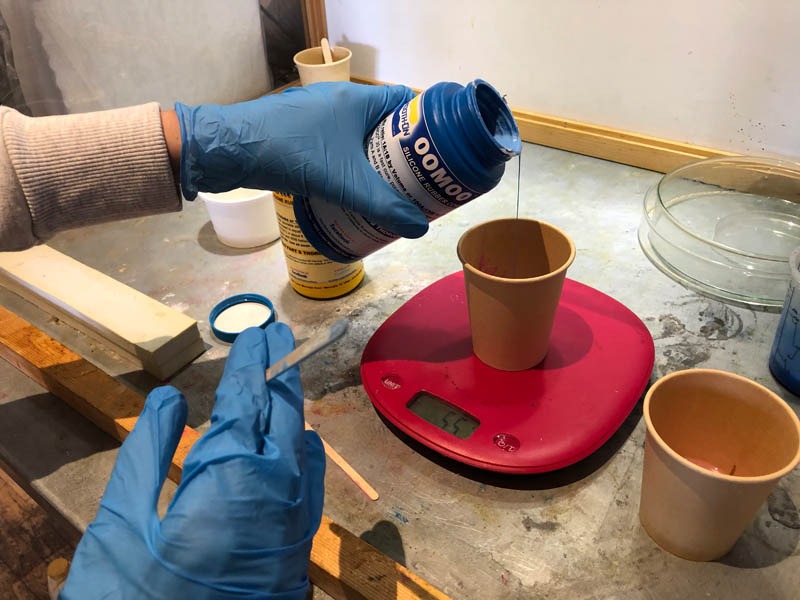
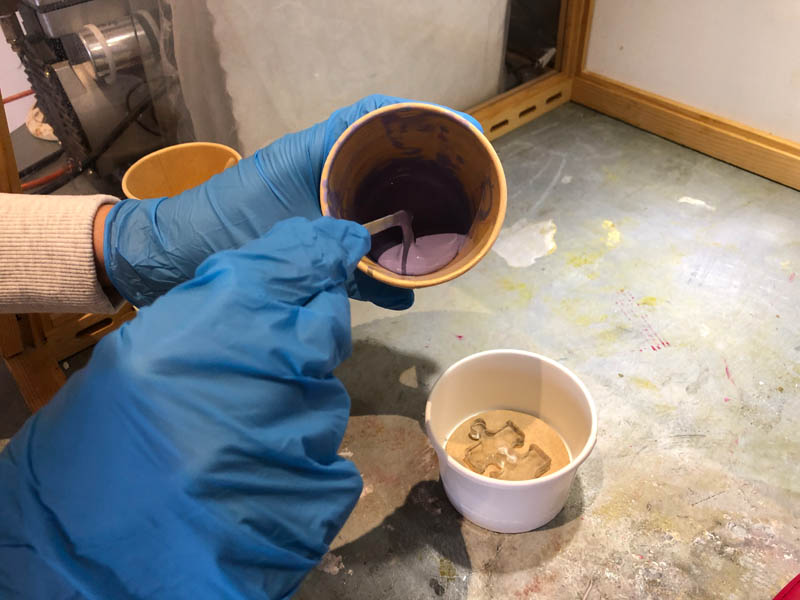
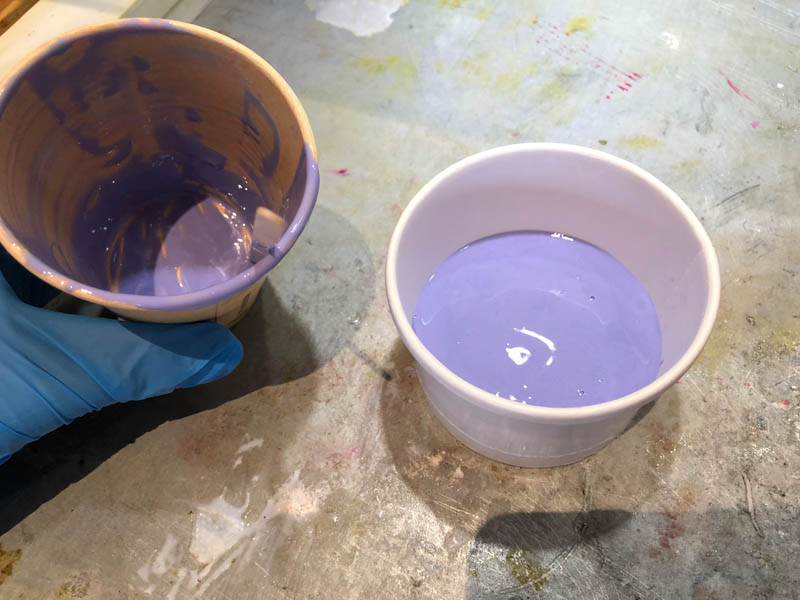
Mix it until everything is purple and make sure not to create bubbles. Then slowly pour it in the paper cup. Start with the lowest point and work your way up.

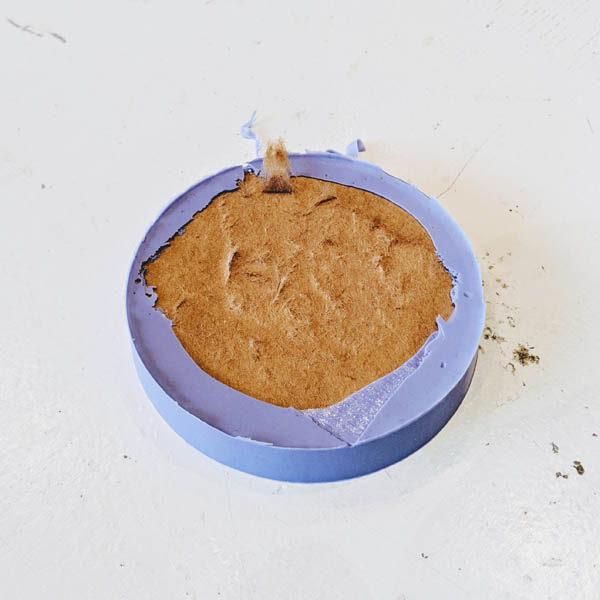
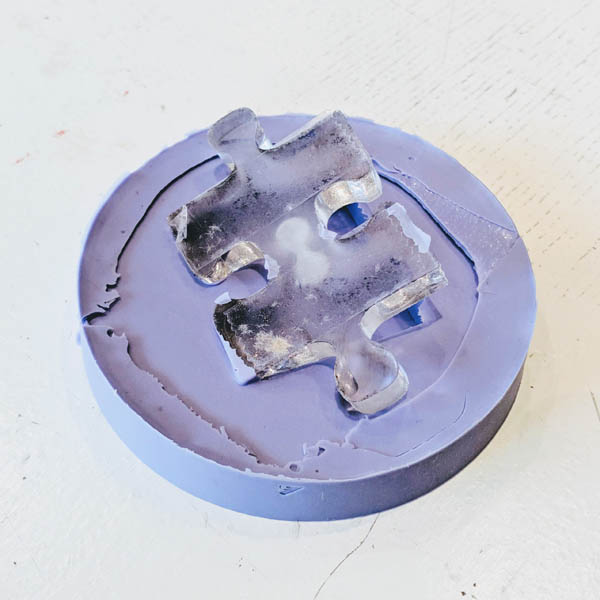
After solidifying overnight, Nadieh went to Waag to capture the results. The resulting mold came out like this. She removed the cardboard (left image), revealing the laser cut puzzle piece (right image).
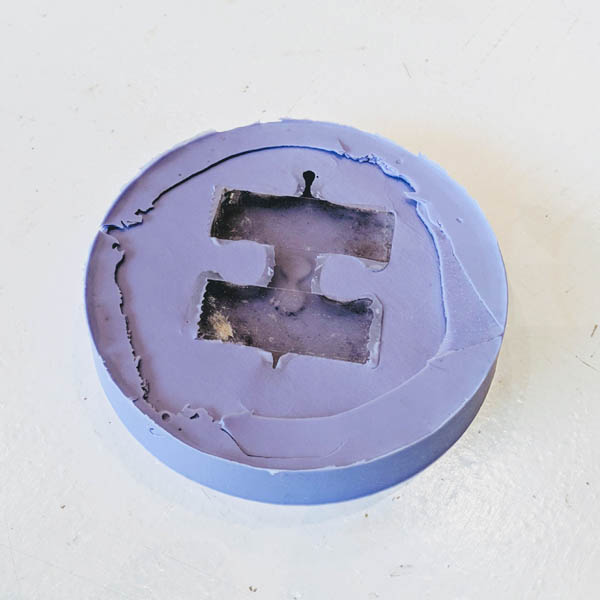
Next, she removed the puzzle piece. Some parts were overflown by excess OOMOO.
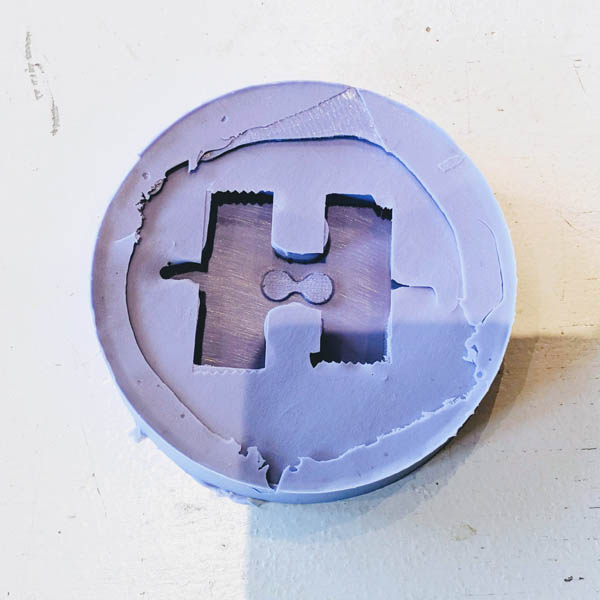
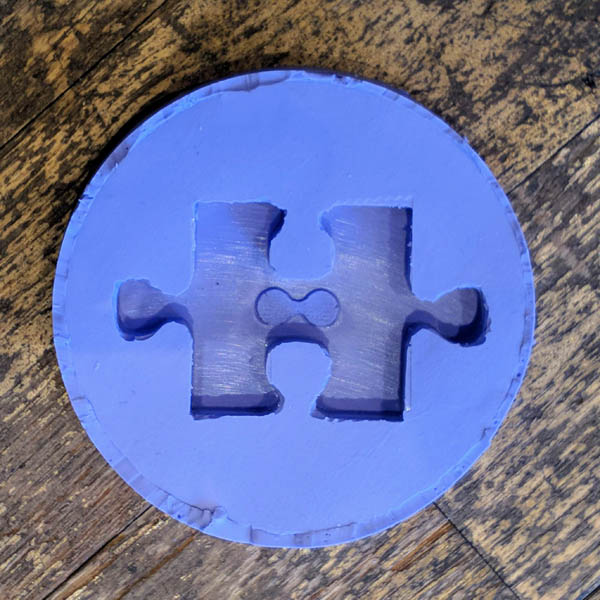
With a knife, Nadieh removed the OOMOO. This is our final result of the mold that can be used for casting.
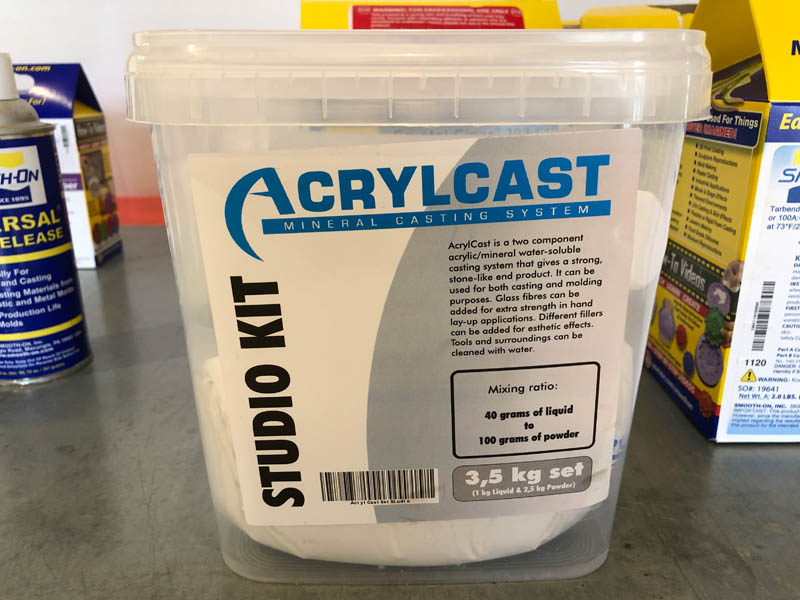
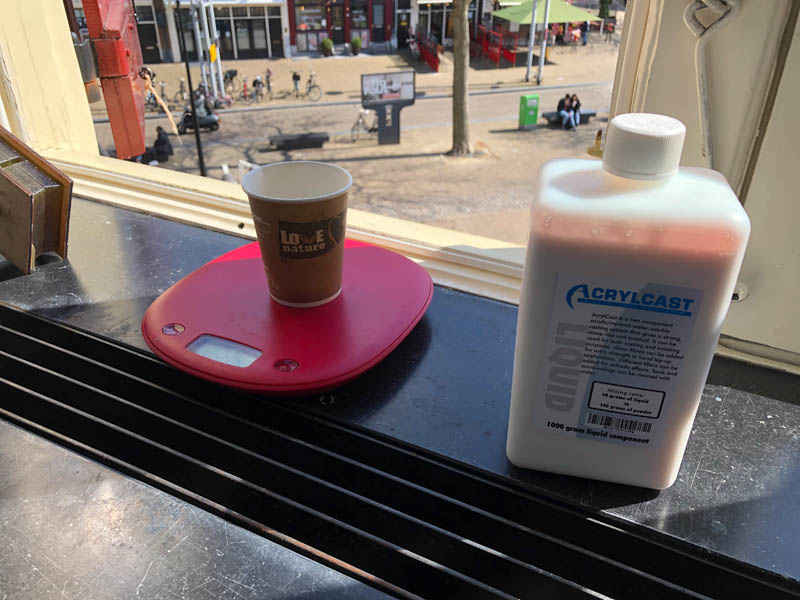
2. AcrylCast
The next material Nadieh and I were interested in testing was AcrylCast. As the name indicates, it’s a casting material.
This is a stone-like material. If you’re interested in metal casting, metal powder (bronze, iron, brass) can be added to give the look of metal. Marble and stone powders can be added to achieve various results. The digital safety data sheet can be found here.
Pot life will be about 6 to 12 minutes depending on circumstances. Machine mixing will reduce pot life. Note: Using a power mixer is easier and gives better results than hand mixing.
With only 6-12 minutes of pot life, we knew we had to be fast. We followed the instructions:
- Calculate the amount of material. The mixing ratio by weight is 40 parts of liquid to 100 parts of powder.
- Shake or stir the liquid component well. Dispense the required amount into the mixing cup. We measured 14 grams of water.
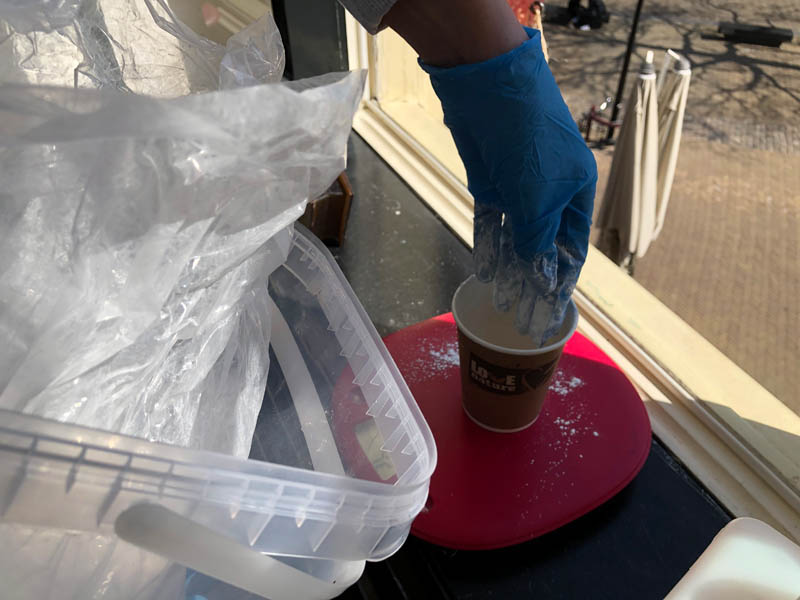
- Add the appropriate amount of powder into the mixing container by gradually sifting it through the fingers (adding up to 36 grams in total)
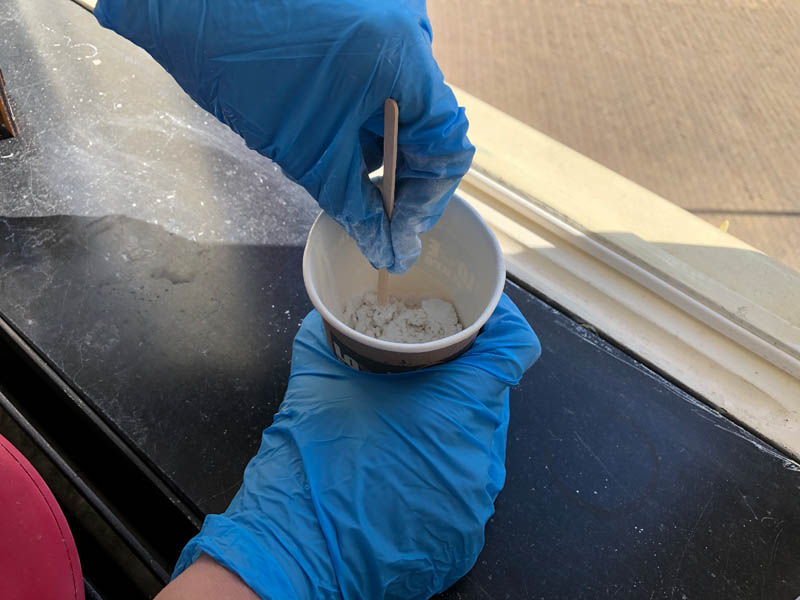
- Mix it thoroughly by hand or machine until the dry powder is dispersed into the liquid (min. 60 seconds).
- Brush a face coat of AcrylCast onto the surface of the mold. This helps to break surface tension and ultimately reduce air bubbles.
- Slowly pour the mixture into the mold.
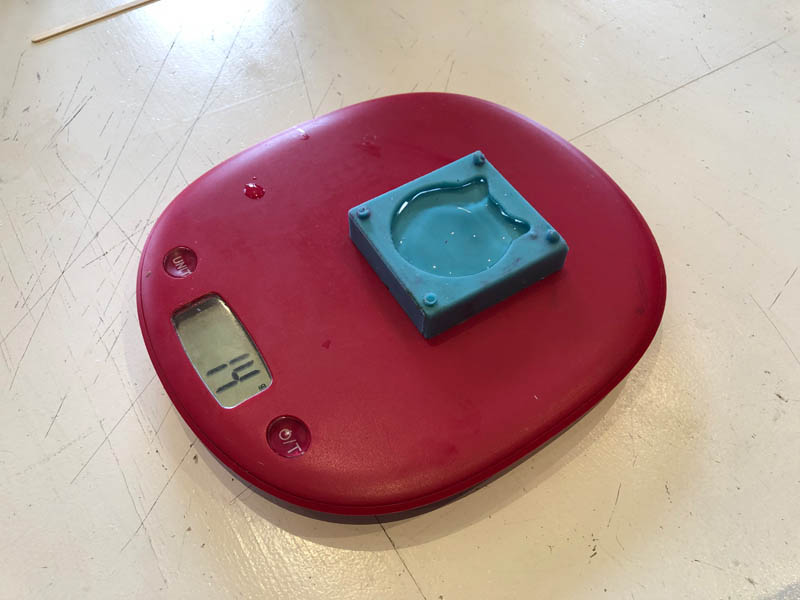
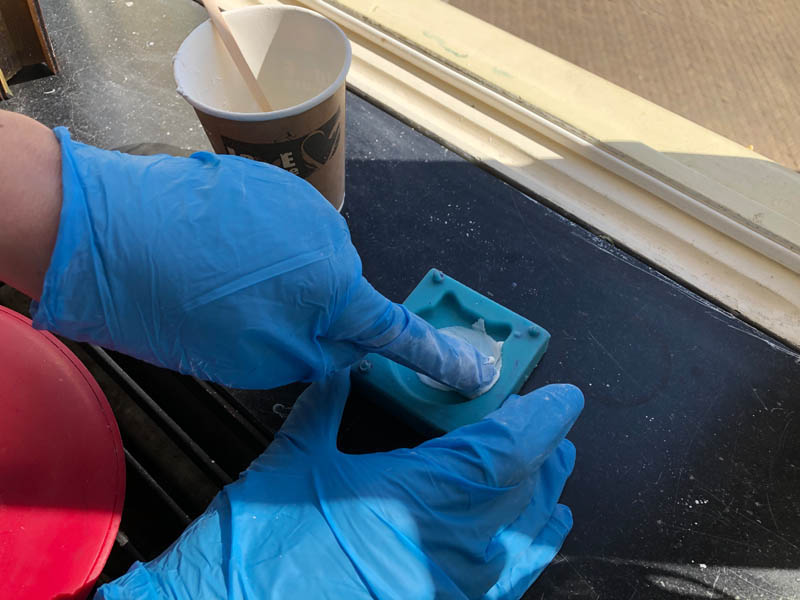
So here we go. We selected a cat mold that was made in previous years and filled this with water to calculate the amount of casting materials.
We moved our workspace to the window to get more fresh air, as we both experienced respiratory difficulties due to the toxic smells from other Smooth-On products in the room.
Stir the mixture of the liquid and powder well until it becomes a smooth yoghurt-like substance.
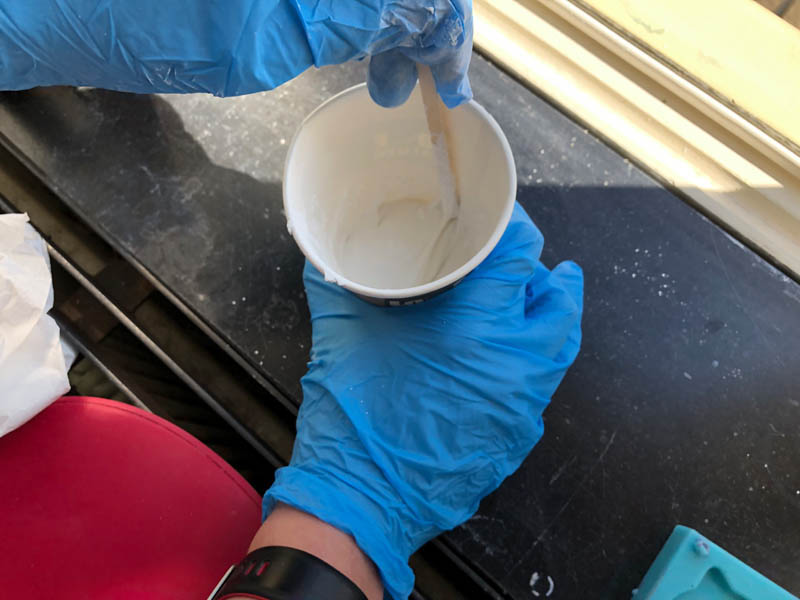
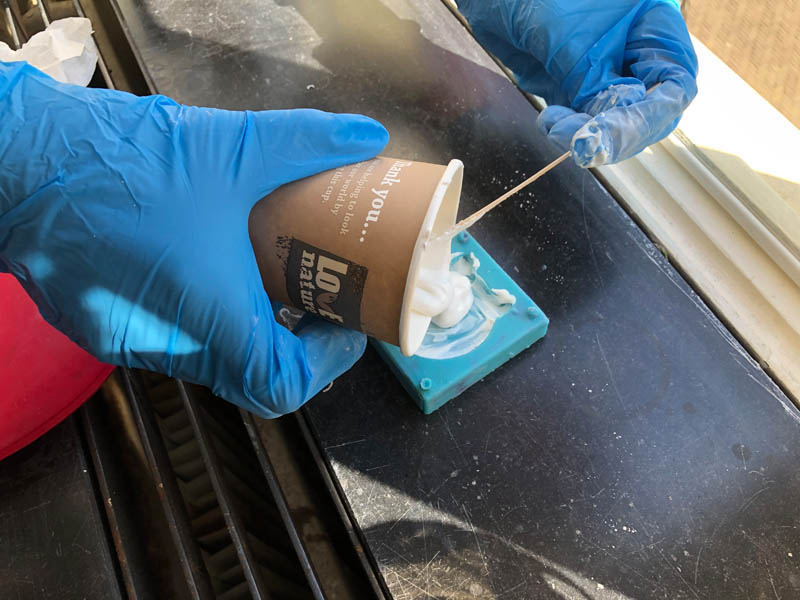
We then applied the face coat onto the surface of the mold to help break surface tension and reduce air bubbles. Next, slowly pour in the casting material.
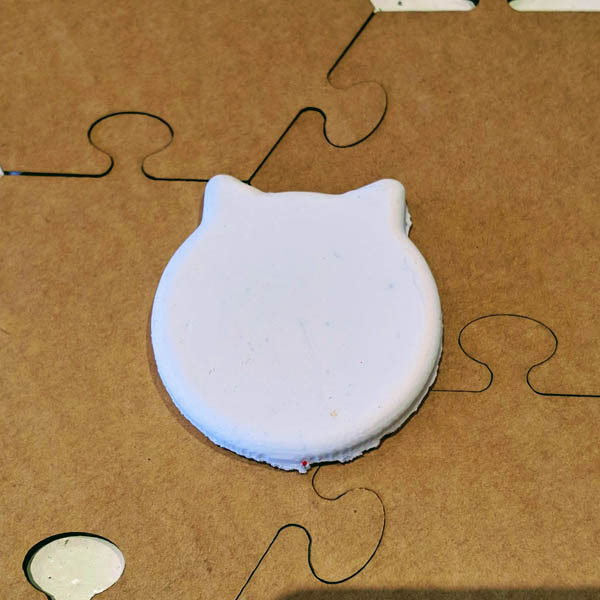
Now we have to wait for the mixture to dry. The data sheet doesn’t mention anything about the curing time. So the next day, Nadieh took out our cat from the mold. This is the resulting product.
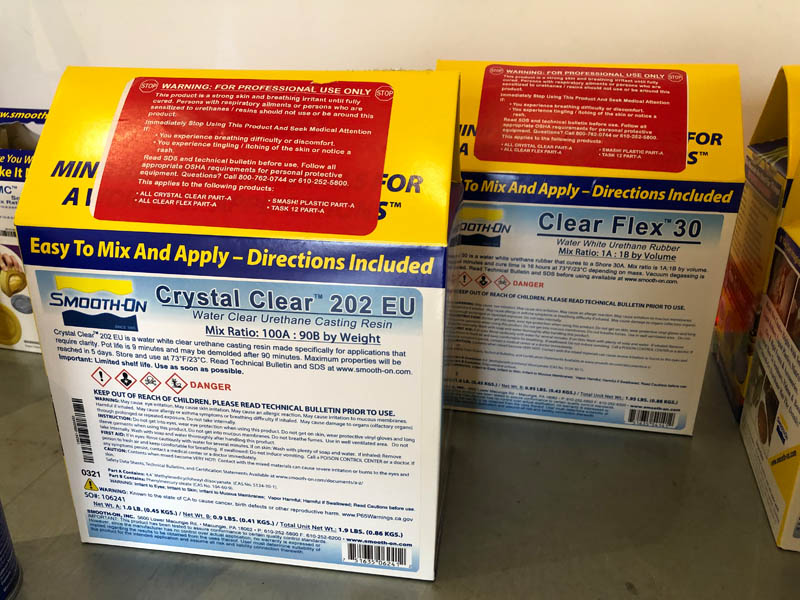
3. Crystal Clear 202 EU
This is a casting material. The Crystal Clear 202 EU safety data sheet can be found here. It provides a product overview and safety precautions:
Crystal Clear™ 202 EU is water white clear and made specifically for applications that require clarity. Low viscosity ensures easy mixing and pouring. Crystal Clear™ resins cure at room temperature with negligible shrinkage. Cured castings are UV Resistant and are not brittle. Vibrant colors and color effects are achieved by adding pigment dispersions. Applications include encapsulation, making prototype models, lenses, sculpture reproductions, decorative cast pieces, jewelry, prototype models, special effects and props. CAUTION: NOT FOR HOME USE. THIS PRODUCT IS FOR INDUSTRIAL USE ONLY. Proper ventilation, A NIOSH Approved Respirator and Protective Clothing (gloves and long sleeves) are required to minimize the risk of inhalation and dermal sensitization. If breathing is affected or a dermal rash develops, immediately cease using this product and seek medical attention. Read SDS before using.
The safety precautions are why we decided not to experiment with this material.
4. Liquid plastic
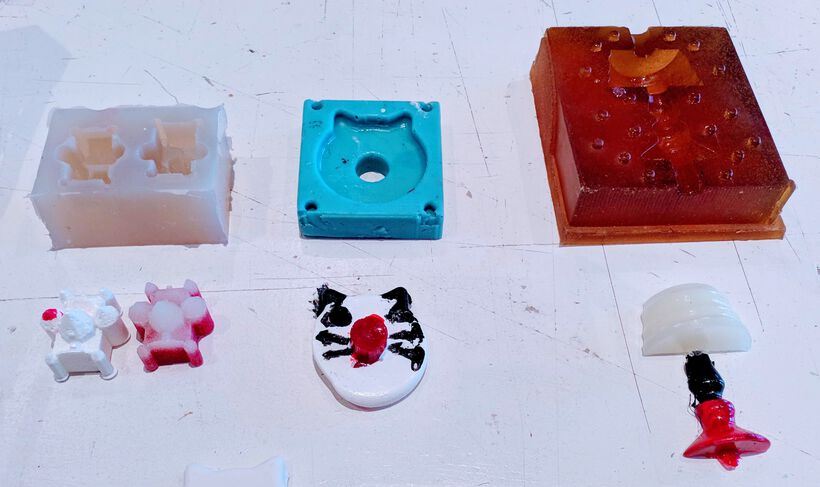
Liquid Plastic is is another casting material by Smooth-On. There are many different varieties available. The other group (Lucia, Loes and Erwin) tested this material. Here is an overview of all molds they made. From left to right: Smooth-On OOMOO, PMC 121/30 WET, and Mold Star 30.
And the casts, using Smooth Cast 325 with a variety of pigments.
Design process
This week, we start with designing a CAD model. This is followed by CAM protocols. Before we started, Henk provided tips and tricks on how to design a good model for this assignment. It can be quite confusing, because we work with both positive and negative molds.
Introduction to molding and casting
For the individual assignment, the learning outcome of this week is to demonstrate workflows used in mold design, construction and casting. When would molding and casting be a suitable production method? Benefits compared to 3D printing, include:
- Better surface finish
- Better structural properties
- Enables large scale production
So if an application requires one or all of these features, molding and casting is your production method to go. For example, this could be the case for consumer products, tools and architectural applications. The assignment for this week is to design a 3D mould around the stock and tooling that you’ll be using, mill it (rough cut + (at least) three-axis finish cut), and use it to cast parts. Let’s break this down in three steps:
Step 1: machine a wax mold with 3-axis milling. This week we mill a wax mold using a CNC milling machine, with a 3-axis milling method. What does that mean? According to the Fab Academy assessment guide, you should have smooth tilted or curved surfaces instead of “steps” towards axis Z.
Step 2: cast a flexible mold in this wax mold. Choose a material based on the properties of your end-product and pour this in the wax mold. Let it solidify.
Step 3: make your cast. Remove the flexible mold from the wax mold and cast your end-product in the desired material.
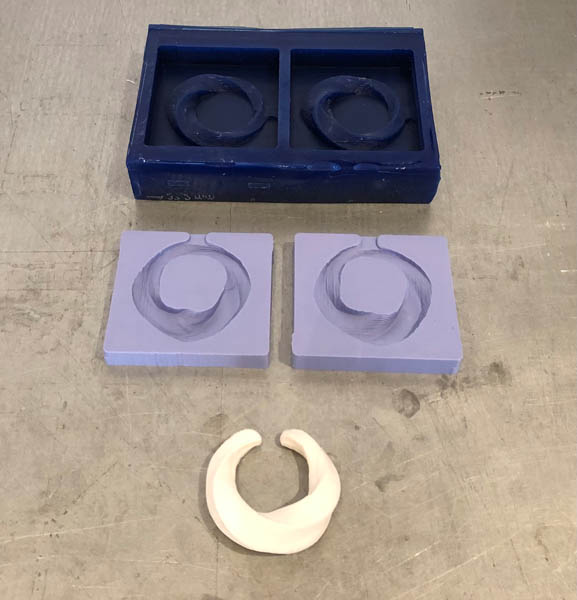
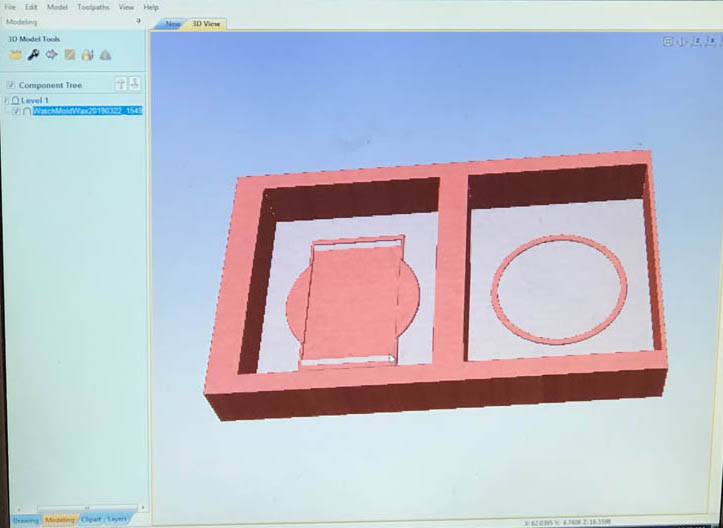
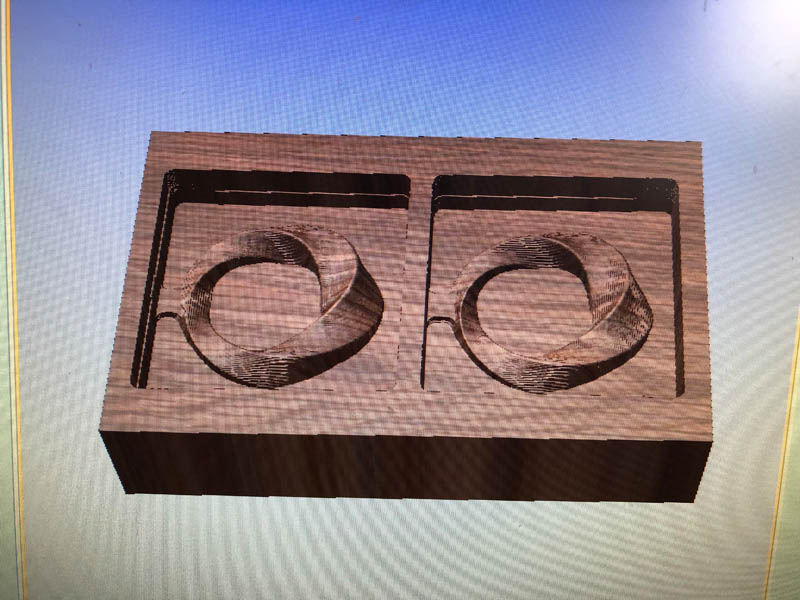
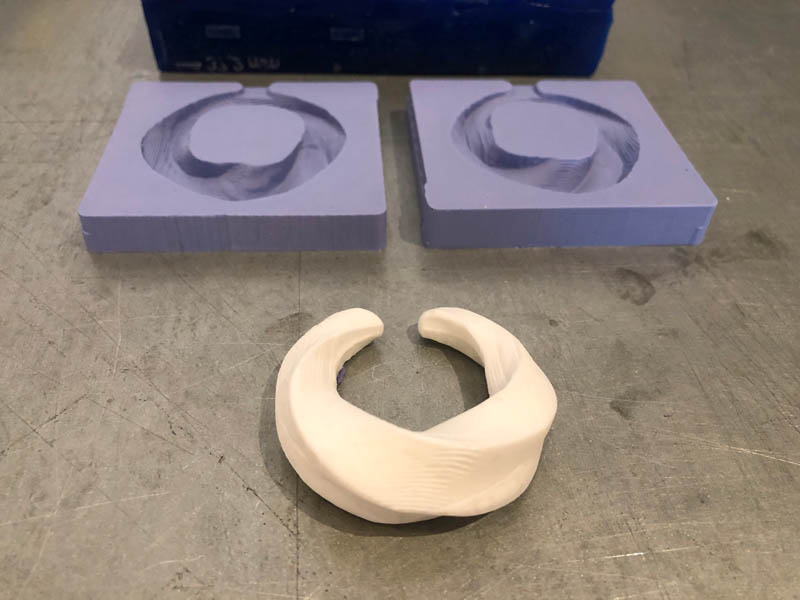
To illustrate this, our instructor Henk provided an example from a previous year:
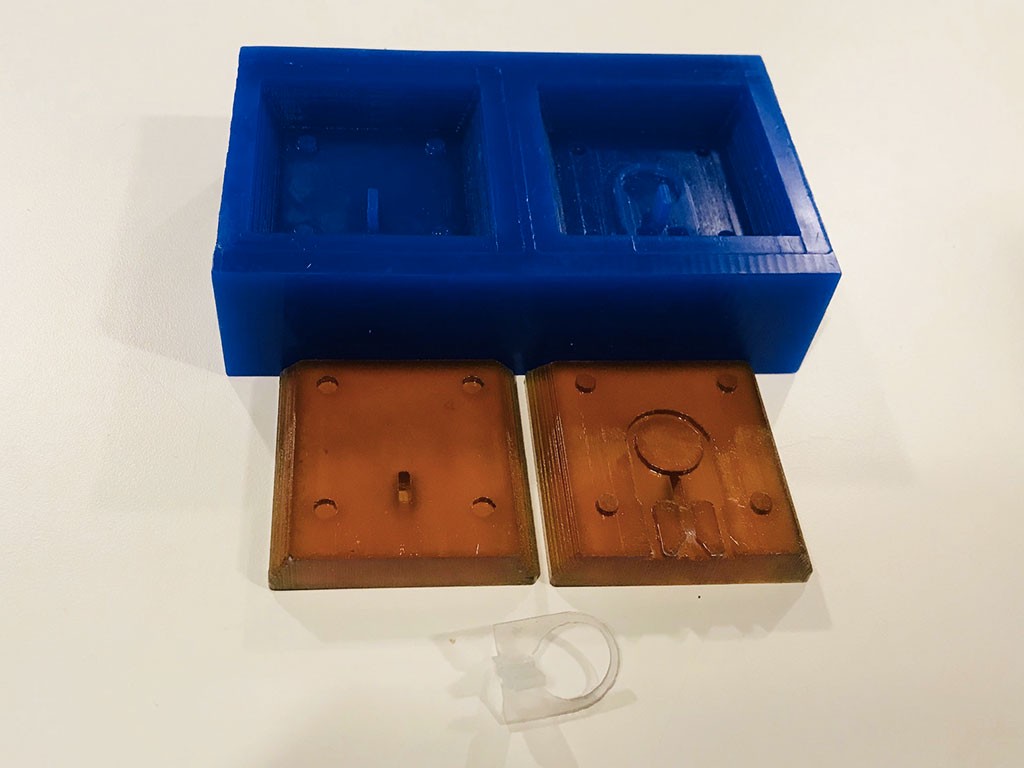
In blue you see a CNC of a negative of the mold you want to cast for this job. The Shopbot 3D milling should be involved for creating this part. In brown is the result after casting to get a rubber/flexible mold. According to Henk, you have to use registers for a perfect fit of the 2 sides of the mold. Neil said we won’t need them. Secondly, you have to use a “opening” to pour in the substansion for the final cast. In transparent, the final result of a casted ring!
Project ideas
From a circular design standpoint, I’m not in favor of wasting materials. I’ve made amends with the fact that this is kind of inevitable during Fab Academy, and I’m doing my best to avoid this as much as possible. So in selecting the object to make this week I’m aiming for a multi-purpose mold that can create practical and reusable objects. In addition, it is extra interesting for me if it can be applied in construction. This guiding principle rules out a lot of potential objects and landed me at voxels.
The definition of voxels can be found in the 2020 IEEE paper on Algorithmic Approaches to Reconfigurable Assembly Systems, written by a team of MIT’s Center for Bits and Atoms:
Voxels are modular lattice elements with reversible connections that have been assembled into structures with record setting mechanical properties, large-scale reconfigurability, and mission-adaptive performance.
An application example of voxels in combination with molding and casting can be found at the largest dyke of the Netherlands: the Afsluitdijk. This iconic project spans 32 kilometers and was opened in 1933 to provide protection against floods. From 2018 to 2023 the dyke is renovated to provide protection against rising sea levels in the 21st century. To achieve this, one of the strategies is to deploy 75.000 so-called Levvel-blocs that are specifically designed to dissipate energy from waves in case of a superstorm. Weather-proof RFID tags (radio frequency identification technology) are casted into the concrete to measure the quality and performance of each of the concrete blocks over time. Fun fact: we drive on this dyke each week to get to Waag in Amsterdam, and observe the construction progress from close-by.
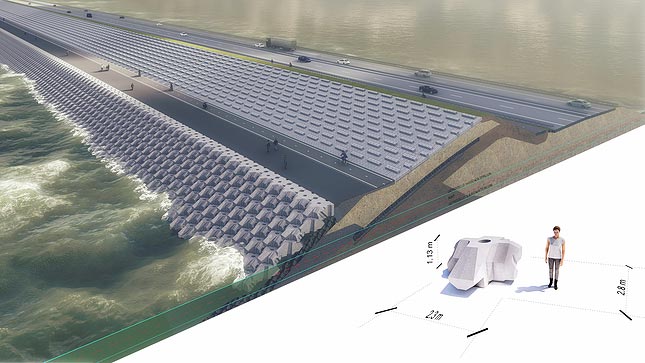
Image credits: Levvel
Another source of inspiration for this week is the work of M.C. Escher. Very few people know that he is born in my hometown, Leeuwarden. Therefore, the project idea for this week is to design an M.C. Escher-inspired voxel that can be replicated endlessly and deployed in a variety of purposes.
Reference projects
My goal is to design the mold in Rhino and Grasshopper. Other students from previous years who did this, include:
- Tiffany Cheng who casted a cauliflower
- Jasmin Rubinovitz designed and made an Eames house bird
Unfortunately they only showed screenshots of their final designs and didn’t document their workflow. Because the goal of this week is to learn about the molding and casting process, I will focus on documenting this well. If there is time, I will work on a more complex voxel design.
Design spiral 1: serviette ring
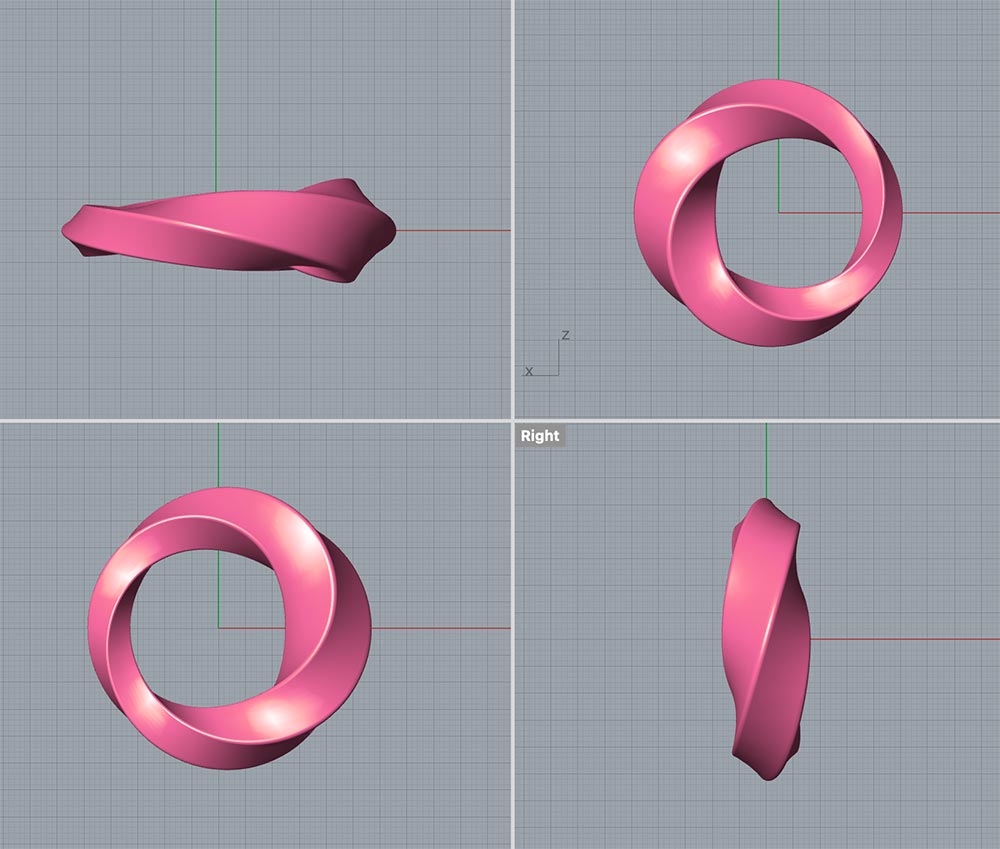
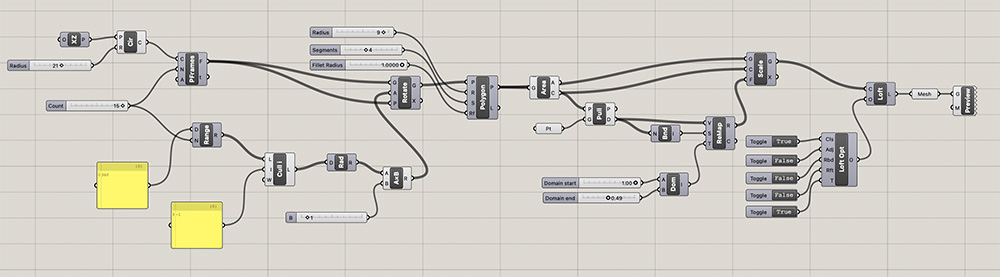
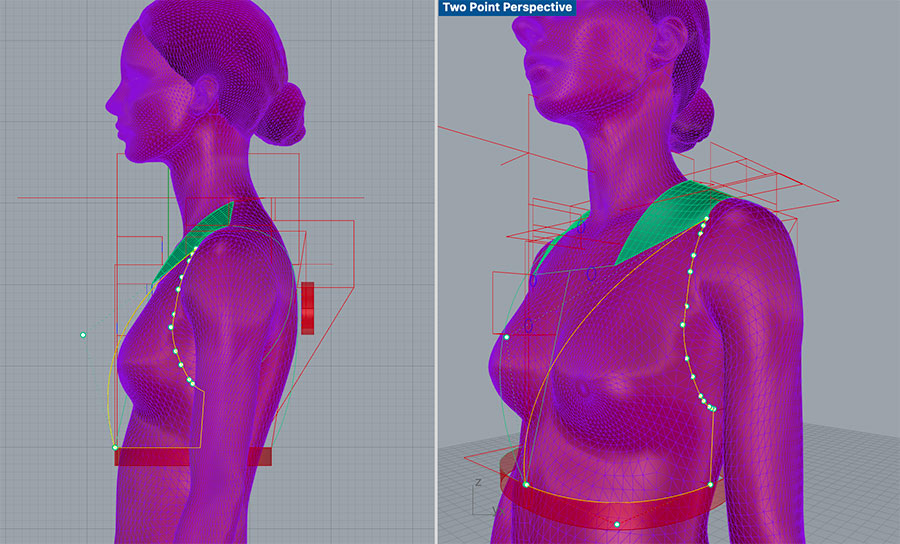
My first spiral was to make a basic design with this jewelry tutorial to create a simple ring. I scaled it up a bit so it can be used as a serviette ring.
Here is the Grasshopper canvas:
After the design is complete, we’re preparing the mold. To do this,we start with adding a cutting plane in its center. For guidance, I looked at Jasmin Rubinovitz’s Eames house bird in Rhino. In this quick Youtube tutorial it is shown how to actually do this. Start with the CutPlane command to set the plane.

Then type Split to slice the object in parts. Somehow this doesn’t work in my design. I can’t select the mesh of the ring as a splitting object. After a while, I found out that this is because it’s a closed mesh. Turns out, the solid-looking sphere from the tutorial is actually a closed surface that requires other commands.

A search on the Rhino forum resulted in the following suggestion by Menno Deij - van Rijswijk:
Create an array of
MeshPlane, each with one face that is larger that the closed mesh. If you want to end up with closed slices, use theMeshBooleanSplitcommand, instead of theMeshSplit.
So let’s do this. Draw a MeshPlane on top of the CutPlane and type MeshBooleanSplit. Now it is possible to select the mesh of the ring!

After pressing enter, this is the resulting shape.
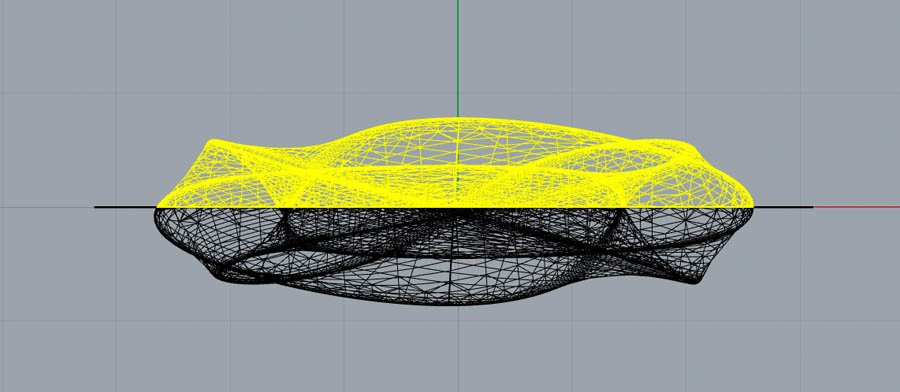
The two parts of the model are now ready to be added onto a wax block.
Mold making in Rhino
Rhino 7 provides an upgrade with new commands for Mold Making Tools. Except from this 6 minute video no tutorials are made yet. So I’ll stick to a regular mold-making process with a simple box that has the same dimensions as the wax block.
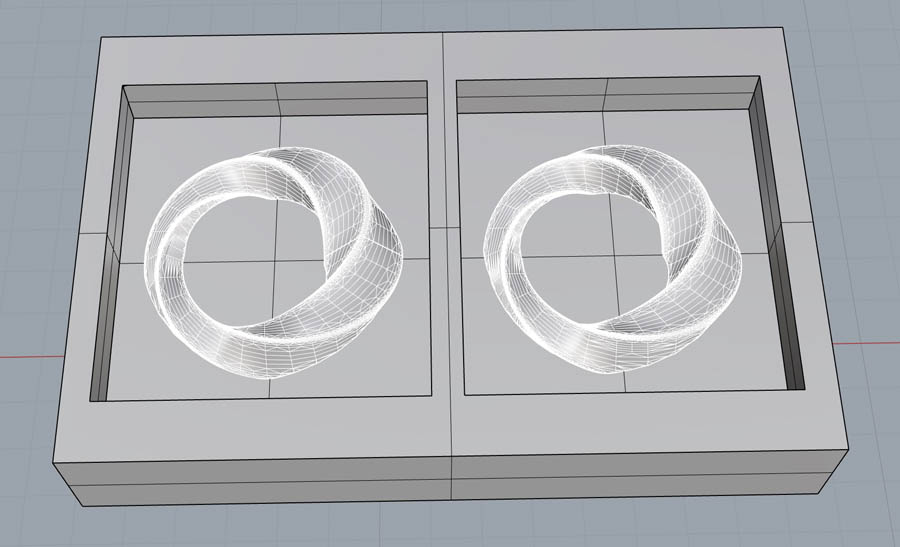
Plus, I’m adding a small rectangular shape on top, to allow for pouring in the molding and casting materials.
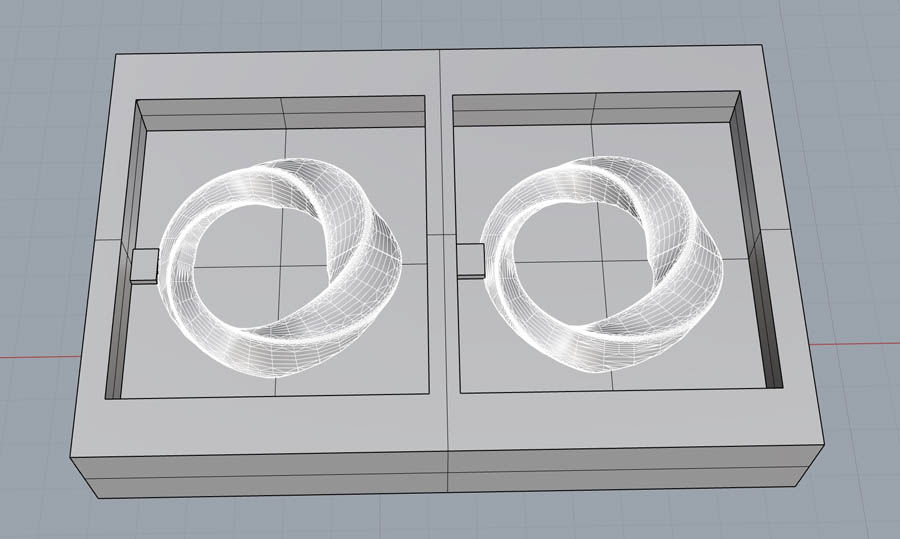
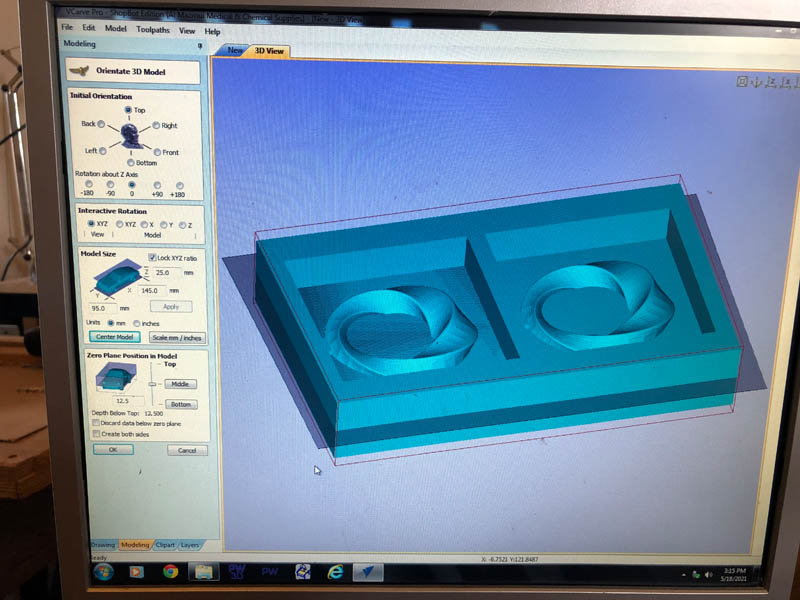
The file is now ready to be exported as an .stl file for toolpath generation in VCarve Pro.
3-axis milling process explained
This is an overview of the 3-axis milling instructions we received on Thursday. The material of the mold is a wax block. I was happy to learn that this material can be reused. Therefore, we collect the waste after milling. This is then melted into a new block.
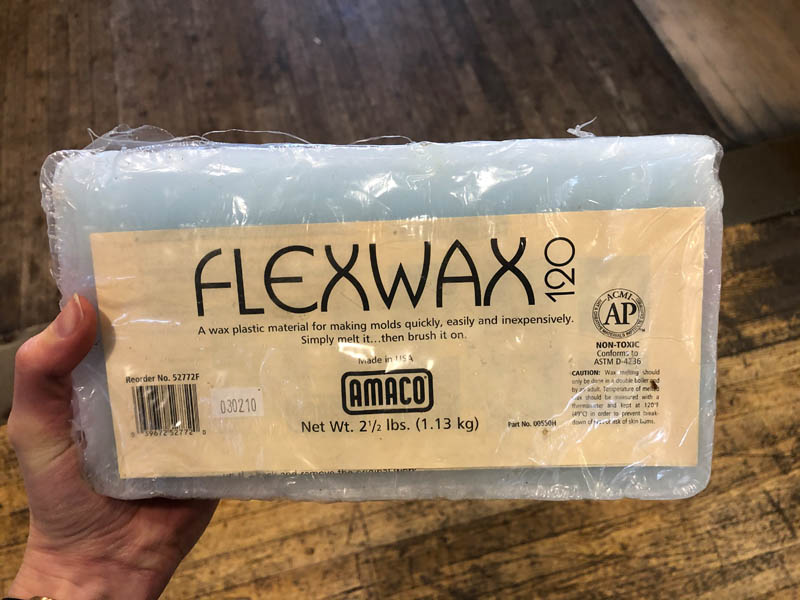
The photo below is of the Flexwax 12. It’s wax for making molds. But according to Henk we don’t use this one since the melting temperature of the material is about 40 degrees. So both for machining and casting that’s to low. Therefore, we use machinable wax (blue blocks), that has a melting temperature of 70 degrees.
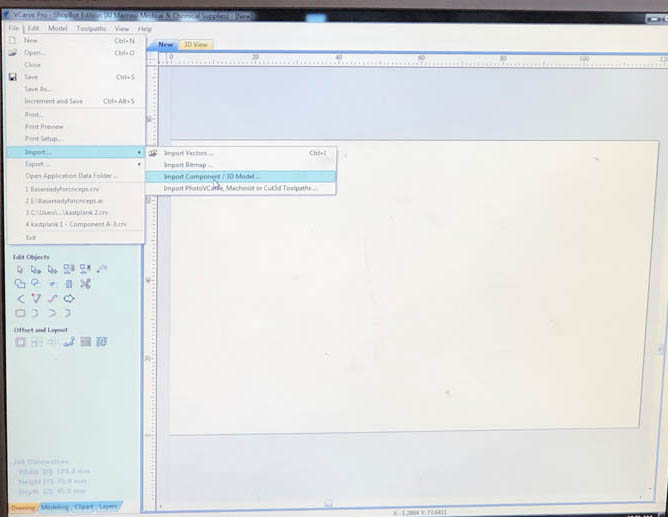
The software for toolpath generation is VCarve Pro. We use this at Waag because this is compatible with the large ShopBot. First, start with the Job Setup. Enter the Width and Height of the block. Then add the height in the Material(Z) section. Make sure to make the dimensions of the block in VCarve a little bigger than the block of your model, otherwise it mills away the outsides of the block as well. I included this picture for future reference.

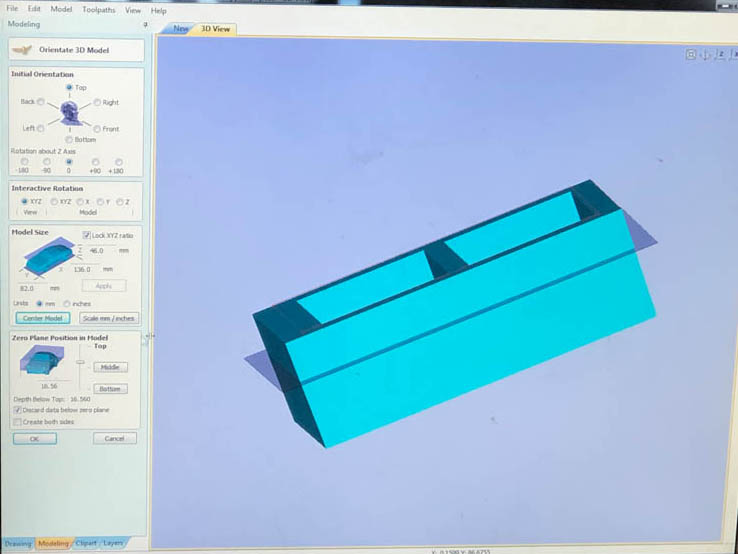
Next, import the .stl file of your design.
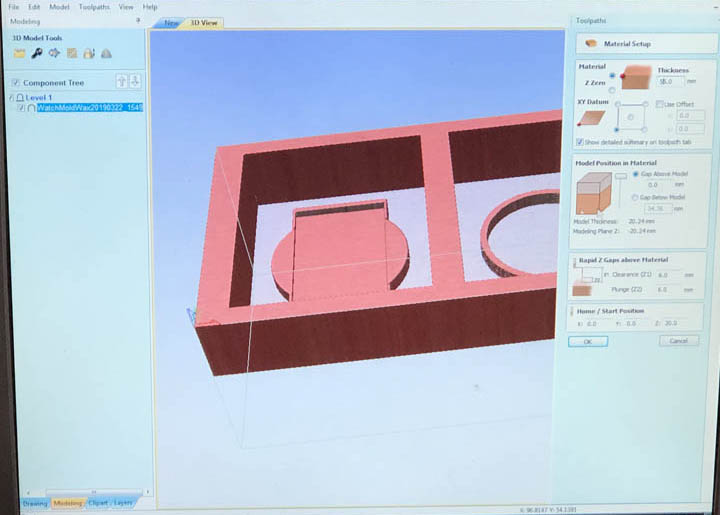
Your model appears in blue along with a small red wireframe.
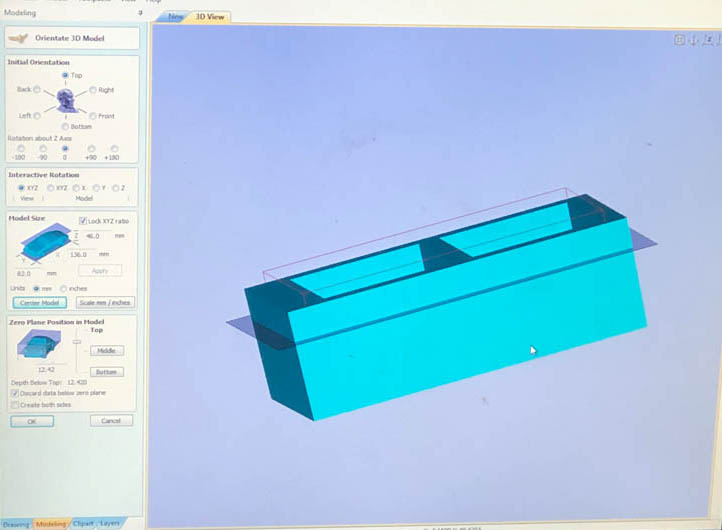
Position your model exactly underneath this line with the Zero Plane Position in Model slider. Important: uncheck ‘discard data below zero plane’. If you’re happy you can click OK. Beware, after orientating the model, it is not possible to move back to this screen.
Then this screen appears.
On the vertical tab on the right, you can click Material Setup to adjust the material thickness. Click OK to close this window.
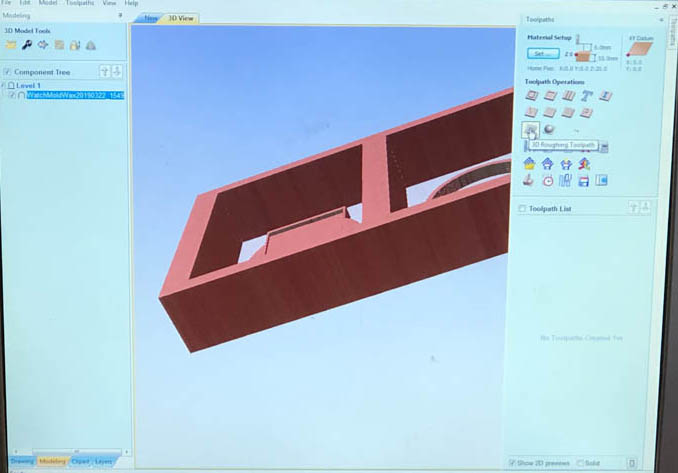
Roughing Toolpath
The first toolpath we’re creating is the 3D Roughing Toolpath.
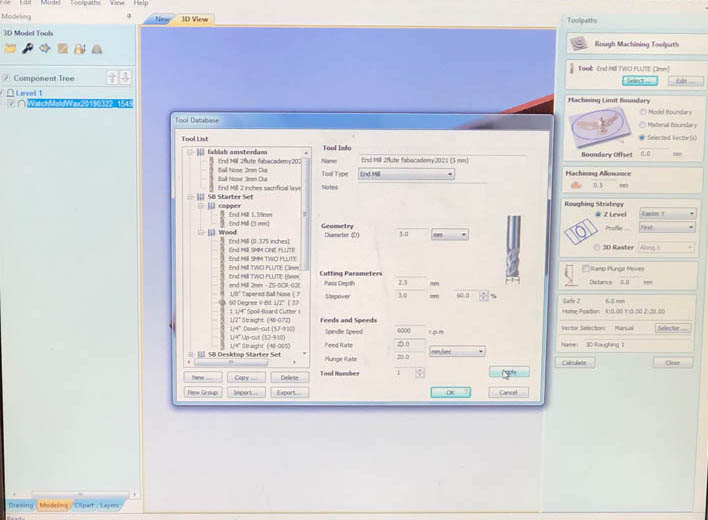
In the Tool section, click Select.. for a pop-up menu with a Tool Database to find the pre-installed End Mill 2flute fabacademy 2021 (5mm). This is the same end mill we used during the ‘make something big’ week. We change the Stepover to 3.0 mm or 60%. In the Feeds and Speeds section, set the Spindle Speed to 6000 RPM and the Feed Rate and Plunge Rate to 20 mm/sec. First click Apply and close the window with OK.
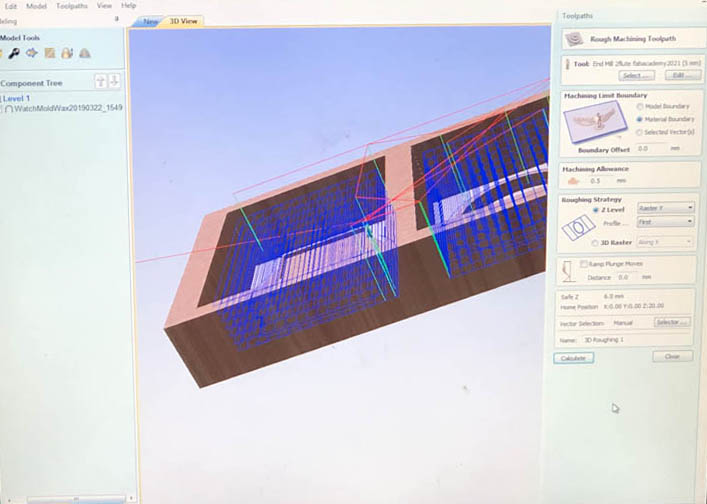
The second element in the Rough Machining Toolpath window is Machining Limit Boundary. This can be set at Model Boundary, Material Boundary or Selected Vector. During the instructions, we set this at Material Boundary. We keep the Machining Allowance at 0.5 mm. The next setting is Roughing Strategy. On the Z Level, this can be set at Raster Y or Raster X. You can see the direction of the paths change in the second image.
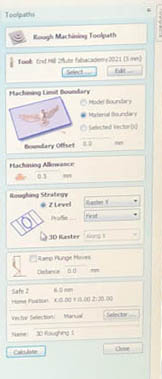
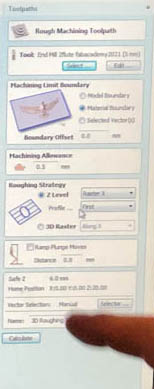
We choose direction Y because for this model it’s the shortest path for the machine with the least turns. Click Calculate to see a preview of your rough toolpath. Then Close to return to the main Toolpath sidebar menu.
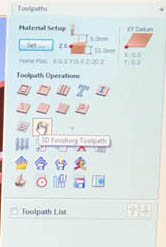
Finishing Toolpath
The second toolpath we create is the 3D Finishing Toolpath.
When you open this, a similar screen as before appears in the right sidebar. For the Tool, select the same 2flute fabacademy end mill, with the same Feeds and Speeds settings. In Cutting Parameters, change the Stepover to 0,5 mm or 10%.
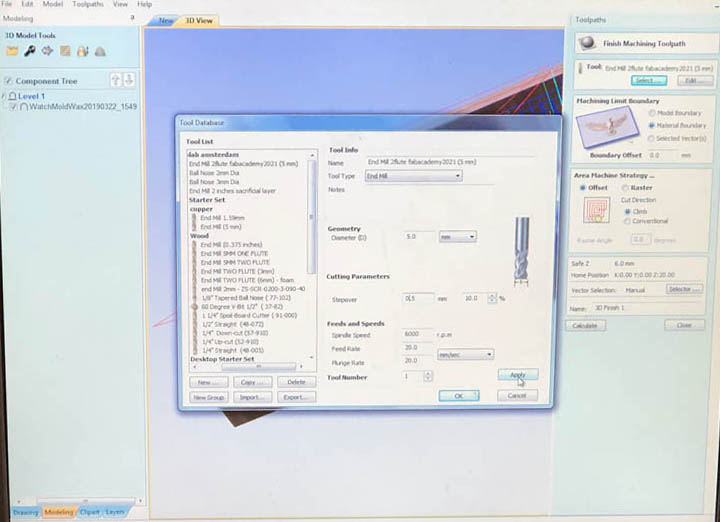
The Area Machine Strategy can be set at Raster or Offset, depending on your design. This generates a different path, as can be seen below.
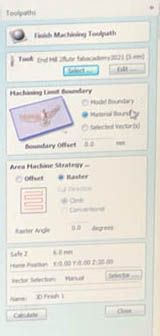
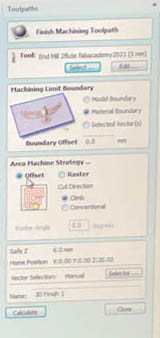
Click Calculate to preview the toolpath and Close to return to the main menu.
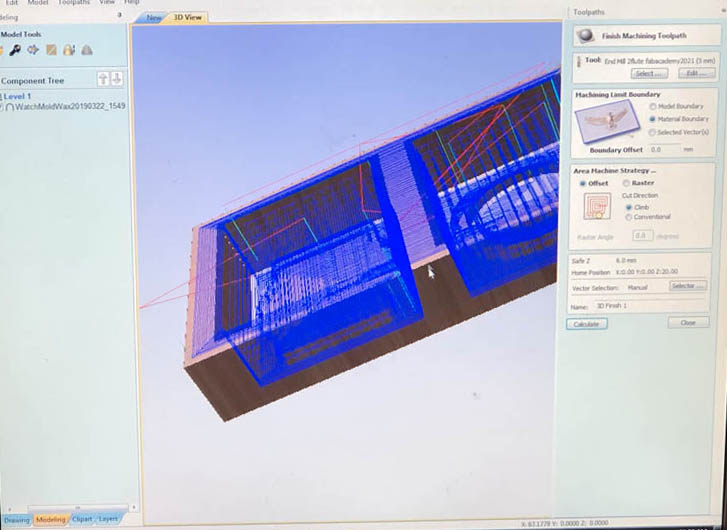
All toolpaths are listed, click the Preview Toolpaths icon to animate your results.
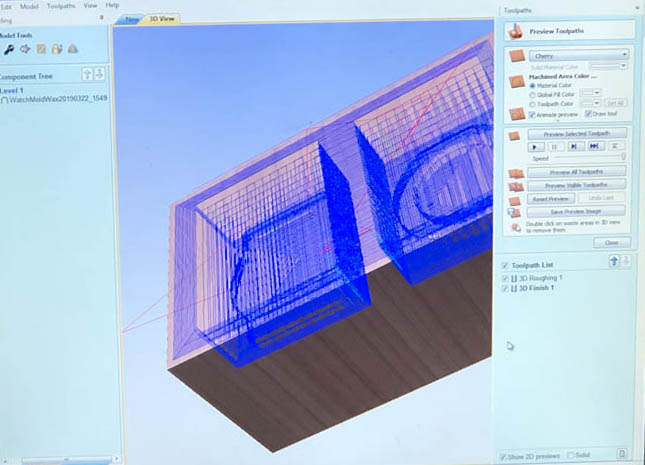
This is a preview of the rough toolpath.
When you’re happy with the results you can export the toolpaths in one file.
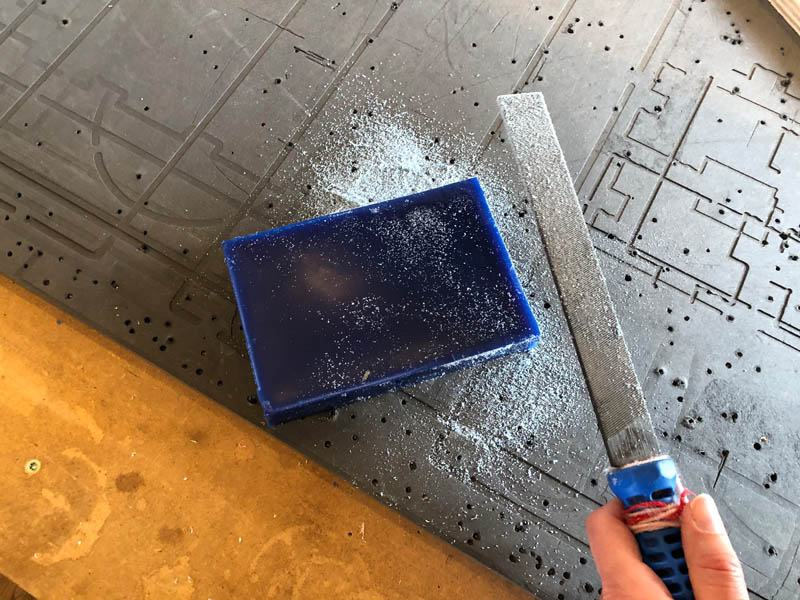
Wax preparation
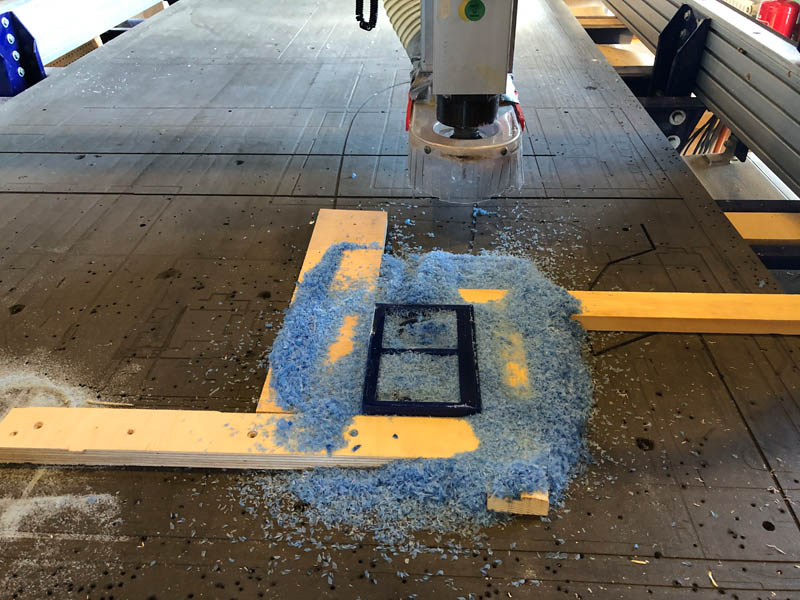
Next, Henk showed how to prepare the ShopBot and wax block for 3D milling. First, start with the removal of excess material from the wax block.
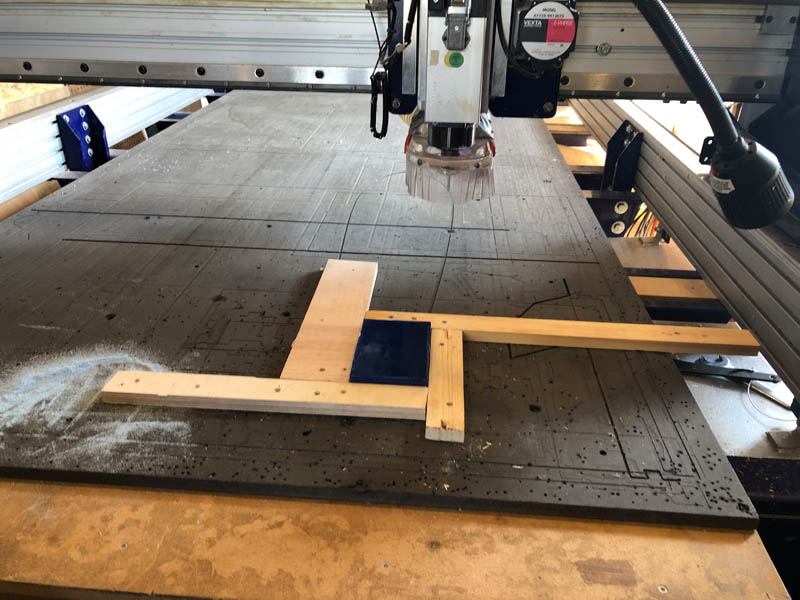
Then create a frame from wood pieces to keep the wax block in place during milling. Screw the wood into the machine bed and make sure the block can’t move.
Now you’re ready for milling! A precaution: don’t turn on the air exhaust! The wax particles are heavy enough to stay on the machine bed, and we want to collect them afterwards for reuse.
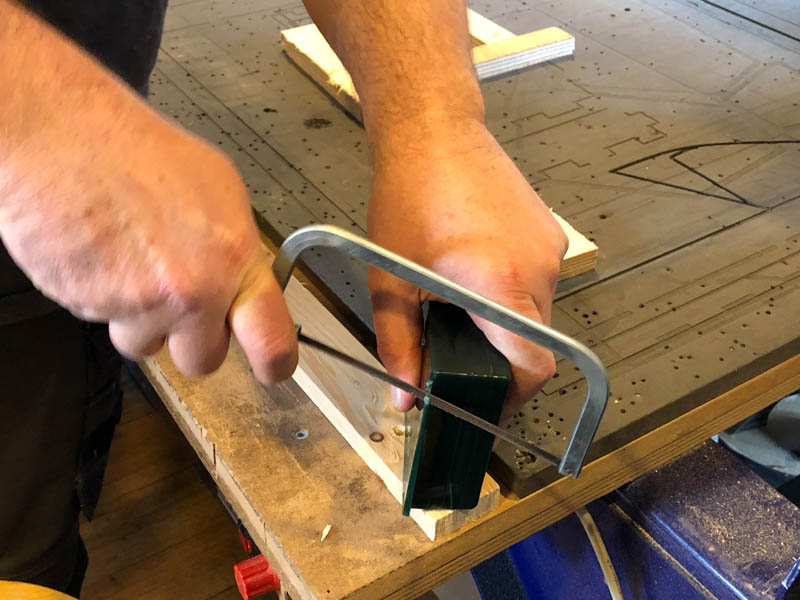
Casting the serviette ring
Following the above process, I milled the wax mold and casted a flexible mold in it. Then, after it had dried, I casted the final product in this flexible mold.
Milling the wax mold
With the help of the instructions from above I started with creating the toolpaths in VCarve Pro. Make sure to center the model within the red frame. And level the zero plane underneath the design.
Here is the simulation of the toolpaths:
And a VCarve Pro render of how the final design should look like after milling.
Preparing the wax block, by sanding off the edges. In the end, I spent almost 30 minutes processing this block. It felt like forever! It is quite a contrast to do this all by hand while working with an advanced machine.
Next, sticking the wax block to the bed with double-sided tape and fix it firmly with wood. Excited to start with milling!
In the Shopbot software, import the file that was created in VCarve. First start with homing the machine. Then, set the origin of the wax block by activating the keypad K and navigating with the arrows. Always take a picture of this position.
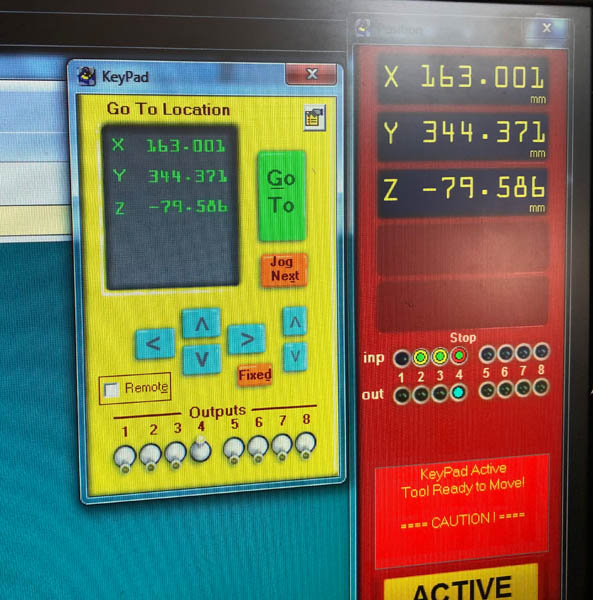
Confirm this position by zeroing the X & Y axes.
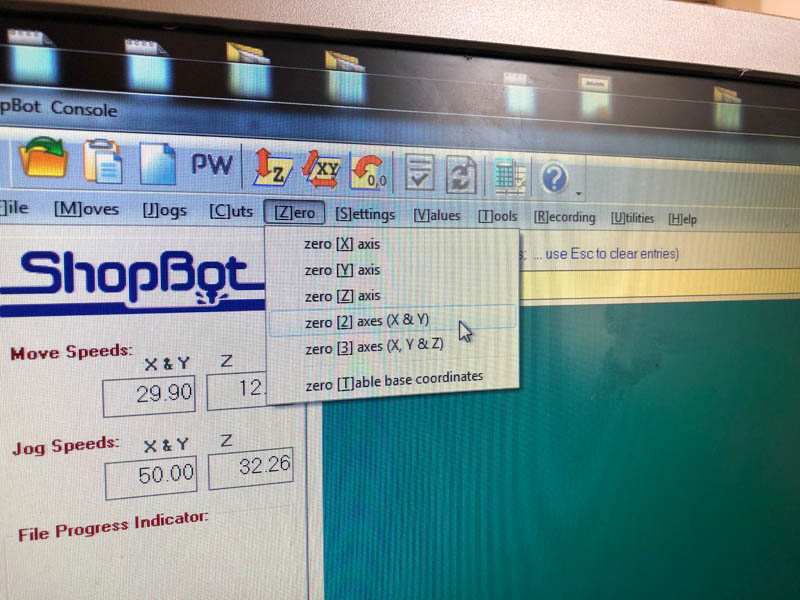
After that, the Z-axis was zeroed with the help of the metal tool attached to the Shopbot. Then the job was sent to the milling machine. Here is a short video of the milling process:
After about 1 hour, the block was ready! Make sure to collect the wax chips, they will be melted into a new block for future Fab Academy students.
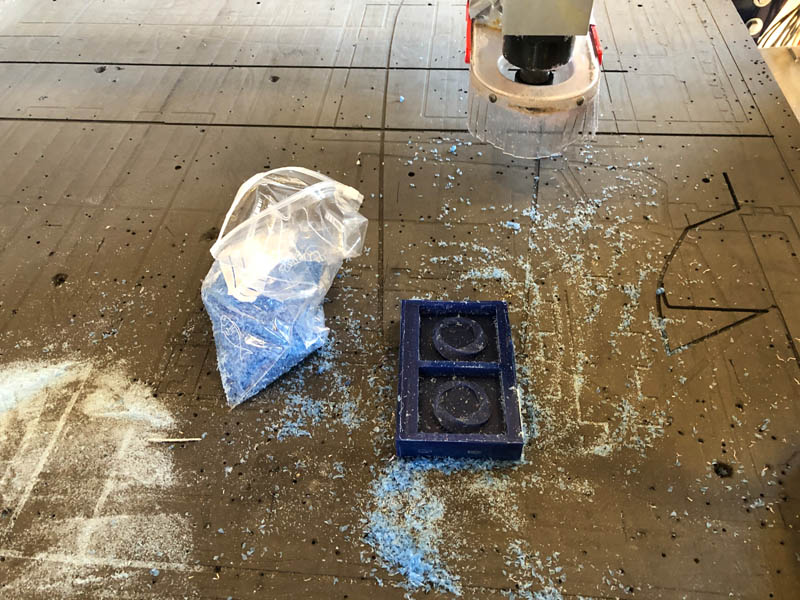
Cleaning up a bit more. This actually looks better than I expected!
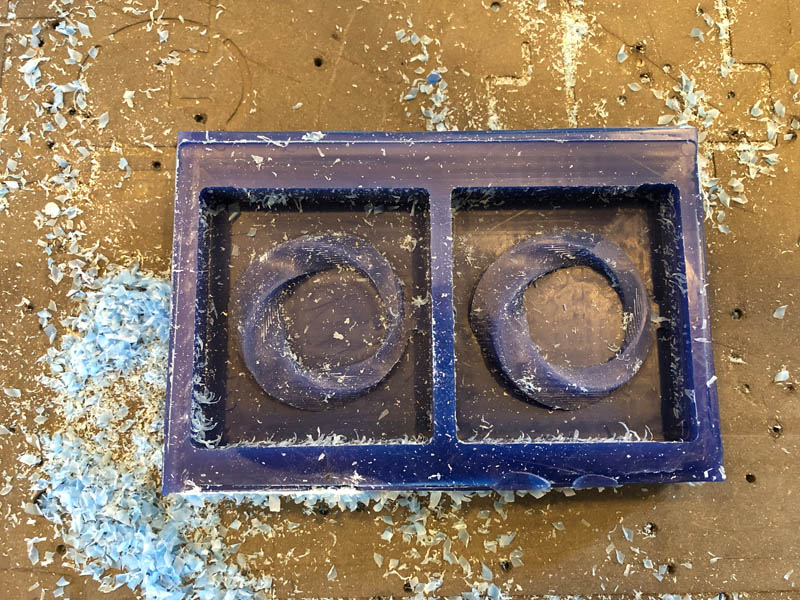
And here is an picture of the wax mold after I cleaned it. It has quite a lot of detail and the curves came out nicely.
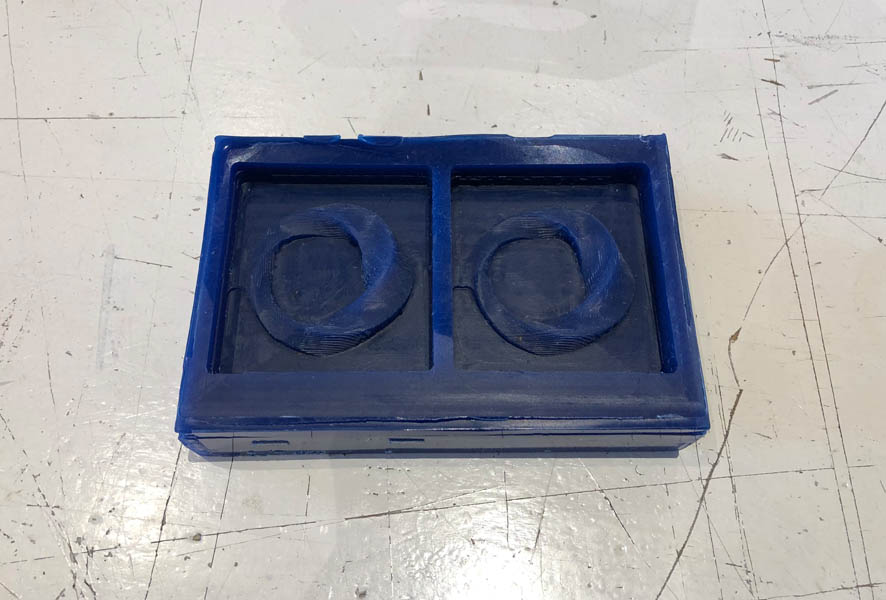
Casting the flexible mold
Now that the first mold is ready, I continued with casting the flexible mold. The material I’ll be using is Smooth-On’s OOMOO-30. Of all casting materials, this one didn’t seem to smell too strongly with proper ventilation. Just as in the group assignment, I started with measuring the amount of material needed.
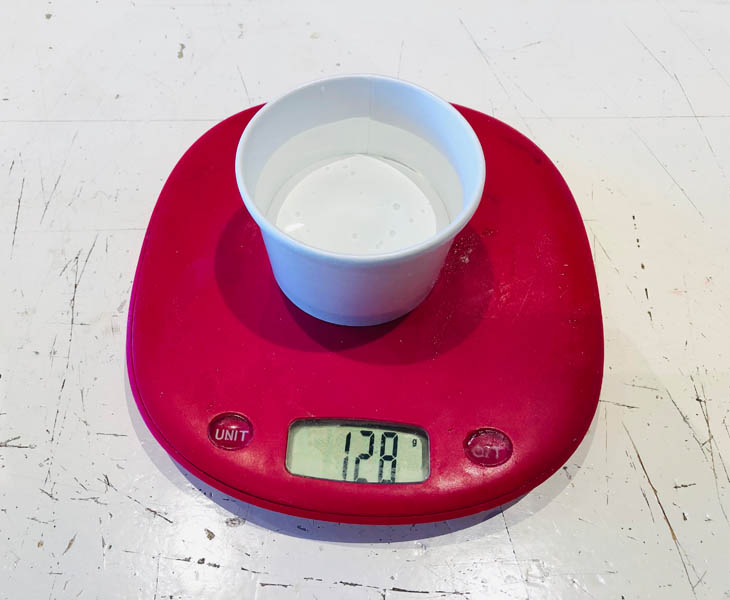
I spilled water when I transferred it from the wax mold to the cup, and added a little extra water to make sure there is enough. The mixing ratio of OOMOO’s Part A to Part B is 100:130 by weight. The total amount of water is 128 grams. So I’ll need approximately 50 grams of part A and 65 grams of part B. Mixing the two materials thoroughly to make sure it’s all one color. OOMOO-30 has a pot life of 30 minutes, so there is no rush here.
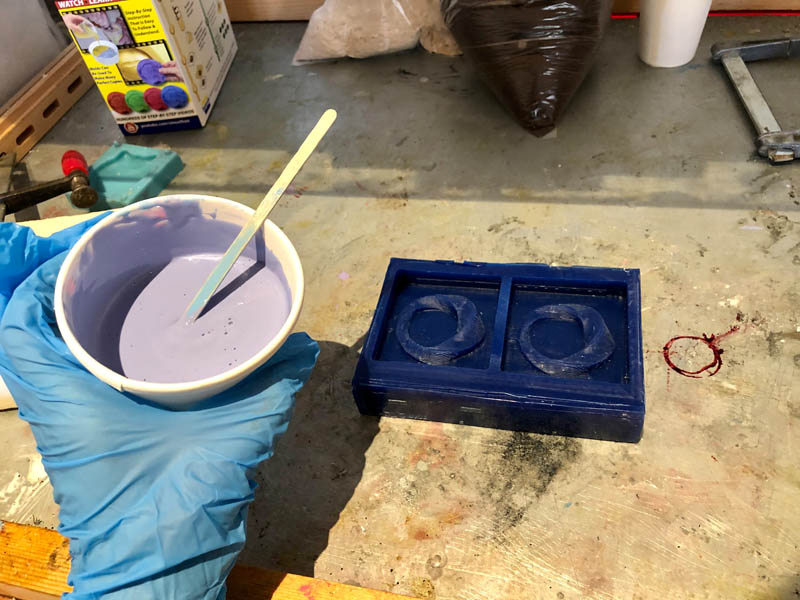
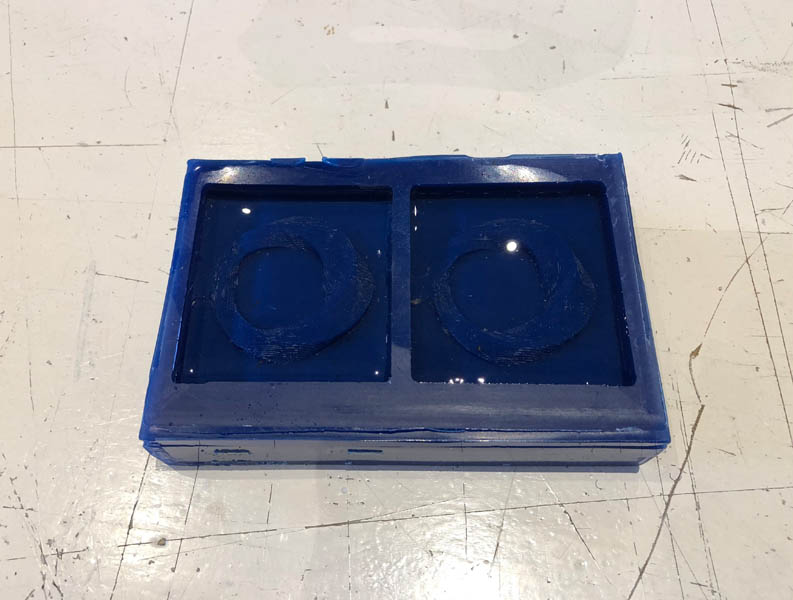
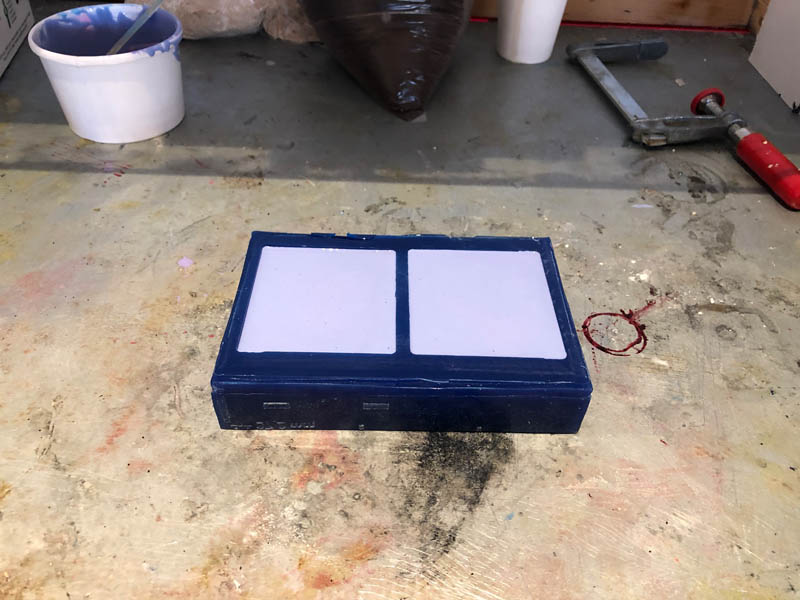
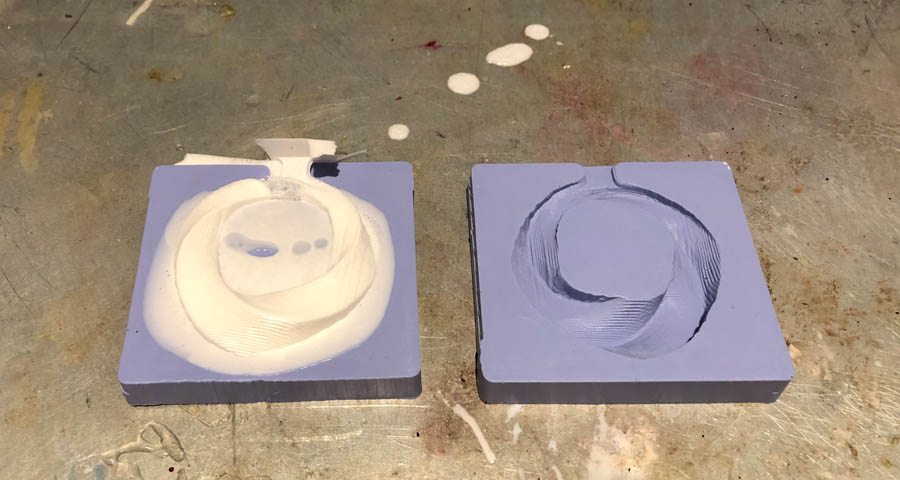
Then slowly pouring it into the mold, starting with the lowest part to prevent air bubbles. Now let’s wait six hours for the mold to dry. In the right picture the mold was carefully taken out.
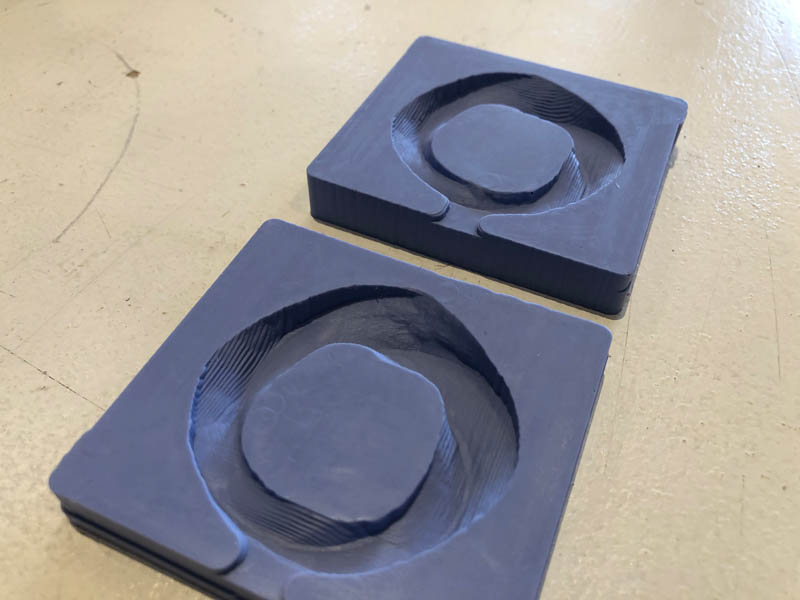
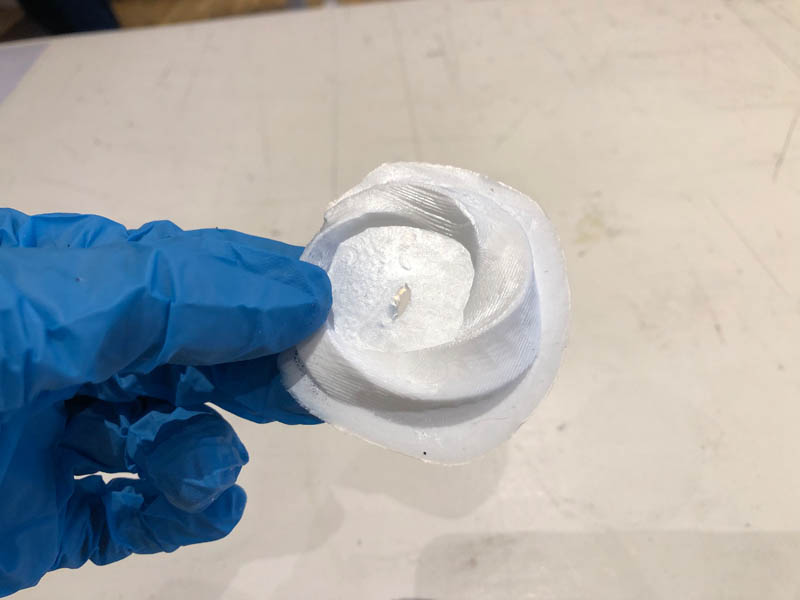
In this close-up you can see the toolpath created by the machine. I’m positively surprised by the level of detail and precision.
The final cast
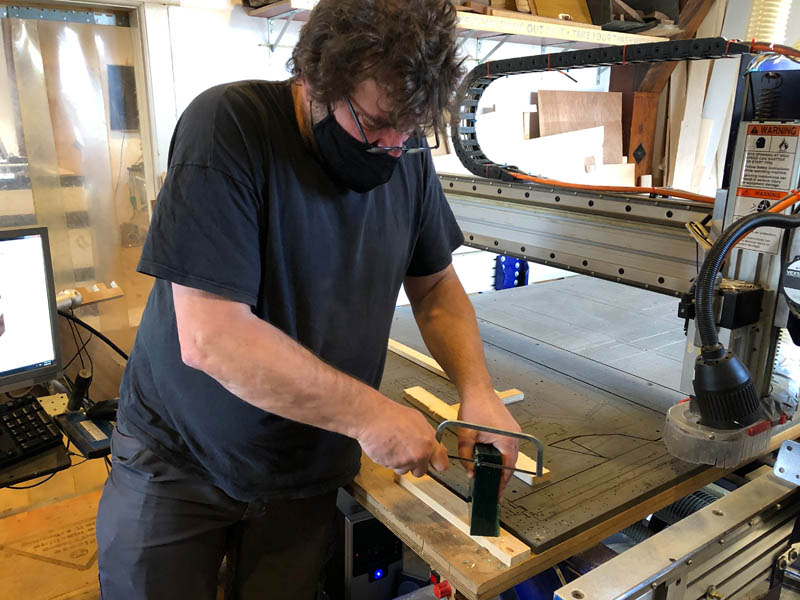
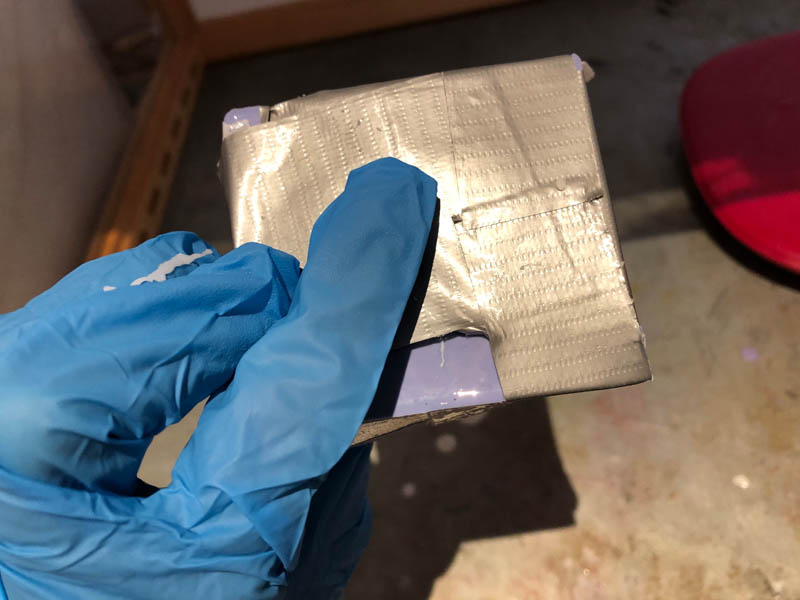
The mold is ready for the final cast. First, I spray the mold with release agent and let it dry for 30 minutes. For the final cast I’m using Smooth-Cast 305 because it is white and has a curing time of only 30-40 minutes. To keep the mold together, I use duct tape.
After about two hours, I open the mold and tadaa, here is the cast. The material flowed over a little in the center, because I didn’t fix the mold in between two pieces of wood. Next time I make sure to do this.
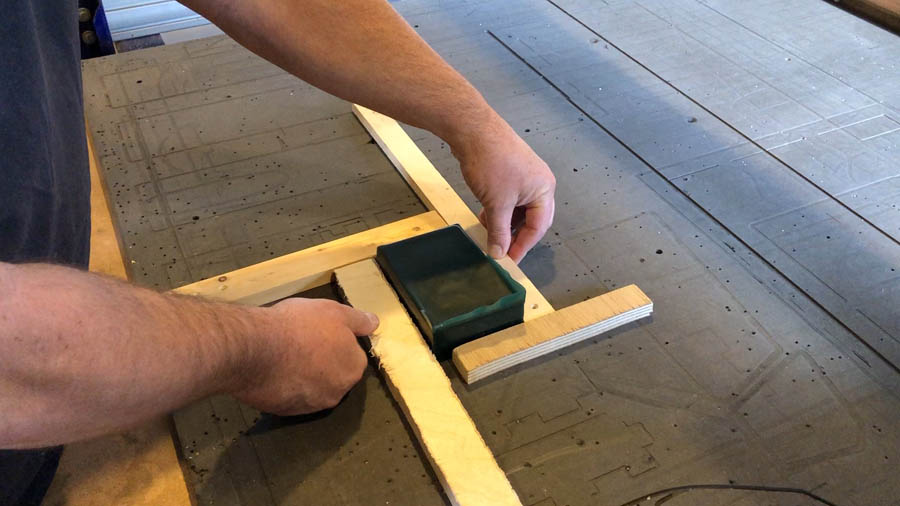
The overflown parts can easily be removed with a Stanley knife.

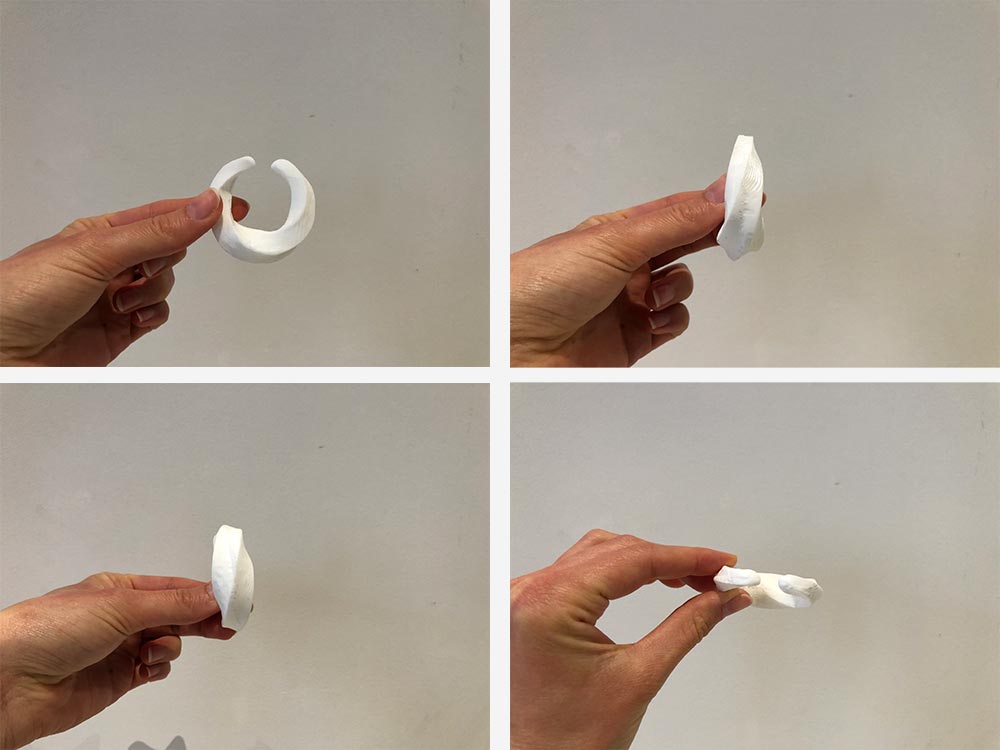
It still looks a little rough so I decided to sand the object to make sure it’s a smooth surface. Here are pictures of the ring before sanding.
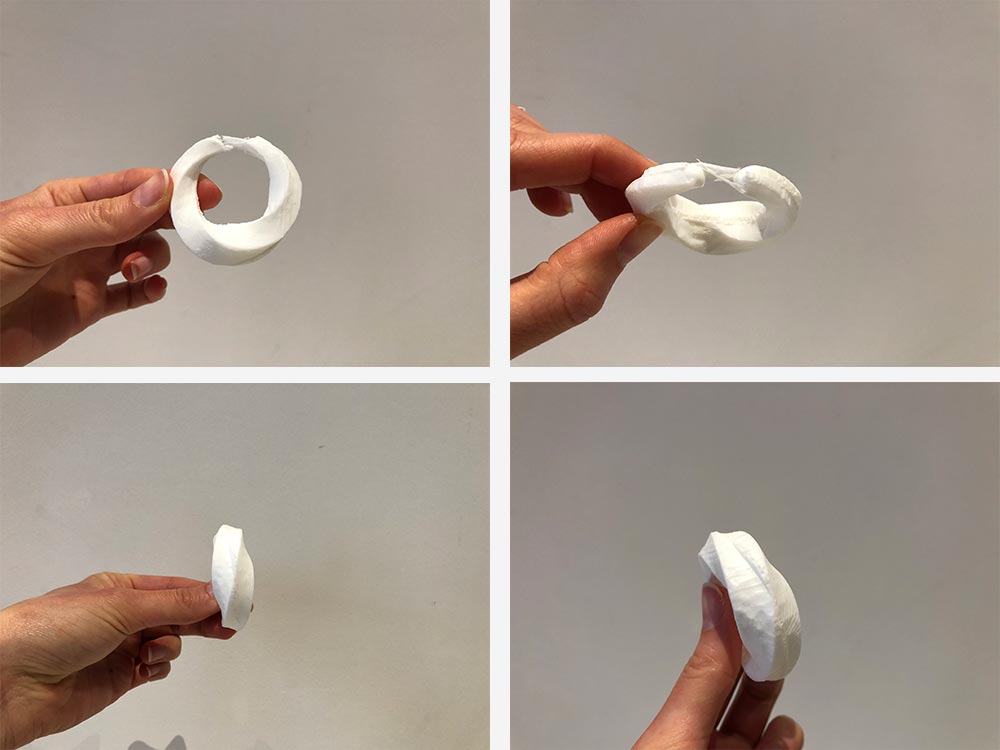
And this is after sanding for 15 minutes. The top part was too weak and I decided to sand it off. Because I didn’t make an air vent in the mold, bubbles kept the upper part open. This can be prevented by adding a second hole in the mold.
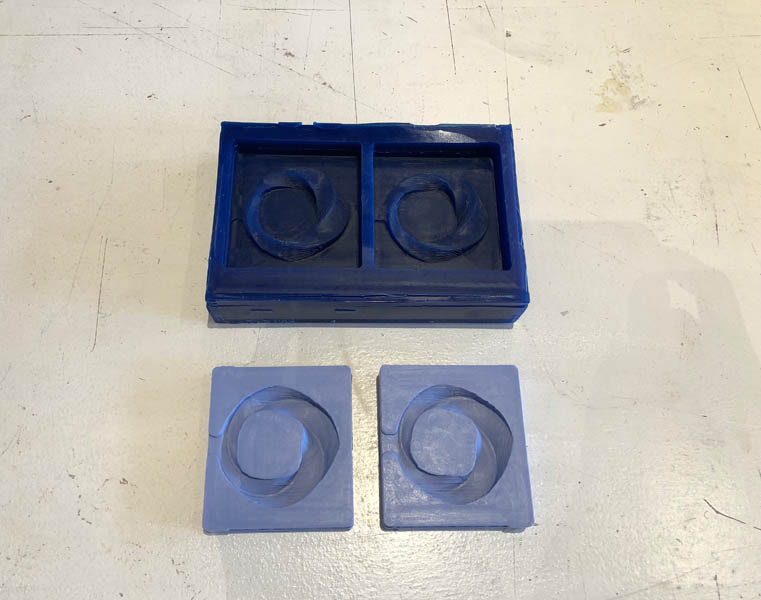
This is a hero shot of the three molds/casts:
And a close-up of the ring. It came out better than I expected!
What I could have done better: design the two sides of the mold in a way that you can press one side exactly into the other. We were told not to make reference notches so I left this out altogether and forgot about it. Learning point for next time!
Some notes on casting with biomaterials
During the regional meeting, Ferdi mentioned a glycerine + gelatin recipe for creating a flexible mold. You mix it, heat it in microwave and it’s ready for casting. The only problem is that it’s heat sensitive. So this material is not suitable if you want to cast concrete, for example. The estimated drying time of biomaterials is approximately 6 hours.
References for working with biomaterials:
- Recipe book Texture by Martin Lersch.
- Materiom database
- Research paper in Science: Composites from renewable and sustainable resources: Challenges and innovations
- Fabricademy video on Biofabricating Materials
- Lorena Delgado
Downloads
Explore more like this

Week 17 Invention, Intellectual Property and Business Models
After acing through the technical assignments of Fab Academy, the last two weeks have a lighter load so we can focus on the final project. But this does not mean...
Week 16 Applications and Implications
Propose a final project masterpiece that integrates the range of units covered, answering: