Week 05
3D Scanning and Printing
Group assignment test the design rules for your 3D printer(s)
Individual assignment design and 3D print an object (small, few cm3, limited by printer time, that could not be made subtractively, 3D scan an object (and optionally print it)
Group assignment
 - Test the design rules for your 3D printer(s)
 - We (Lucia Phillip and myself tested the PRUSA MK#S)
 - google different filaments/machines
 - test different filaments
3D printing at the Waag
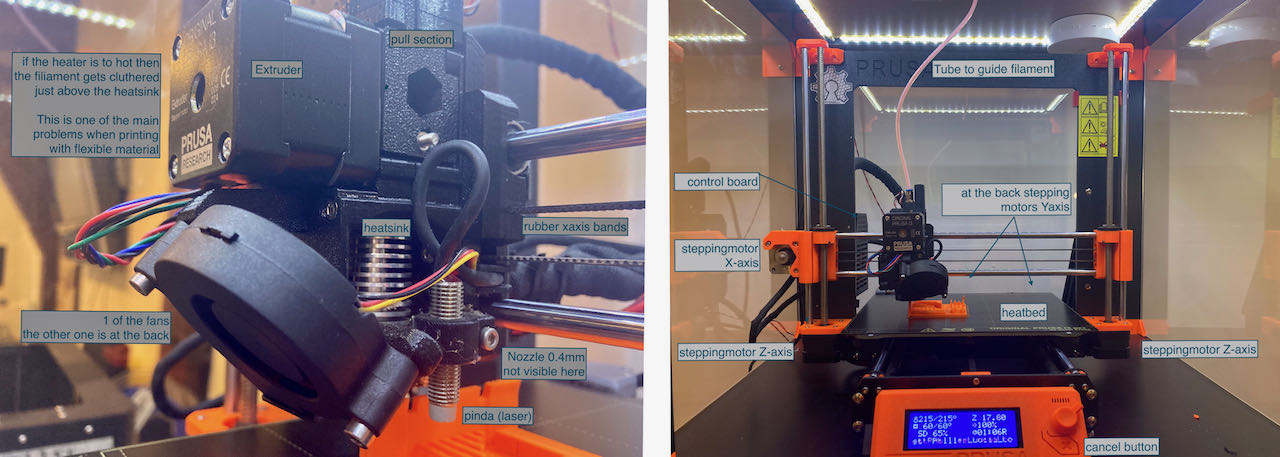
First a little introducion to the Prusa, our machine for today.
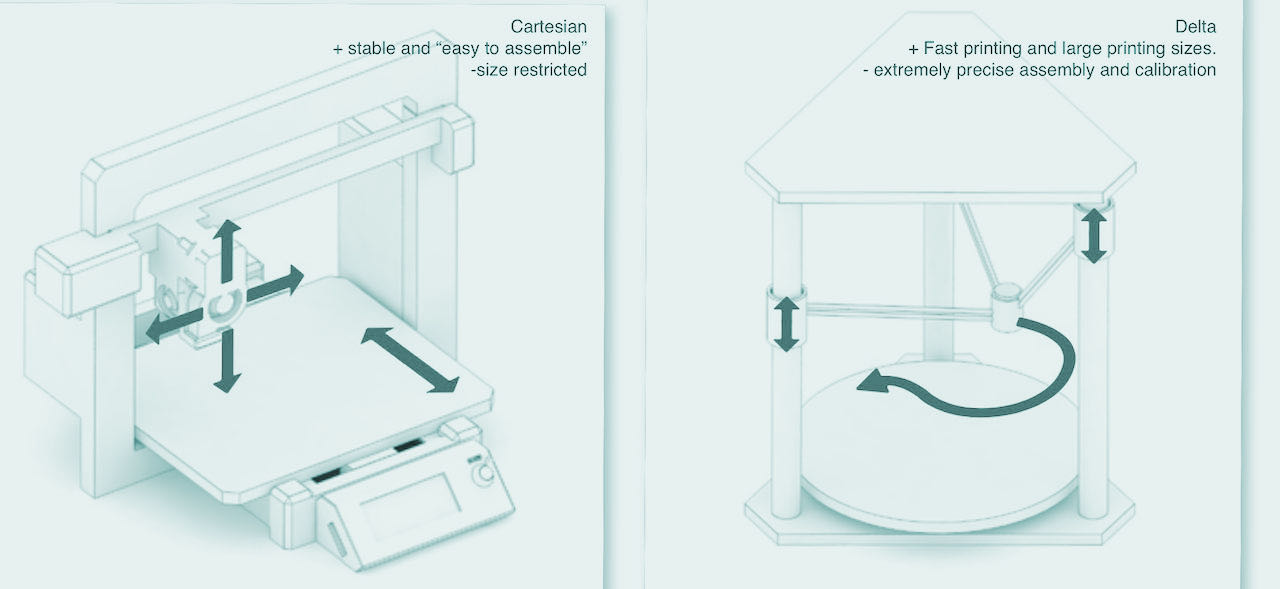
PRUSA MK3S+ is a Cartesian 3D printer which has this basic build up, next to it a Delta machine which i have never seen yet and apparently there are also polar printers but if i understand correctly not many people use these.
Some info i found to understand the basics a bit better:
Extruder or a print head, is designed to lay down printed layers by extruding melted plastic. It goes through a heat sink, which is a part designed to dissipate heat coming from the heat break and minimize the transition area between solid and melted filament. The heat sink usually has a fan mounted on the side to increase the cooling efficiency. The heat break is essentially a piece of tube with an outer thread, which is narrower on one end to minimize the diameter as much as possible, so there’s less heat rising up towards the area, where the filament should remain solid.The heater block is made of heat conducting materials, usually aluminum, and contains a small electrical heating element along with a thermistor for measuring the temperature. The material is melted in the heater block and it is pushed further and out through the nozzle. The nozzle can have different diameters and many printers allow the users to change the nozzle to a new one with a different diameter. You can read more about nozzles with various diameters and their benefits in an article at this site
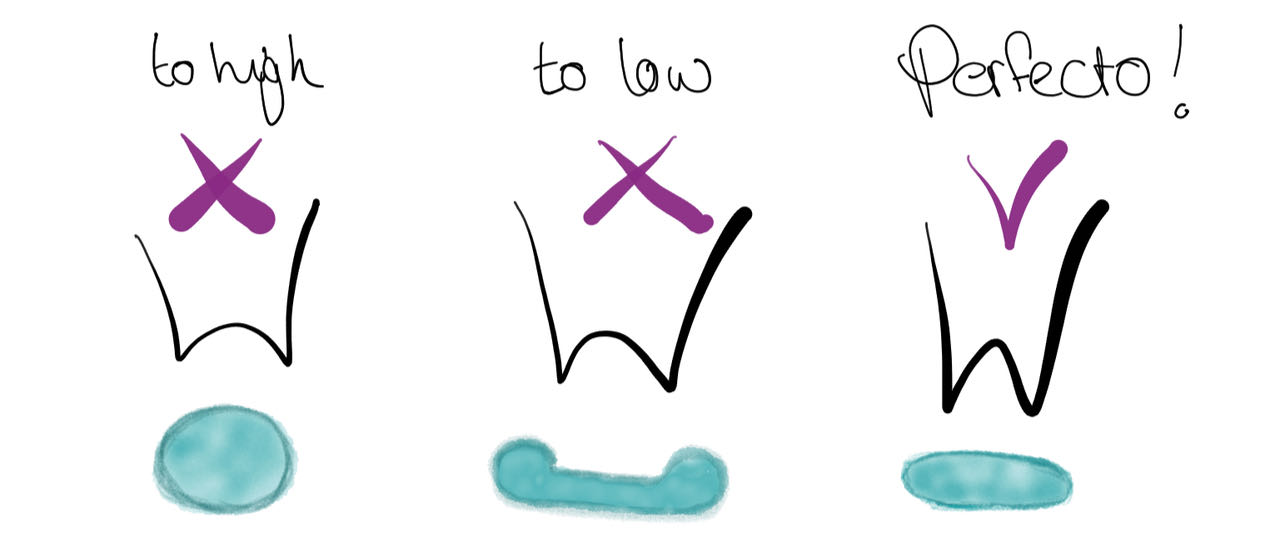
Below a drawing on how the filament should form.
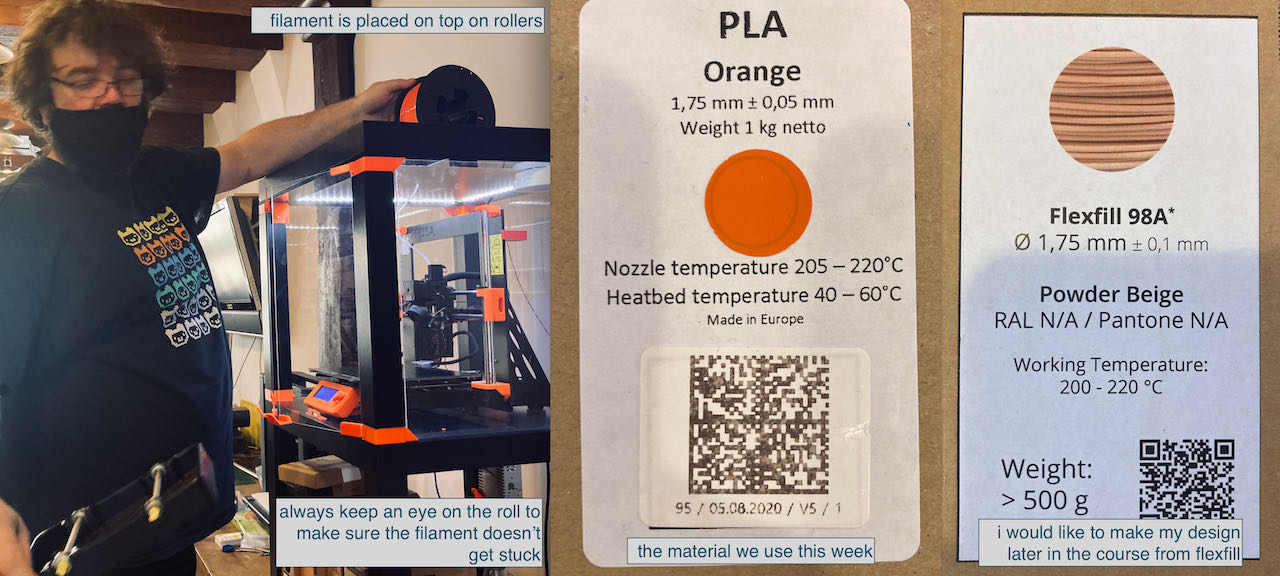
Above you see Henk placing the filament on top of the rolls of the machine, before you enter the filament in the machine make sure the roll is not tangled and cut the filament at 45º before you insert it into the machine. Push it in till the pulling section and then go on the machine to the menu to insert the filament, this should pull the filament in. Once this is done it’s time to calibrate the machine (if it’s been moved) This is found under calibration we performed the wizard but there are more options to choose from.
For this week we use PLA which is easier to break then other filaments but it’s the most understandable material to start with, with flexibel or material with other ingredient in there (like carbon) its harder to understand what is triggering what. So we start with the basic material to understand how the machine works before we go wild.
creating the STL file
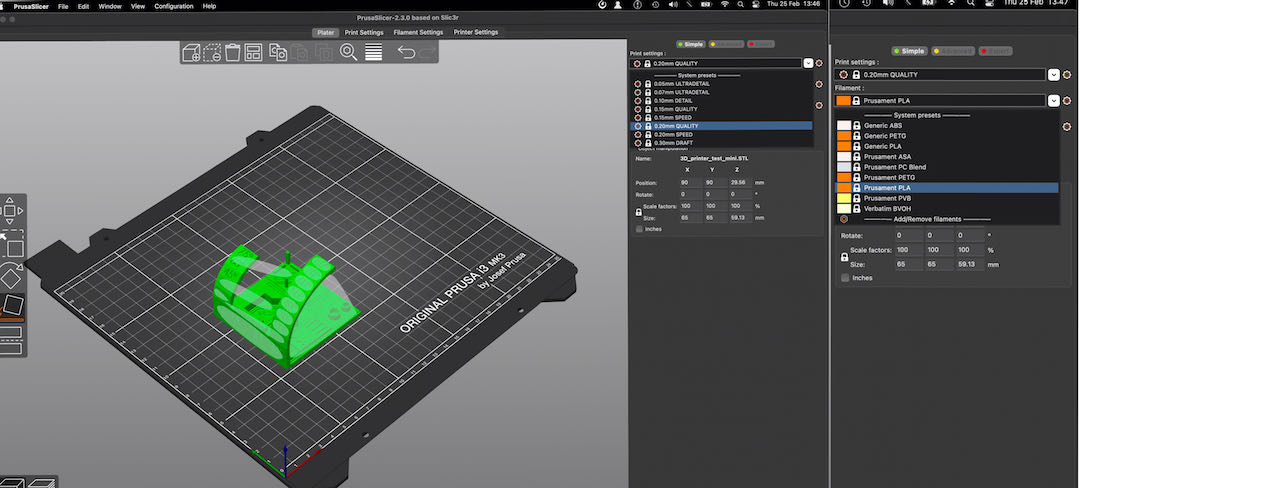
The files we use is STL, for testing purposes we now use the file they made last year which you can find here. The file you import into the slicing software, which for the PRUSA is Prusaslicer, that is easily found on this website
First we imported the file and then placed it on the bed.
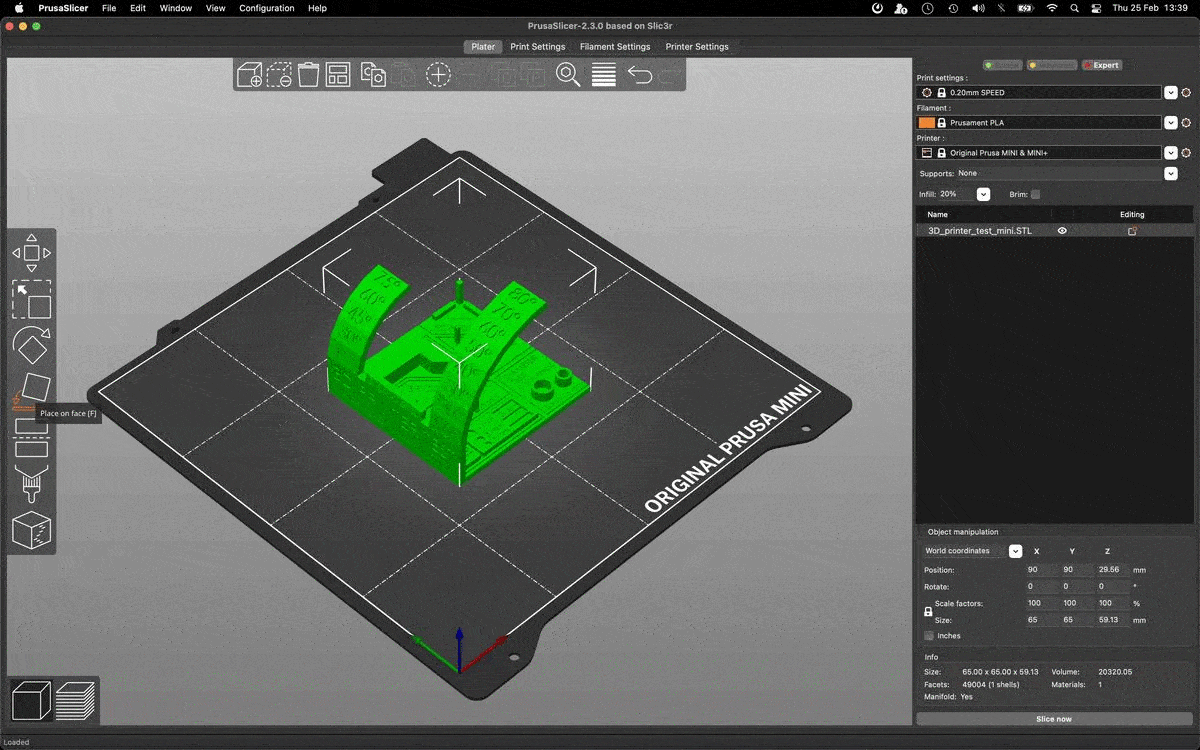
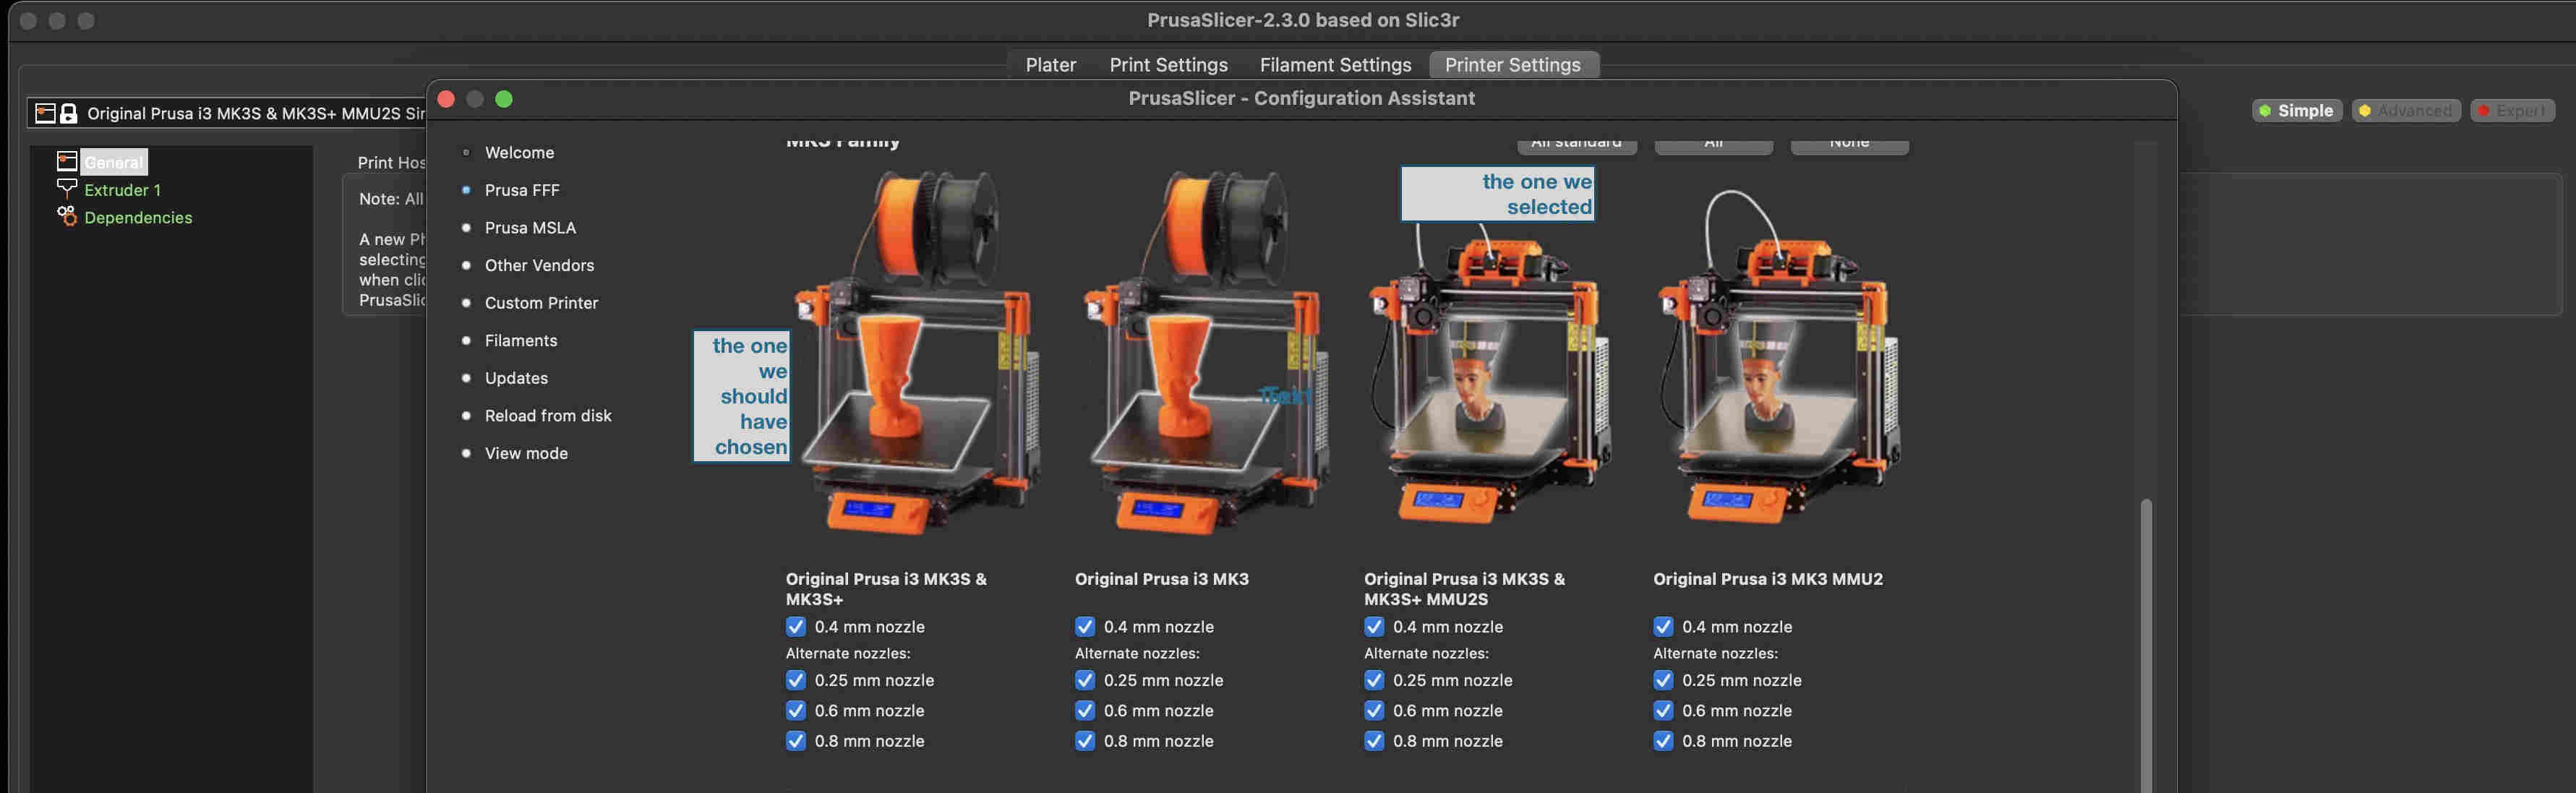
Then we decided to check if we have the right printer, it gaves us a update software inbetween which we ignored to avoid having to wait for it. We should have checked a bit better because we actually choose the wrong one..
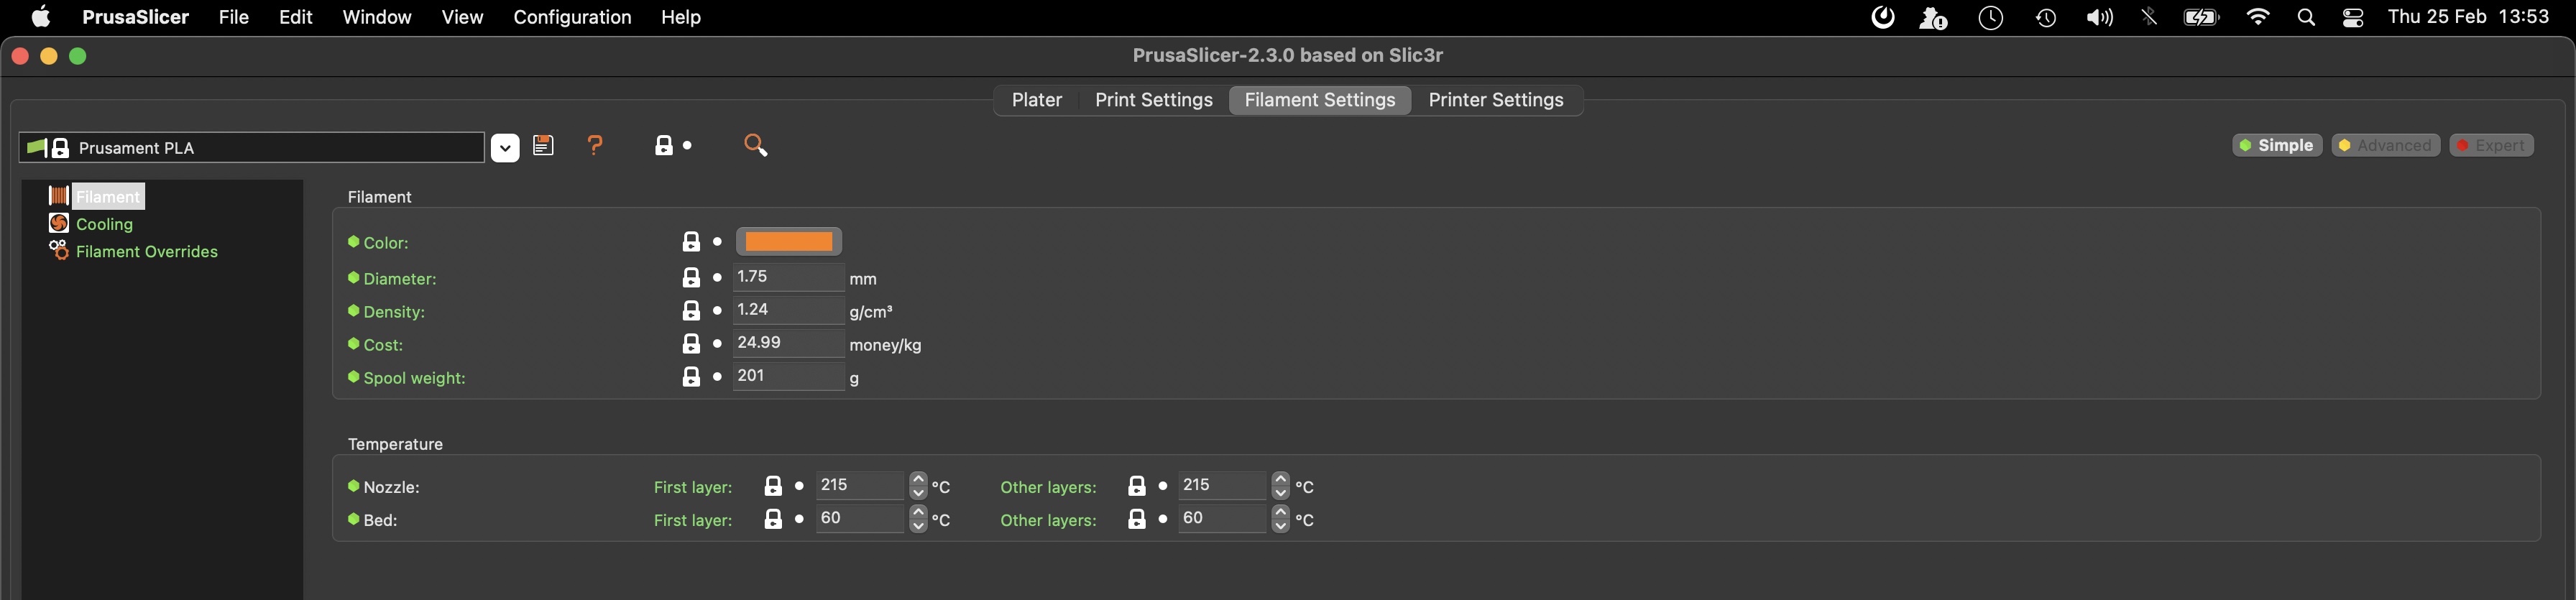
In the software we still had to check a couple of things, like the PLA and the nozzle.
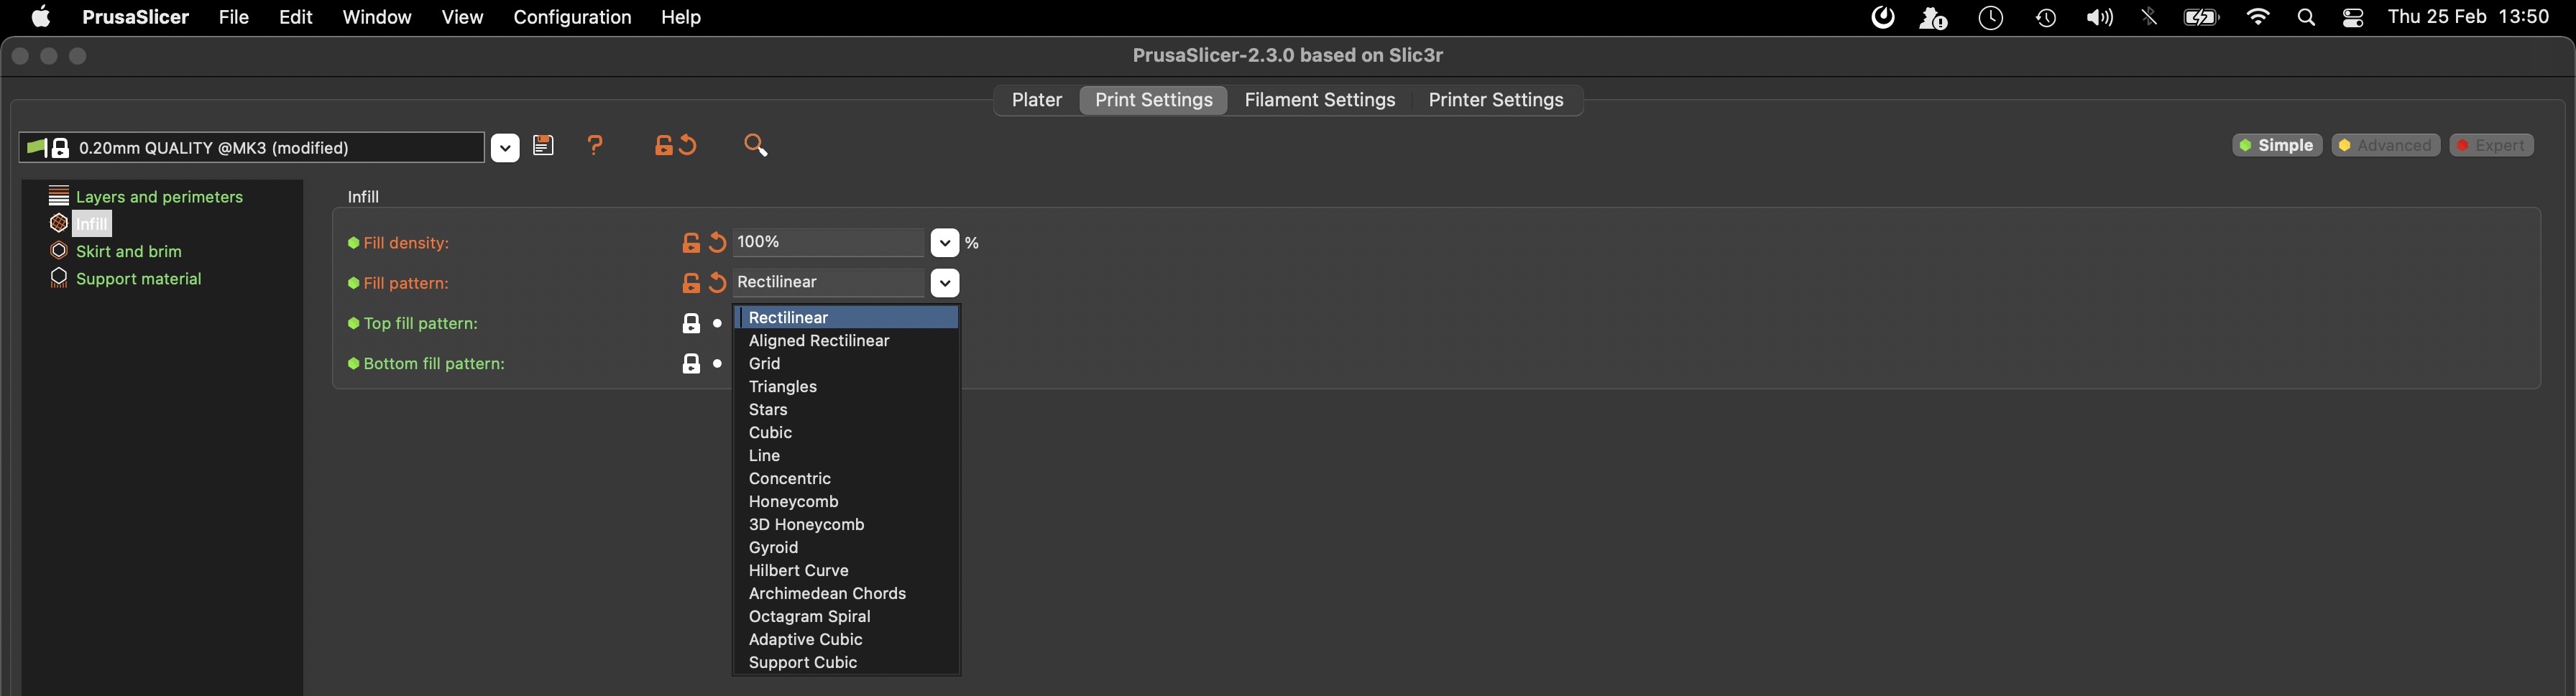
When we tried to make the inside hollow by putting the inFill to a 100%, we got this message
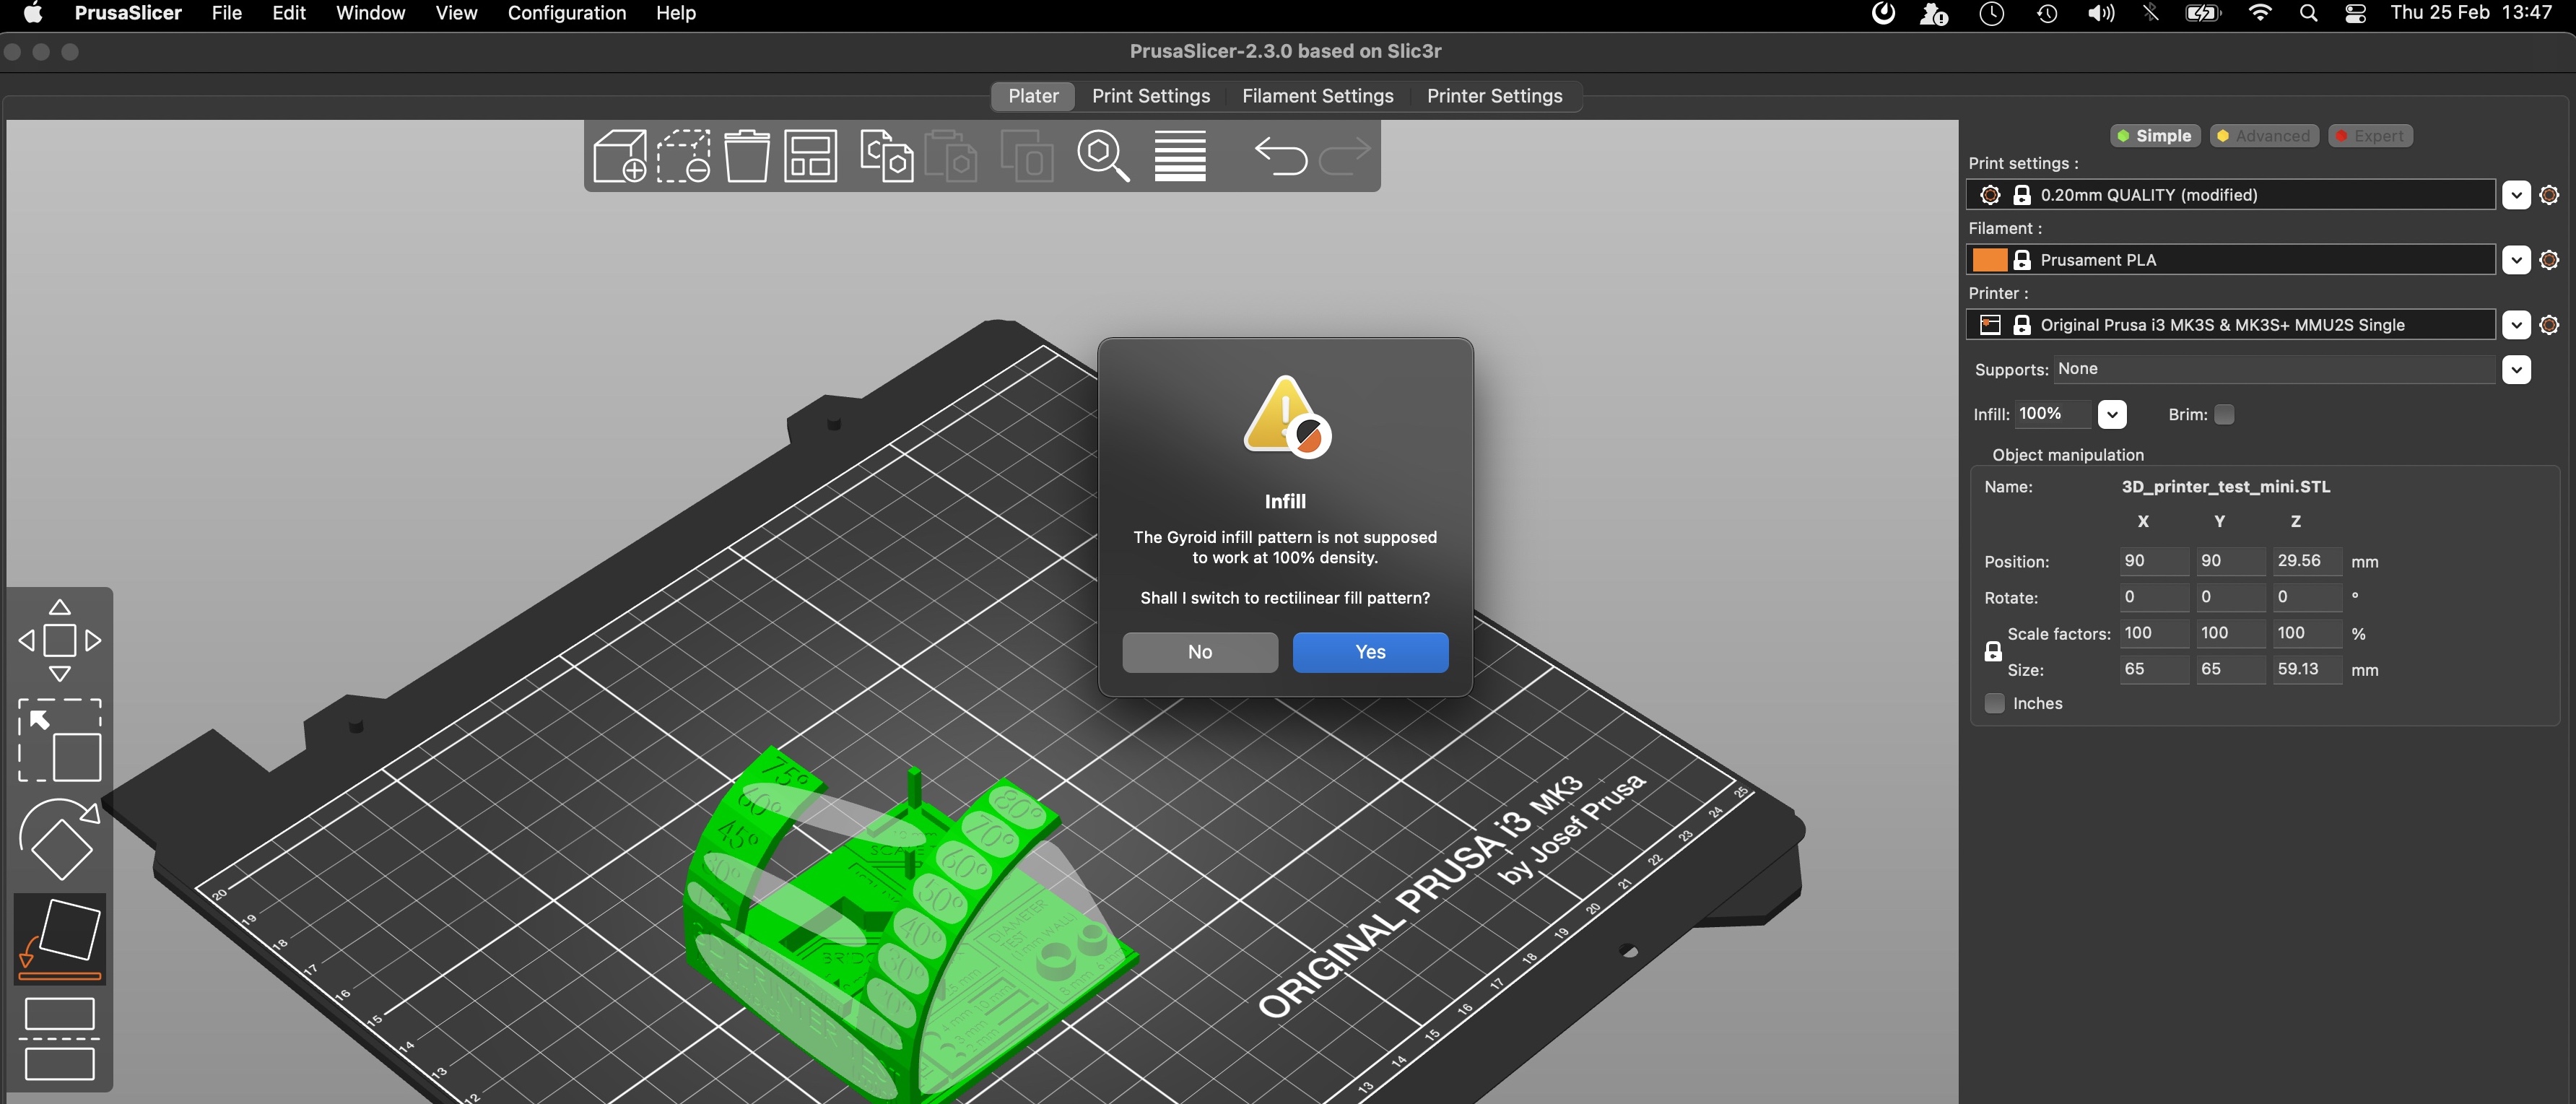
We have read in the documentation of the group from 2020 that this also happened to them so after a bit of figuring out our alternatives we went for it.
Making sure we we really testing the machine with our test plate we uncheck the support material.

There are several ways to give your model support:1
- Raft: The raft is a base added to the bottom the object.
- Skirt: The skirt is an outline around your object that does not touch the object. It’s the first thing the printer makes. It helps to ‘prime your extruder and establish a smooth flow of filament’.
- Brim: a more extensive skirt. ‘Brims are often used to hold down the edges of your part, which can prevent warping and help with bed adhesion.
- Infill: You can add supporting material to the inside of your structure. 100% infill means the model will be completely filled with the structure.
- Supports: You can have the slicer software add supports to parts of the model that ‘float’ in the air. These supports are added during printing to add support and can be taken away after the print is finished and cooled down.
Last check for the printer
And a sneak preview at the slices, we finally exported the G-code to a SDcard. When i tried to close the software it asked me if i wanted to save the settings which i did just for future reference.
On to the Prusa, first we wanted to import the file and it gave us this message G-code sliced for a different printer type. Continue? Blessfully ignorant and convinced we choose the right printer we continued by calibrating the first layer.

We tried a couple of settings from -0.15 till -1.00 and decided -1.00 was just perfect.
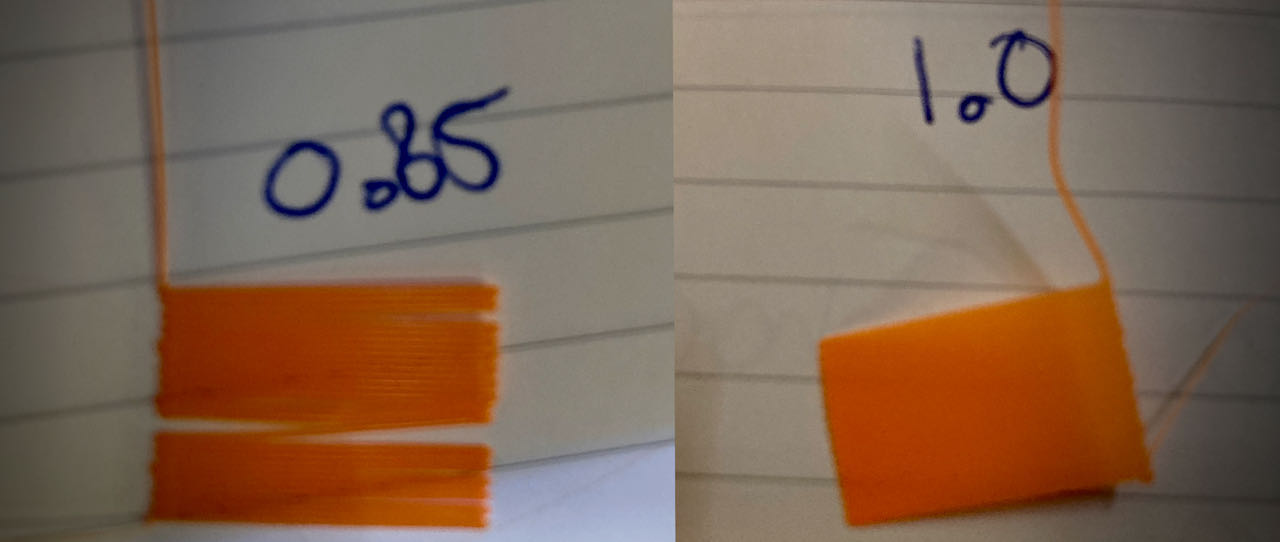
One of the corners of our object ended up going slightly up which could have several reasons
- the bed is to hot or to cold
- the bed is not clean enough
We did clean the bed with glassex but afterwards still took off the material after the 1st layer test, maybe thats the reason?
Here is our final version which just at the end of the 80º overhang seem to have a bit of a rougher not so clean surface, this effect could be because the corner slightly up.

The other half of the group made the same print out but on a different machines.
- Prusa i3 MK3S in Orange
- Ultimaker in Pink
- The right dark Purple one on the right is made by Erwin on the PRUSA
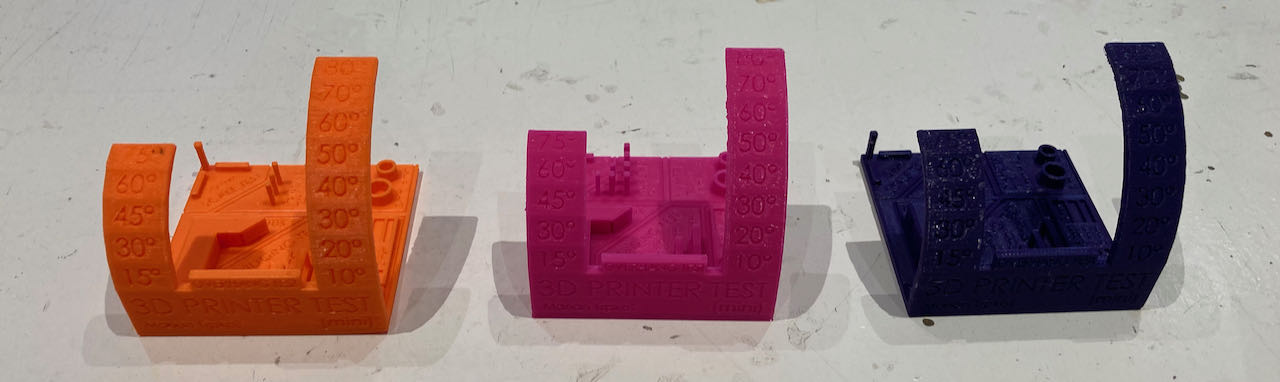
The Ultimaker made the work more shiny and it seems less precise, for instance the 2mm hole was a lot smaller also the cylinders turned out wider then on the Prusa. Another downside to the Ultimaker is that it took about 1.5 hour more to finish but that could have been the preferences that were used.
In general the both printers did quite comparable with the square design as well. However, the Ultimaker’s pink version clearly had more droopy lines below the two half arcs.
Overall, the Prusa results came out looking just a little better, although both performed more than fine.
Individual assignment
- Design and 3D print an object (small, few cm3, limited by printer time) that could not be easily made subtractively, 3D scan an object, try to prepare it for printing (and optionally print it)
- Make a small practical design that i can print in less then an hour so i can do some try outs within the time.
- look around a bit on Thingiverse and search for ideas
- understand the ways to make the machine do what you need.
Scan an object
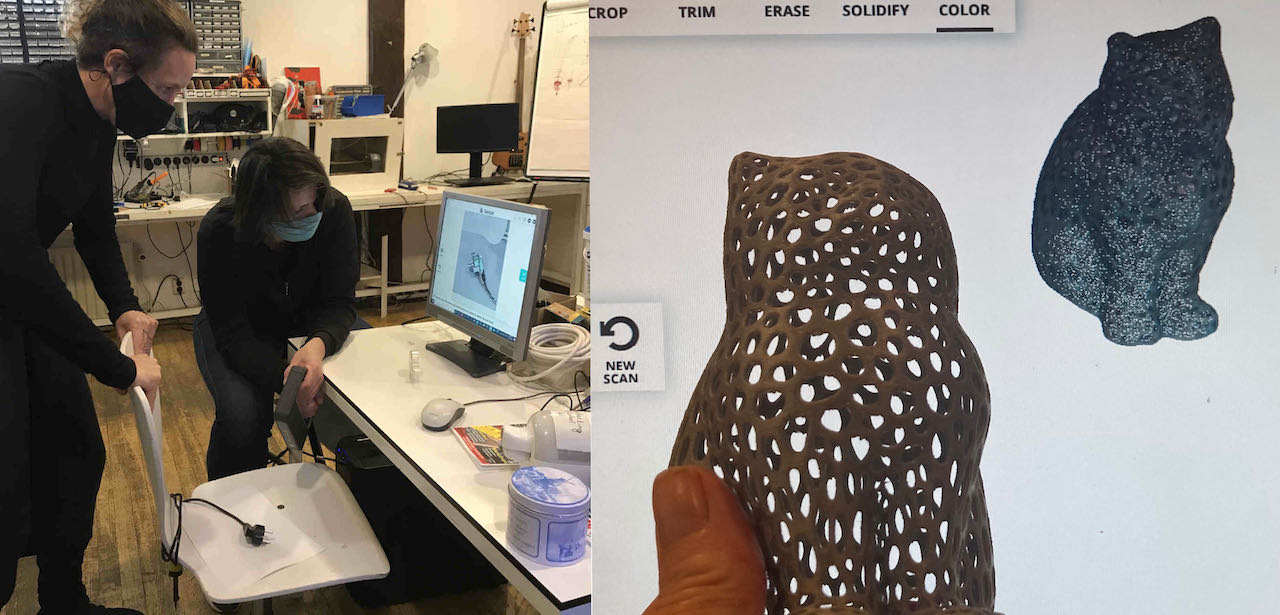
In the time at the lab i tried together with Lucia to scan this little printed cat, which worked really smooth probably because it has so many marker points for the scanner to hold on to. Before the cat we tried so many other object, all of them were really not working out. The machine didn’t seem to be able to get a grip on uniform colored round shapes, it needs features to hang on to.
The workflow was basically:
-
starting up the sense software
-
start the scan
-
find the green box around the object
-
move it gently and calm around the object (or the chair the object is on)
-
if it lost its points go back to where you come from
-
move it gently and calm around the object
-
if it lost its points go back to where you come from
-
STAY CALM!!!!
-
if you get to the point where you have a whole green object then finish the scan
-
take off all the unnecessary clutter
-
make it into a solid and save (be happy you made it)
Unfortunatly i lost the file somewhere between the Waag computer and my own, so can’t share this.
Thinking that i should be able to do this “better” with all the new technologies that we have in our pocket with our phones i gave Qlone, an iPhone app a try. It started out great, printed out a ground paper with a black and white grid on it which it used as ankerpoints and started with scanning a lightning cable, took a long time but it build a nice globe around it. But then i looked at the object… next time i will use the scanner at the Waag again.

Design & 3D printing an object
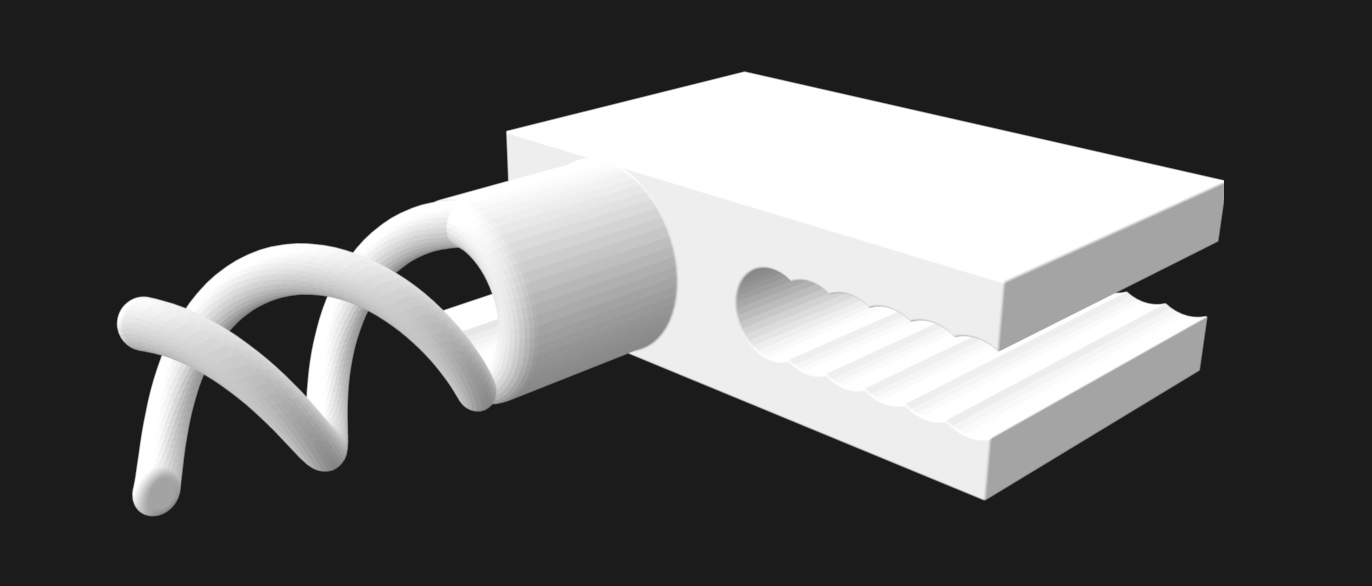
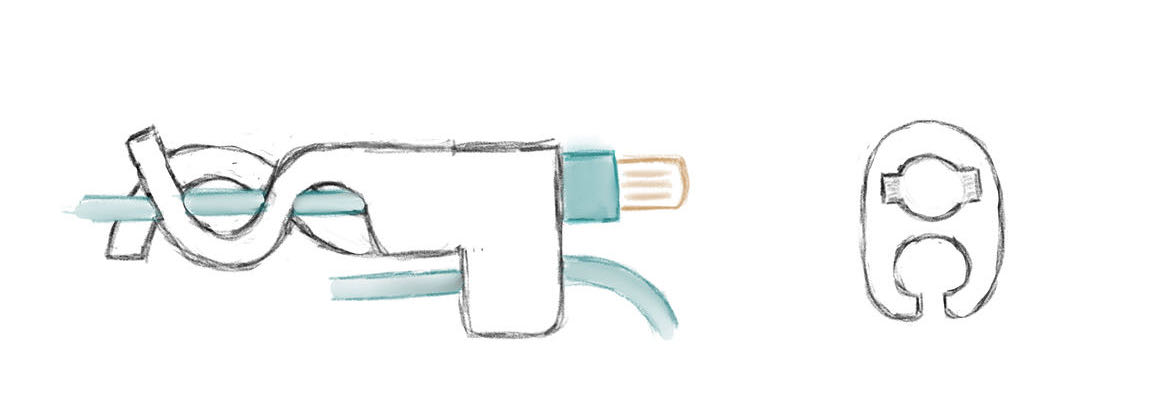
After a bit of searching i realized i want to make something that i miss in my life which is a good lightning connector saver that has a double function as a cable wrap. Its not an easy task and i will not make it work in one go i am pretty sure but i wanna start to see how far i get. Below is my first drawing, to be adjusted as i learn.
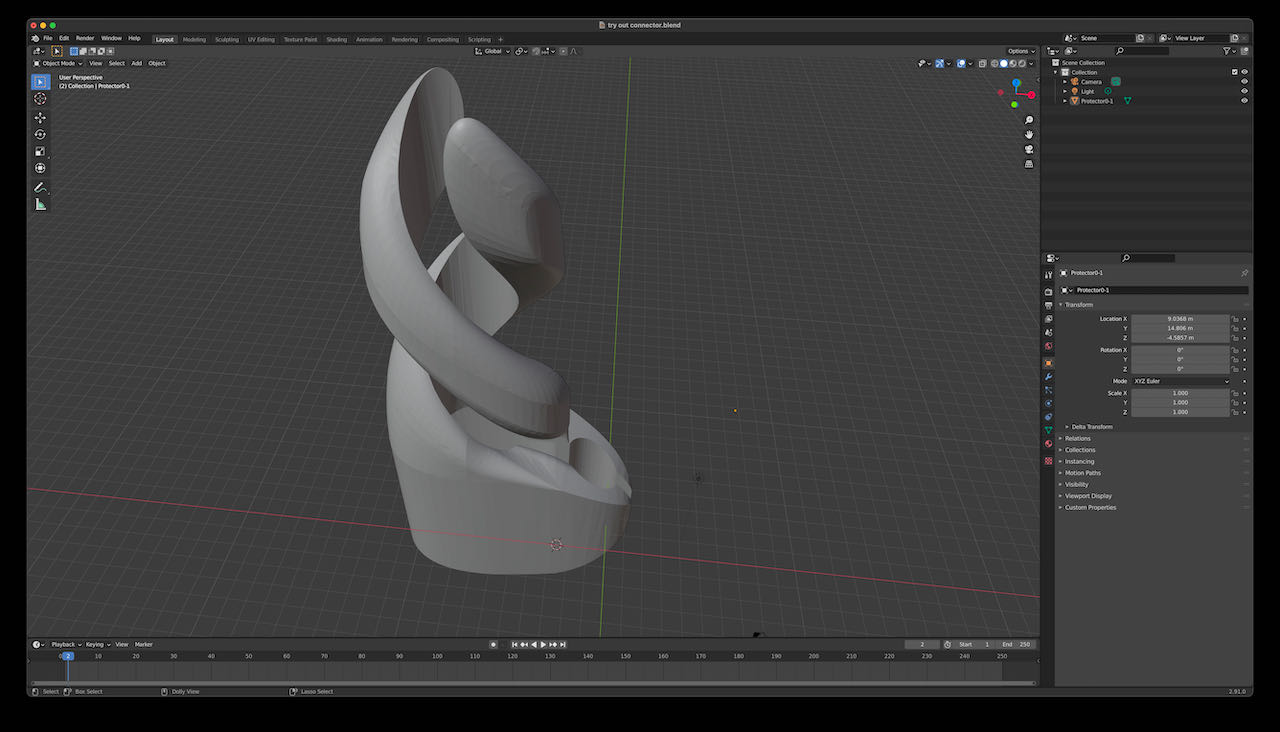
I first tried to make a drawing in Blender which worked out pretty good untill i got stuck in how to make it parametric and figured it should give fushion a try. But here is a screenshot on how far i got and a link to the file is listed below.
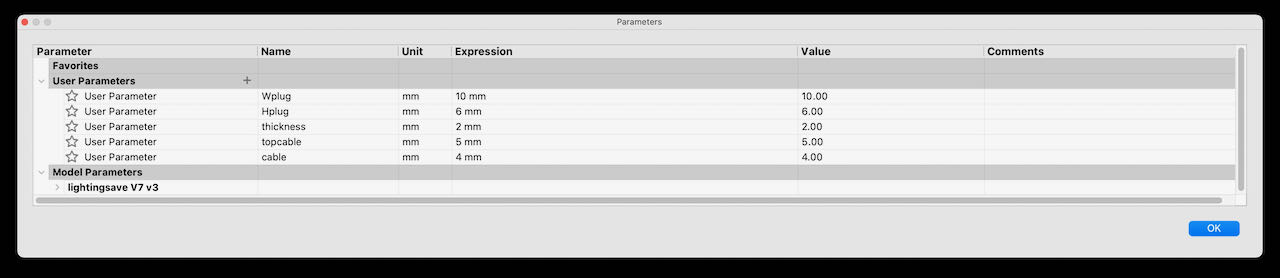
So back to Fushion, feeling a bit more comfortable to draw in Fushion although still a million things to learn, for instance i wanted to make the base of the coils thicker then the top but couldn’t make it work so figured i would put it on my todo list for the coming months.
The bonus from Fushion is the easy parametric design :)
At first i made a sketch, which of course changed as i was drawing the 3D
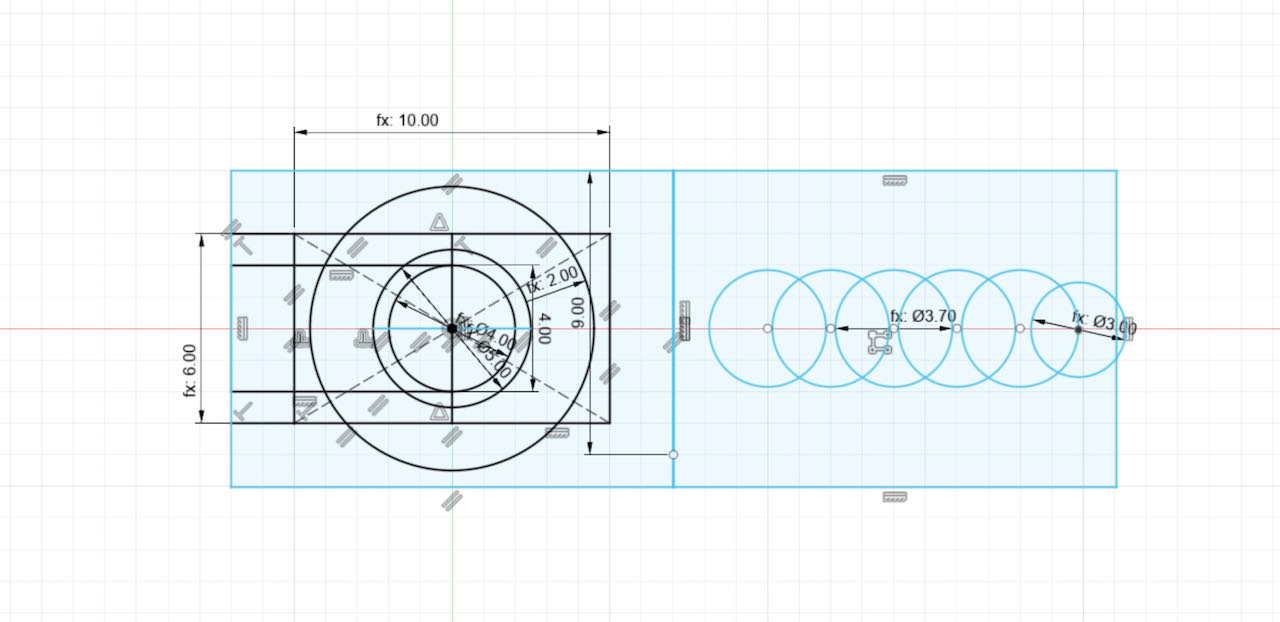
Made a section analyse to see if the inside was as i hoped it was.
Then i imported it into PRUSA and tried a bit of different settings, mainly with brim or not, and the amount construction aid. First version was with lots of support but think its gonna be more so much of a hassle to get the structure out again.

So decided to have a bit support and a brim to hopefully help, lets see what the printing will bring.
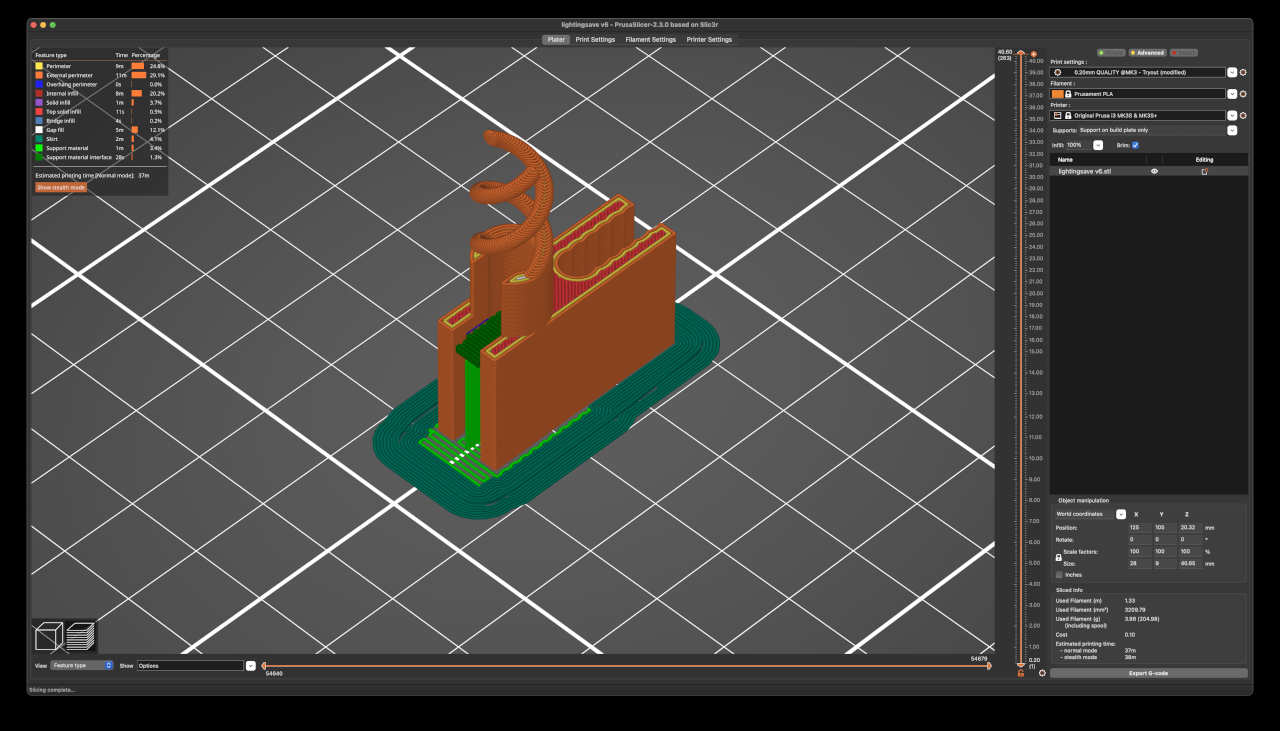
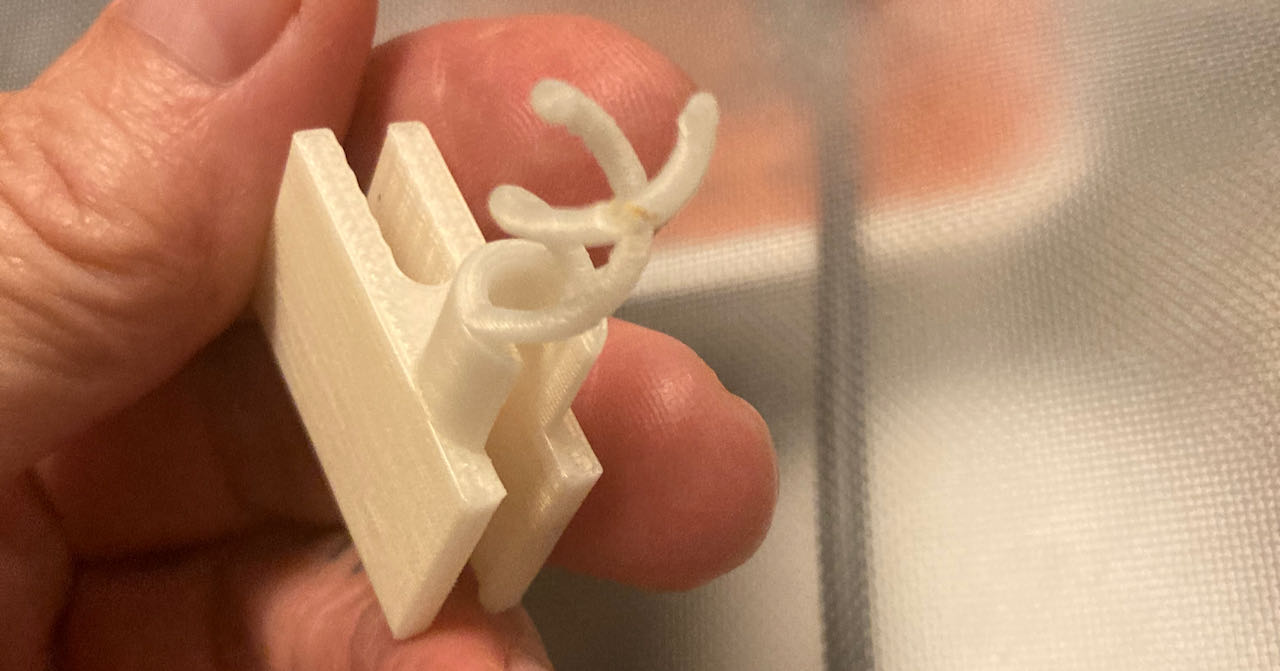
The QRlabel on the Prusa box bring you to a website with all the specifics so you can make sure you are using the right temperature, which was not needed for me since i knew the basics from the material since we also used it for the group assignment. The print turned out fine, exactly how i designed it a bit rough but that i could smooth out aa bit with the heatgun.. not to long and/or close otherwise it melts.
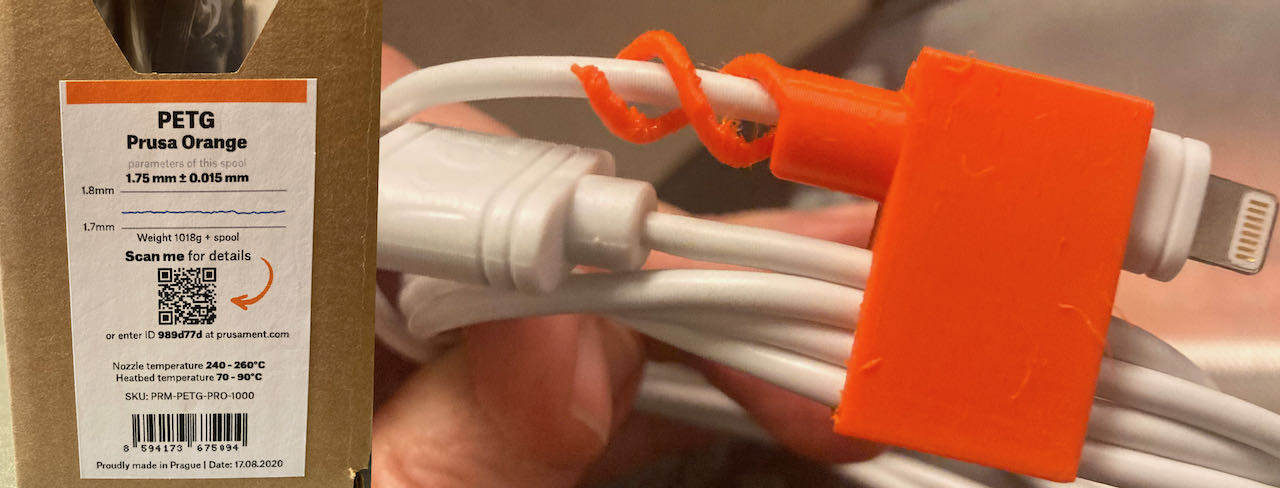
Later on i also tried to print in with the pearl white version of the PETG (same specifics just different color) which came out like this:
- Loved this week, fun to make something appear from your screen into the real world
 - Ask people that know how to do a specific thing in software if i cant find it via google (make the legs thicker at the bottom)
- build up my Ender at home so that i can continue the research on this cable connector (only found time to do this in the final weeks)
Files
Links
-
freely interpretated from Tessel her page ↩︎