1. Principles and practices and project Management
Goals of the week :
- Work through a git tutorial.
- Build your personal site describing you and your final project.
- Plan and sketch your final project.
GITLAB REPOSITORY SETUP AND CONFIGURATION
First thing to do: learn about GIT.
To understand what is GIT and why it’s important to use it I read a GIT tutorial for beginners.
The definition of GIT is “Git is a version control protocol…”.
But… what exactly is a version control protocol?
Well, to make it easier than possible a VCS will be the thing that, in the next months, will help me to not messed up my website and my mental sanity.
But for those of you who are fond of descriptions a “VCS is a software tool, also known as source control, that helps to manage changes in software codes and keep track of them.”
This tool is especially useful if you’re working in teams because allow you to track every individual change by each contributor. Version control also helps to move faster and gives you the possibility to go back to a previuos version of your work.
One of the most popular VCS tools is GIT, free and open source, developed in 2005 by Linus Torvalds, the famous creator of the Linux.
Git isn’t a common VCS, it’s a DVCS (Distributed Version Control System). This means that, rather than have only one single place for the full version history of the software, every developer’s working copy of the code is also a repository that can contain the full history of all changes.
So, after understand what is GIT and why it’s important to use it, I’m ready to install it on my pc.
First step:
Download the latest Git for Windows installer.
During the installation I followed the next and finish prompts leaving the default options.
Second step:
I opened Git Bash and I started to personalize it with my email and user name. With this specifications, every commit I’ll create will be associeted to me. For this, I used:
git config –-global user.name “YOUR_USERNAME”
git config –-global user.email “YOUR_EMAIL”
After the configuration, I started to try different commands to see how everything work.
- pwd //print work directory, give me information about where I am,
- ls //ask to git what elements are present in a specific folder
- ls -la // give you a more detail list of the element in a specific folder
- cd // change directory, move in another folder
- mkdir “name” //allow you to create a new folder
- cd ../ // go back in the previous level
- cd .. // go at the beginning
- touch namefile.exe // give you the possibility to create a new file
I also learned how to create a repository, a virtual storage of the project that allows you to save versions of your code, which you can access when needed.
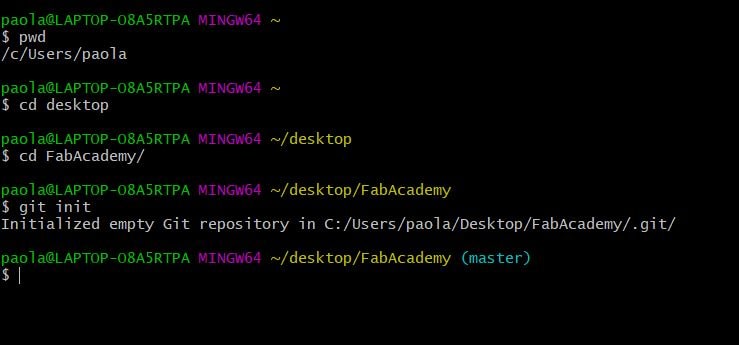
I also tried to use the git init command, a one-time command for the initial setup of a new repository. Executing this command will create a new .git subdirectory in your current working directory. This will also create a new master branch.
One of the GIT’s benefits is the security aspect. If you are using a remote repository instead of a local one (as in my case), it’s important to create a SSH key with GitLab. GitLab supports secure communication between Git and its servers using SSH keys. The key also offer the ability to pull and push without the necessity to type username and password everytime.
Third step:
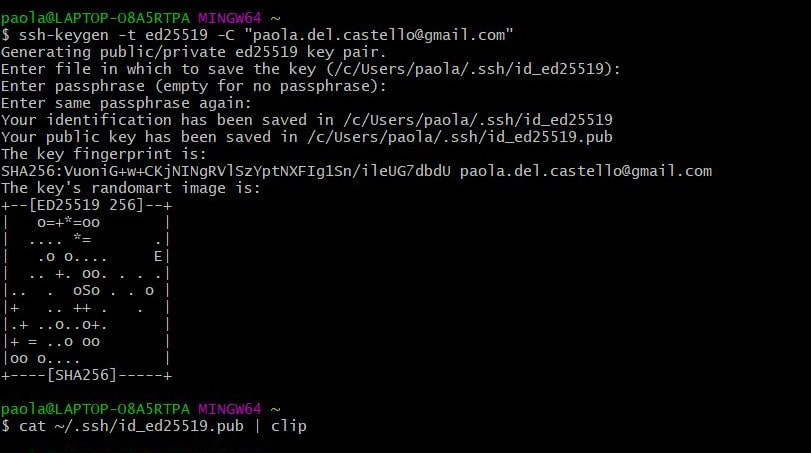
To set up the key I used the next two commands:
- ssh-keygen -t rsa -C “$YOUR_EMAIL” //create the key
- clip < ~/.ssh/id_rsa.pub //copy the key to your clipboard
At the end of this procedure I went on GitLab –> user settings –> SSH keys. I pasted and added the key.
Fourth (and last) step:
Clone the remote repository in the local one.
The main idea behind this is that the developers make changes in their private workplace and after commit, these changes become a part of the repository.
With the Clone command you’re going to have a private copy of the whole repository.
It’s an easy operation: I went on my GitLab profile, I pressed the blue button “clone” and copied the SSH link. After that, I pasted that line in the bash.
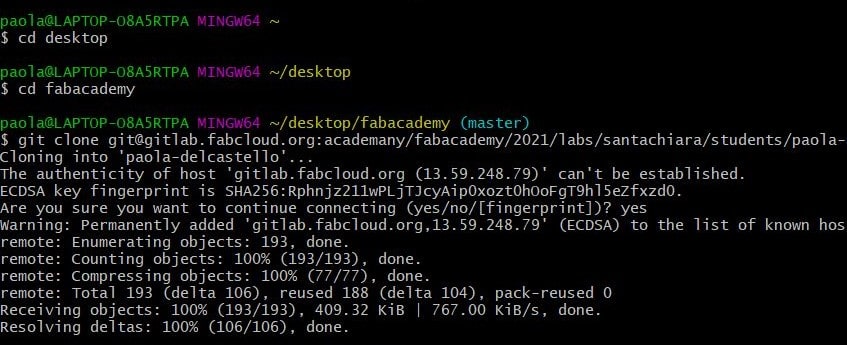
After that operation you will have the full repository in your local folder.
At this point, as well as being proud of myself for not let my brain blow because of all the new information, I realized that from now on I would use few commands to implement my website:
- git status //check the status
- git add //add all new files to the branch
- git commit -m “comment” //commit the changes
- git push //push all changes to the master repository
WORK ON THE WEBSITE
I don’t have experience with website development so I decided, at the moment, to work with Markdown and it was easier than I expected.
At the beginning, I started to make all the changes using the block notes editor. It wasn’t a good idea because of the confusion in the visualization. So I decided to download another text editor: Atom.
I read few tutorials to understand markdown language:
- John Gruber’s Markdown documentation –> The original guide written by the creator of Markdown
- Markdown Tutorial –> An open source website that allows you to try Markdown in your web browser.
After that I started to change on Atom some parts of my website and with Git bash (add/commit/push) I sent everything to the remote repository.
I’m looking for changes in themes and other featurs of the website, hope I can manage. Stay tuned!
Updates - 01/02/2021
The truth is: I couldn’t manage nothing.
But even if I’m a little confused I’ll try to explain what happened: the power of the screenshoot will help me.
Well, I was really exiting about try to change everything… so exiting that I made a terrible mistake!
I edited the file mkdocs.yml in the remote repository instead of the local one.
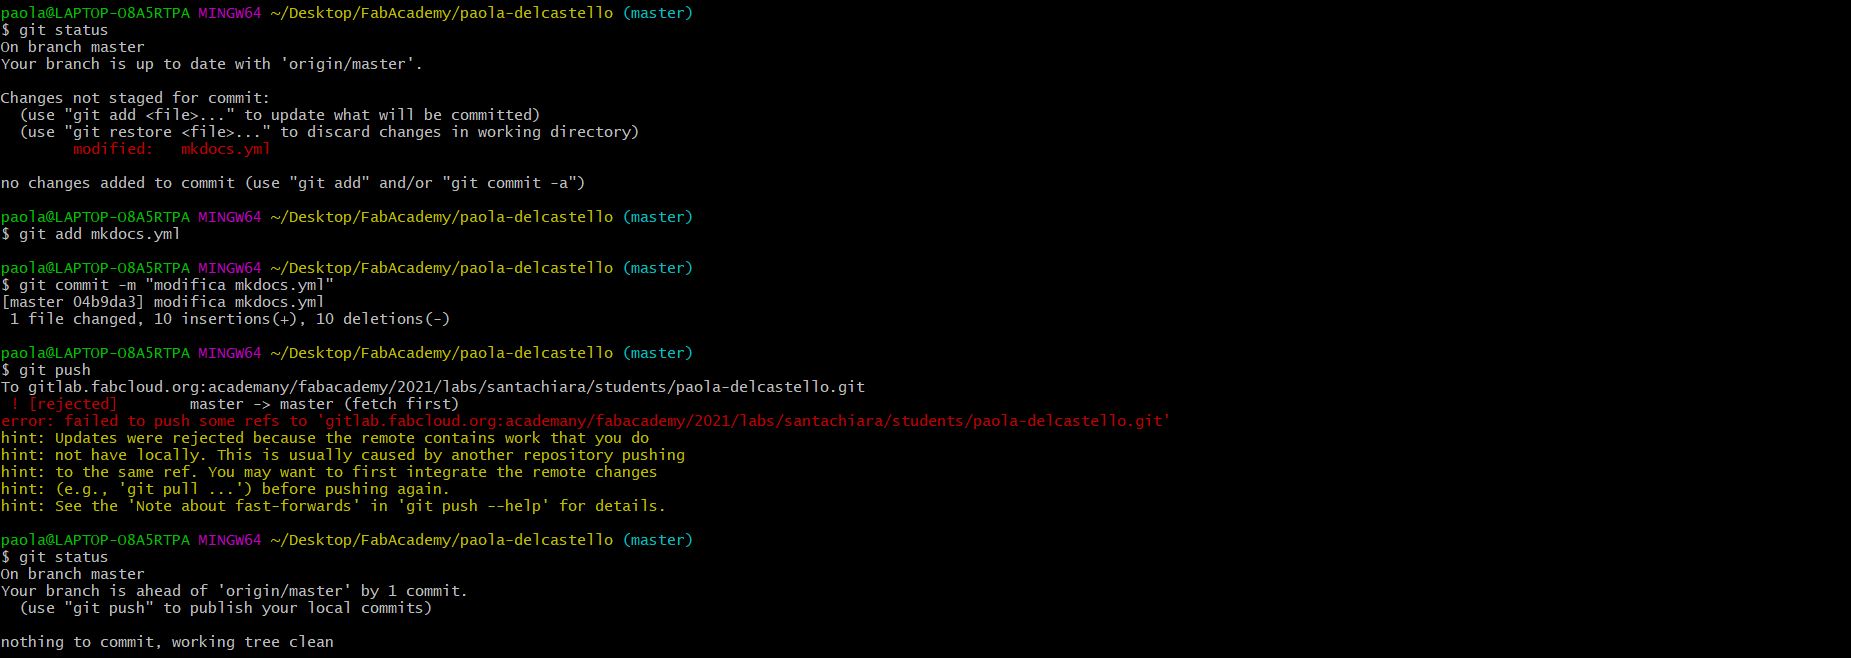
I committed two times and the result was an error message: pipeline failed.

And at this point I made the real mistake: I edited the same file mkdocs.yml but in the local repository. I committed the change, and pushed everything in the remote one. Fail message. Rejected request.

I asked for help and my FabAcademyGuardianAngel Simone, the instructor, came to rescue me from the Gitlab’s claws.
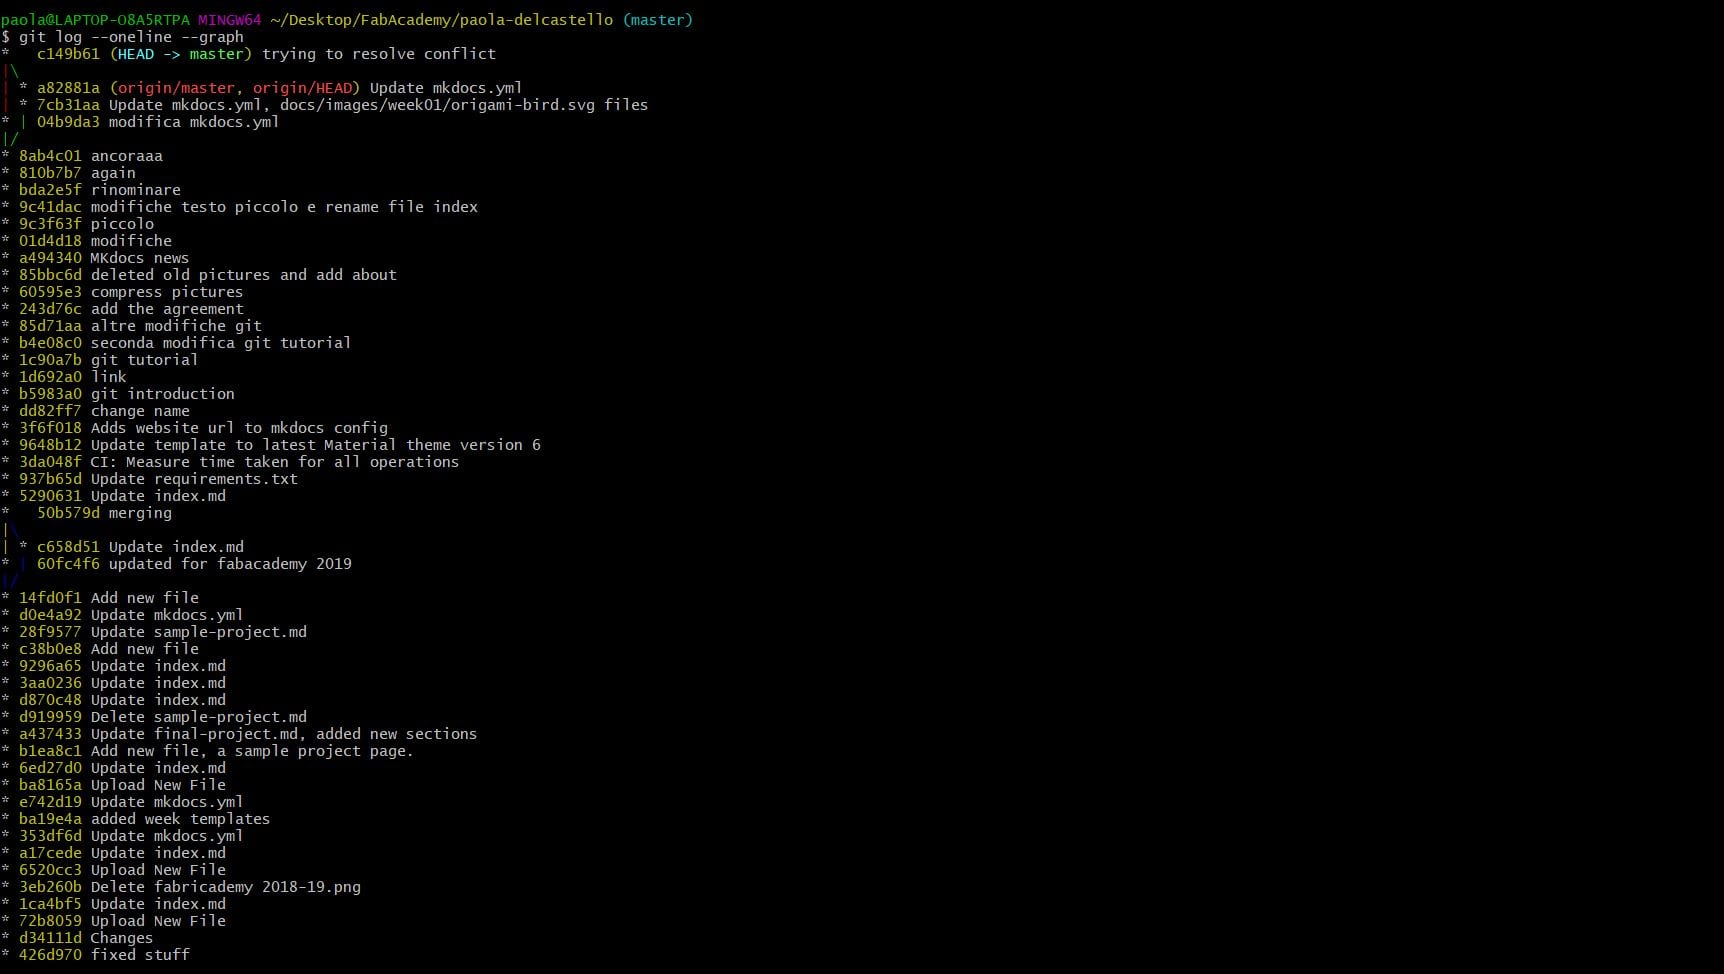
We used the command git log to see all the commits and we noticed that there was a contrast between origin master and origin head

To summarize, the problem was that I had been create two different branches with two different version of the same file mkdocs.yml.
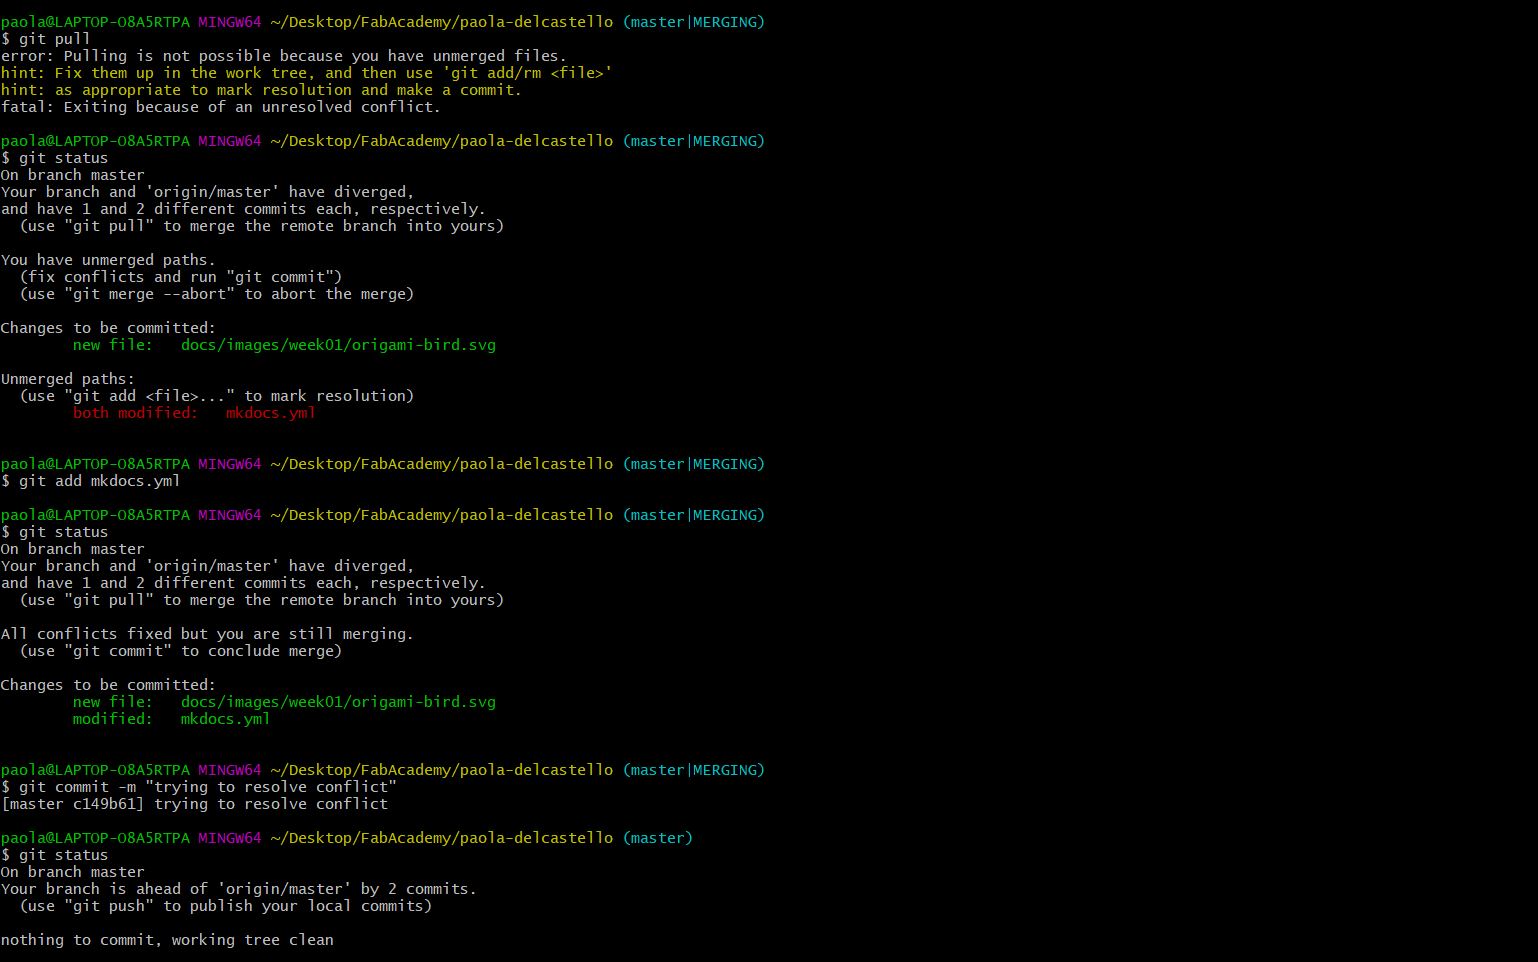
To find a solution we tried to do a pull command and see if we could replace the remote file with the local one.
Result: CONFLICT. AUTOMATIC MARGE FAILED.

At this point we forced the merge, adding the local changes to the remote file.
Result: pipeline failed again.
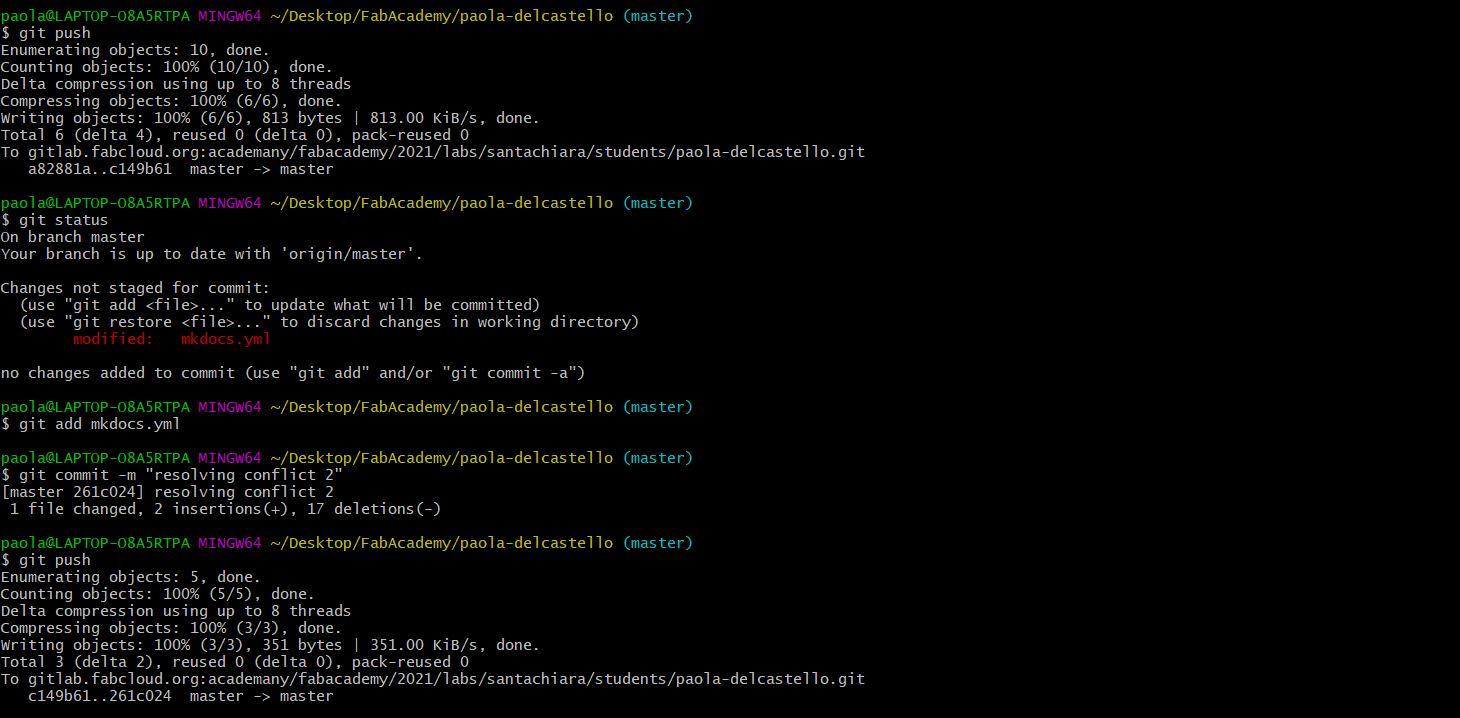
The mkdocs.yml in the remote repository contained changes to both files. We delated part of them and we tried to restore a normal situation on the remote file. After that, we did again git pull on the terminal and we added the different version of the file in the local repository. Another commit, another git log to check the situation and finally: PUSH.

Last but not least: Plan and sketch your final project –> for update go to the following link.
Everything has been restored and they all lived happily ever after…

…until the next assignment.