- Modeld 2D Designs (Raster, Vector)
- Modeld 3D Designs (Animating, Simulate, Renderd)
- Use CAD Design Program You never Used
- Modeld the Final Project
- Model experimental objects/part of a possible project in 2D and 3D software
- Show how I did it with words/images/screenshots
- Included my original design files
.jpg)
PhotoShop xDesign Blender Fusion 360 InkScape Gimp Modelo
Raster
What is raster ?
In its simplest form, a raster consists of a matrix of cells (or pixels) organized into rows and columns (or a grid) where each cell contains a value representing information, such as temperature. Rasters are digital aerial photographs, imagery from satellites, digital pictures, or even scanned maps

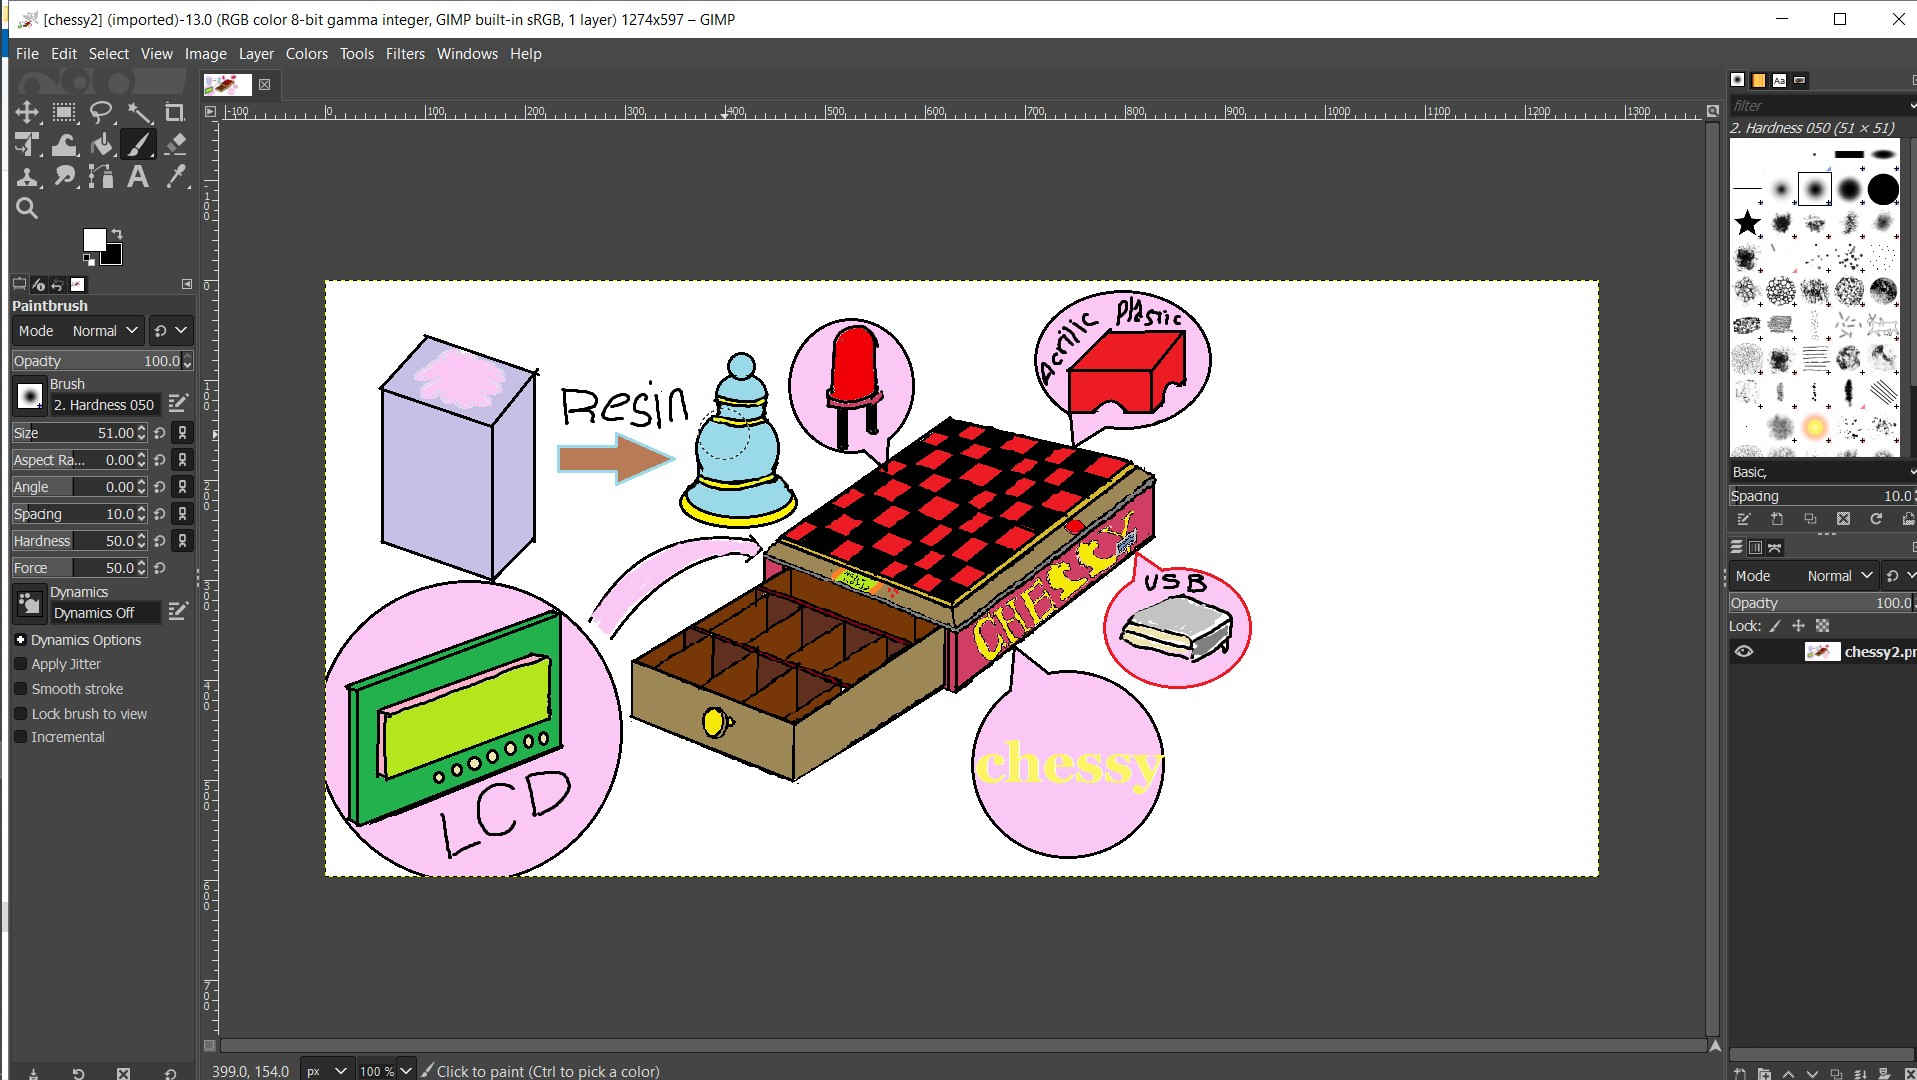
I will Draw an Sketch to descripe the function of my final Project
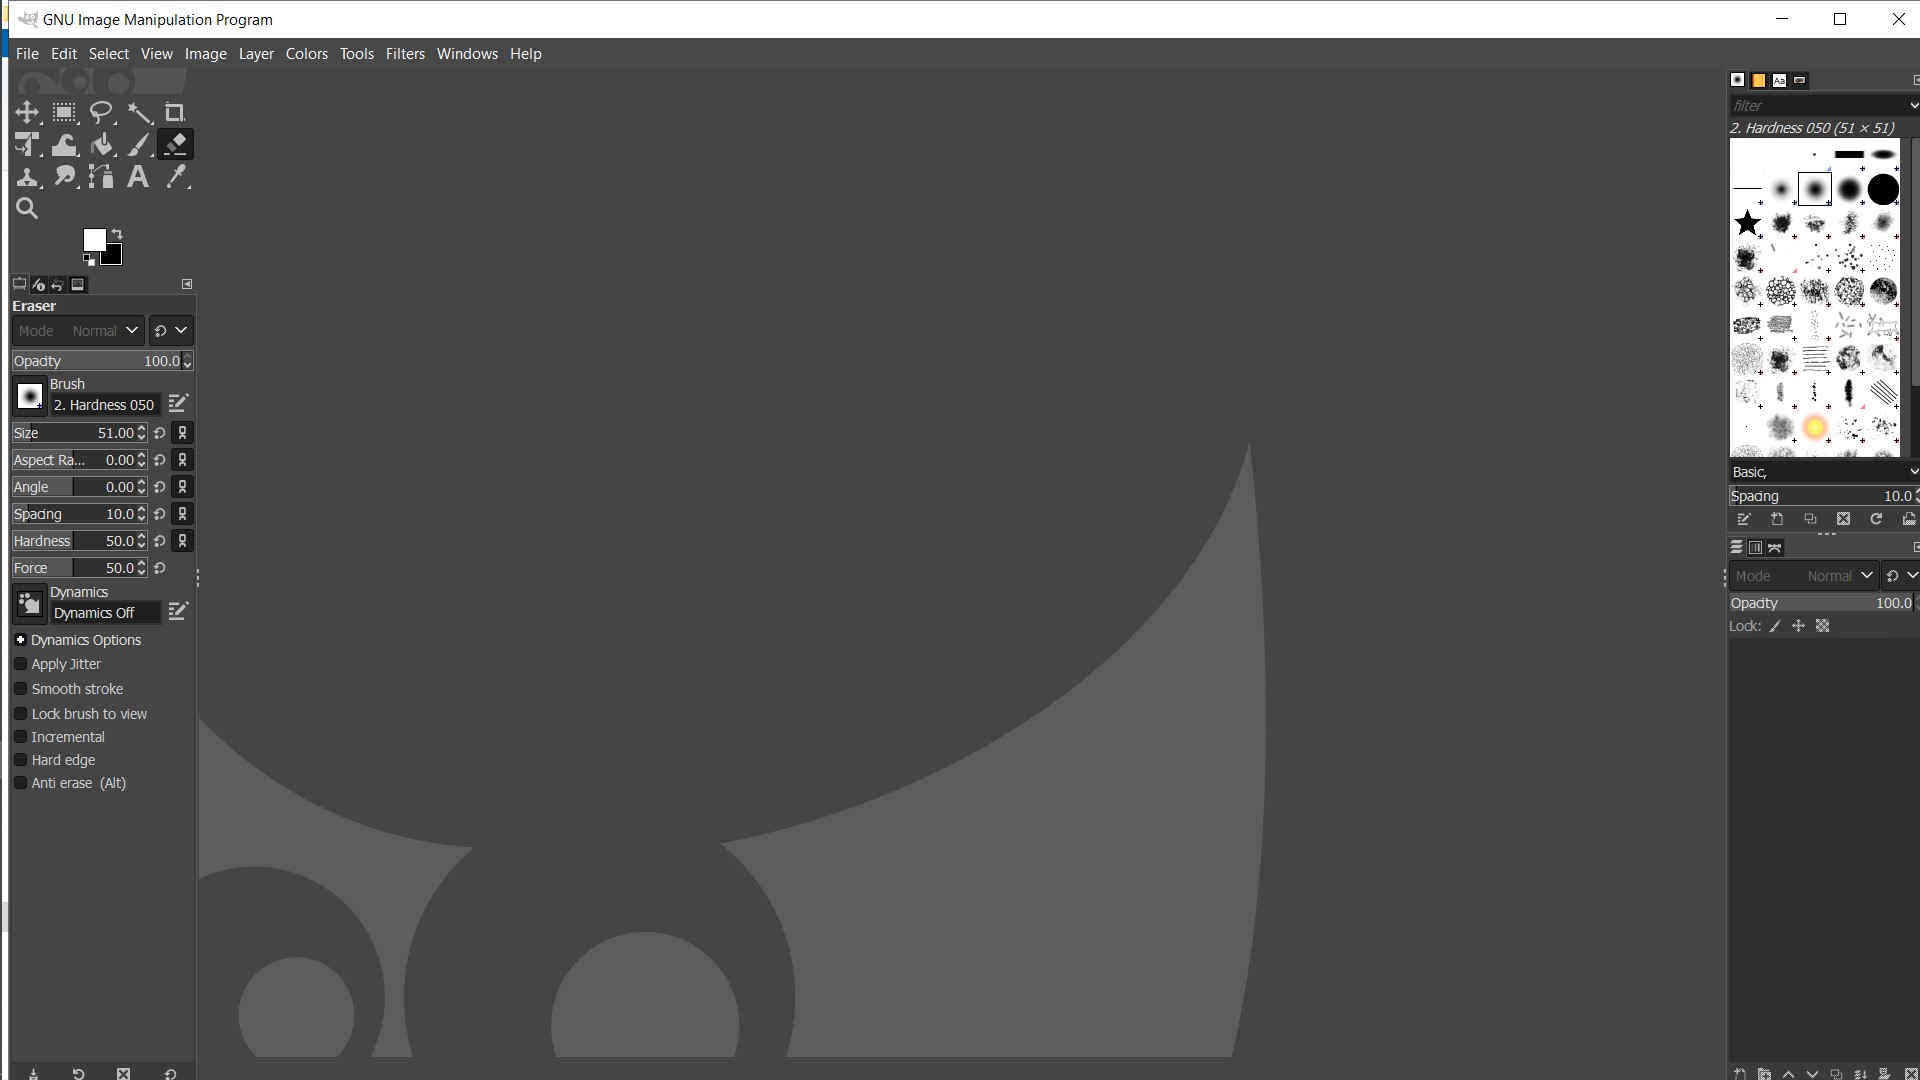
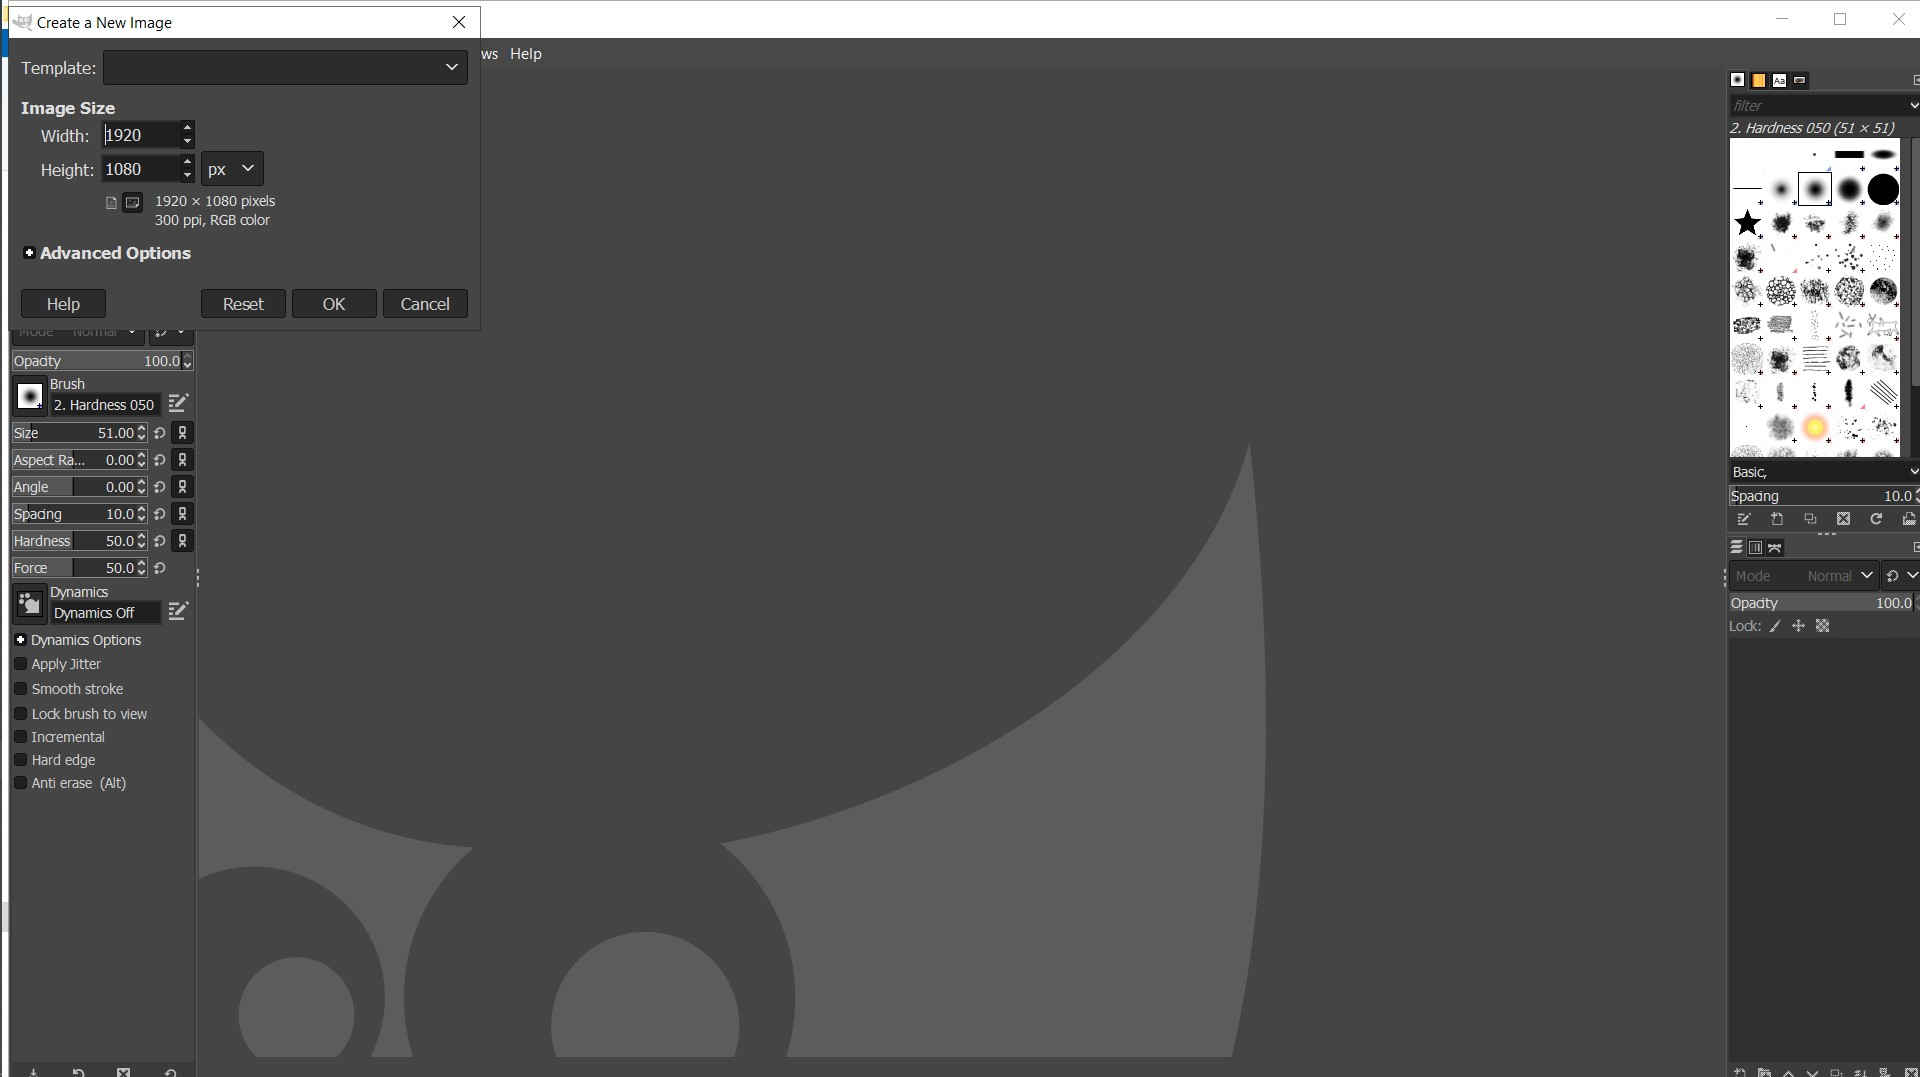
Open Gimp
Choose From >>File<< >>New<<
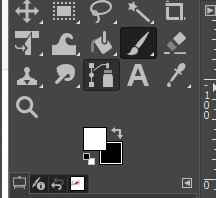
This the tools you would use for me I used Prush tool
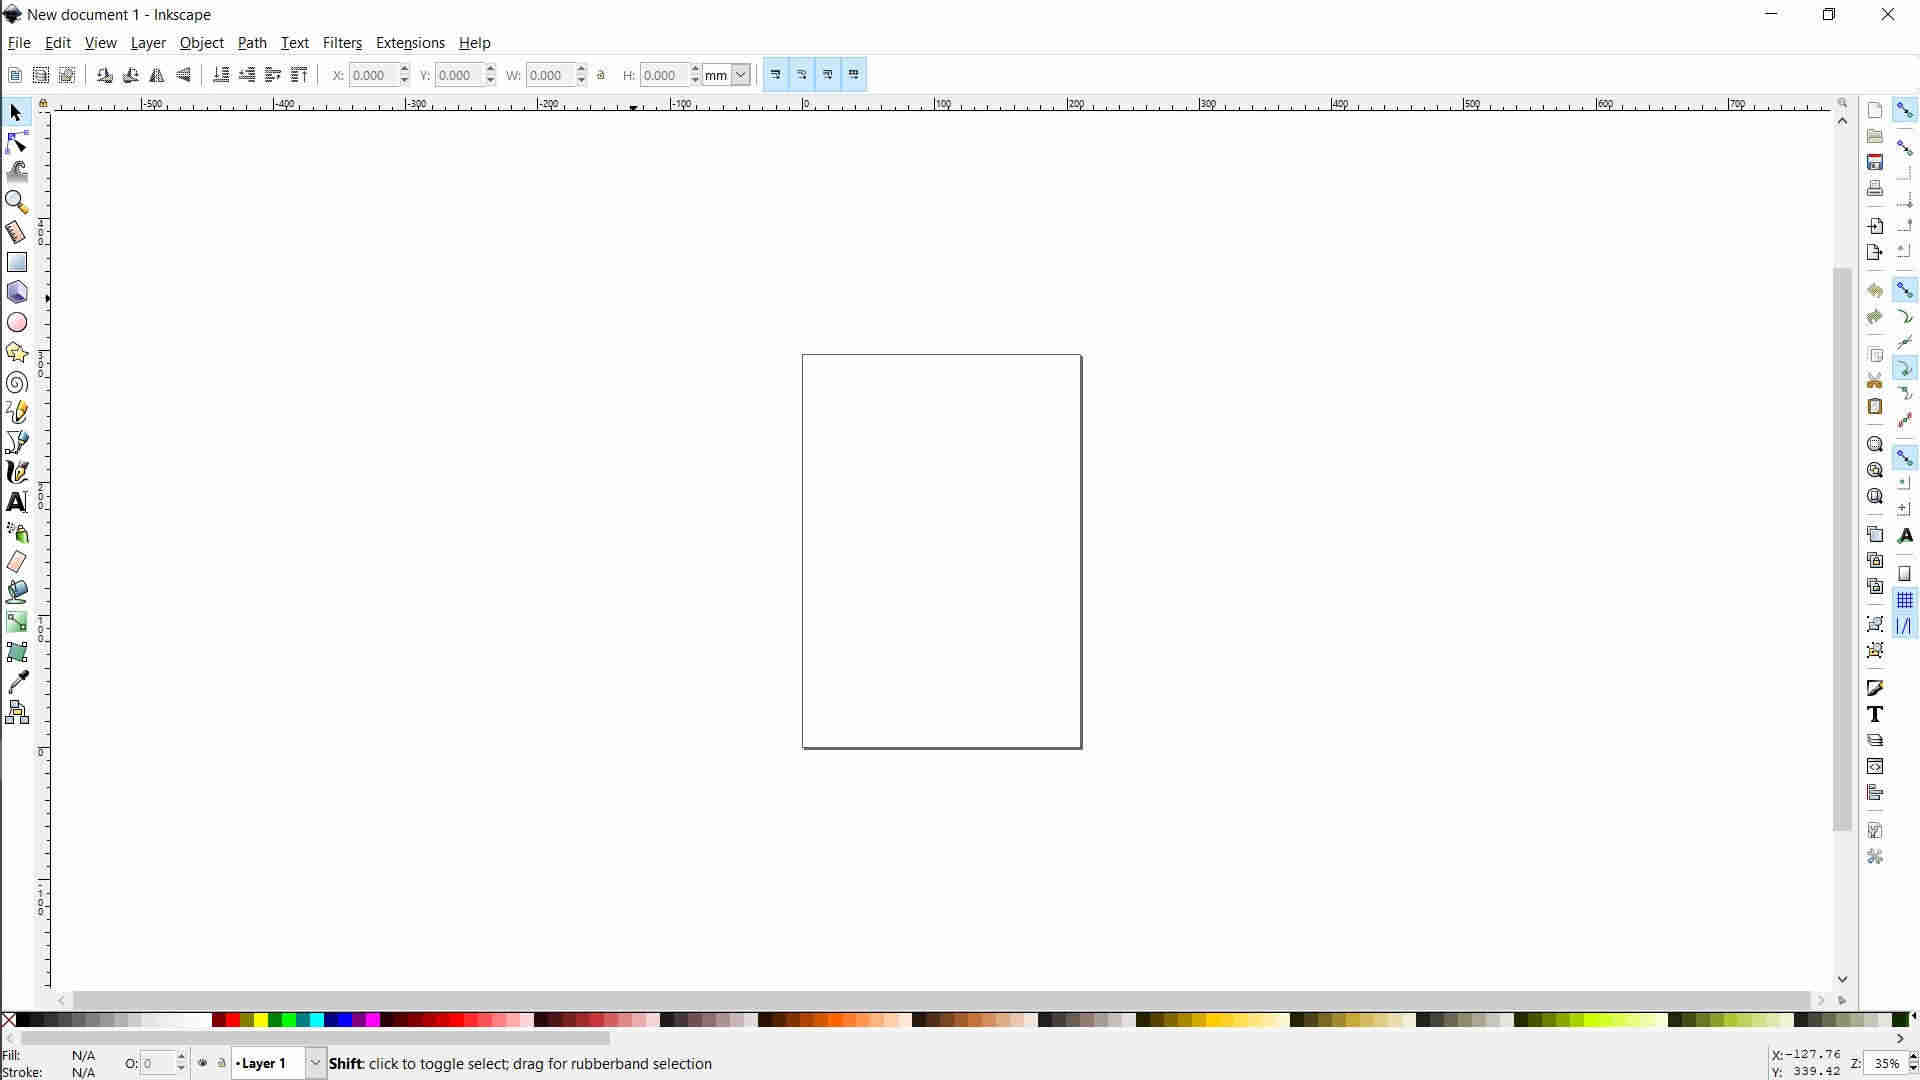
Last I Draw My Sketch and it was a wonderful Sketch in my opinion
Vector
Vector artwork is a term that describes any art made with vector illustration software like Adobe Illustrator. Vector artwork is built from vector graphics, which are images created with mathematical formulas. In comparison, raster art (also referred to as bitmaps or raster images) is created with colorized pixels. Enlarge pixel-based art in a raster file too much and it looks jaggy, whereas you can enlarge vector art to any size without negatively affecting its appearance. This resolution independence allows vector art to be used in a variety of forms, from small illustrations to massive billboards.

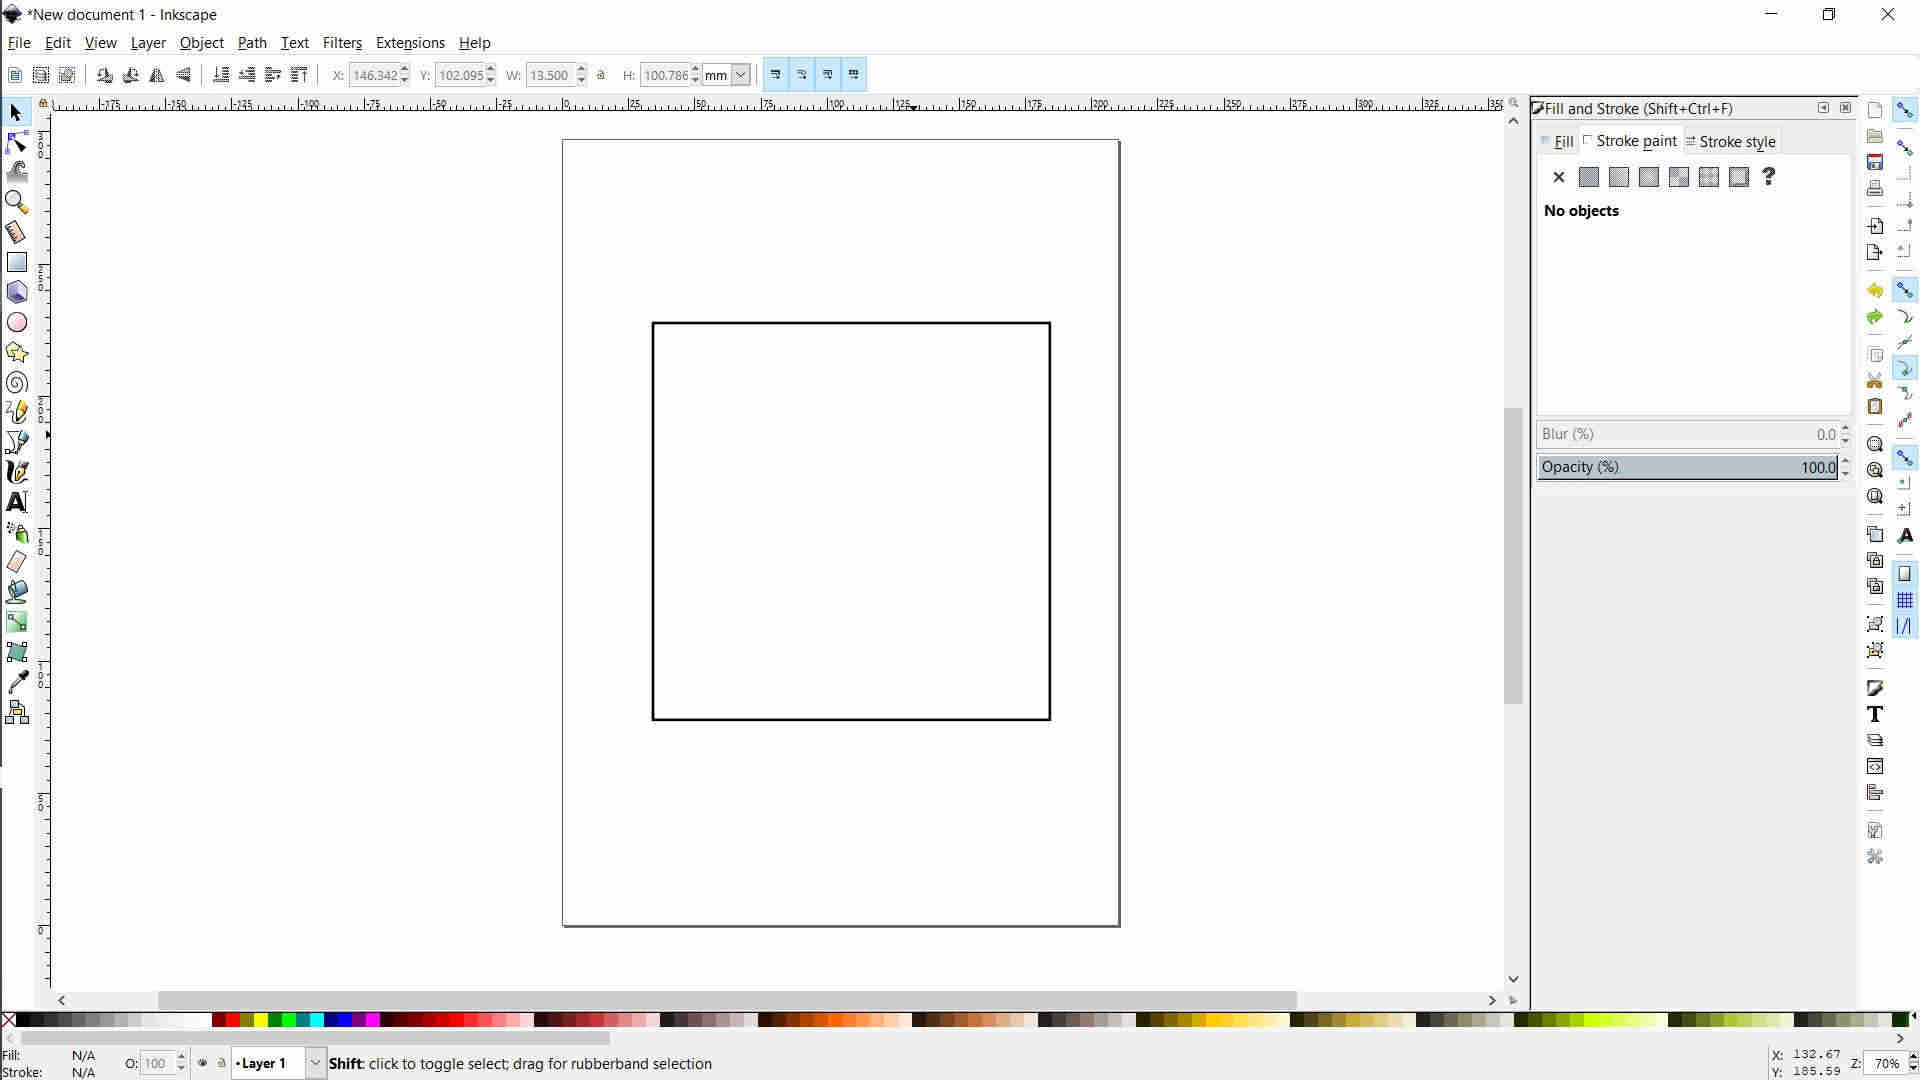
We will use inkscape to Make a Sketch that we will use it later to make the final Project
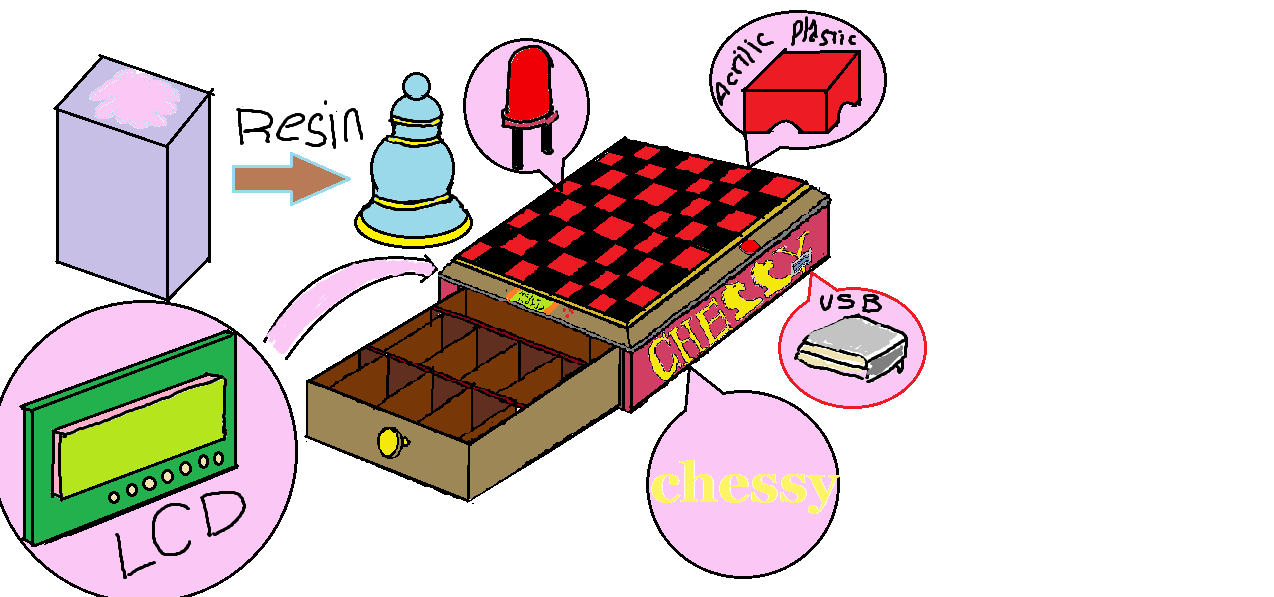
Open inkscape
Draw Square for the chess board frame
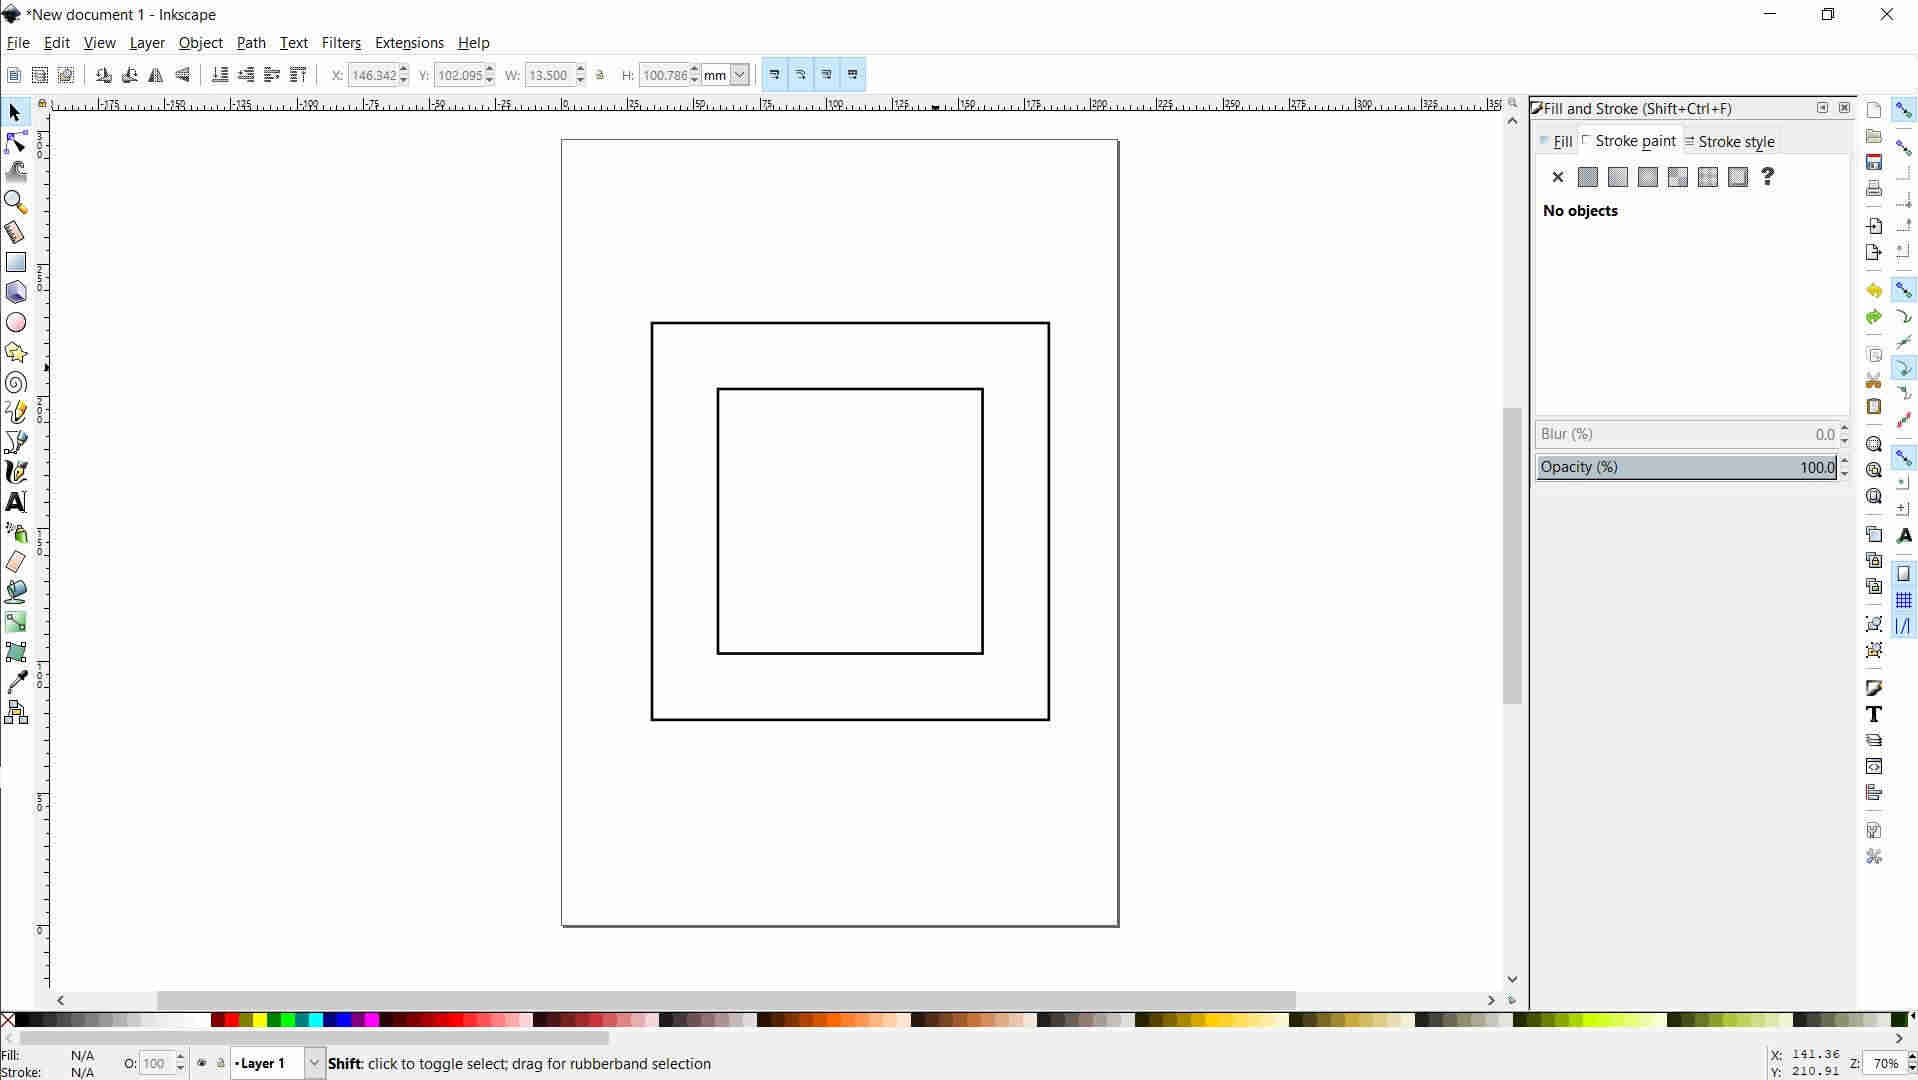
Draw another square in the middle of the outer square
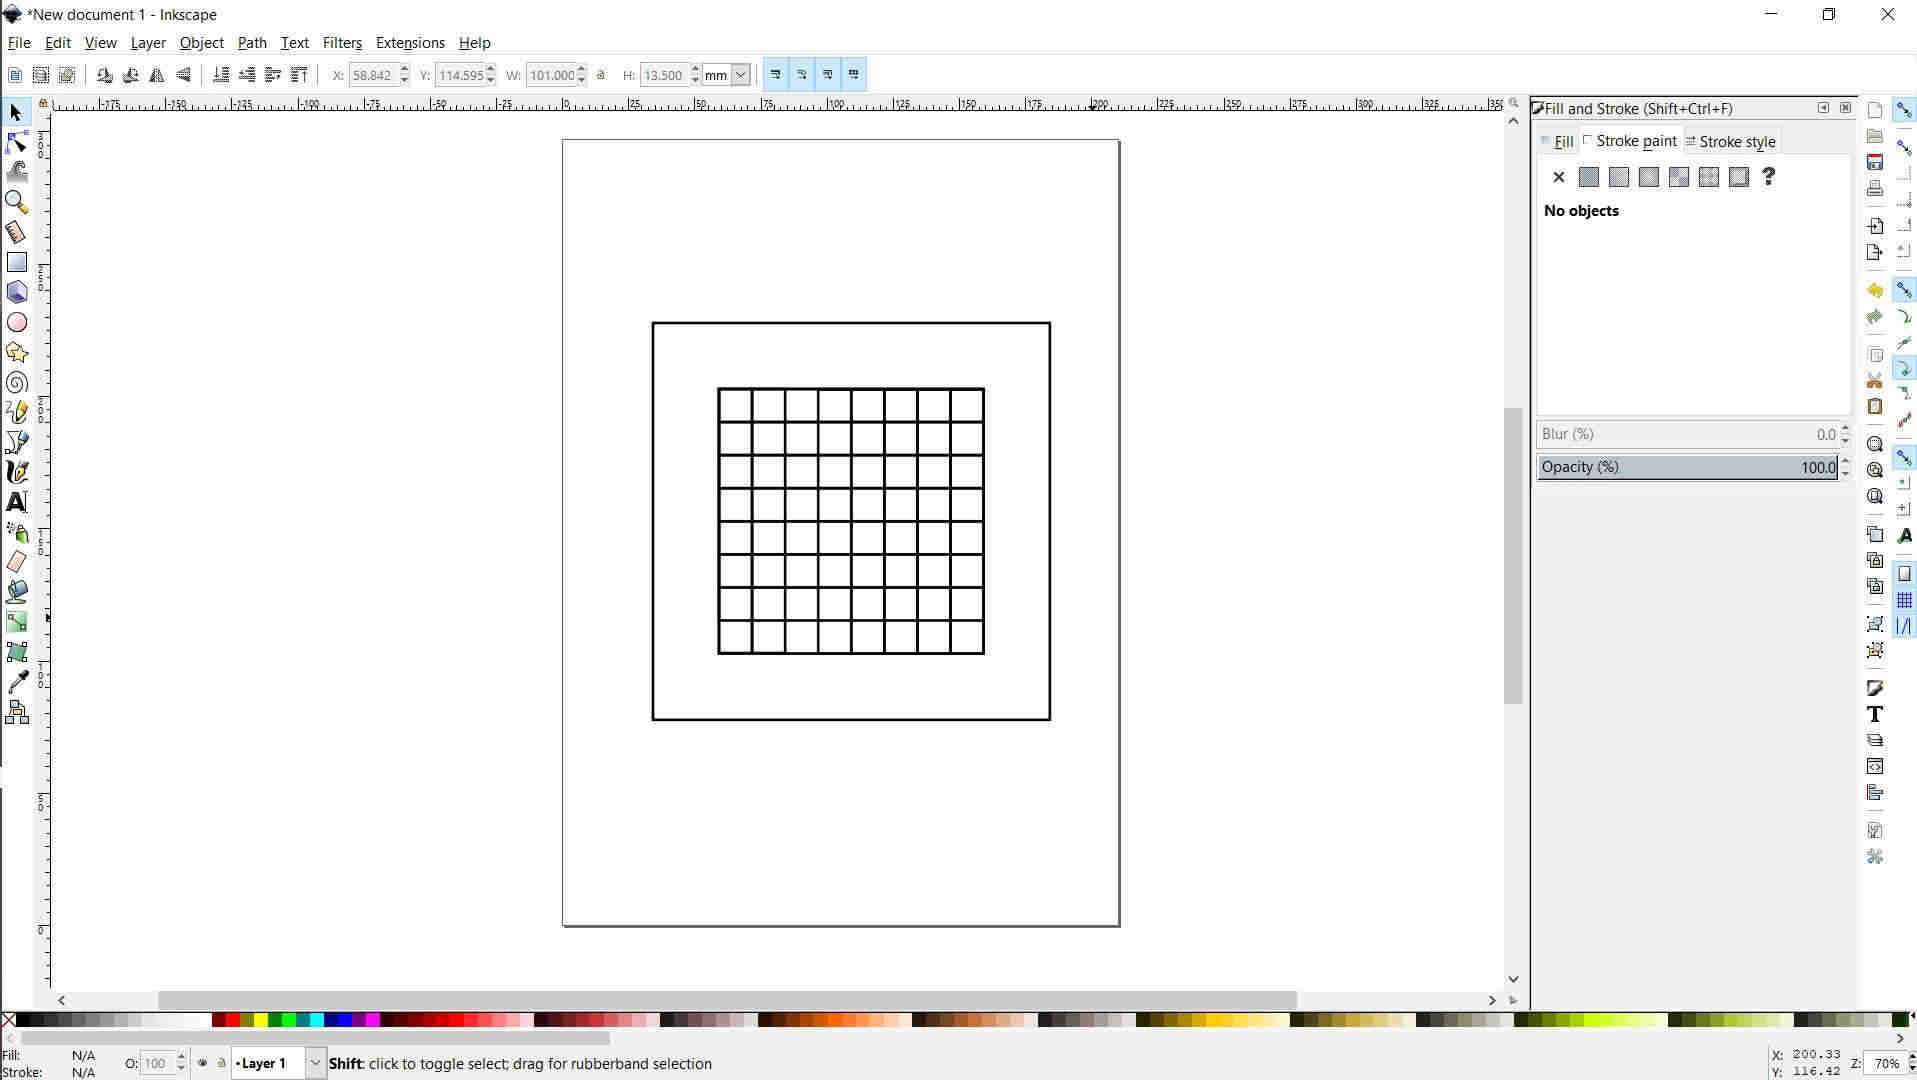
Draw rectangles for chessboard

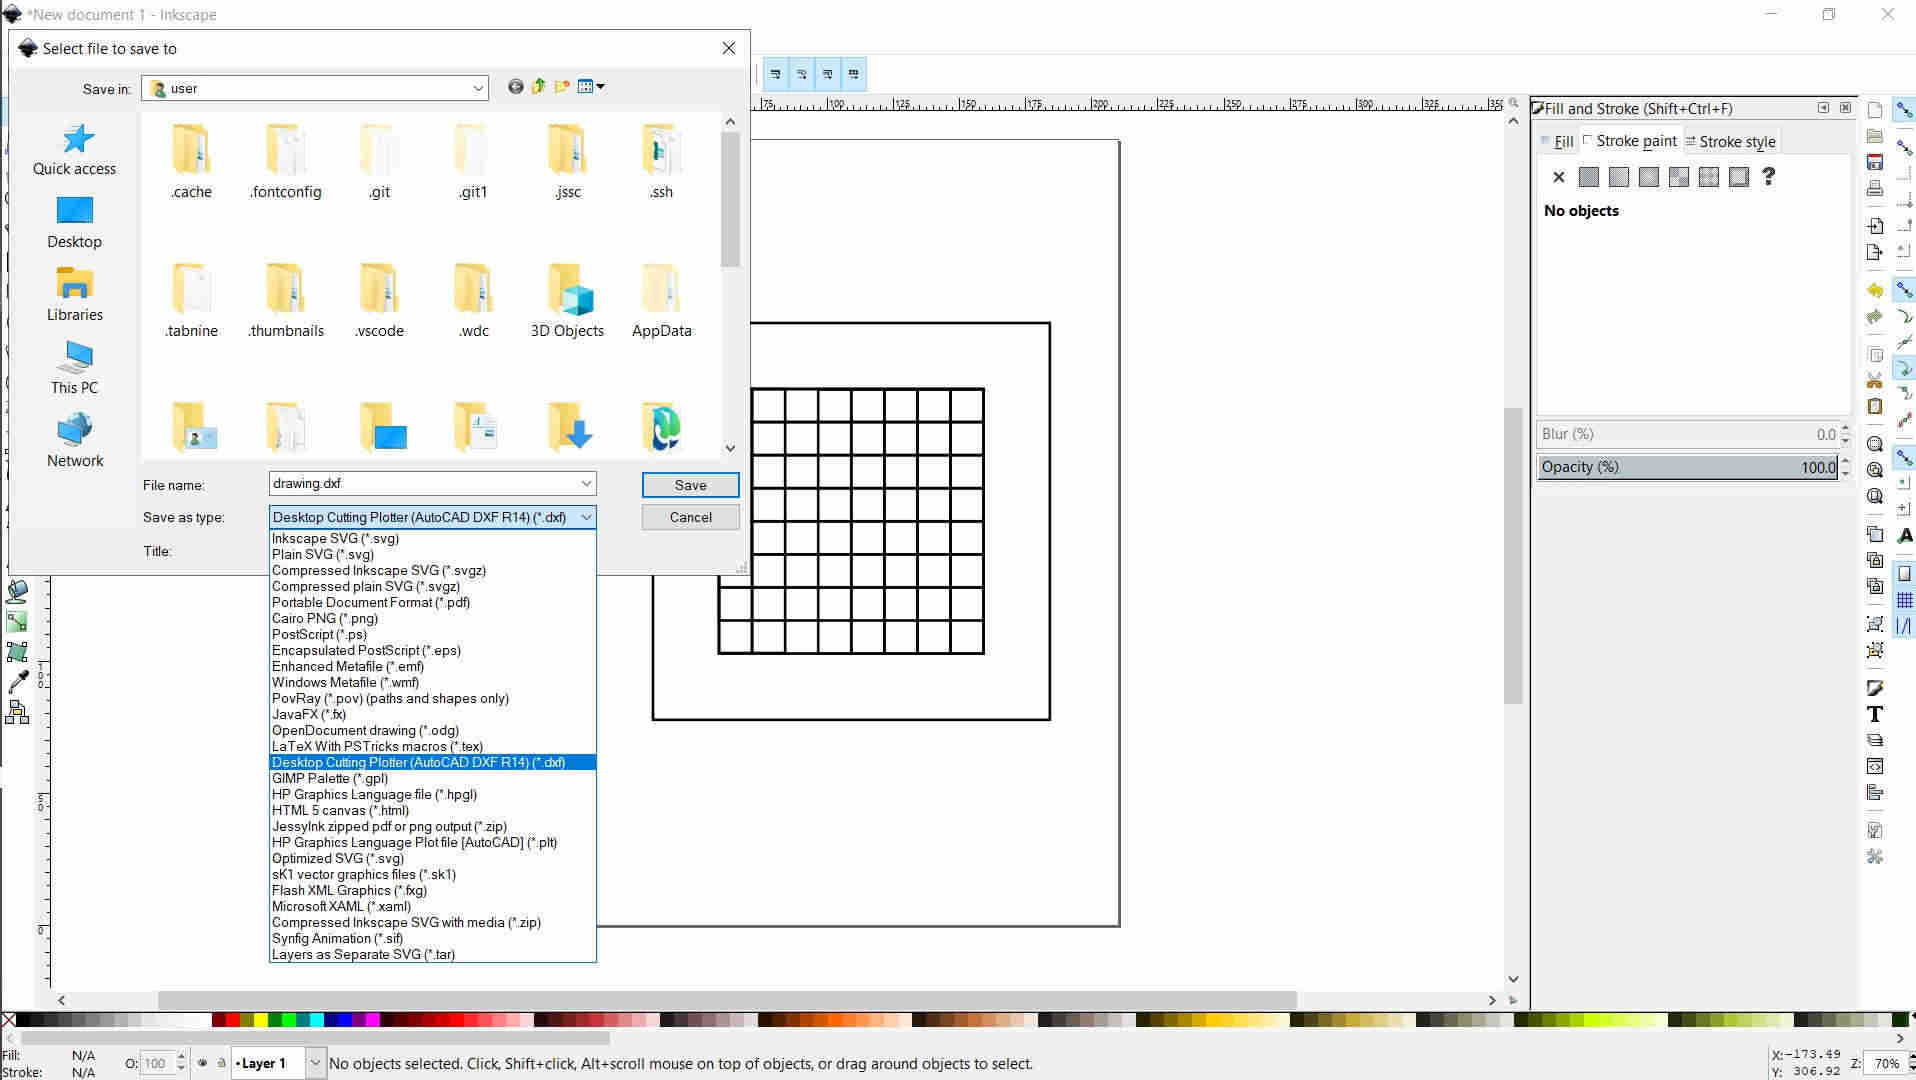
Then choose >>file<< >>Save as<< and choose >>DXF<< format
Final Project (Fusion)
Because I Love Designing and I live CAD Softwares I Decided To Design another Thing
I decided to make my final Project and make Rendering to it So Keep following
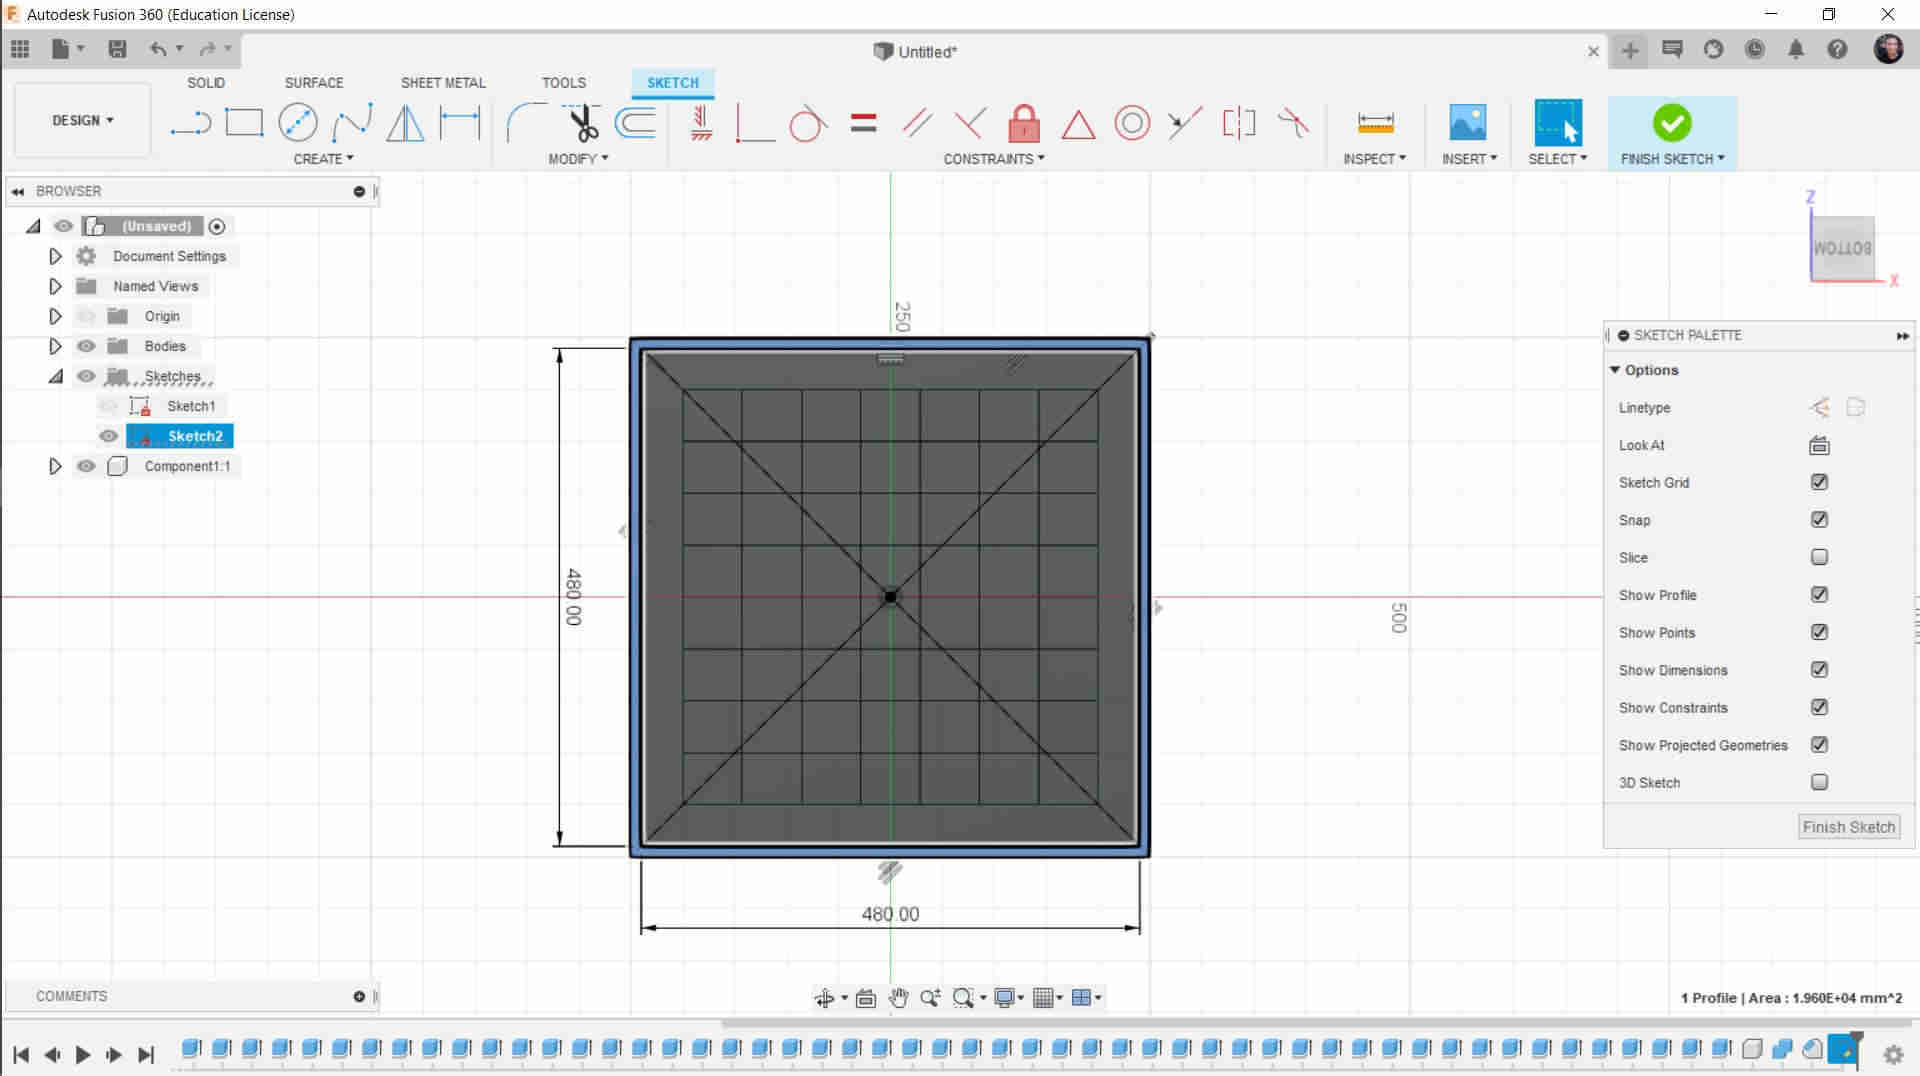
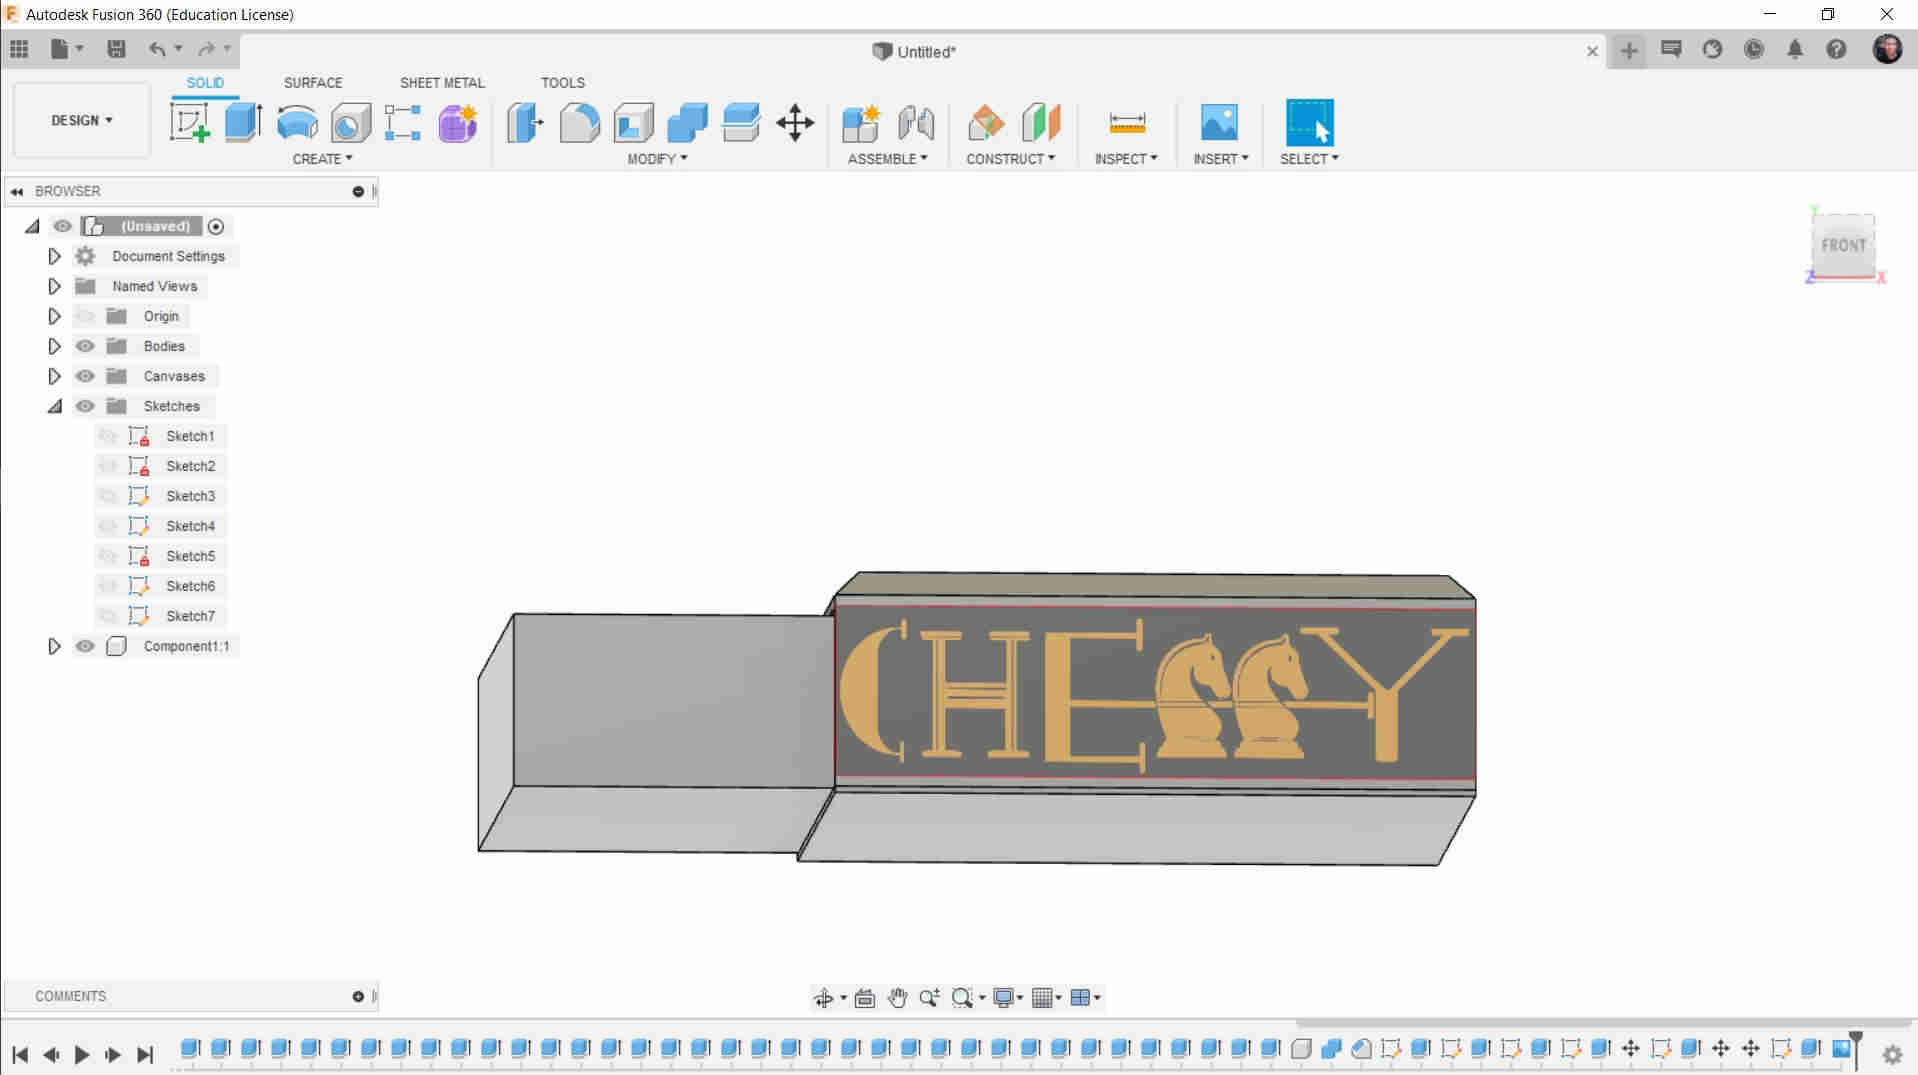
Bring the Dxf File you export from inkscape to fusion
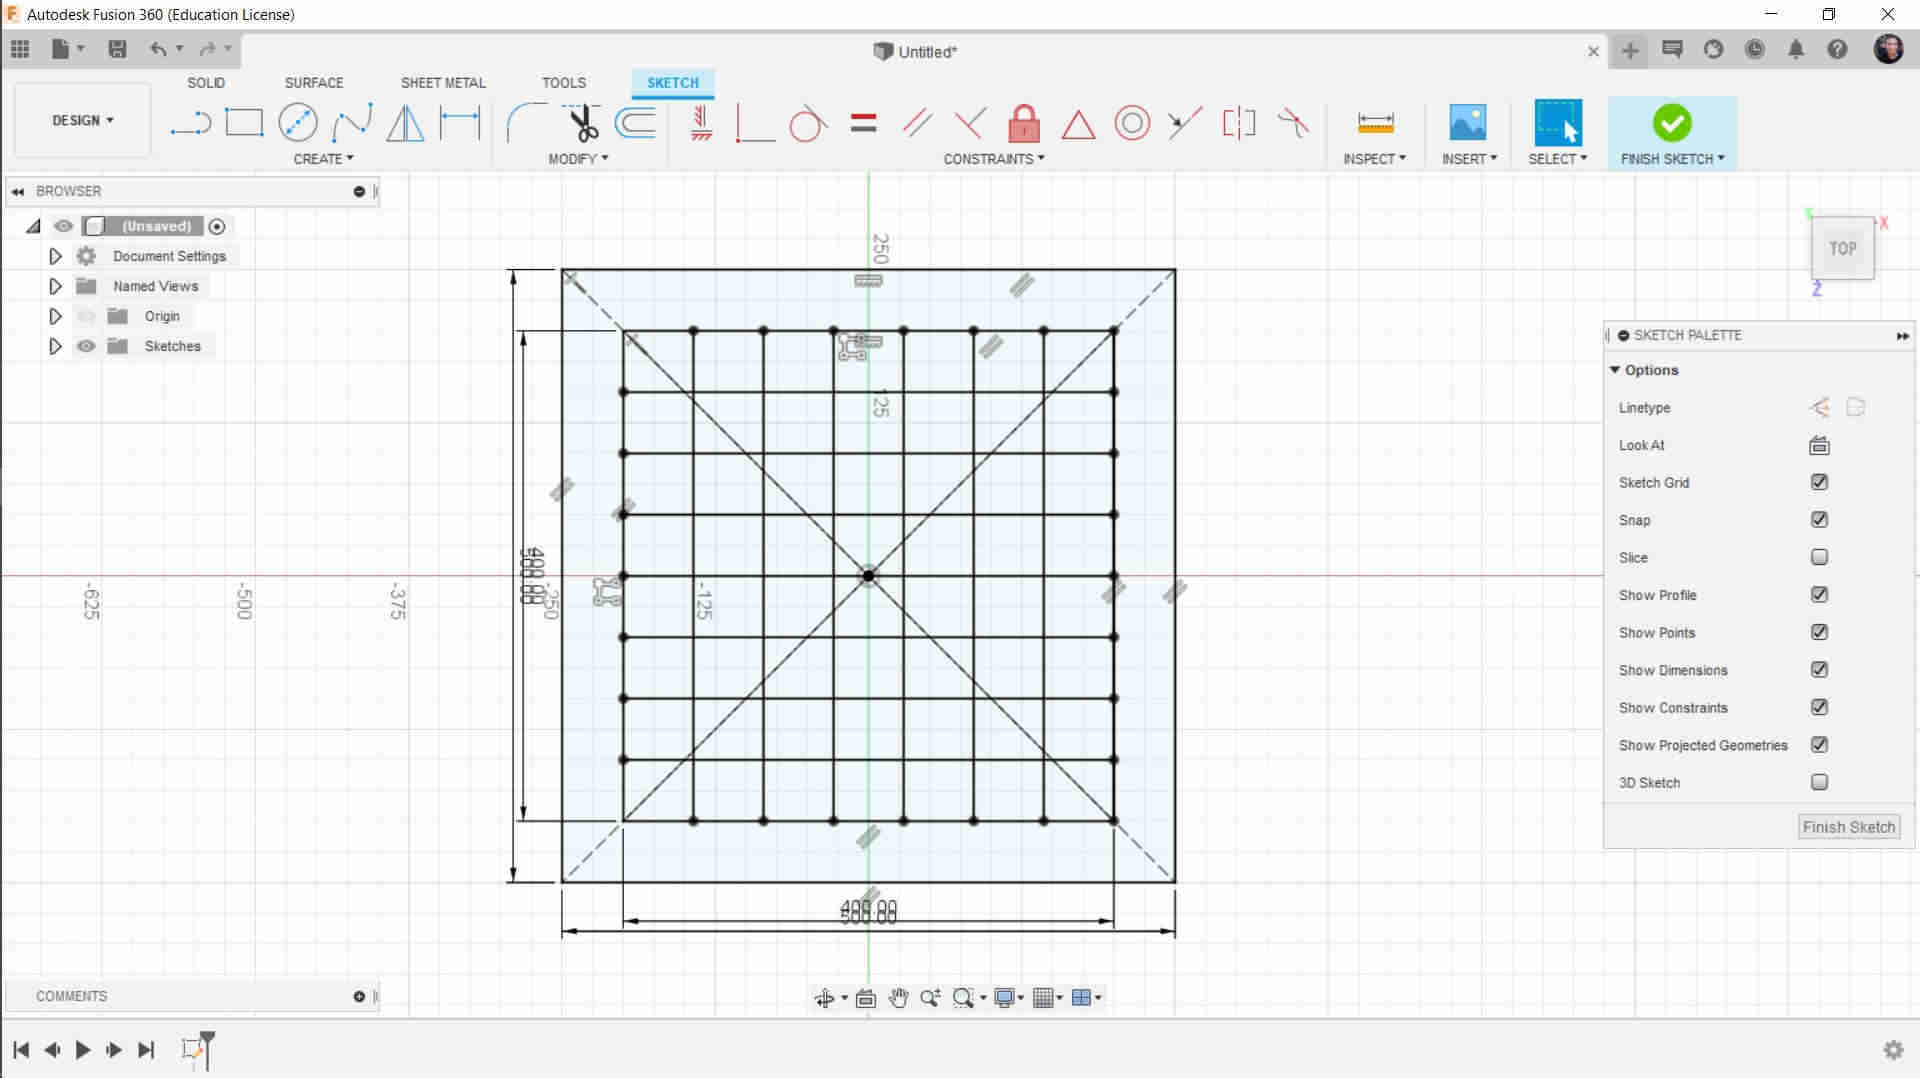
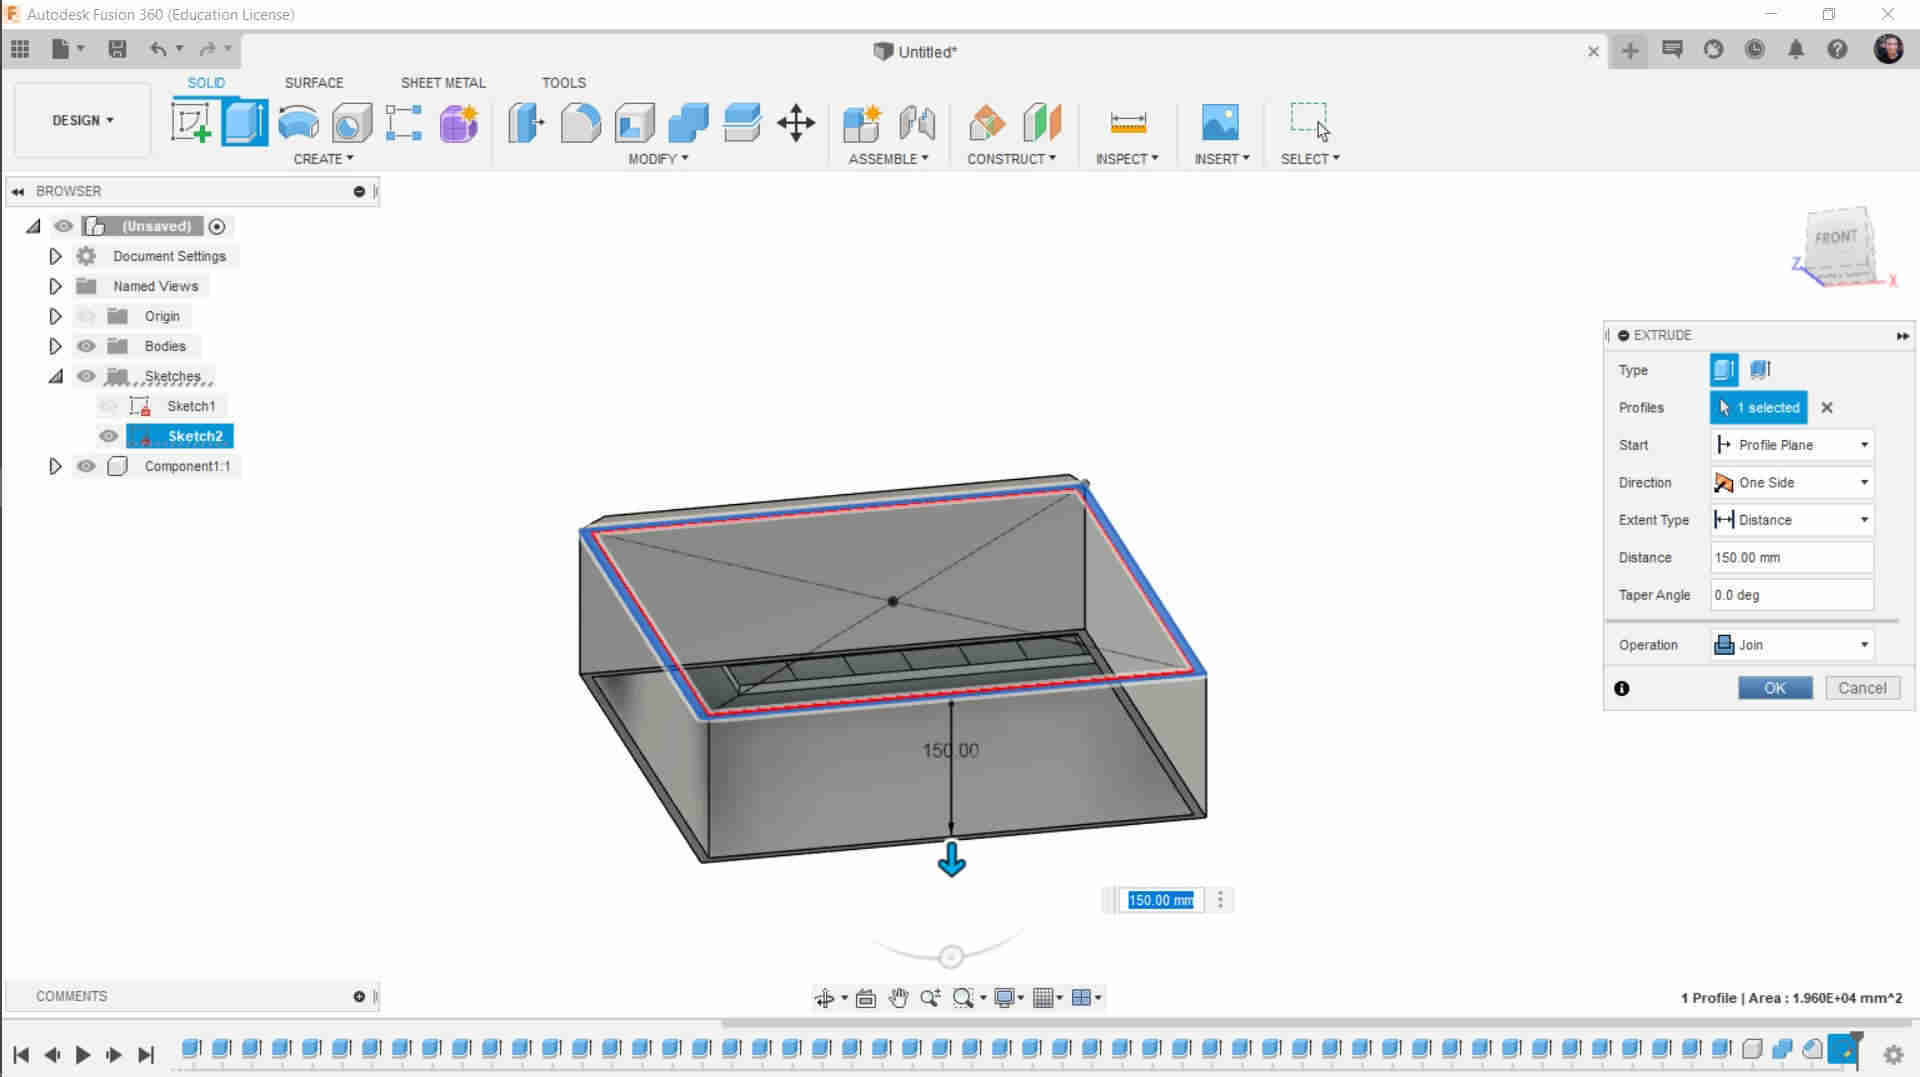
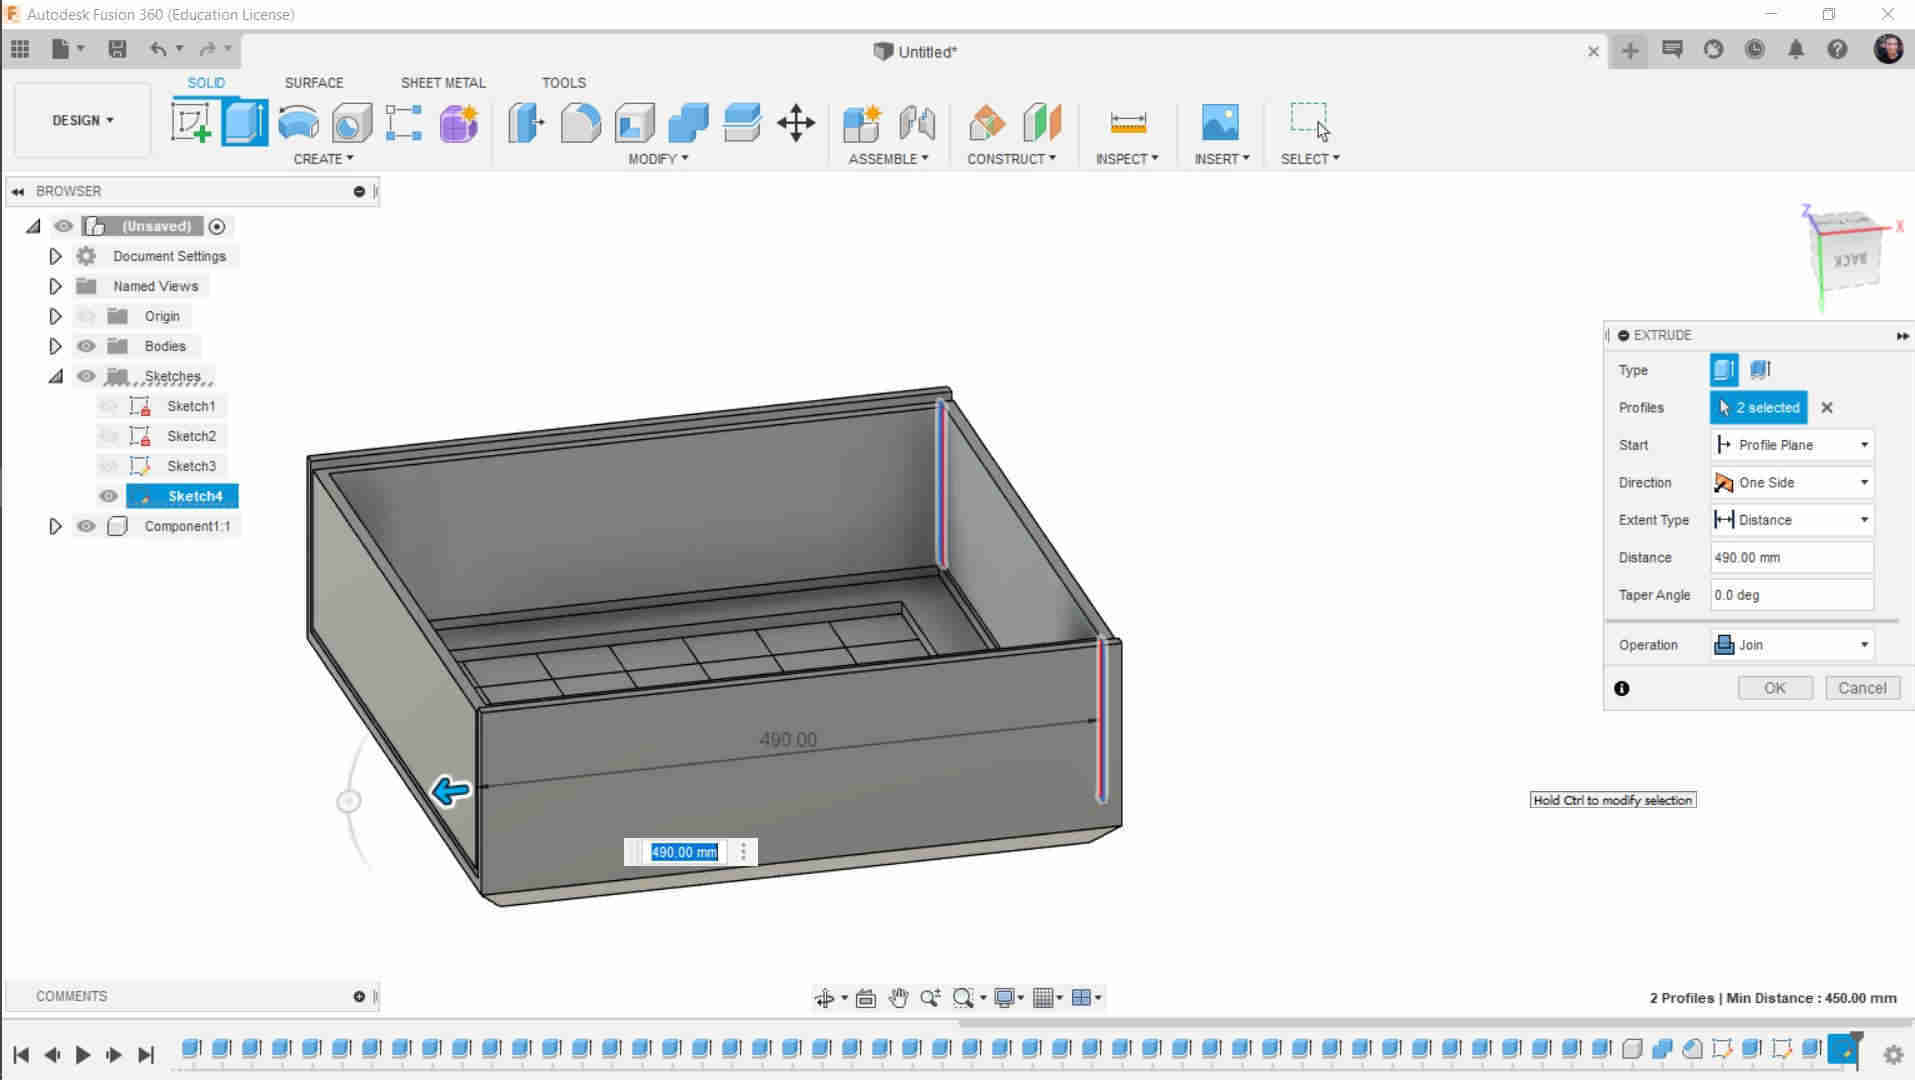
Make Extrude of the out frame as shown

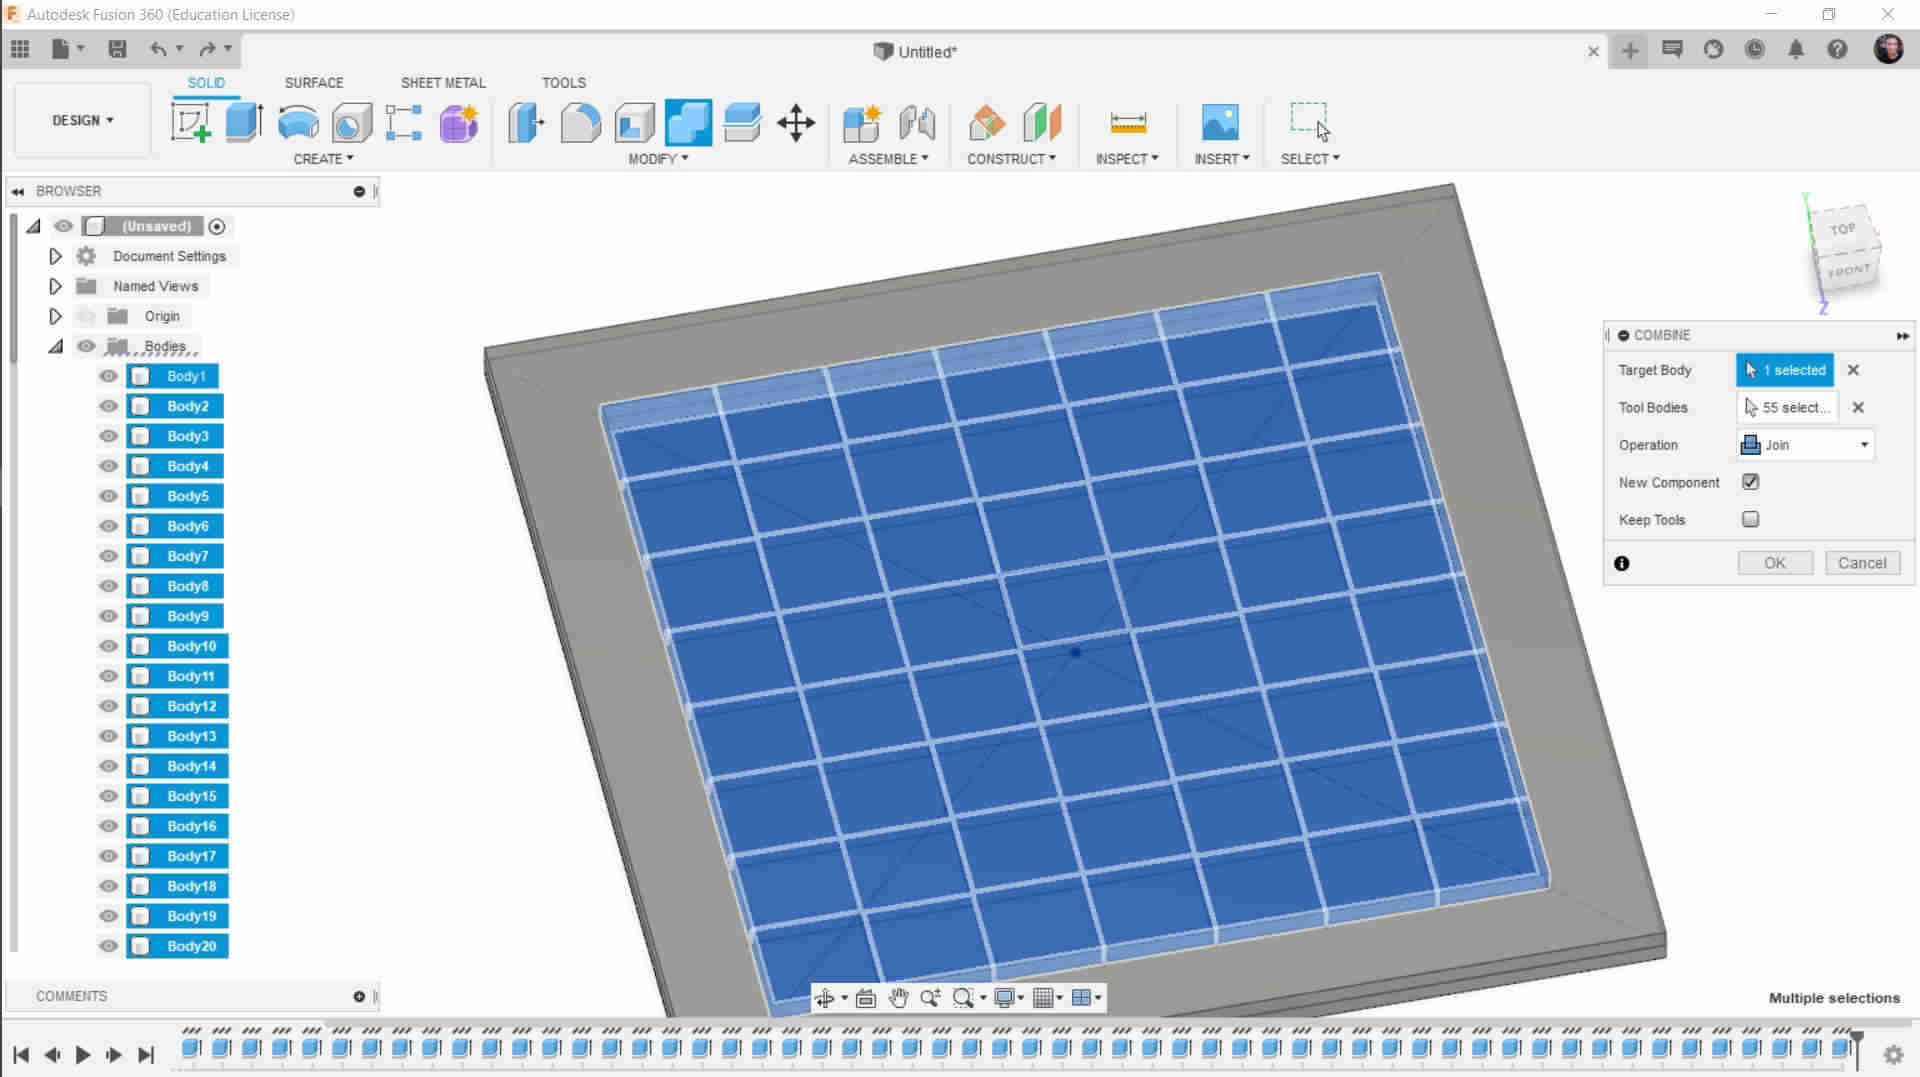
Make Extrude of the Squares and make the operation (New Body)
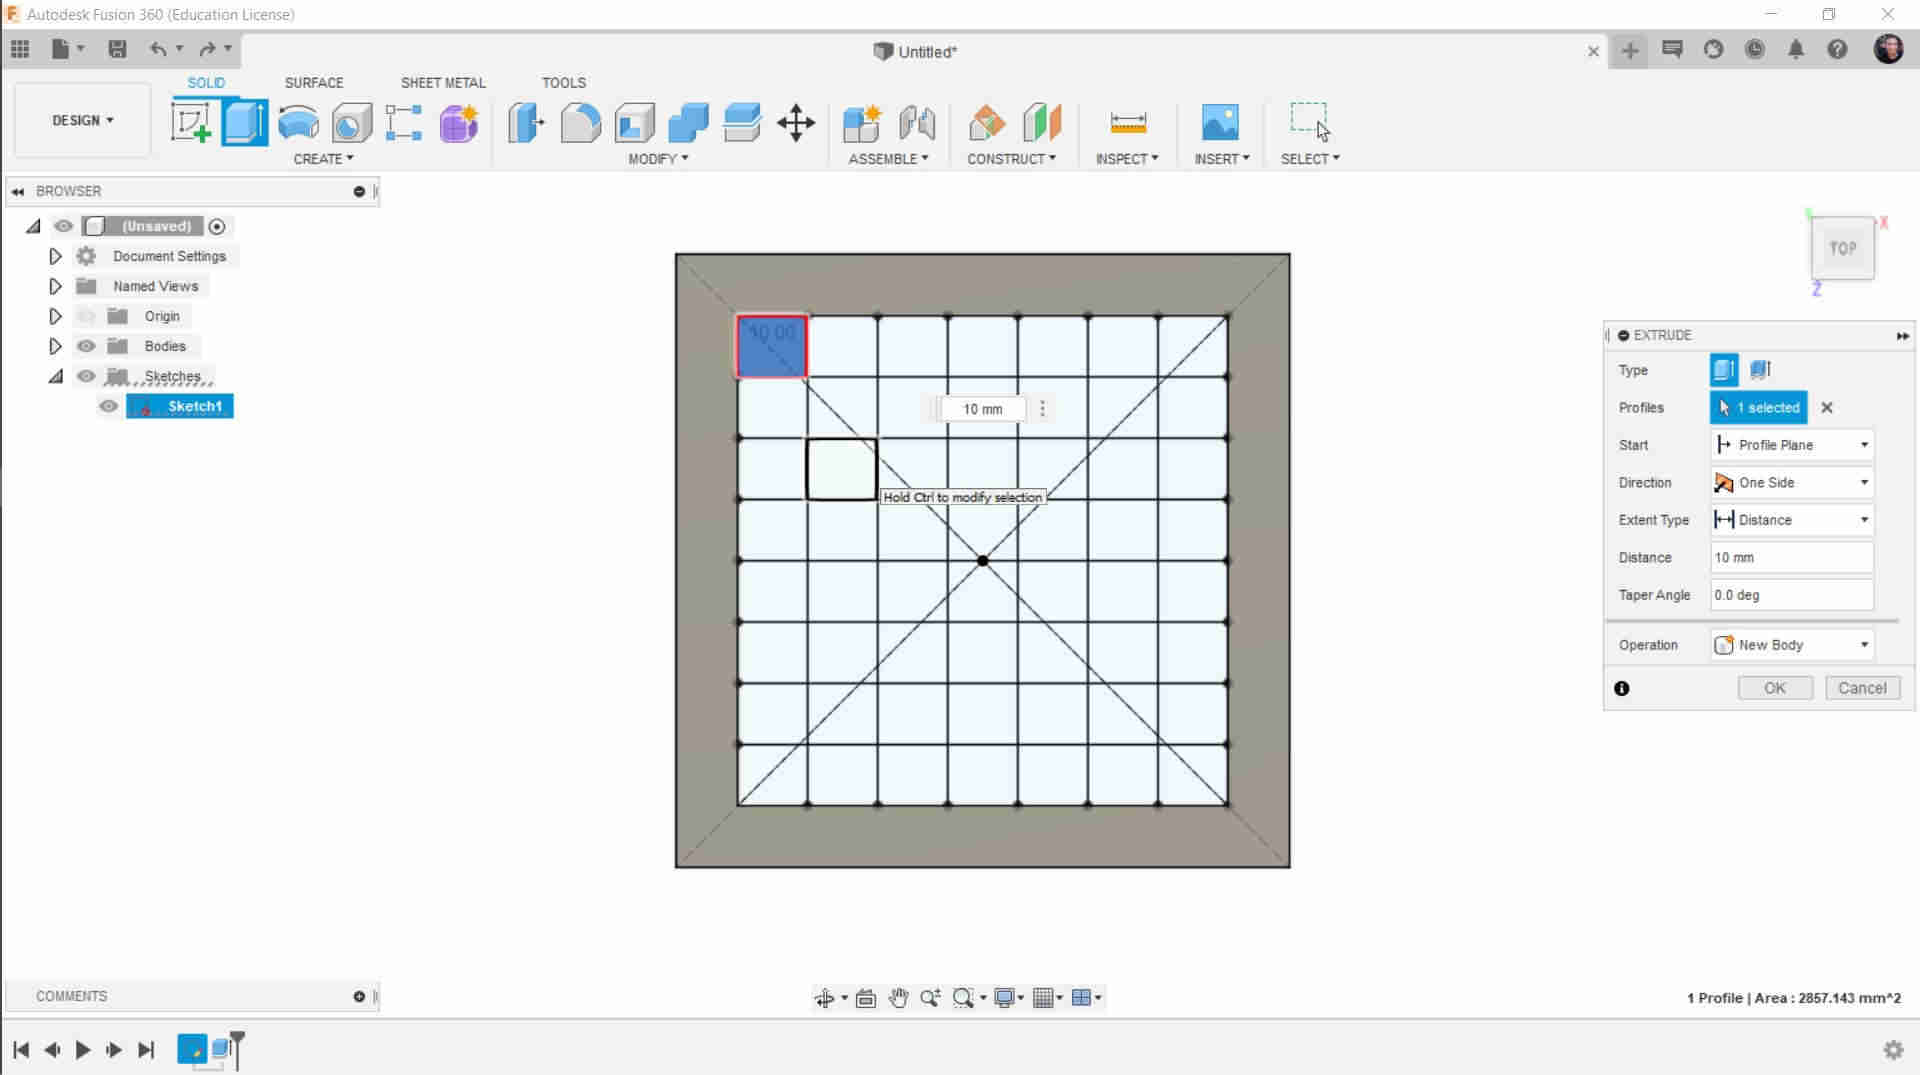
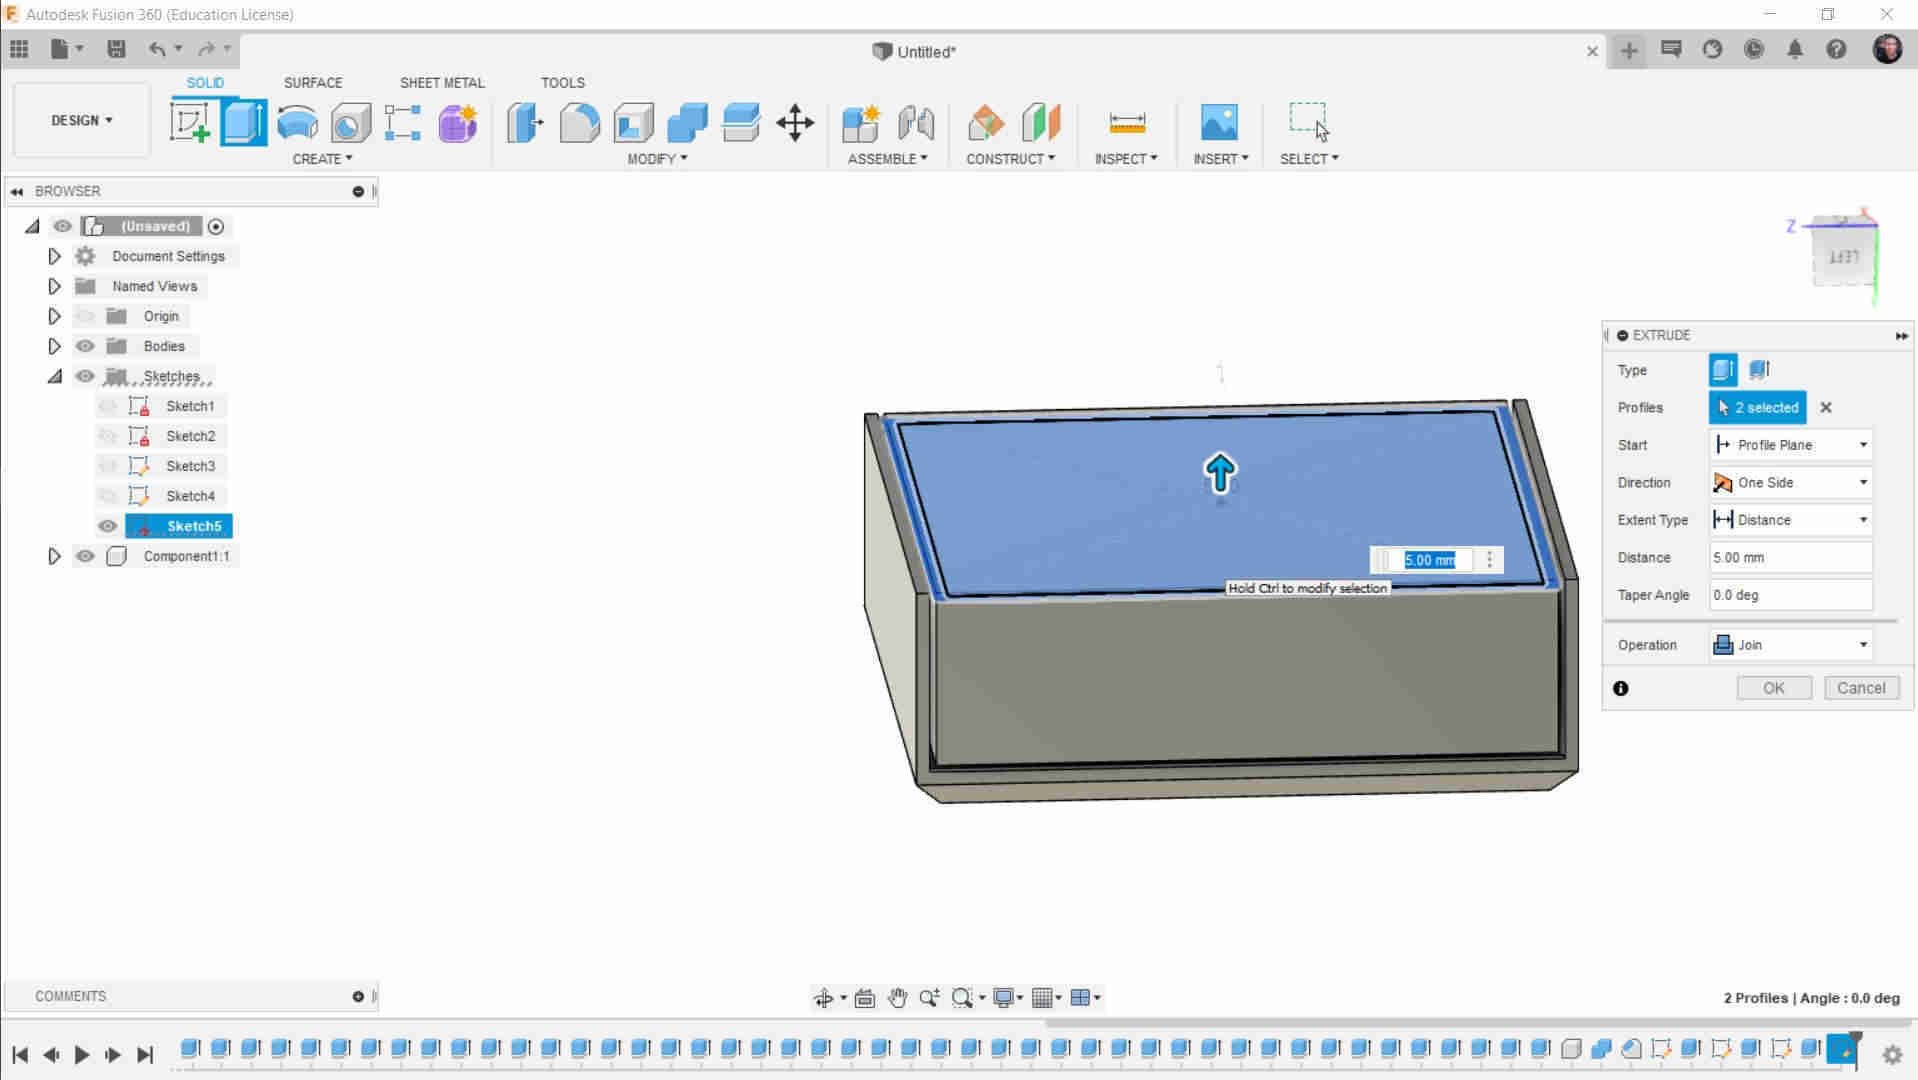
Make the Previous step for all the Squares
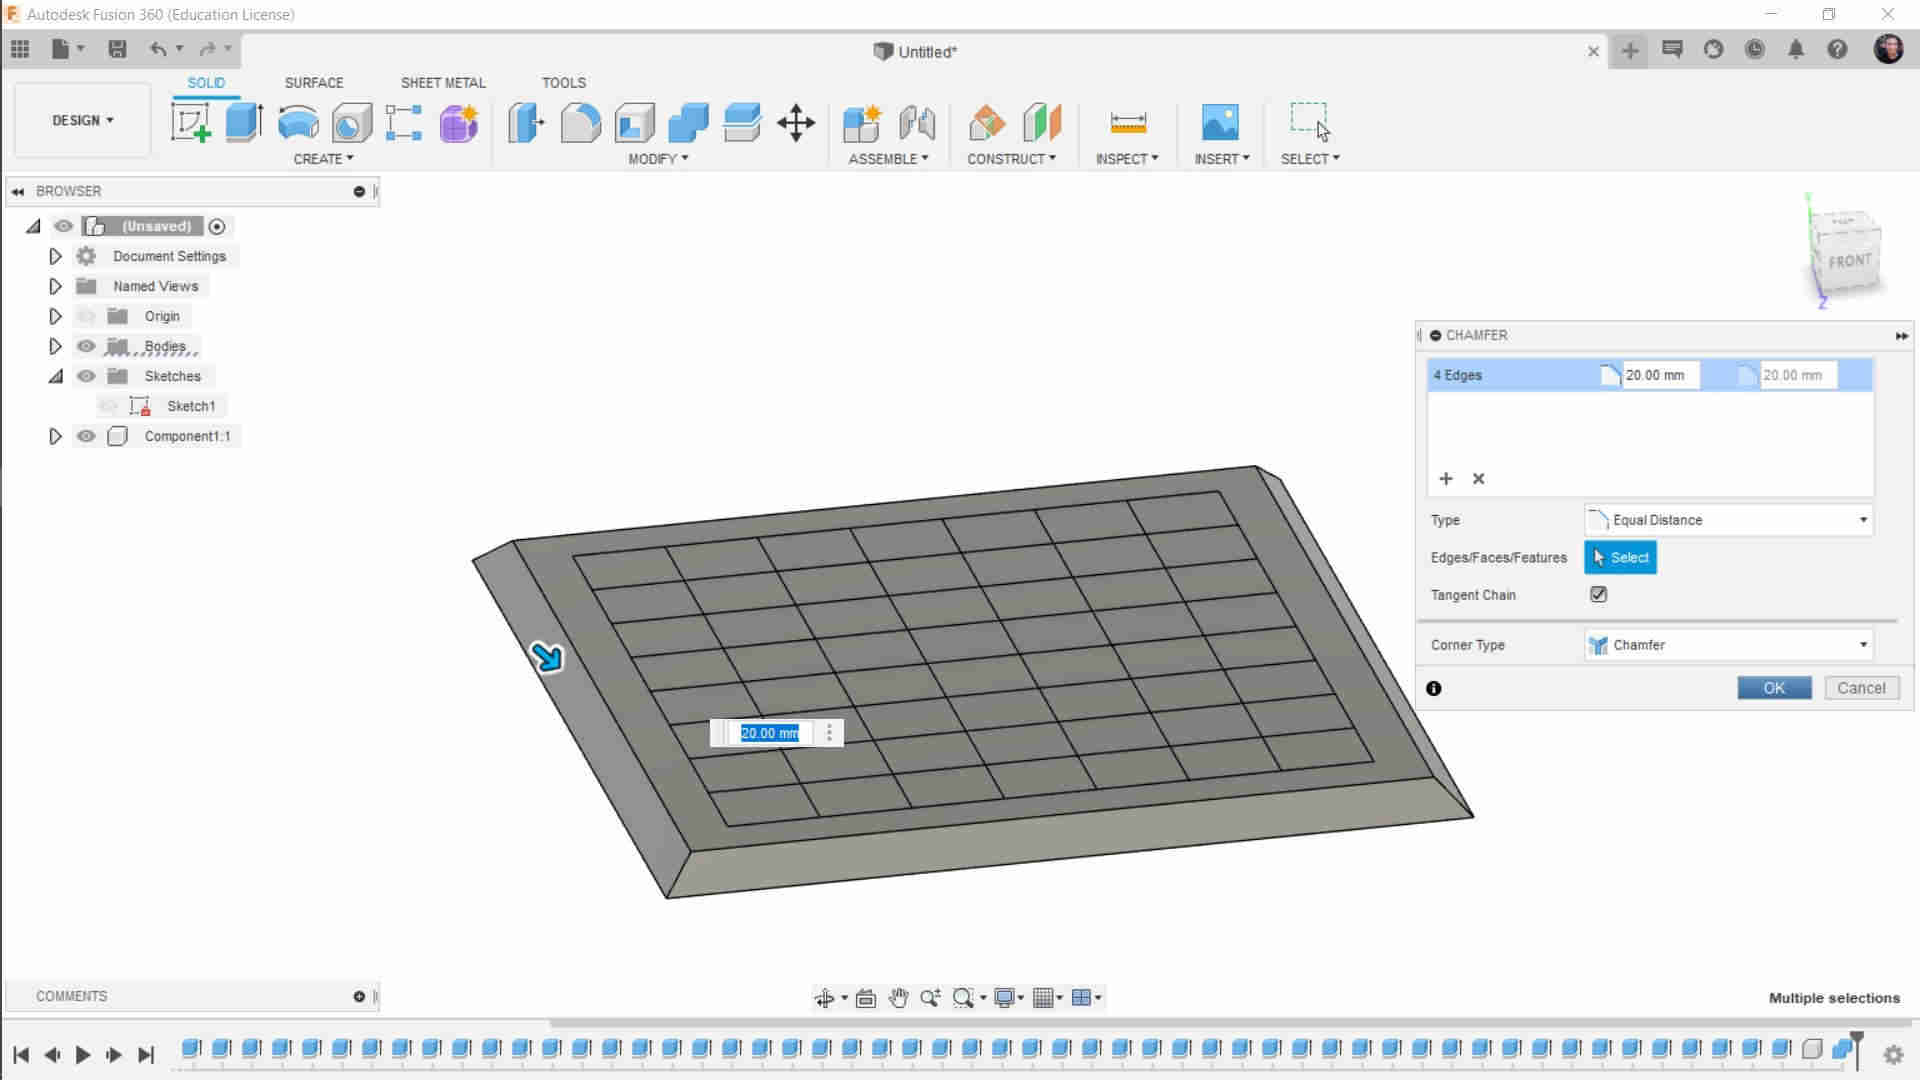
Use Chamfer Tool To make the Edges look like the Image
Make Rectangles in the Bottom of the Chess board as the following image
Extrude the Rectangles as the Following image
Make in the Side of the board Rectangles
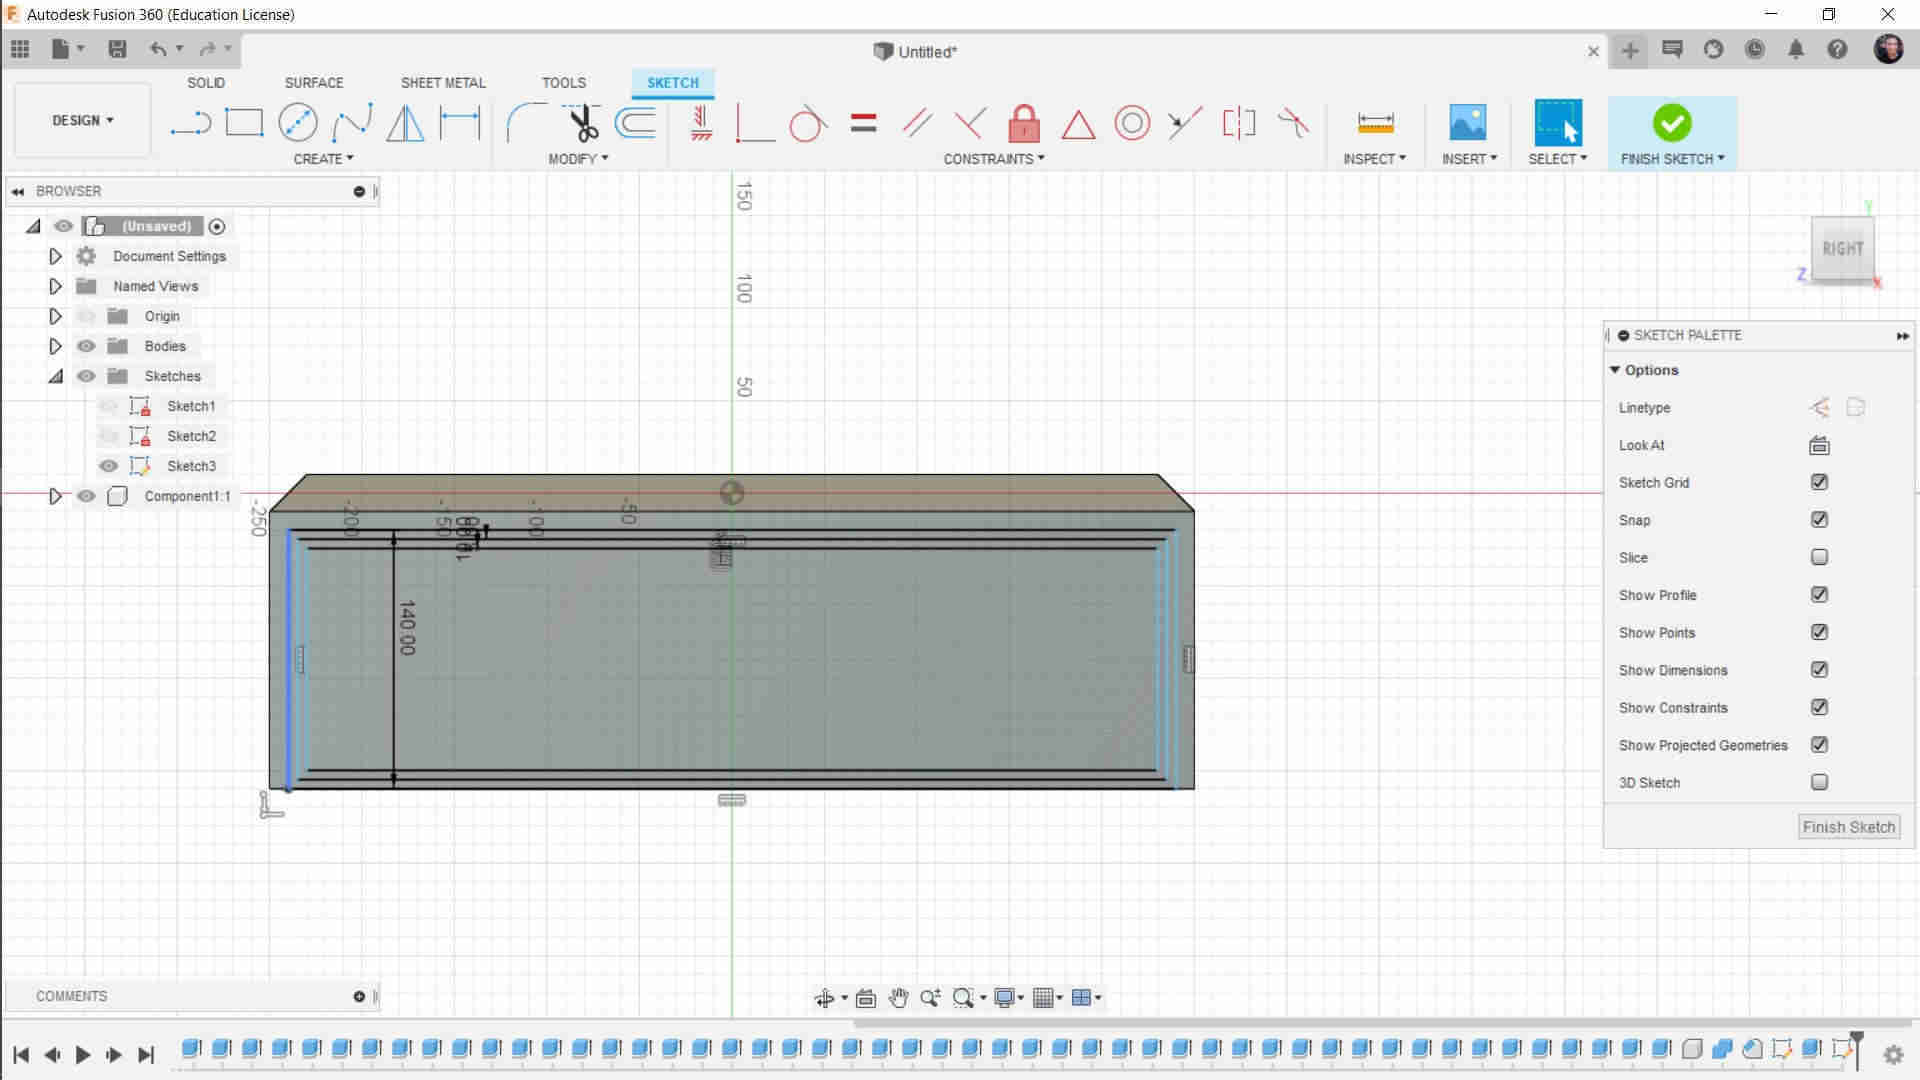
Make Cut in the side of the board as the following
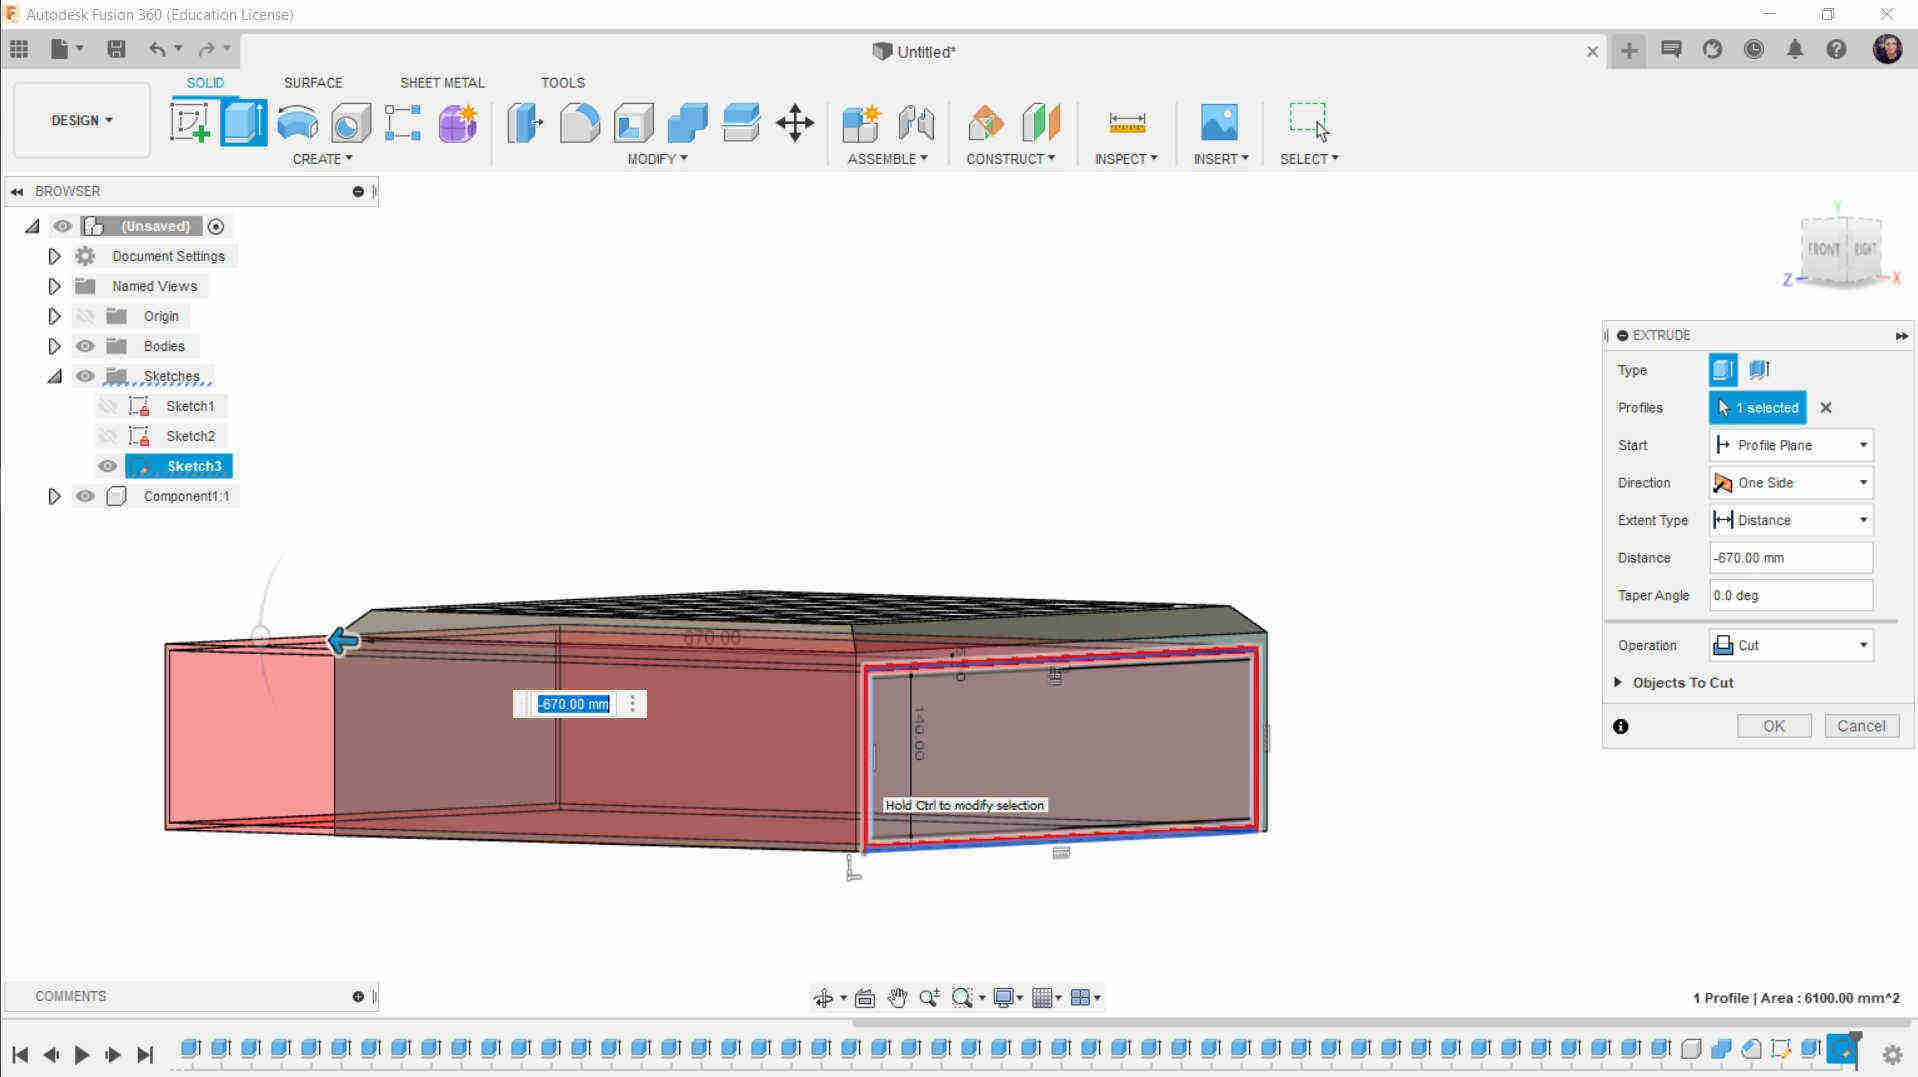
And make shelf in the side of the board of chess as the following
Make a Bottom of the shelf
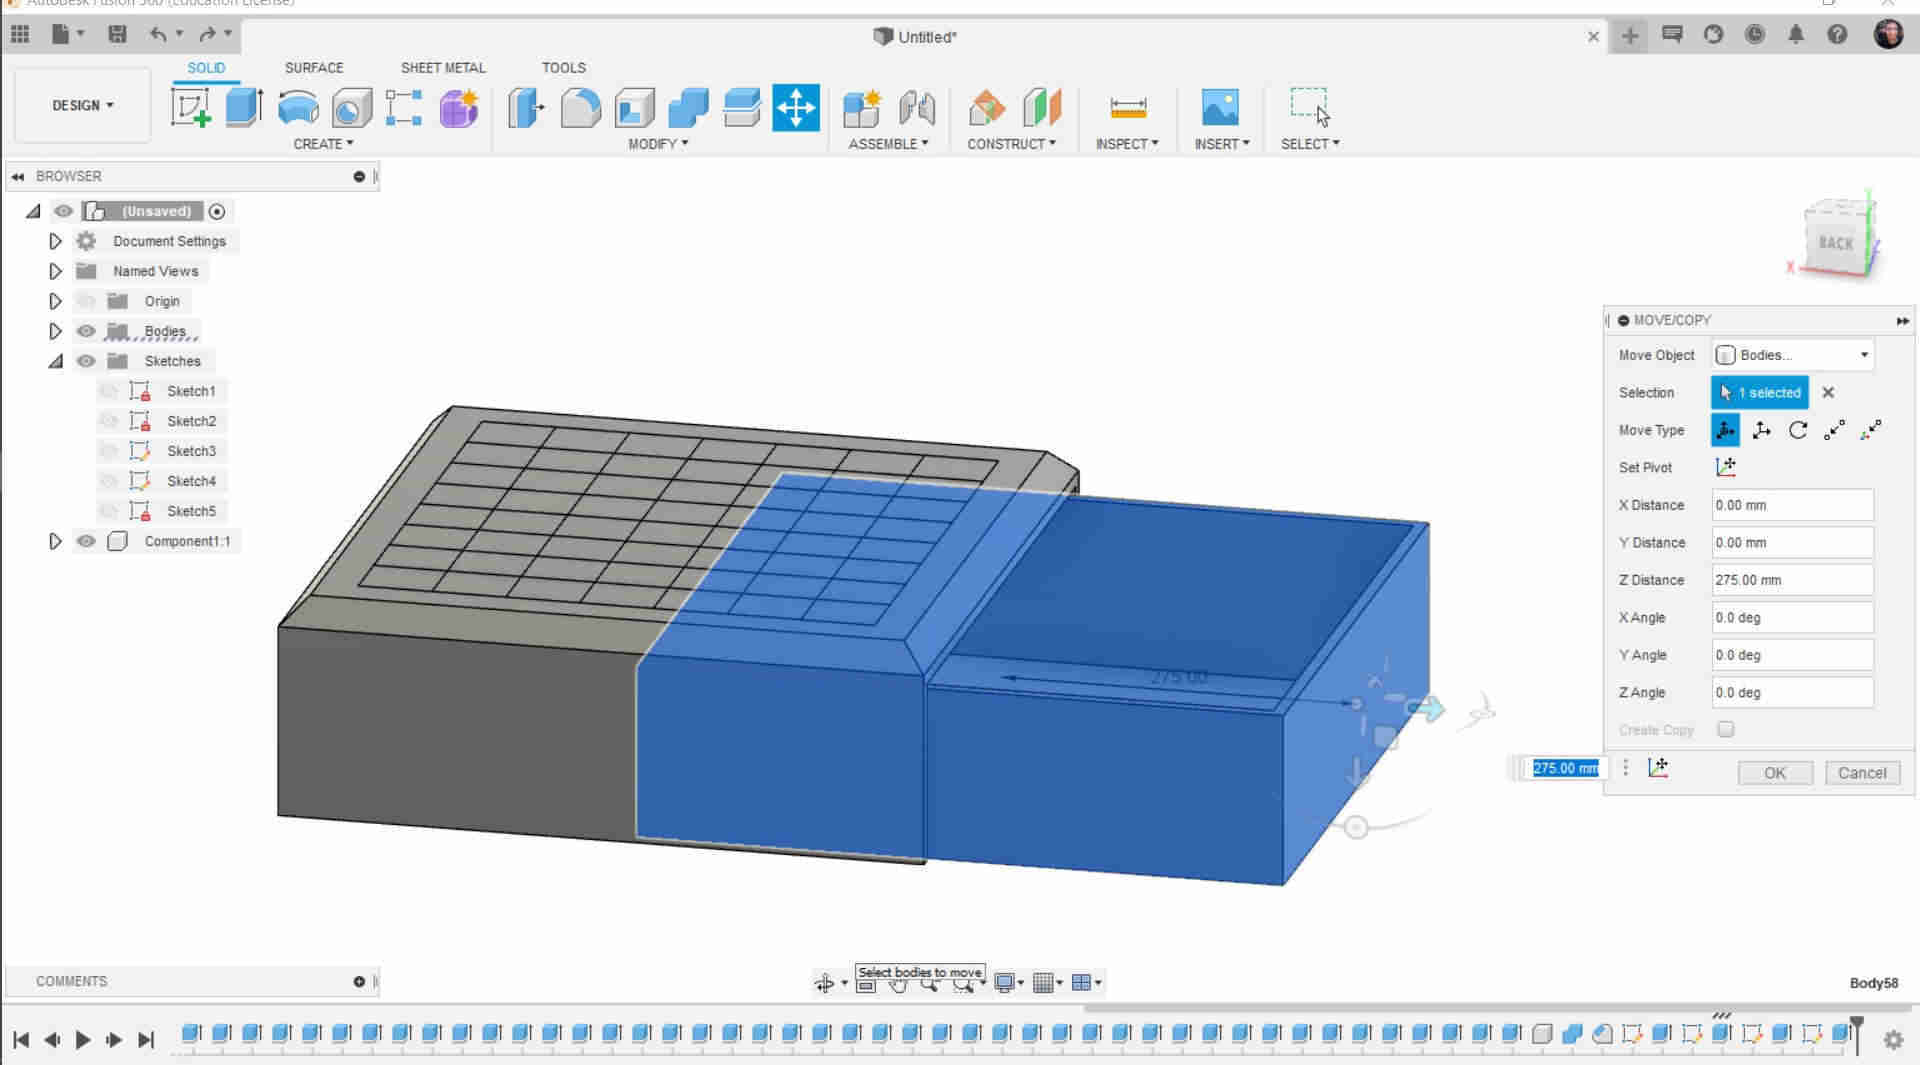
Move the Postion of the shelf and move it slightly forward
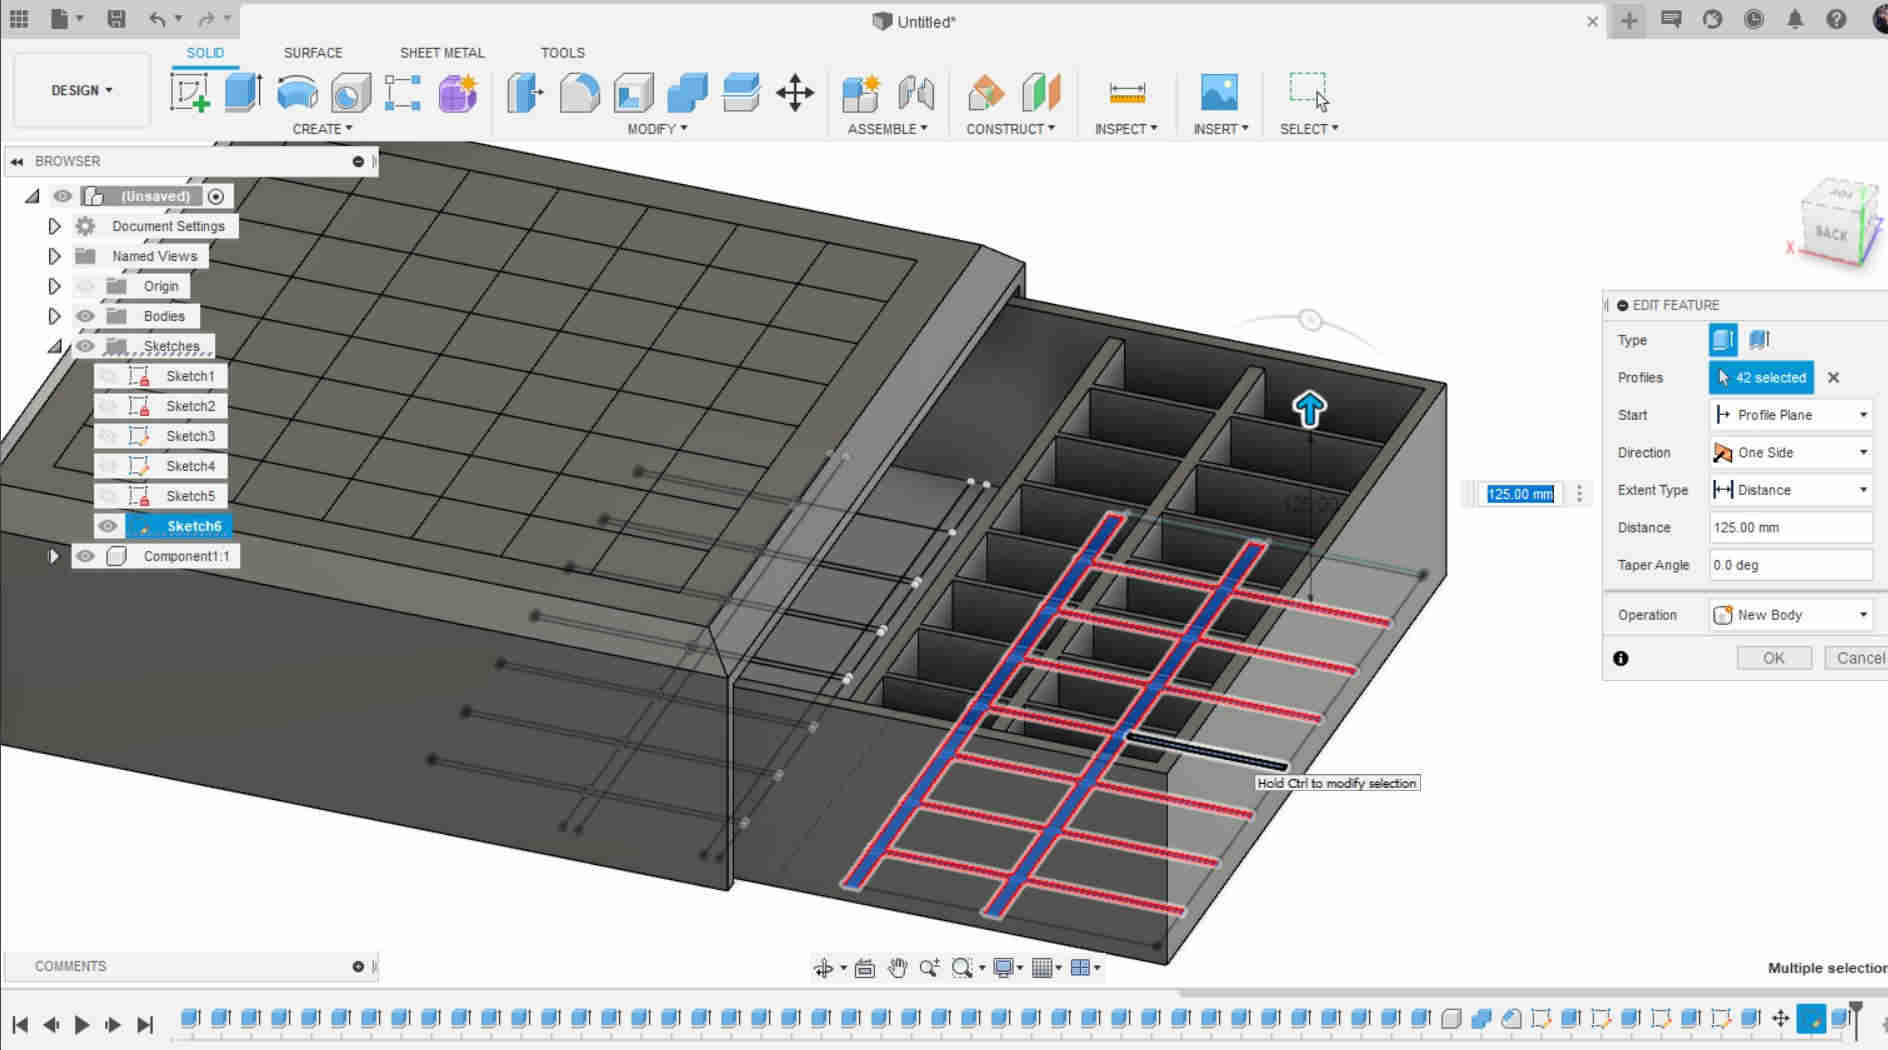
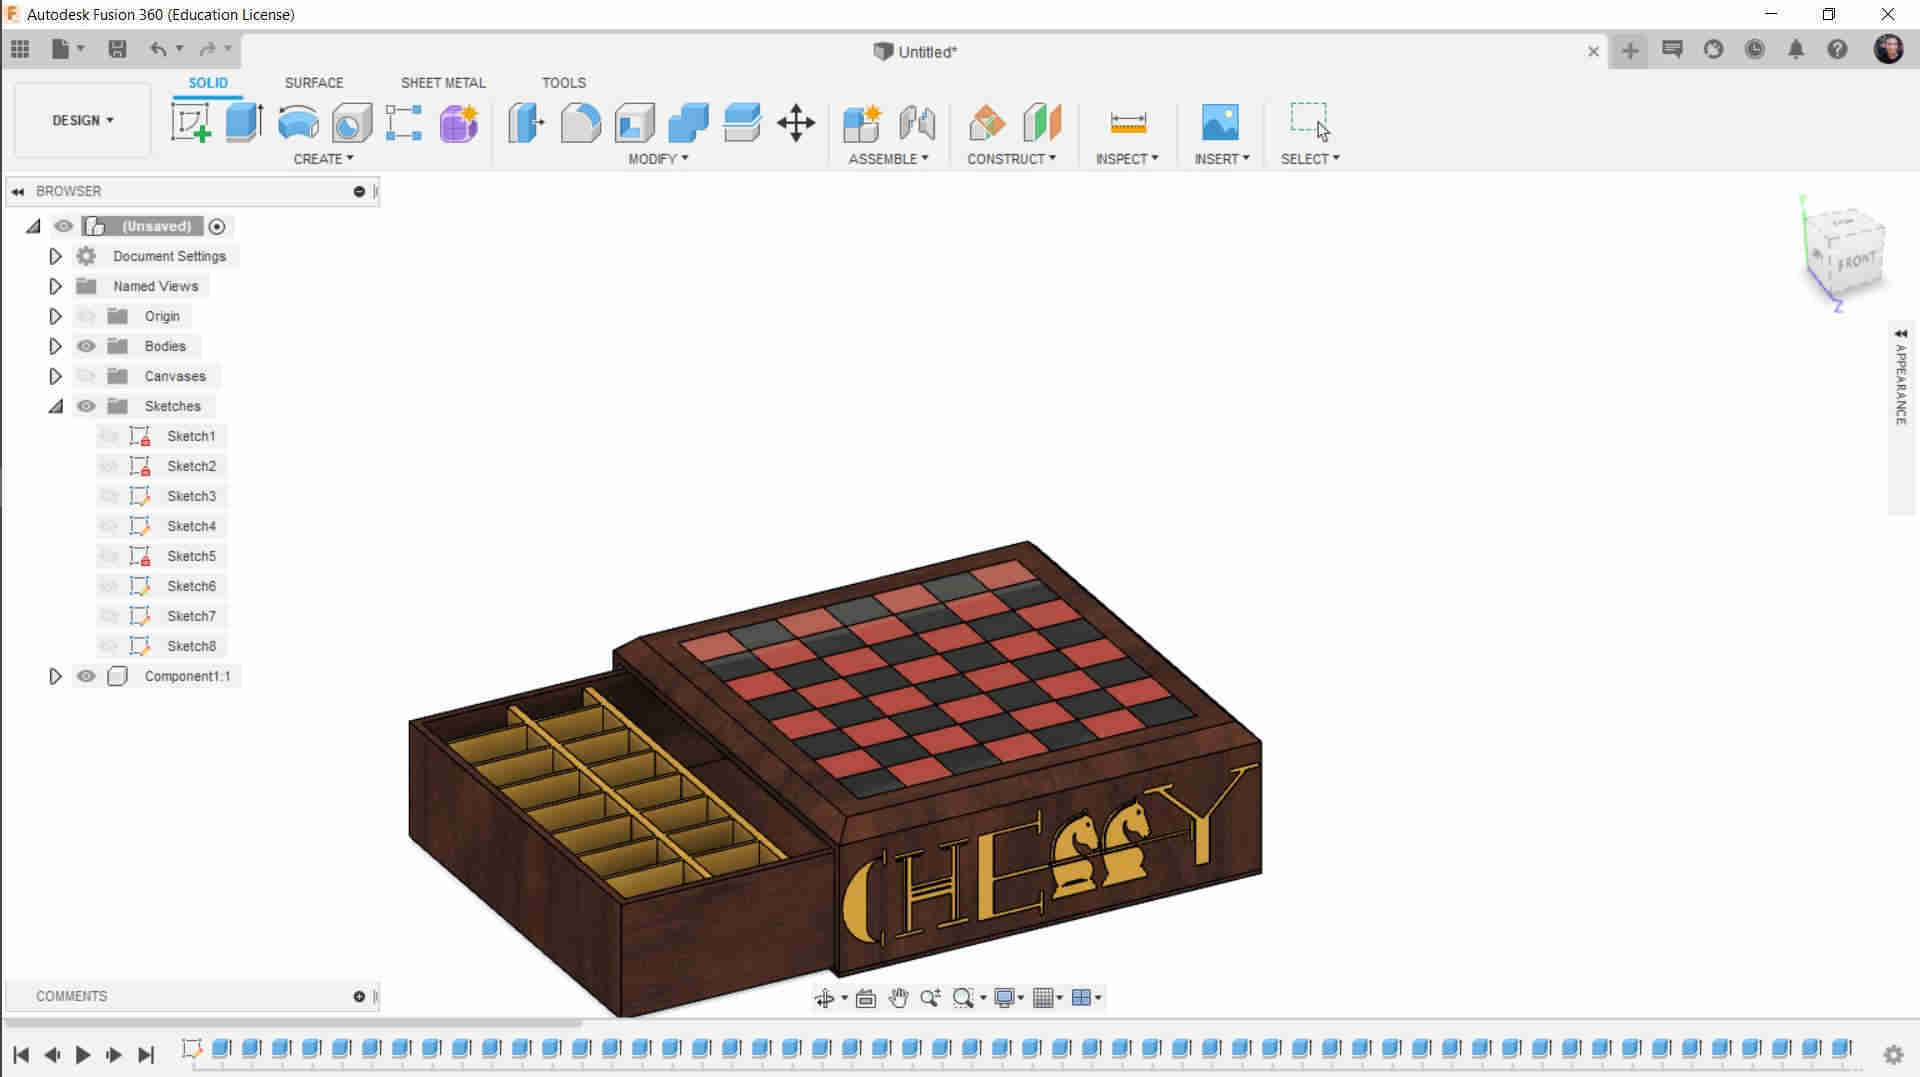
Make shelfs in the big shelf as the following
Choose CANAVAS and put the image in the side of the chess board
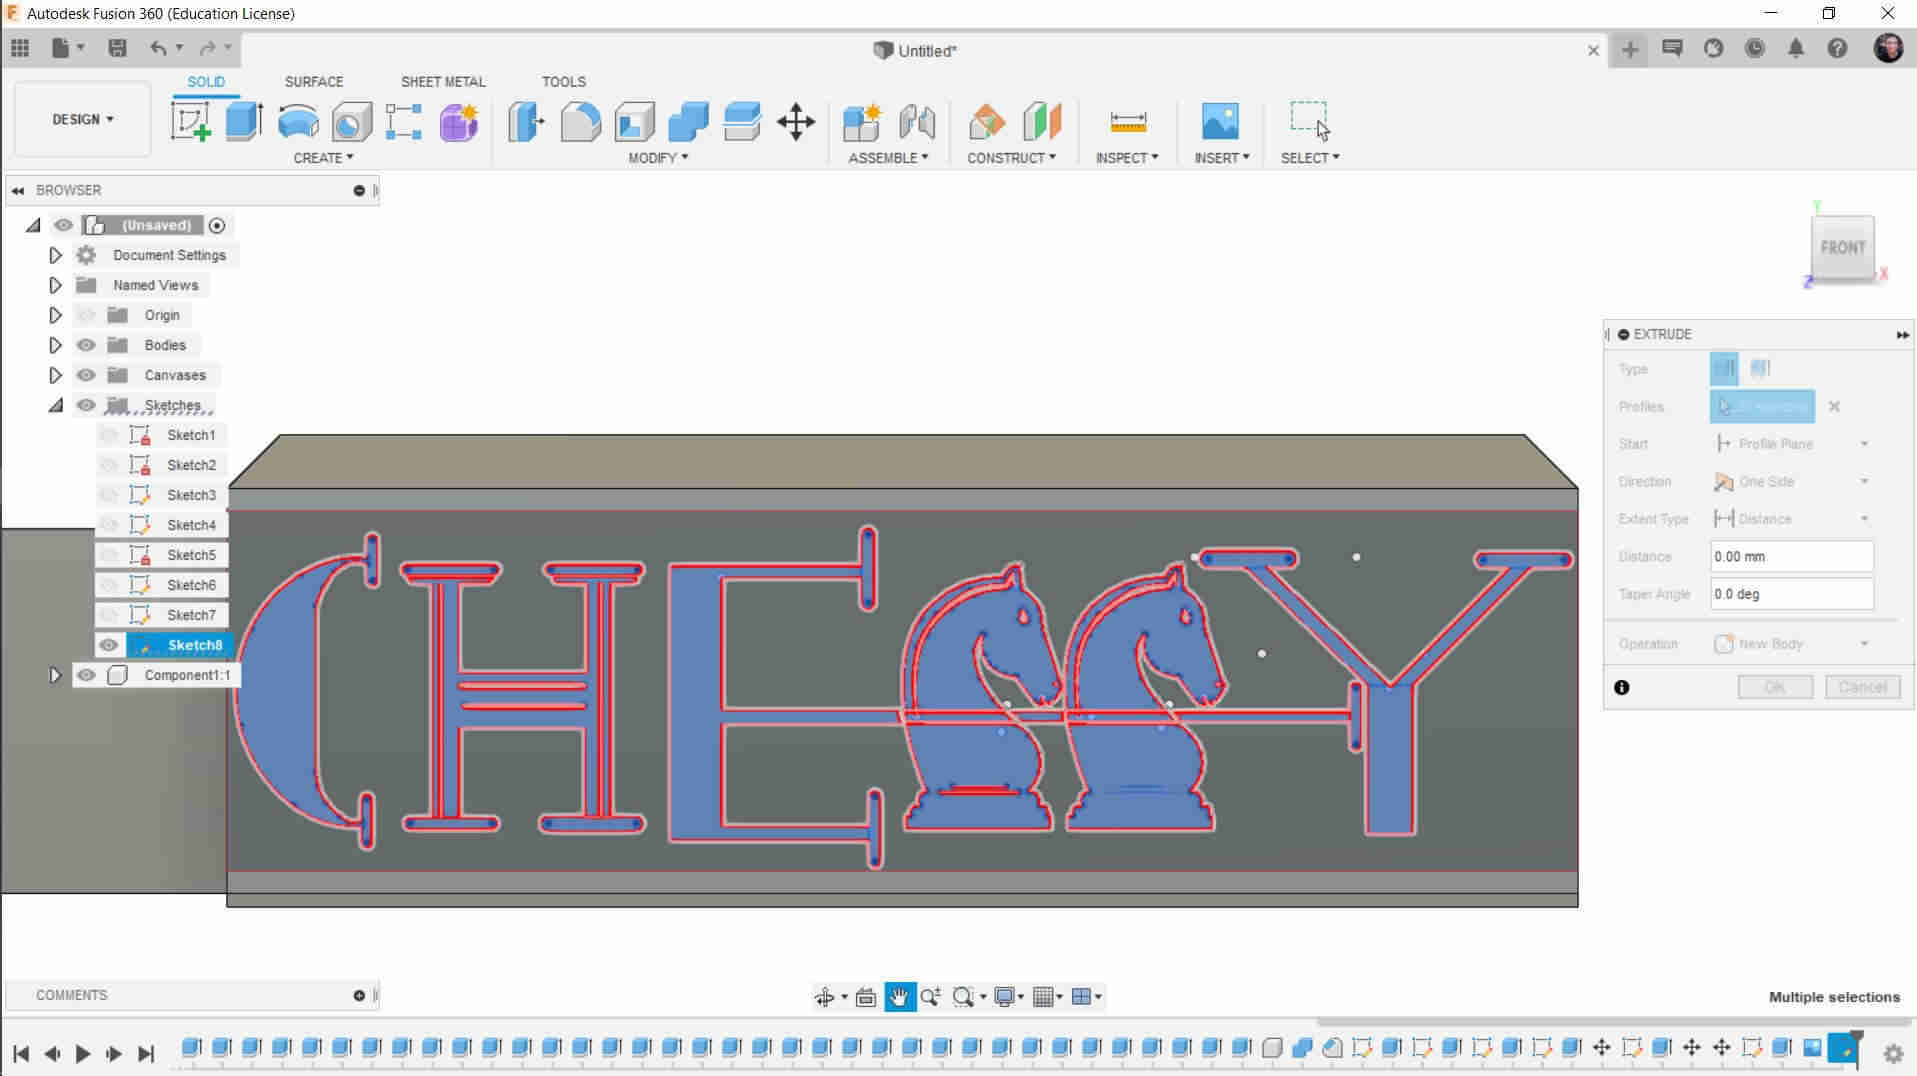
Draw the LOGO
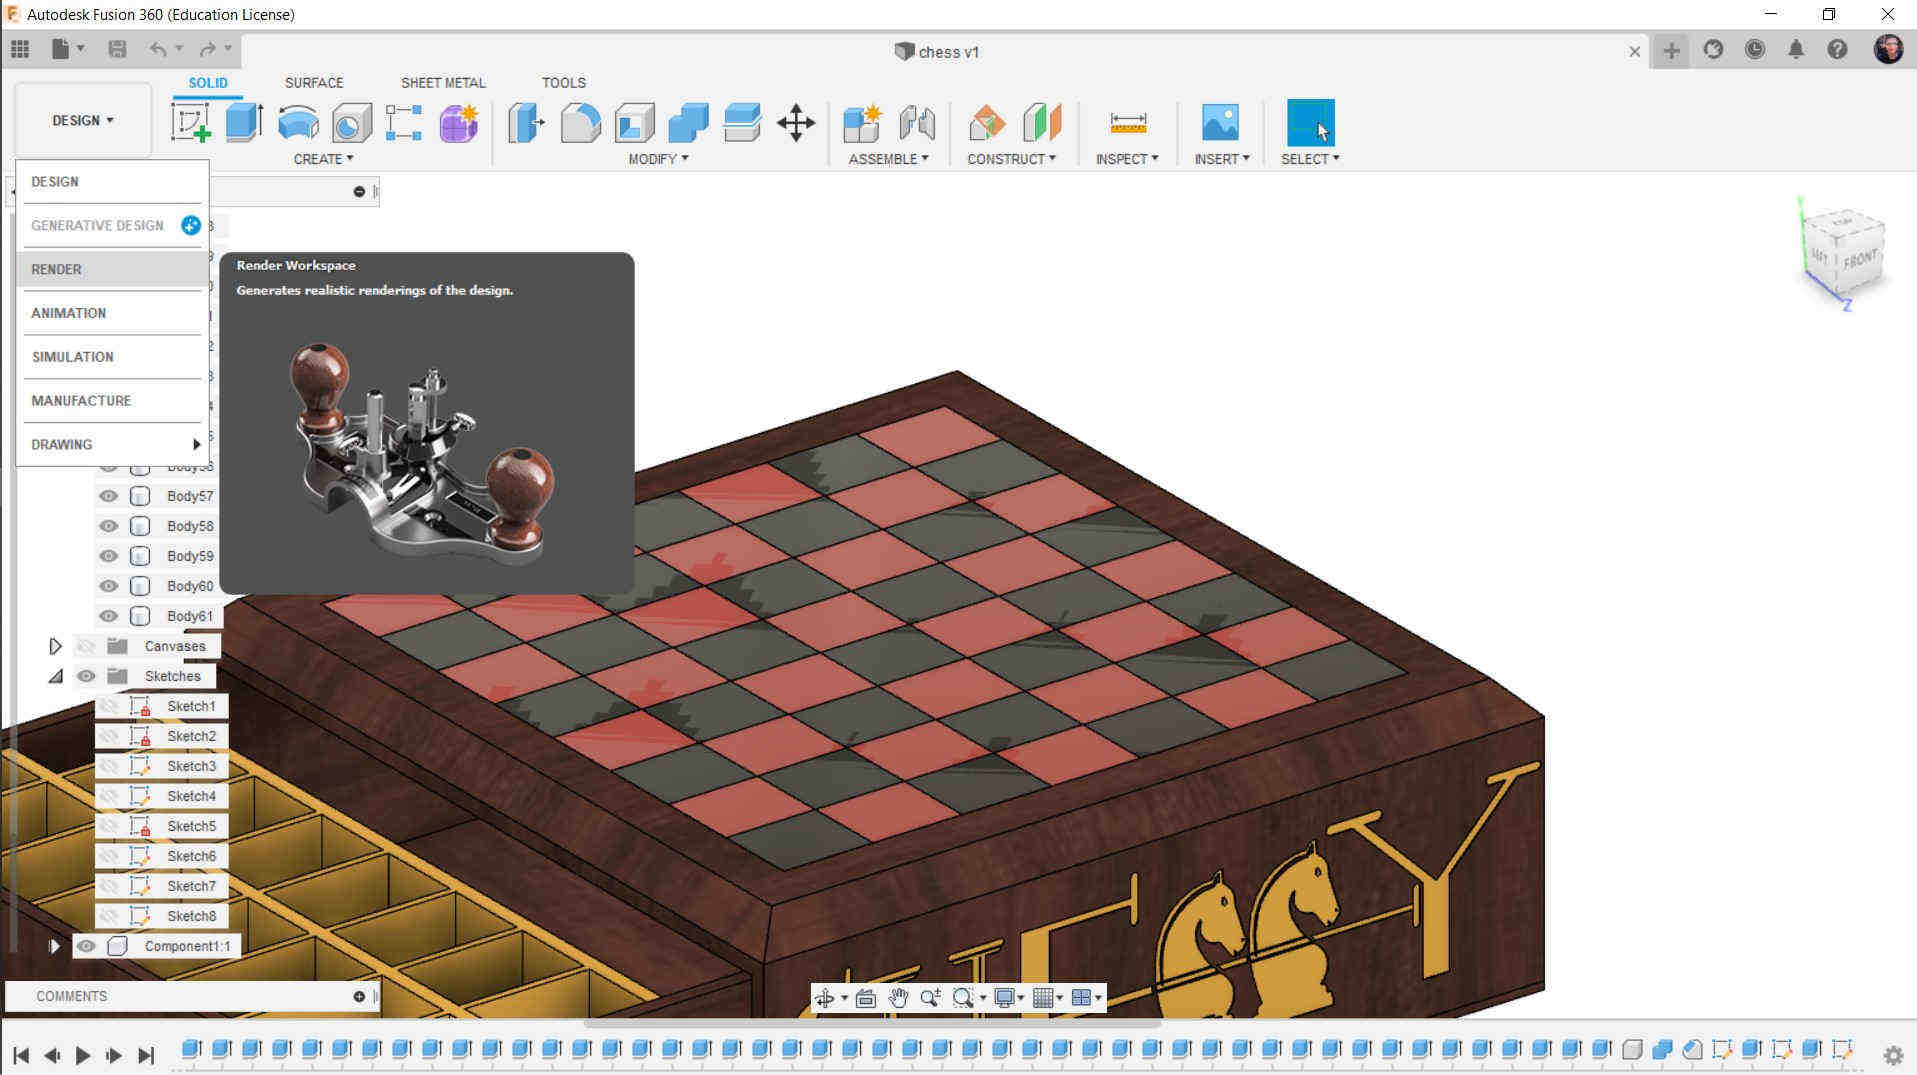
Change the appearance and material of the chess board to Move to Rendering Steps
Rendering
Open the Render View in Fusion
Then Edit in the Scene Sitting Like (Brightness, Background, ....etc)
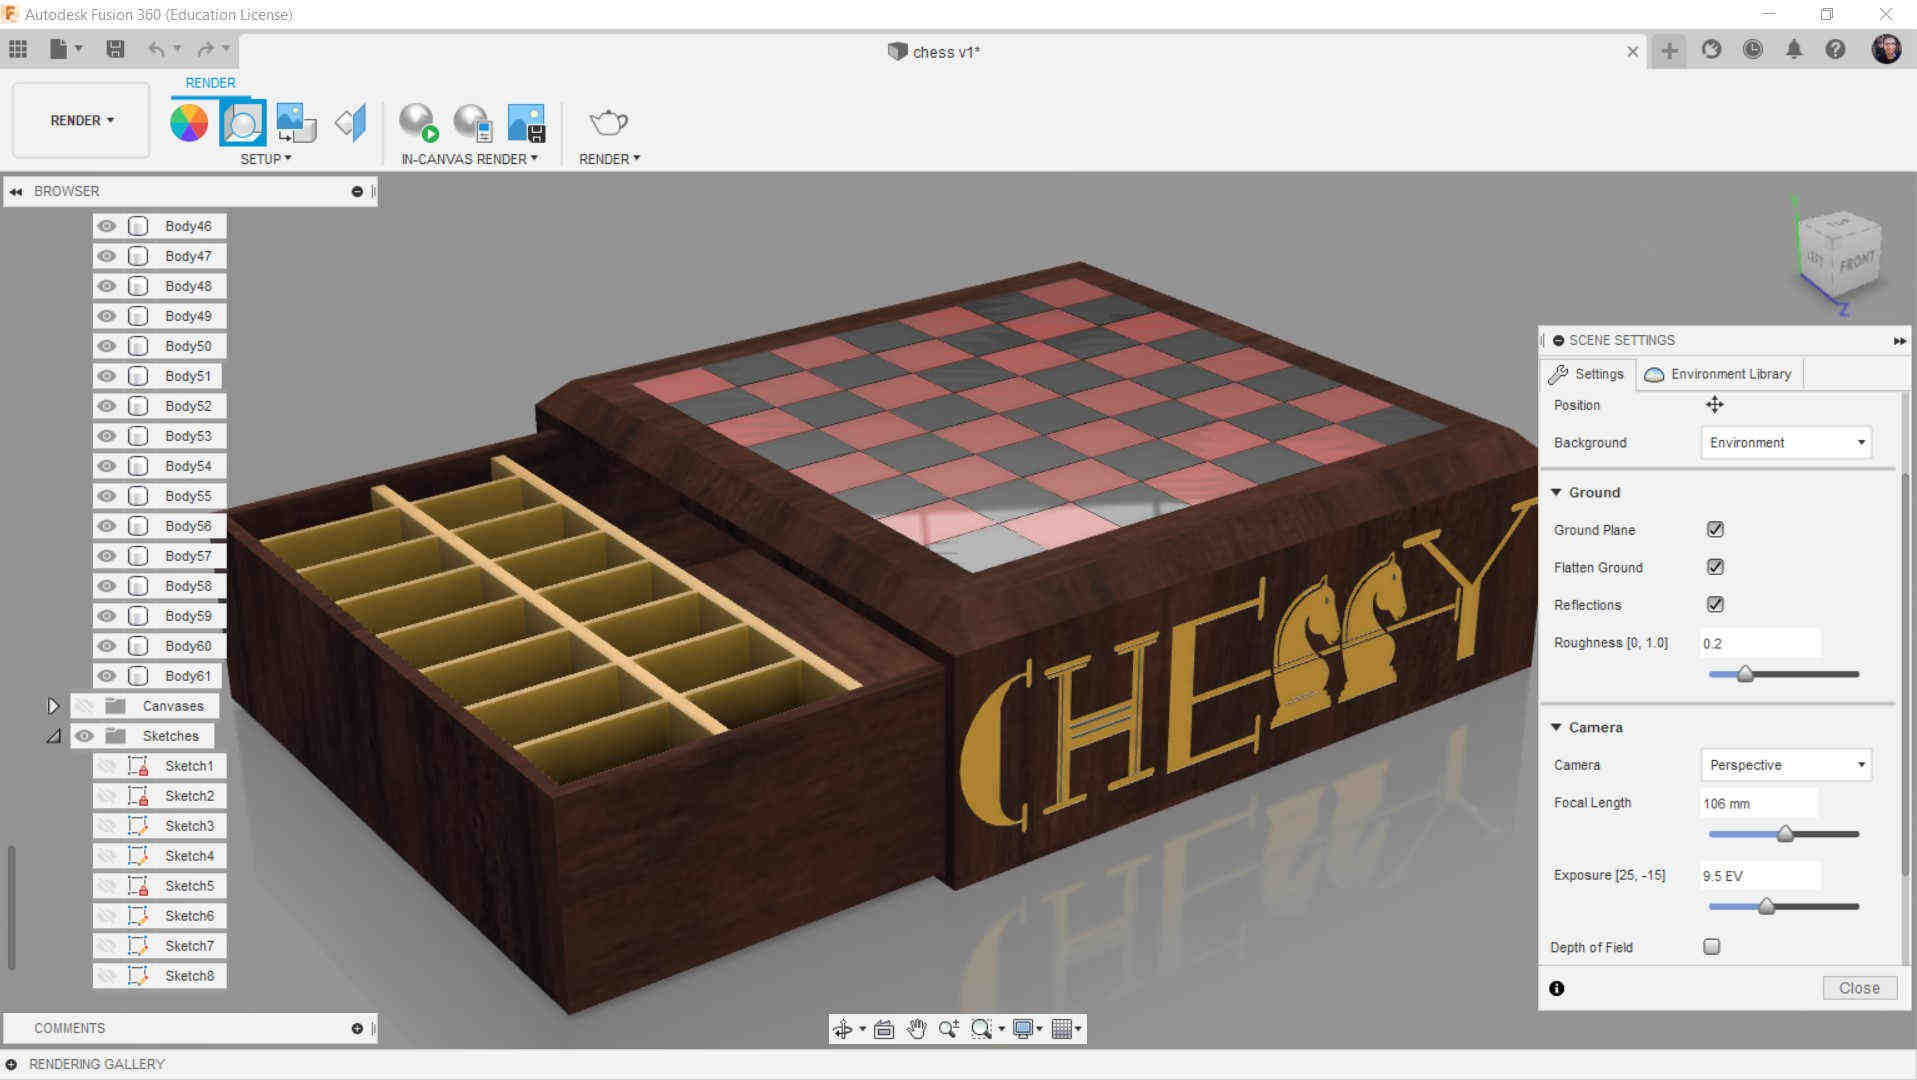
Then Click on the render tap above
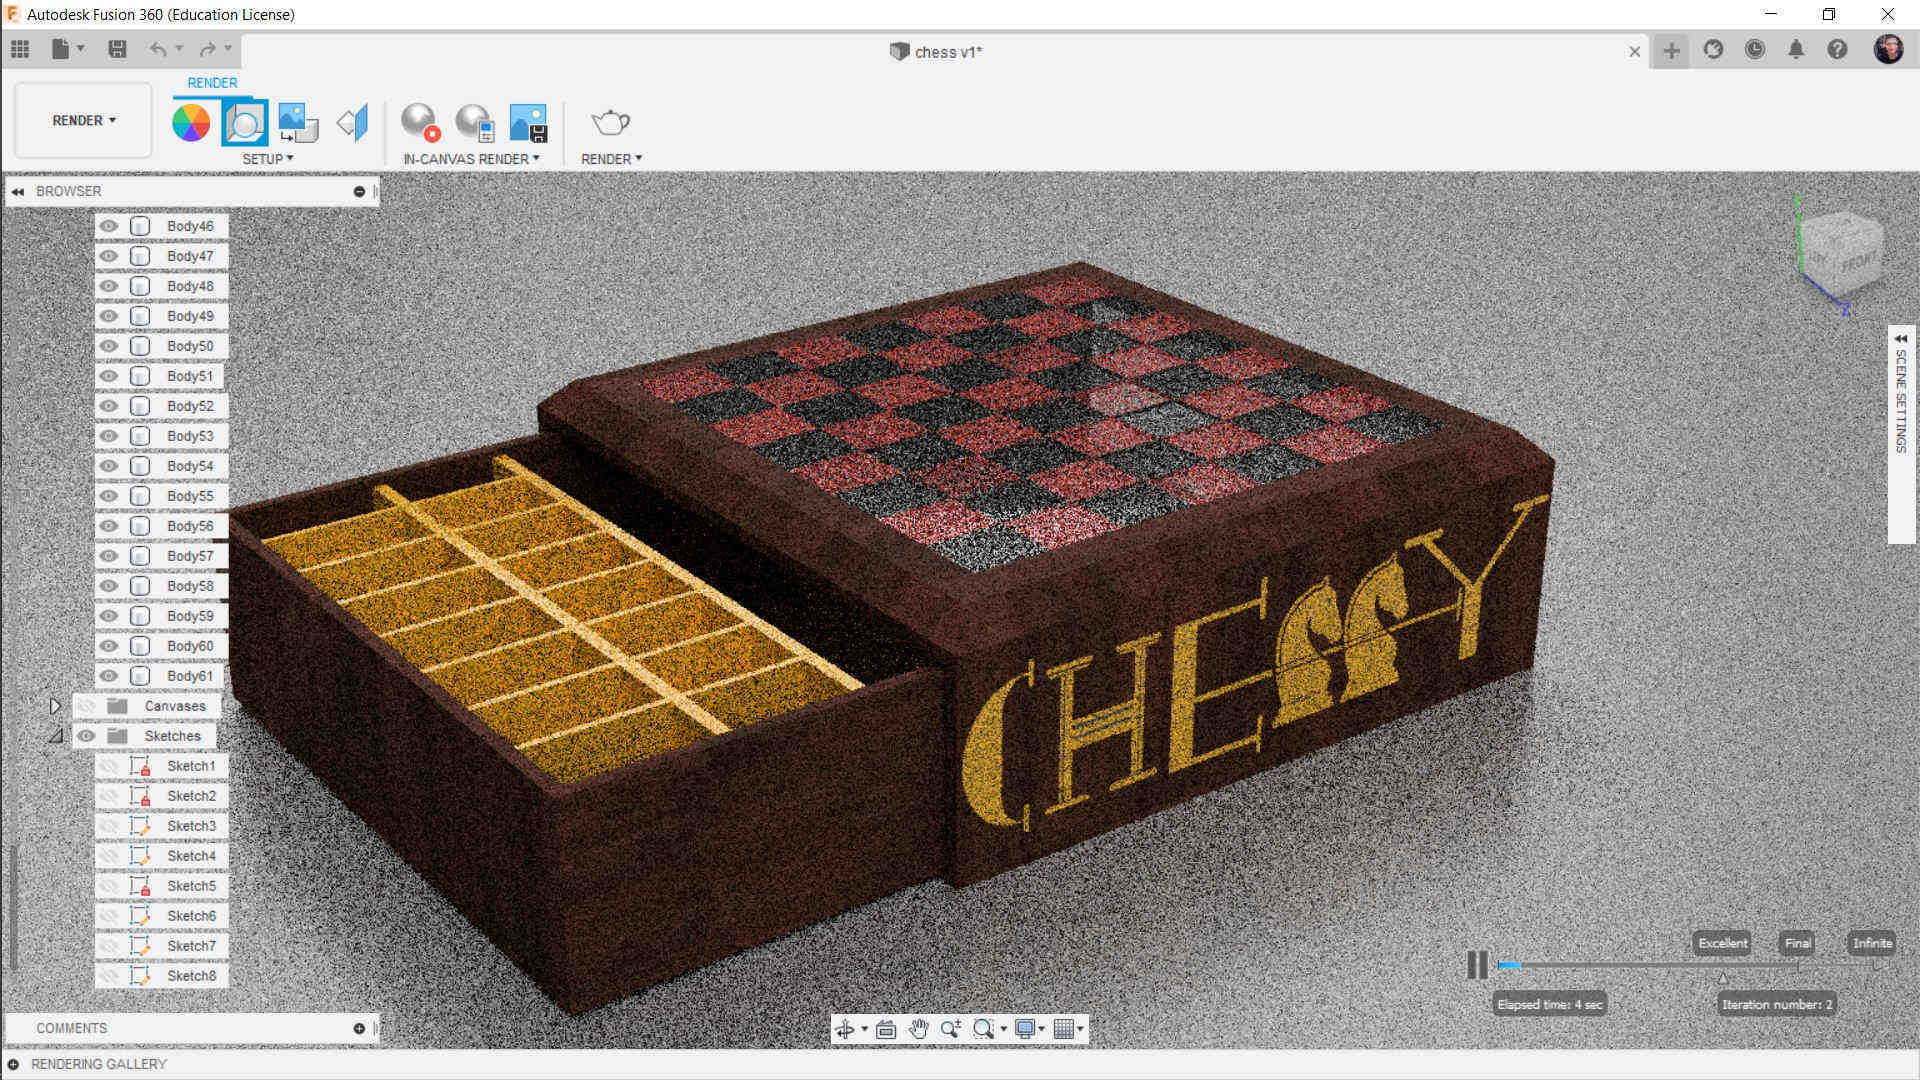
Now Let's see the result
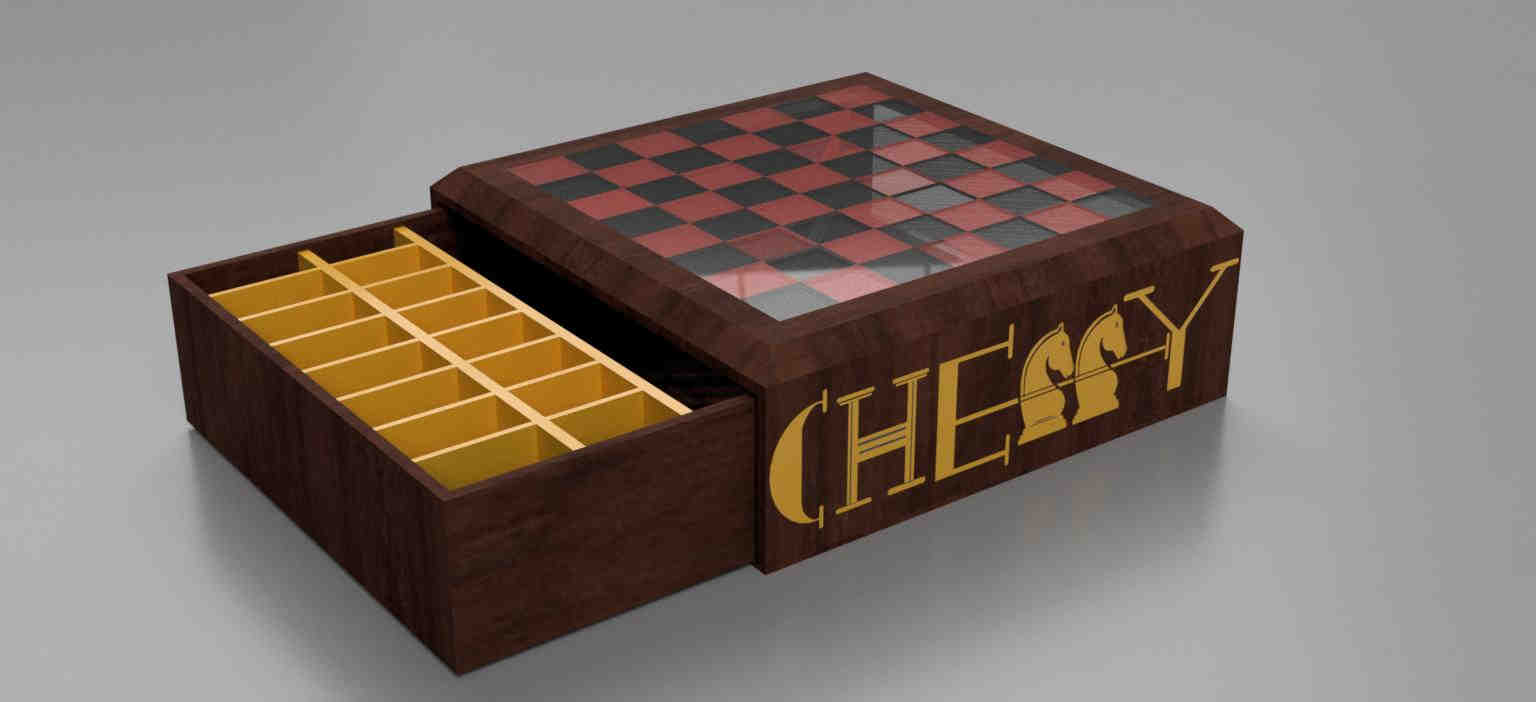
And here is it the chess Pieces Rendering
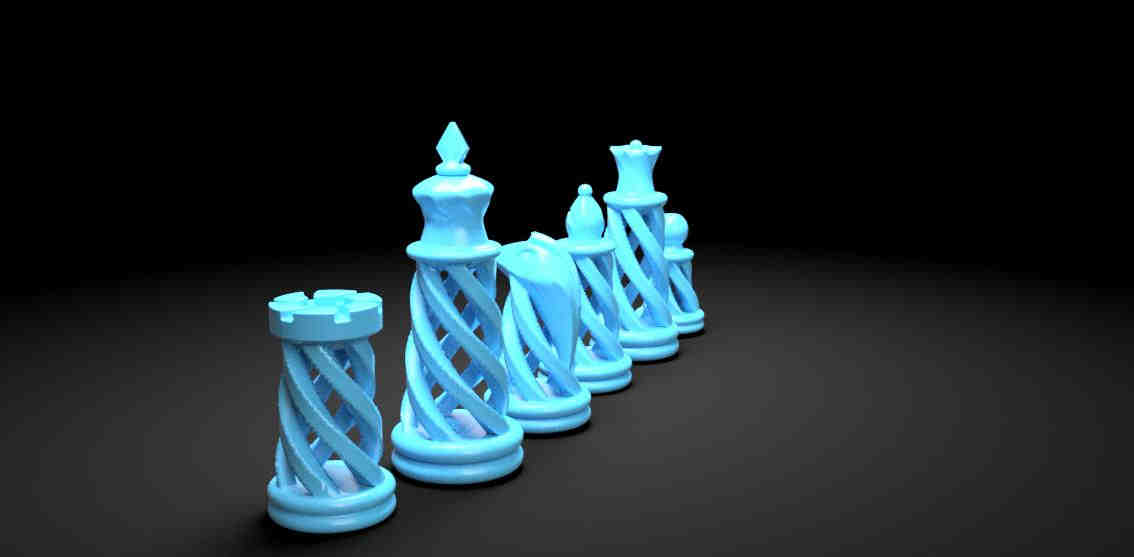
3D View
And here is Design For Pieces
Motor Motion (Fusion)
“Creativity is nothing but a mind set free.” –Torrie T. Asai
One thing I always to make when I was young, I think you already guessed it Motors
Isn't Cool To make something beautiful Like Motors, but actually that's not the only reason to make it, I make this Motor to Practice on joints and how to Study motions
I admit it's not simple to make a motion of motor, but believe me it's worth every hour to spend in designing it
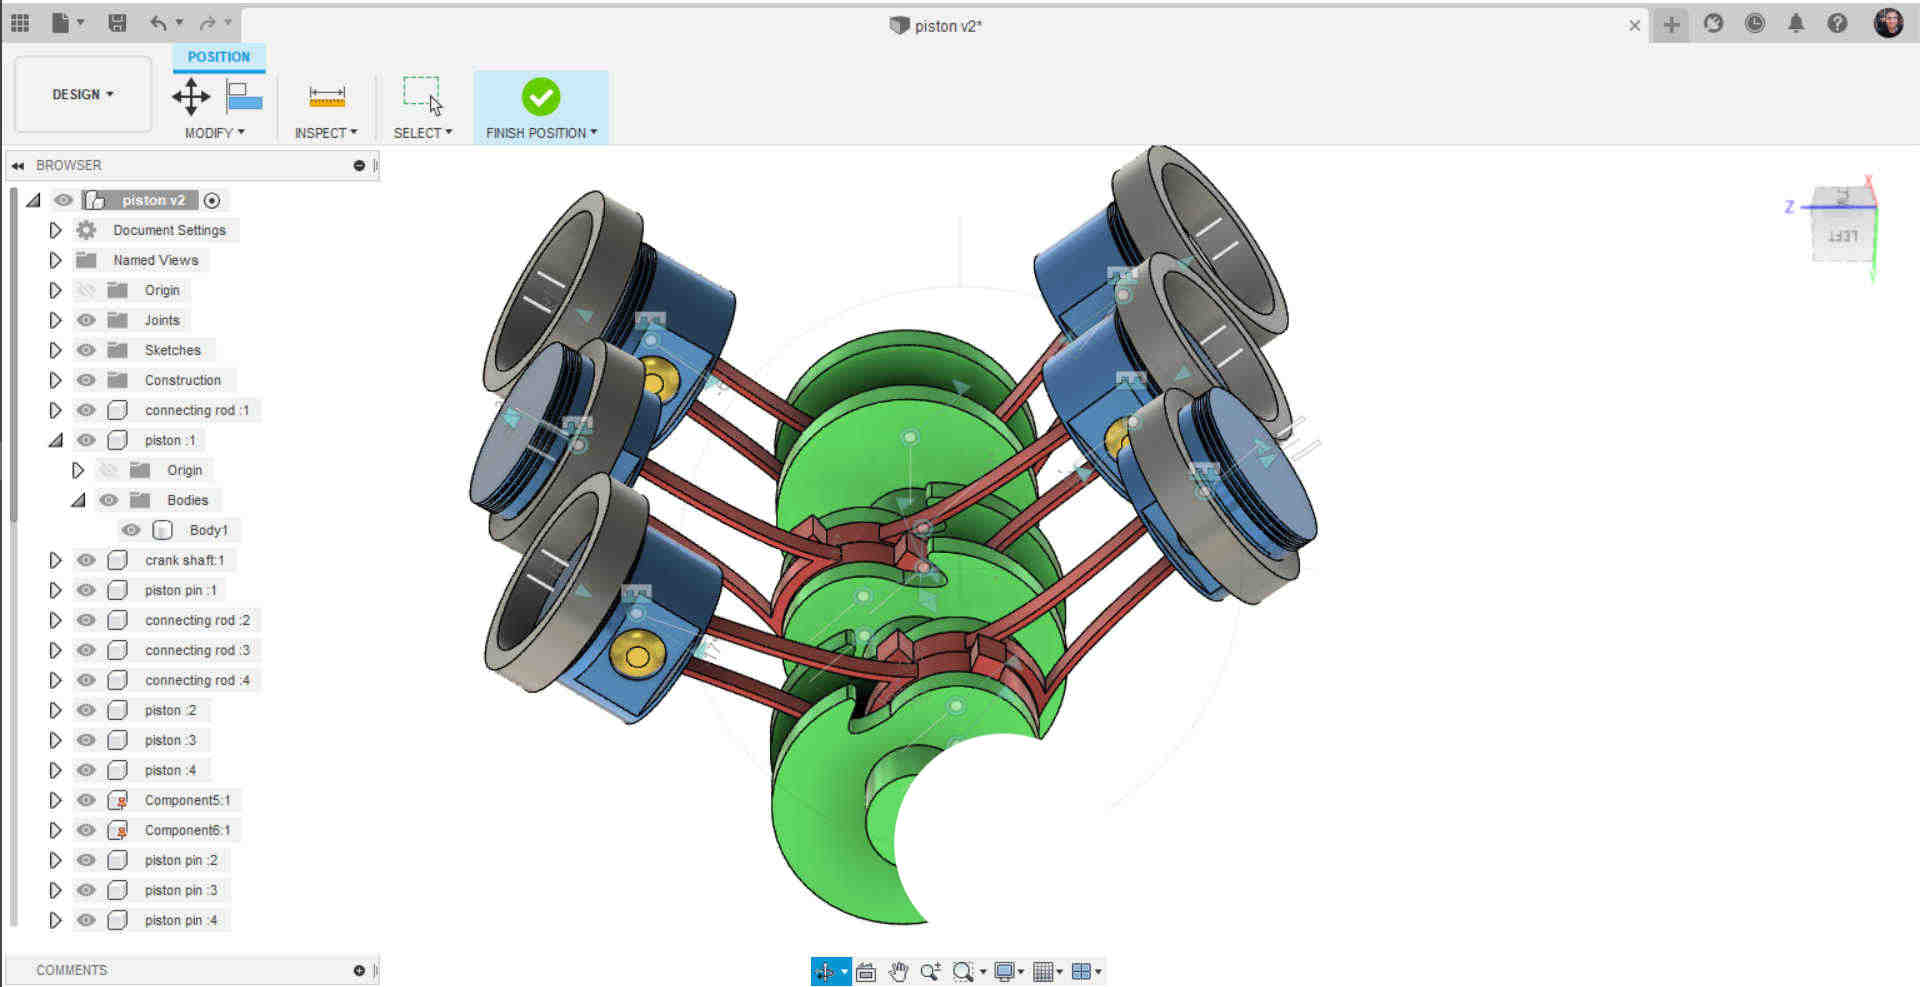
The Final Result
I will expalin the Parts of Design In form of steps
Piston
Open Fusion 360 and Choose plain to Sketch on it and then make Rectangluar and remove the Parts that Shown in the edge
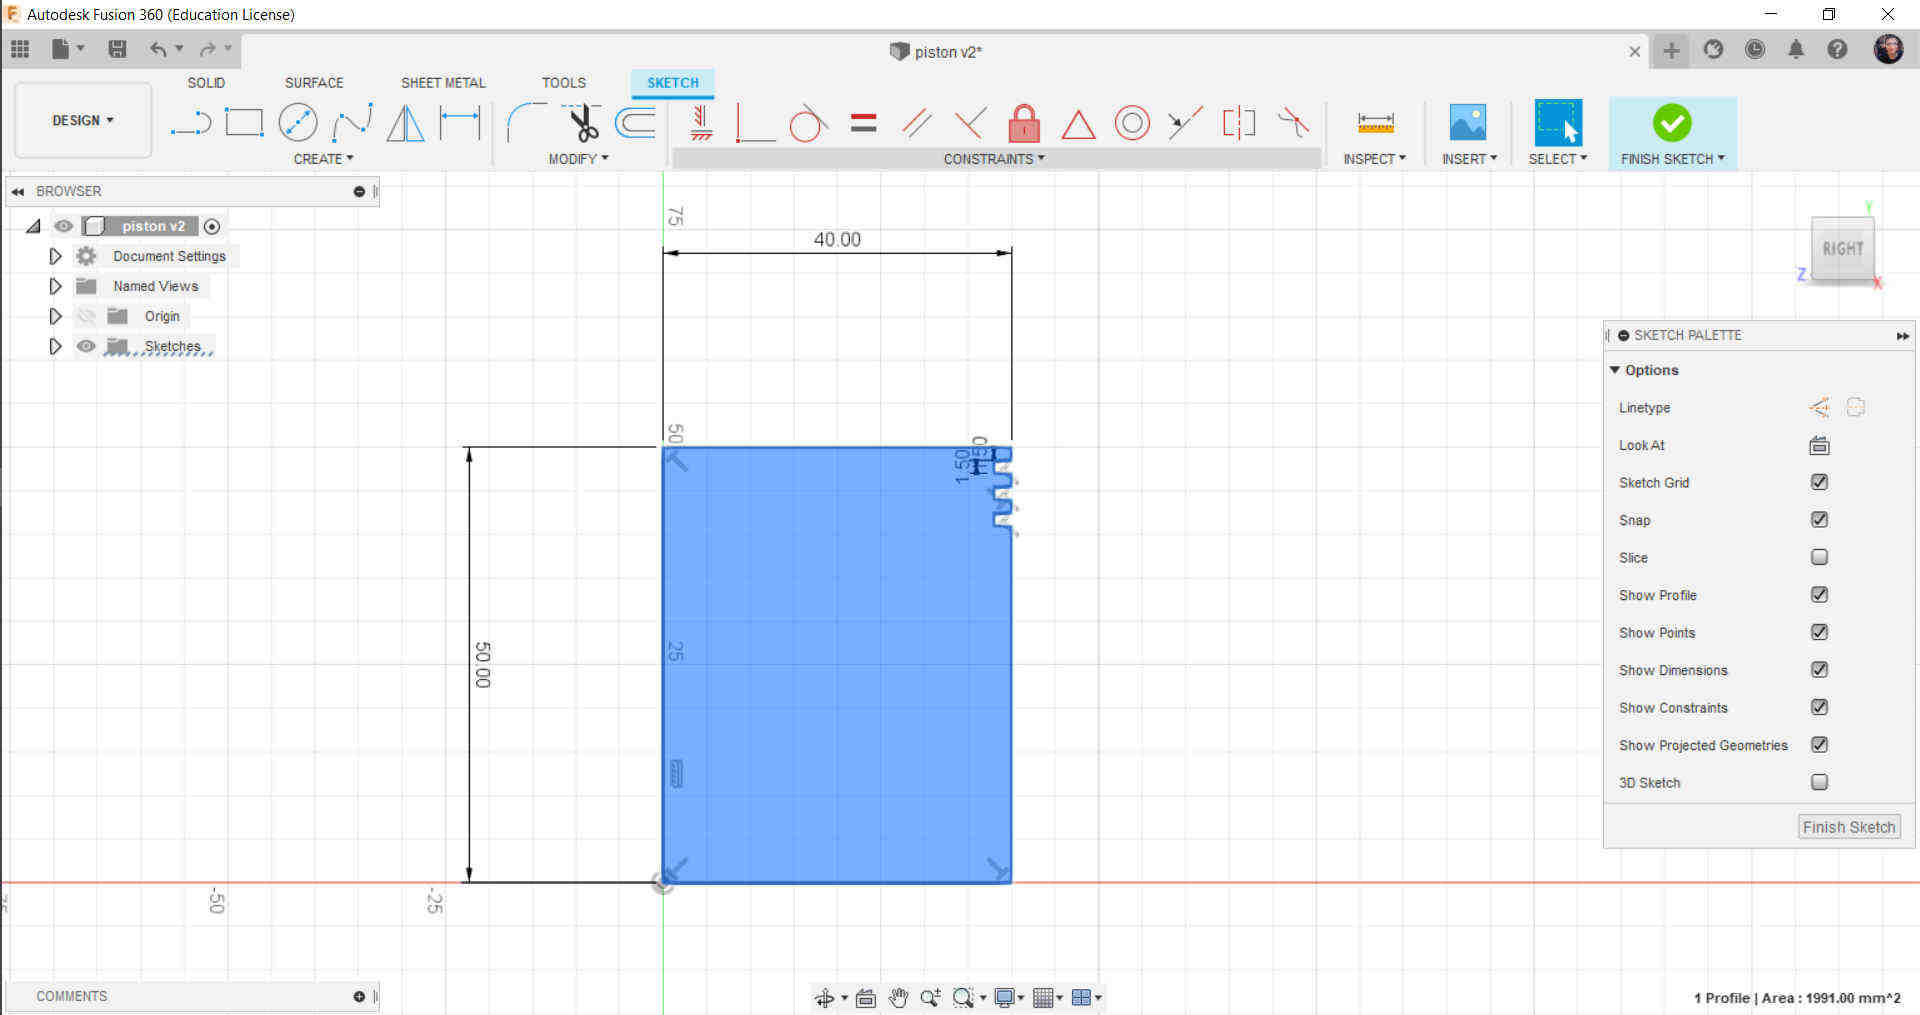
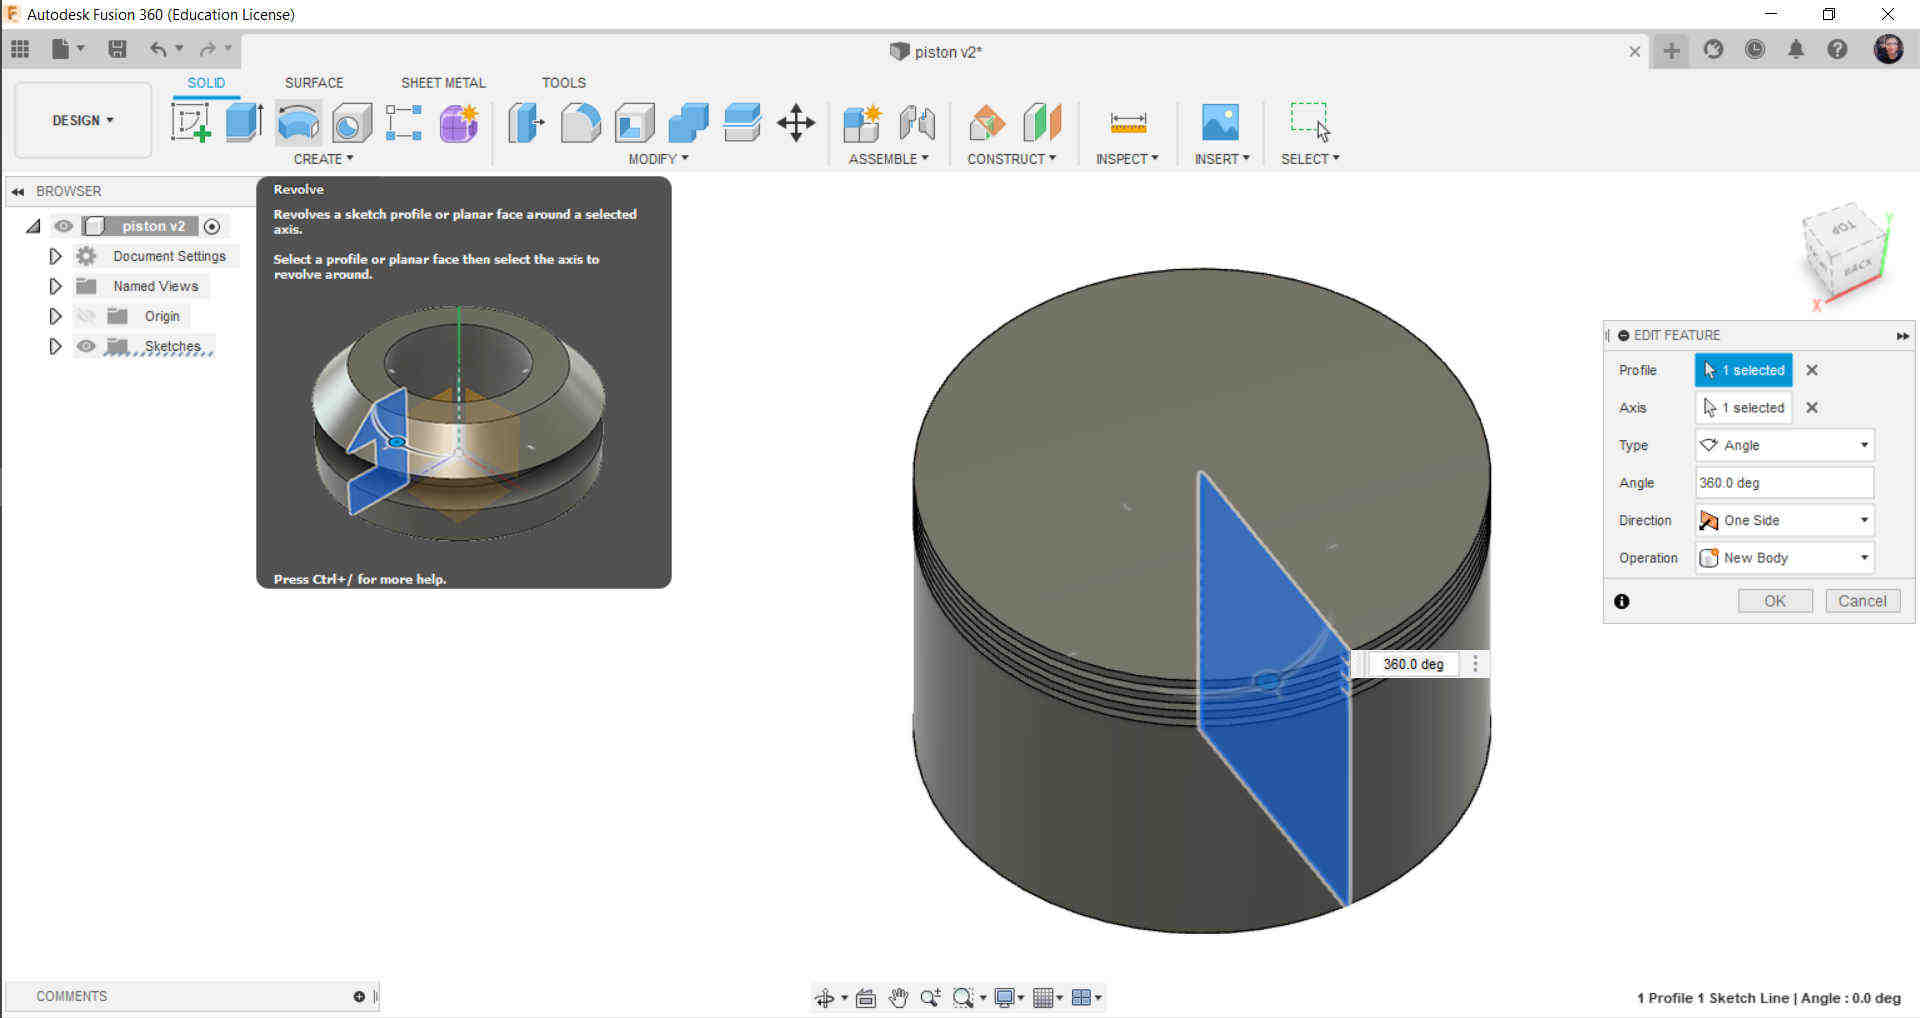
Then from >>Solid<< tap choose Revolve Tool and Configure the options like you see (Revove 360 relative to the center)
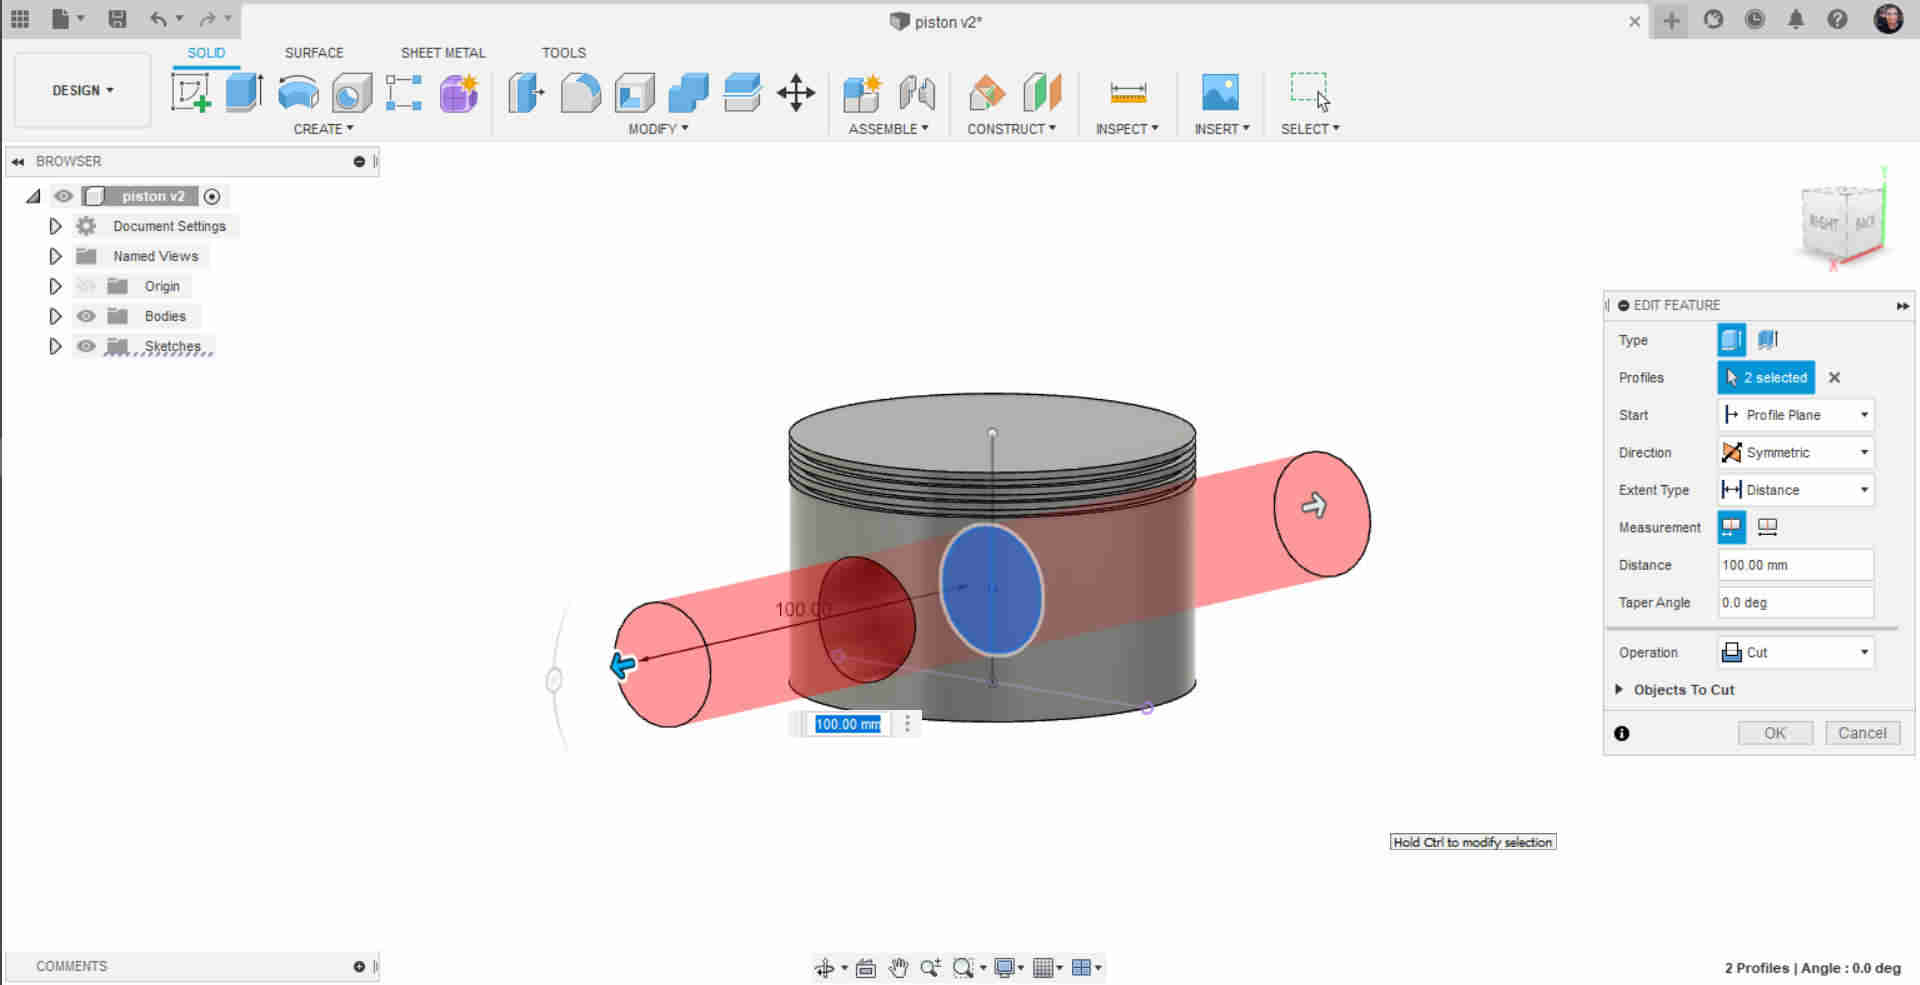
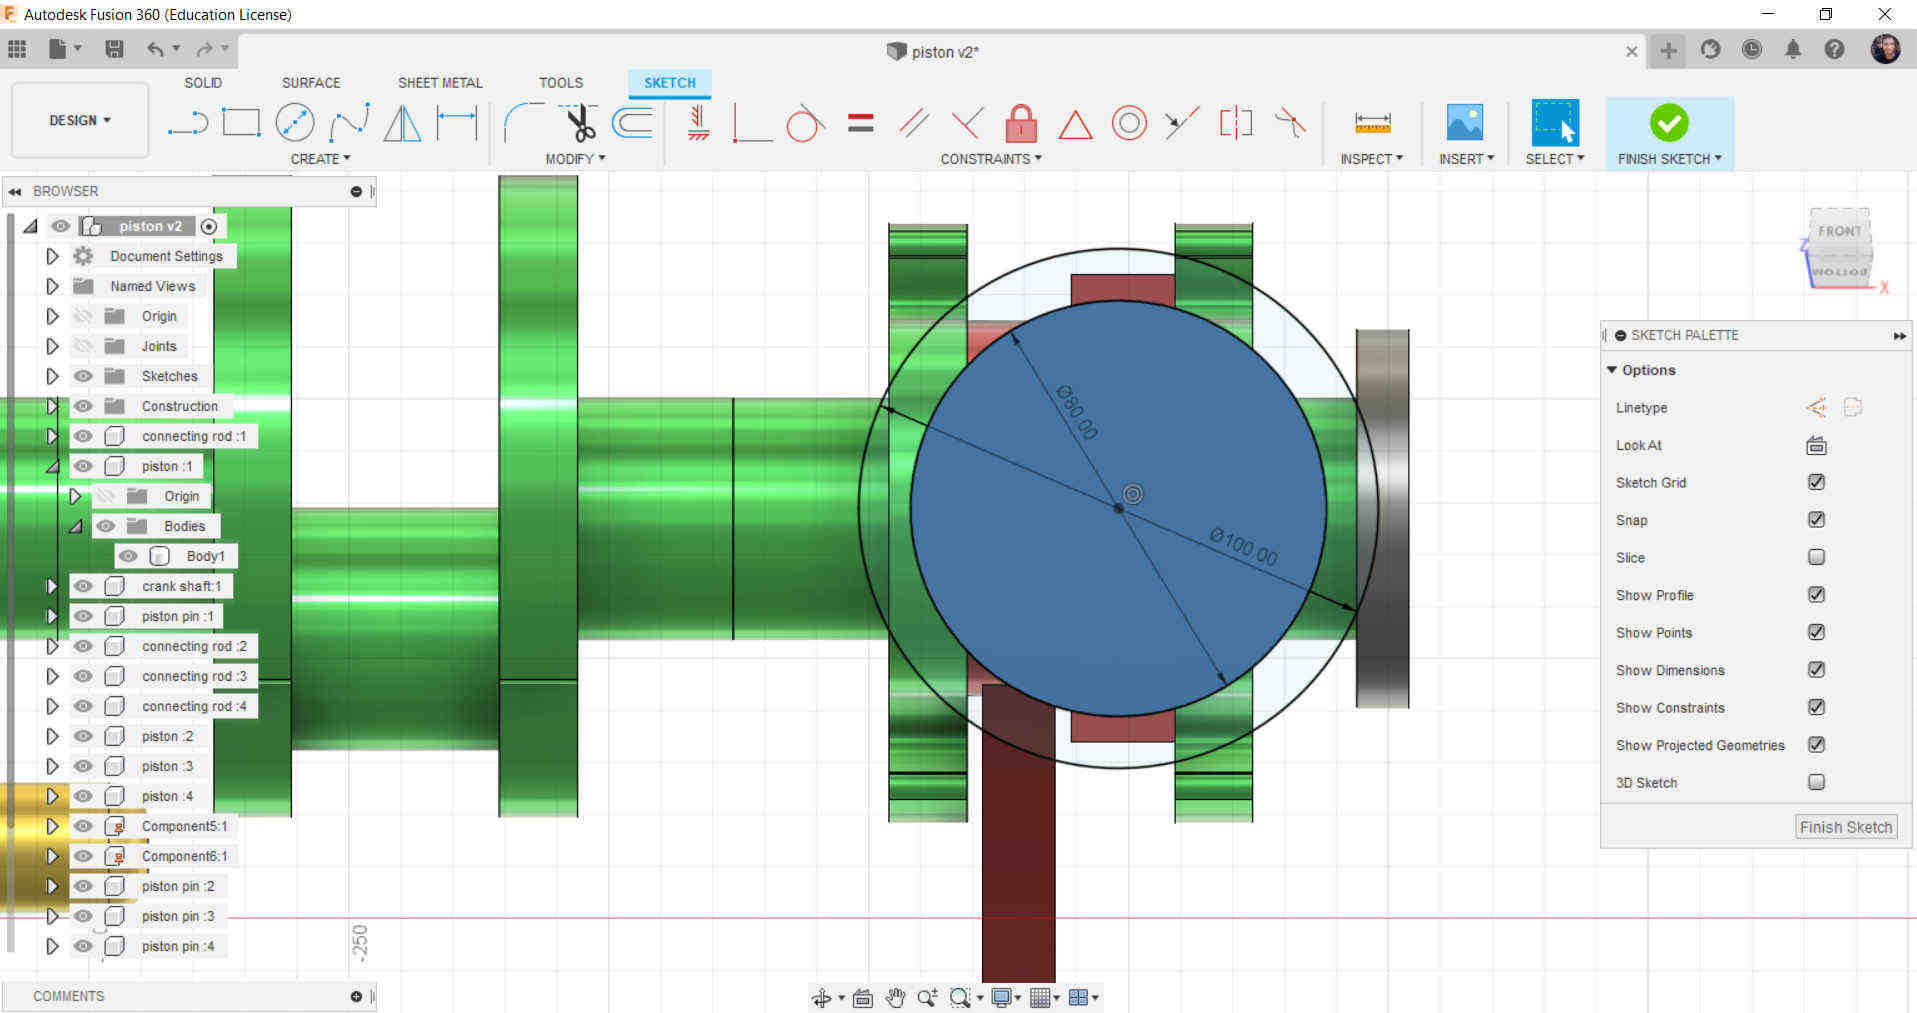
Make Sketch in the Center of the Piston and draw Circle
Cut out this Circle from the piston from >>Extrude>> and Cut
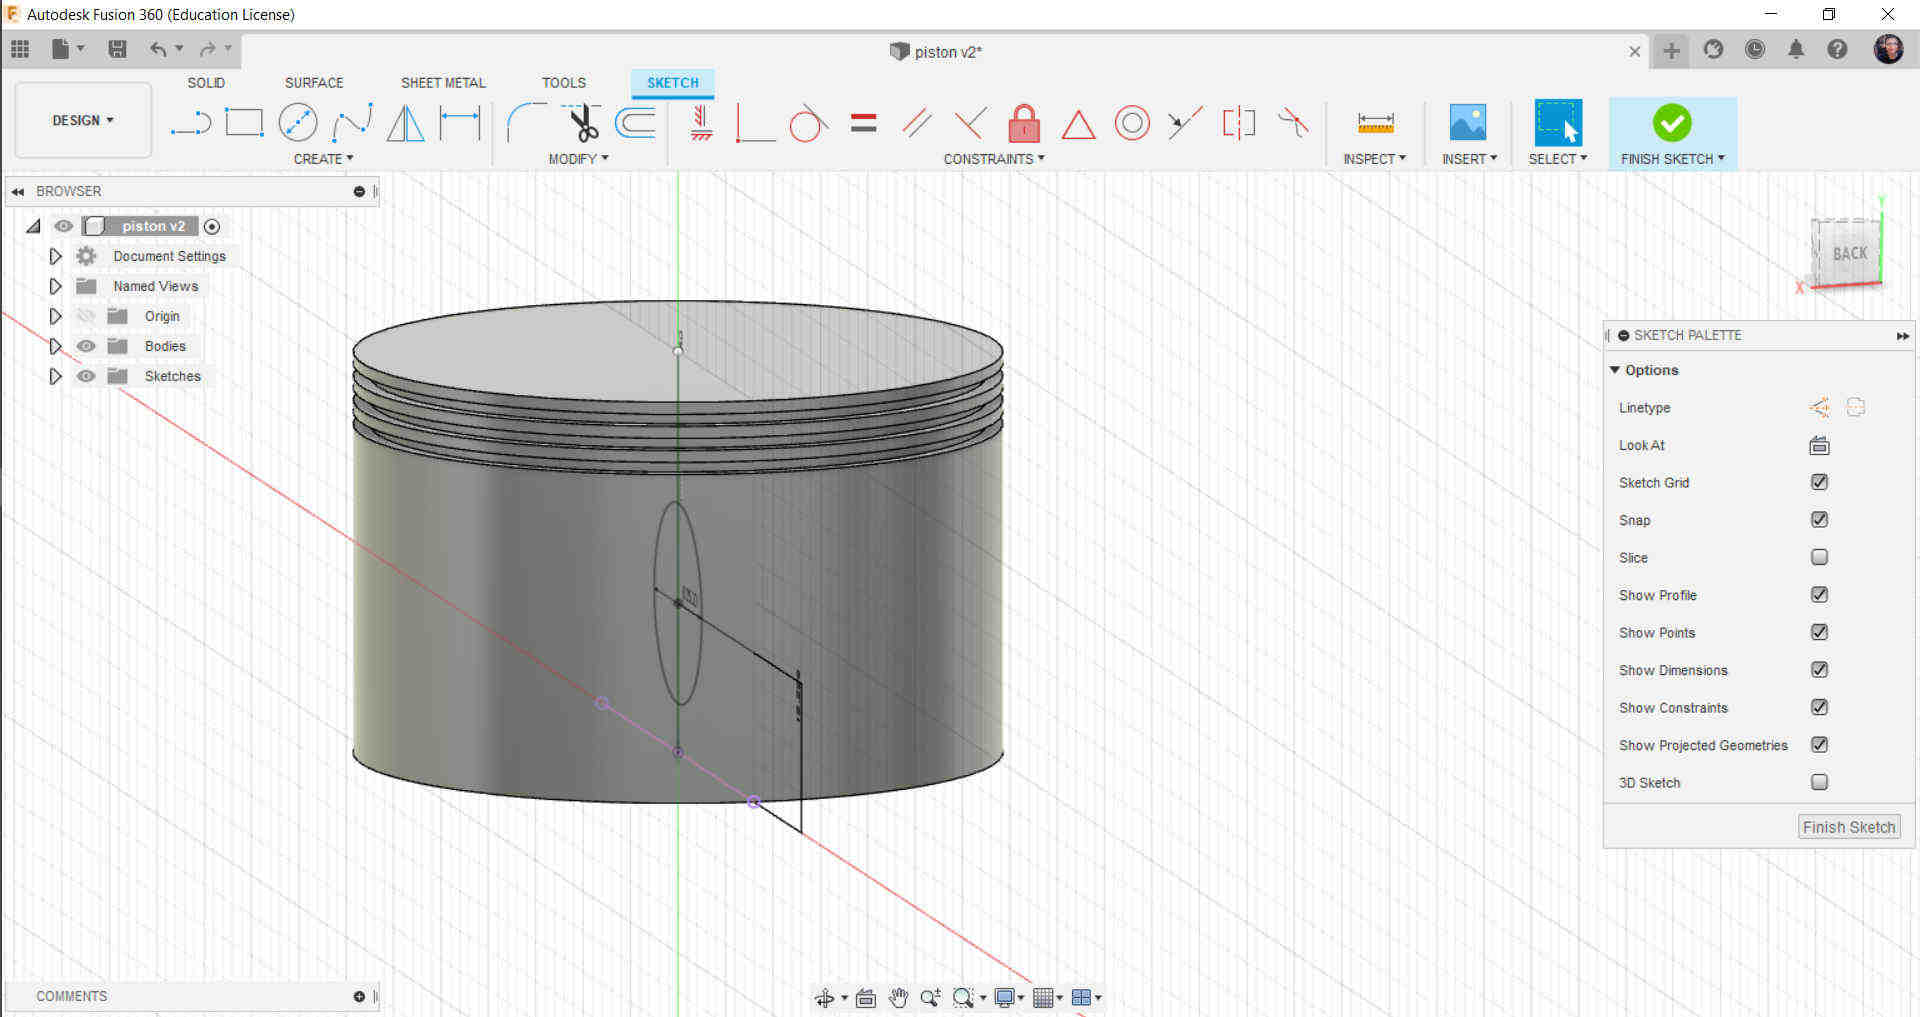
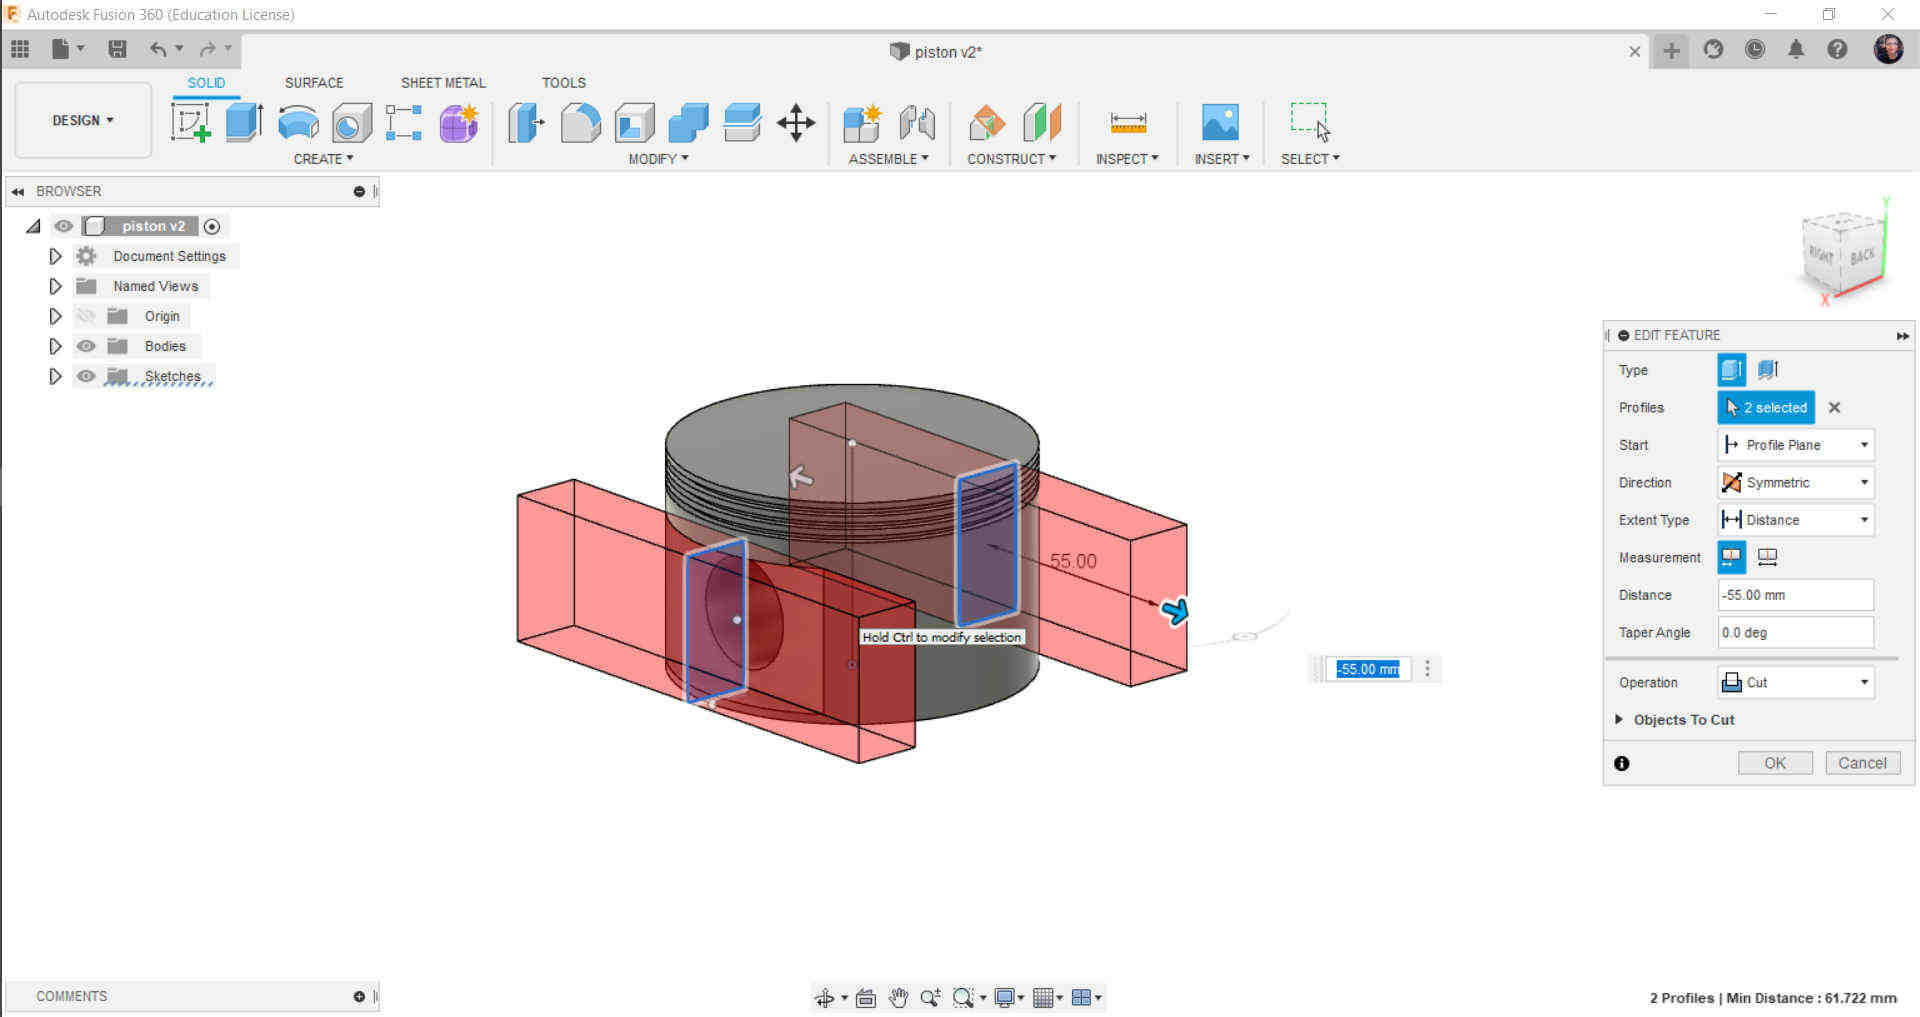
Then Make Sketch perpendicular to the Circle plain and draw Rectangluar like shown
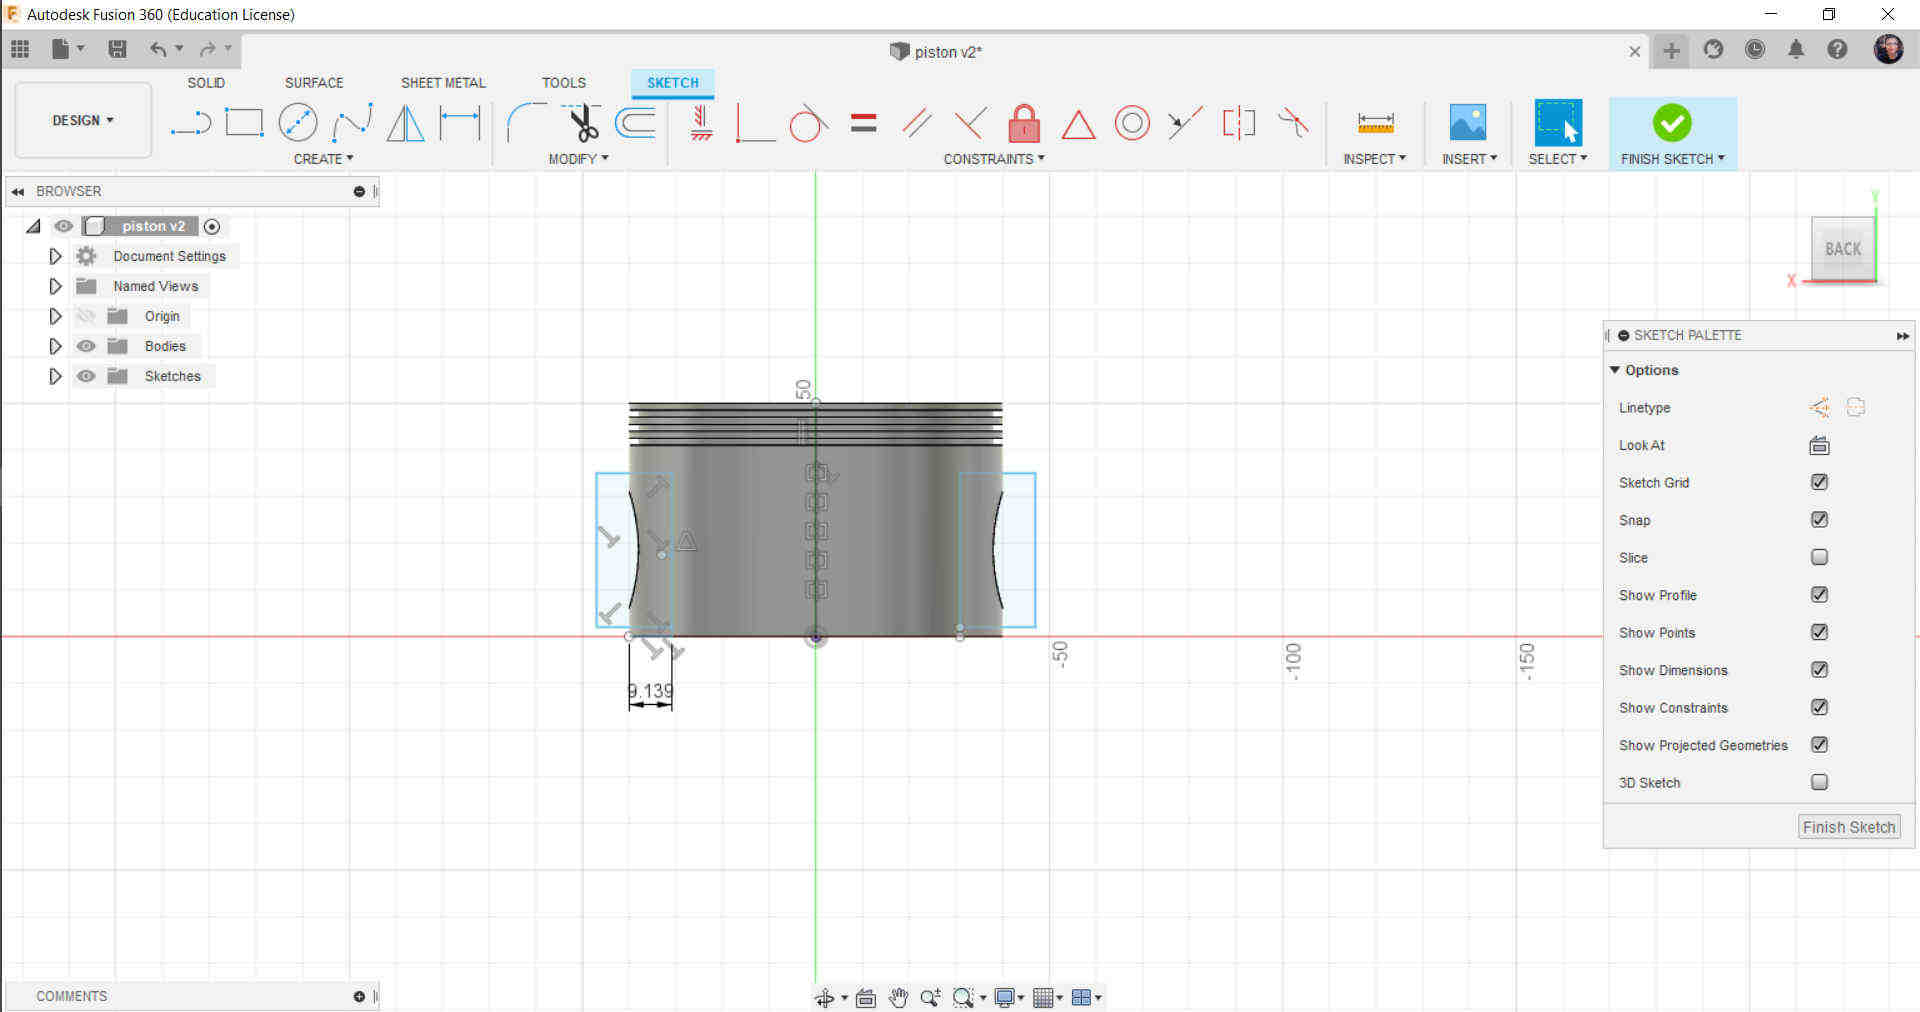
Then Cut out the Rectangle from the body
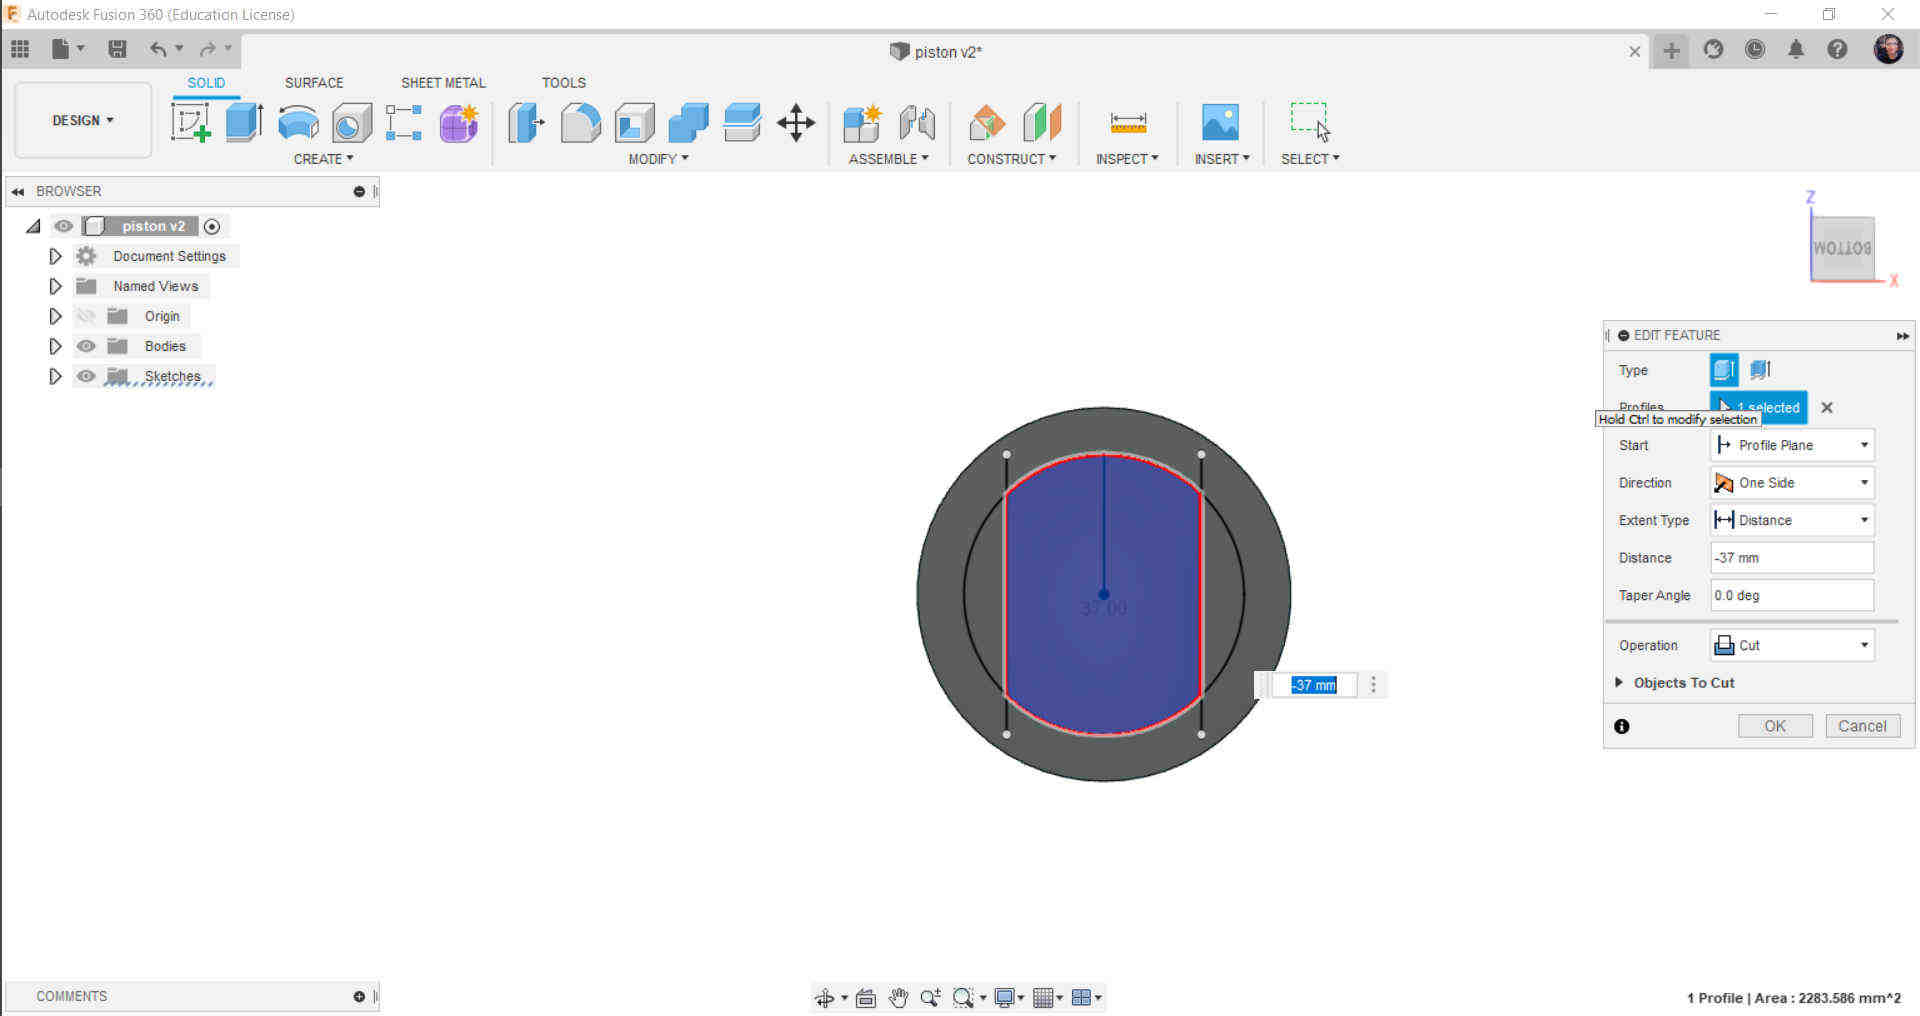
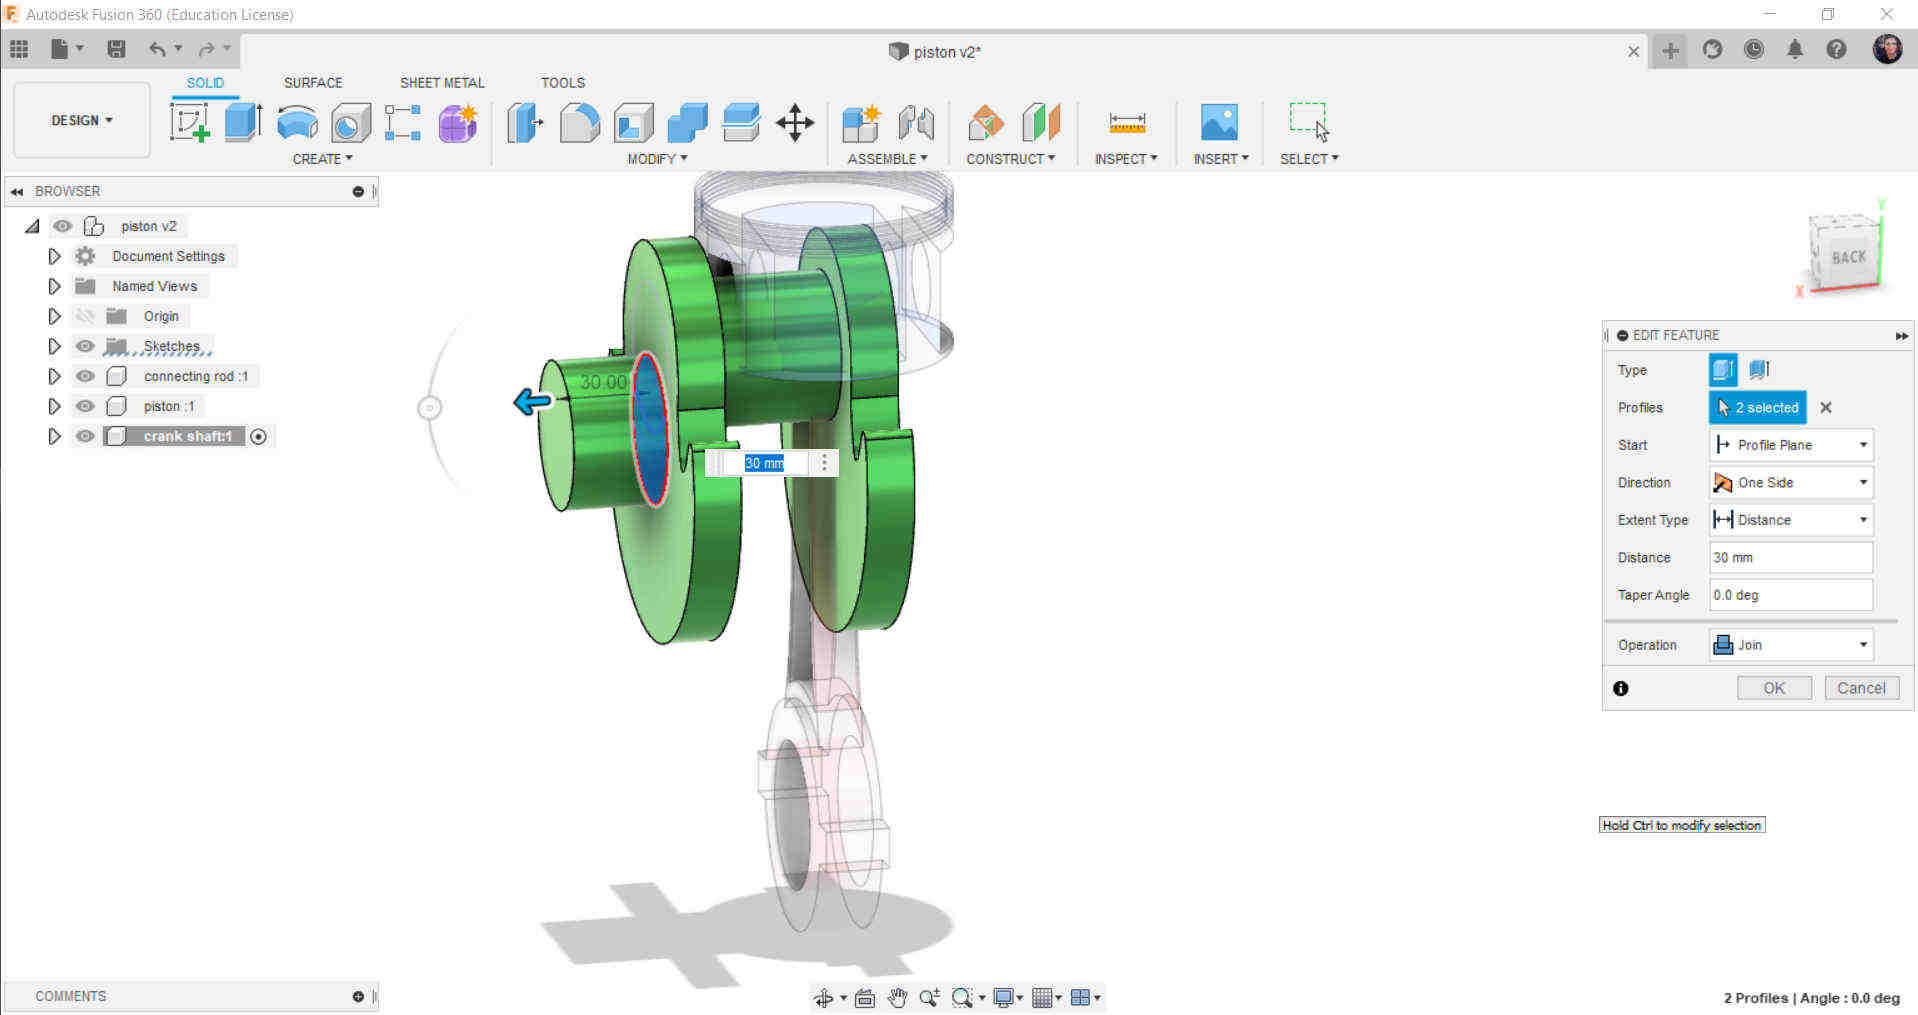
In the Bottom plain of the Piston Draw Circle as shown and then draw two lines throw the circle
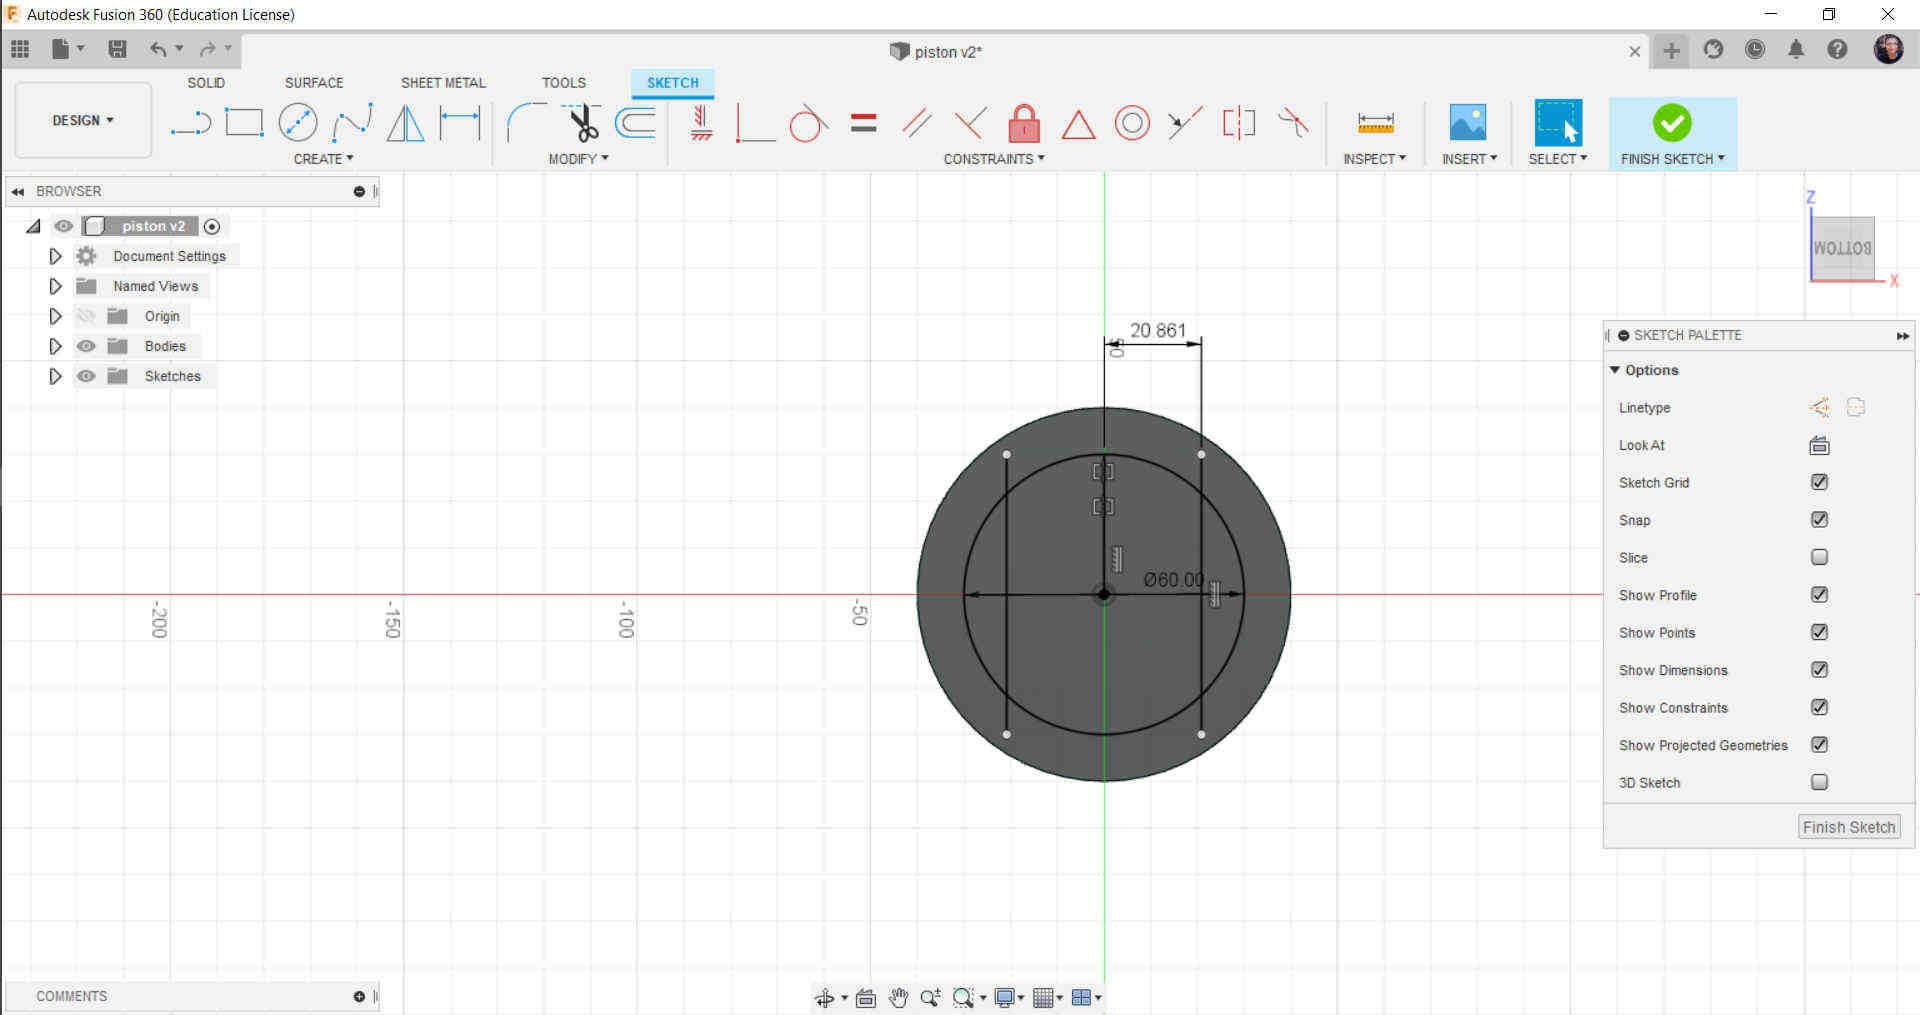
Last Cut in the shape in depth 37mm
Handle
Make new Sketch for the handle as Shown

Extrude the Two Rings in the handle as Shown
Extrude the inner body of the handle as Shown
make sketch in the middle of the Big Ring and draw the two rectangles
Then Extrude the two rectangles as Shown
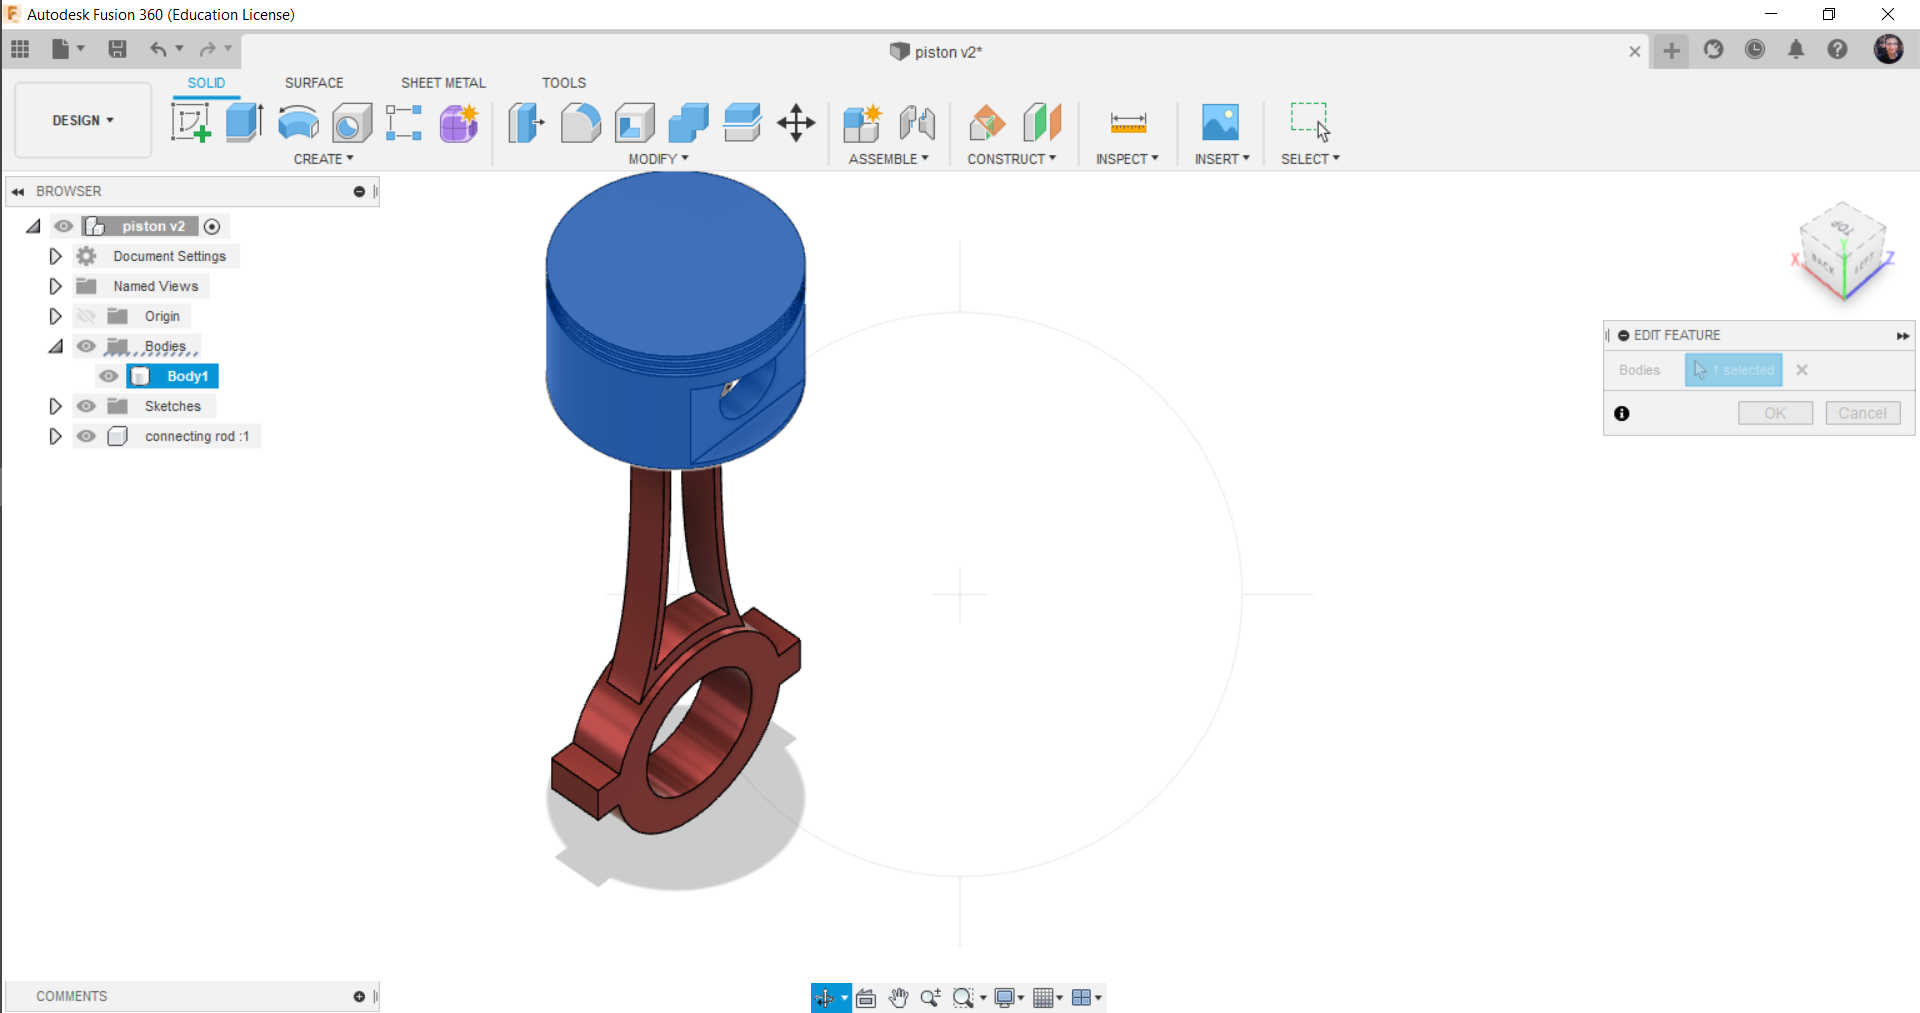
With reaching to this step then you will have the Two Parts (Piston & Handle)
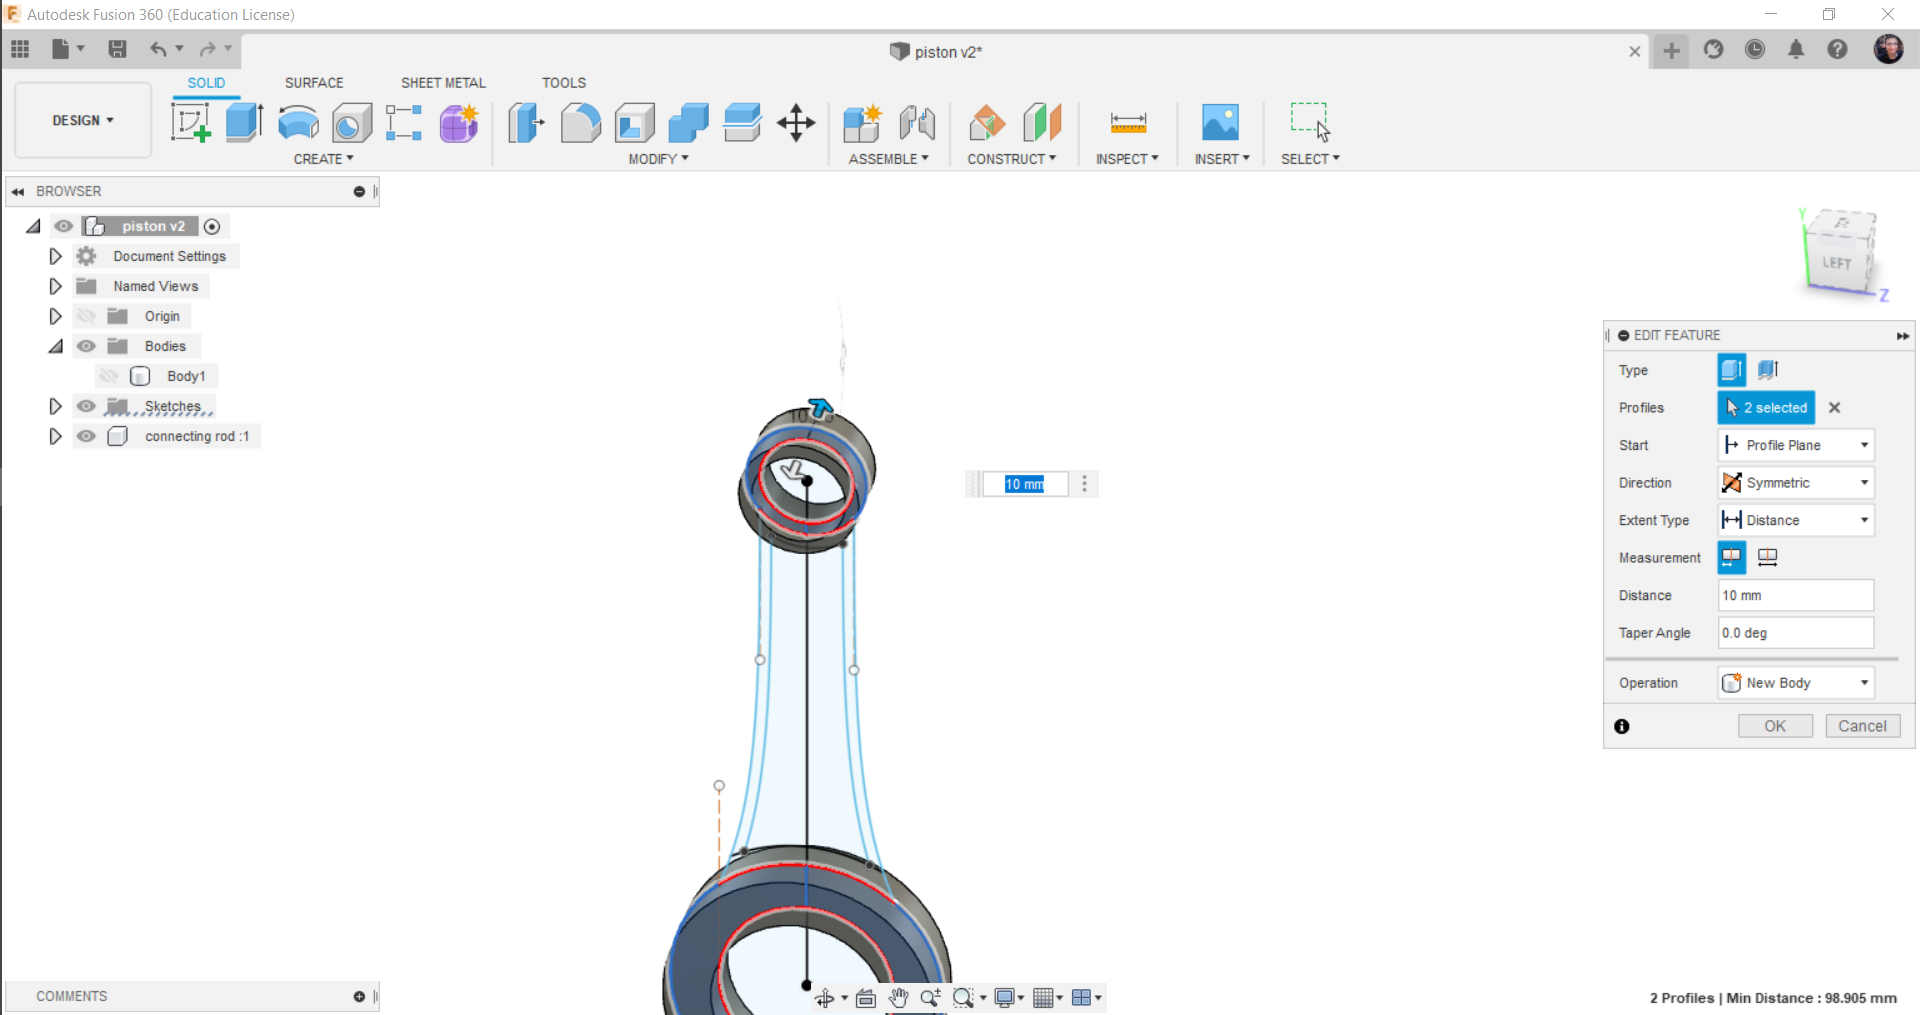
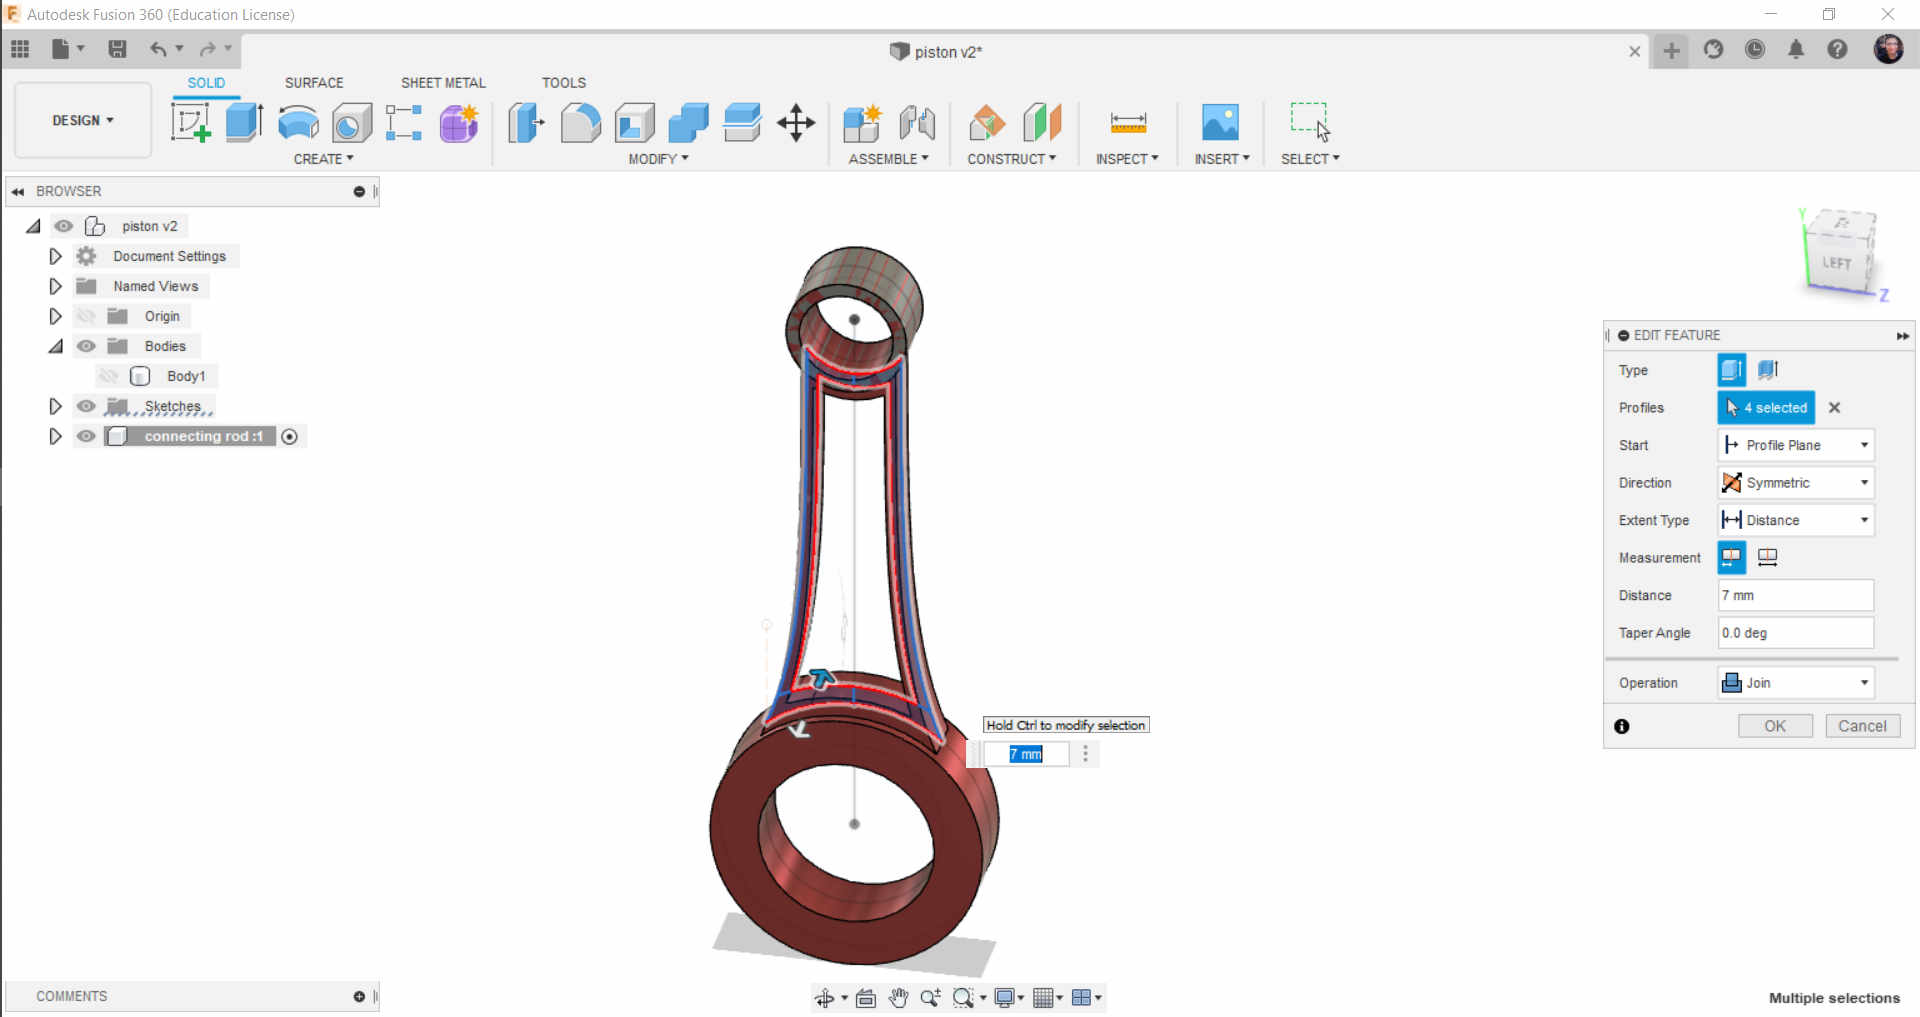
Connecting Rod
Sketch Shape Exactly like You see in the Image
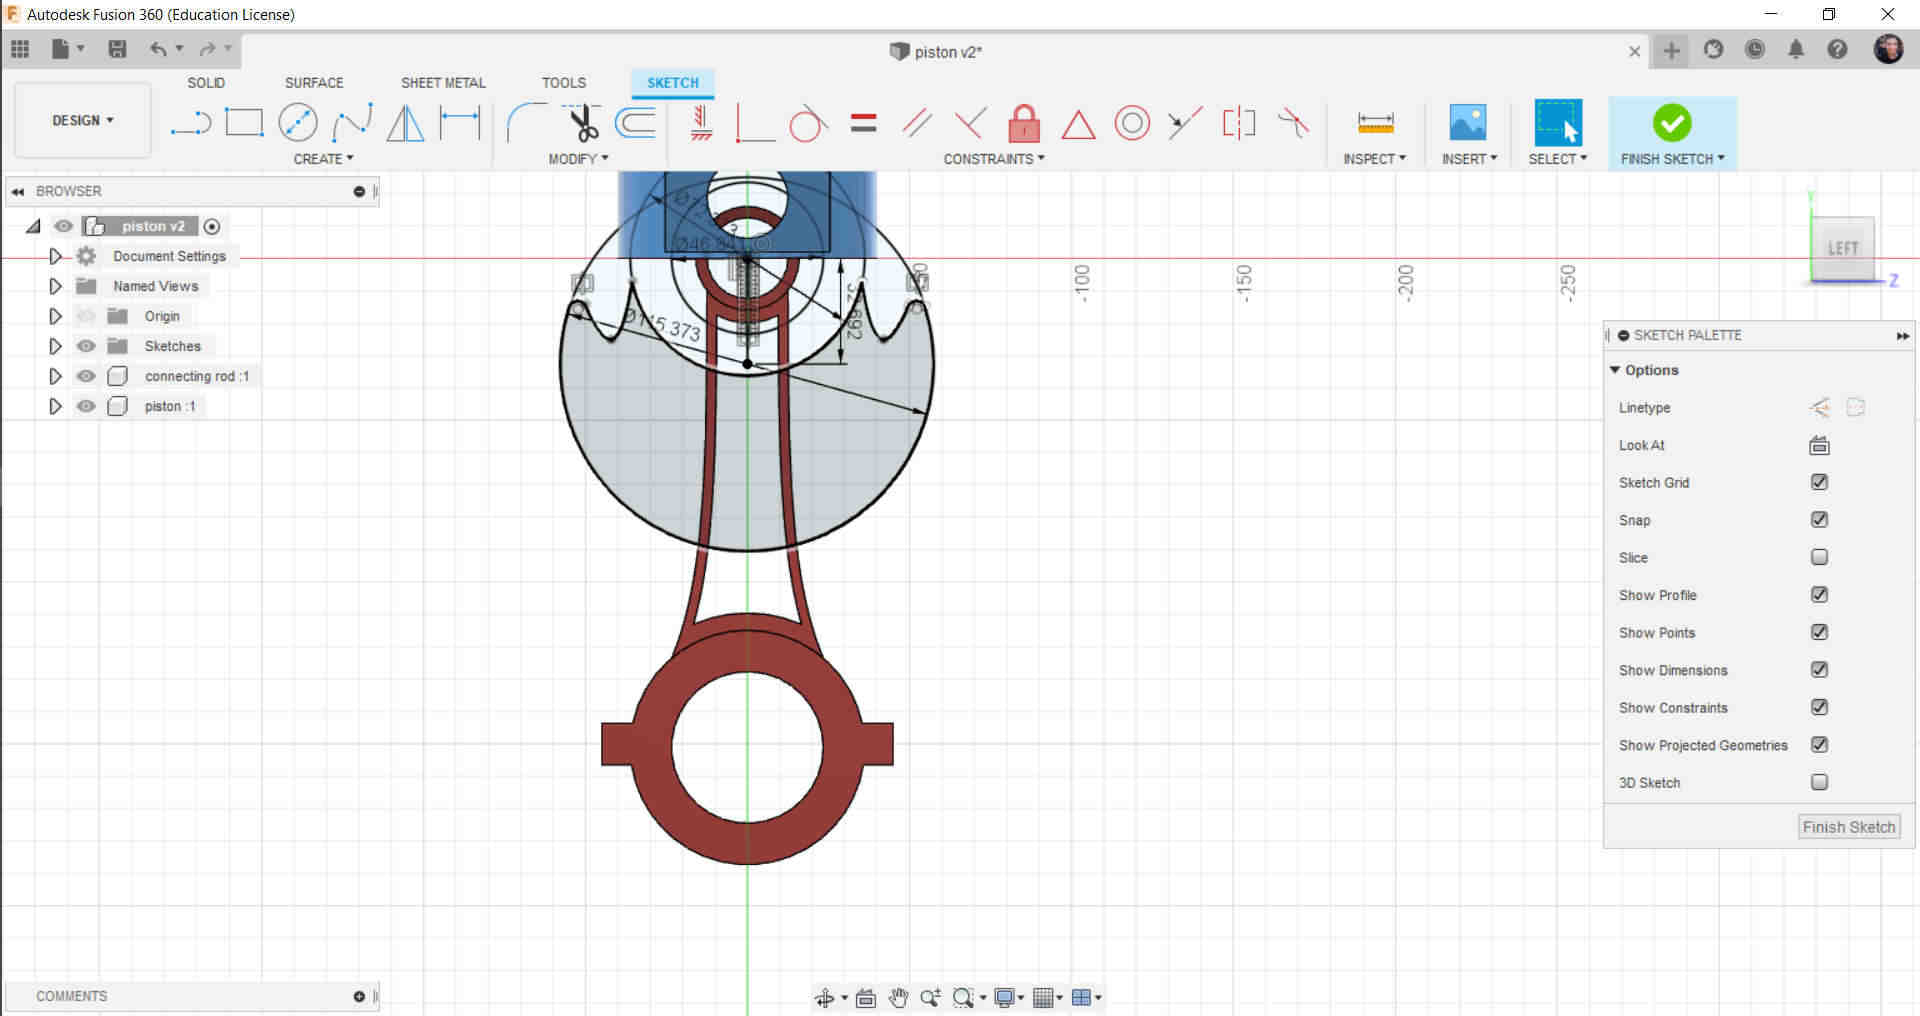
Extrude The Connector To look like the Image (Don't woory I will leave the files down)
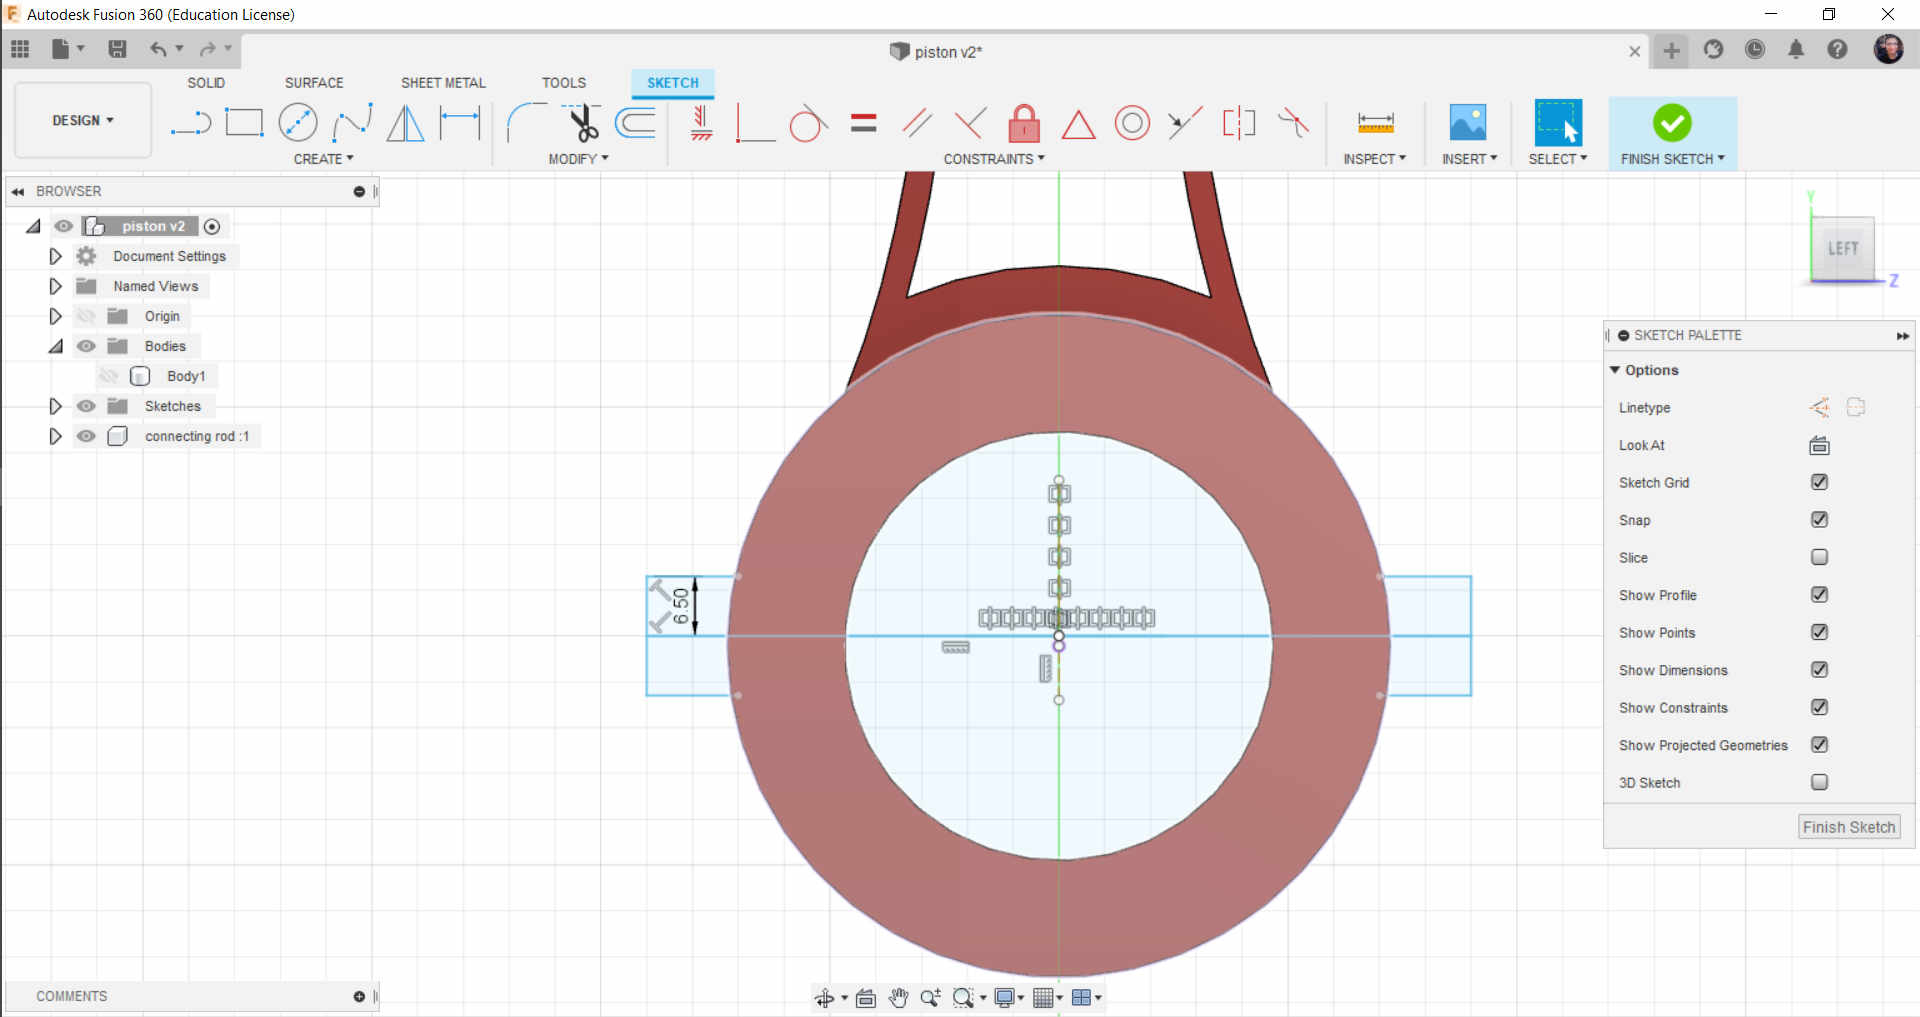
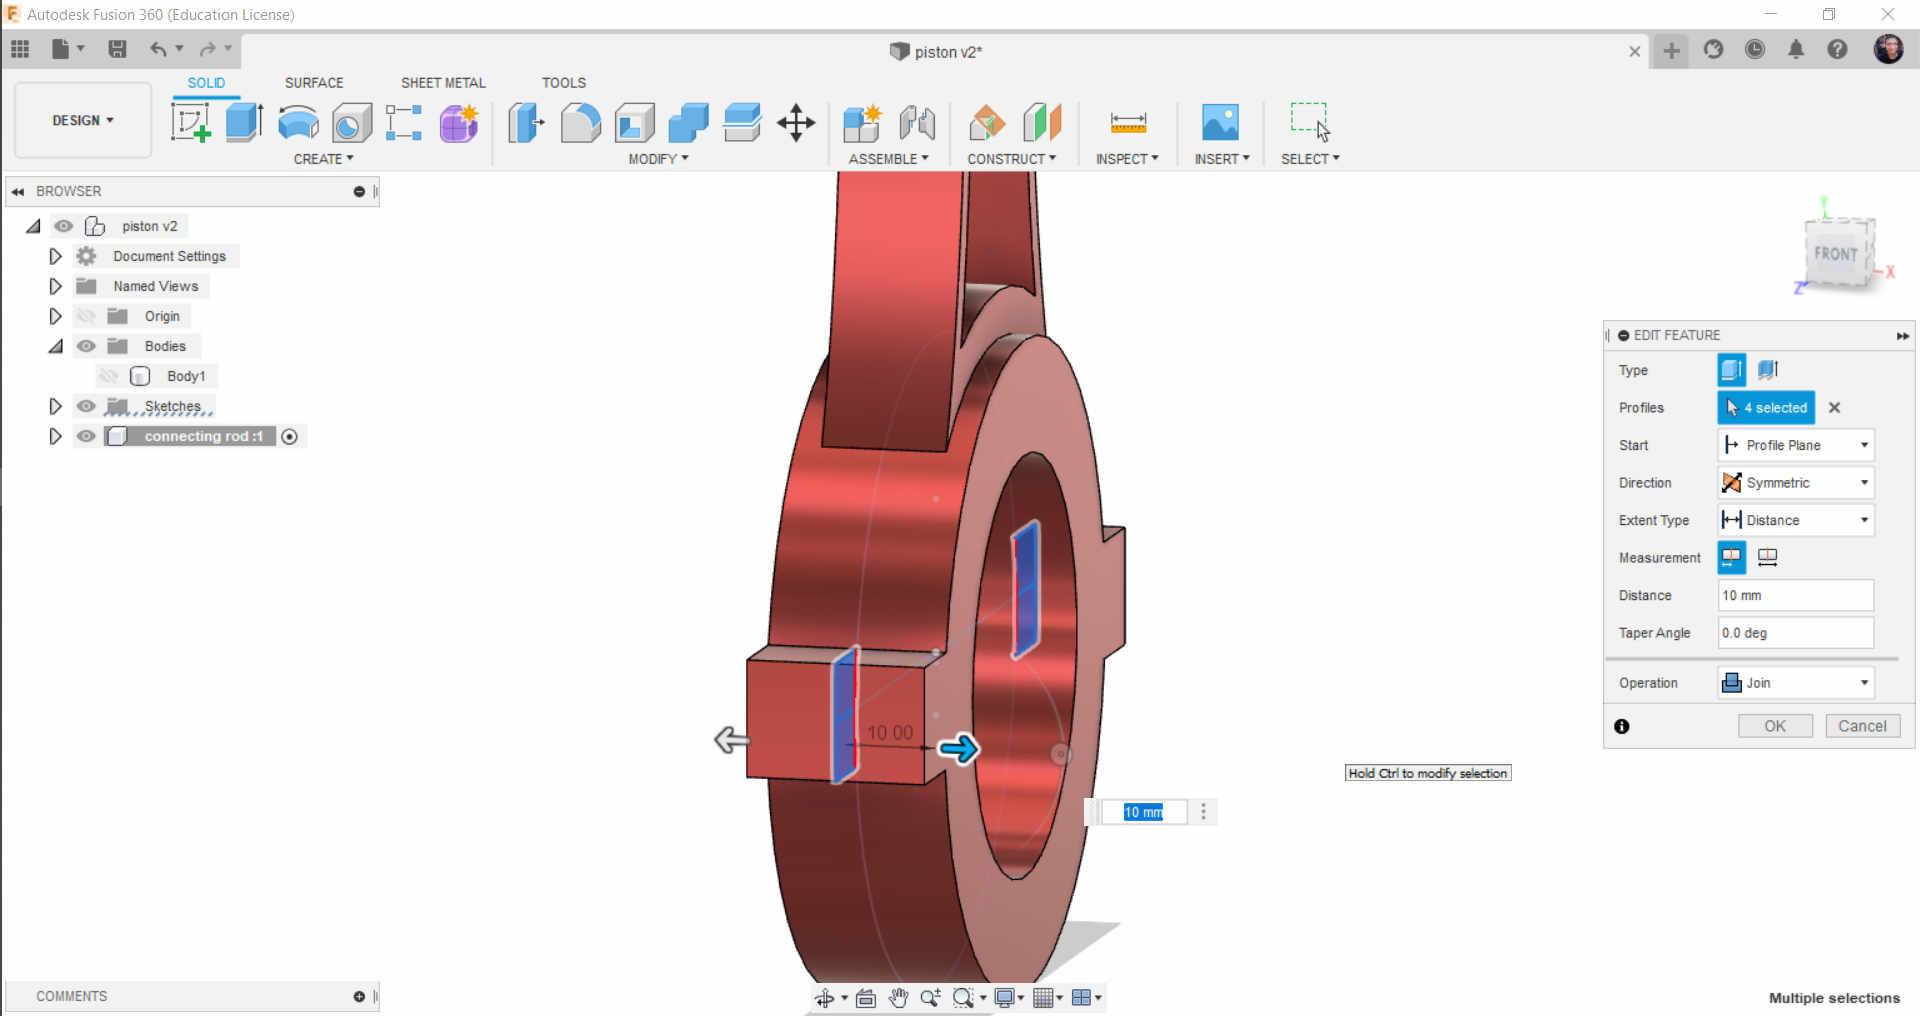
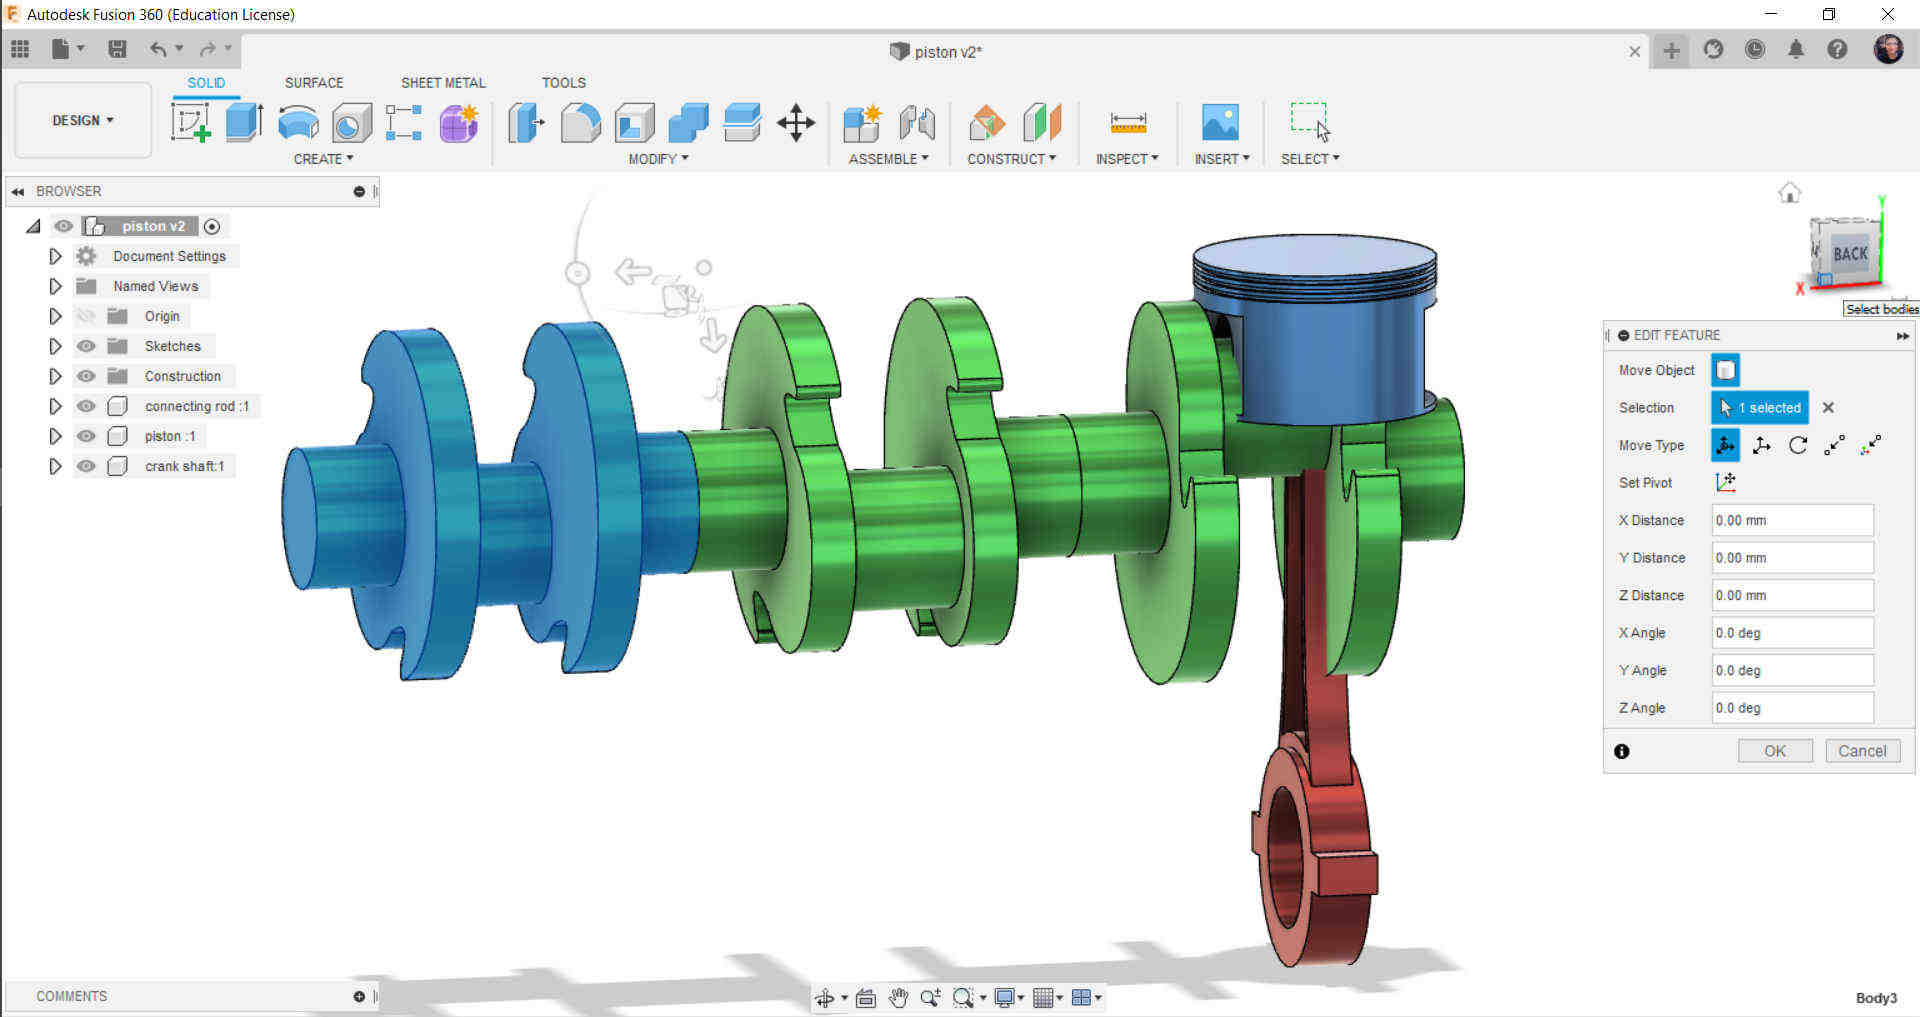
Make Copy of the Connector to make the Shaft
Repeat the Previous Steps Again to have the shaft
Make them Like the Image
Joints
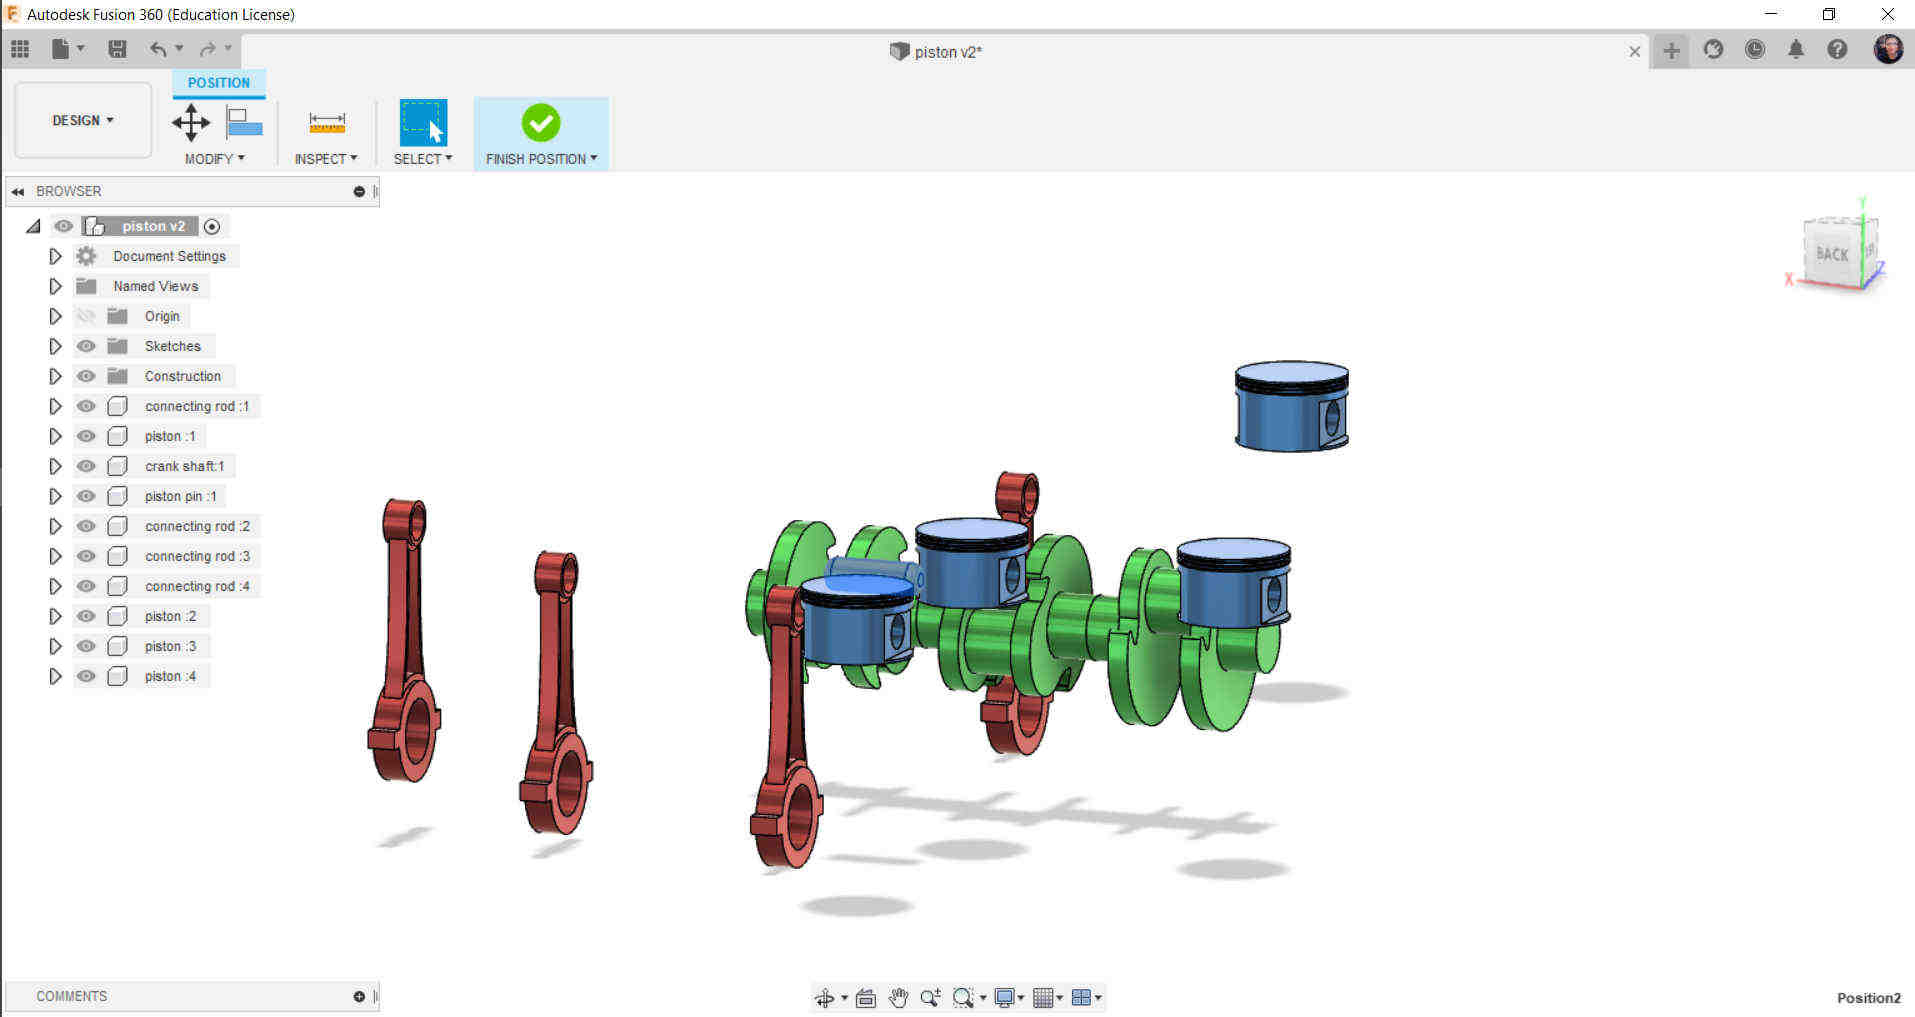
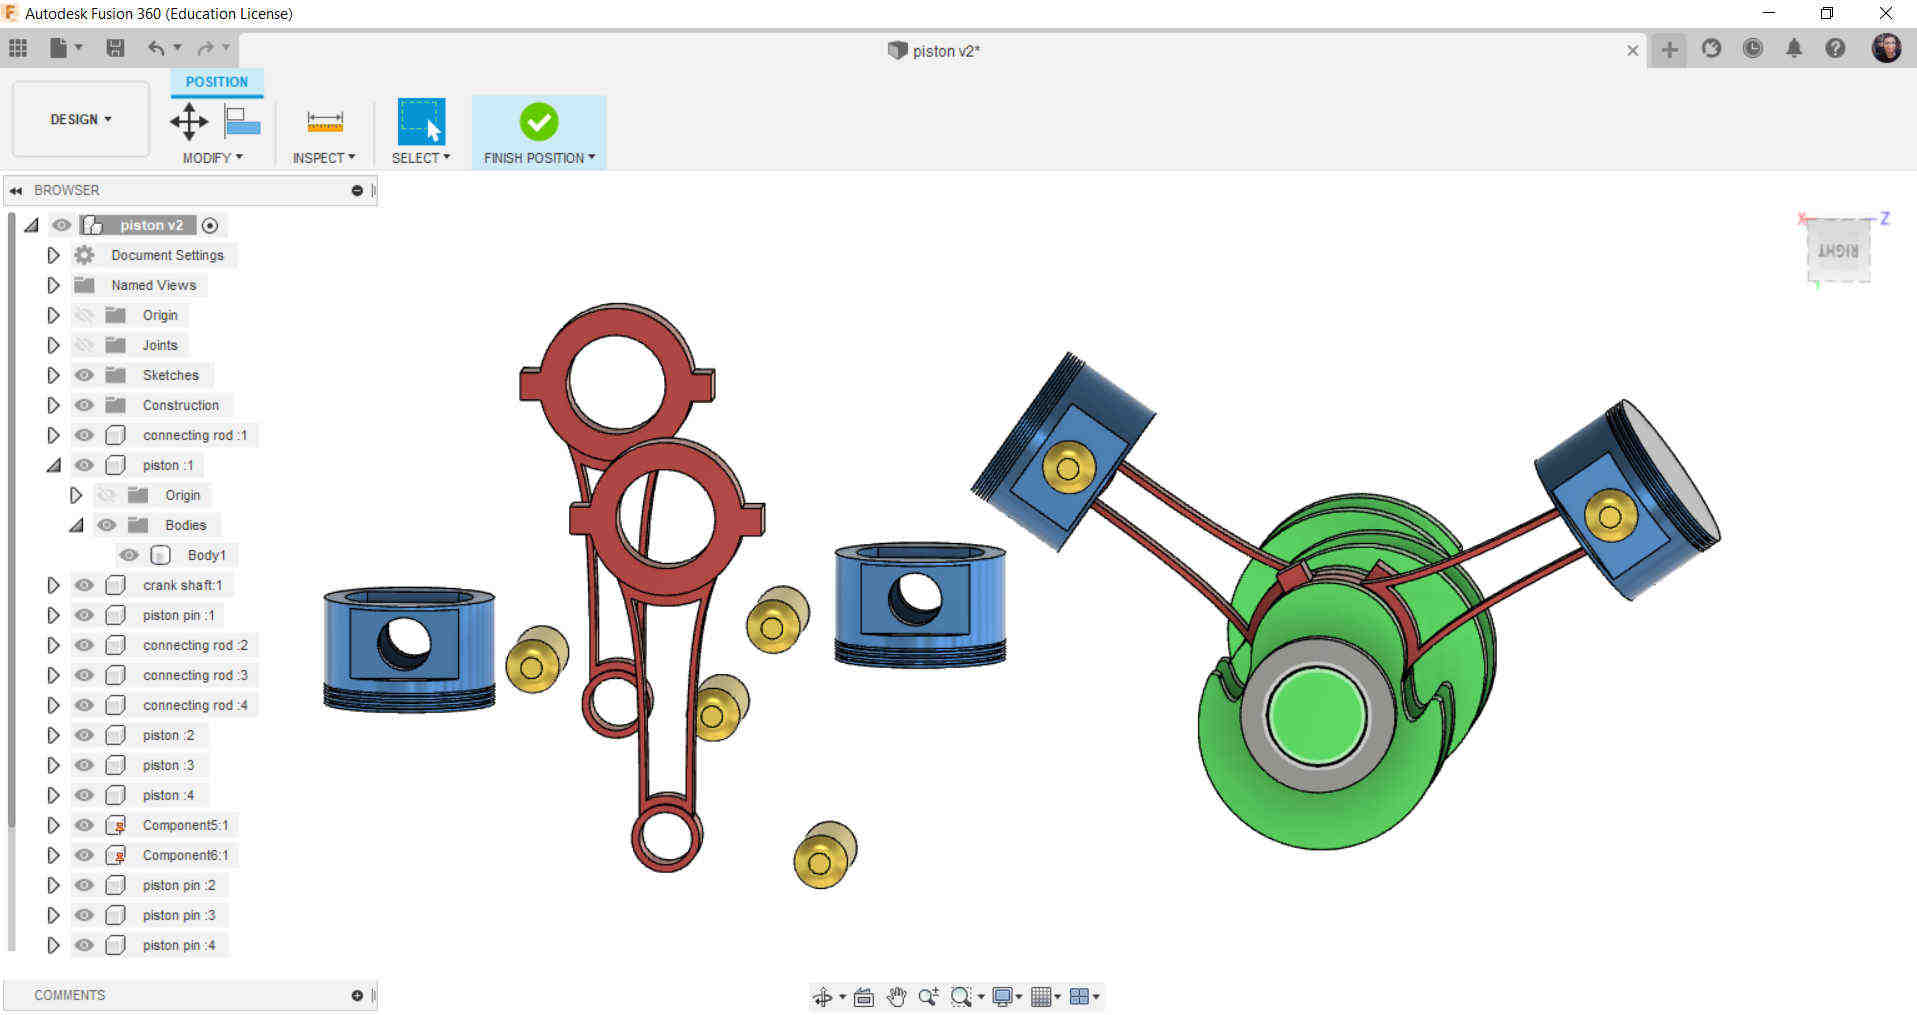
Make Copys as You see in the Image (4 Pistons, 4 Handles , Shaft)
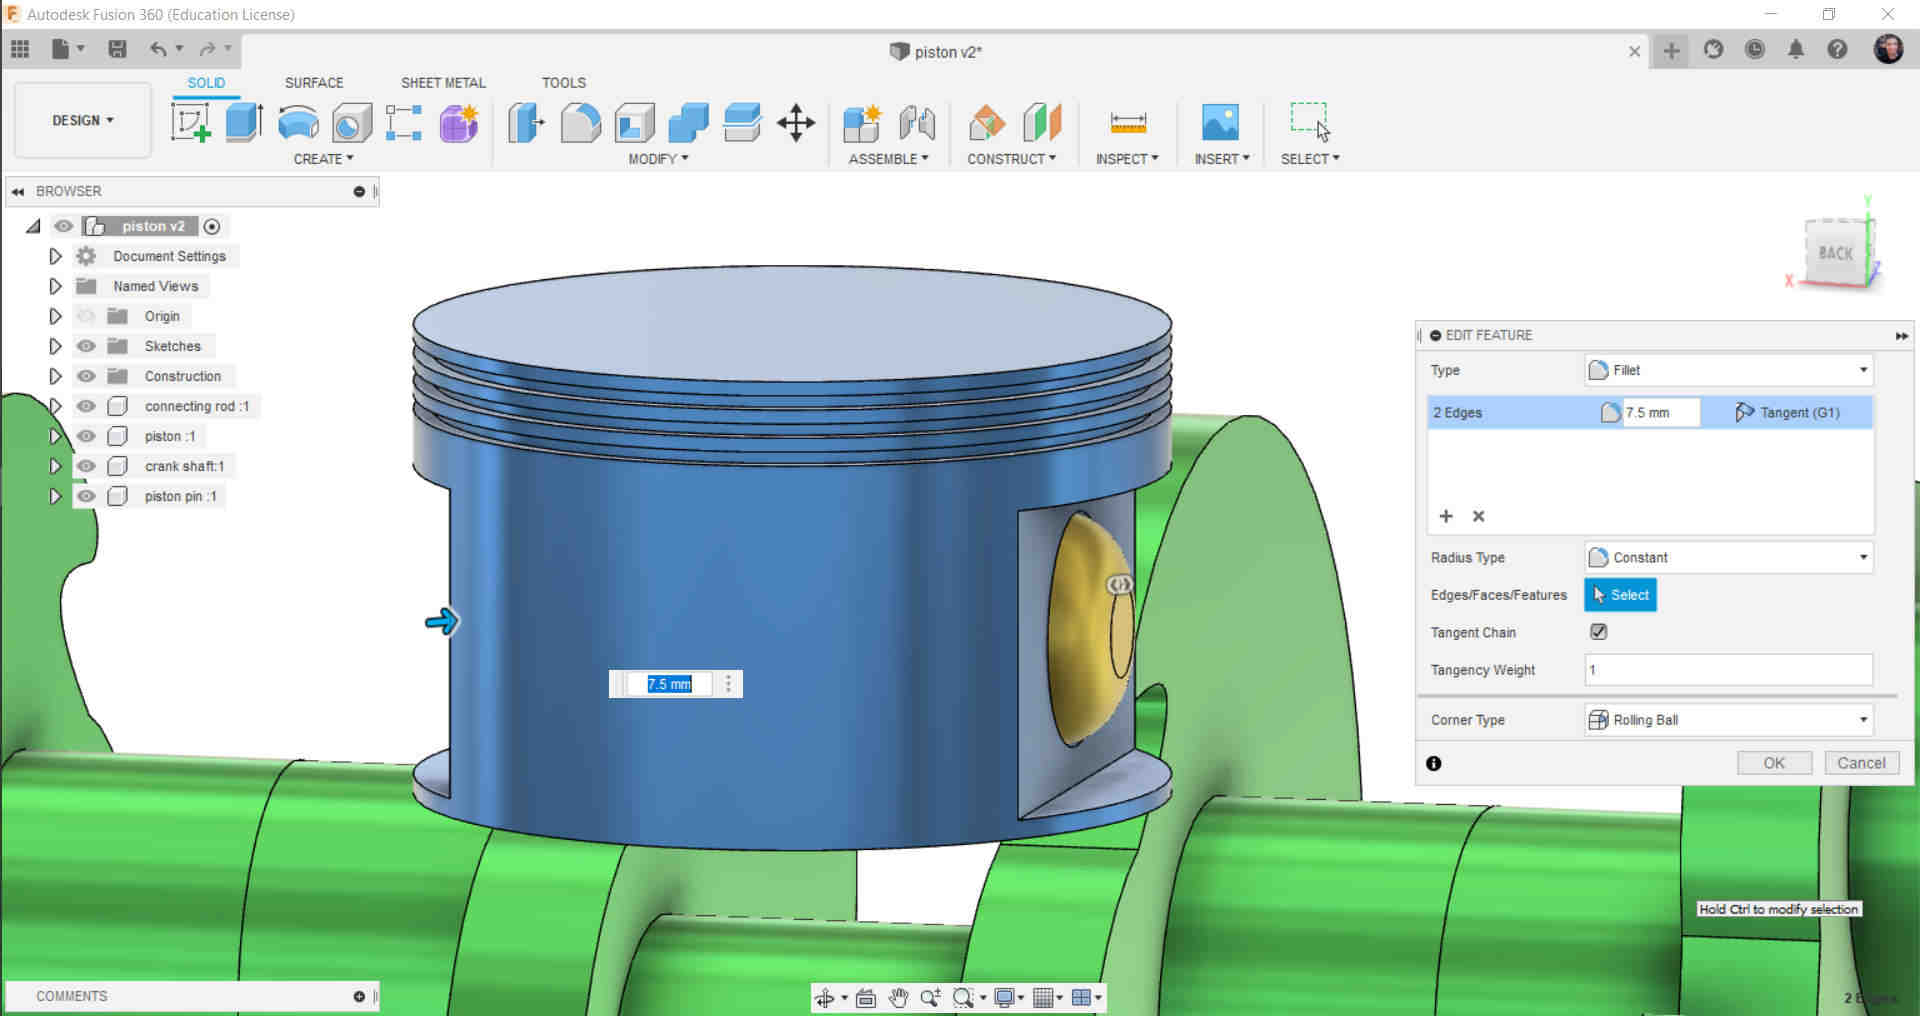
Make In the hole of the Piston (Bullet) and Extrude it as Shown
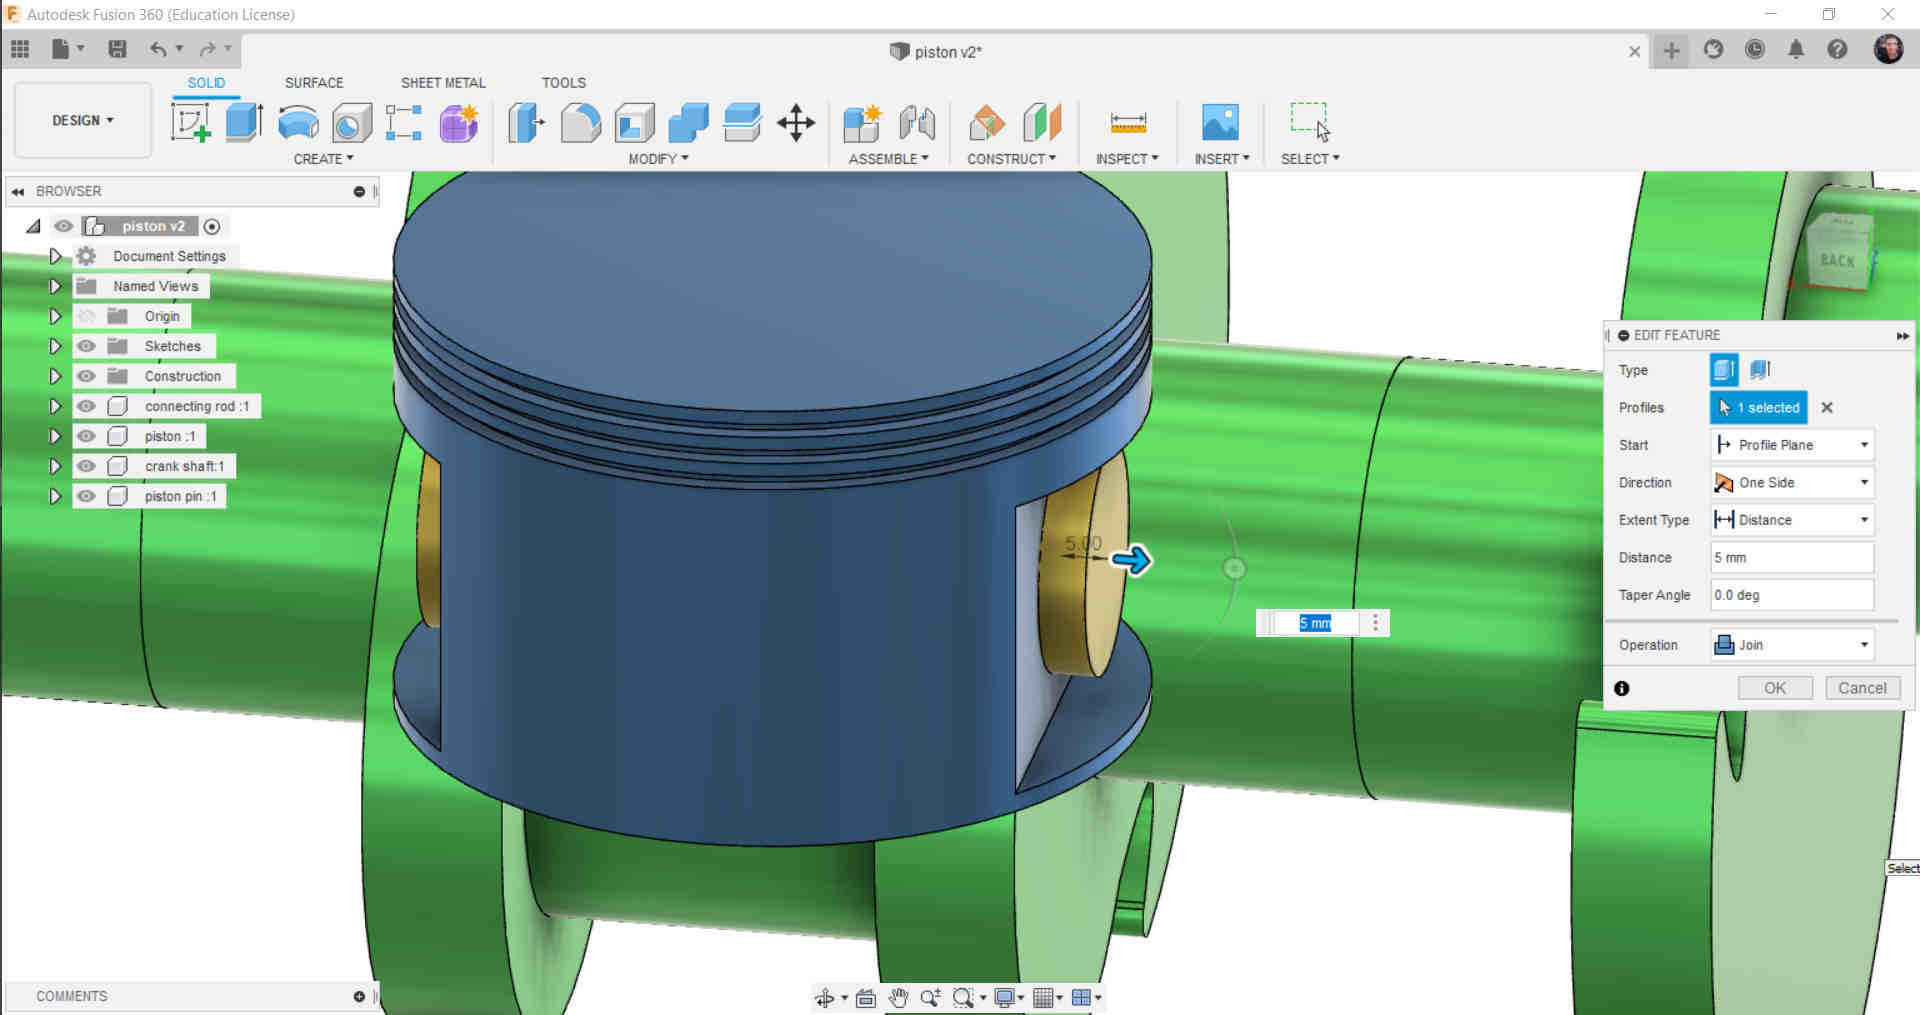
Use Filet Tool
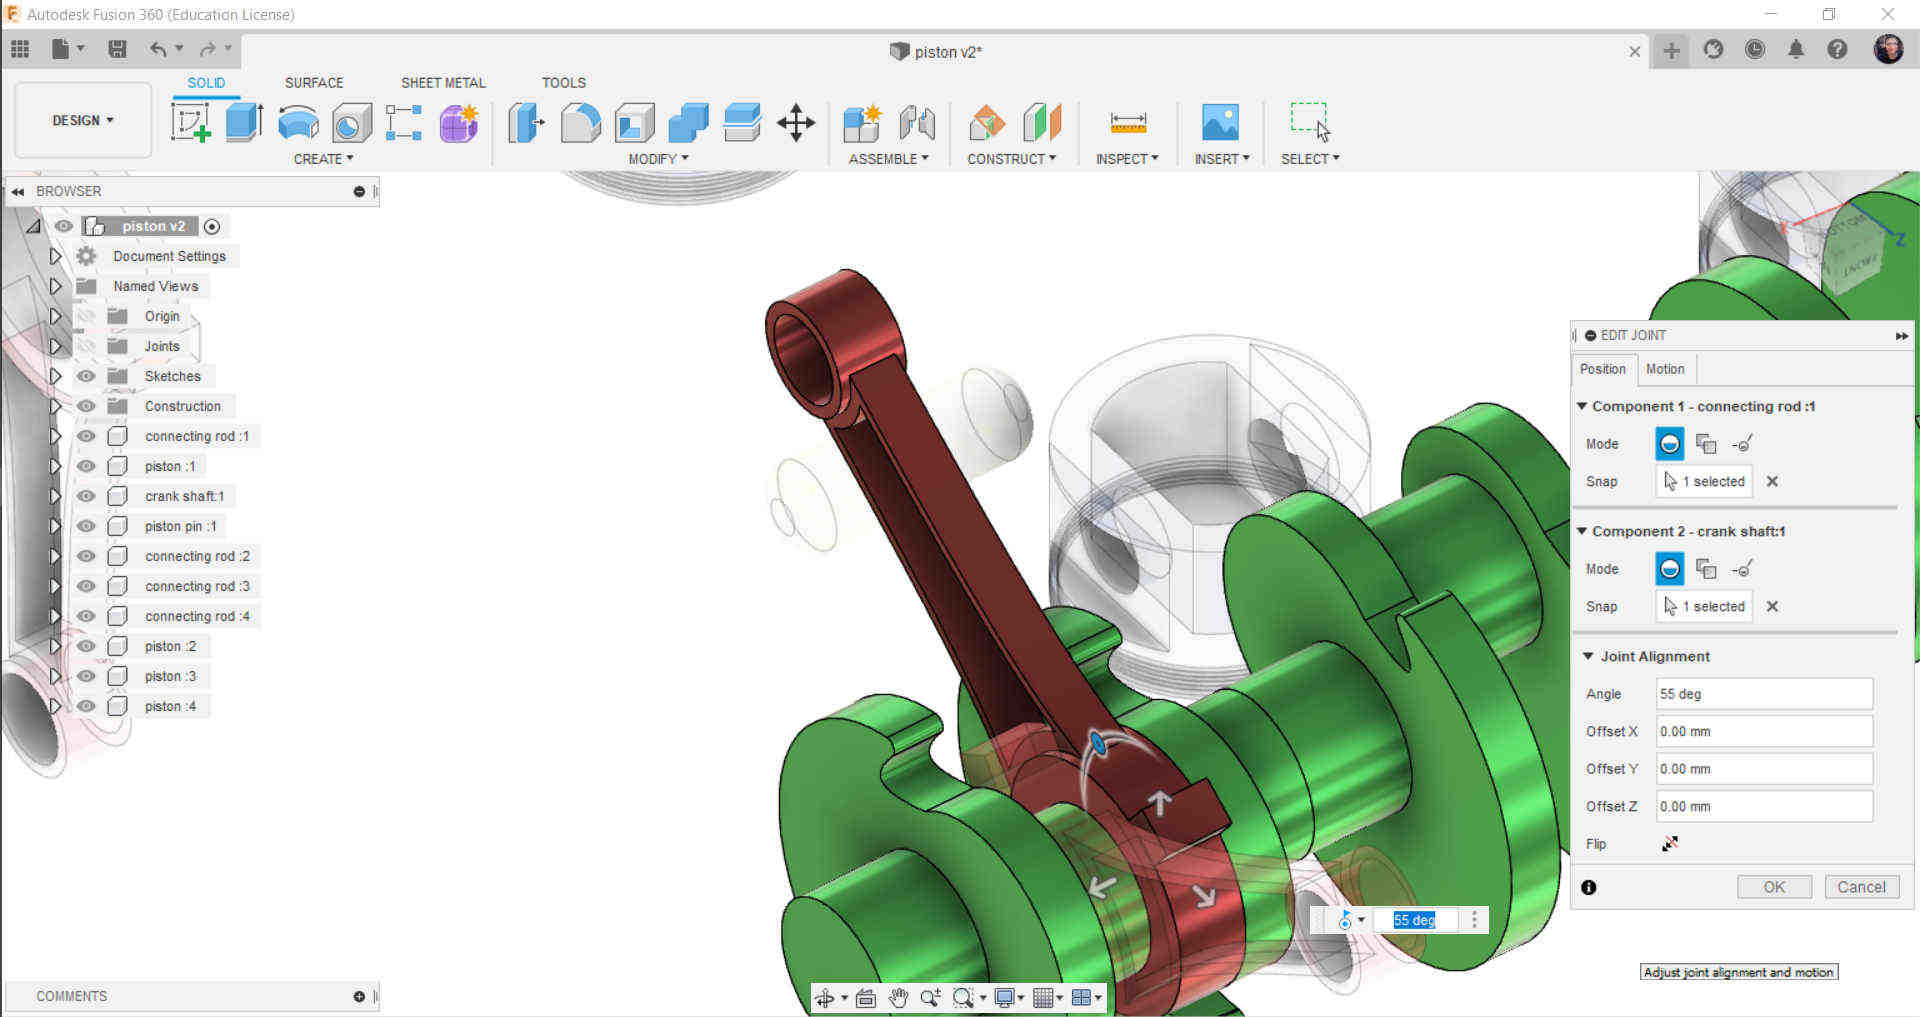
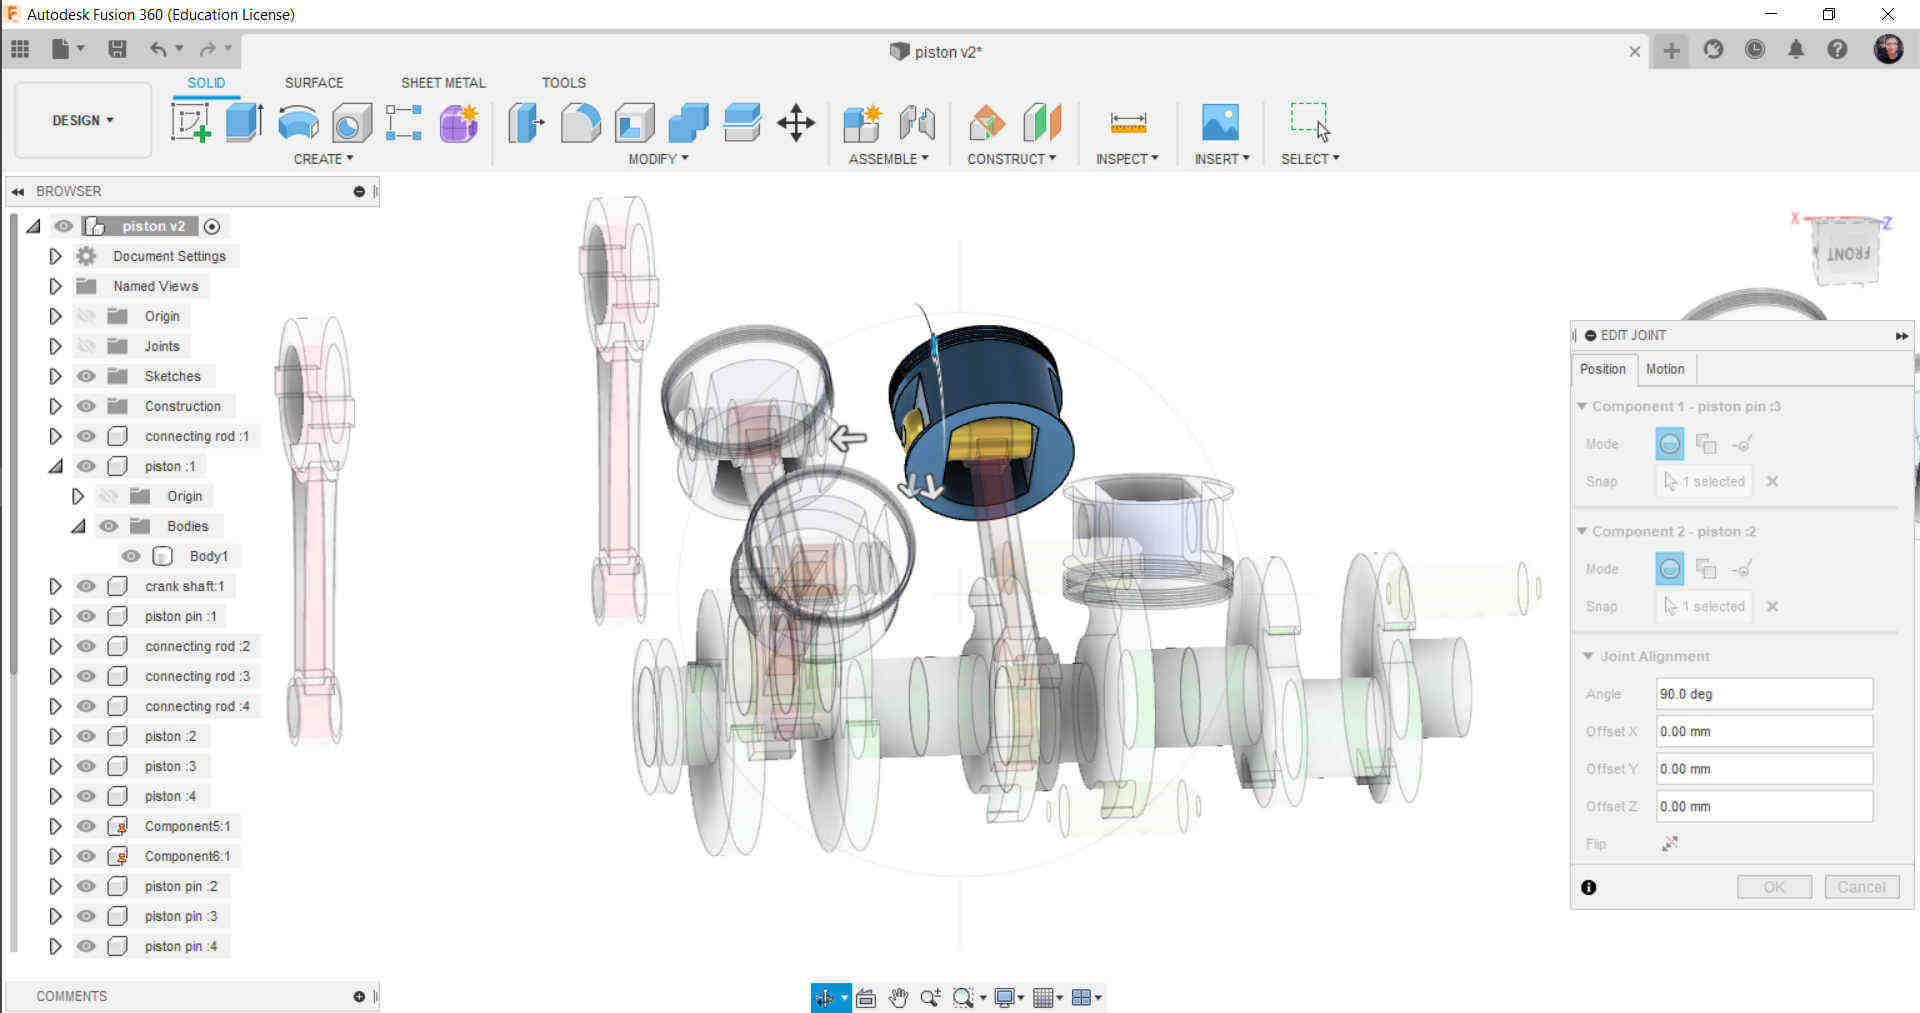
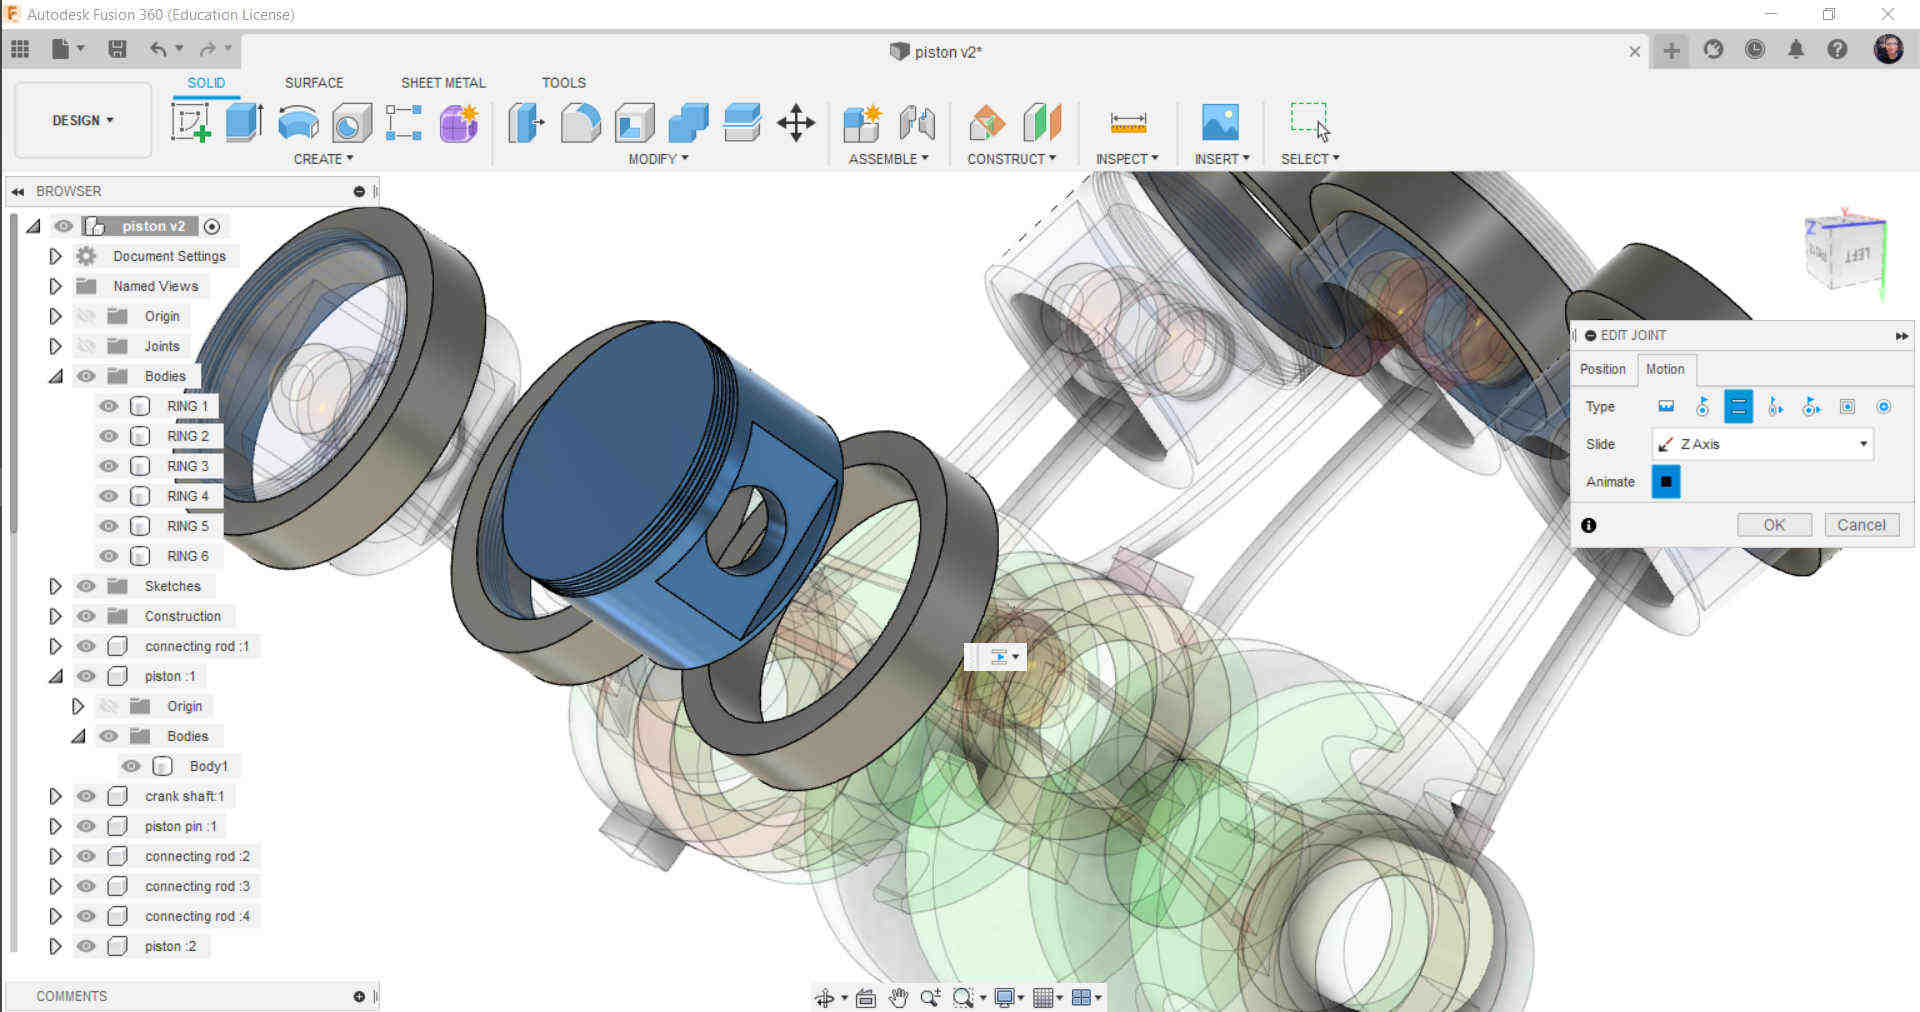
Make Joint Between the handle and the Shaft as Shown With angle of 55 degree
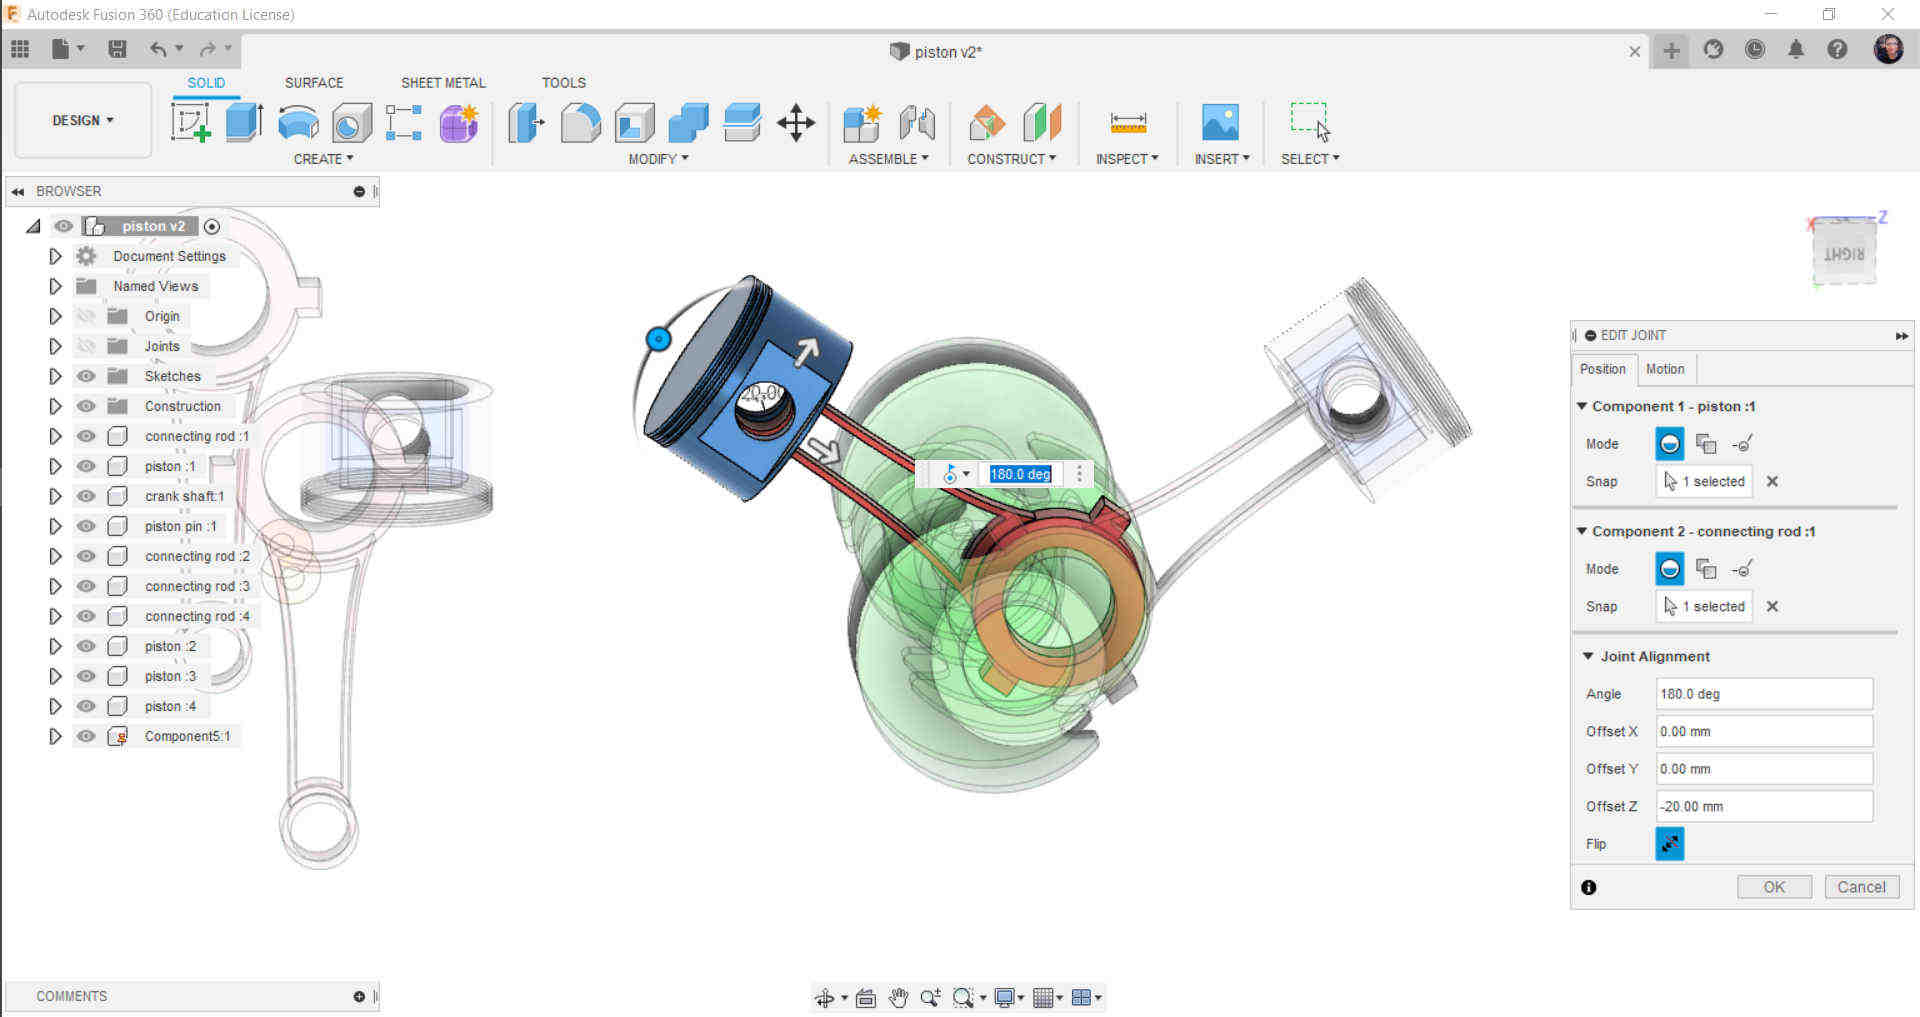
Make Joint between Piston and the handle and make the motion Rotation with Limits
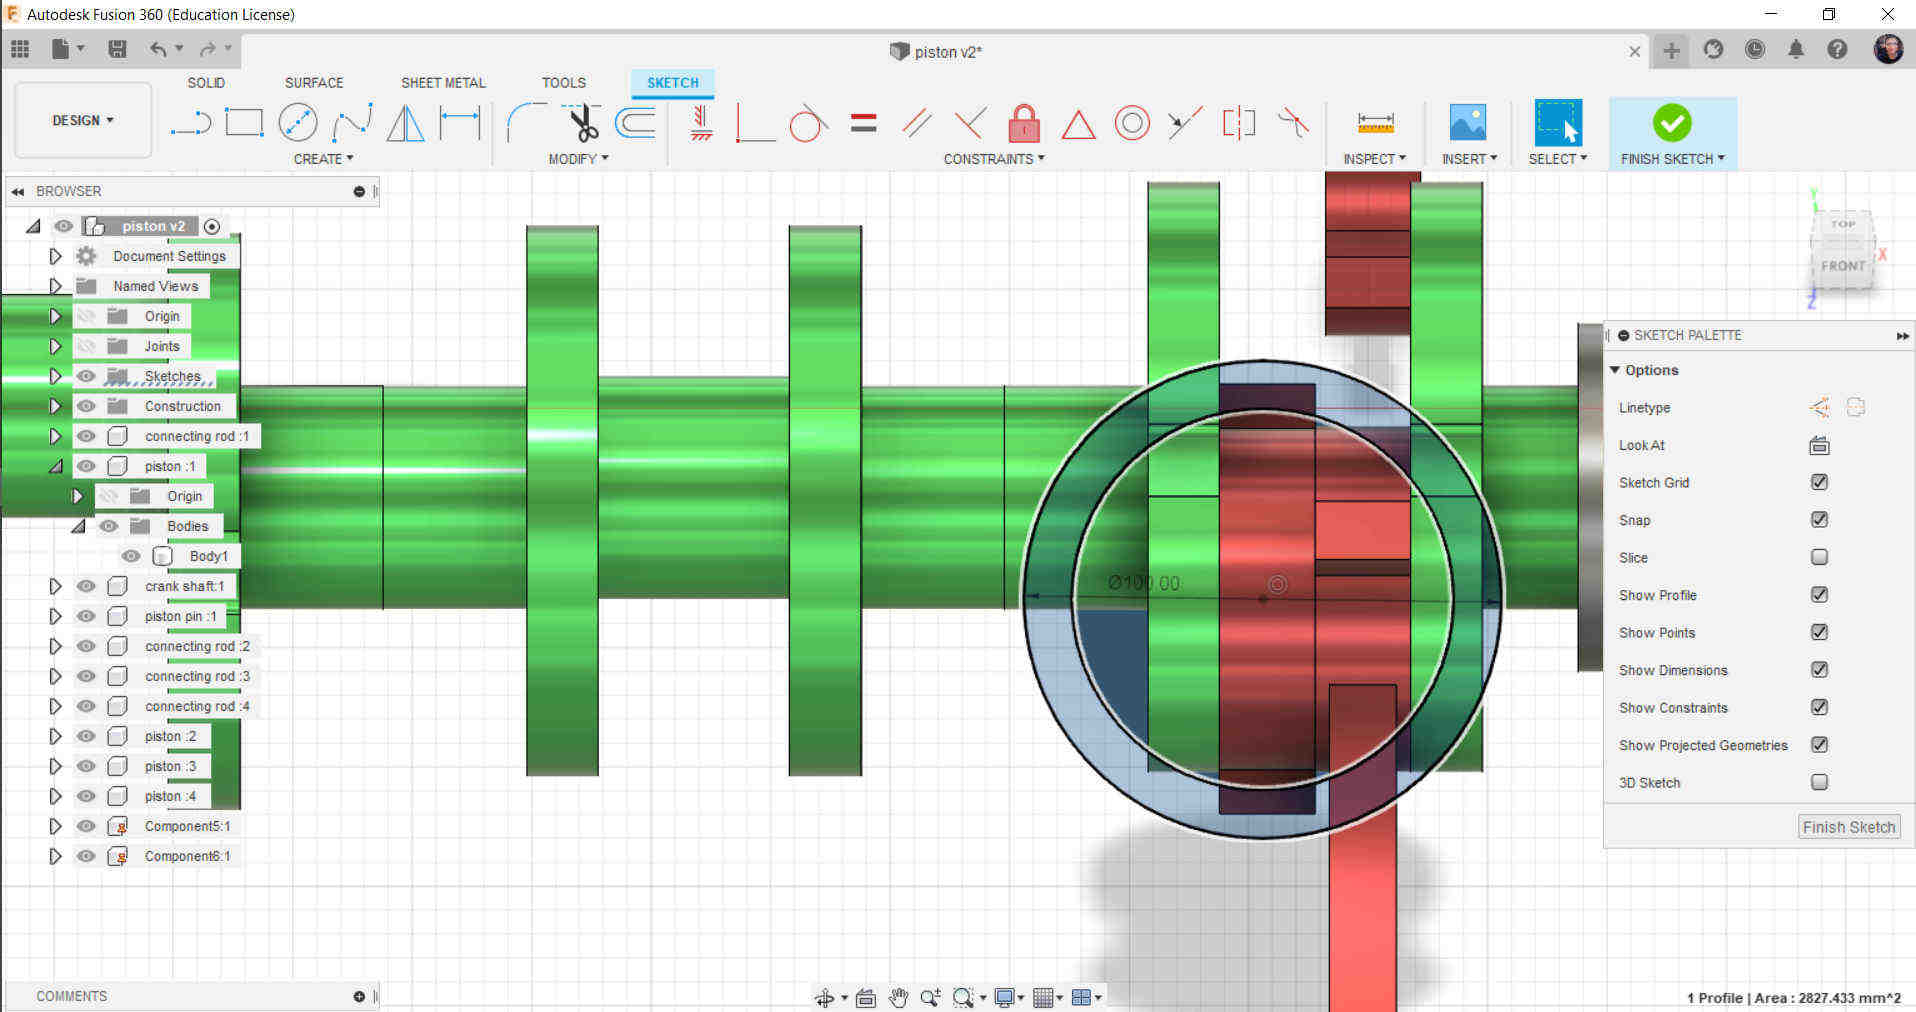
Make Circle ring in the end of the shaft as shown to make the shaft Rotate relative to the ring
Make Regid point between the bullet and the Piston
Repeat the Previous Steps
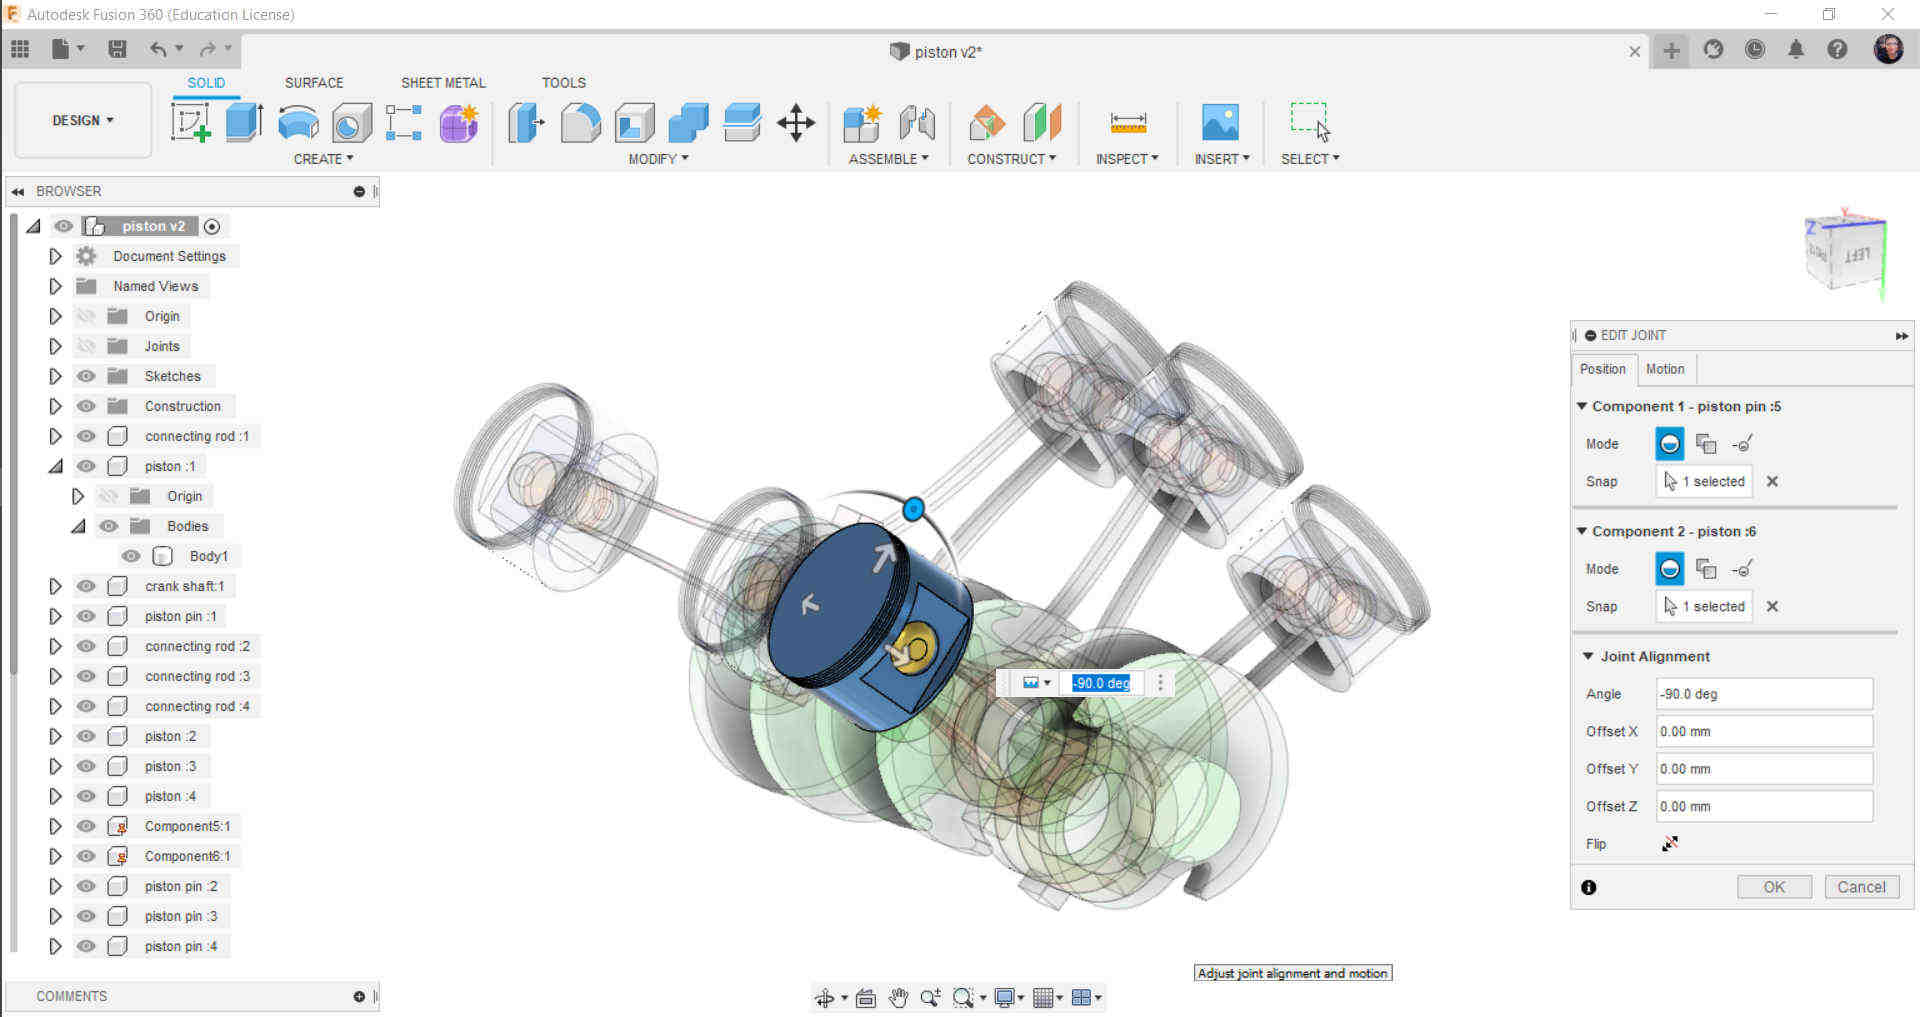
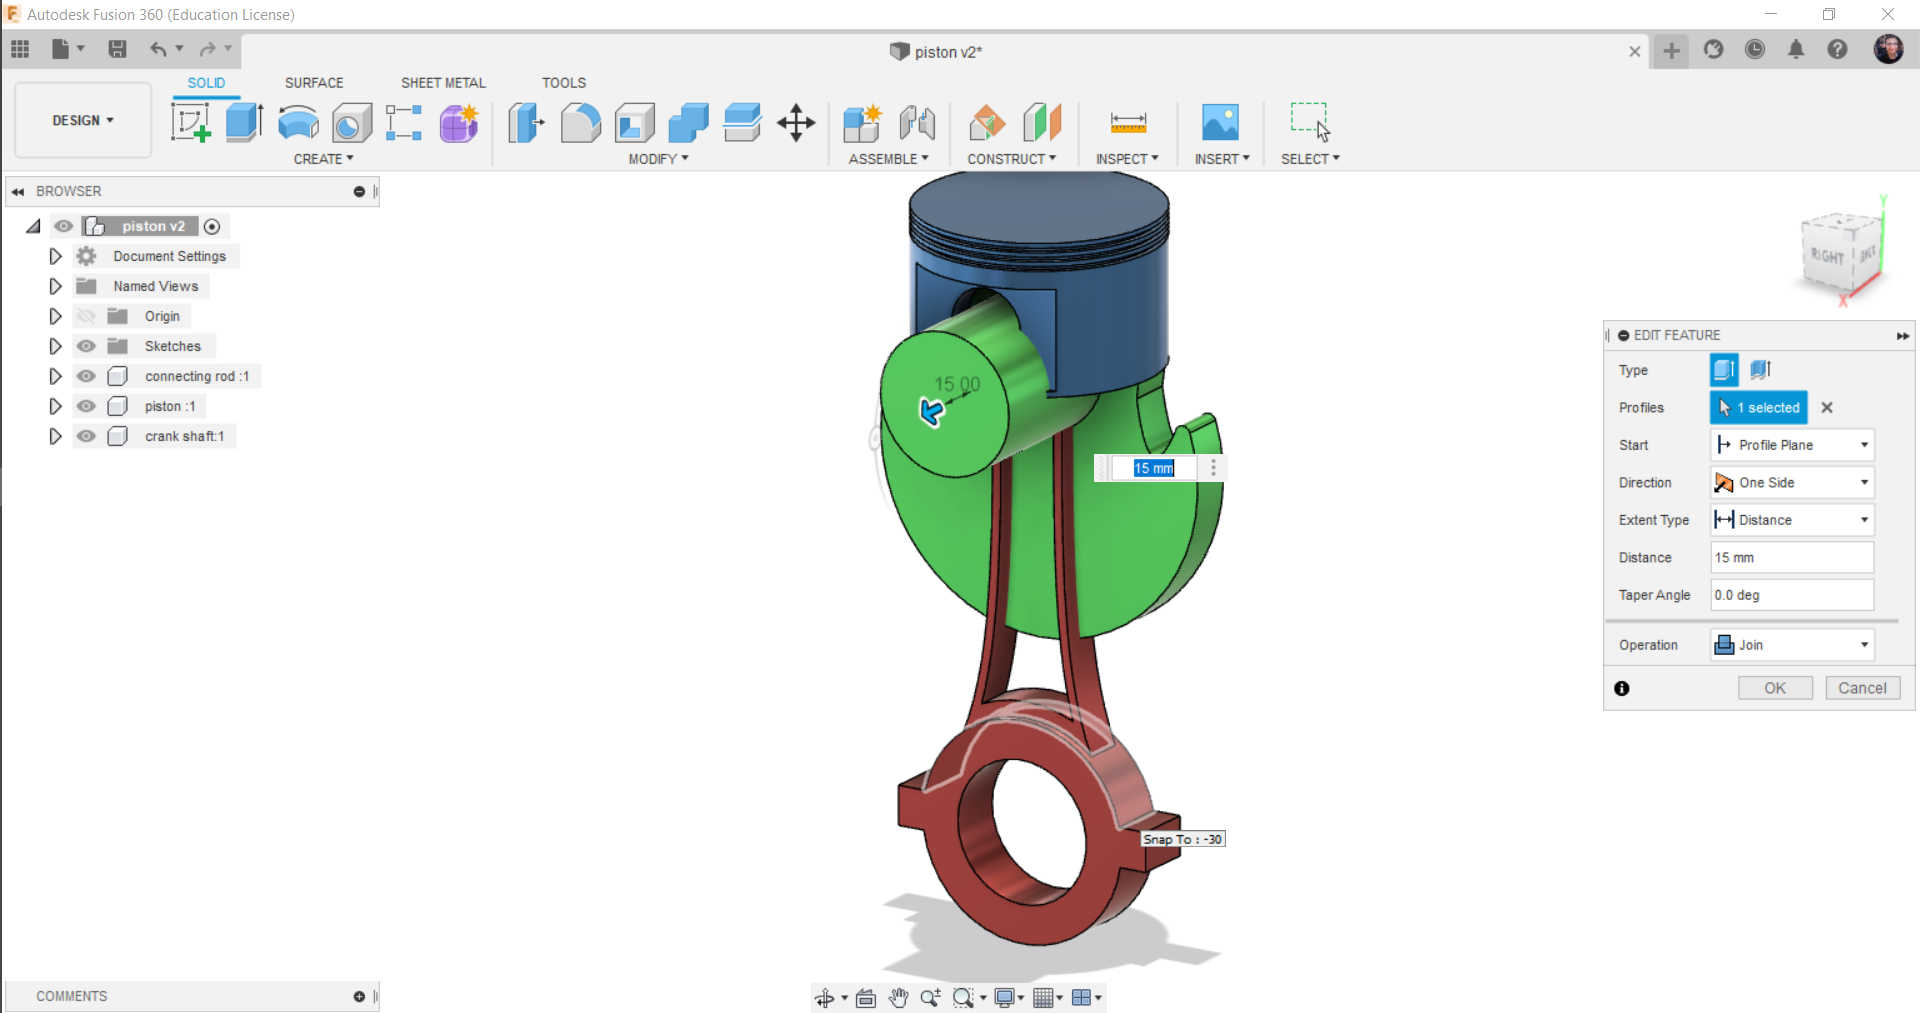
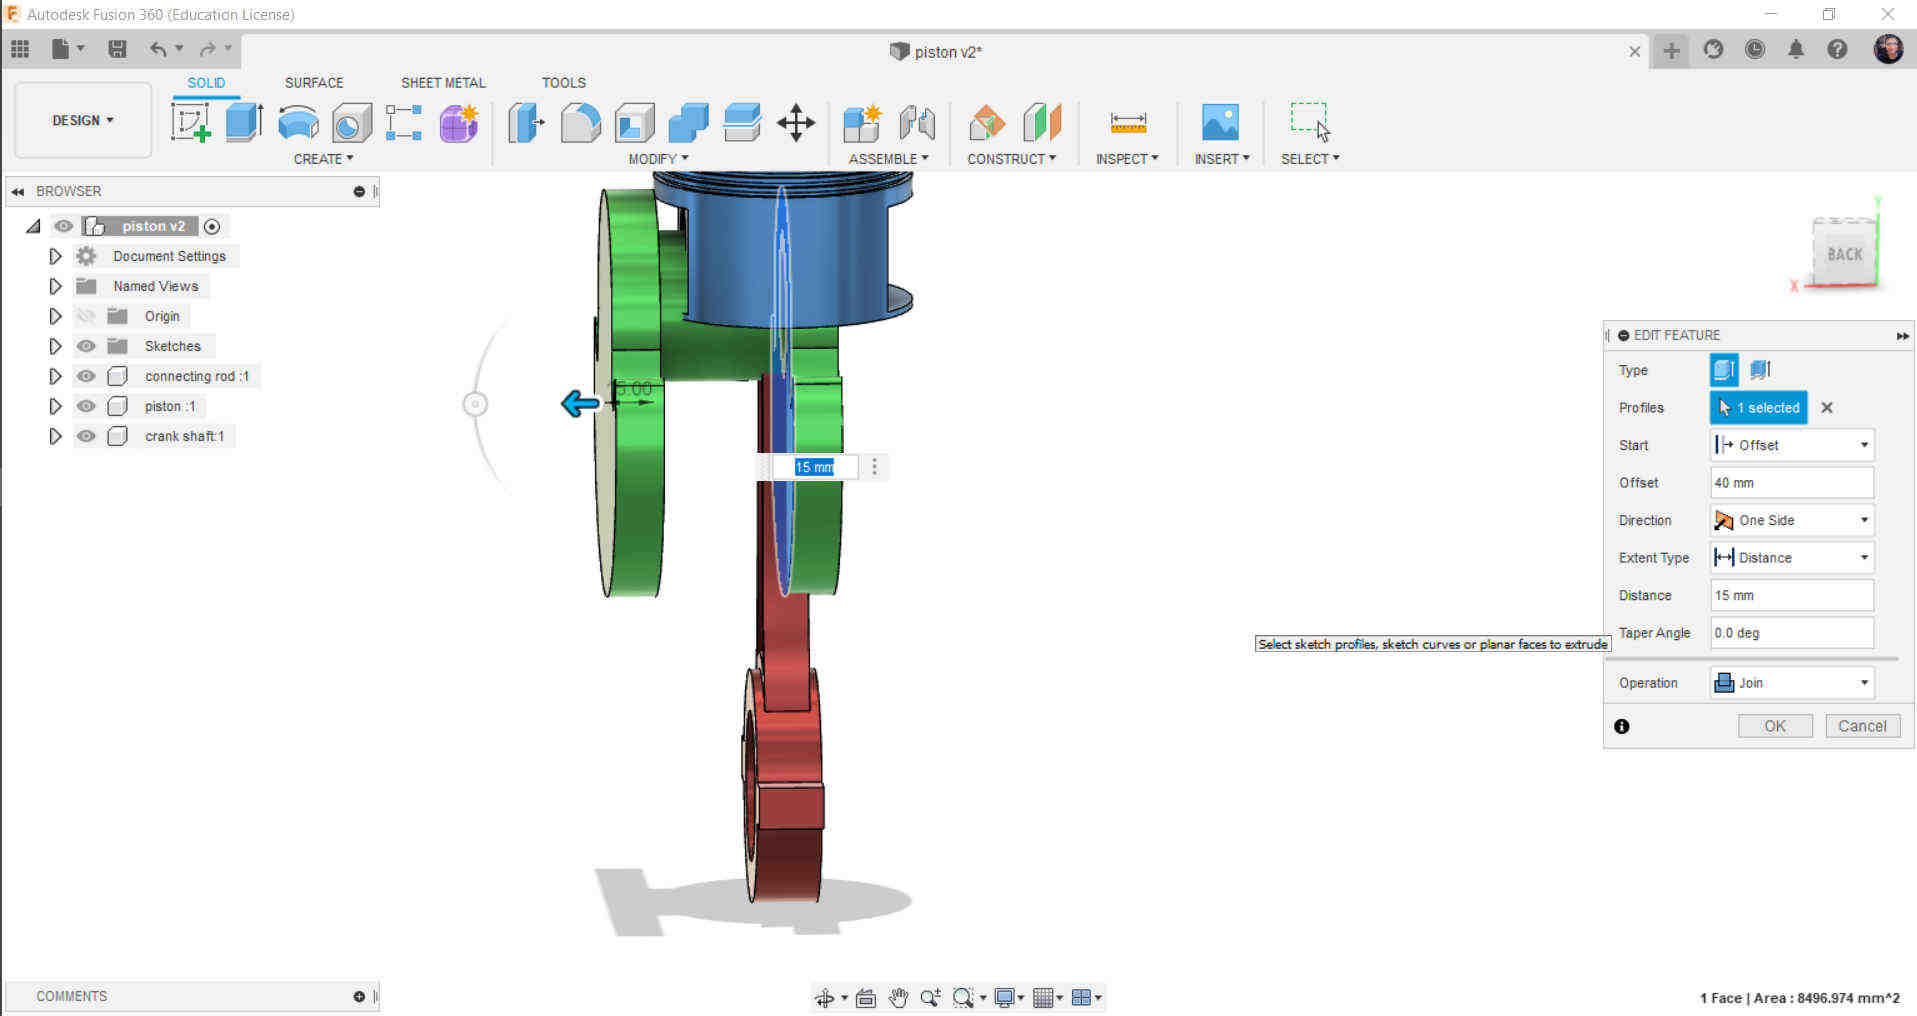
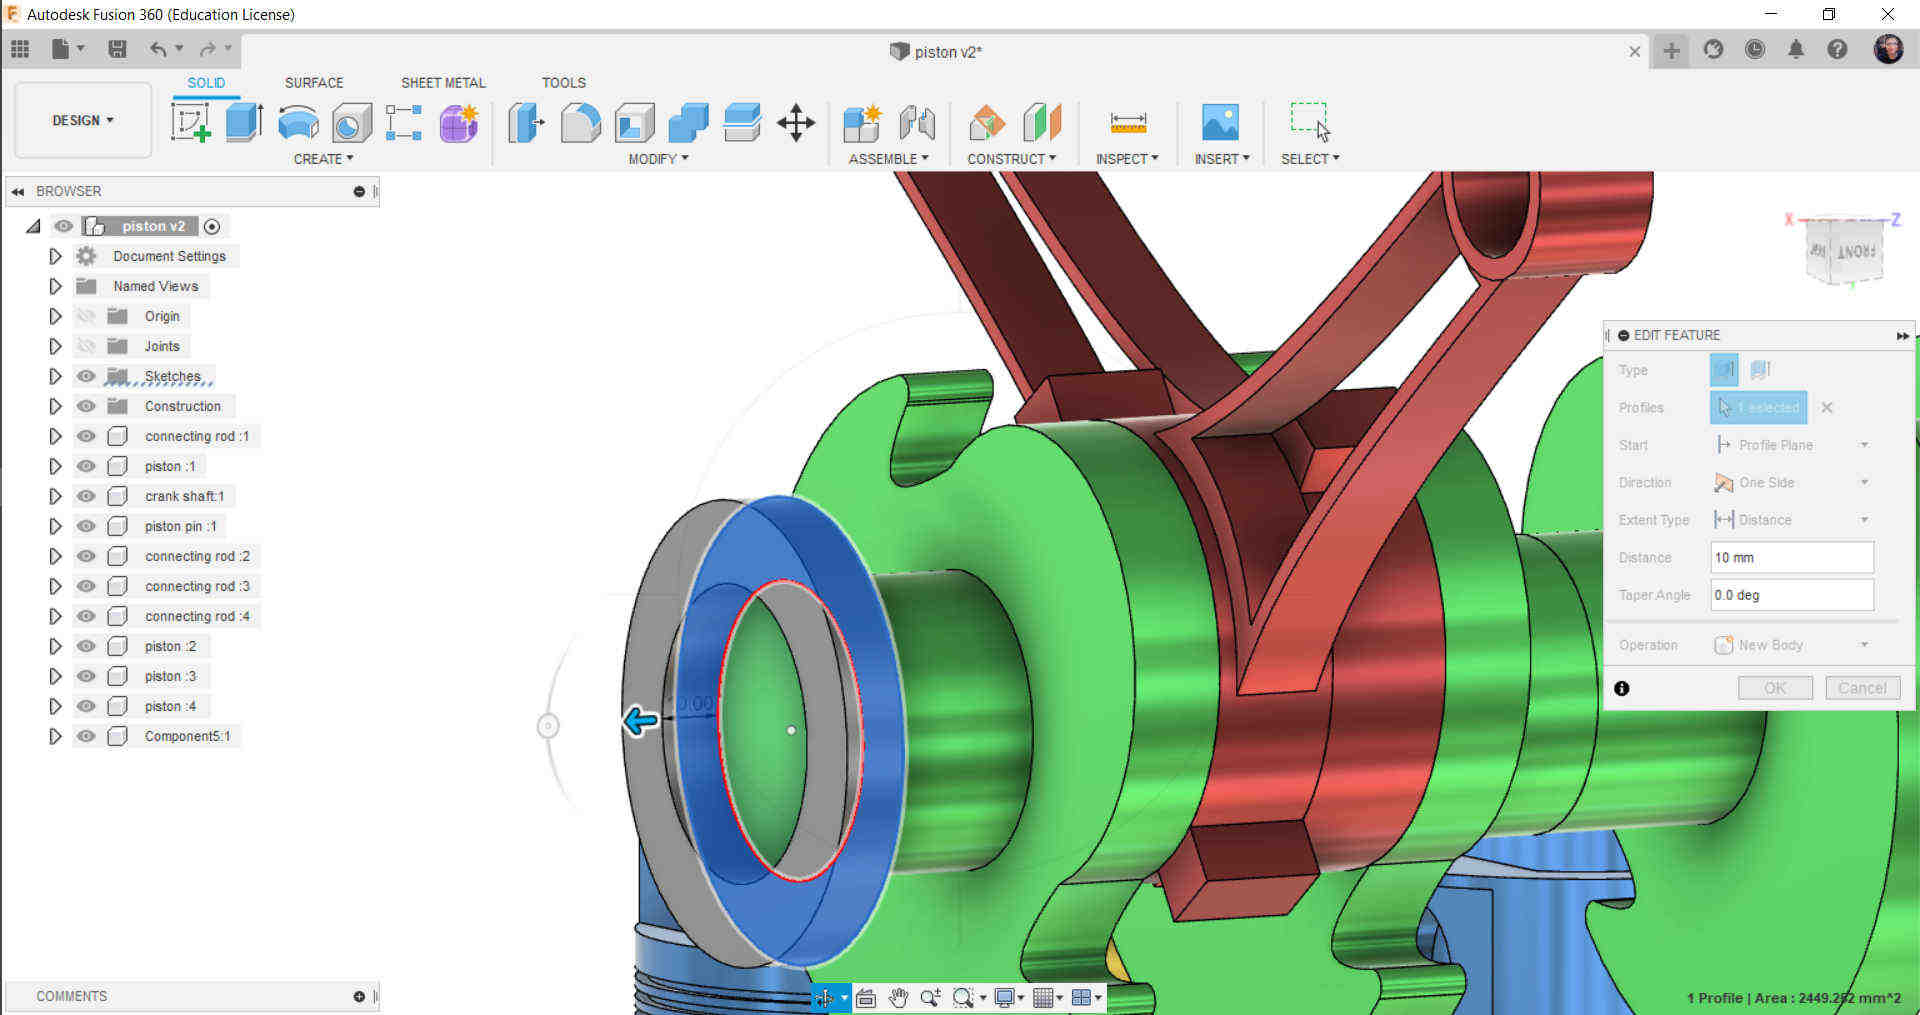
Make offset plan from the Piston and draw two circles as shown
Make the Circles For all 6 Psitons and Make Sliding Joint With the Piston
And Here is our Result
Animaing Video
3D View
xDesign
What make me use xDesign Soft ware is that I want to Use Diffrent cad tool that I never Used before.
and really xDesign Amazed me, I didn't take long untill I could Use It.
For the First time I used xDesign I didn't Watch any tutorial just I Used It as I use Fusion.
I made Simple Sample to see how Difficulty is xDesign and It was Very easy.

Open xDesign

From Scketch Tap Down Choose Circle and draw in the front plain two Circles with any dimentions

draw Diagonal line as shown to make the A letter

Completeing Drawing of the A Letter

Make the Arrow in the A Letter


Make lines in the Circle To Extrude


Extrude The Logo

Make Filet in the Edge of the A letter

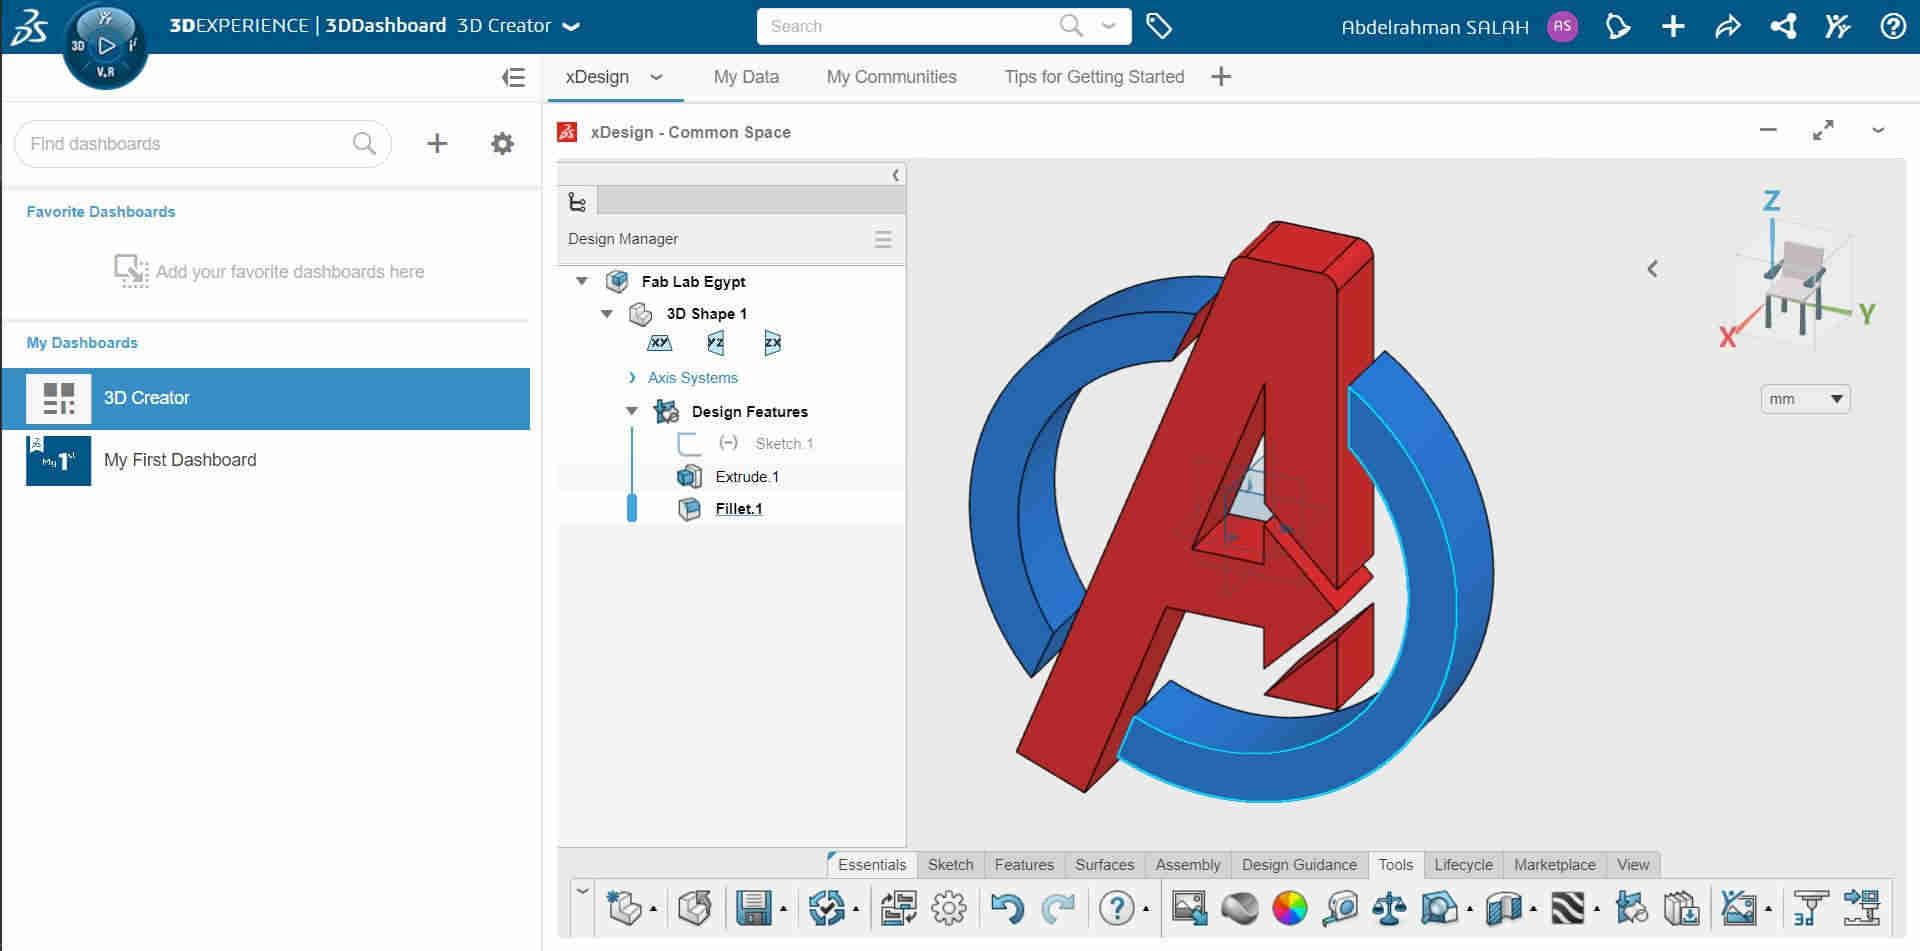
Finish the LOGO and paint it From Tools Appearance

The Final Shape
3D View
Blender
It's my first time to use blender, But I Amazed with the things that Blender Can do.
But It was hard to deal with actually, It Took from me about 2 days to know some of tools that Exsist, and It took 8 Hours to make My First Design on it.
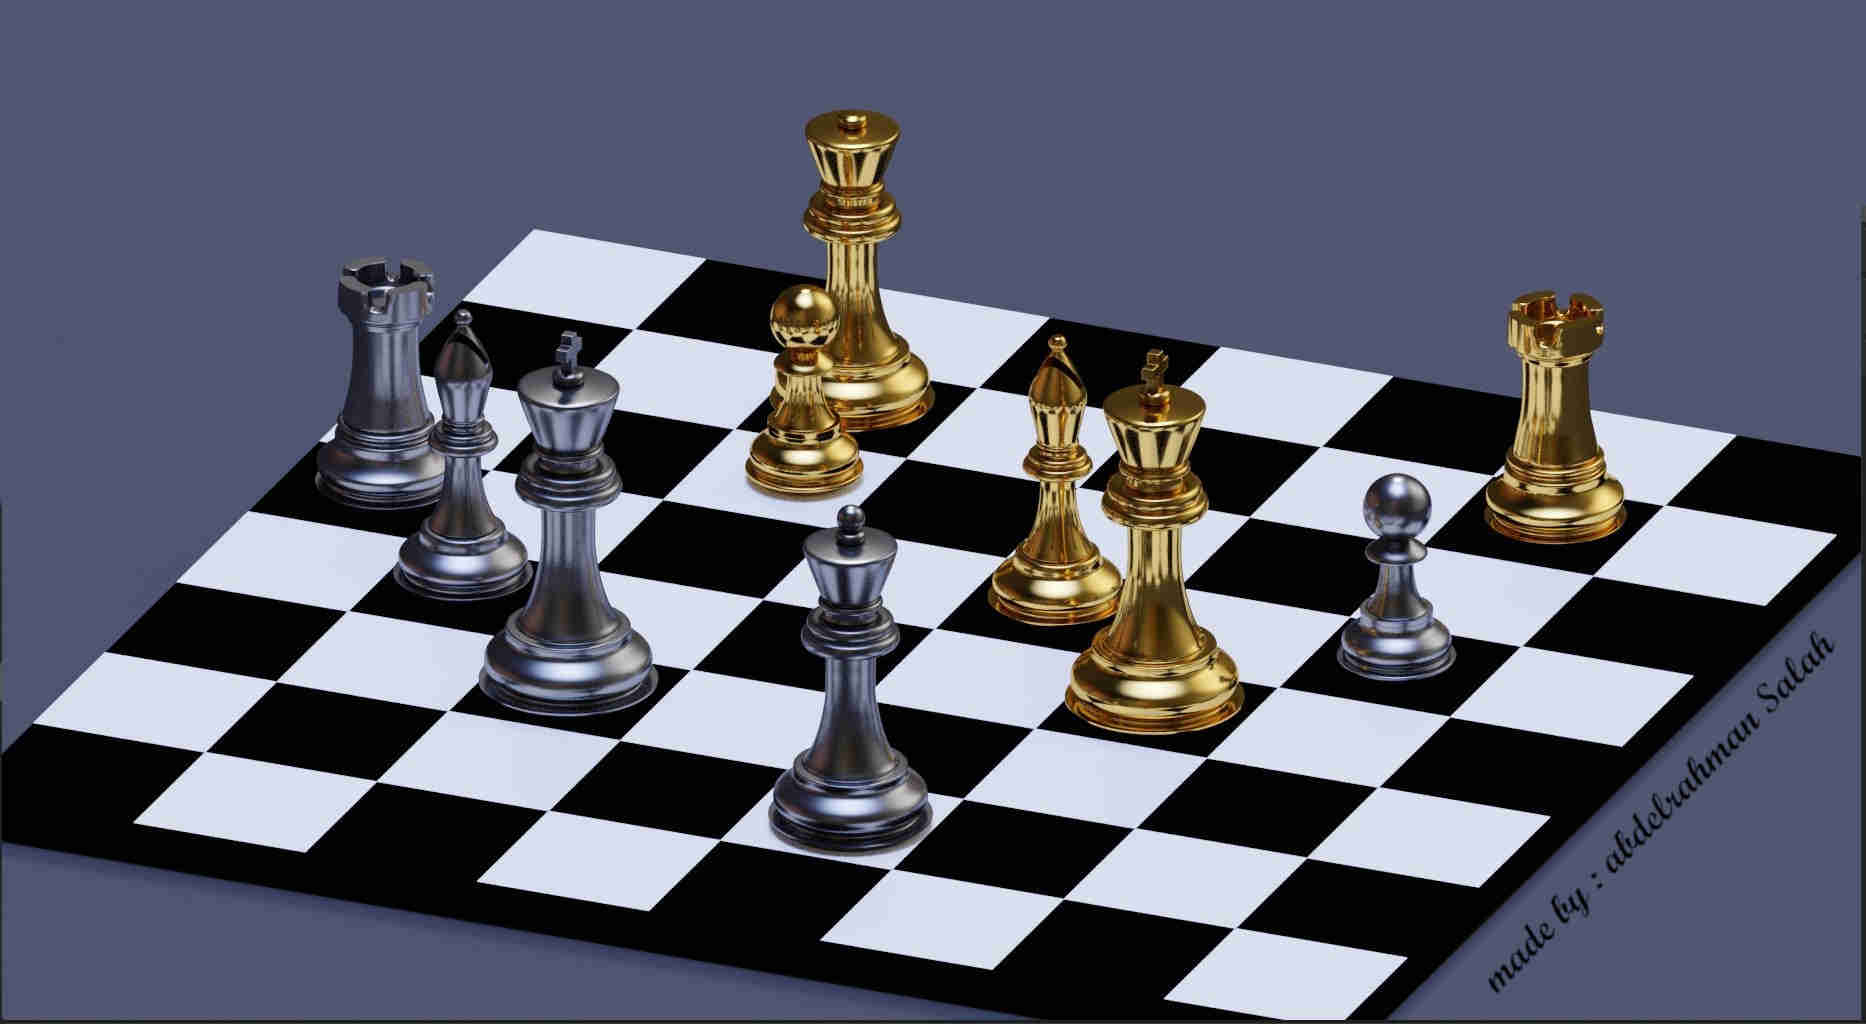
I was Happy to make Chess board, and I will show you the Journy of making this Design.
The final Render
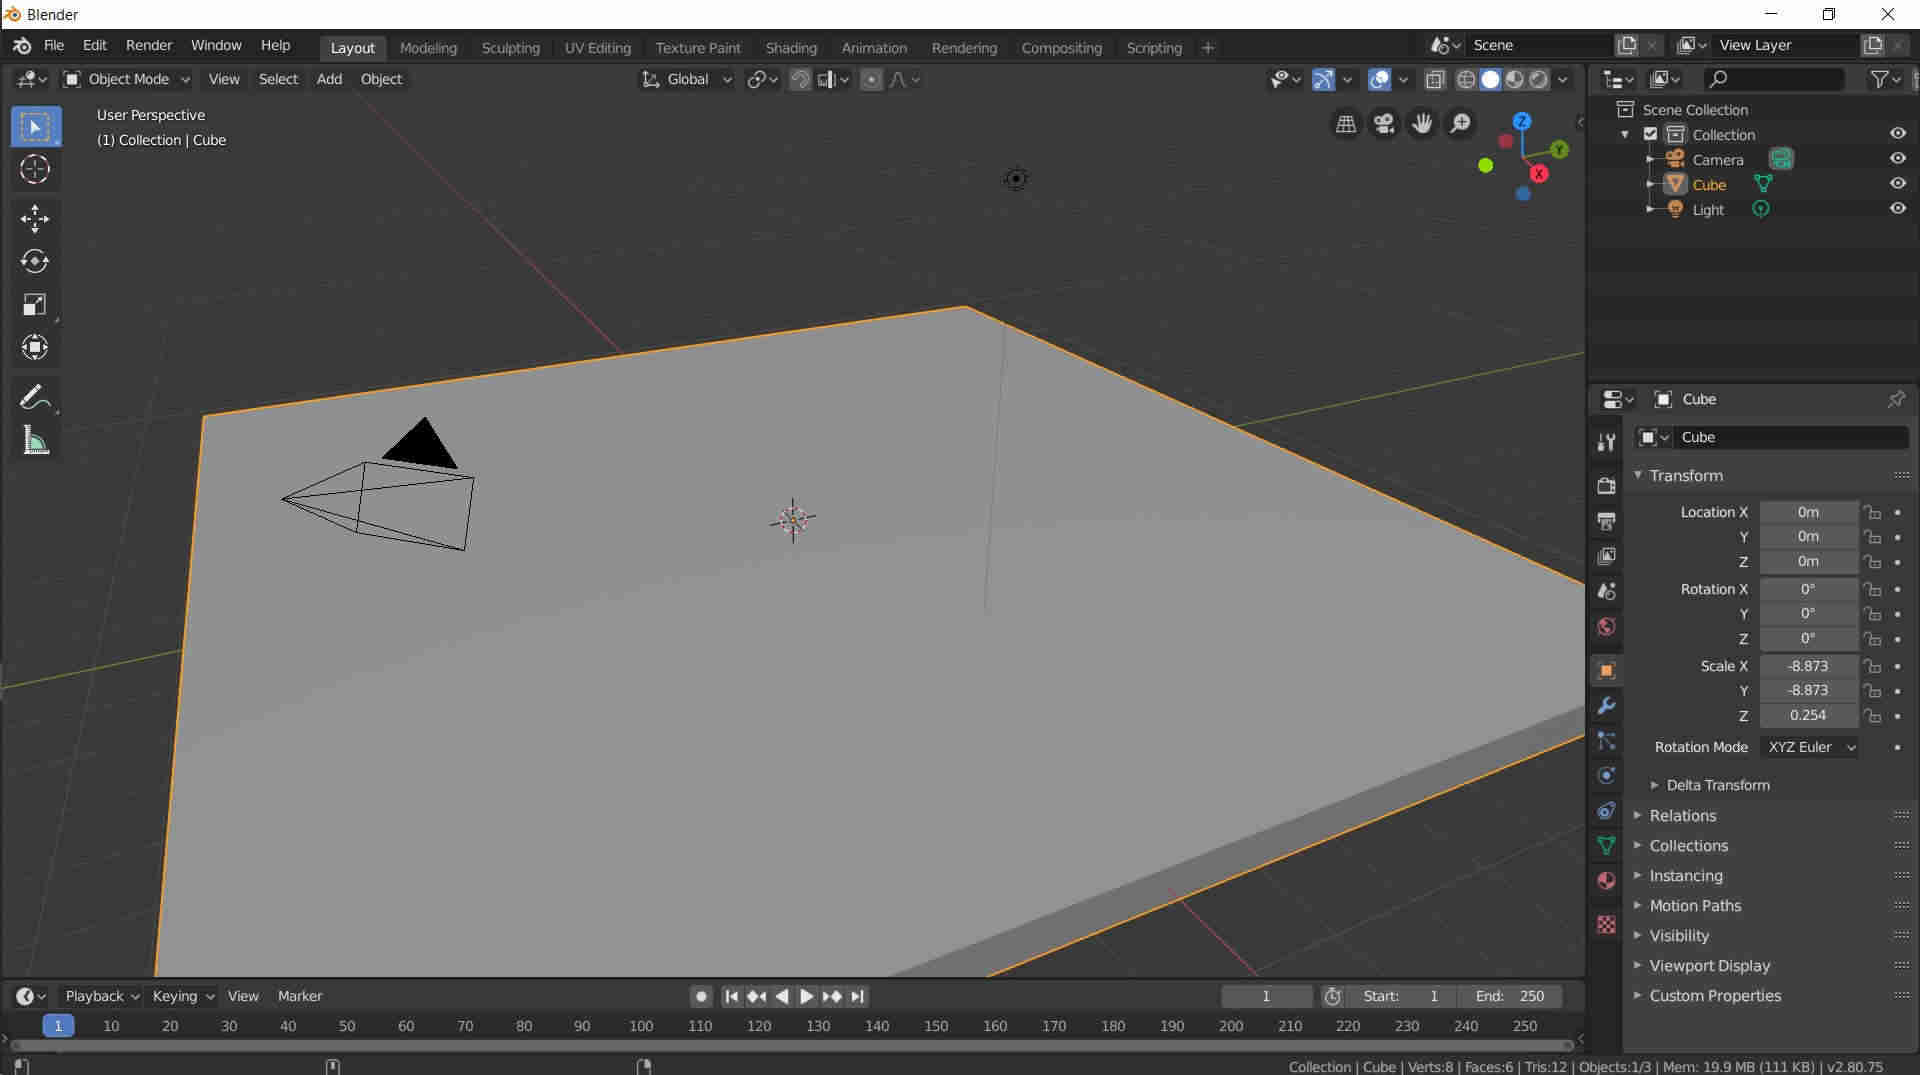
Open Blender (the Version I used Blender 2.80)
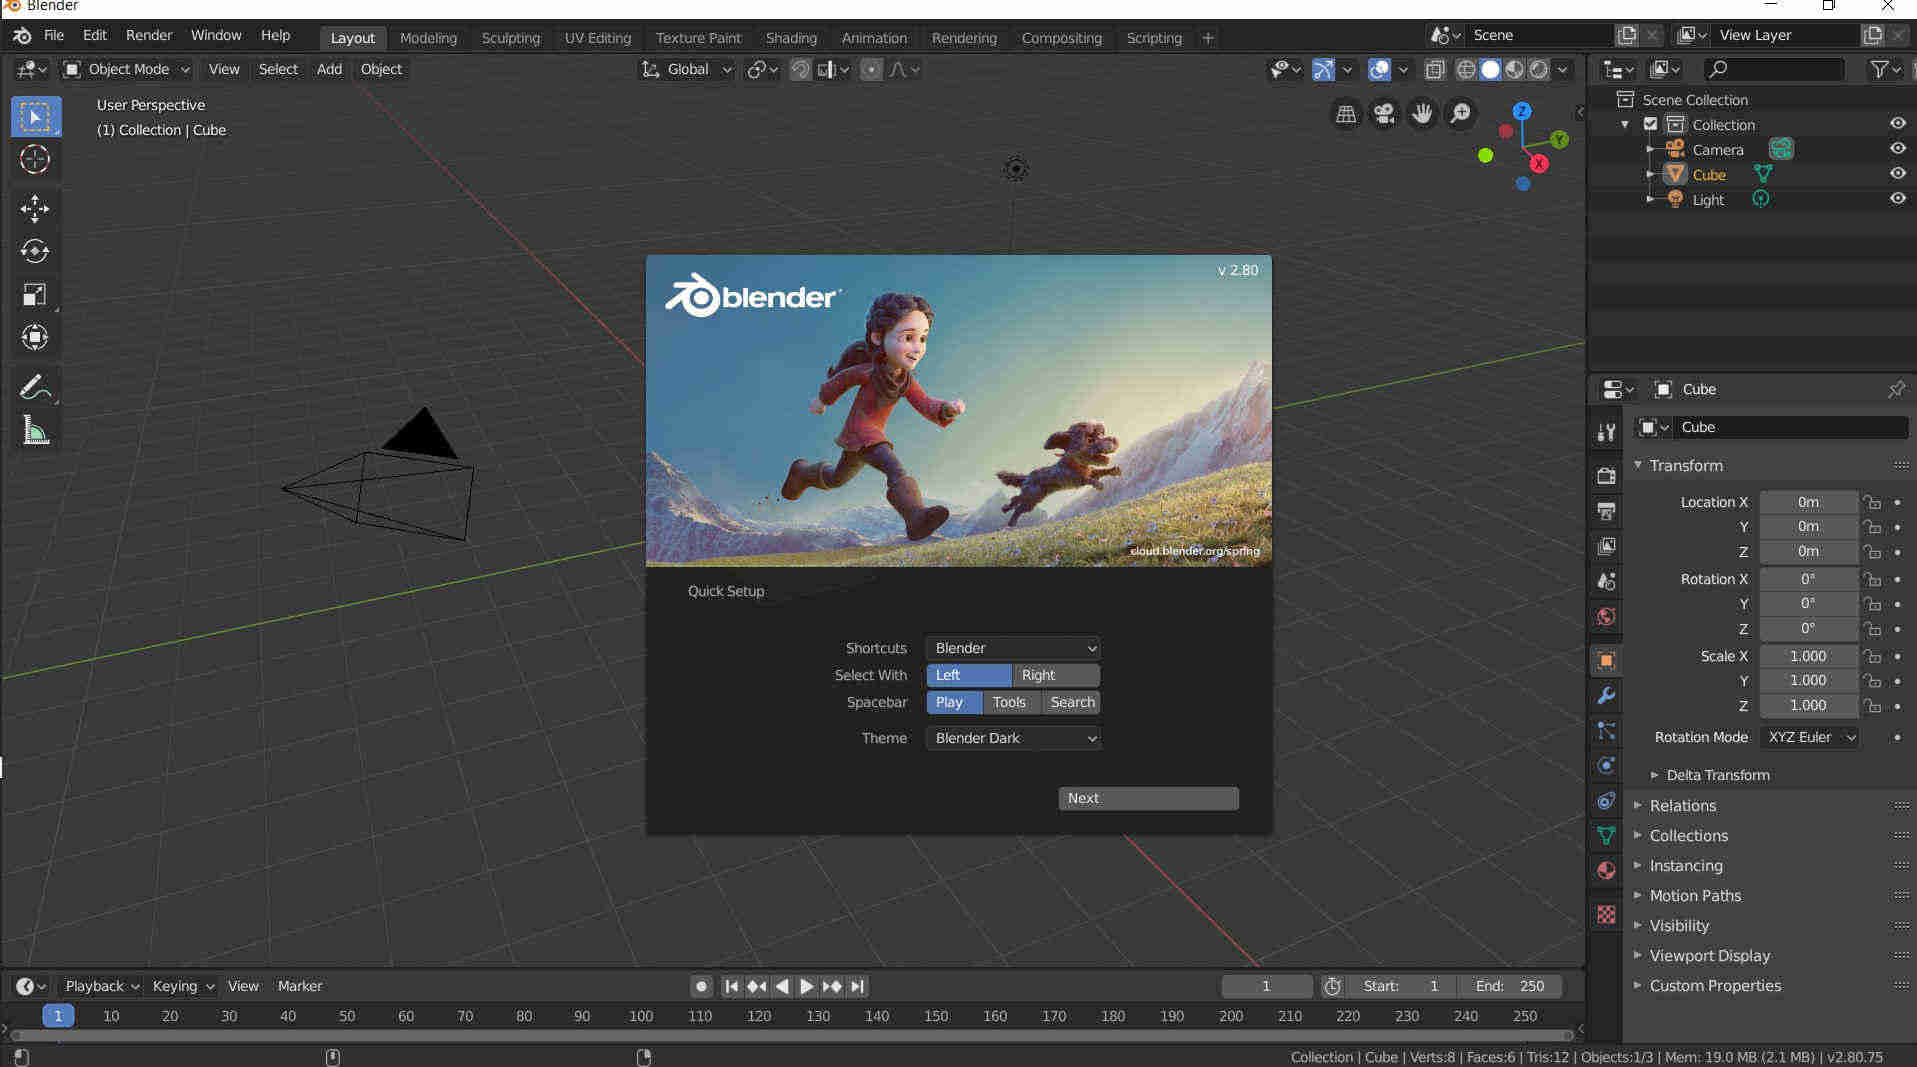
I Change the Cube Into plan but had thikness to Make the Chess Board
I Split the Screen Into 2 TO Edit in one screen and the other will show to me the Changes
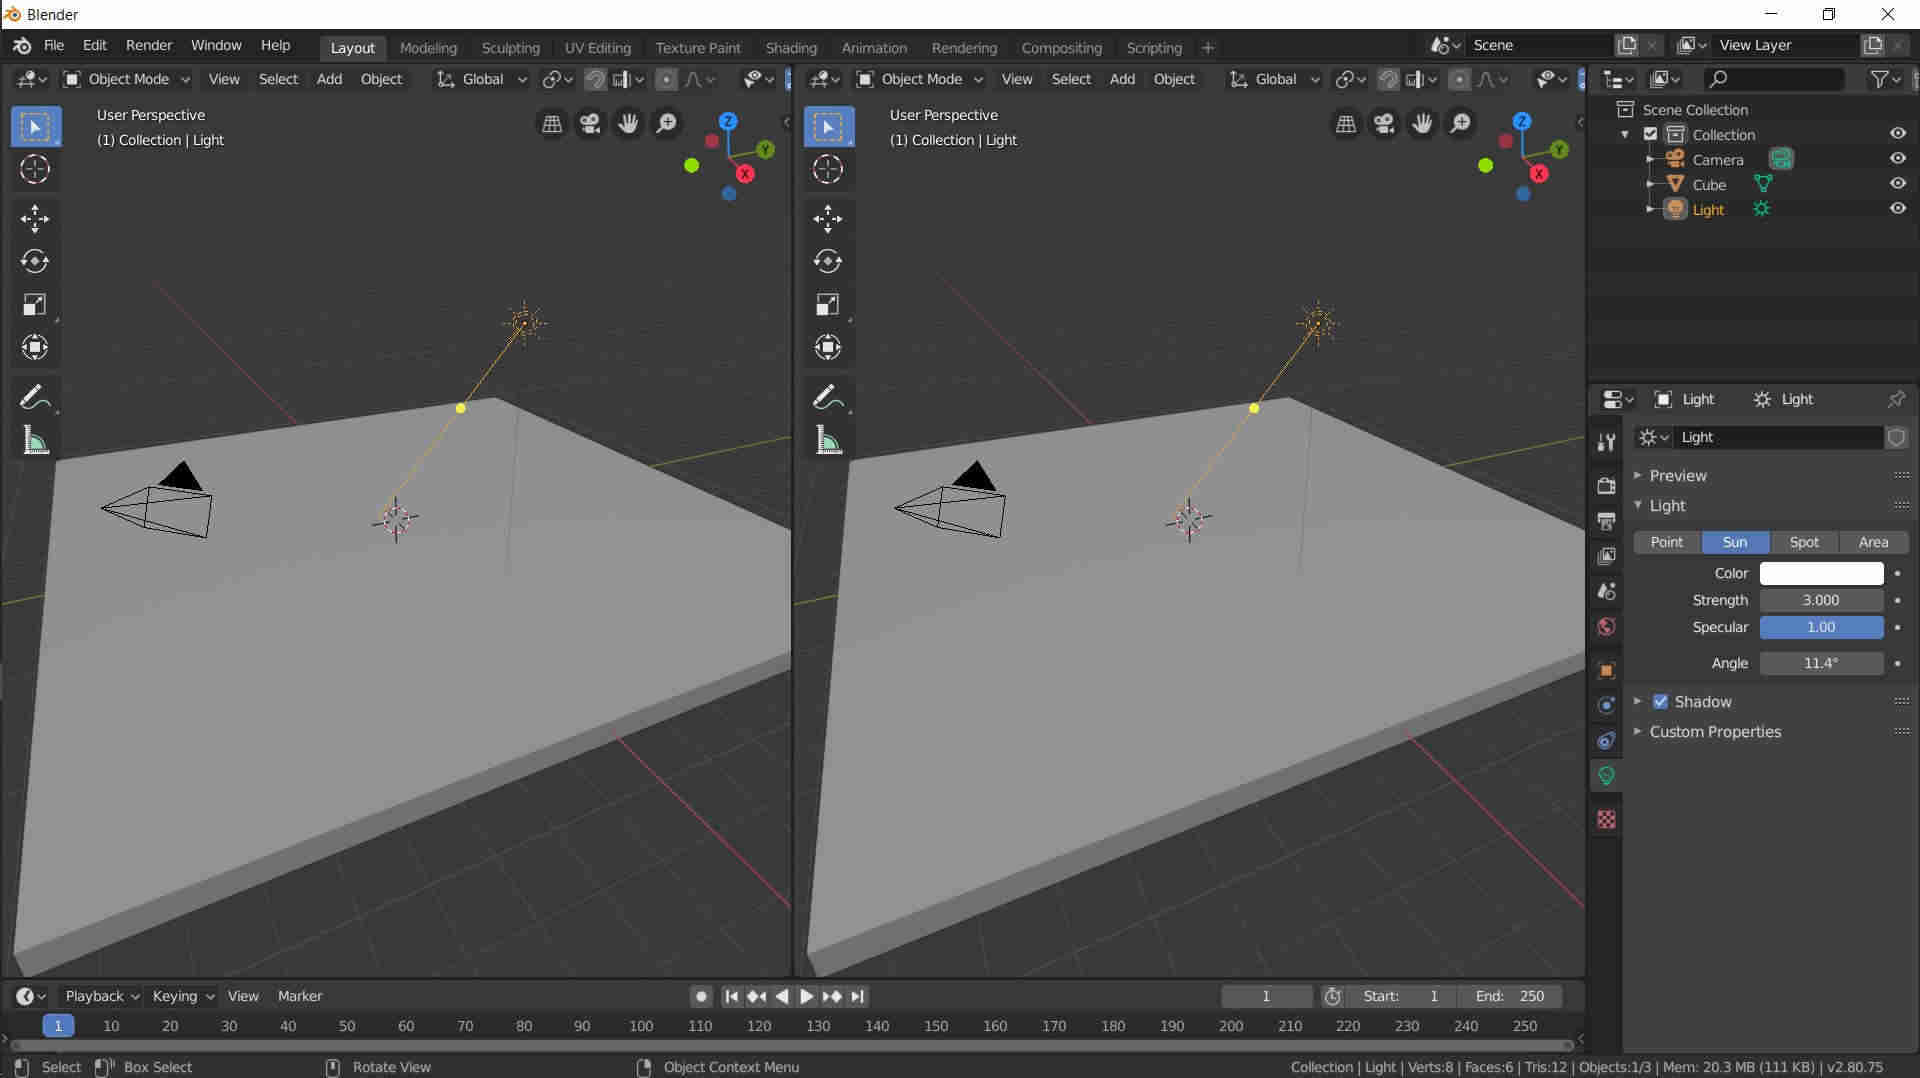
I go to shade Editor in the second screen

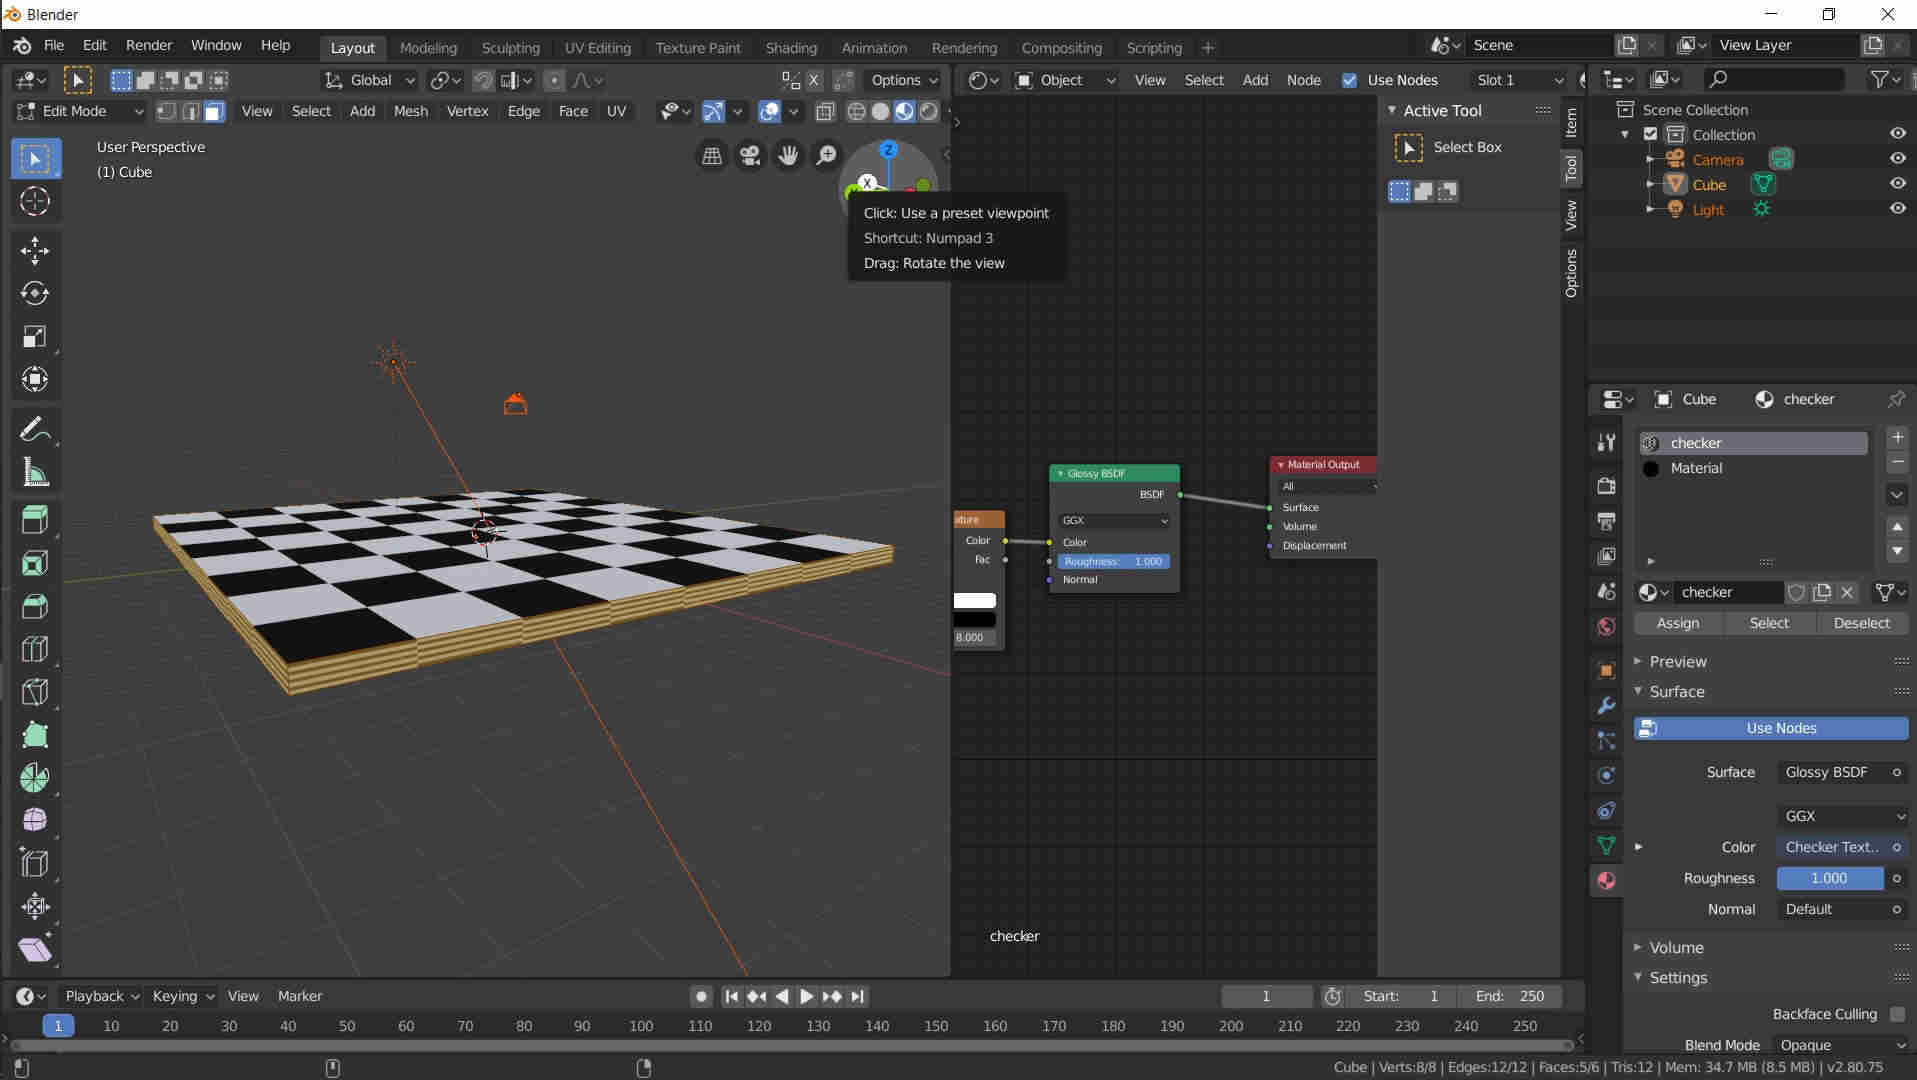
Then I Edit the Plan to Look Like the Chess Cubes
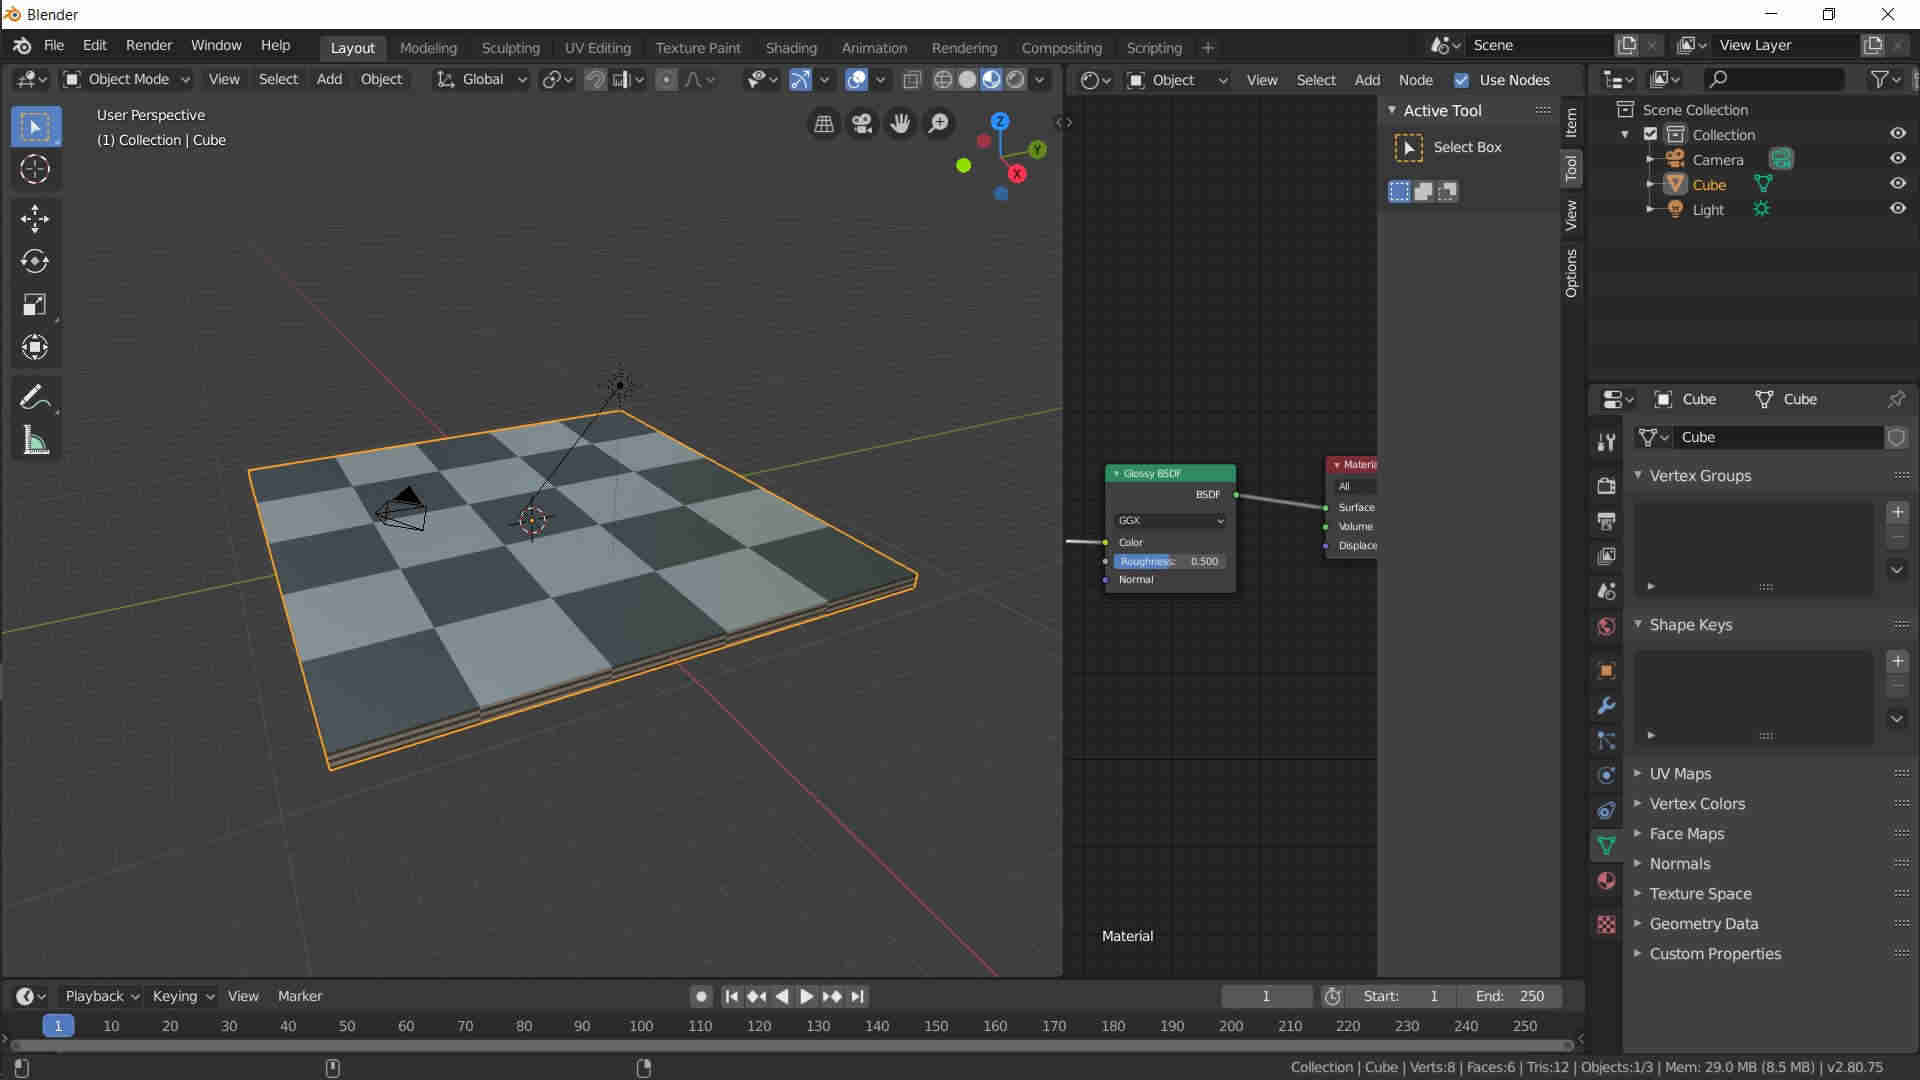
Make some changes in the board (change color and make the squares 8x8)
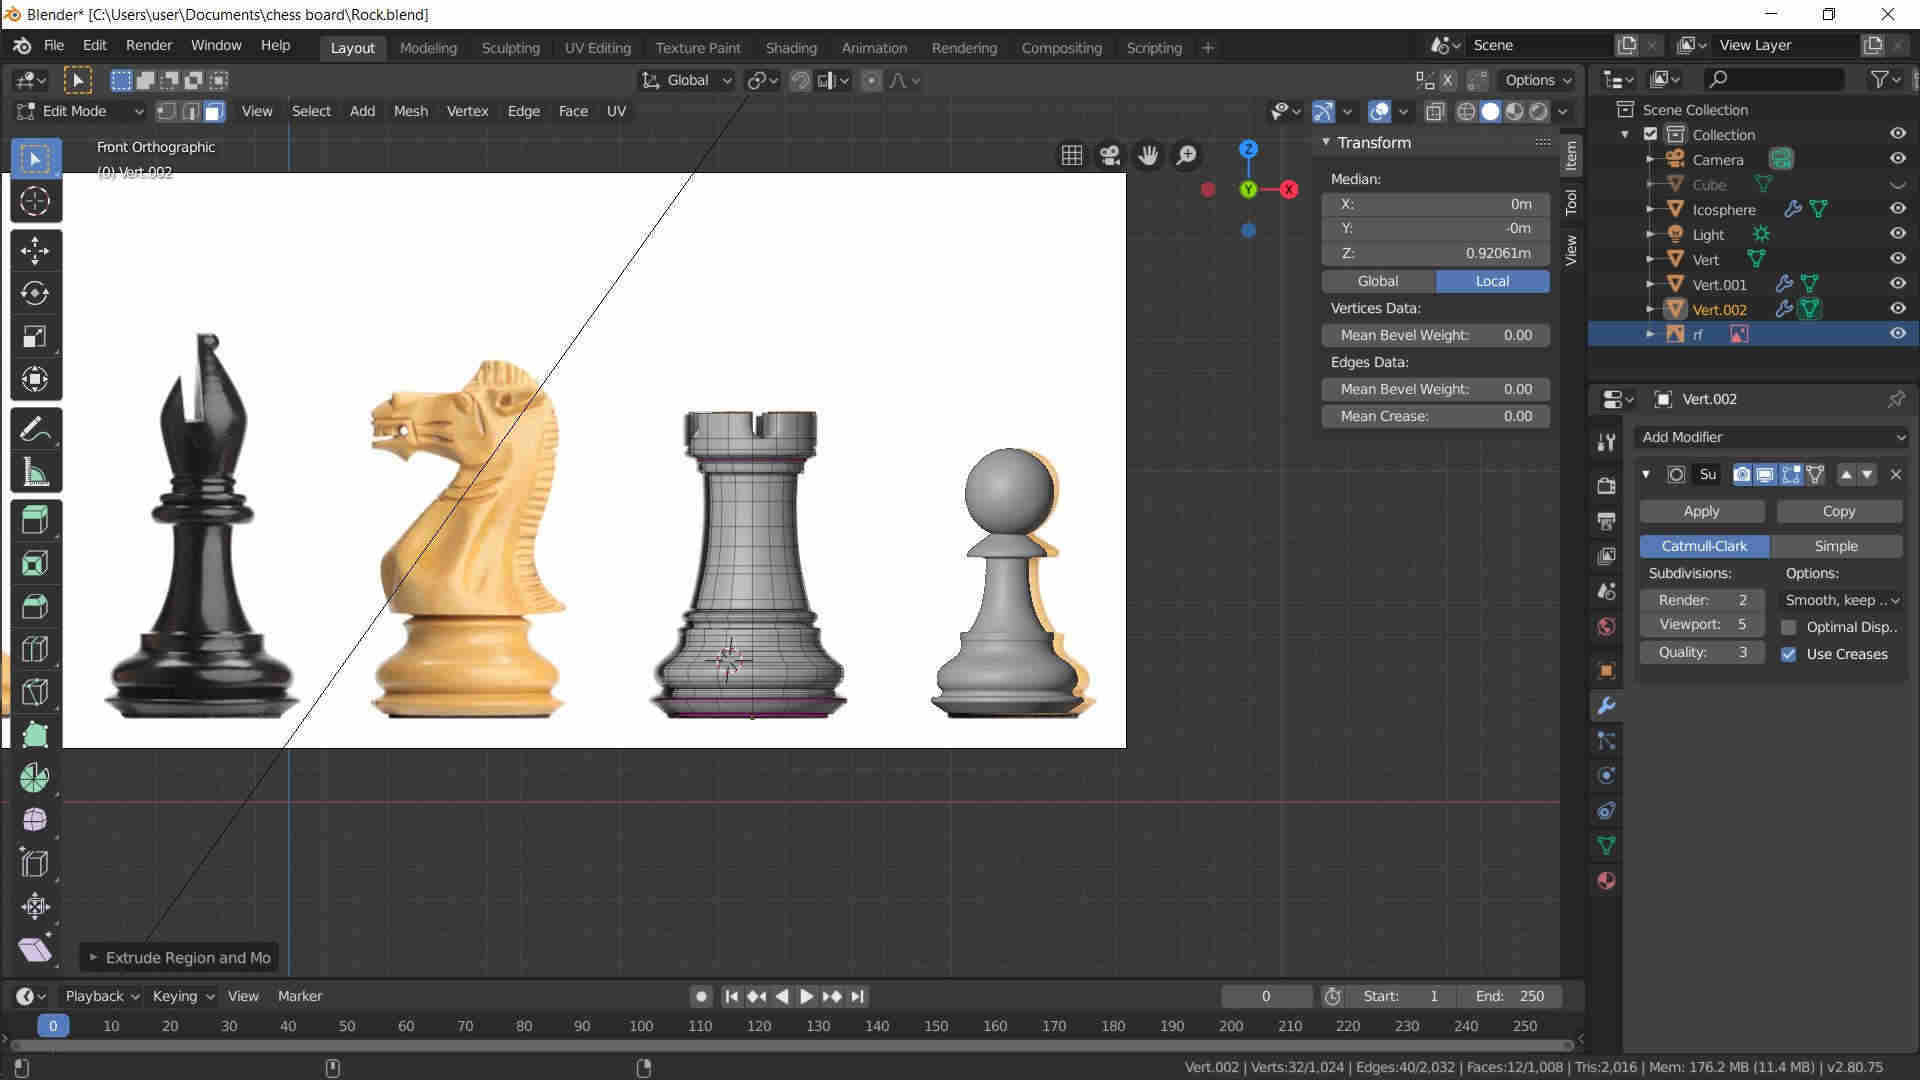
I Bring Image for Pieces to make them as the Image

I draw the Bawn at first aby make 2D sketch and use thread tool
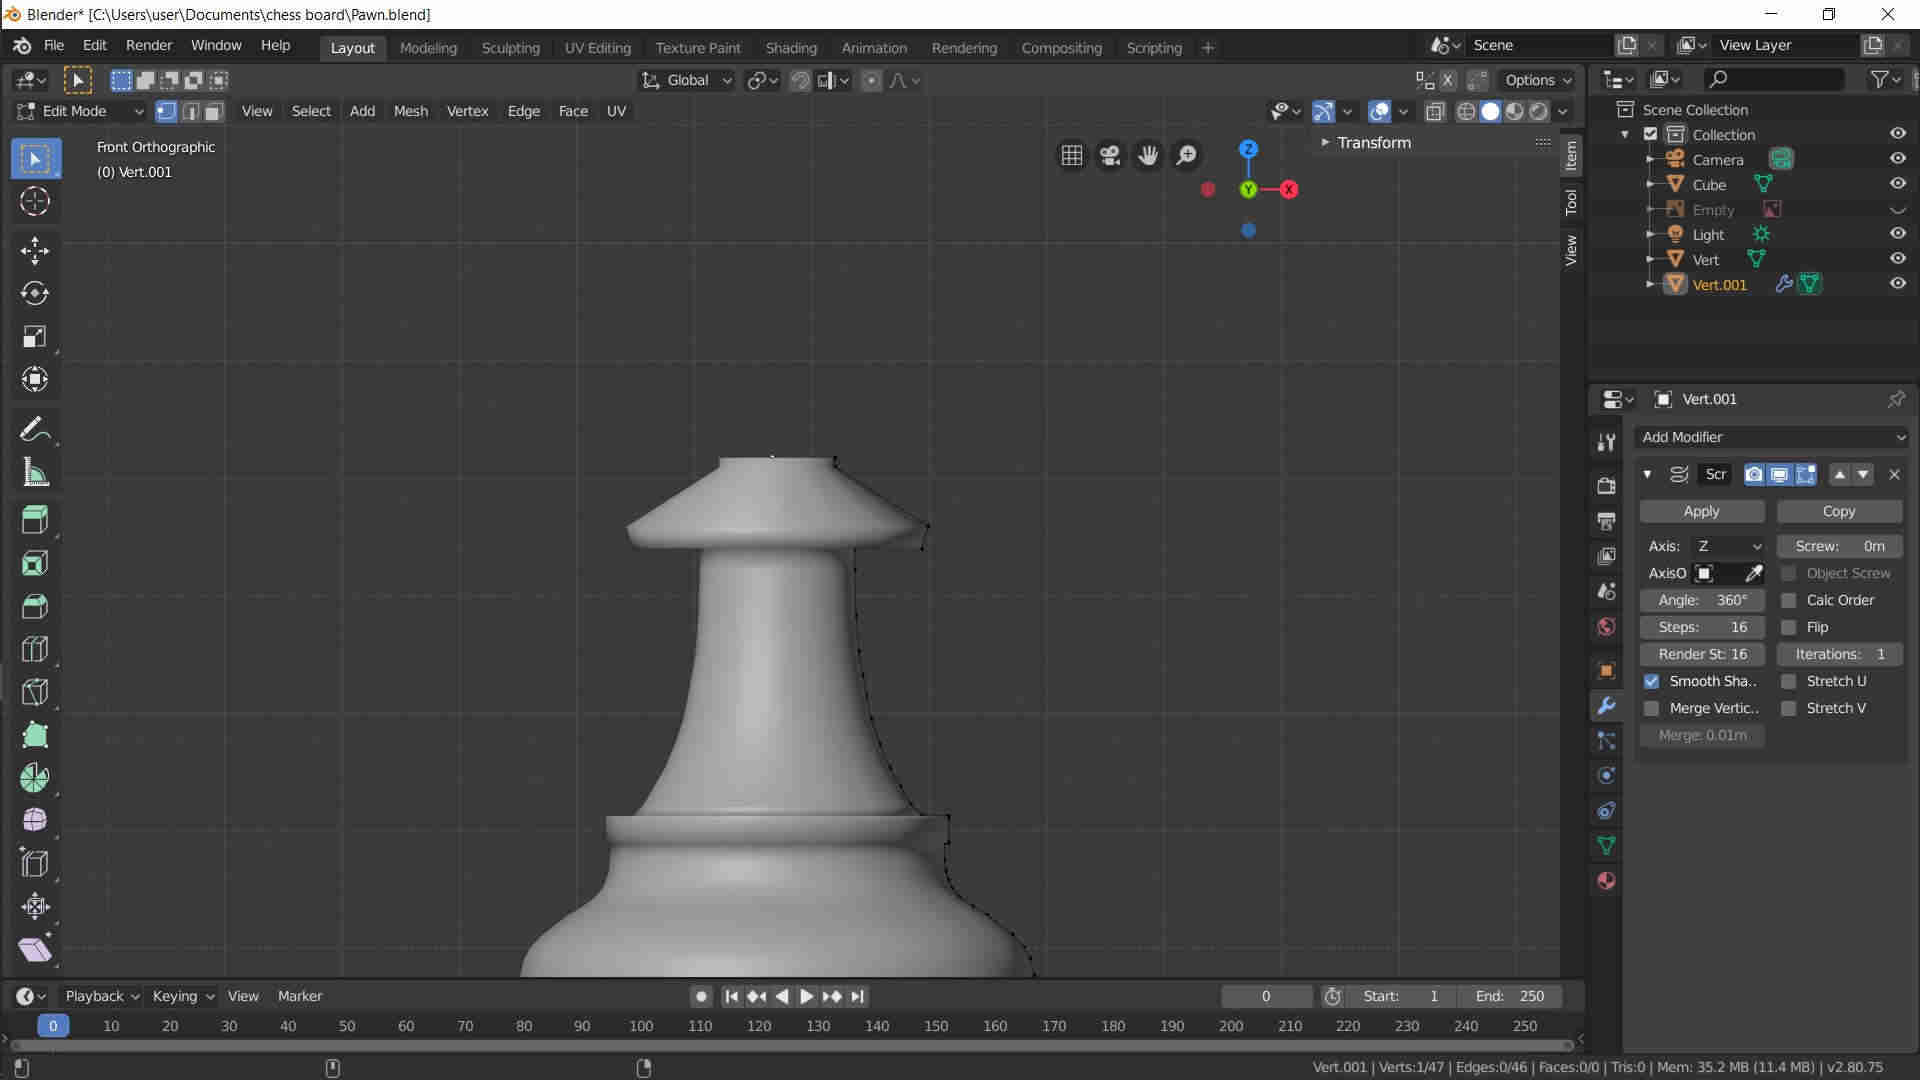
Then I Complete the Head of the Bawn

And then I Made the Rock Body
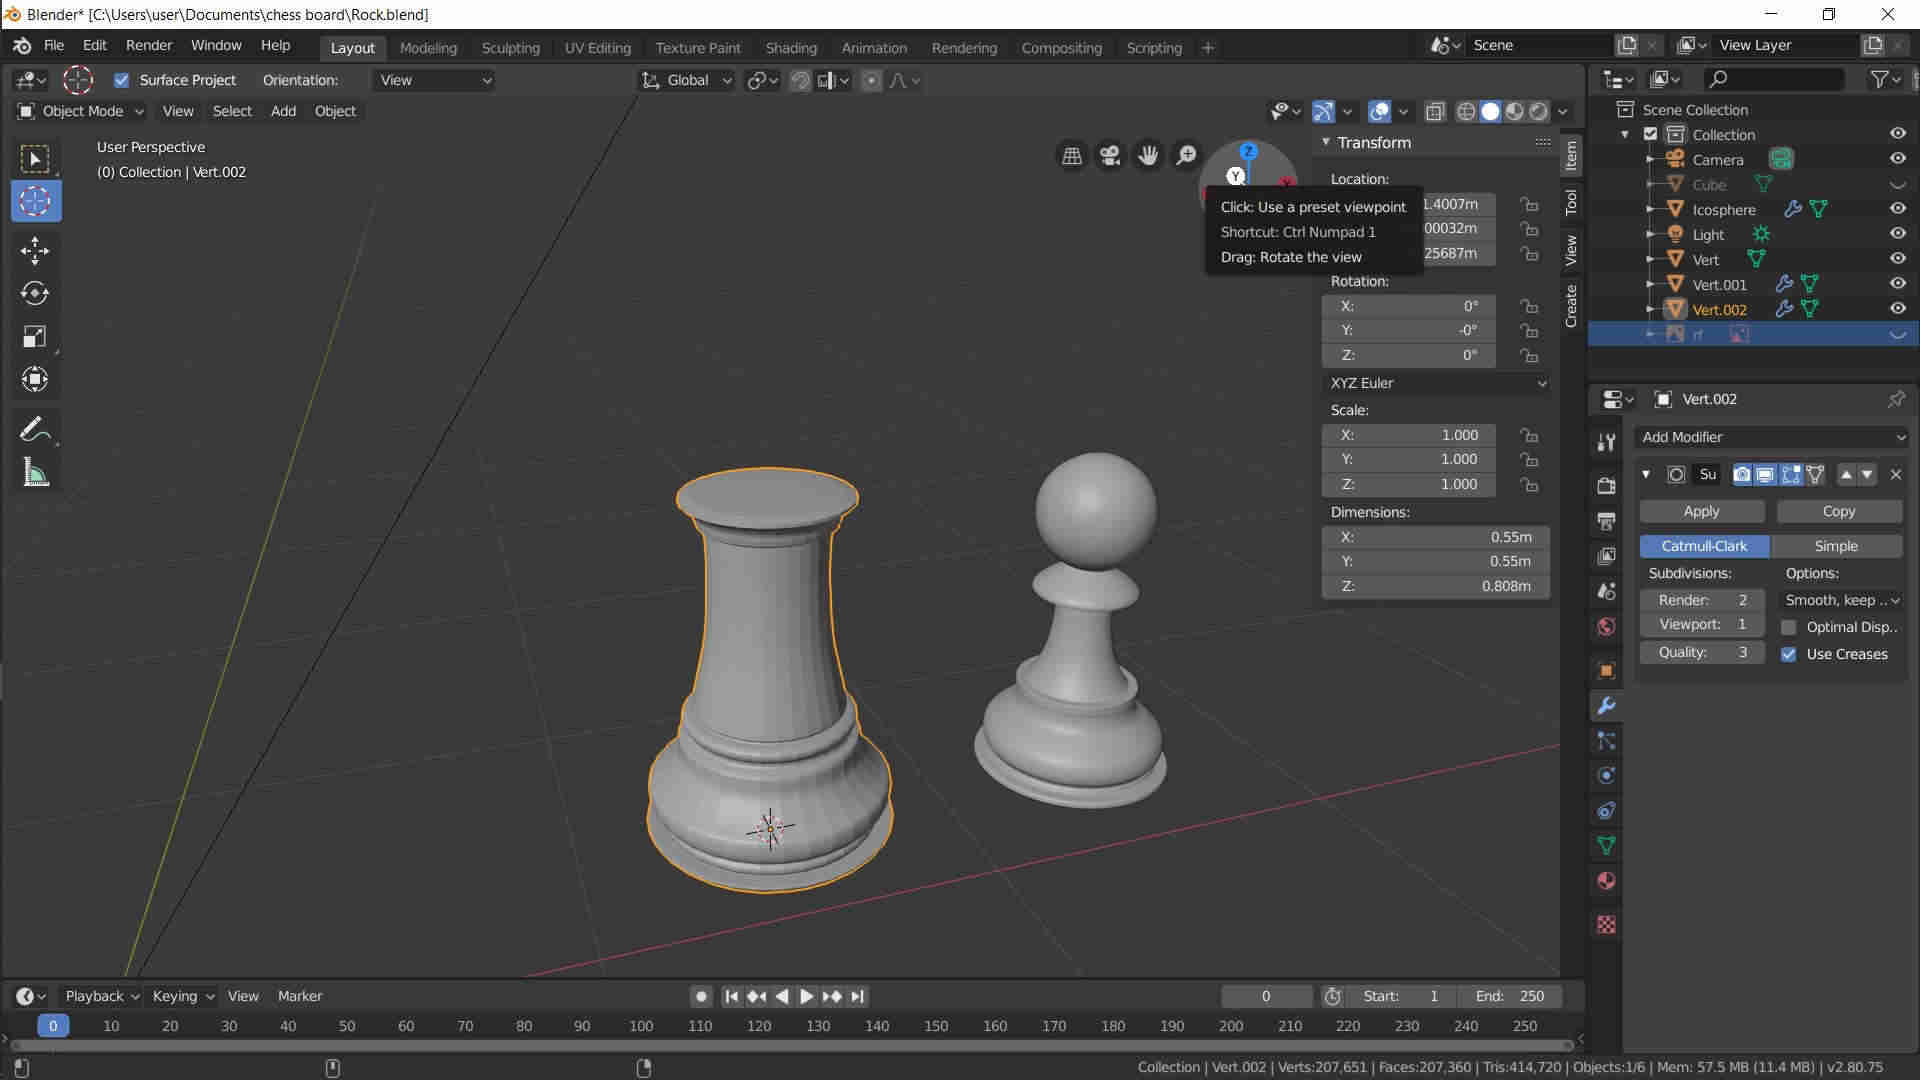
And adjust the Rock to look like the Image I download
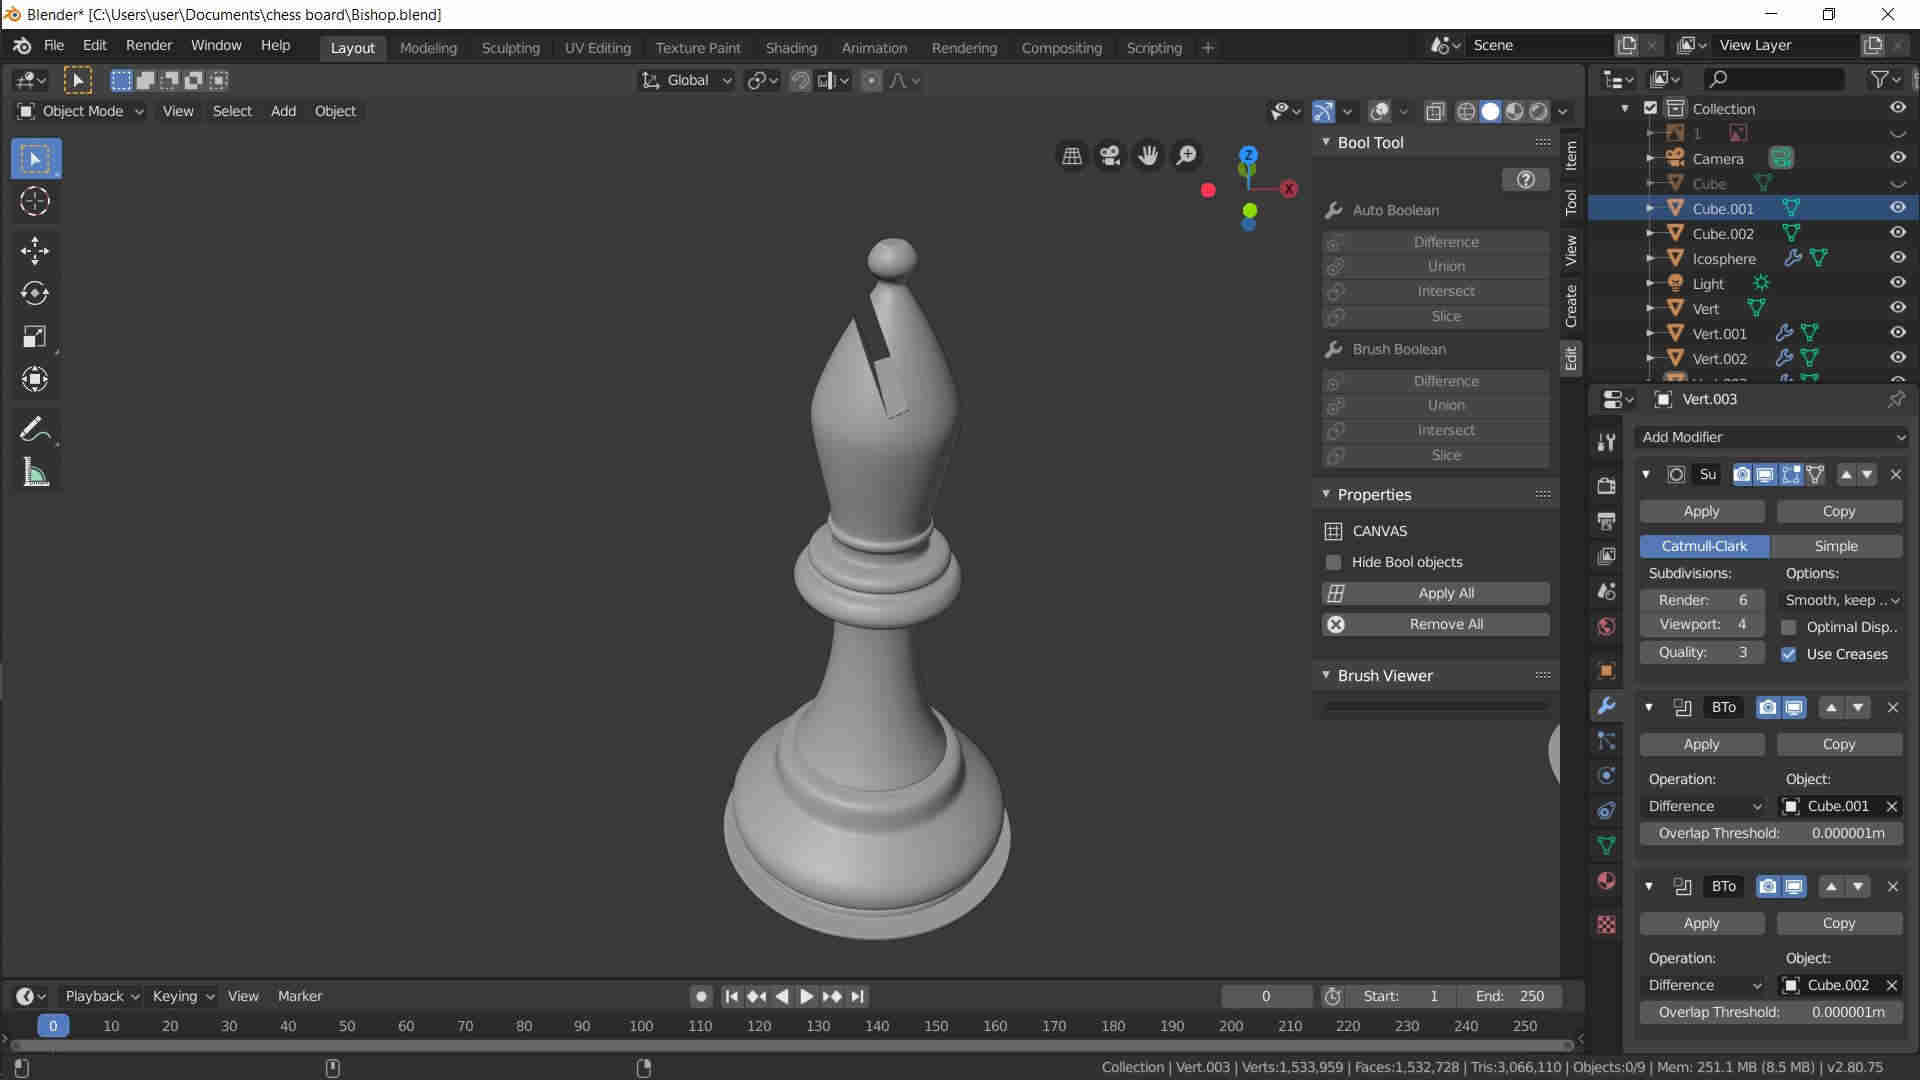
After That I Begain to make the Pishop
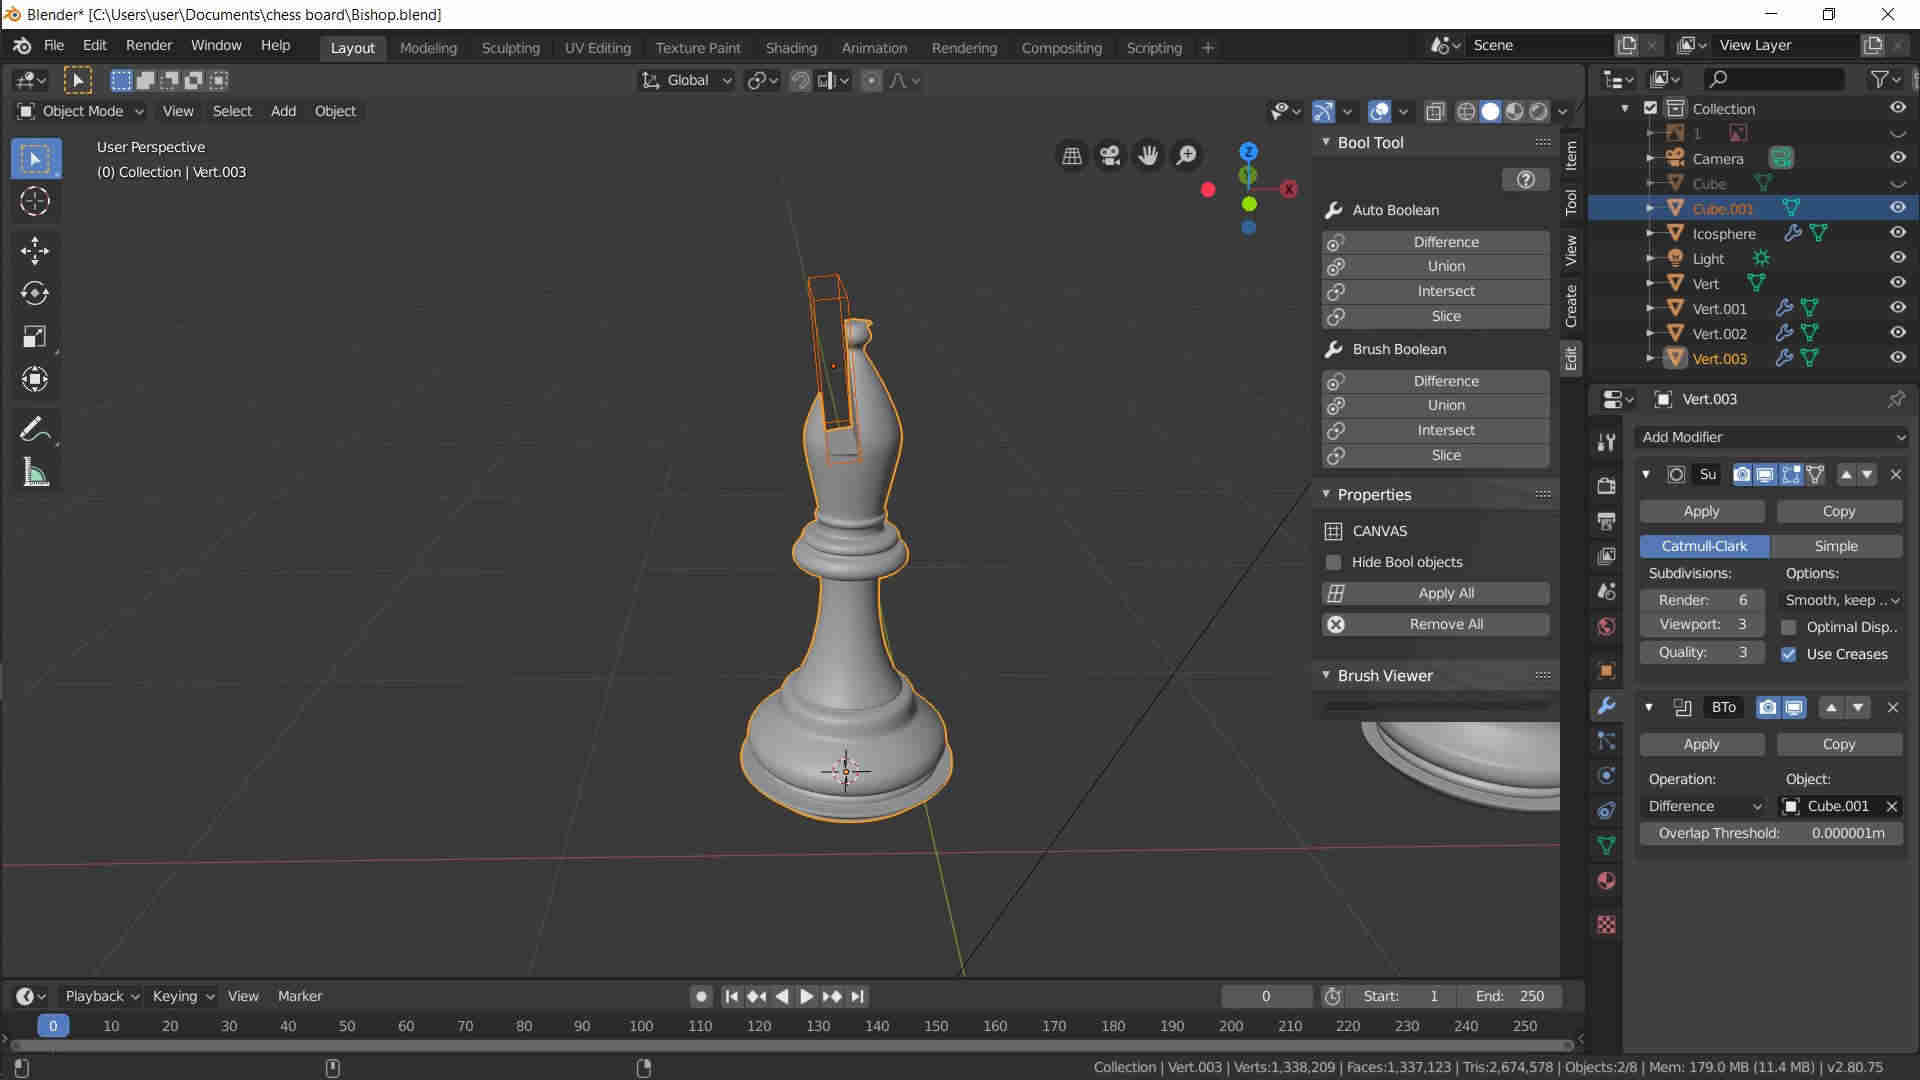
and then I adjsut the Pishop piece and make it smoother
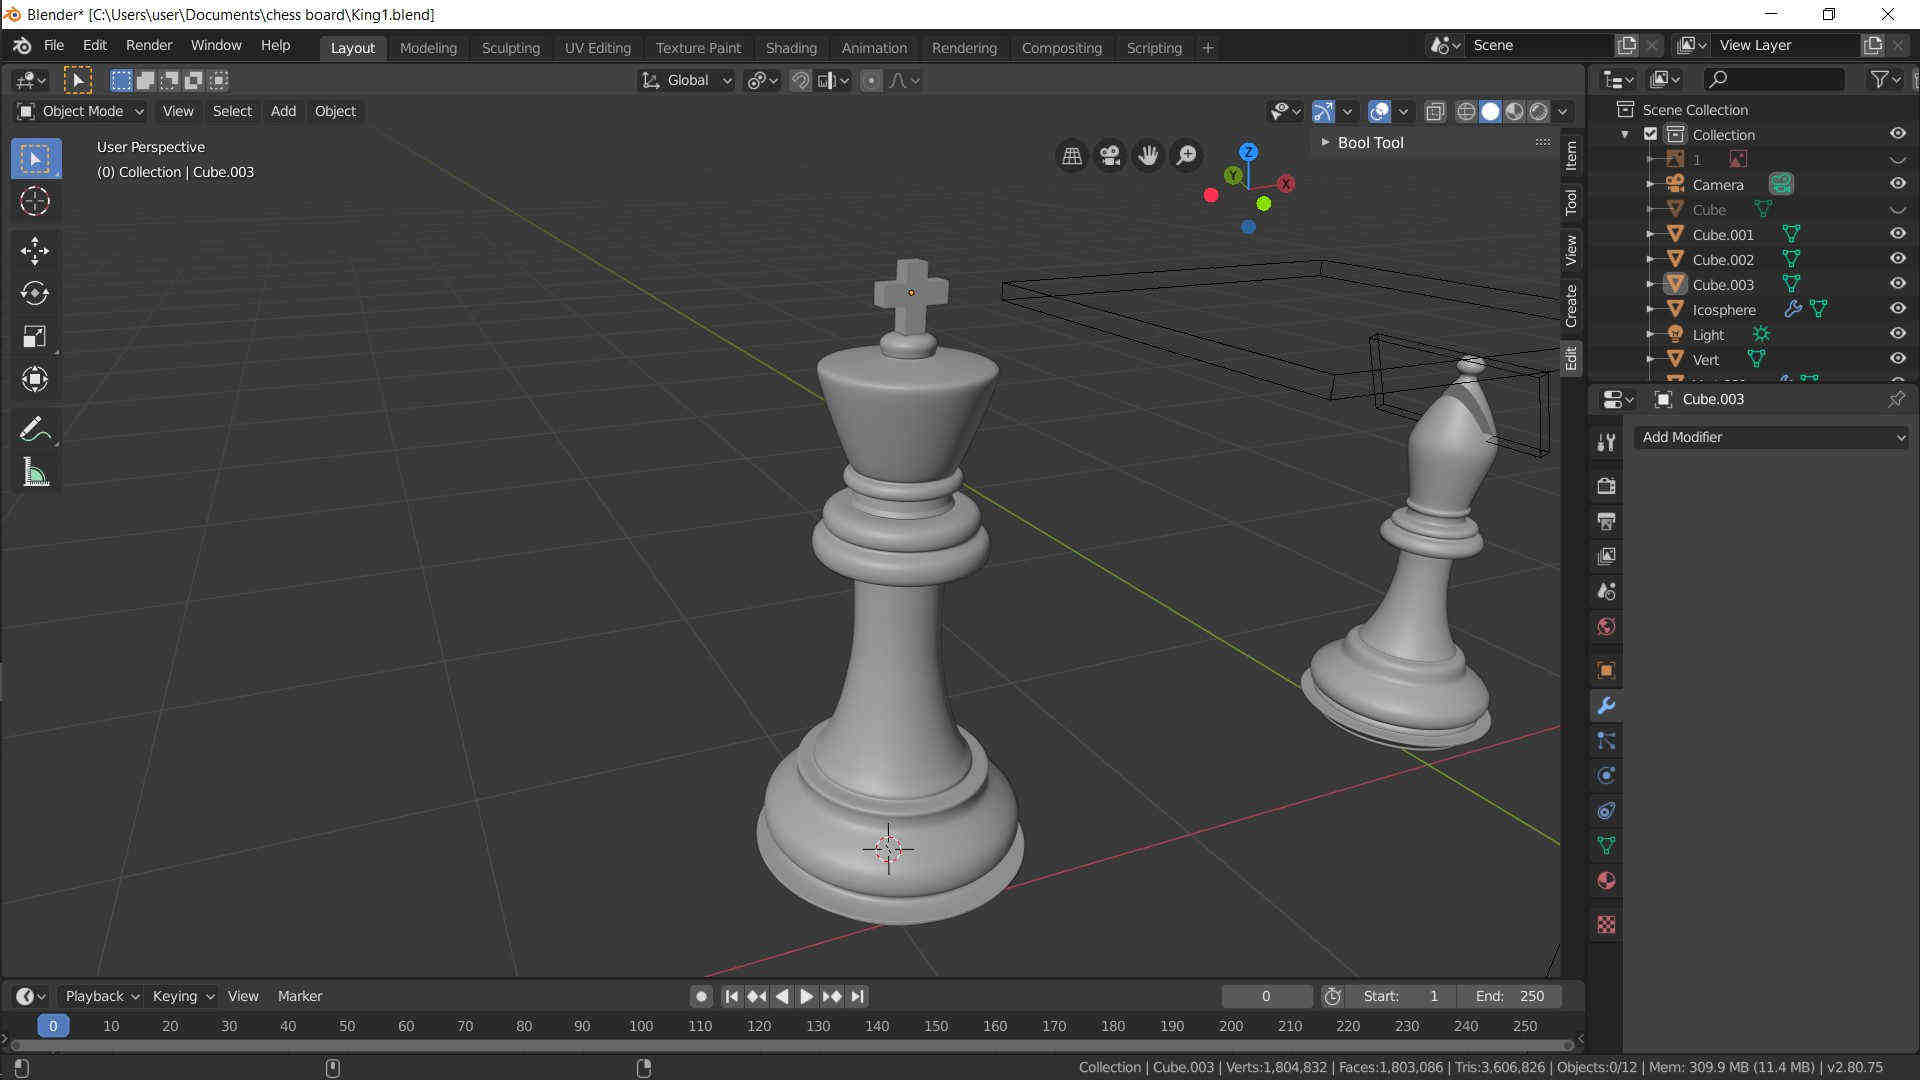
Then I begained to make the King Piece
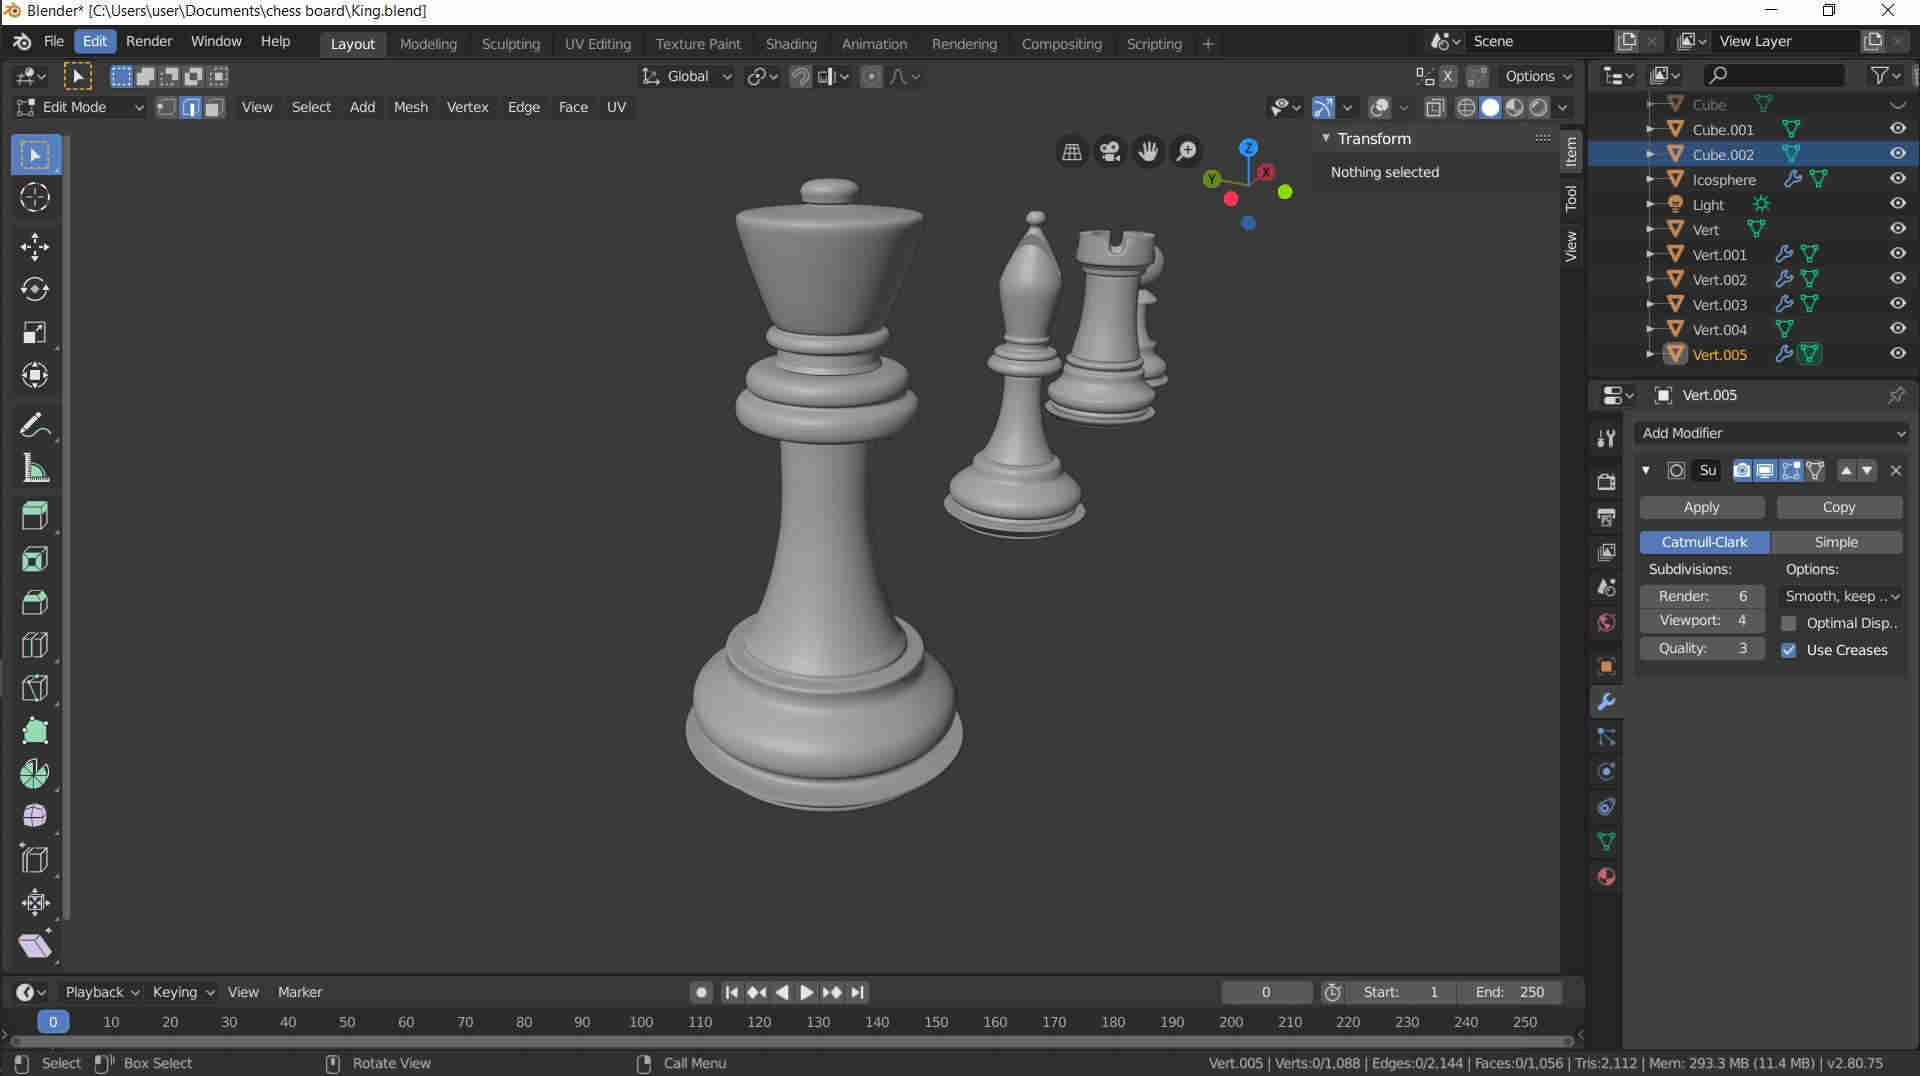
Then I made the cross to recognize the King
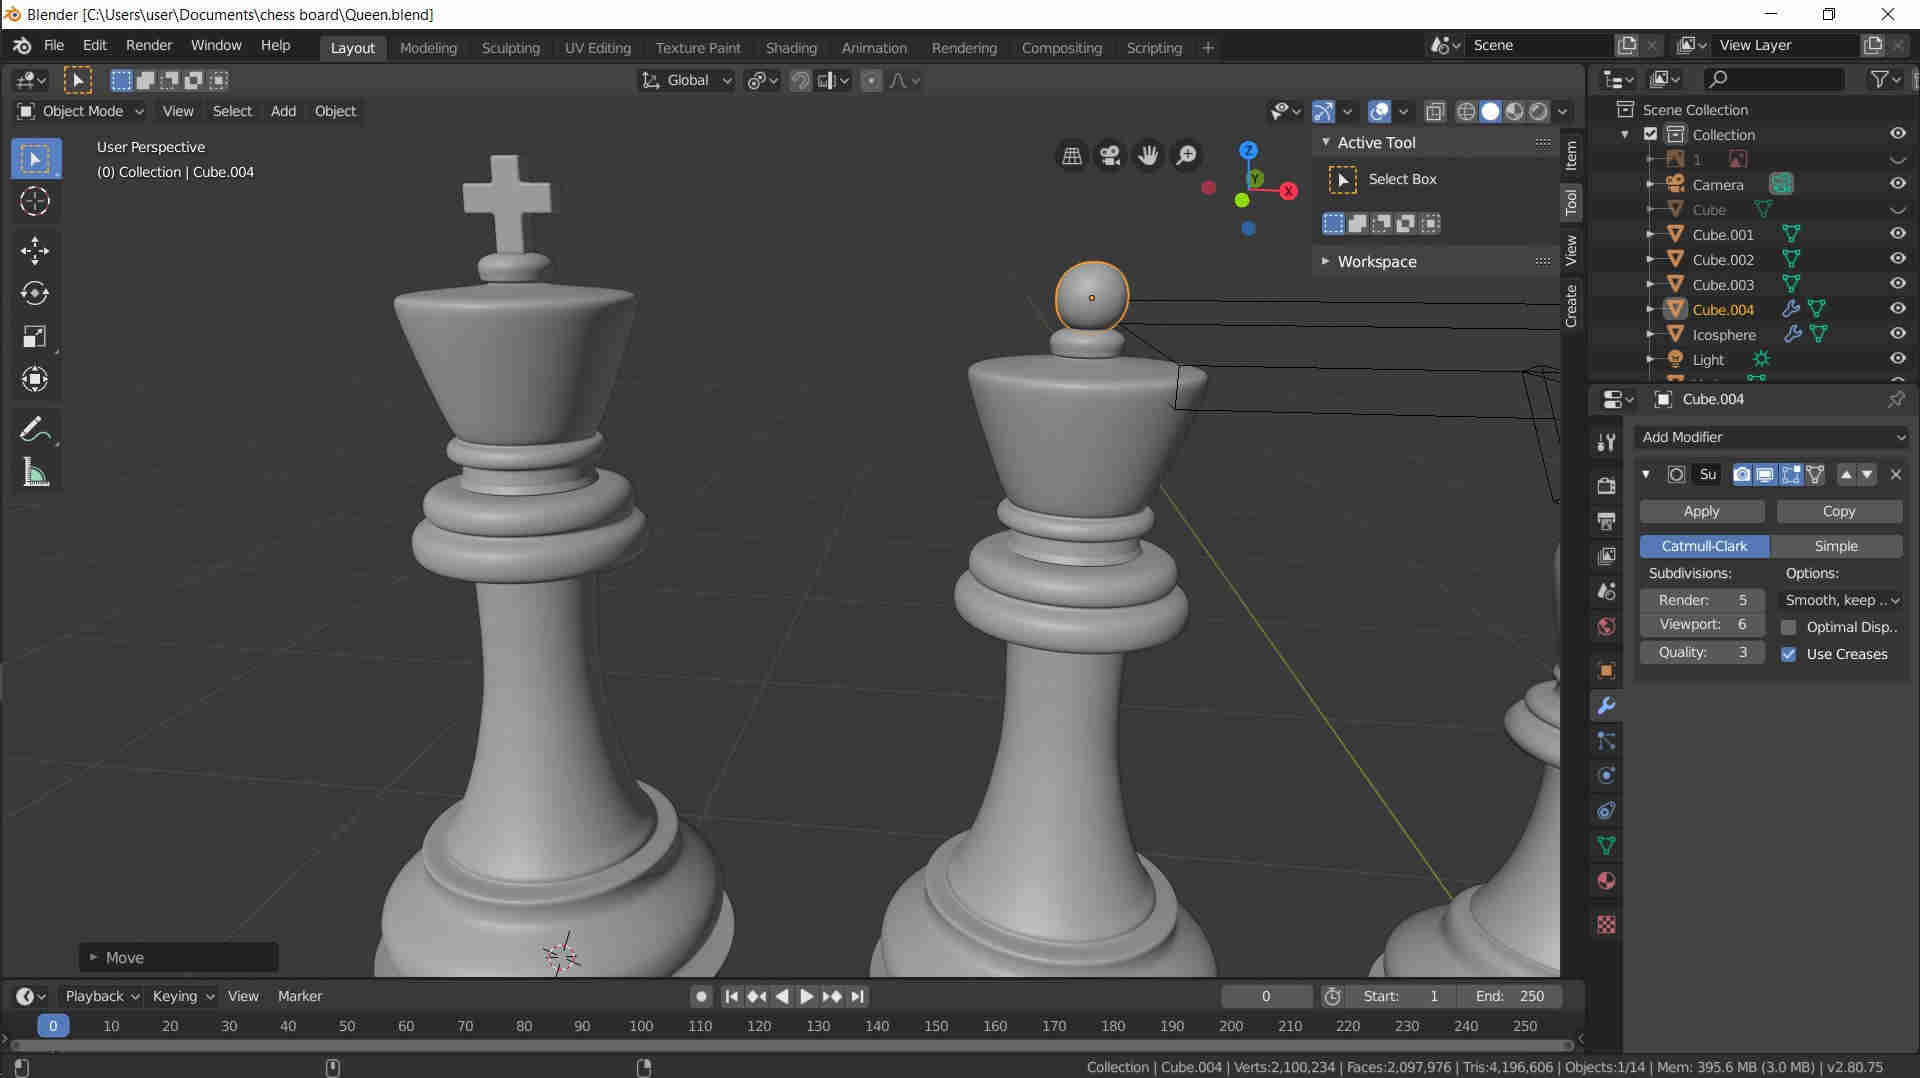
Then I Dublicate the king and made from it the queen, and resize the queen piece than the King
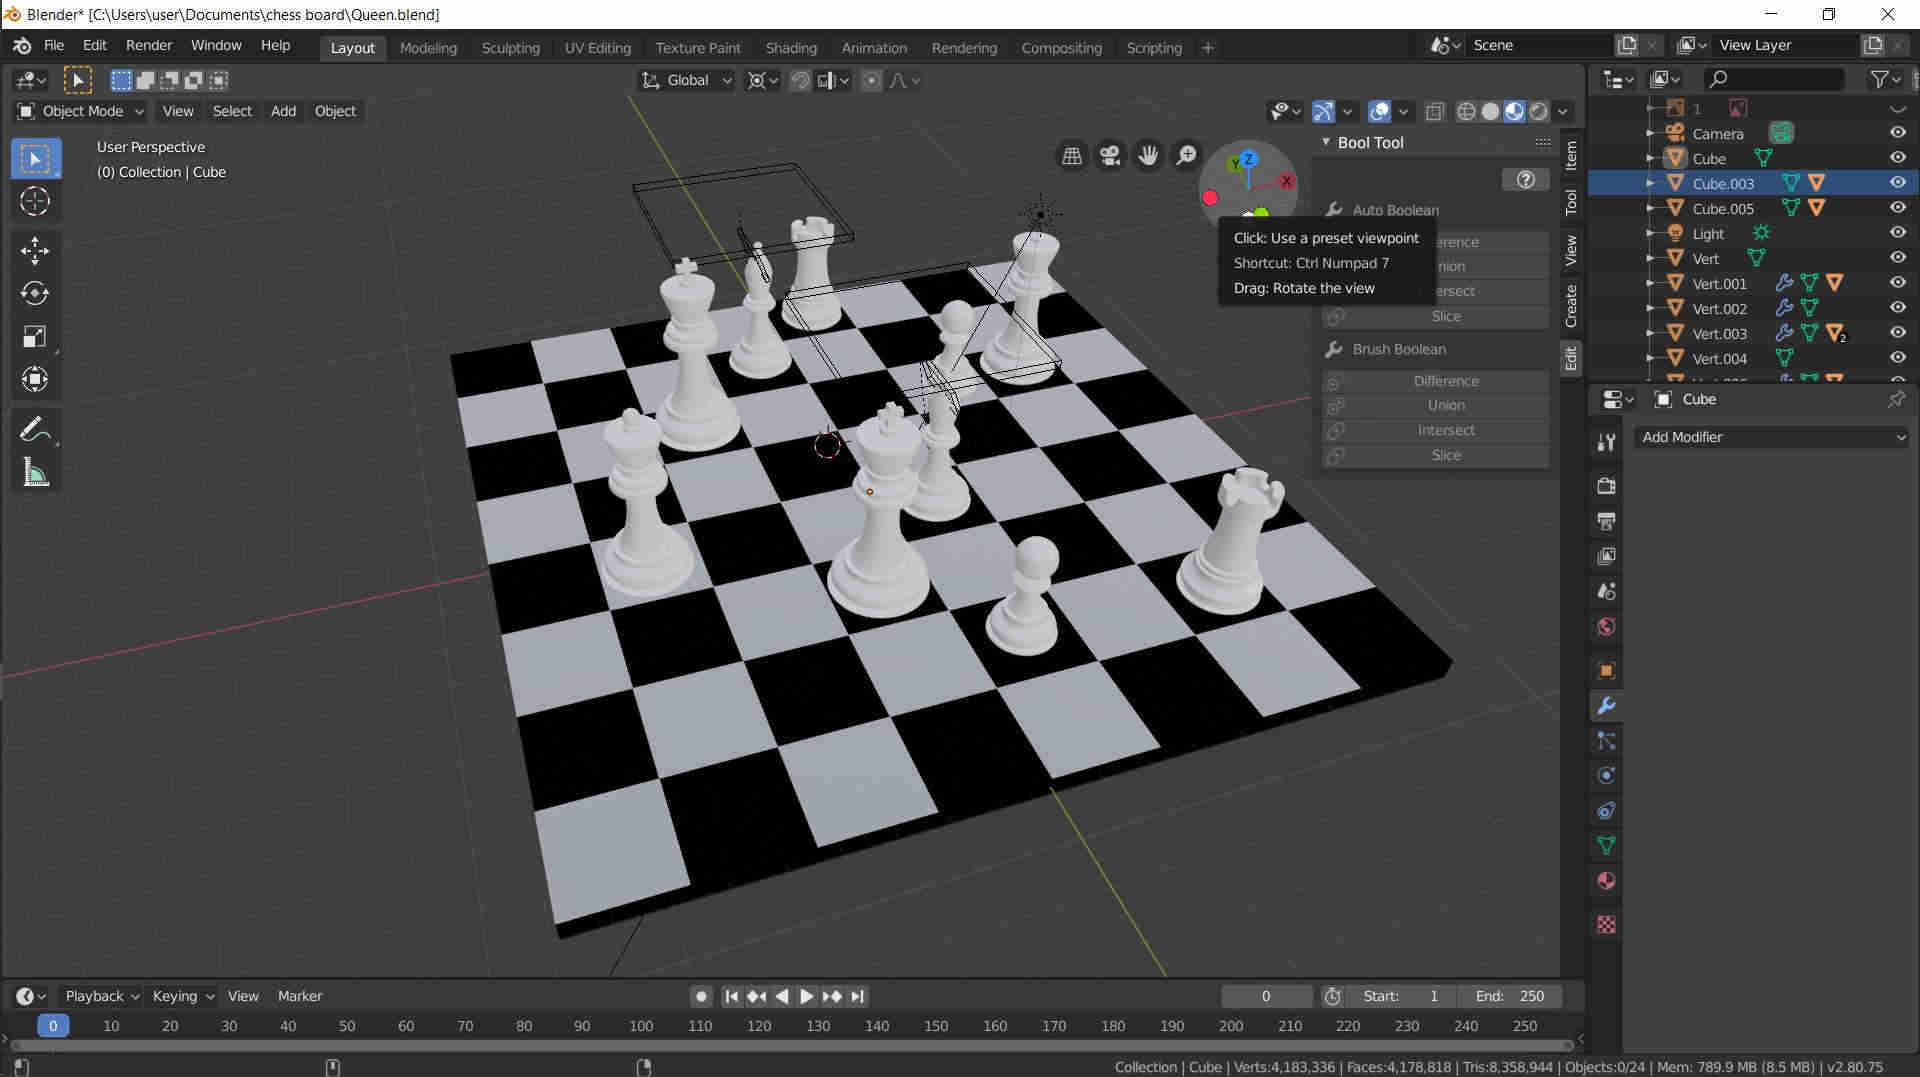
Then I Adjust the Pieces on the Board that I made before
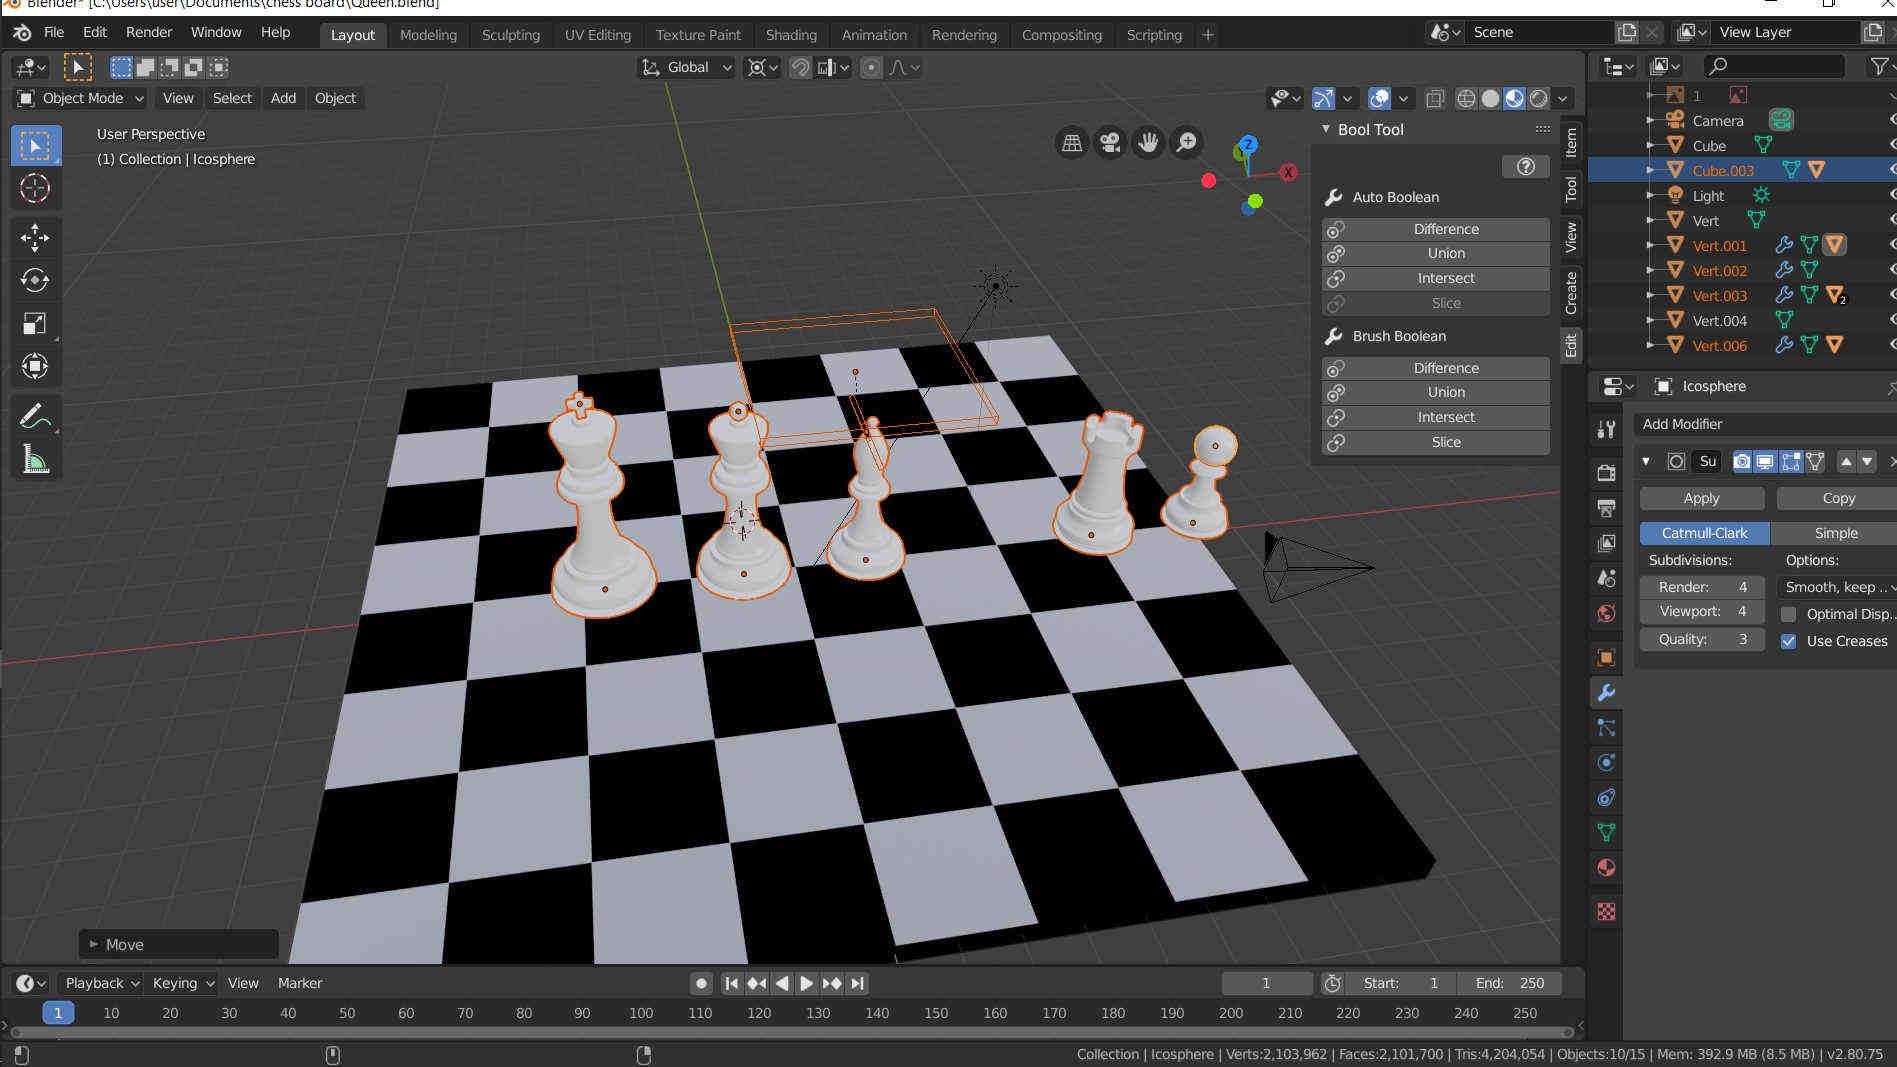
I Dublicate the Pieces to make the white and the black Pieces
I Made Glossy material and paint the Rock Piece Gray to make the black Pieces
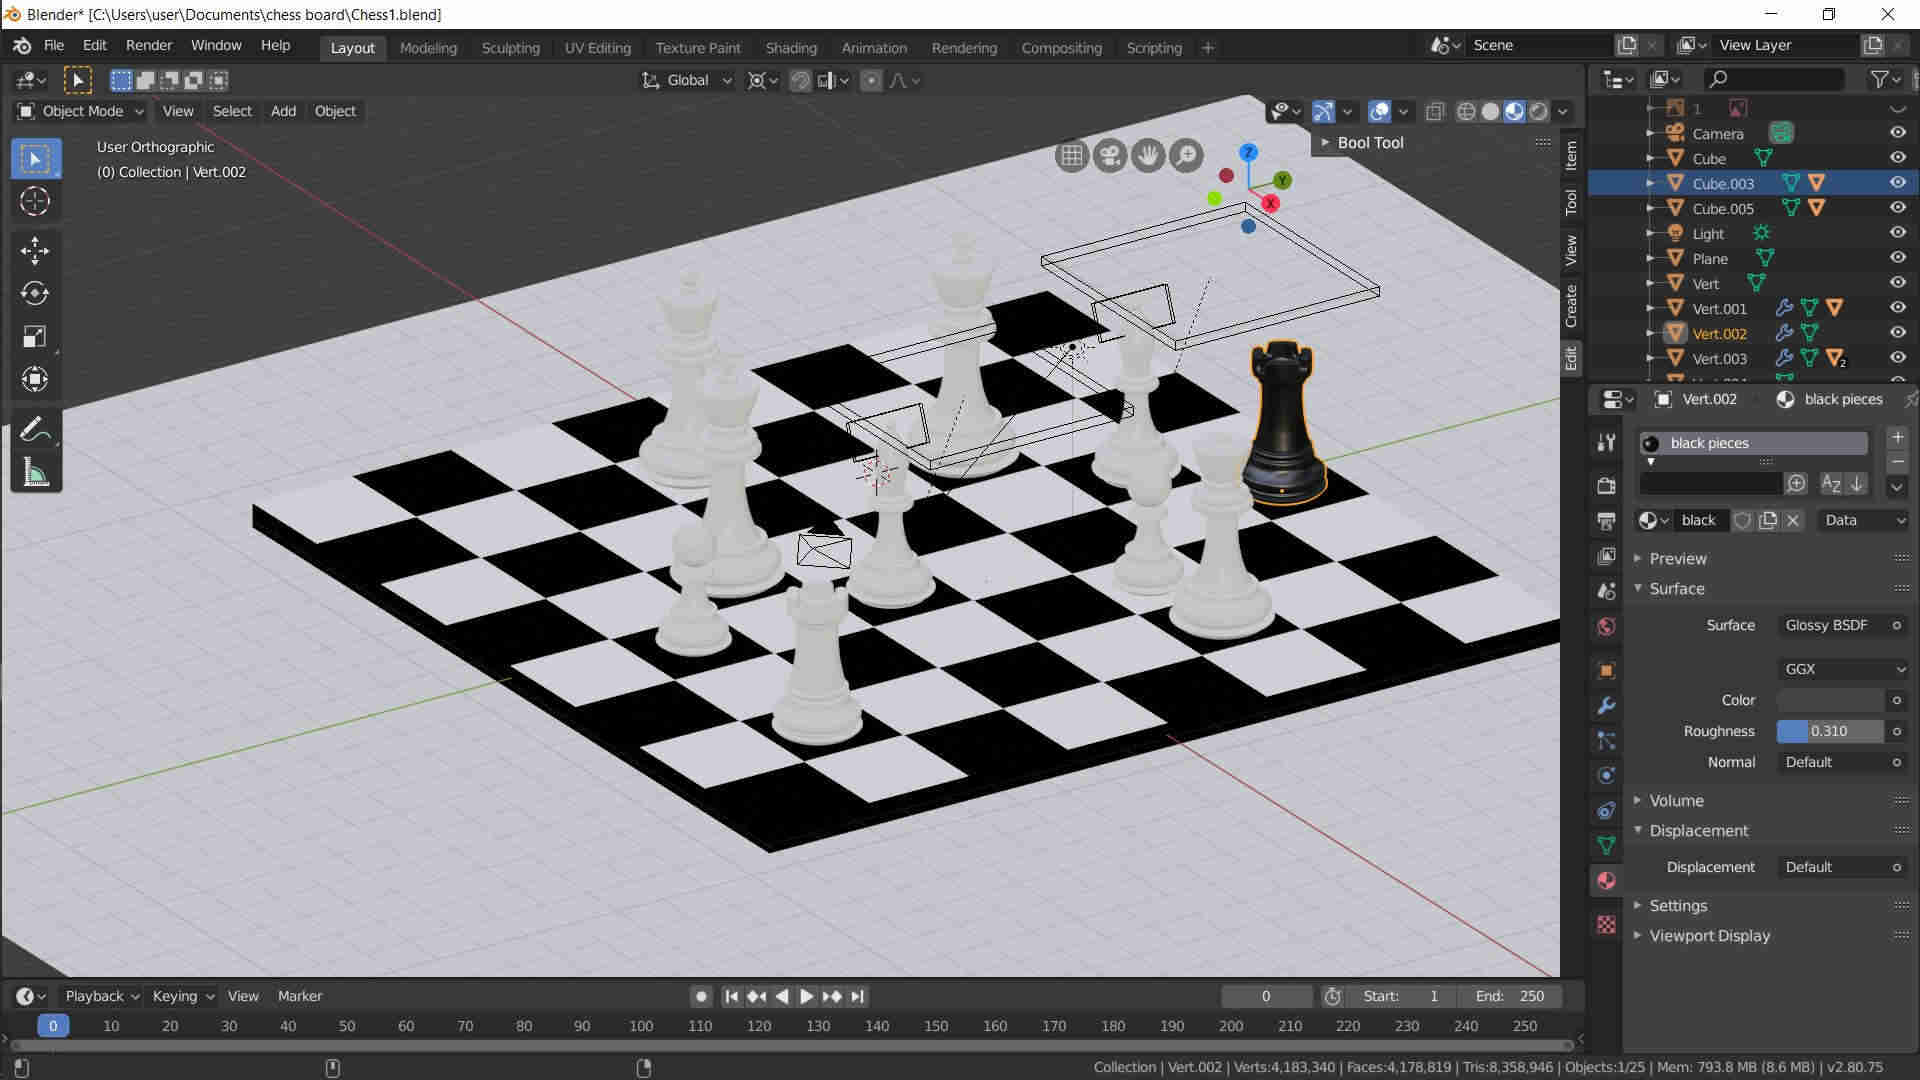
Then I made the other Pieces Gold Paint and make the bodies in render view
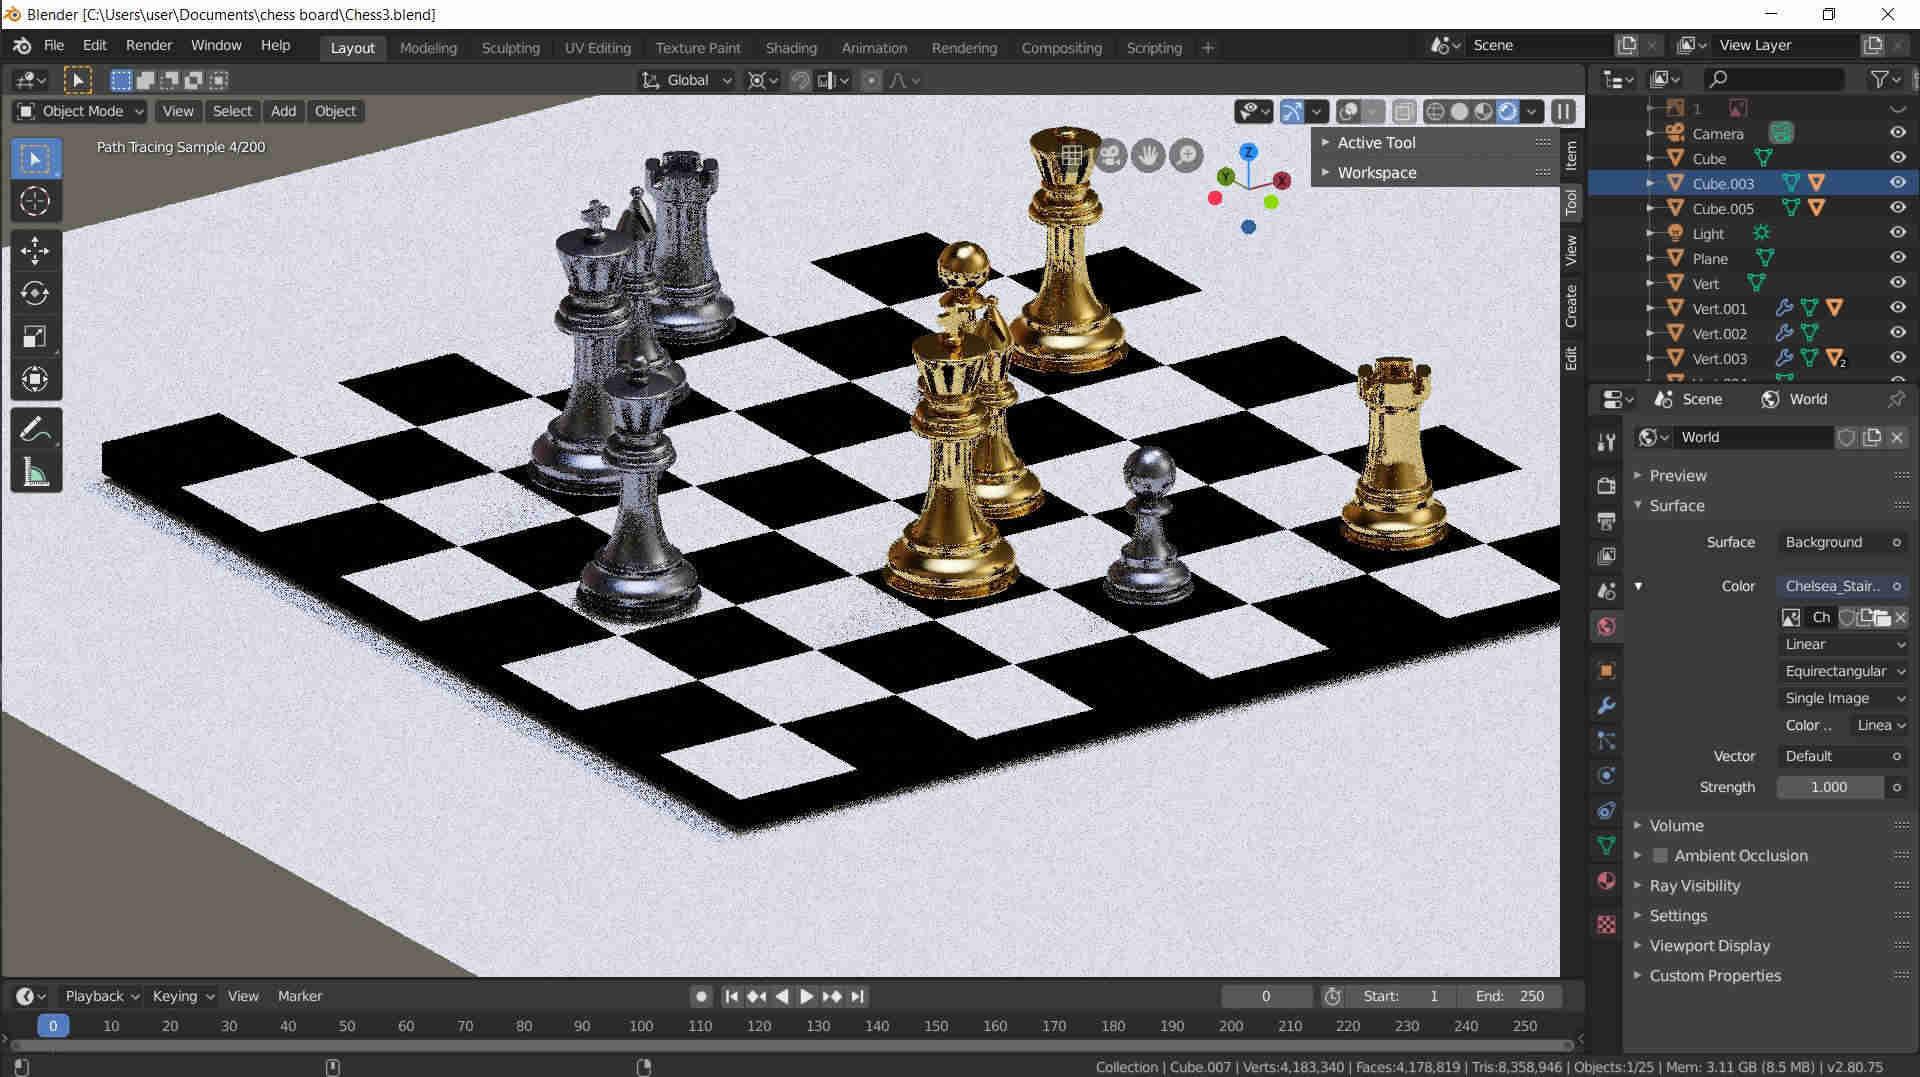
And that's the final Render With Blender
Downloads