5 - 3D printing
This week is about 3D we will test the design rules for your 3D printer(s). And I will design and 3D print an (small) object, that could not be made subtractively.
How can I use this in my final project?
- Could I make a MVP of my product casing? Or a clock/barometer?
The steps for this assignment
- 1. Find the design rules for our 3D printers & Scanner
- 2. Design a 3D object for the 3D printer
- 3. Print the 3D object with the Ultimaker 2+
- 4. Prepare and Print on the Prusa MK3
- 5. Create the 3D chinese puzzle ball - Fusion 360
- 6. uPrint Dimensions - Print the Chinese Puzzle Ball
- 7. Prusa 3 - Print the Chinese Puzzle Ball
- 8. 3D scanning
- Conclusion of this week
1. Find the design rules for our 3D printers & Scanner
read all about this group assignment
http://fabacademy.org/2020/labs/waag/groupAssignments/week5.html
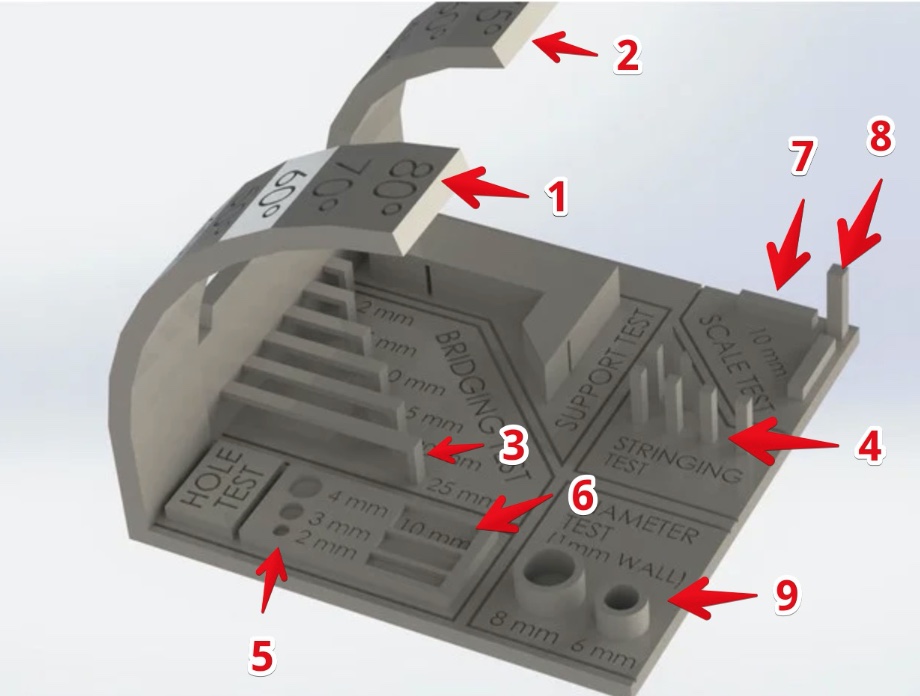
The result of the 3D printers tests
| nr | test | Prusa MK2S | Prusa MK3 | Ultimaker | PrintrBot |
|---|---|---|---|---|---|
| 1 | Overhang Limit Long | 45° | 75° | 60° | 30° |
| 2 | Overhang limit shot | 50° | 65° | 65° | 45° |
| 3 | Bridging | 25mm | 25mm | 25mm | 25mm |
| 4 | Stringing test | All strings | no strings | some strings | Some strings |
| 5 | Hole test 2/3/4mm | All fail | All fine | All fine | All fail |
| 6 | Rectangle test 2/3/4mm | All fail | All fine | All bit wobbly | All fail |
| 7 | Scale test: horizontal | 2.0 to 2.3mm | 2.0 to 2.1mm | 1.9 to 2.0mm | 2.3 to 2.7 |
| 8 | Scale test: vertical | 2.0 to 2.4mm | 1.9 to 2.1mm | 2.1 to 2.4mm | 2.3 to 2.6 |
| 9 | Diameter 6 & 8 | Thin strings | Good | Pass | Strings |
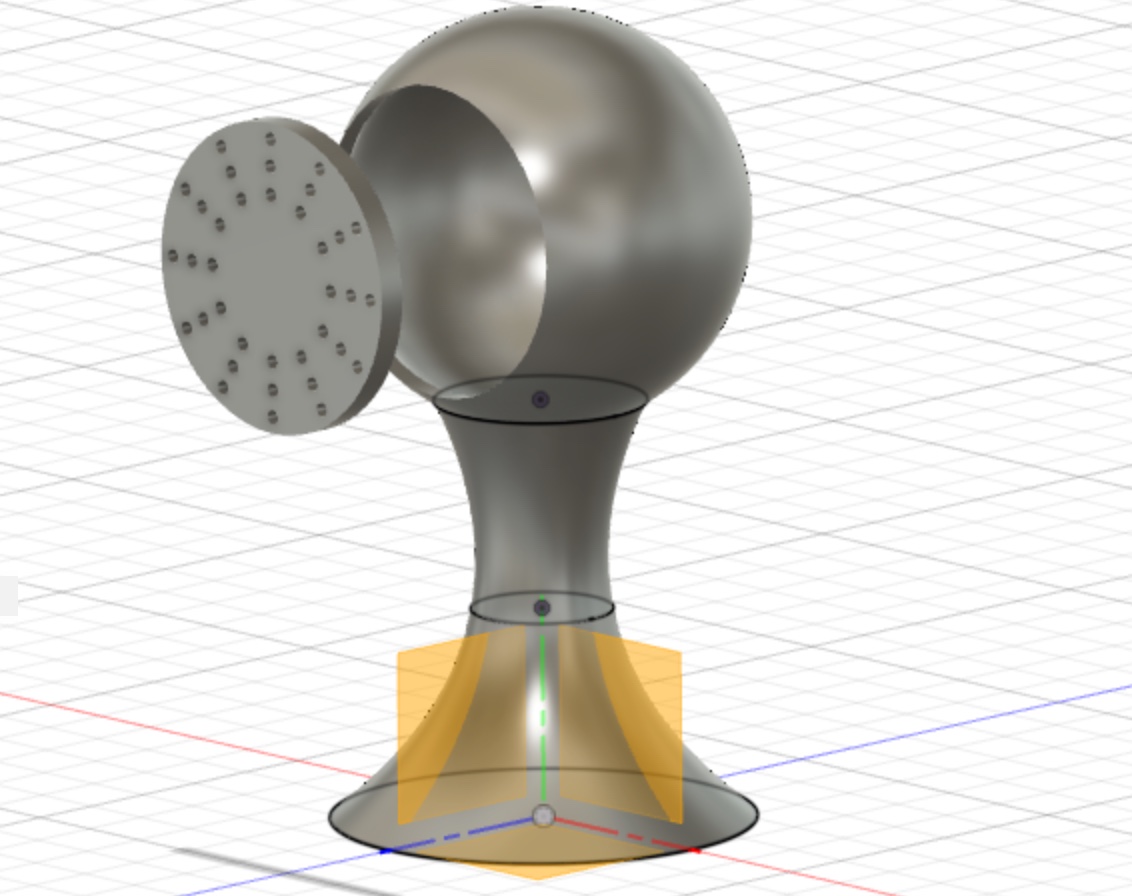
2. Design a 3D object for the 3D printer
I used fusion 360 to create my 3D object.
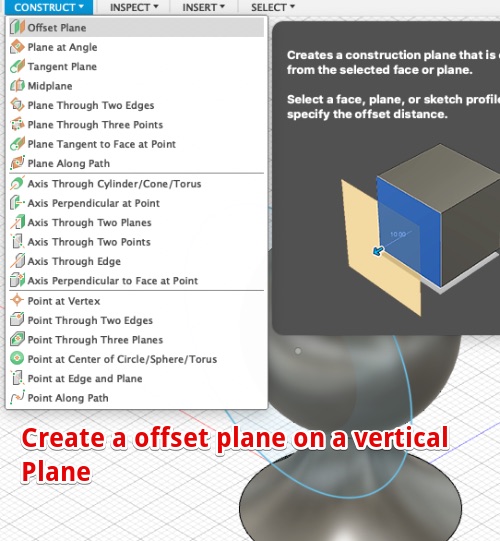
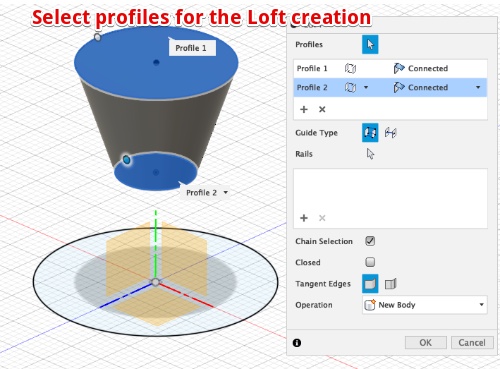 | Create sketches (circles) on different profiles with an offset. Create a loft between the circles for the foot |
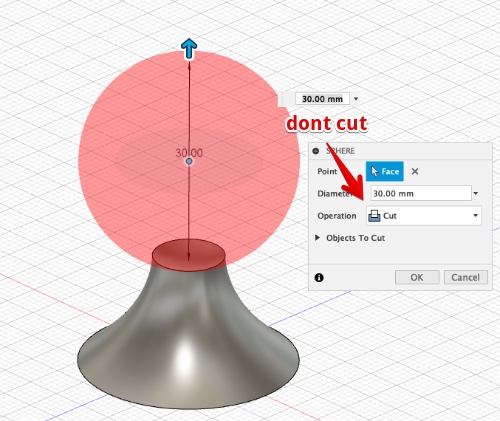 | Create a sphere on the face of the foot , but don’t cut |
 |  |
 |  |
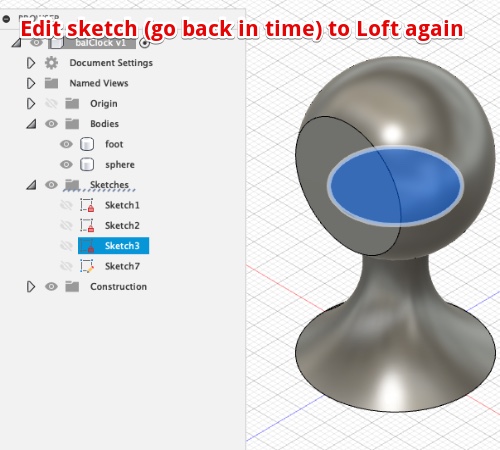 | 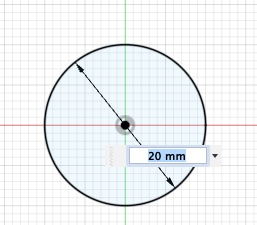 |
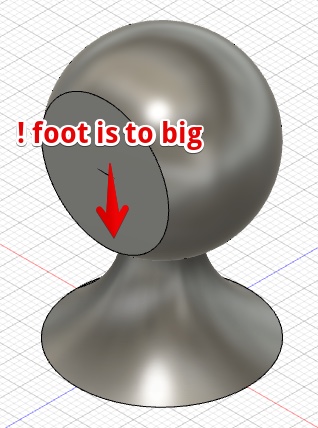
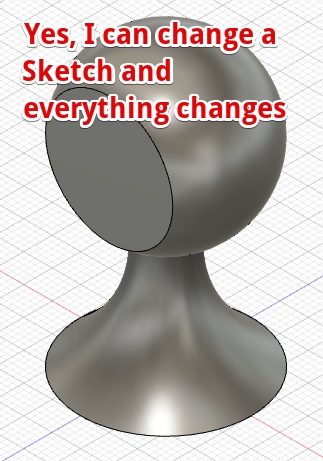 | Yes, by changing the sketch the foot was made of everything changes and the foot is not sticking out |
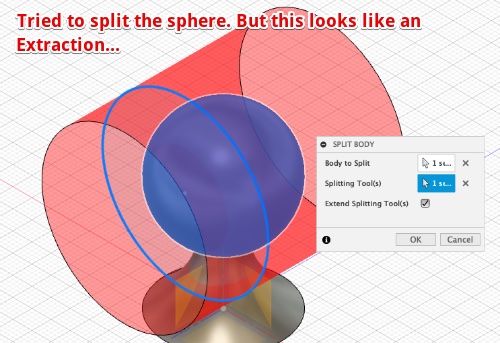
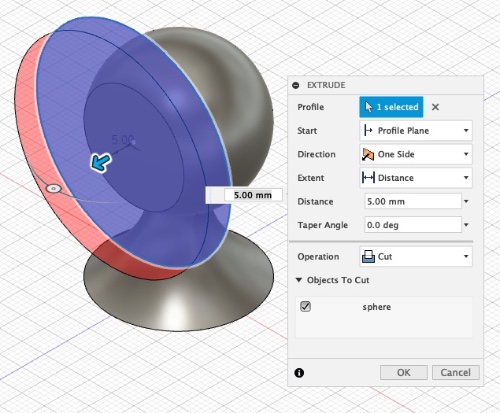
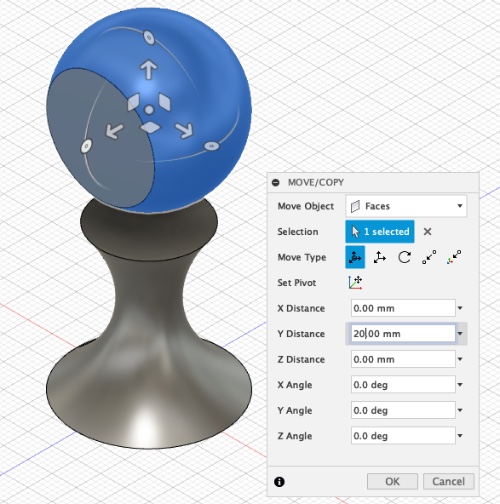 | Move the sphere to get a longer foot. Mistake! Don’t move Faces! Move object |
 |  |
 |  |
The result
 | Fist object I printed |
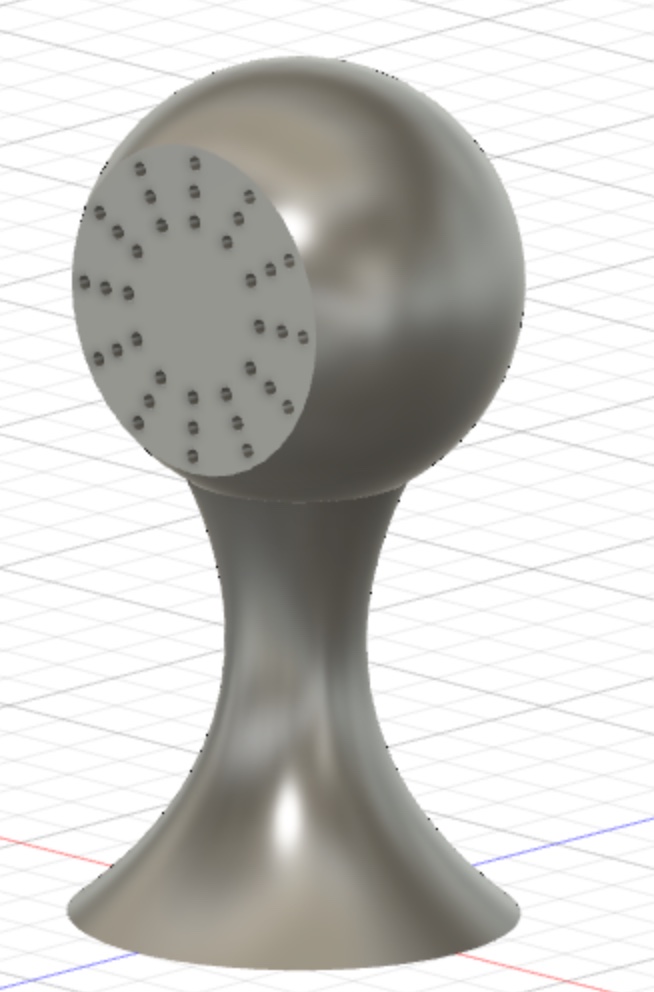
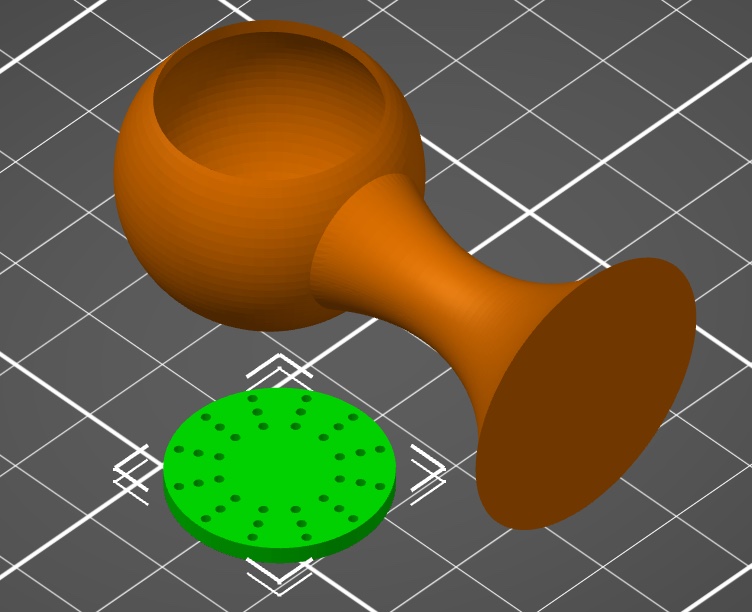
 | Since I want to make an object where I can place the electronics inside, I changed the design.. With an entry for the electronics, Used this on the Prusa 3 printer |
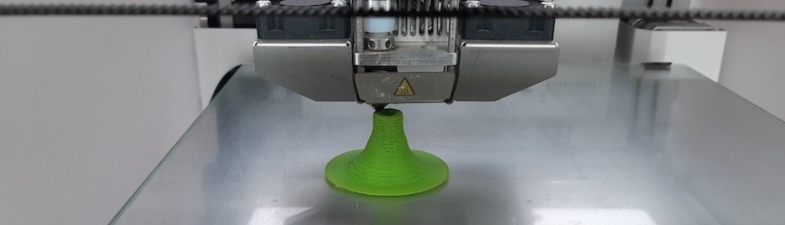
3. Print the 3D object with the Ultimaker 2+
First I tried the Ultimaker 2+ at the University of Applied science (the printer at the Waag was reserved)
Slice with Ultimaker Cura
- Open Ultimaker Cura
- Rotate to set on the foot
- Select the SLA
- Select 0.2 mm print quality
- Play with Infill (20% will do)
- Insert a SD Card
- Click “save to removable drive”
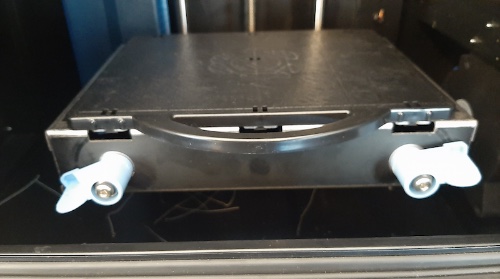
Ultimaker 2+ printer
- Switch machine on, on the back
- Material/Printercores > Material 1 > Load
- Cut the fillament end
- Place the spool on the spool holder
- Insert the filament
- On the interface >”select material”
- Select PLA and confirm (now material is pushed through the tube after heating)
- Press “confirm” if material comes from head
- Insert SD card
- “Print”
- Select file
- Now printing starts
The result
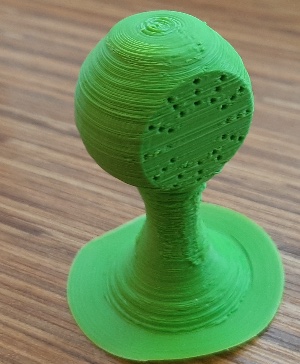
Problem The Ultimaker 2+ is not the best printer available. But with slower settings it could be better. Another posiblity is the fillament is old.
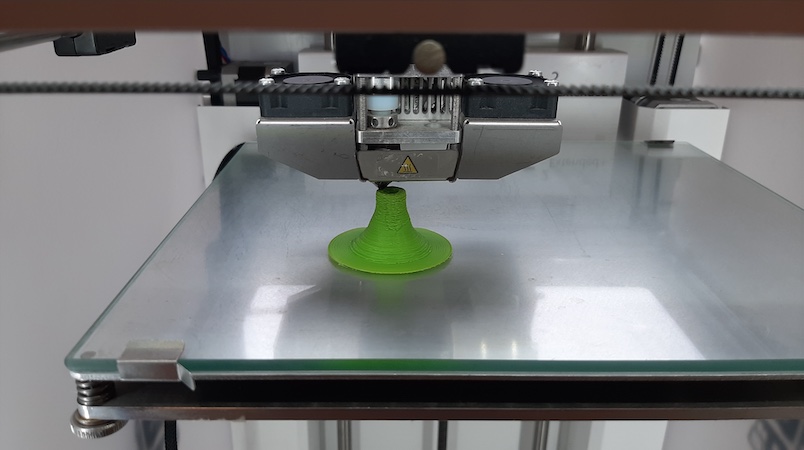
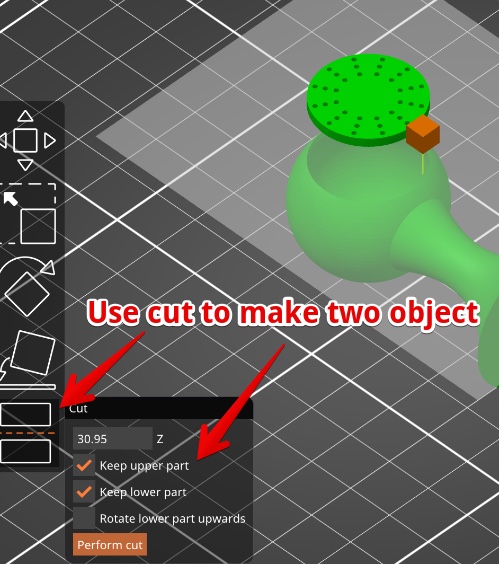
4. Prepare and Print on the Prusa MK3
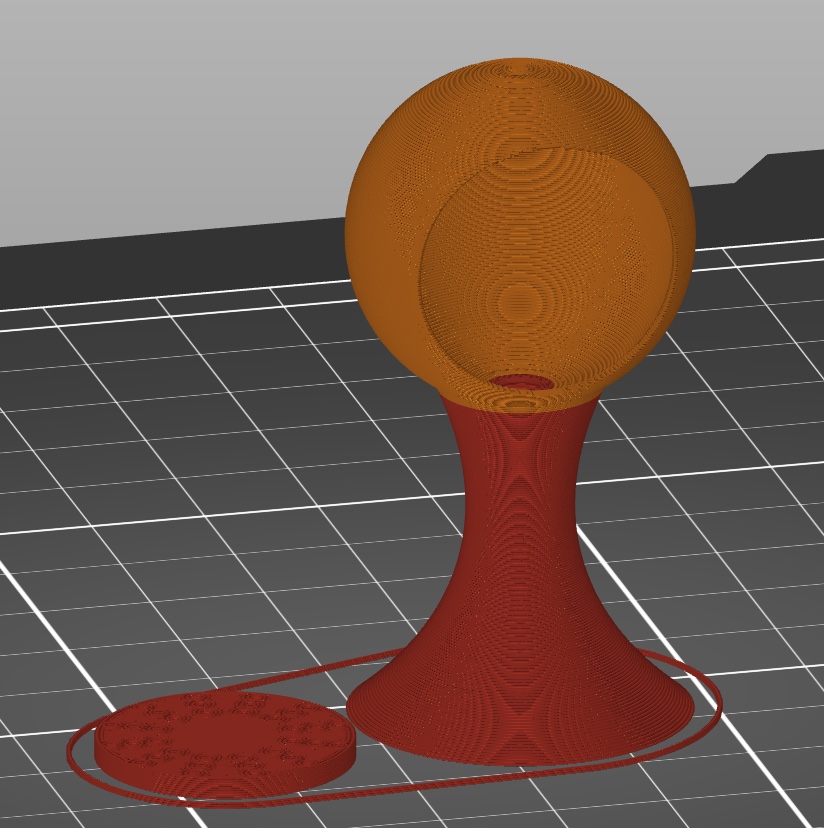
A. Prepare the file in PuraSlicer
 | 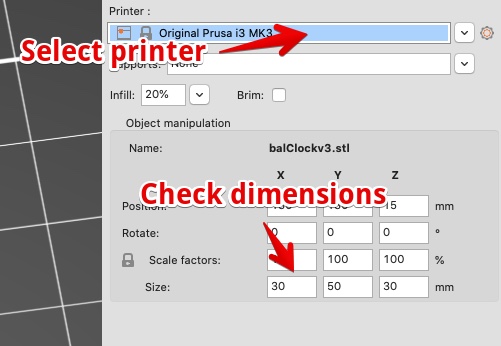 |
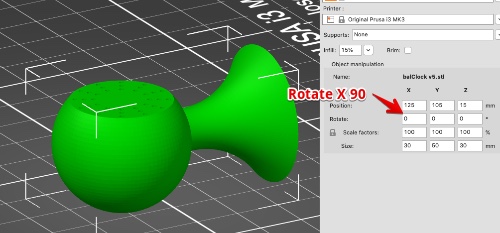 | Rotate to set on its foot |
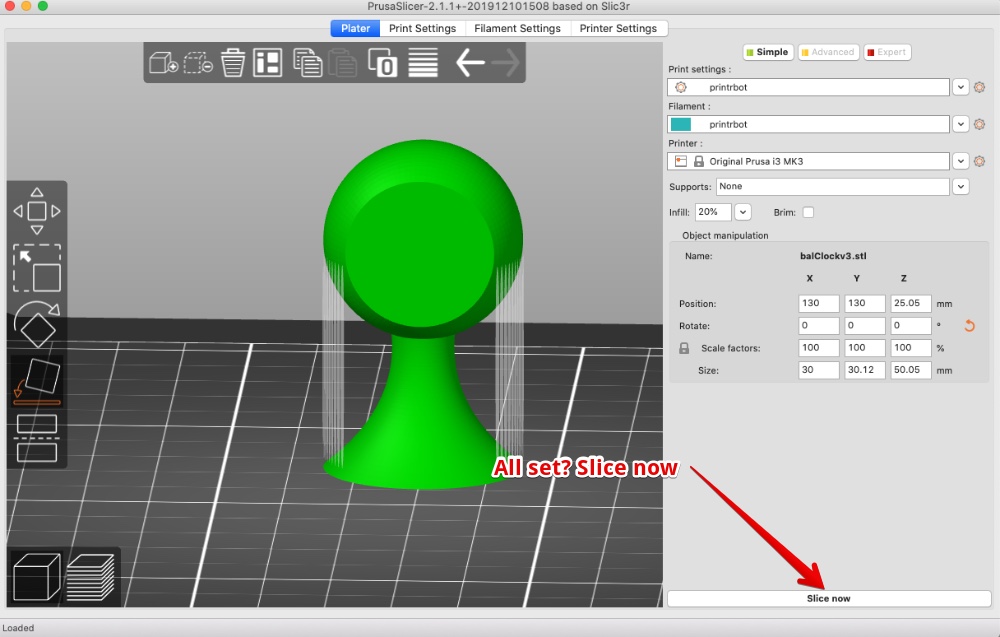 |  |
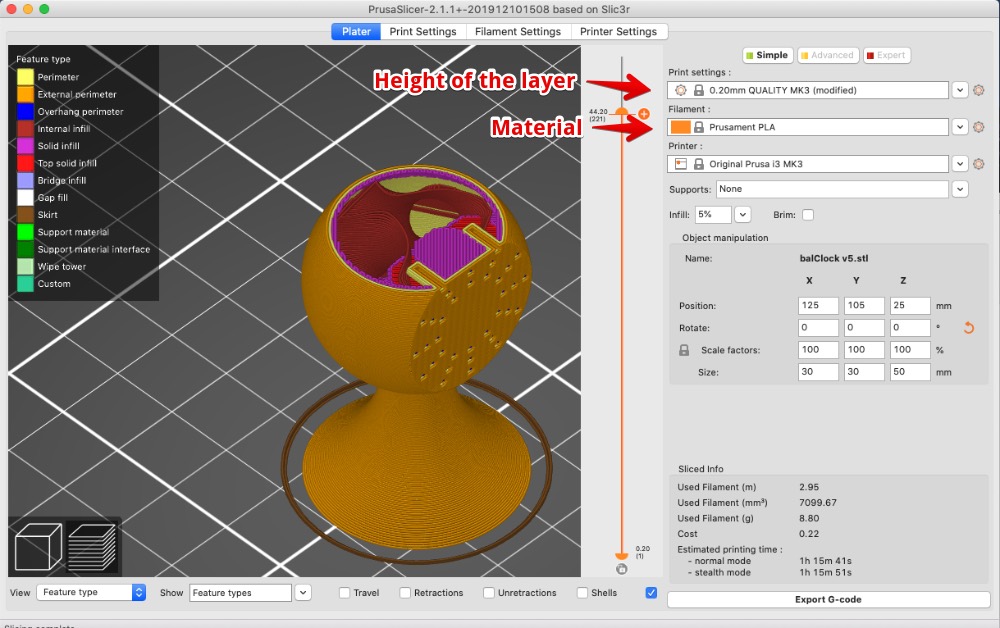 | |
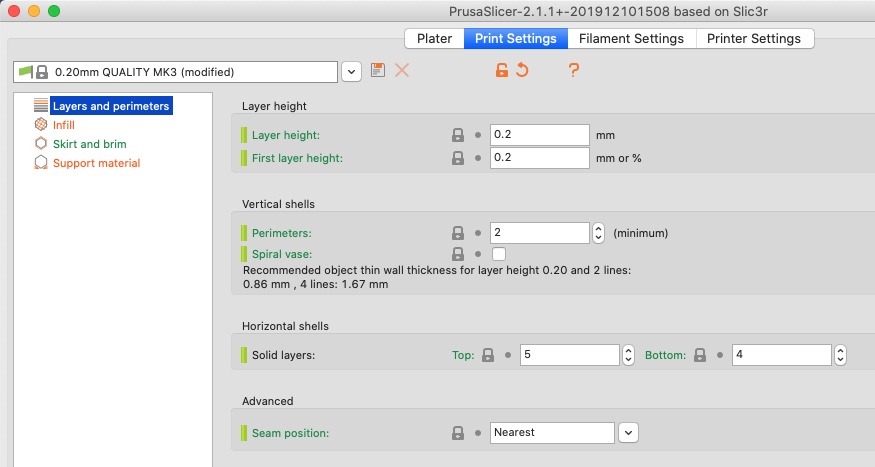 | 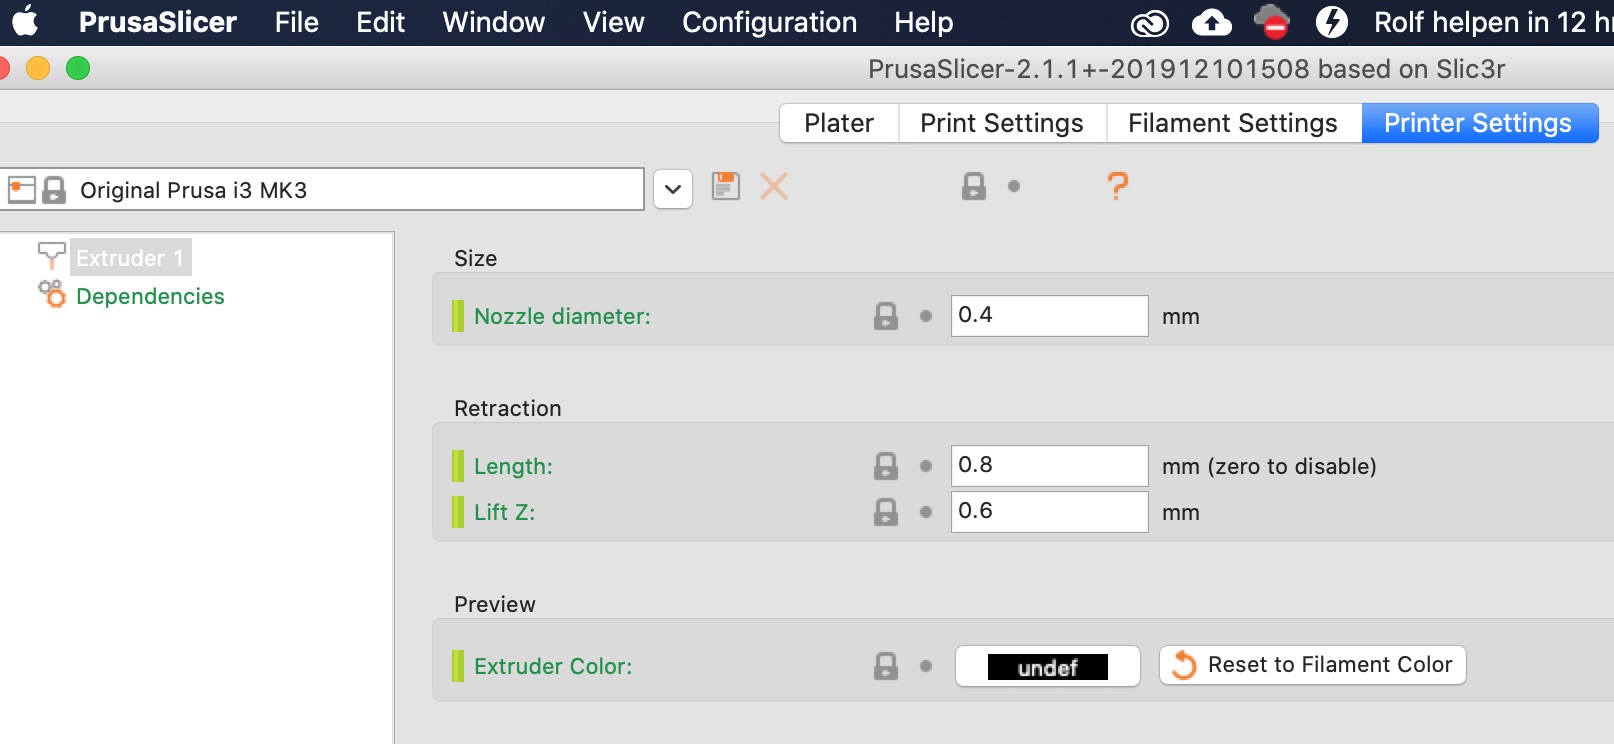 |
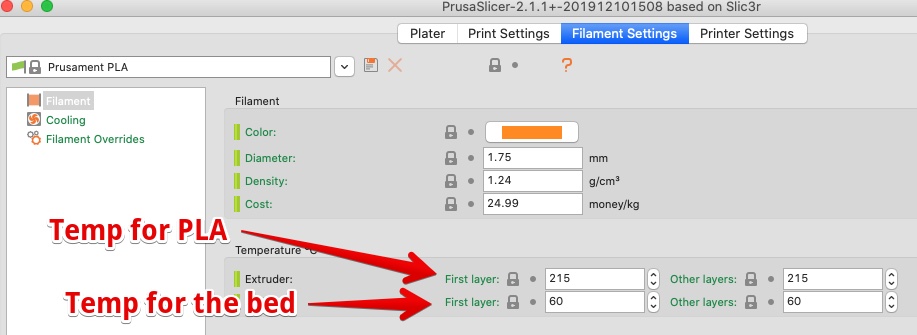 | PLA temperature = 215, Bed = 60 |
 |  |
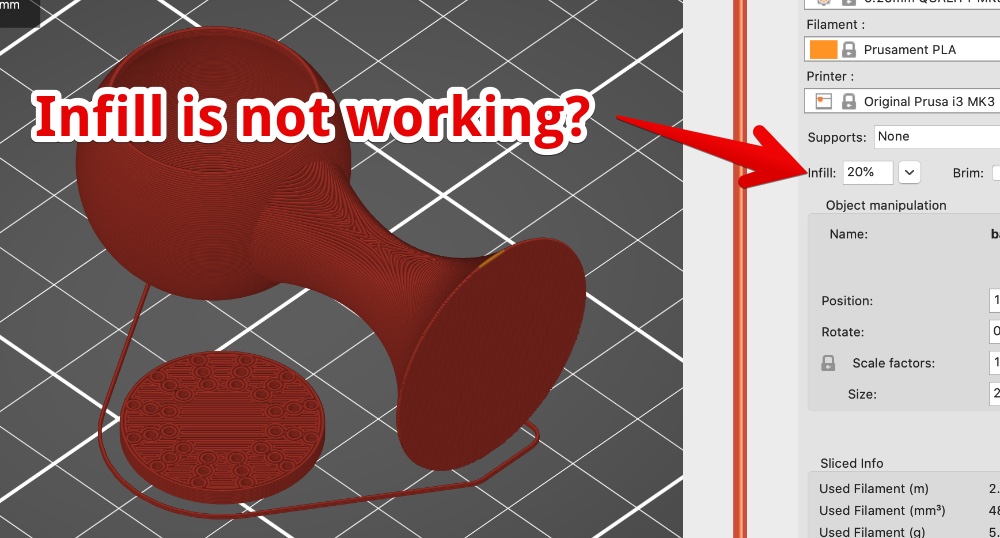 | Problem Infill is not working. Solution: change my definition of infill and support… infill the structure inside solid bodies. Support is material to support the structure, inside or outside… |
The result
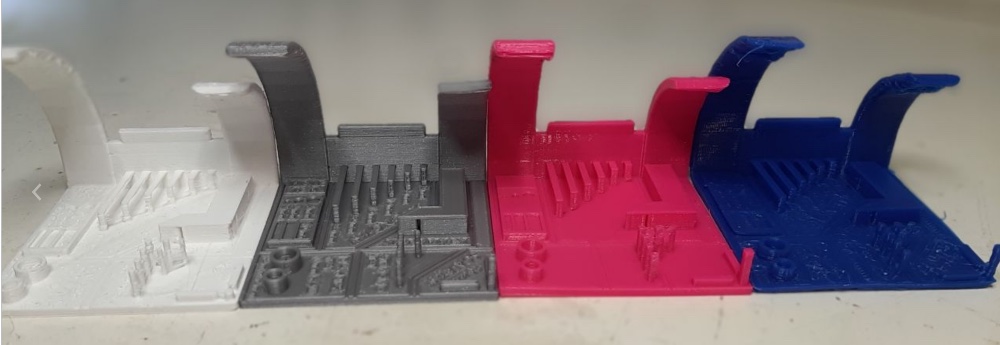
B. Print on the Prusa MK3
for detailed pictures see group assignment
- Switch printer on (right back)
- Filament - insert in tube
- Preheat
- Load filament > choose PLA
- Print from SD
The result is on the right (Red) 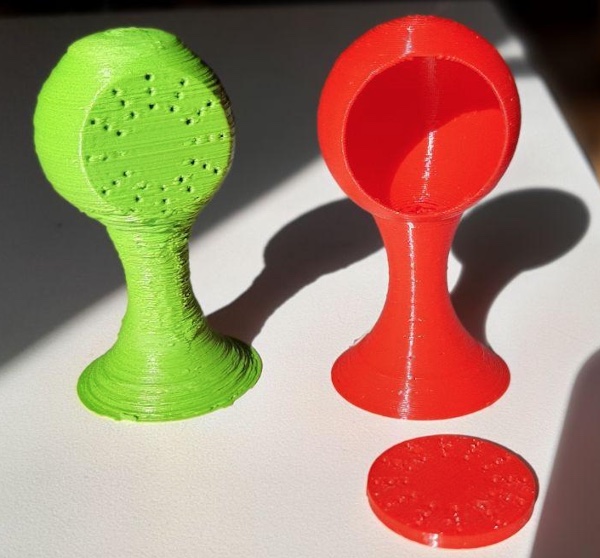
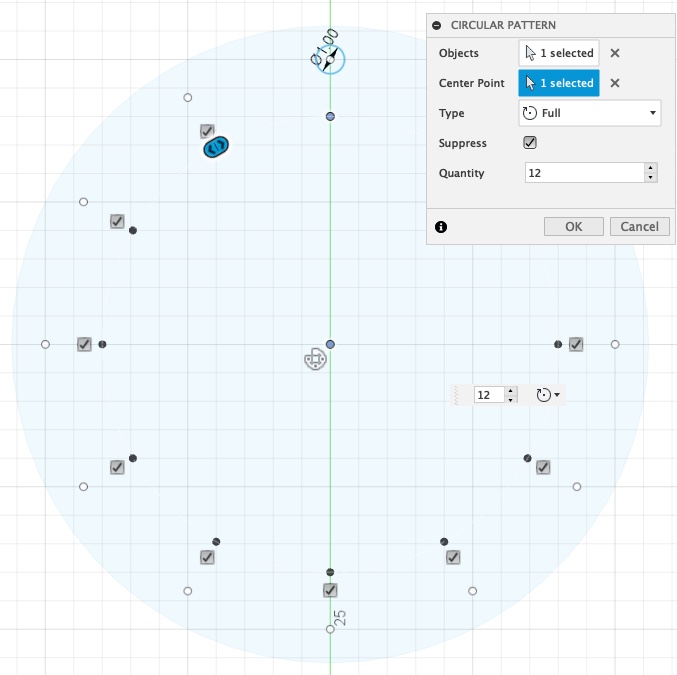
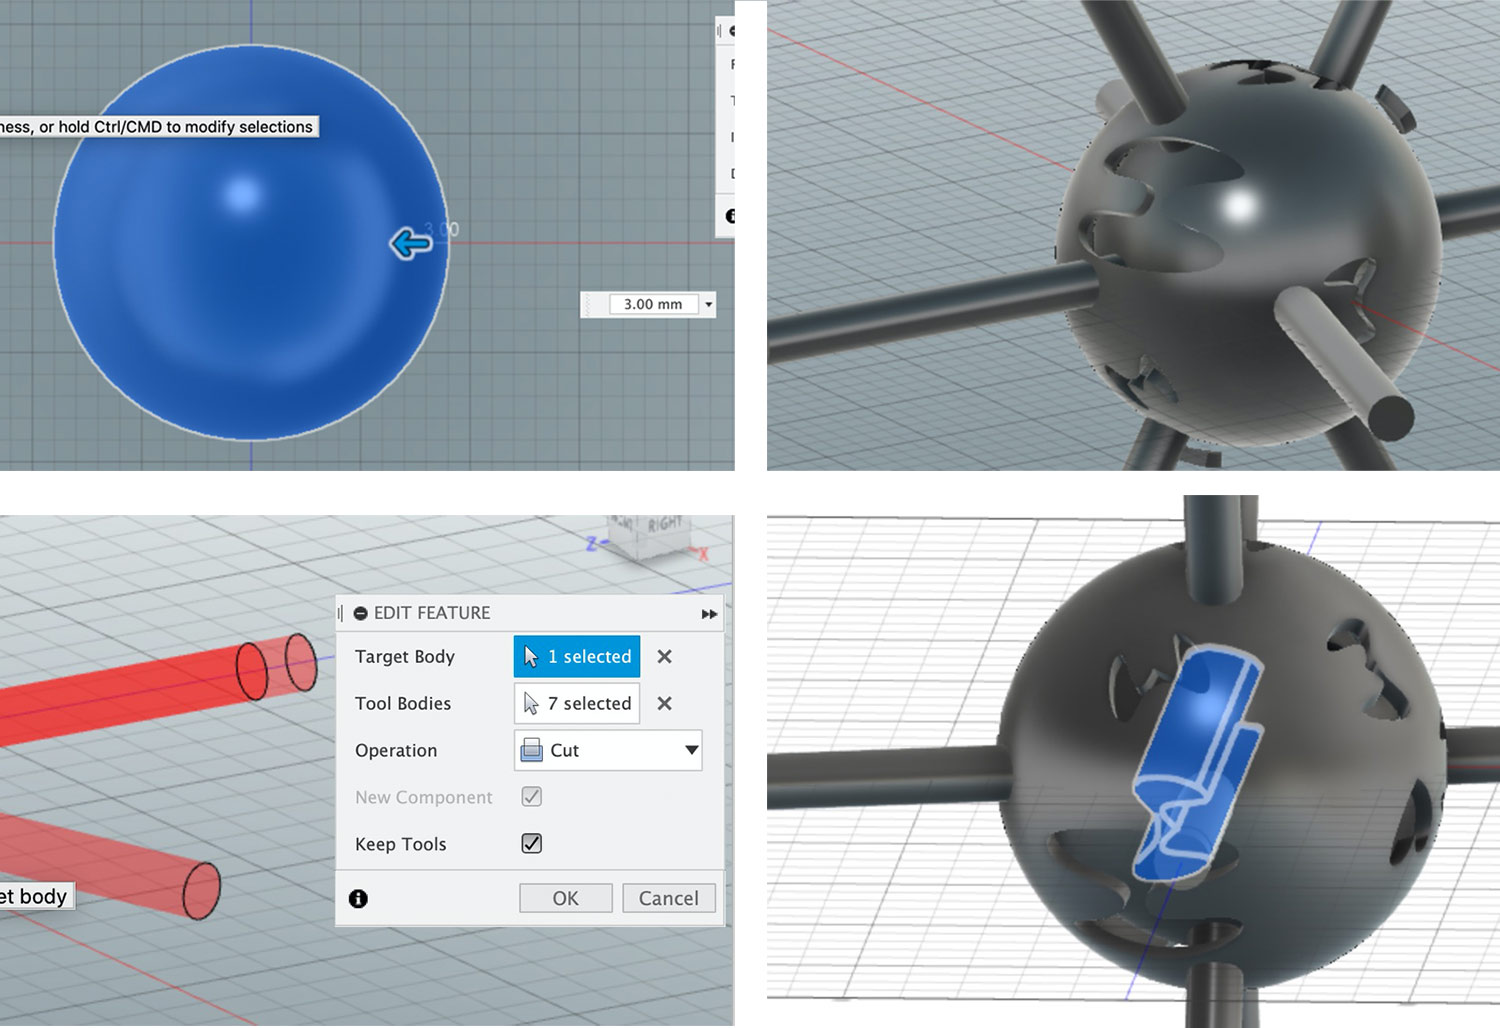
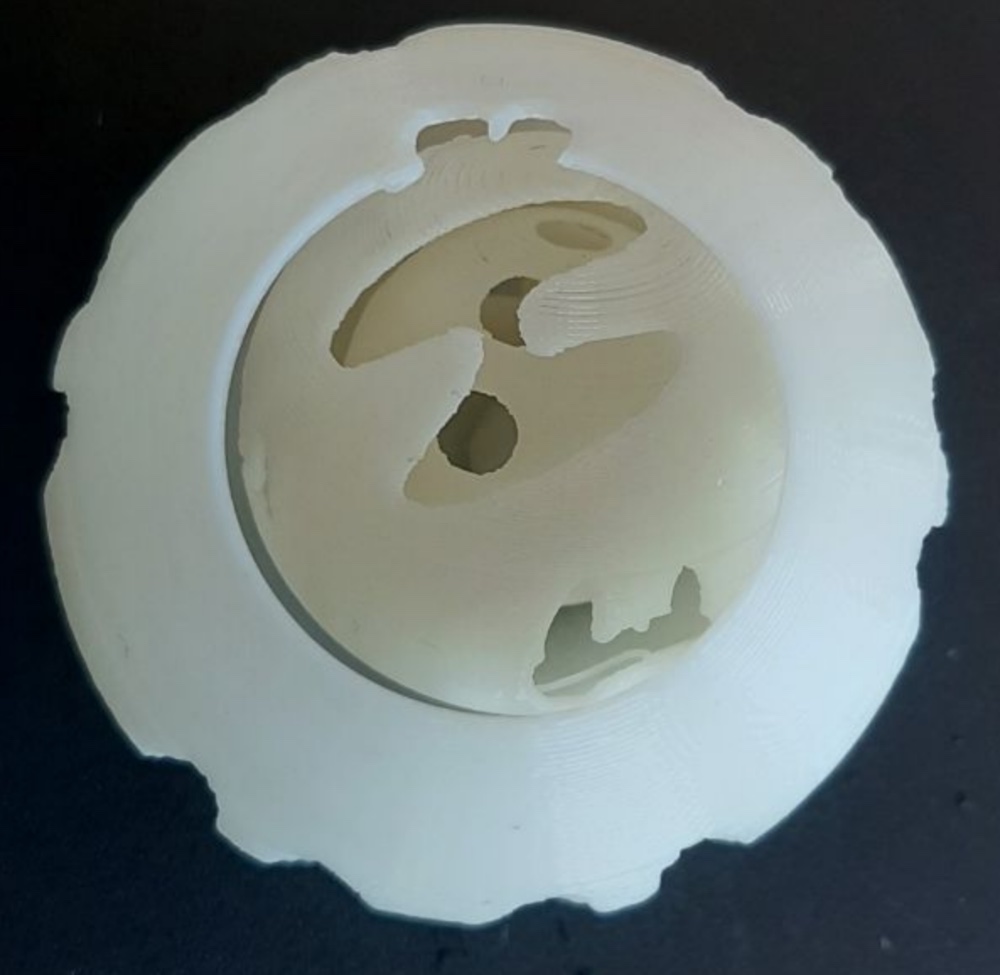
5. Create the 3D chinese puzzle ball - Fusion 360
- I first made the small ball
- I created body’s from sketches (round or M or hart)
- I used the body’s to extrude from the ball
- Then I worked my way up to the biggest ball
You will find M, H and Hart shapes. Since my girfiends and my name start with an ‘H’. My sons name starts with a ‘M’ the hart is in the center and connecting us all.
The ‘Puzzle’ is you should align the first 3 holes to make the hart visible.
This is the result:
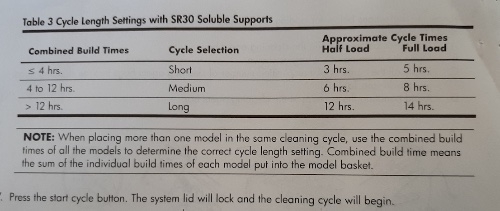
6. uPrint Dimensions - Print the Chinese Puzzle Ball
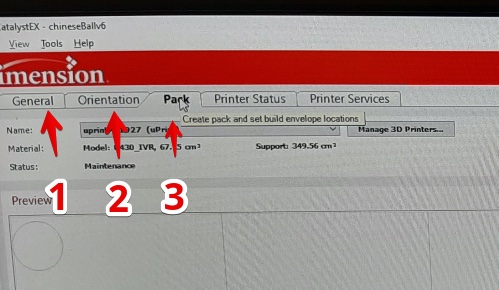
A. Prepare with CatalystEX
- Open file
- tab general > check supports
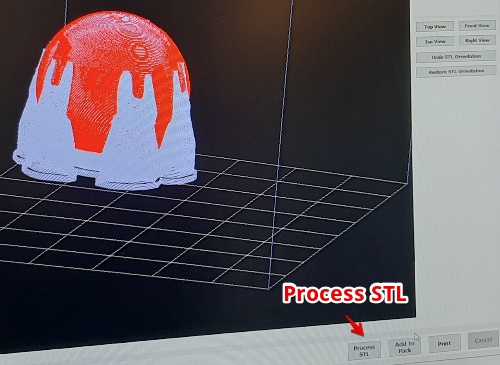
- Process STL
- Orientation > check position And check layers (step up step down)
- Add to pack
- Pack: Check Material & support = available material on the roll (must be more than listed under ‘Pack details’)
- position and/or duplicate
 | |
 | This is what it looks like with soluble Support |
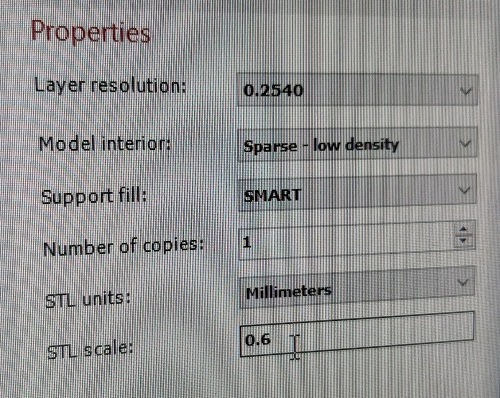 | Set the properties |
 | When ready Add to Pack (this is the print Que) |
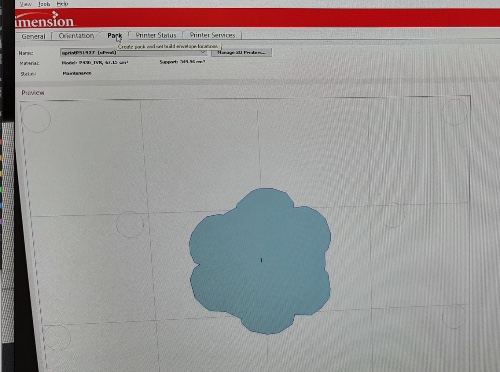 | In the ‘Pack’ tap place the print in the center (about) |
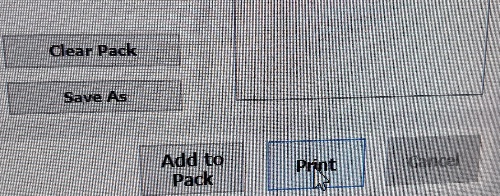 | Check total time and press ‘Print’ (in Pack Tap) |
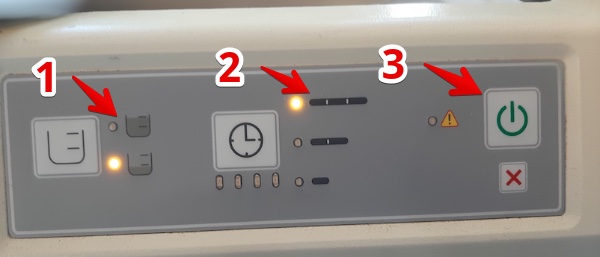
B. Print on the uPrint Dimension
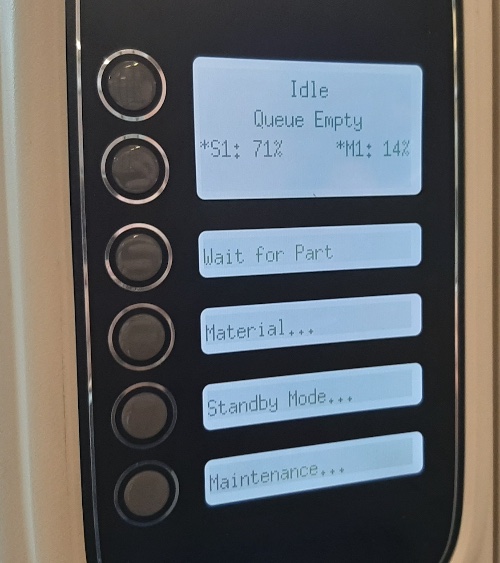 | This is the interface on the Uprint Dimensions |
 | When the file is received, Press “Start Model” |
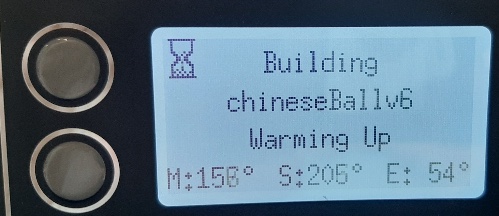 | The machine is preparing and will start printing when ready |
 | Take the tray out when printing is ready (mine took 6,5 hours) |
Result from the Uprint Printer with soluble support 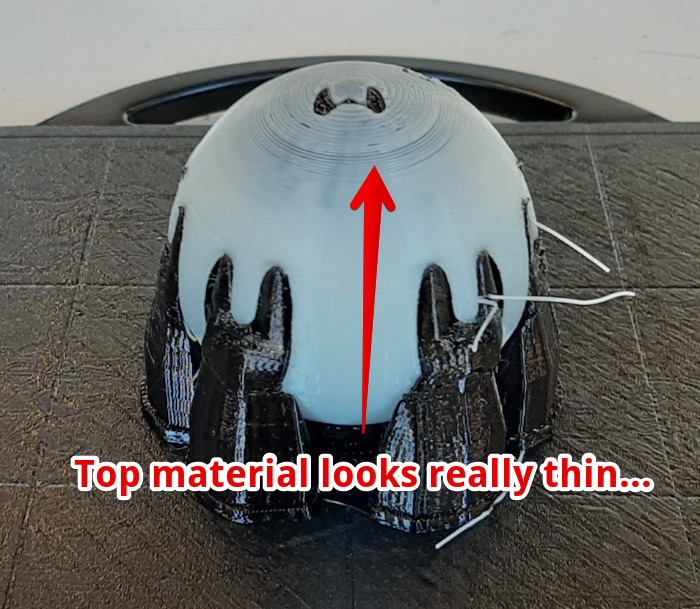
C. Wash soluble with the Wave Wash
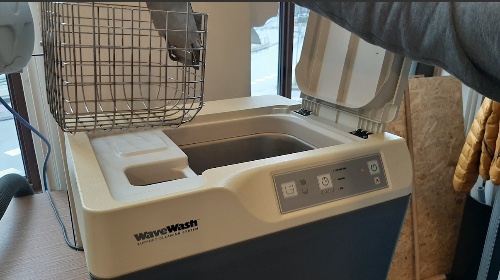 | Open the wave wash, switch on (on the back) |
 | Place print in the tray |
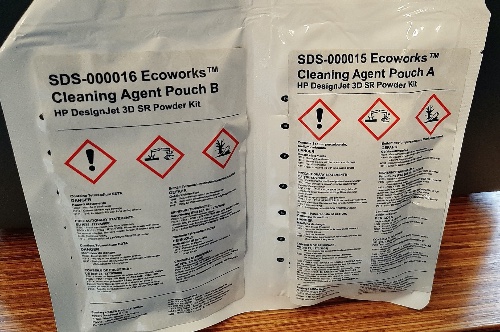 | Put chemicals in |
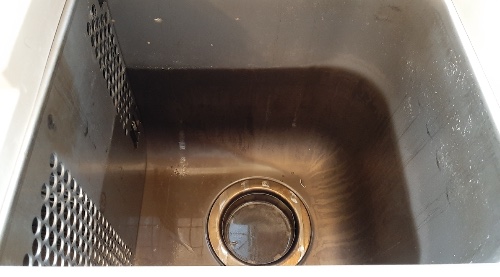 | Put water in, according to the number of products |
 | Washing time will vary but in my case took 12 hours |
 | Set water level, Washing time and START |
The result
 | 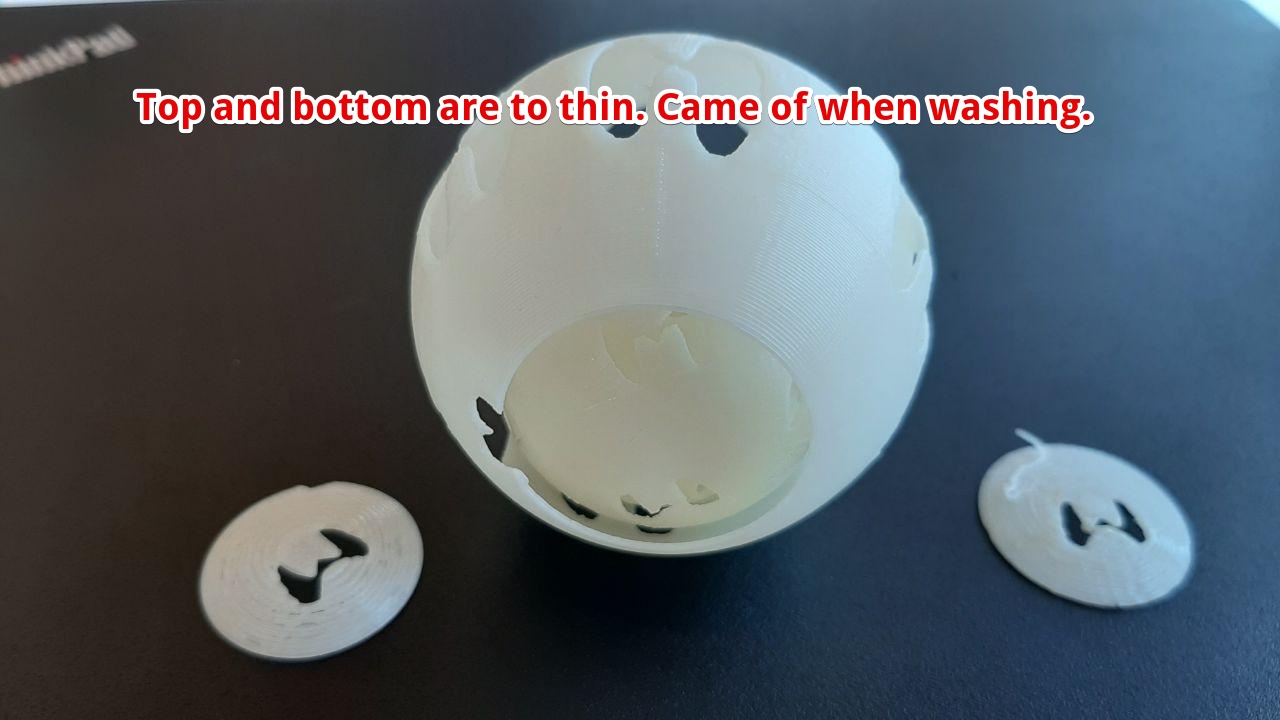 |
What went wrong
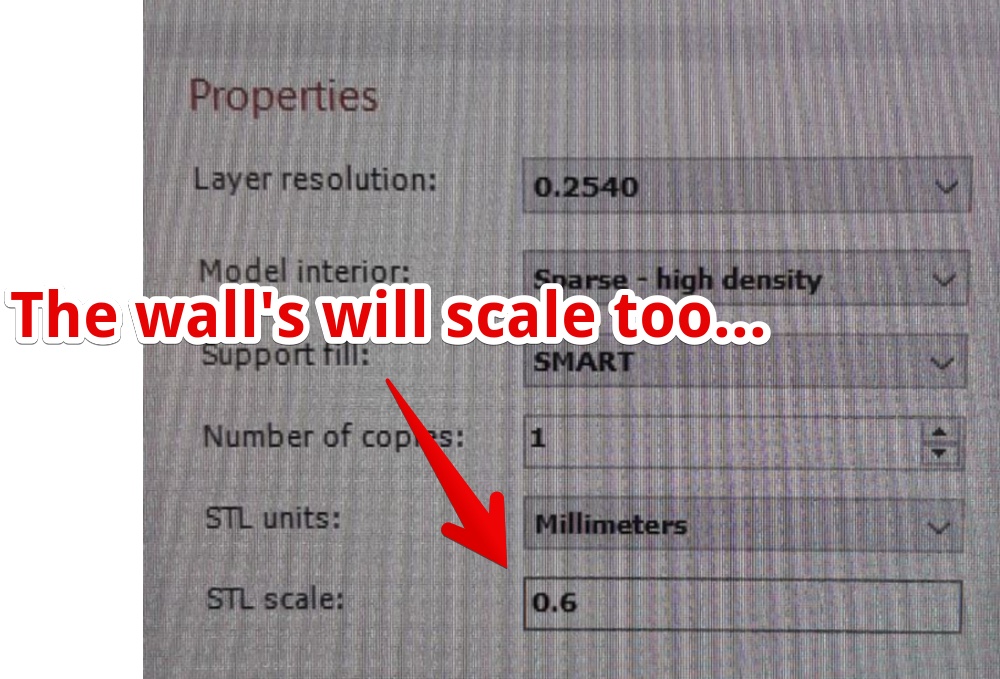 | In the CatalystEX software I changed the model to 60% so the wall thickness was decreased. And I don’t like the fact the ball’s are this different. They should be almost fit (this is a design ‘mistake’) |
7. Prusa 3 - Print the Chinese Puzzle Ball
What went wrong
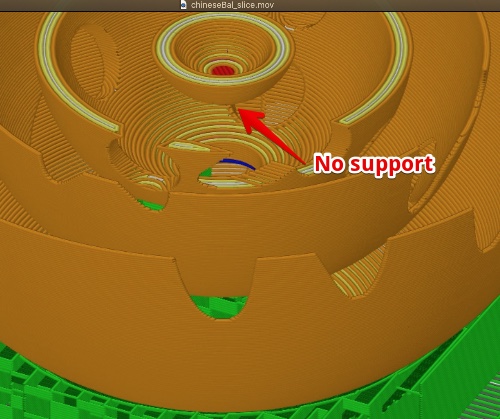 | the little ball is in mid-air, without support |
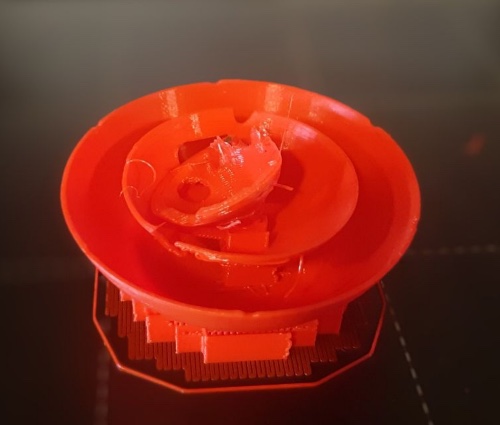 | The result of the mid-air, but the support on the bottum was close to impossible to break away, so I stopped this attempt. This shape made for a printer with soluble support! |
8. 3D scanning
The result of our groupscanning’. The best way to get a complete picture was me slowly turning around on a wheeled desk-chair. 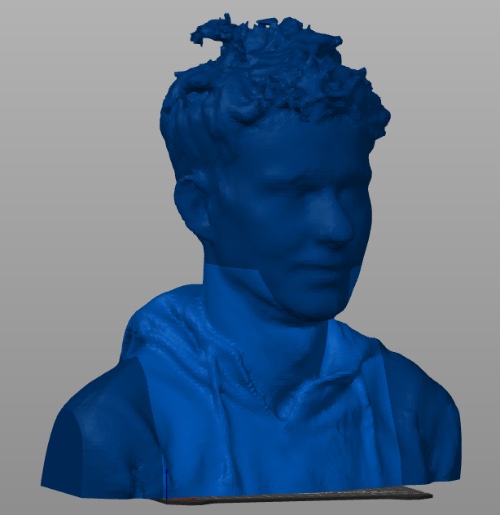 [read all about the problems we encountered] http://fabacademy.org/2020/labs/waag/groupAssignments/week5.html
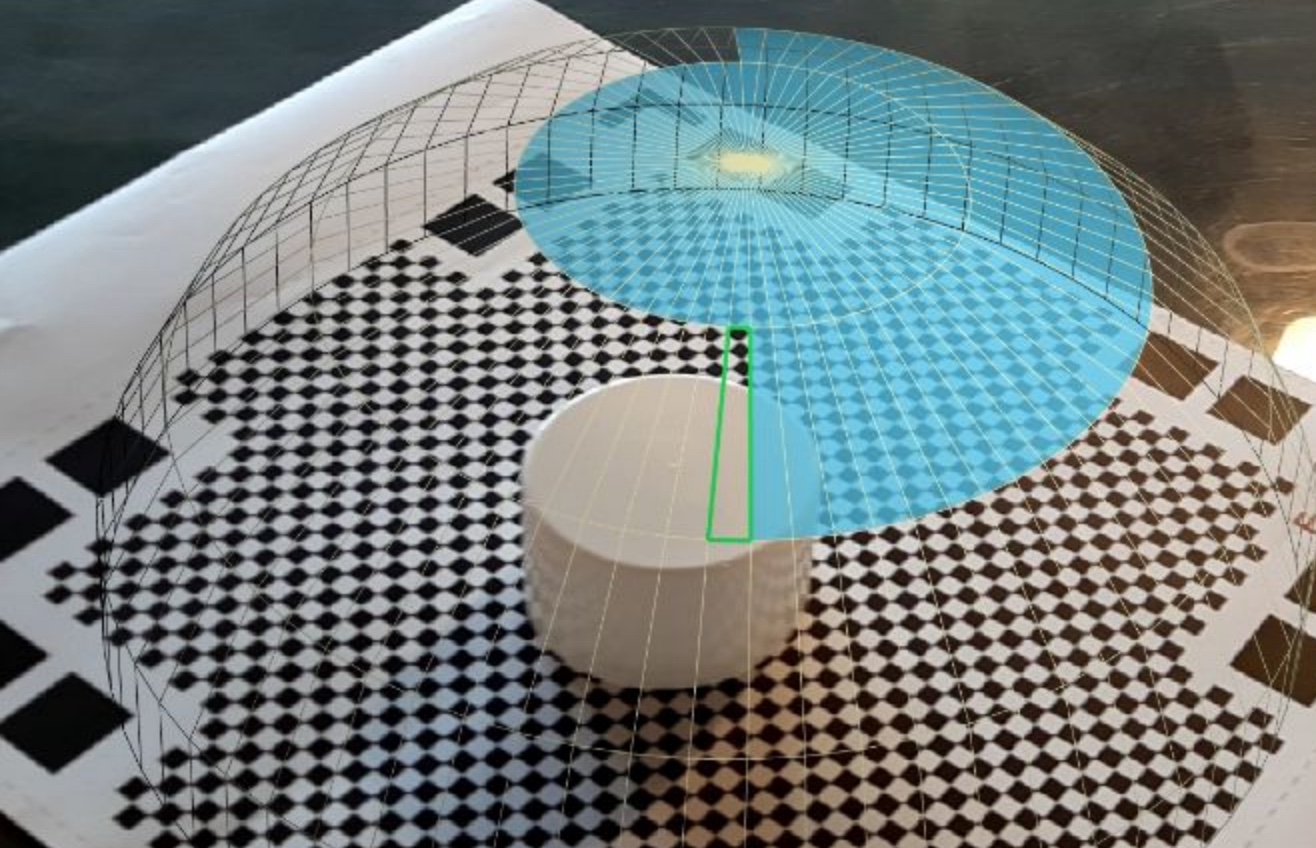
Apart from the hand-scanner I heard scanning with a phone could work really well. Since I own a phone this sounded like a perfect plan to get something in 3D. I would like to scan an impossible figure: a figure with smooth sides with not many difference per side.
- Download and install Qlone
- Download and print the Qlone mat (I printed on A3)
- Open the App and start the scan
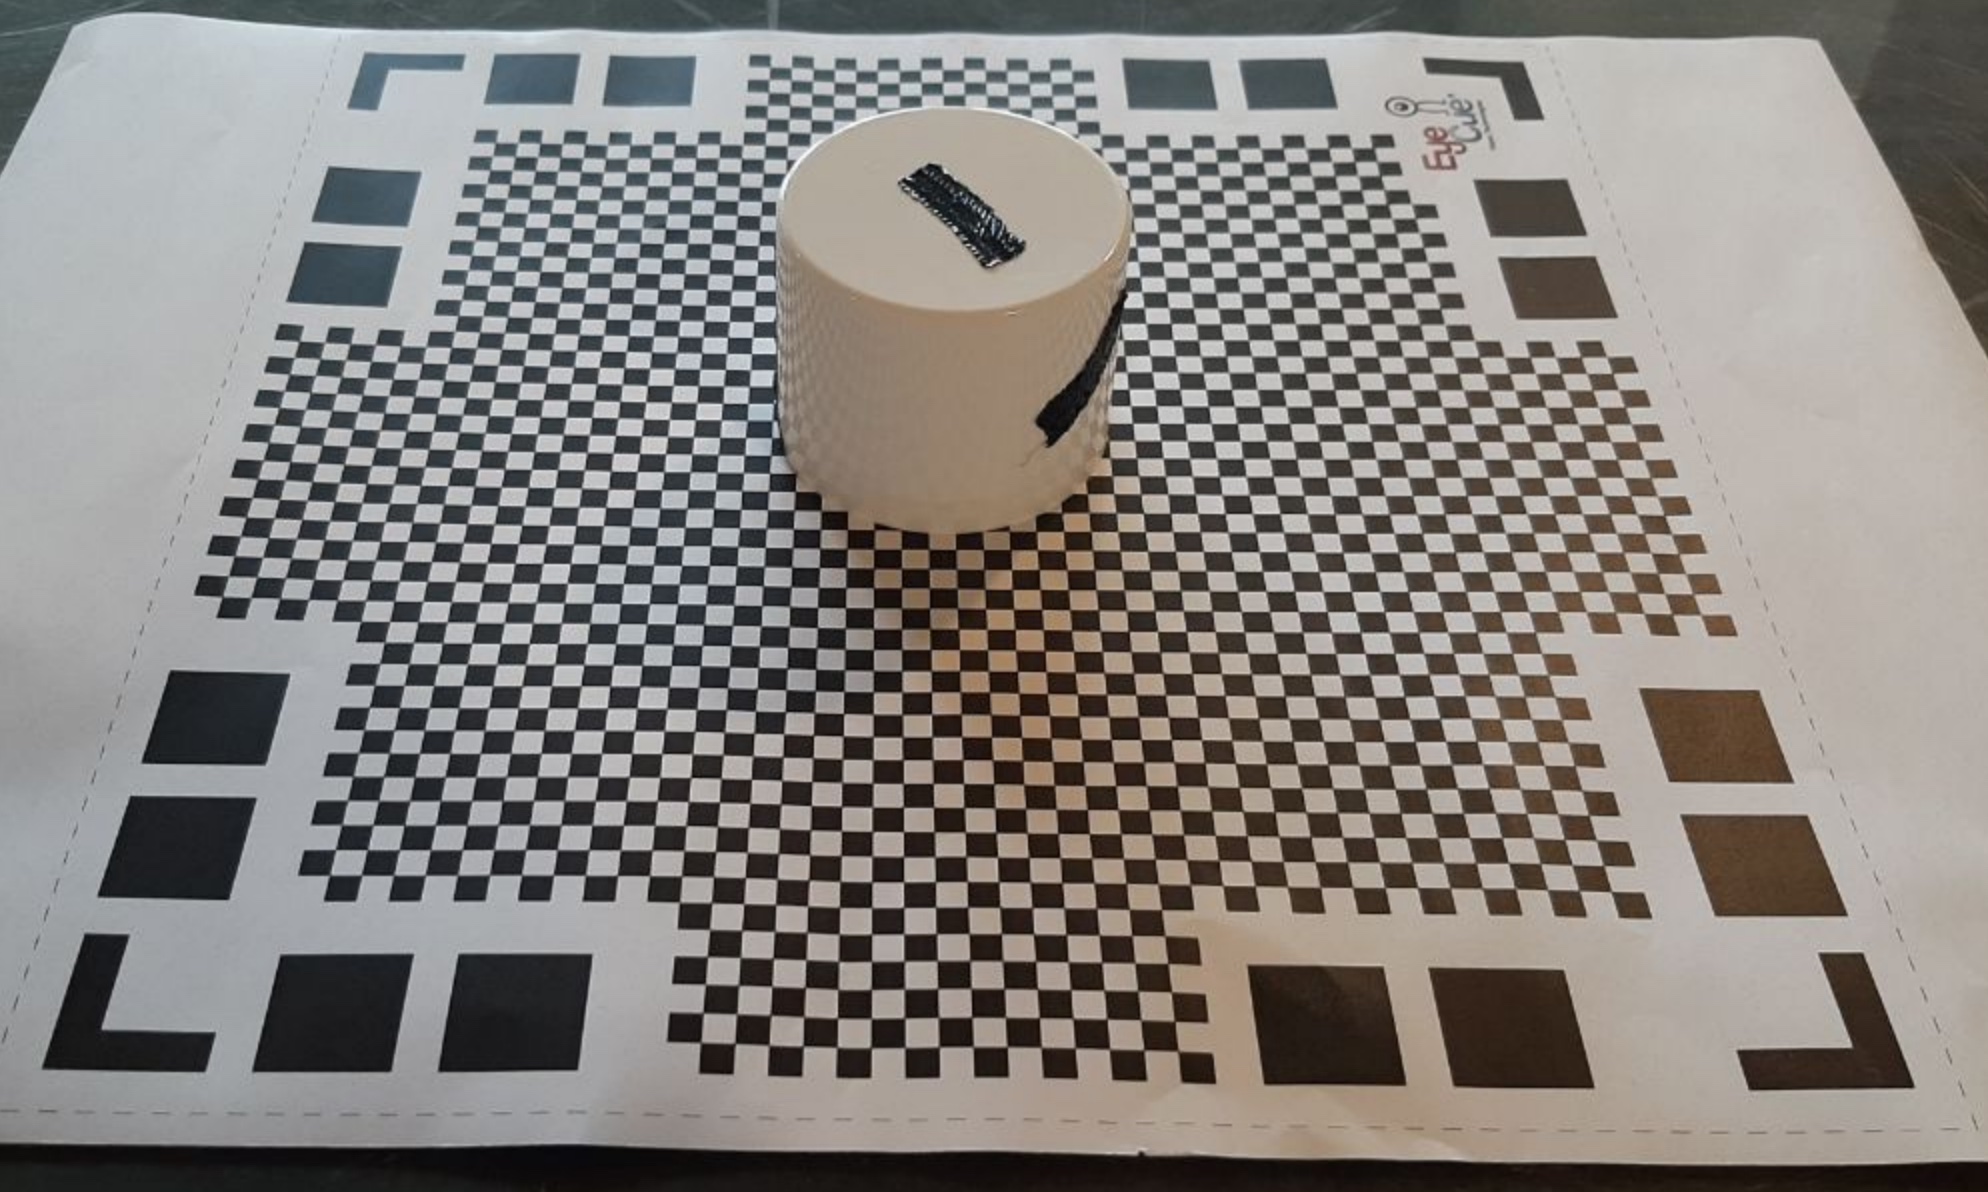
 | The Spray-can cap on the Qlone mat. Scanning without markers |
 | Just fill the dome parts to complete the scan |
 | The result after finishing the dome |
 | Now with the markers |
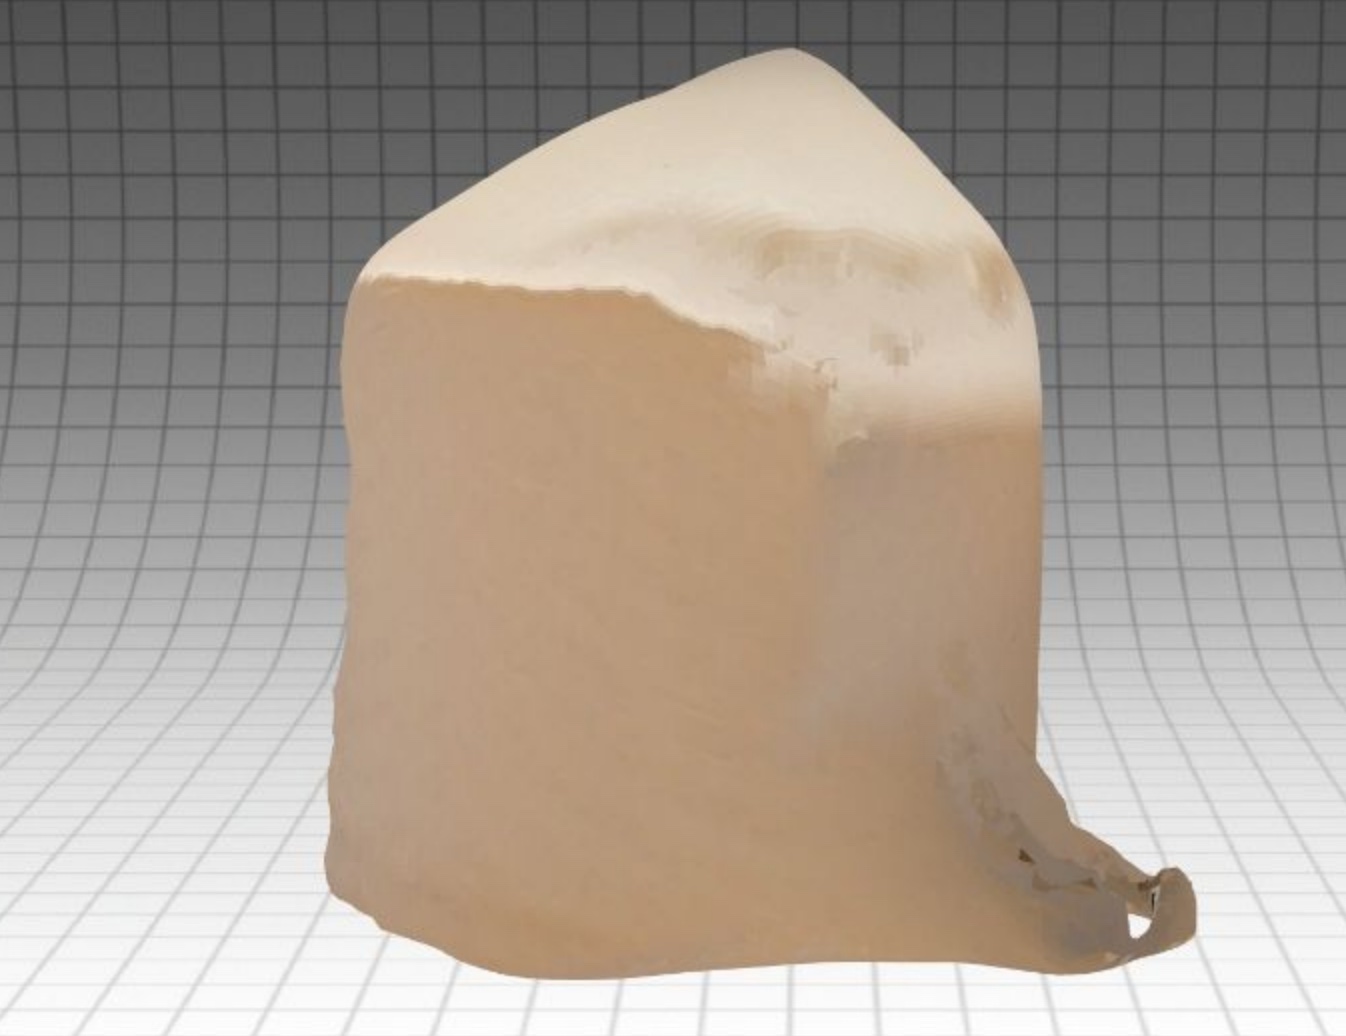
 | The result with markers |
What went wrong
I hoped the spray-can cap was really hard, but with the Qlone is was still surprised the makers in test 2 made a difference. Still it is a messy result but to be expected with a super-shiney object. In both cases I turned the Mat around.
Conclusion of this week
Files this week
Conlusion on printers & Material
- The Ultimaker 2+ result was really terrible, from examples I know a good result must be possible. By decreasing the line heigt form 0.2 to 0.1
- The Prusa 3, It uses PLA
- The uprint dimensions is really my favorite. The usablity is perfect and it will print ABS, so what you create will last. You are not producing waste. It can print Solable material so you can make really objects only possible on a 3D printer.
Mistakes and lessons this week
- Don’t create solid objects in fusion if you like hollow printed objects
- Don’t print a crappy design, the firs 3D object was a bit waste of time
Wat went really good
- Creating the Chinese puzzle in Fusion 360 was nice
My concerns
- For my final project I don’t know what 3D printing can contribute. Other from a box for the electronics.