18. Wildcard week
Highlights of the week
Project 1: Domestic Compostor
Concept
One of the important aspects of modern lifestyle is degrading increasing domestic waste.To this big challenge Vigyan Ashram has designed a compostor which converts wet waste into manure using BARC culture. It’s an open source project and Ashram is promoting to make and use it ourself. Fascinated by the positive impact of the compostor, I decide to make my own in this week.
Design
I referred my colleague Akshay’s DIY manual,student at Design Innovation Centre(D.I.C), Vigyan Ashram. This document certainly was very helpful in design files and steps to follow,assemble to make the compostor.
Specifications
The compostor is made of Mild Steel(M.S) with the following features:
1.Shape:Hexagonal
2.Capacity: 30 Litres
3.Operation: Manual
4.Lid/Door Type: Sliding
5.30% open area for proper aeration
Fabrication
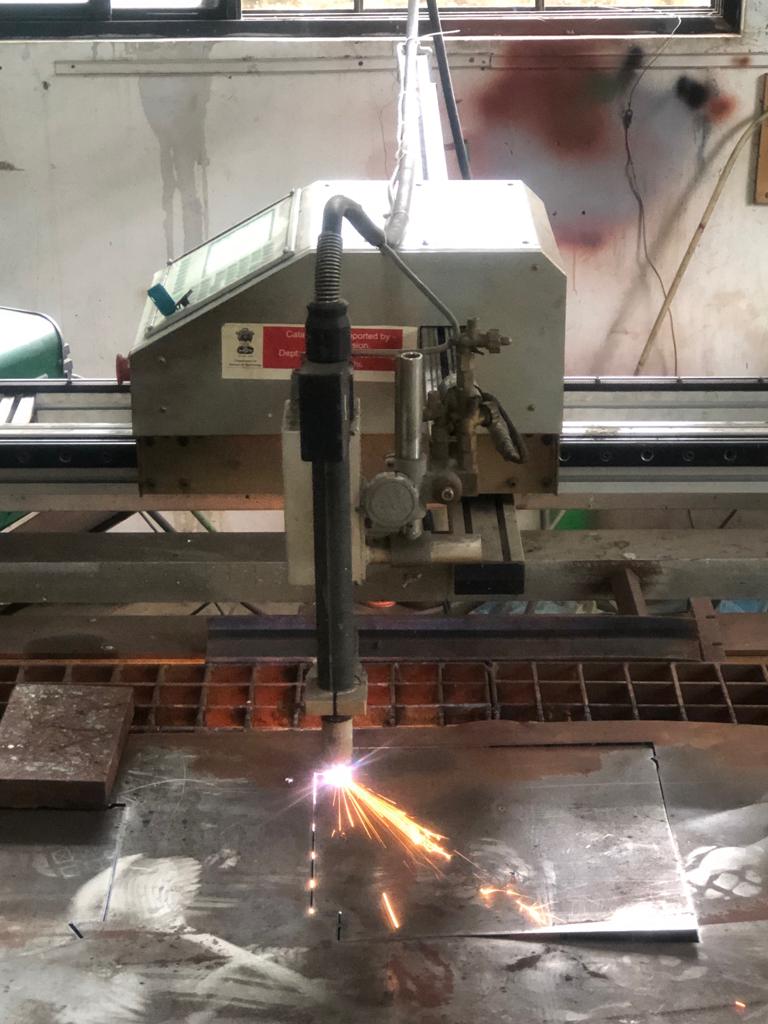
I. Step 1- Plasma Cutter:
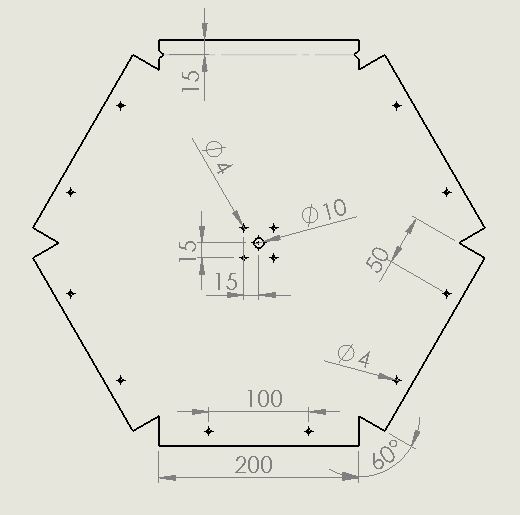
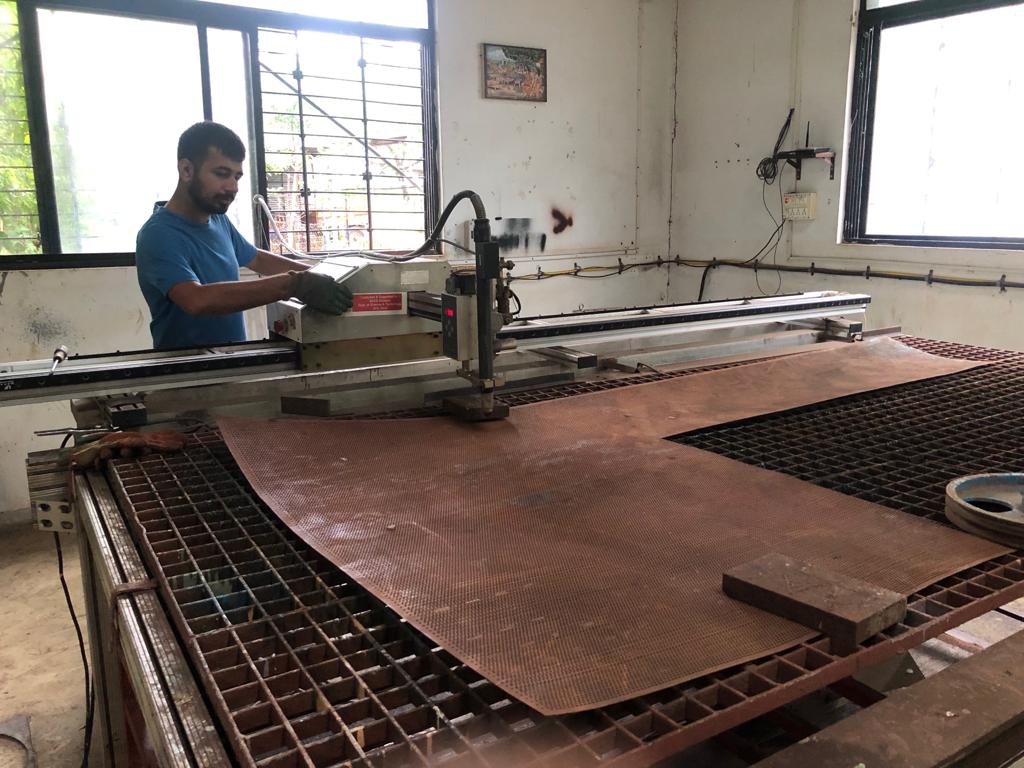
A. Hexangon: I cut 2 Hexagonal frames from Mild Steel sheet of thickness 0.8mm. This is the optimum thickness because thicker material will be difficult to bend and thinner will decrease the life of the compostor.
B. Sliding Door: In the same Mild Steel sheet of 0.8mm thickness. I cut the door which has functional role in loading and unloading garbage in the compostor. The door has 4 notches 25mm inside from the end which will be used in bending and attaining the right shape.
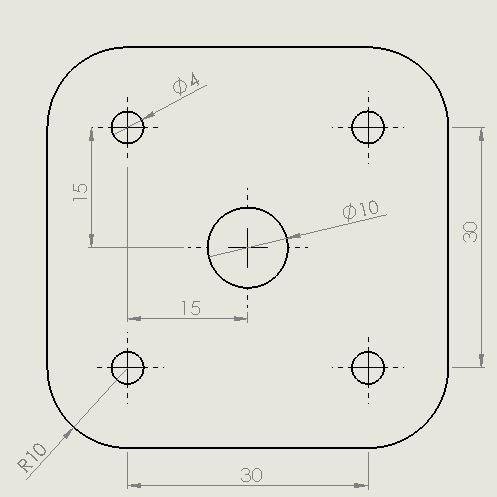
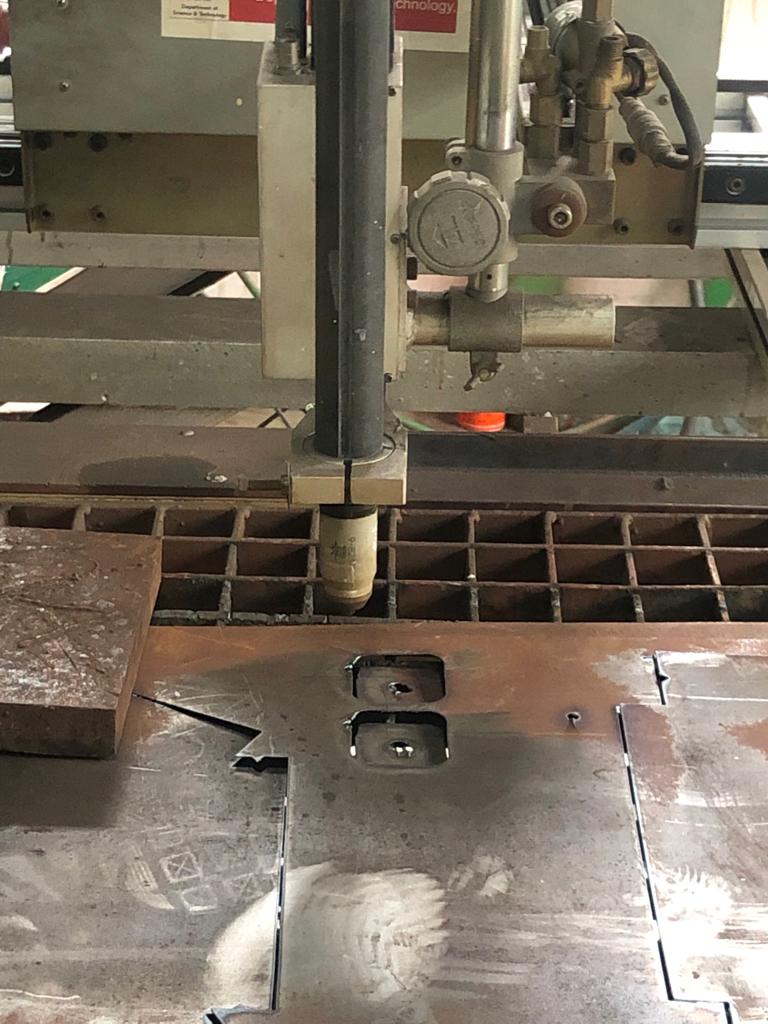
C. Flange: I cut 2 flanges of M.S sheet. They are later fixed on the hexagonal frame cut above. They play the important role in welding a central rod in compostor.
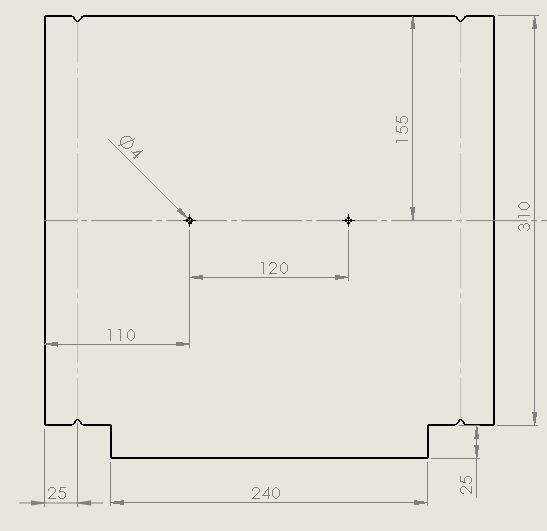
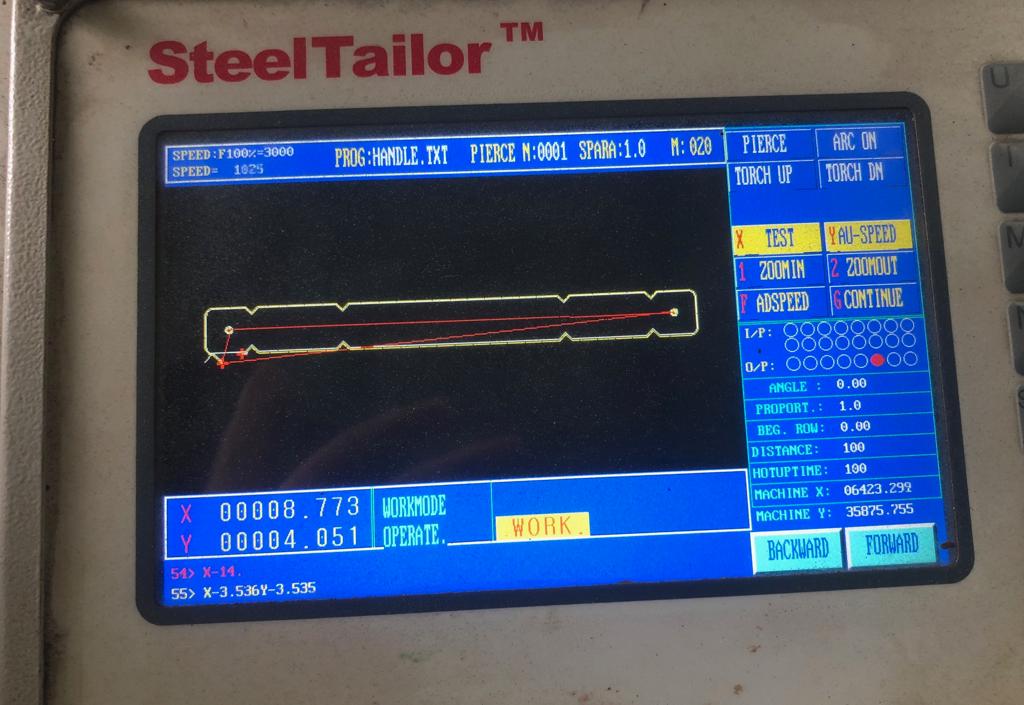
D. Handle:To make the handle for door cut the rectangle strip. It has notches where it is to be bended to get the shape.The image below is the screen of Plasma cutter.
E.Stopper:Two stoppers of 0.8mm thickness to stop the central rod in composor from coming out.

E. Plate:Used MS punched mesh to cut the rectangle sheet which will form 5 sides of the hexagon. It has notches at the specific poistions where it is to be bended.
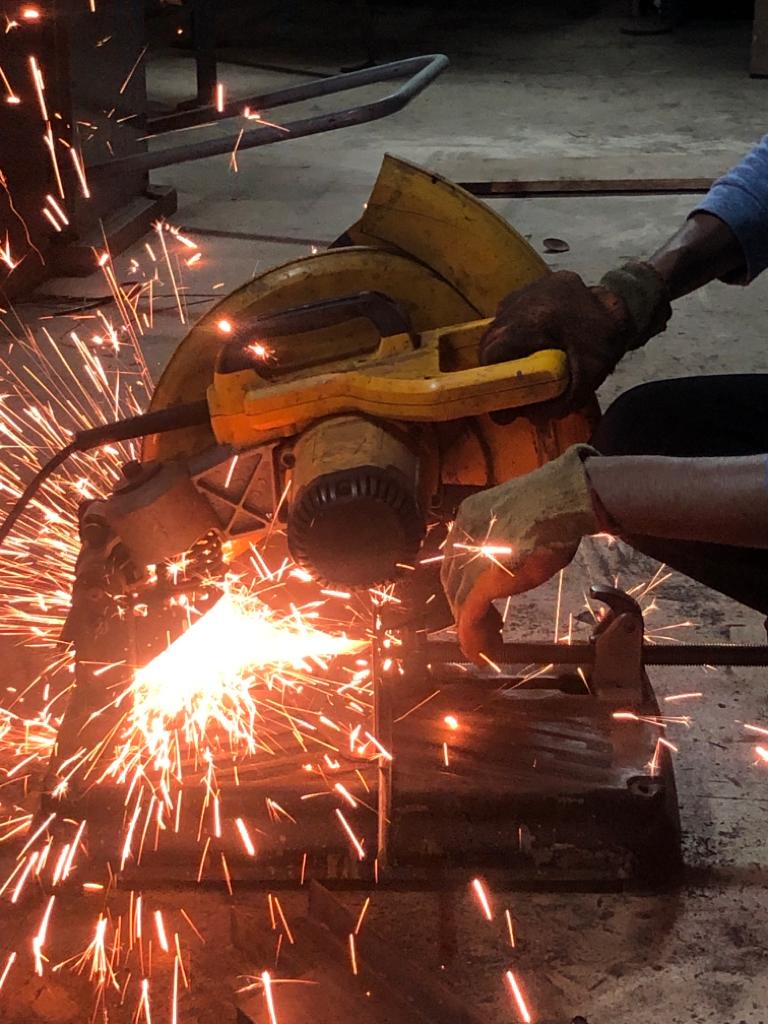
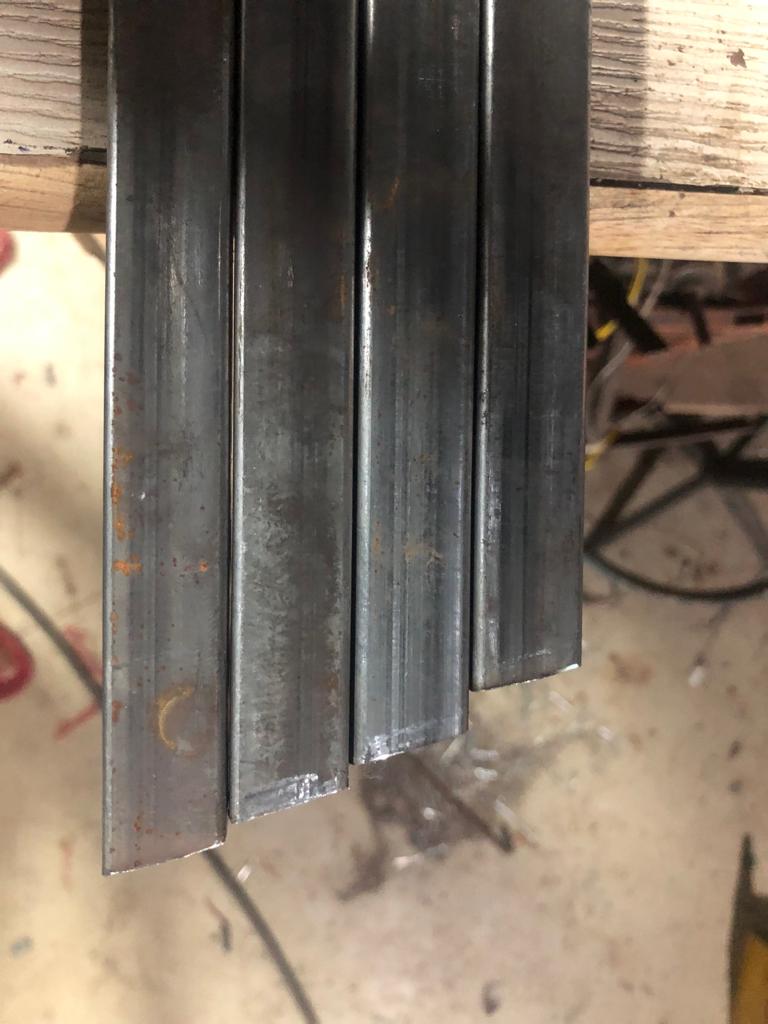
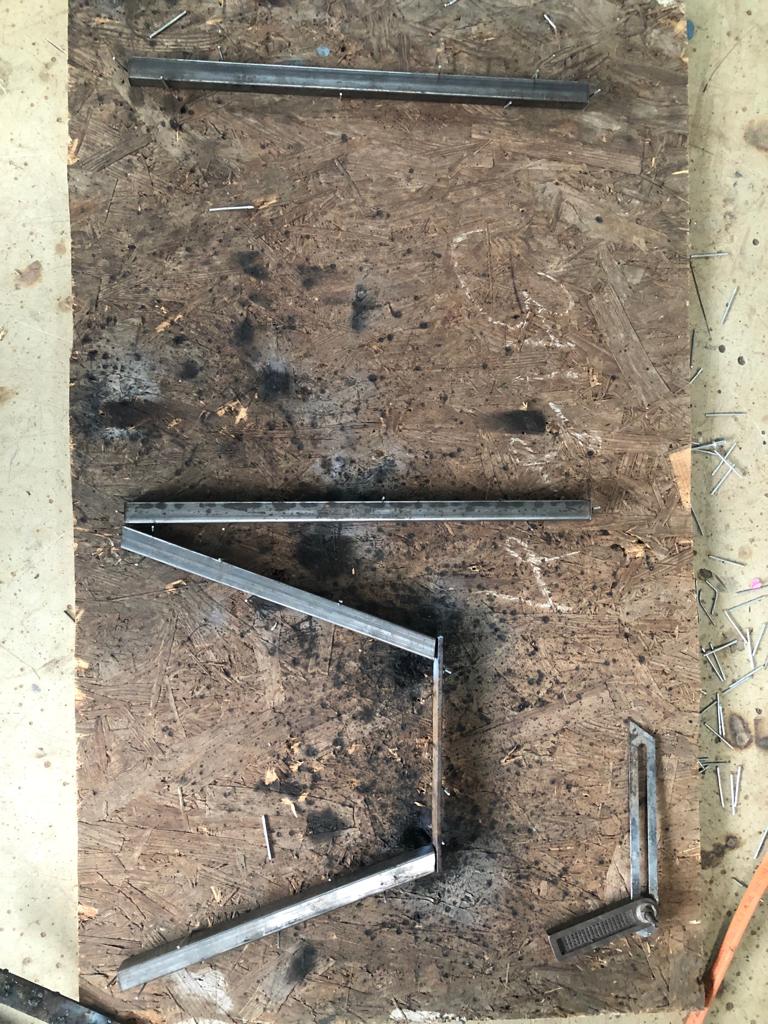
II. Step 2-Power Cutter:
I used “cut off saw” machine to cut square and round pipes of following specifications:
1. Square Tube-25.4mmX25.4mm-2mm Thick-43cm & 30cm Long
2. 2 Hollow Pipe-Inner Diameter:14mm-Outer Diameter:16mm-3 cm Long
3. 2 Seamless Hollow Pipe-Inner Diameter:10mm-Outer Diameter:14mm-3 cm Long
4. 1 Solid Rod-10mm Diameter-44cm Long
5. 2 Baffles-6mm Diameter-15cm Long
6. 2 Flat Plate-Width:1.8cm-Thickness:4mm-Length:21cm
Square tubes, flate plate were used in the stand for the compostor. Solid rod, baffles, hollow pipes, bush formed the main body.
III. Step3-Hand Drilling:
The square pipes which form the stand of the compostor required pipe ends cut at 111 degree from the horizontal base. Used Hand drilling machine to diligently perform the job.
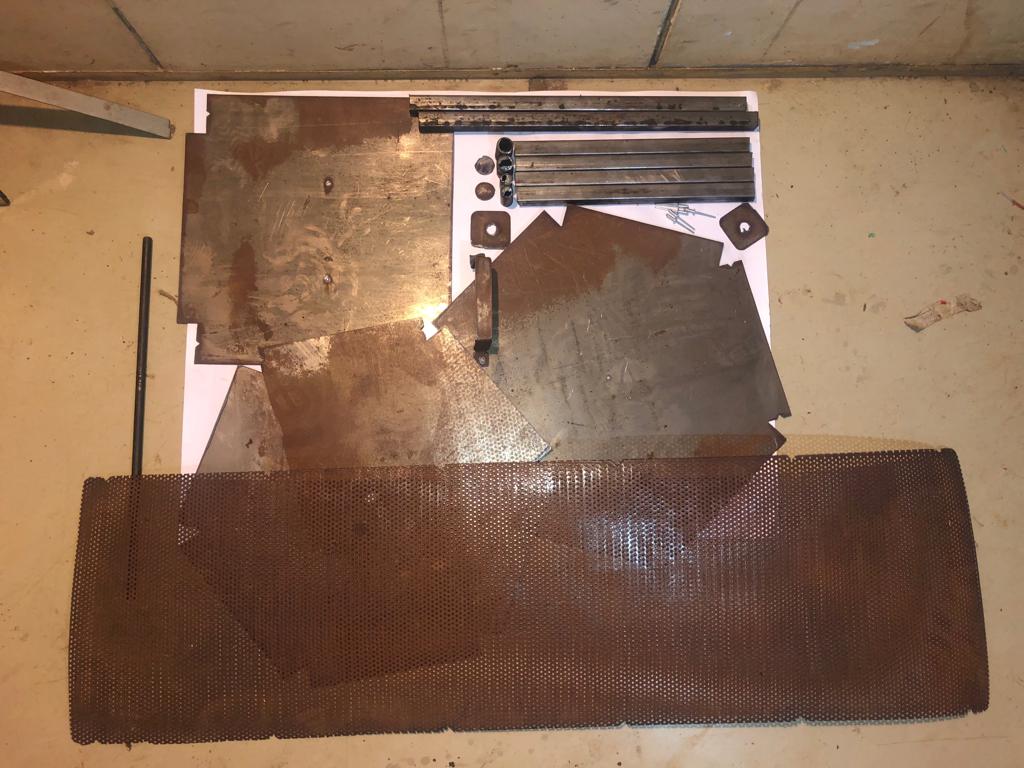
IV. Step 4-Components of the compostor:
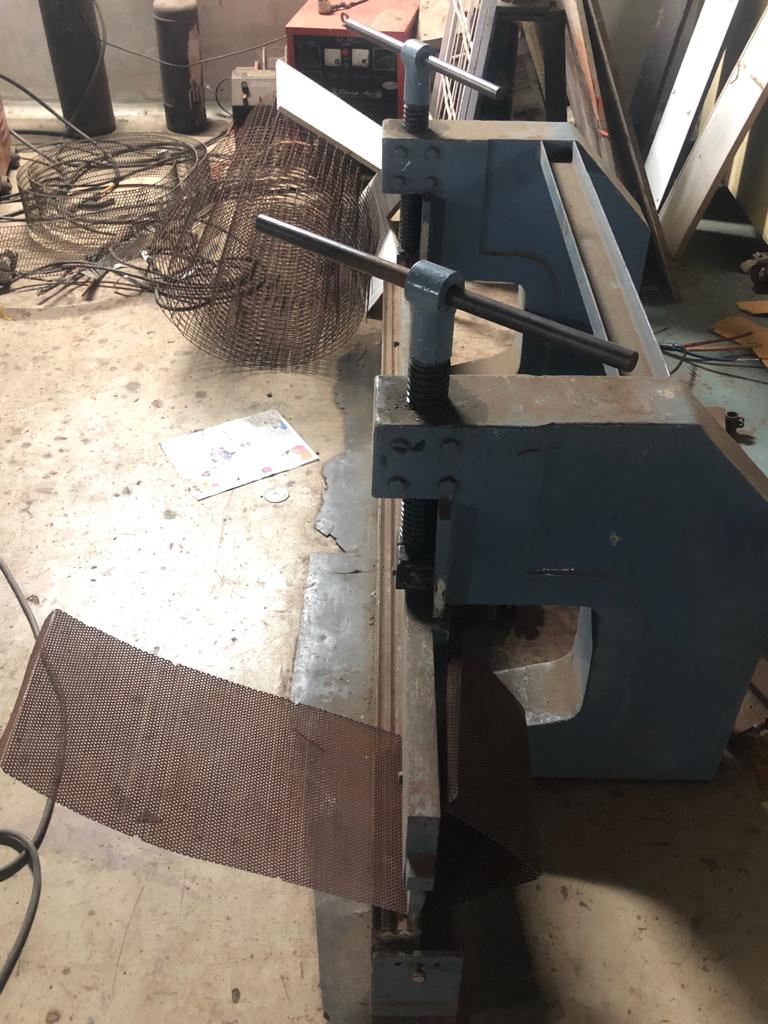
V. Step 5-Bending:
A.Took the flat punched mesh sheet and bent it from the bending lines (Shown by dotted portion in sketch) to form the hexagon.The angle between successive sides is 120 degrees.
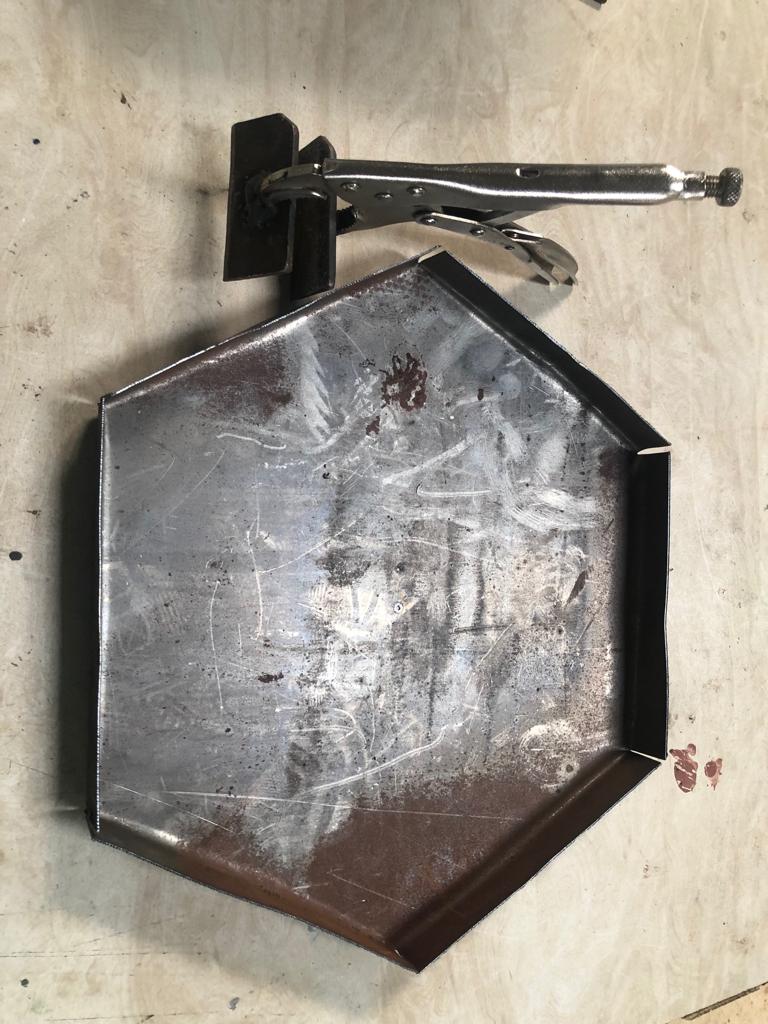
 B. Bent the extended edges of hexagonal frame by 90 degrees using Lock Plier.
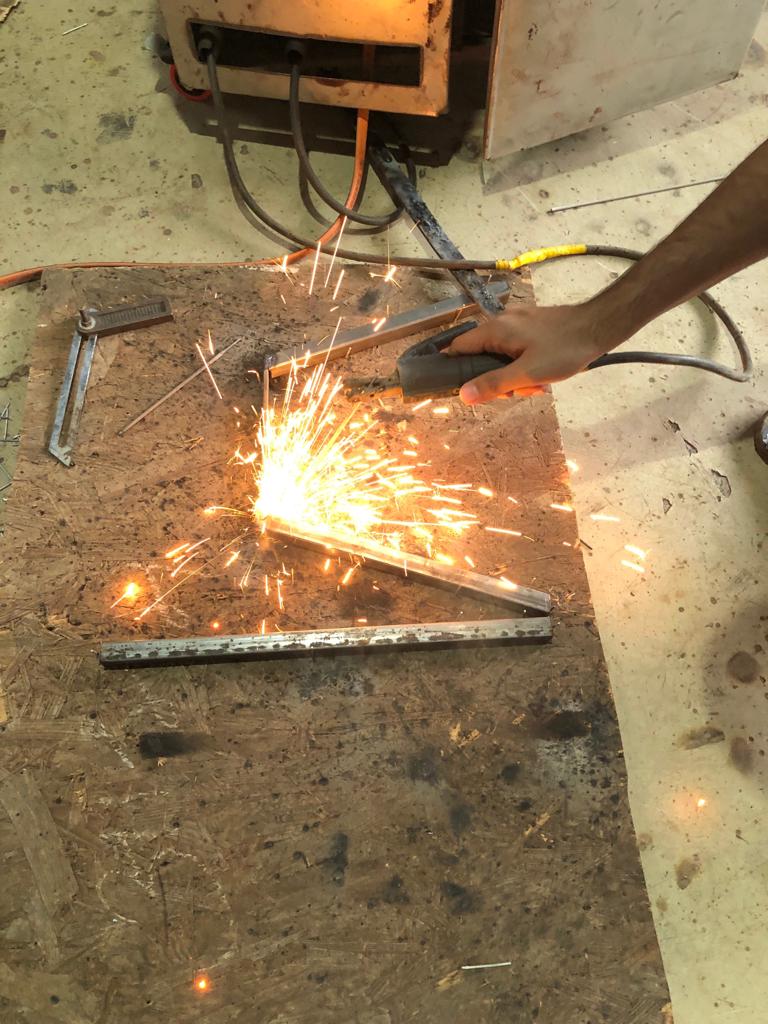
VI. Step 6-Welding:
A. Made a jig where the pipes to be welded at joints were kept together in fixed design between the nails. This structure made welding easy.
B. Welding the joints of square pipes for stand. Further, welded the flange, central rod, baffles and stopper in the main body.
VII. Step 7-Assembly:
Made holes using hand drilling machine at the required joining points. Used Blind Rivets (Aluminium) of length 10mm and diameter 4mm and fixed them with Rivet Gun.

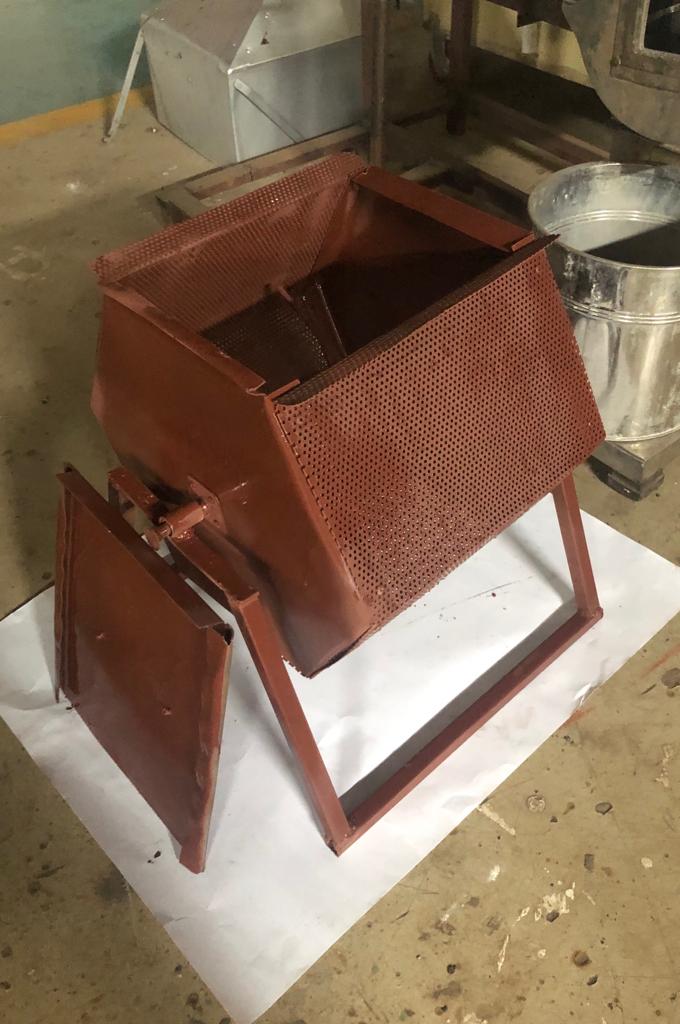
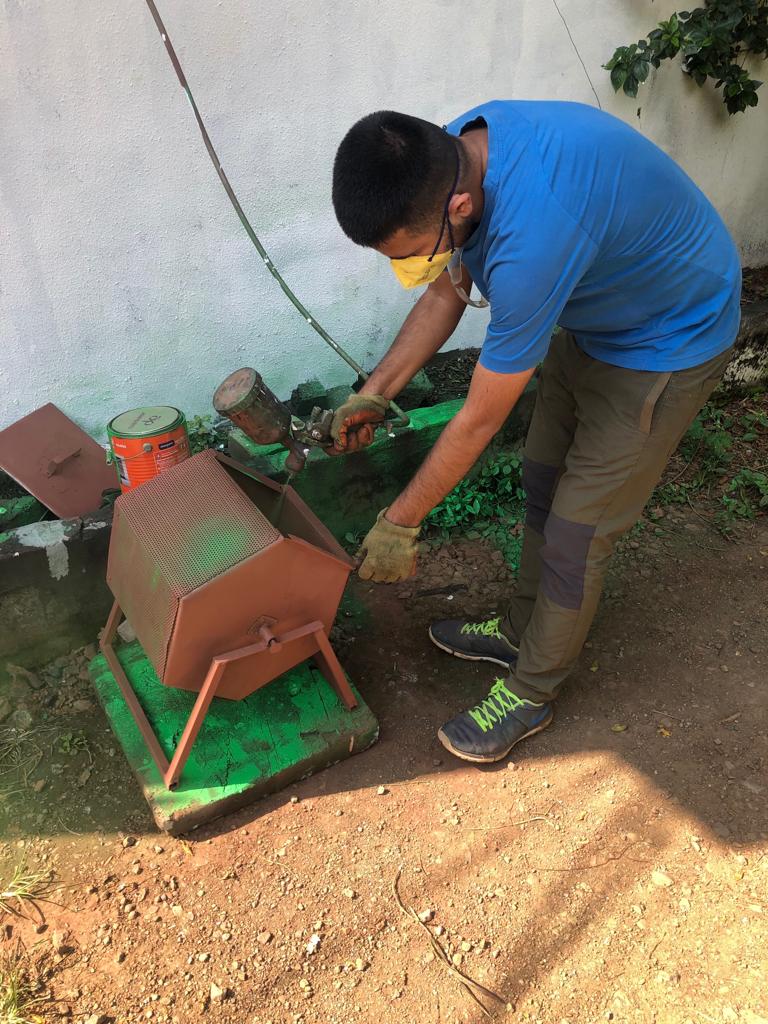
VIII. Step 8-Painting:
A. Red Oxide: Took 200 ml of Red Oxide and using spray gun painted the compostor Red. I left it overnight for drying. This is antirust layer which increases the life of the compostor.
B. Green Paint: Approximately took 200 ml Mint Green color and mixed it with 100 ml thinner. Applied the colour with spray gun which has one end on air compressor. The pigment comes out of pressure from a small nozzle.
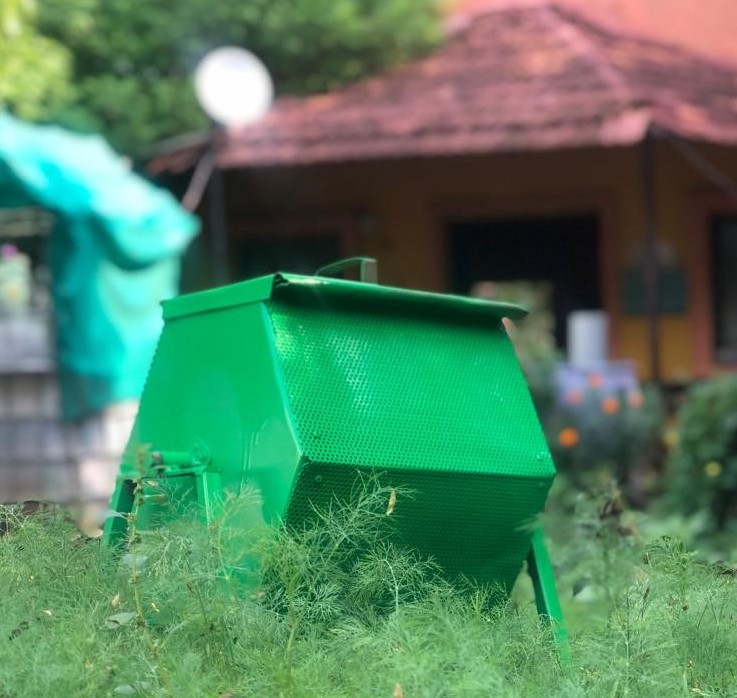
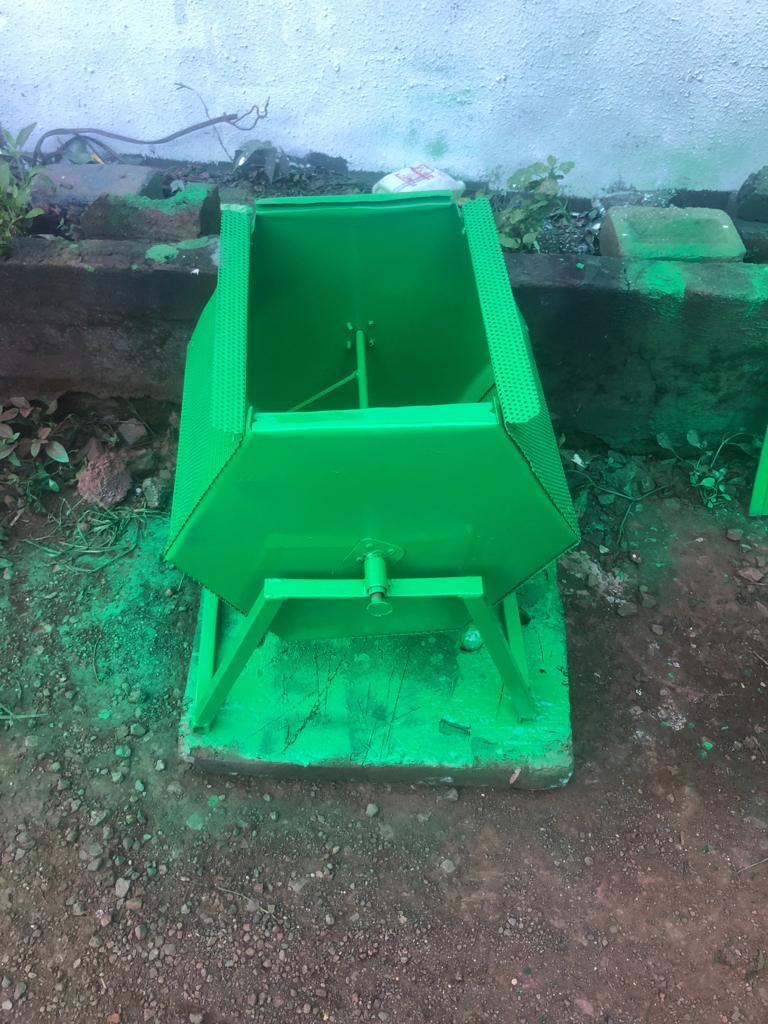
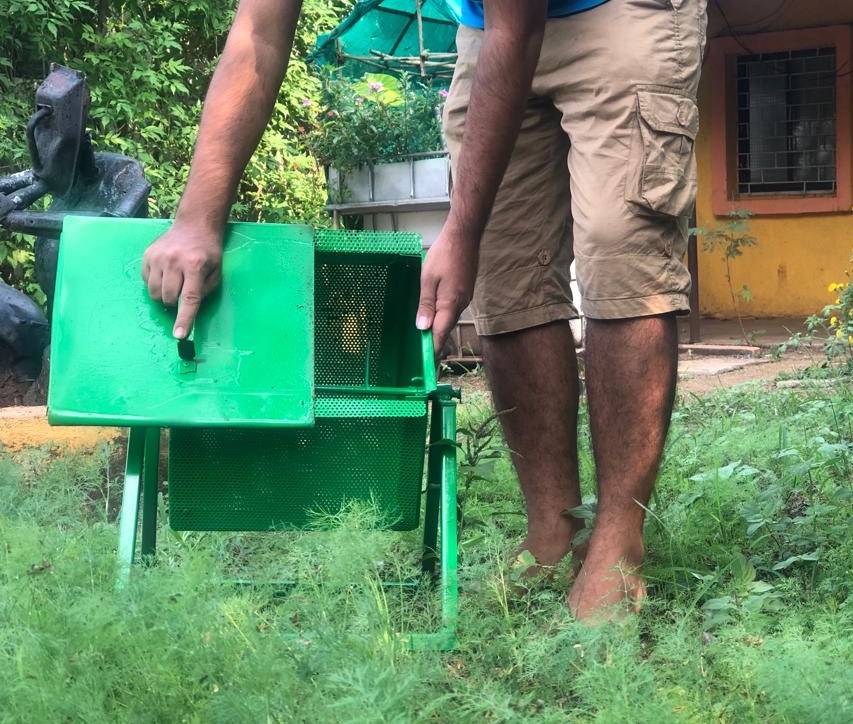
IX. Step 9-Final Look:
Here it is! The final compostor ready to turn waste to wealth. The kitchen waste is to be mixed with culture and it turns into manure in 7 days.Daily after adding he kitchen waste it is important to rotate it 3 times.
Project 2: Embroidery on CNC Machine
Design
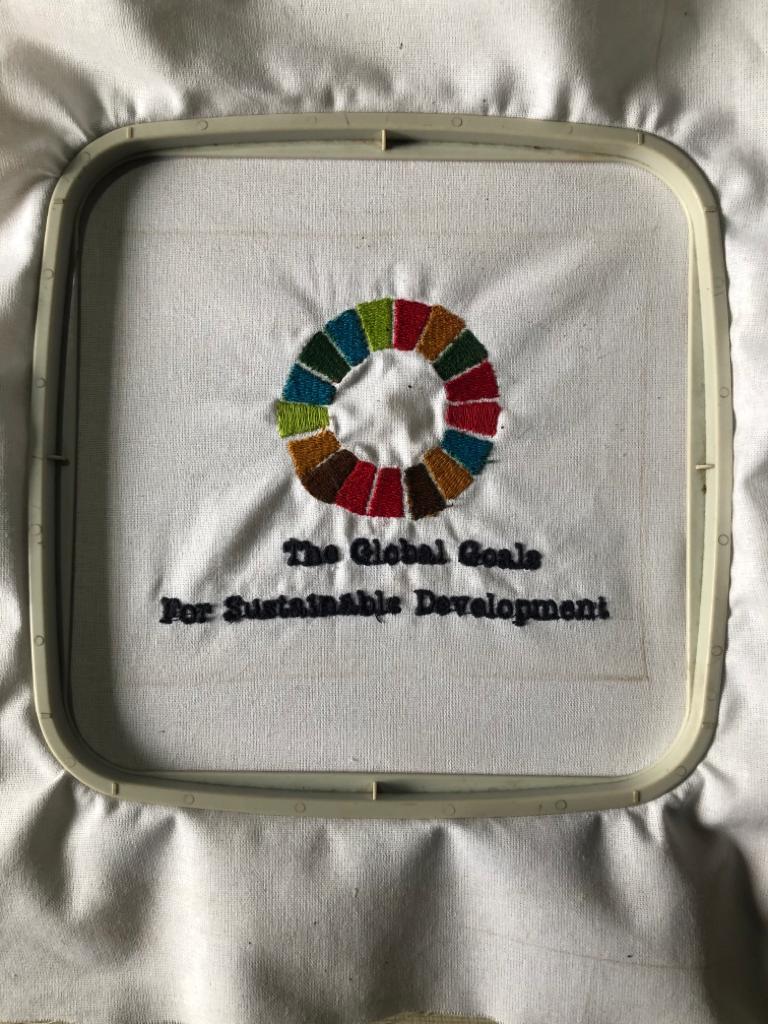
I deeply believe in -United Nations’ Sustainable Development Goals to be achieved by 2030. I made the design of SDG logo along with the message in Corel Draw.
I. Step 1-Image Insert
Opened a new file and copied and paste the .jpg image containing logo.

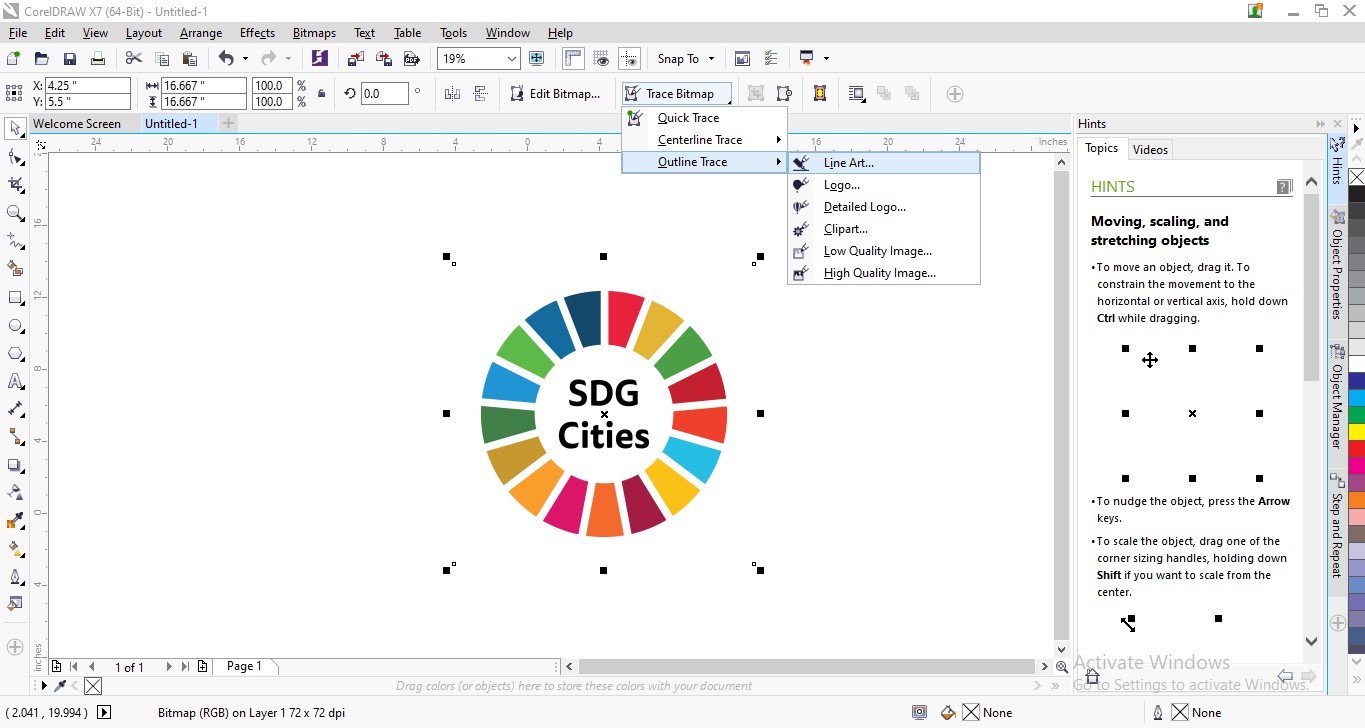
II. Step 2-Trace Bitmap
A. Trace Bitmap>Outline Trace> Line art.The image inserted is rater type becuase on zoom the pixels are visibly grainy. Selected the entire image and converted it into Line art Bitmap. Bitmap image is still a raster image.
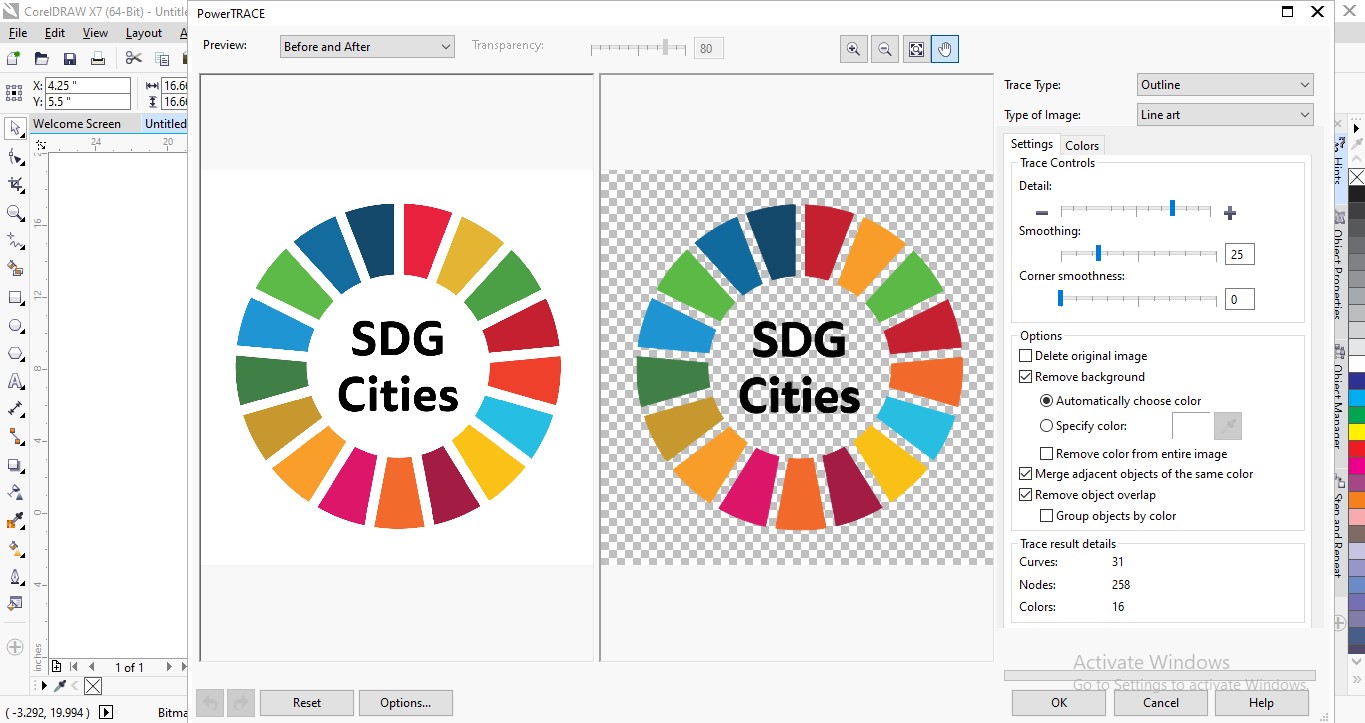
B. Using the same feature removed background and overlaps. Trace result details showed Curves, Nodes and number of colours.
III. Step3-Ungroup and Text
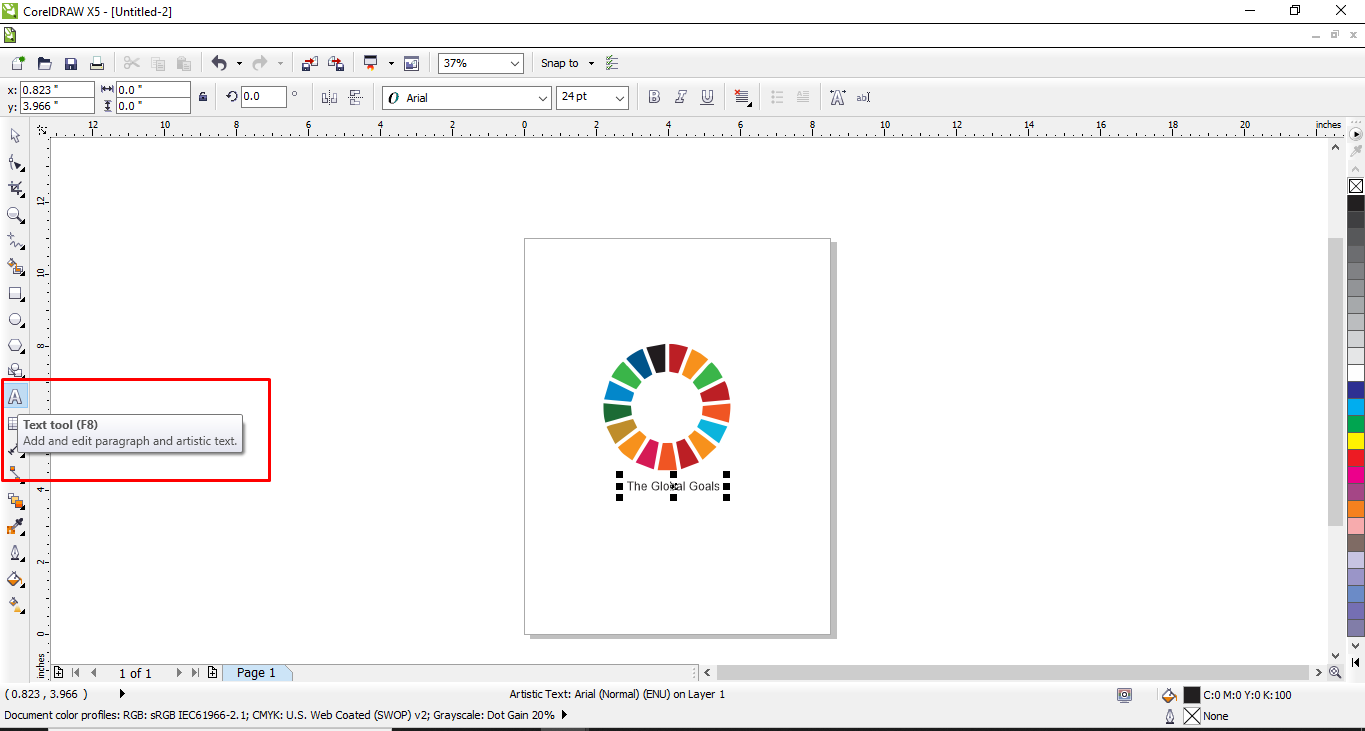
A. Selected the entire image and Ungrouped it after Bitmap by Ctrl U. Deeleted the unwanted text.
B. Selected Text tool and wrote the message of “The Global Goals, For Sustainable Development”. Adjusted the size and grouped entire image by Crl G.

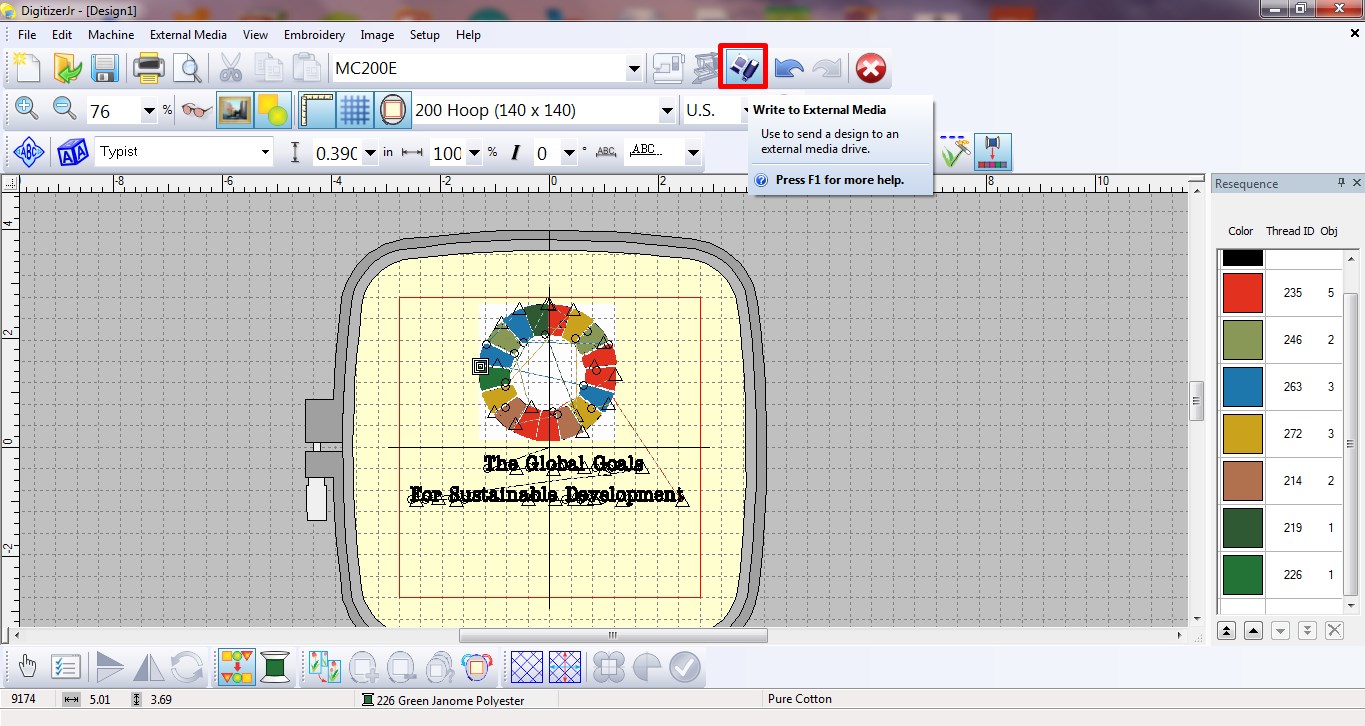
Used DigitizerJr software to convert .JPG image made in Corel Draw to the desired format “JEF” in which CNC embroidery machine works.
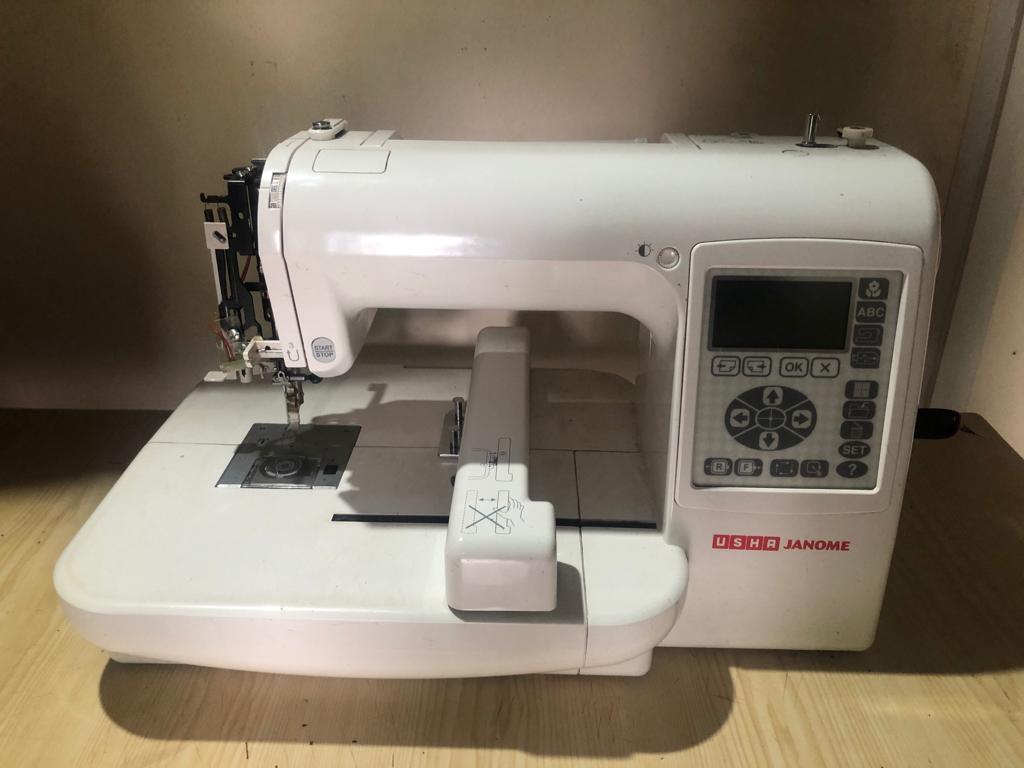
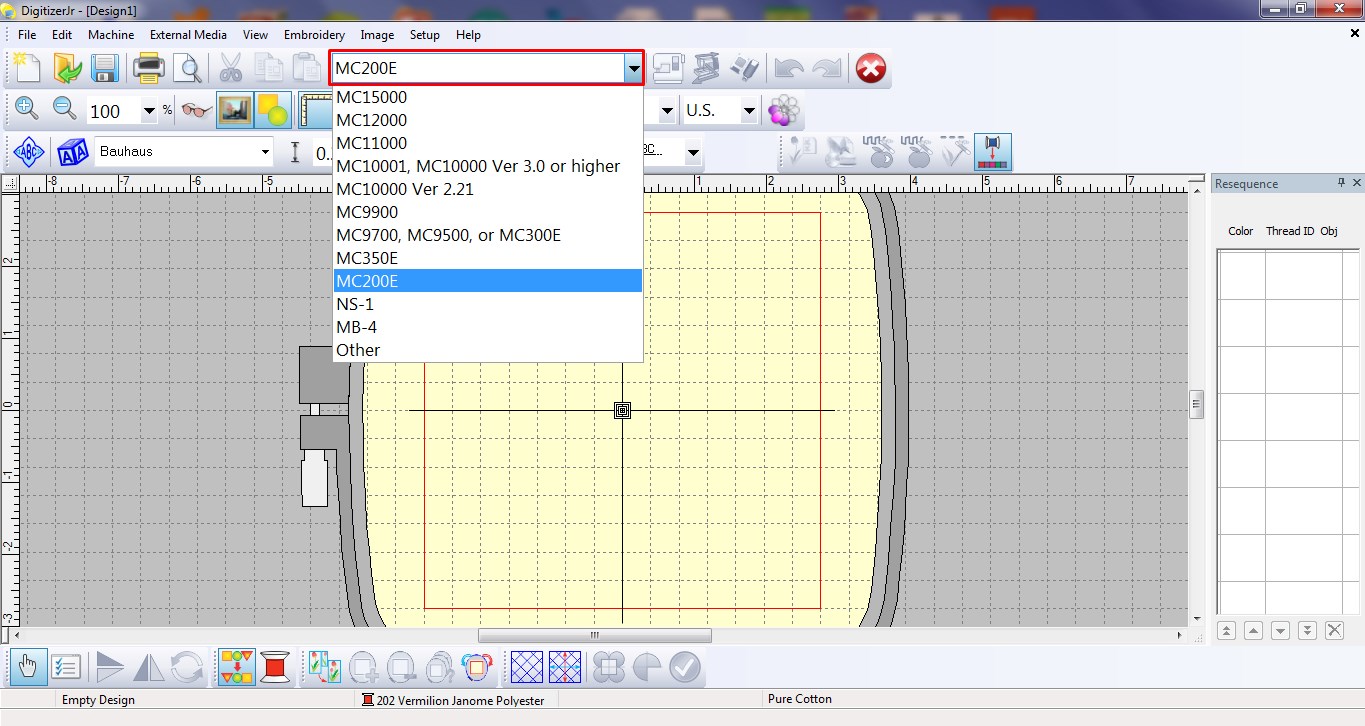
I. Step 1-Machine Selection
At Vigyan Ashram, sewing lab we have Usha MC-200E CNC embroidery machine.Selected the same from the options.The machine only works with physical software key.
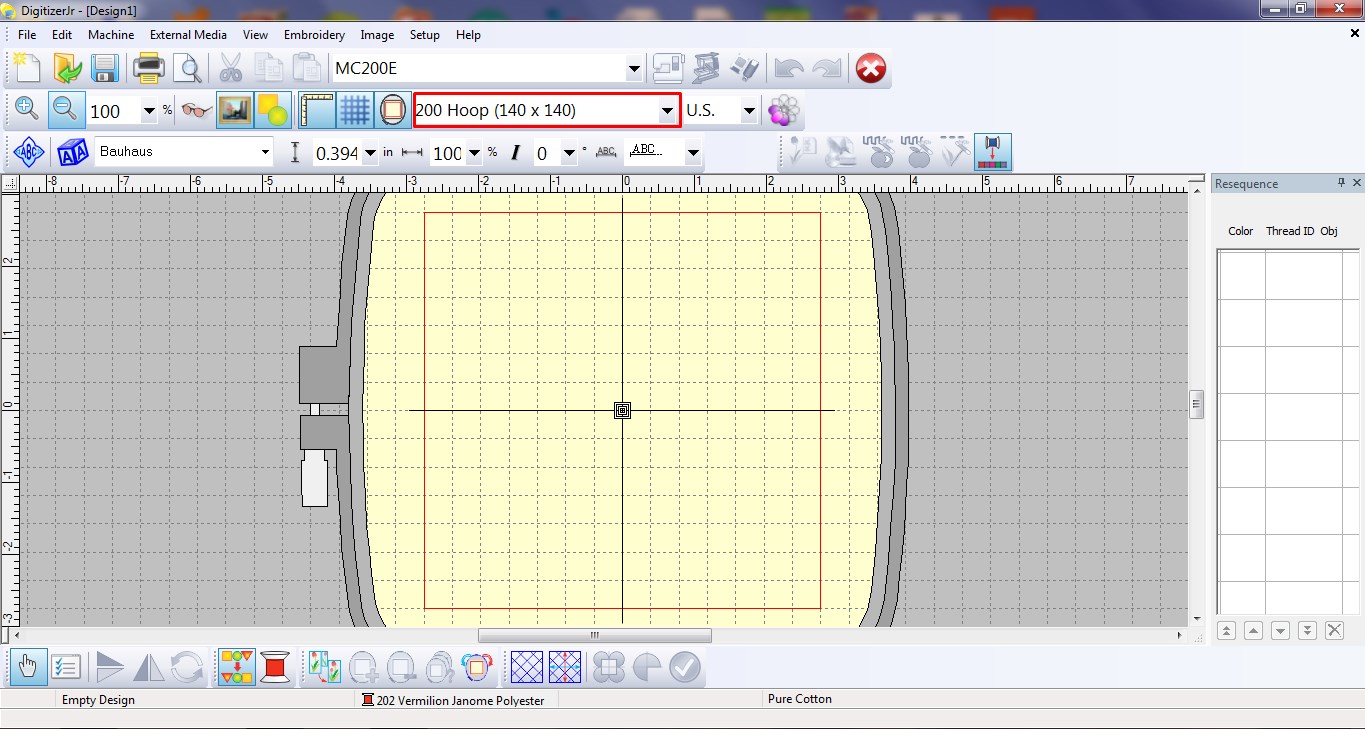
II. Step 2-Hoop Selection
Two hoops of different sizes can be selected. I selected the available larger size in the lab of (140X140). The embroidery hoop has a pair of concentric rectangular rings.
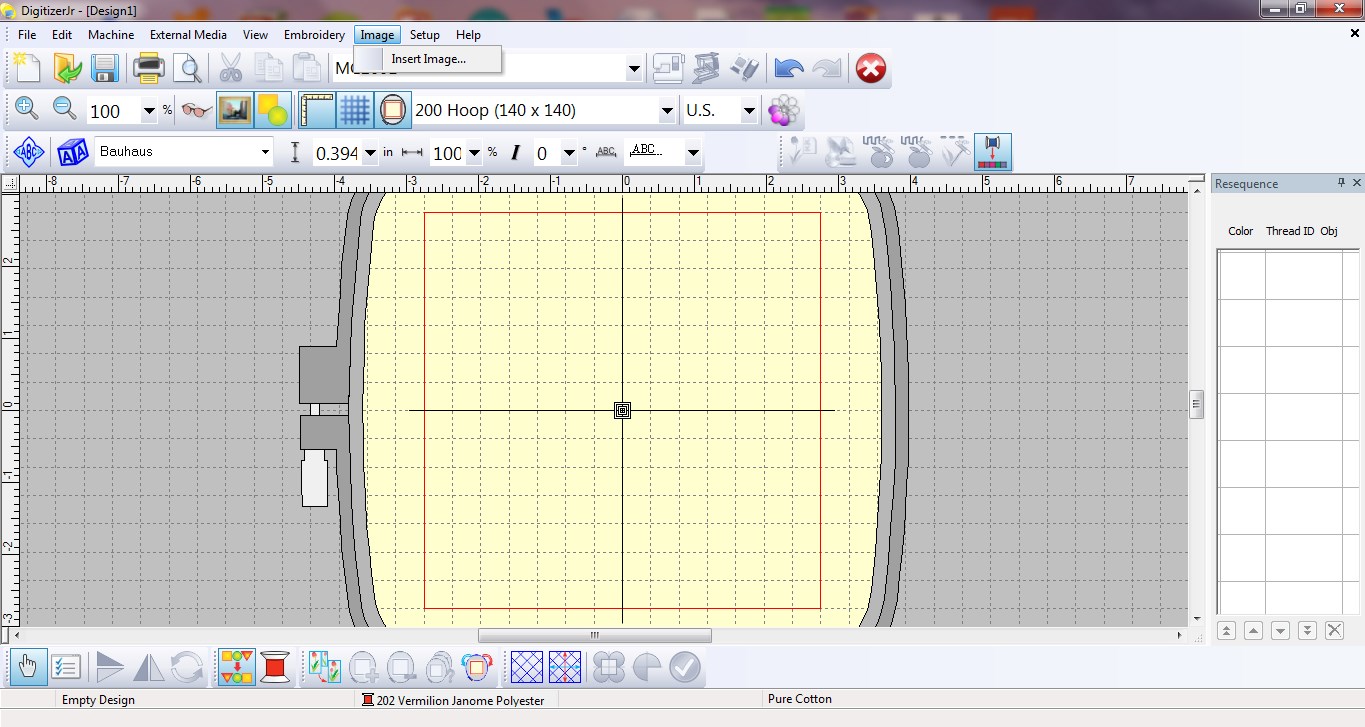
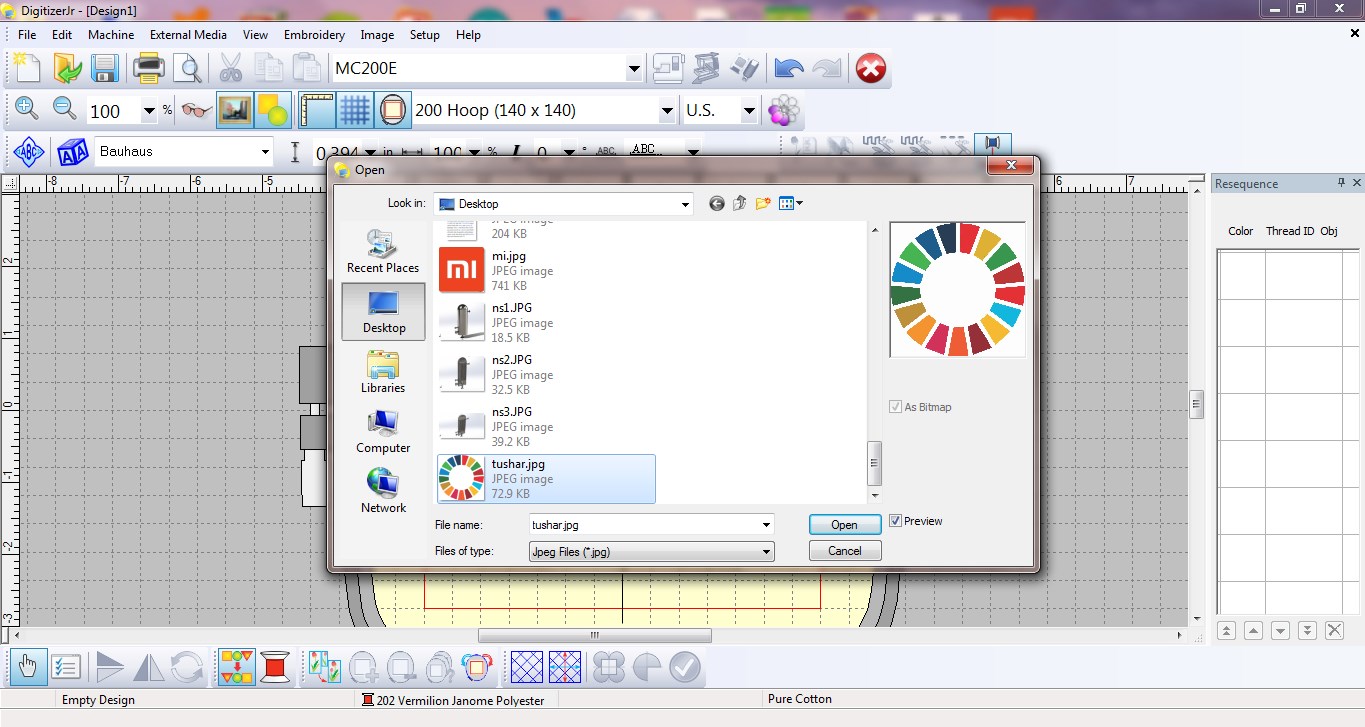
III. Step 3-Add Image
Insert Image.Selected and added image in .jpg format and can be seen on the bed.
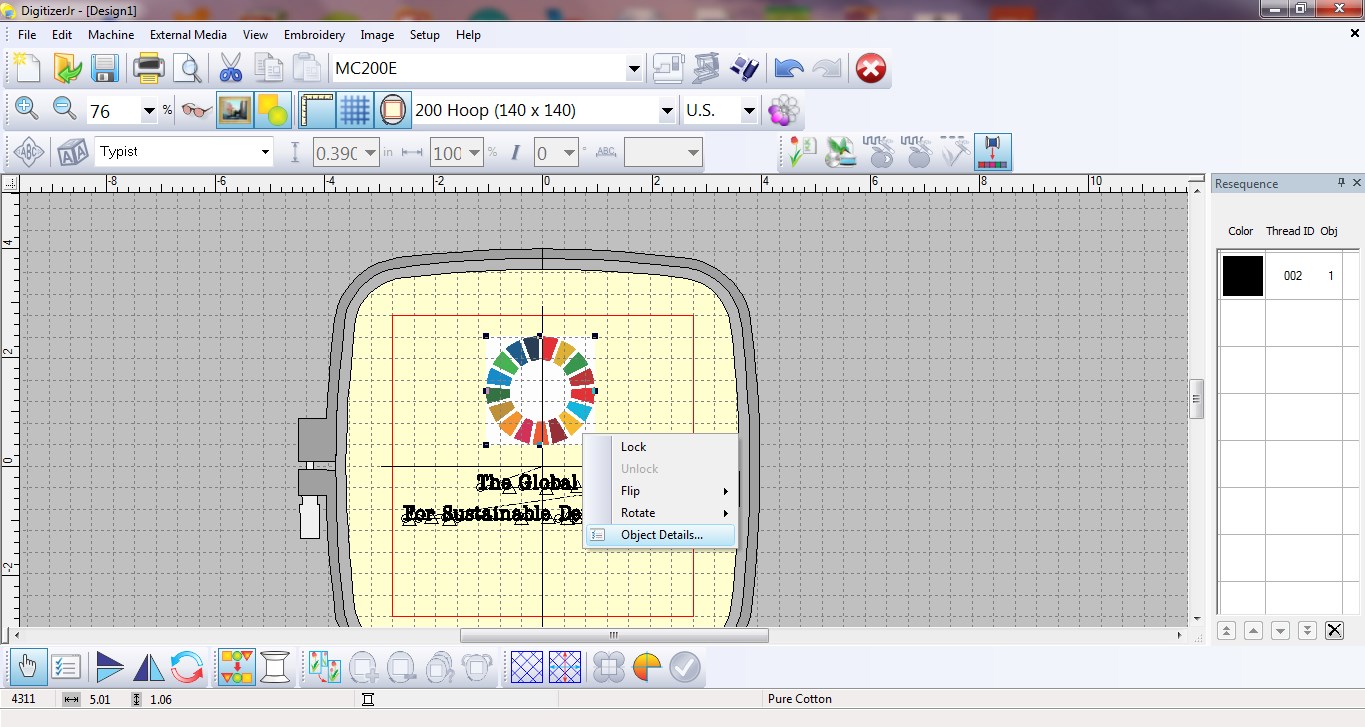
IV. Step 4- Dimensions
Resized logo and the message to look proportionate in the bed.
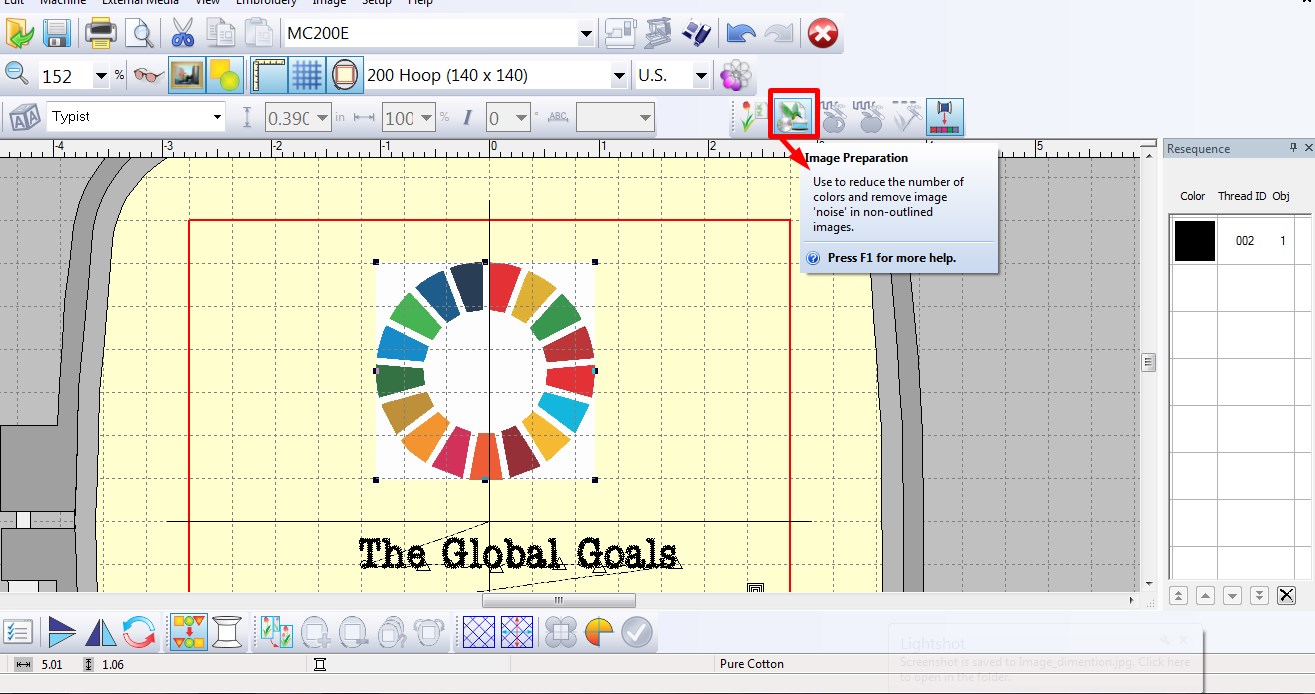
V. Step 5-Image Preparation & Colour Reduction
This feature was very helpful. It allowed to decrease the number of colours. Orginally, the image had 239 colours. I looked into the sewing lab for the thread colours available and reduced the number to 8.

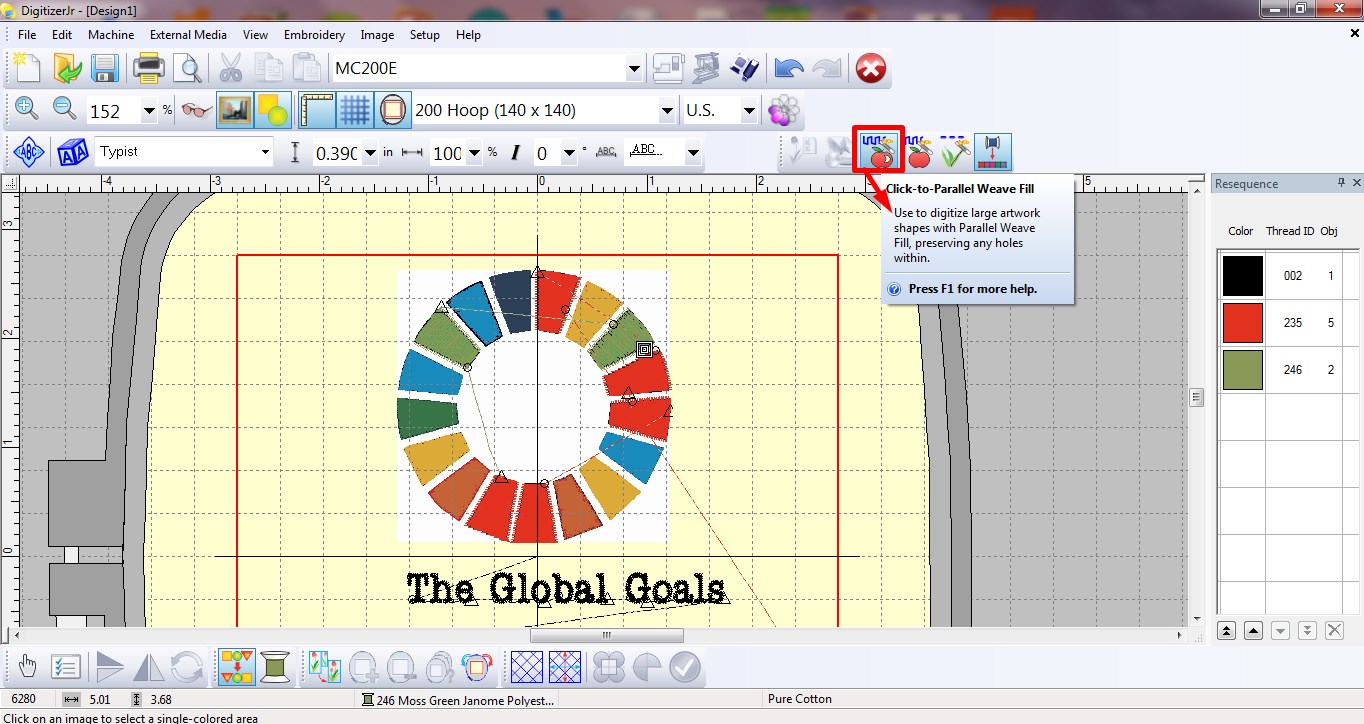
VI.Step 6- Parallel Weave Fill & Thread selection
Identified simillar looking shades and matched them to the same colour. On the right, selected design shape and it’s colour were displayed.

VII. Step 7-Saved File
The software saved file in “.JAN” format. Also, exported the file in “.JEF” format for the machine USHA MC-200E.
Operation
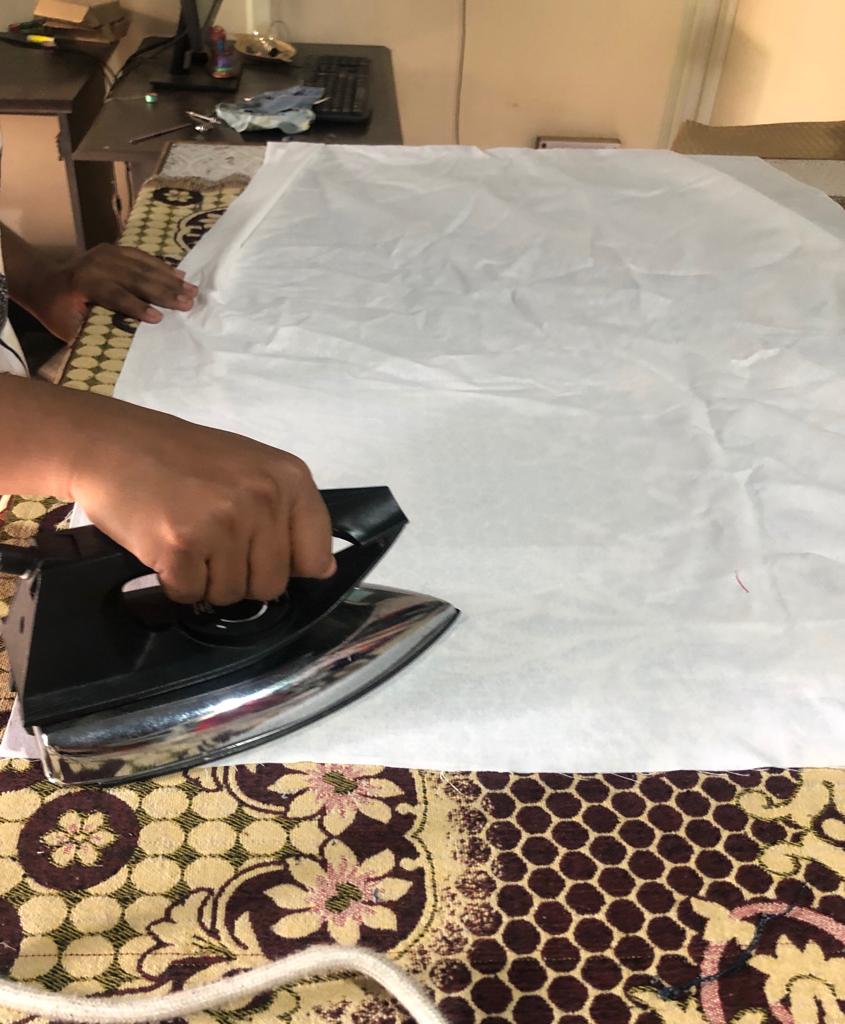
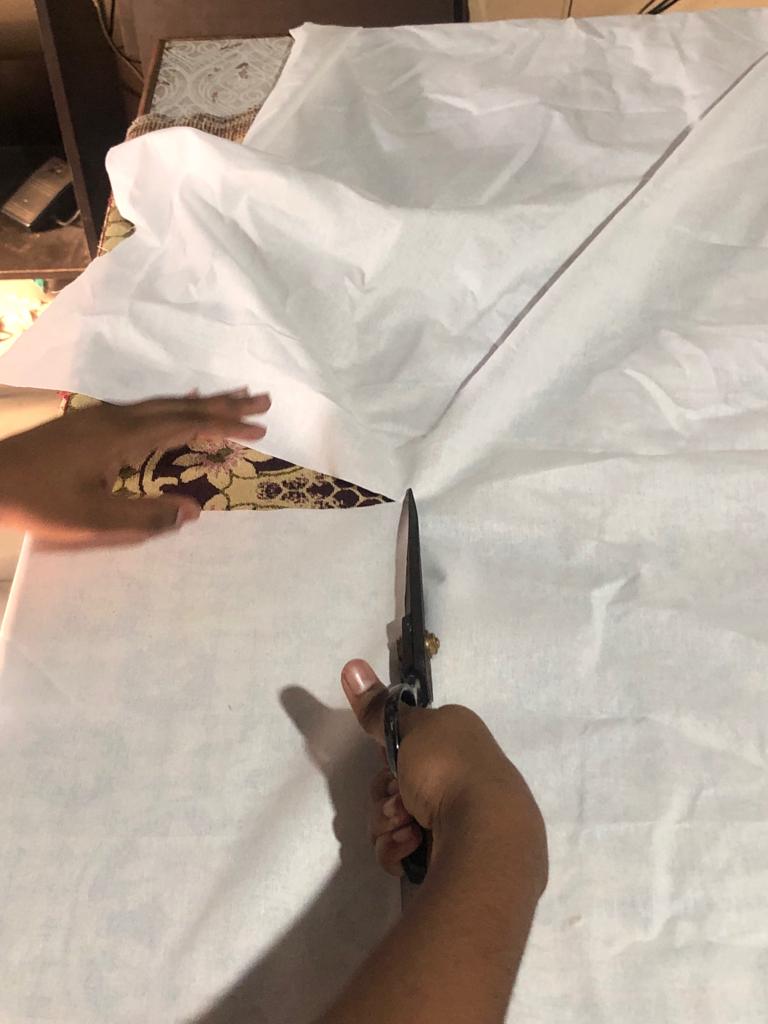
I. Step 1-Ironing & Cutting:
Took a white cloth and ironed it to remove all the wrinkles from the cloth. Cut the cloth into a rectangle.
II. Step 2-Hoop:
Placed the ironed fabric strecthed in the frame. The larger ring has a metal screw for tightening.It really helps in keeping the fabric streched especially when working over a large piece of fabric.

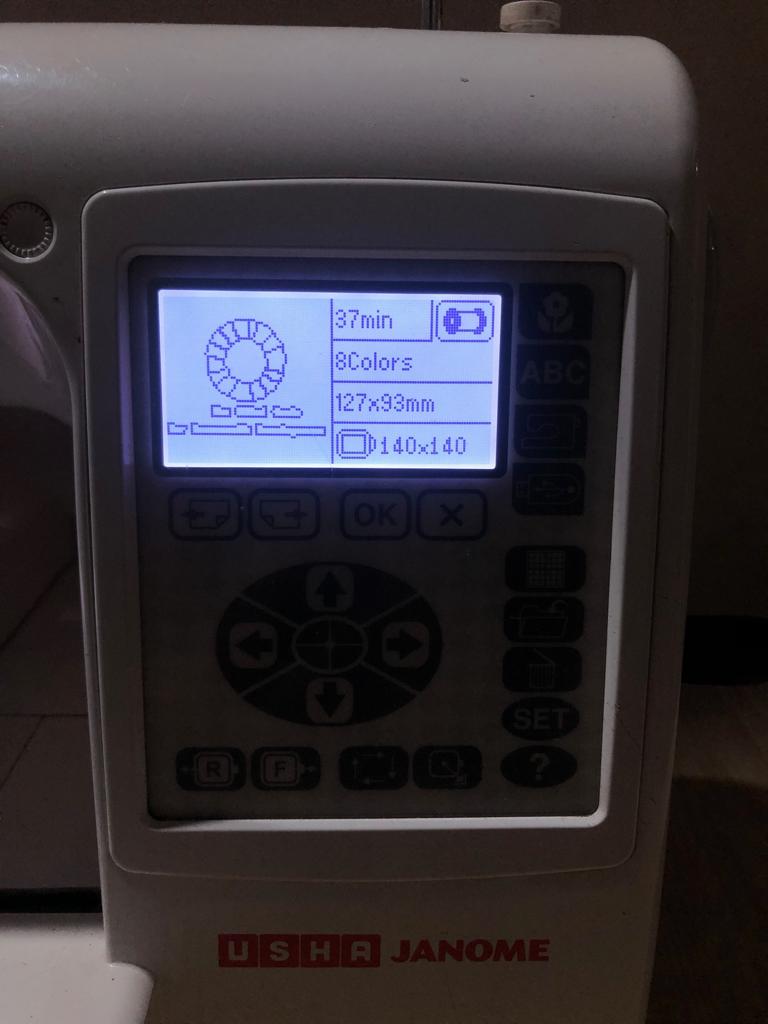
III. Step 3-Design File Selection :
Selected the design file in”.JEF” format and after that the diplay shows time, number of colours, hoop and design size.
IV. Step 4-Thread Rapping in Bobbin:
The video shows Green thread being rapped into bobbin. The bobbin is placed below the hoop to supply thread from backside.
V. Step 5-Machine Working:
Changed thread reel 8 times for every colour. The needle (Z axis) is at the fixed position and the frame moves in X and Y position. Thread from the needle and bobbin(placed below the hoop) completes the embroidery.
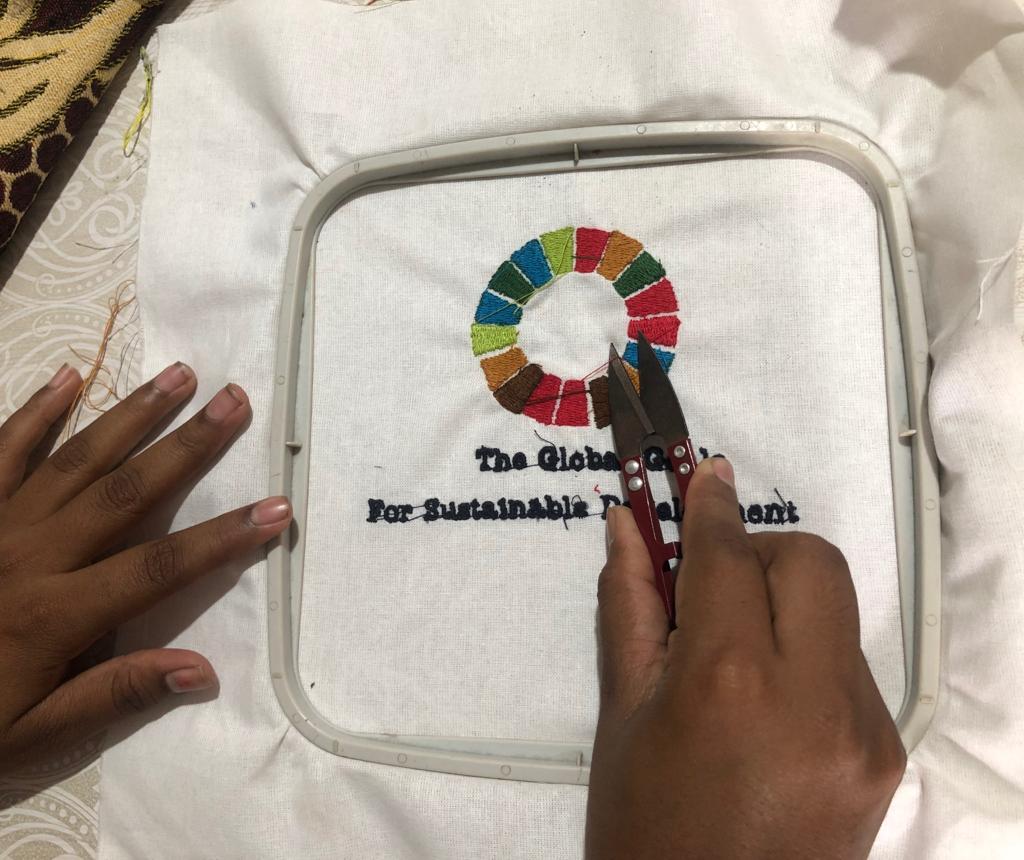
VI. Step 6-Removing Thread:
Extra threads which were out of design were easily plucked out. And the beautiful embroidery was ready.

Trobuleshooting
- The machine stopped inbetween and showed the error to Rethread and Start Again. This meant the thread wasn’t reaching the needle properly.
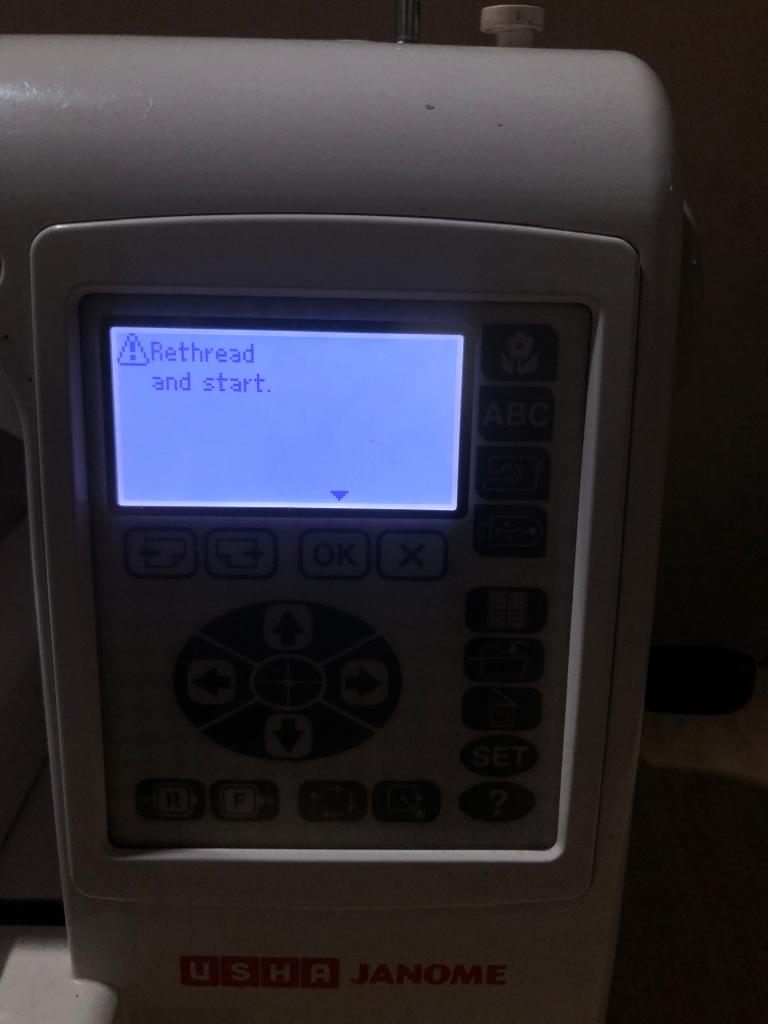
- Opened the front end of the machine and removed the unwanted thread stuck. Again fixed thread with 5 steps(curves at specific points) mentioned on the machine. And it solved the trobule.