9. Embedded programming
This week I am going to show you the multiples mistakes you can have while this assignment. And these are only my mistakes, you probably will have other different.
Group assignment
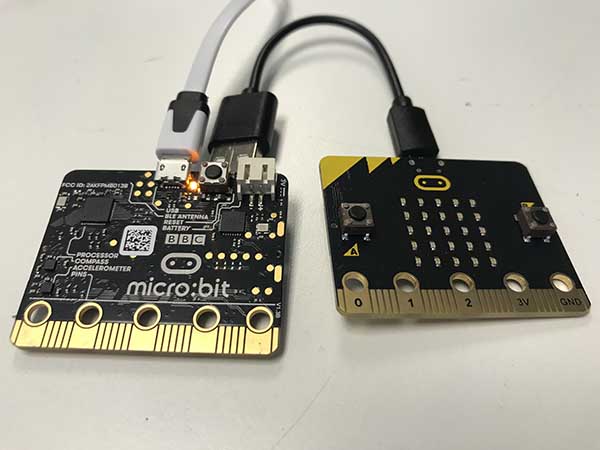
As a remote student I am alone in the FabLab, so I have to do this part individually. * In this case all the remote students have being together testing the following board.
We have checked what components it has and where:
- micro usb
- Batery connection
- 5x5 LEd Matrix
- 2 Button
- GND connector
- External Supply
- Digital/Analogic holes
- NXP KL26Z
- Motion Sensor ST LSM303AGR
- 2.4GHZ Antenna
- Nordic nRF5 1822 processor
Here you can see the board
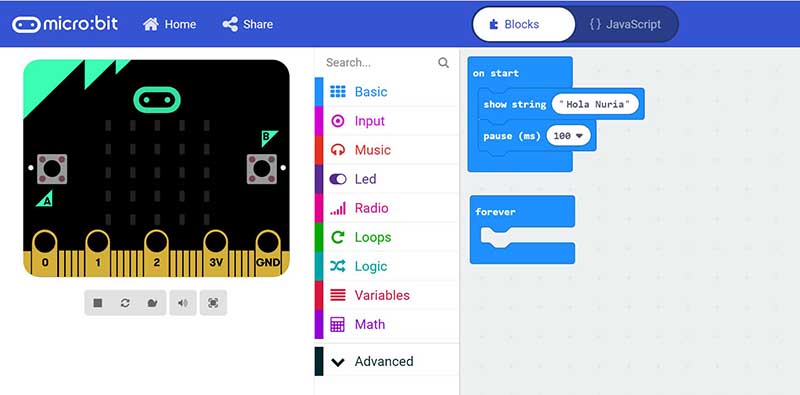
Now its the turn to program it in the online software:
First we try something simple as a text writing with the leds “hello Nuria”
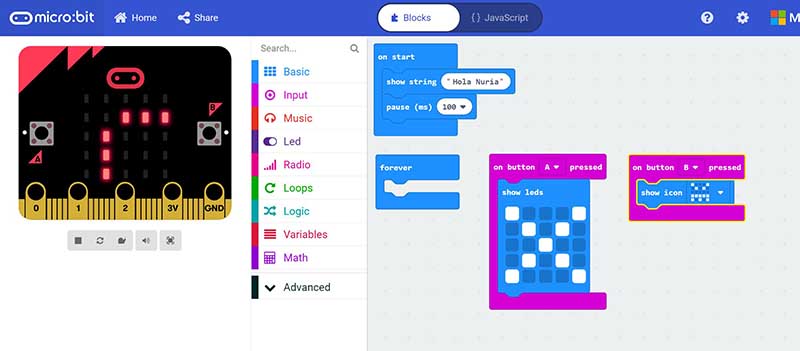
Then, we include the buttons to create pictures and different figures
Finally we wanted to test the accelerometer with the “shake” movement. In this case we put 8g force as an input
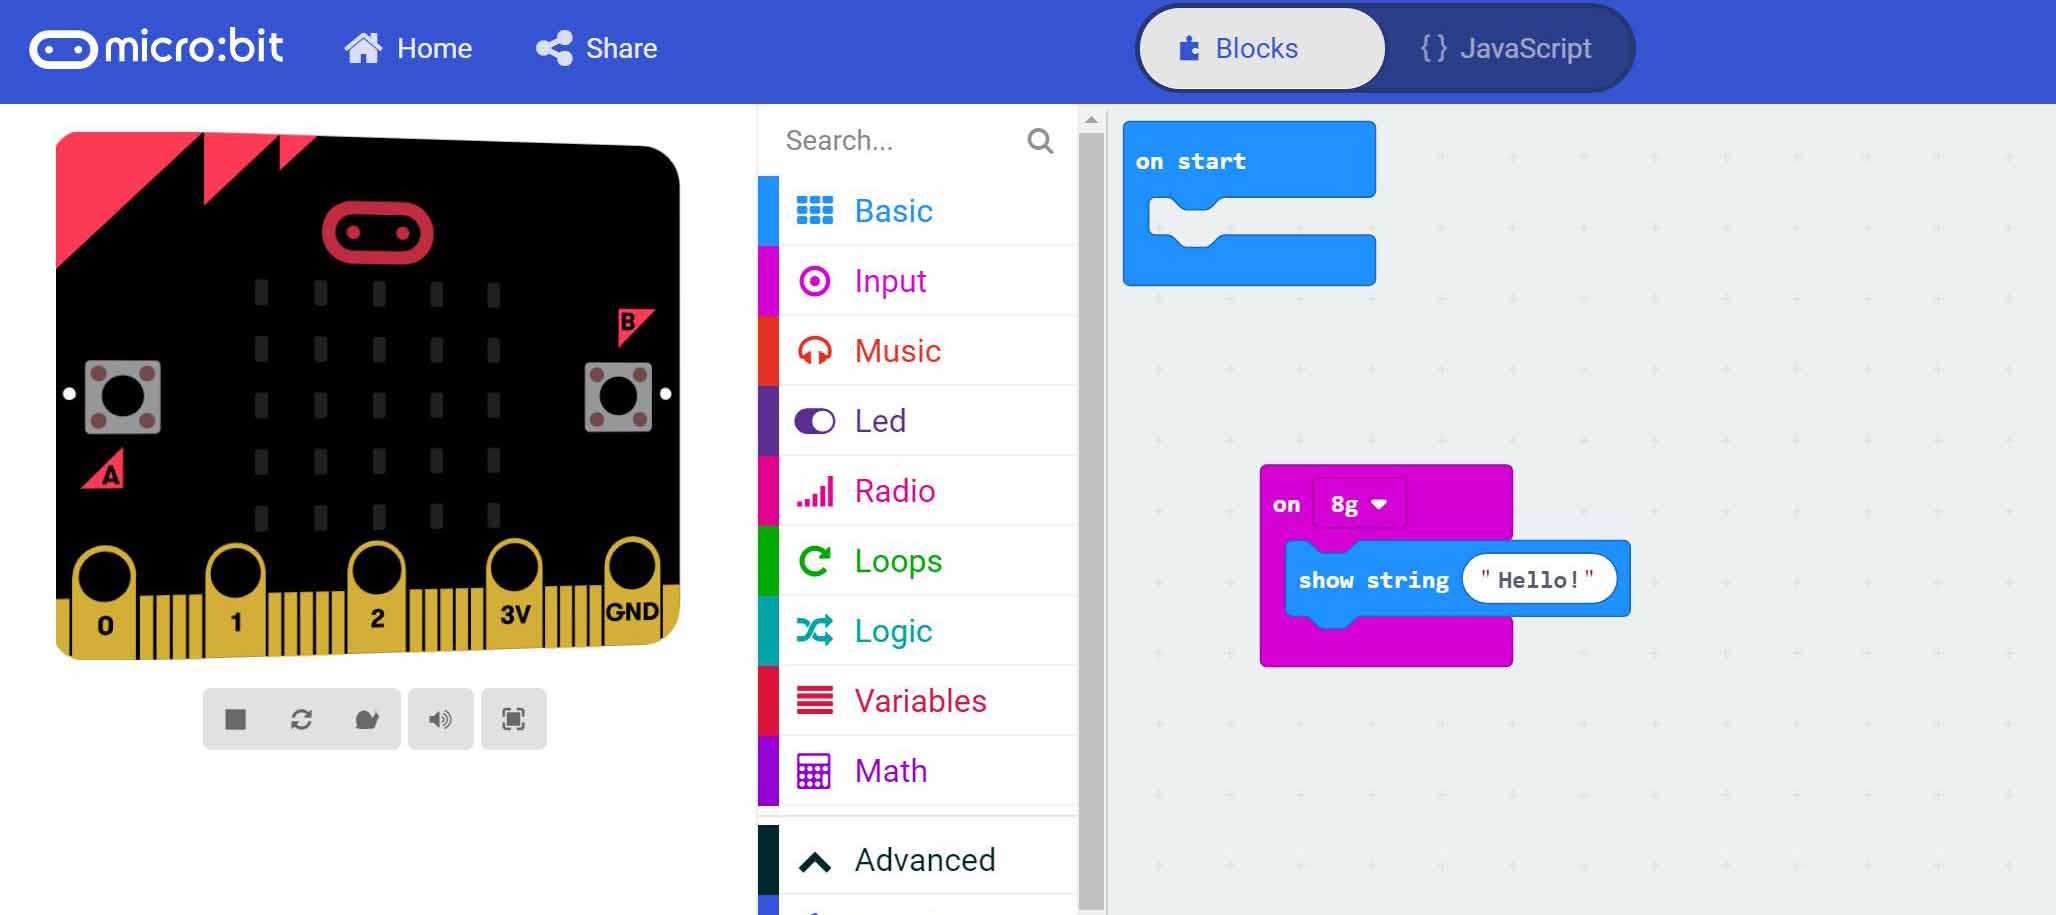
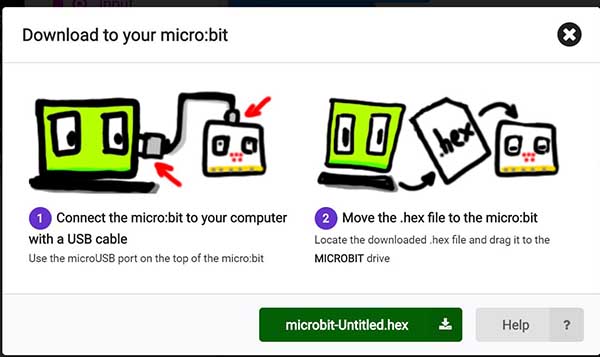
Now you have to download the .HEX file and copy inside the board
ATtiny44, a new world
For this assignment I have read the DataSheet of this micro-controller to know more or less what I am doing when I am connecting paths in Eagle software, or what to check to know if everything is correctly soldered.
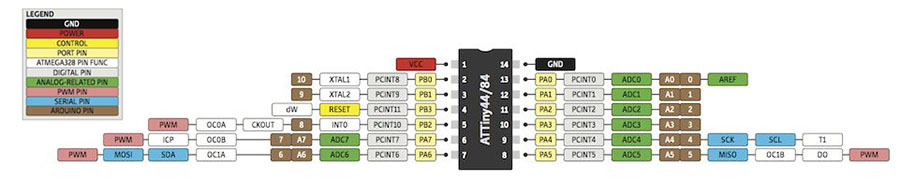
The most important points to know is where is the VCC and GND. Those are the Supply voltage and Ground
Then control where pines are Miso: Master Data input -the data comes into the micro-controller- and Mosi: Master Data output -the data comes out to the micro-controller
And finally, Reset - to reset input
and SCL/SCK - is a push-pull output driven by the master while SCL is an open drain signal pulled low by the master
Because all those pines are going to connect with your USBTiny. Of course you will need to know the analogs and the digital pines to connect different type of sensors and components.
Another useful thing to know is that works between 1.8 - 5.5 V and it has 16 MHZ to check in Arduino when burn Boot-loader.
Here you can download more information: - Arduino
HelloBoard
You say “hello” when you meet with someone and that makes you feel happy. I won’t say hello to my board by this moment at least.
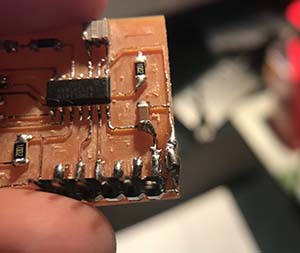
Now is the turn of programing it and you will need to check that VCC and GND connections are correctly connected.
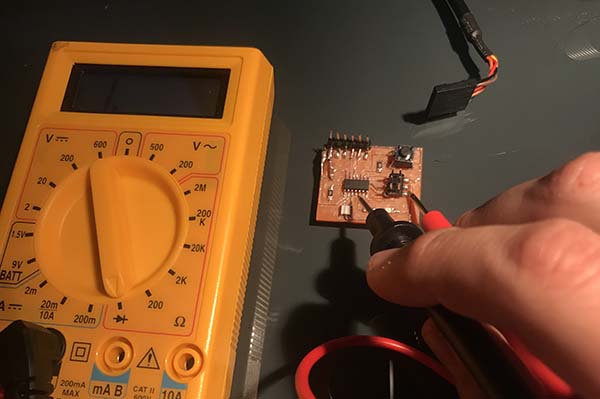
In my case I has No continuity and I need to check why? After checking in my lens i have found something like a scratch!

So I tried to fixed it with a drop of stain like soldering. I know the result is horrible and few elegant but it works !! and for me now it is like a personal achievement.
Connections
This mistake is just the first one, so don´t be hurry! Now it is the turn of the FTDI wire, FabISp and HelloBoard connections If you do it properly you will have something like this.
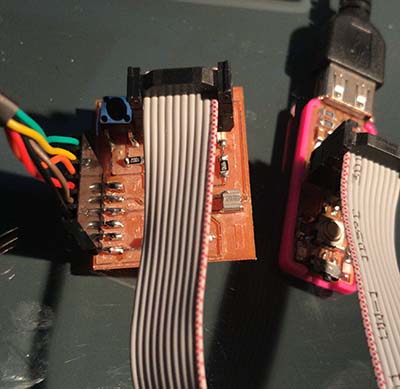
You should connect FabIsp to the computer, HelloBoard to an external usb charger and both of them with the FTDI wire each other.
Arduino! Starting the real fun
Before all connexions you should prepare and install Arduino v 1.6.5 is not the latest but it is safe in Mac OS 10.13
Open it and go > Preferences. There copy this link into Urls Additional Boards Manager:
http://drazzy.com/package_drazzy.com_index.json

Go Program > Include Library and instal the one you have just added.

After go > Tools and fill like this:
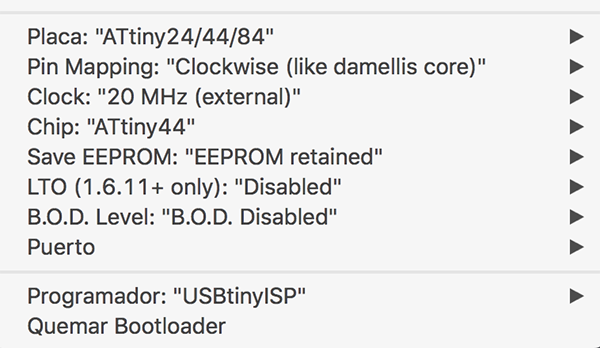
Welcome Burn Boot-loader, or not
Now you are ready to Burn Boot-loader, but destiny is capricious and it has another fate for you. Go > Tools > Burn Boot-loader and wait.
Wait few minutes. And you will have lost precious minutes of your life waiting how Arduino Answer you with an ERROR!!
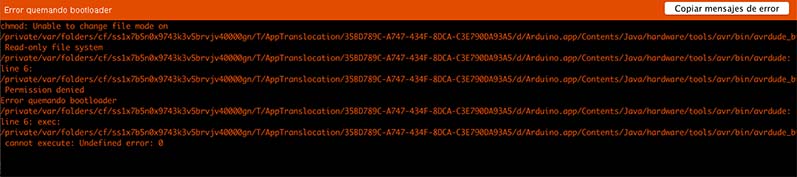
After 1 hour searching on Internet, asking my tutors and testing different things I could solve doing this.
/Applications/Arduino.app/Contents/Java/hardware/tools/avr/bin/avrdude_bin
Change mode Read-Only to Read-Write and you will solve the problem.
Now Repeat Boot-loader and ENJOY!
Testing HelloBoard
Here you can find the different test I have done with my board.
Testing HelloBoard from Jesus lopez on Vimeo.
Programing using C
Now we tried another way to program our board.
Open Terminal and you will need to download these files:
Create a new folder with those files and through TERMINAL go to this folder.
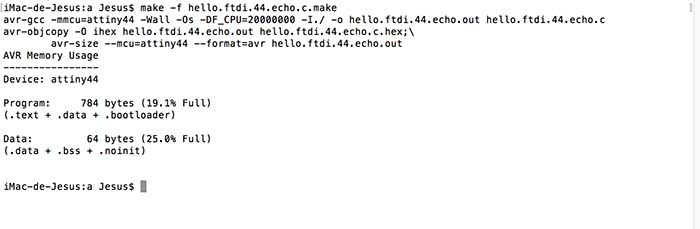
Then we start:
make -f hello.ftdi.44.echo.c.make
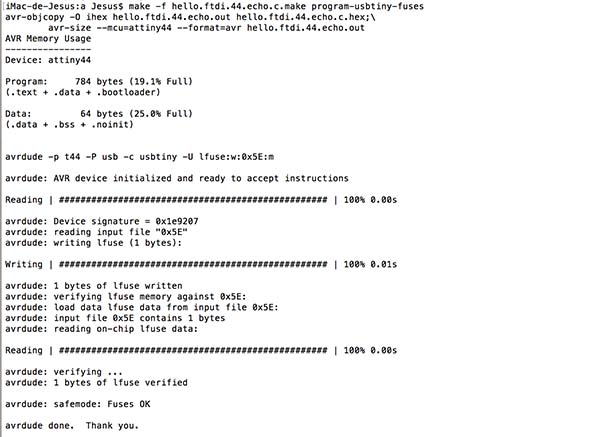
make -f hello.ftdi.44.echo.c.make program-usbtiny-fuses
sudo make -f hello.ftdi.44.echo.c.make program-usbtiny
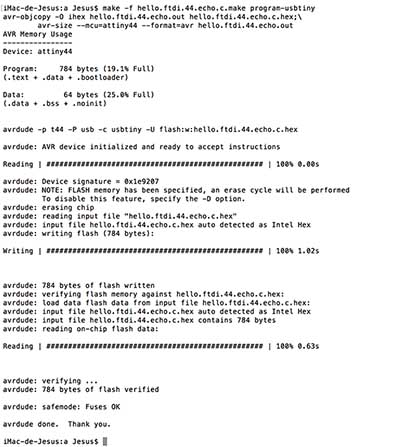
It works the same and i don´t have any fatal error in the pcb

Este obra está bajo una licencia de Creative Commons Reconocimiento-NoComercial-CompartirIgual 4.0 Internacional.