2. Project management
This week I will try to explain how to make a website from GitLab.
How to survive a GitLab Website on macOS
This is my first time trying to generate a website. I have seen something over internet programs where you can easily create a website without any knowledge programming webs. So I am going to explain you how to do this assignments with success and do not to drop out in the attempt.
SSH Key
Magically, the first thing you will need after loging in GitLab site, It is to generate a SSH Key to work in a secure way between your page and your computer.
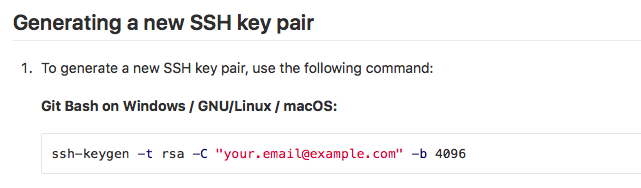
The guide to do all of these steps from GitLab I have to admit that is very useful and someone like me without any experience could do it. This is the link I used.
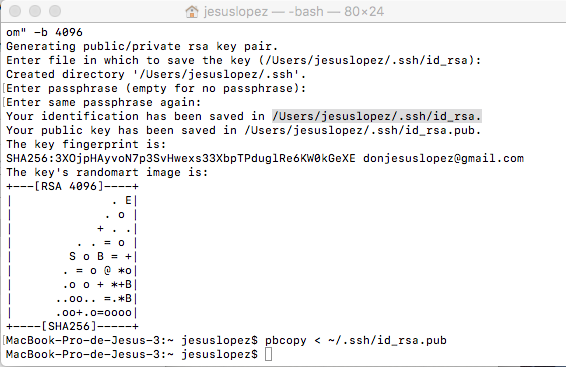
After follow the steps you will have some terrifying script lines in your command terminal as you can see in the picture above.
Once you have generate the SSH Key, I manually search between my files in the following route:
- [ /Users/jesuslopez/.ssh/id_rsa. ]
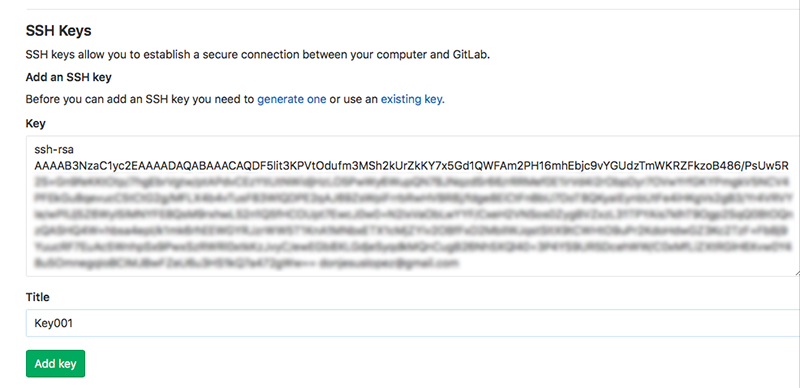
Finally, you must open this .pub file with a text editor program, and copy it in the correct place in the GitLab page.
Lets start!
Once I found some problems in this tricky world of programming. I will show you the steps to achieve the glory!
But first of all open your terminal and instal Git (it allows to communicate by Terminal with gitlab in this case)
Thanks to our tutors to provide little guides for us. Those are the command lines you need to clone the repository from GitLab to your computer.
1. Open a Terminal
2. Navigate to the folder where you want to store the folder with the Archive. For example: cd ~/Desktop/
3. Clone the archive. git@gitlab.fabcloud.org:academany/fabacademy/2019/labs/leon/students/jesus-lopez.git
4. Now you should have a folder "jesus-lopez" which contains all the websites of your Fabacademy website.
Now I recommend you to download a text editor. In my case I try with “Atom”
You will find the program here:
This is my first experience creating webpages, so for this time I want to control and use first FabAcademy template a see how comfortable i feel.
As Neil emphasized last day, you will need to use images as light as you can. For that reason I will use an online pictures editor to reduce size.
You will find the program here:
If you want to upload some pictures or files to your web page, after reduce size, you can search how markdown Syntax works, and you have to create a new folder into your webpage directory and save it there. Just link it like this:
You can see also some markdown tips here:
After a lot of mistakes, and copy from the master page commands and signs trying to reply some aspects you will see something like this:
Problems are coming…
When you arrive to this point, you will have a beautiful web, but anyone could know it… Because you will almost learn how to communicate with the fantastic Terminal!!
There is some key words I used after instal Git that I show you below:
cd - to search in your laptop
ls - to see the list item of that file
But when you want to upload or download the version in the cloud, you will need some more like:
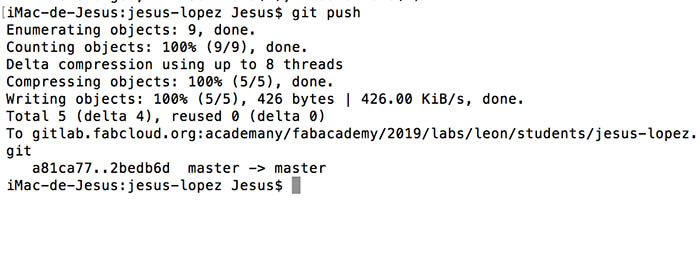
git pull - to download your last version
git add . - to include archives. I forget this step my first time*
git commit -m - to commit with a message what you do
git push - to upload your changes
But the truth is that you haven´t finished yet, I have just learned that you will need at least one more to complete the process if not, you will received this message:
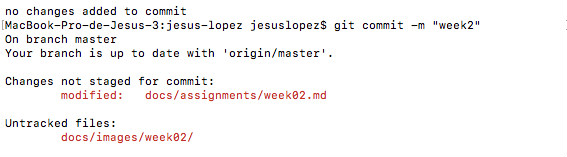
This happened* because, I needed to write the following command:
git add . - to add all the files you generate in your computer
Repeat the process and you will have it complete!
I hope you will enjoy this tutorial and you will achieve to generate you own website.

Este obra está bajo una licencia de Creative Commons Reconocimiento-NoComercial-CompartirIgual 4.0 Internacional.