16. Interface and application programming
For this week’s assignment, I decided to use Processing.
Processing
Processing is a…
-
“software sketchbook”
-
“language for learning how to code within the context of the visual arts”
You can download it from this link!
Displaying Sensor Values using Processing
Arduino
I wanted to display the readings from my input week board on the processing software. To do this, I followed this tutorial.
Here is the code that I uploaded to the Arduino board. I created the code by referencing Mr. Deepankar Maithani’s code.
//This code written by Deepankar Maithani
const int  force=A0;// Connect the middle pin of pot to this pin
int reading;// variable for storing the pot values
void setup()
{
//initialize serial communications at a 9600 baud rate
Serial.begin(9600);
}
void loop()
{
reading=analogRead(force);// reading the analog value
Serial.println(reading);// printing it on serial this line sends the data to processing
delay(1000);// stop for 1s
}
import processing.serial.*; // imports Serial

Serial myPort;  // Create object from Serial class
String data="" ; // empty string to gather the values
PFont  myFont;  // object from the font class
void setup()// this runs just once
{
size(500,500); // size of processing window
background(0);// setting background color to black
myPort = new Serial(this, "COM23", 9600);// giving parameters to object of serial class,put the com to which your arduino is connected and the baud rate
myPort.bufferUntil('\n');// gathers data till new line character
myFont=loadFont("Arial-Black-48.vlw");// font type see the data folder of your sketch
textFont(myFont,70);// font size


}
void draw()
{
  background(0);//refreshing background everytime the draw runs
  textAlign(CENTER);// alighn text to the centre of coordinates
  fill(255);// fill white color to text
  text(data,350,155);// display the data at 350,155 coordinate
  textSize(40);// size of text
  fill(#4B5DCE);// fillinf blue color on the text
  text("  Force Reading",155,150);
   noFill();//the upcoming rect will not have anything inside
   stroke(#4B5DCE);// color of boader of rectangle
   rect(5,100,400,80); //rectangle


}


void serialEvent(Serial myPort)// whenever serial event happens it runs
{

  data=myPort.readStringUntil('\n');//gathering data from sensor in a variable
}
It worked!
Here is a video showing the sensor readings in Processing with and Arduino.
After, I read through this tutorial which is for a temperature sensor.
This is the code that I adapted for my senario. I changed the COM port and variable. For my variable, I used the readings from the force sensor.
//import Serial communication library
import processing.serial.*;
//init variables
Serial commPort;
float force;
int yDist;
float[] forceHistory = new float[100];

void setup()
{
//setup fonts for use throughout the application
//set the size of the window
 size(240,200);
//init serial communication port
 commPort = new Serial(this, "COM23", 9600);
//fill tempHistory with default temps
 for(int index = 0; index<100; index++)
 forceHistory[index] = 0;
}

void draw()
{
 //get the temp from the serial port
 while (commPort.available() > 0)
 {
 force = commPort.read();
//refresh the background to clear old data
 background(123);

 //draw the temp rectangle
 colorMode(RGB, 160);  //use color mode sized for fading
 stroke (0);
 rect (49,19,22,162);
 //fade red and blue within the rectangle
 for (int colorIndex = 0; colorIndex <= 160; colorIndex++)
 {
 stroke(160 - colorIndex, 0, colorIndex);
 line(50, colorIndex + 20, 70, colorIndex + 20);
 }
//draw graph
 stroke(0);
 fill(255,255,255);
 rect(90,80,100,100);
 for (int index = 0; index<100; index++)
 {
 if(index == 99)
 forceHistory[index] = force;
 else
 forceHistory[index] = forceHistory[index + 1];
 point(90 + index, 180 - forceHistory[index]);
 }
//write reference values
 fill(0,0,0);
textAlign(RIGHT);
//draw triangle pointer
 yDist = int(160 - (160 * (force * 0.01)));
 stroke(0);
 triangle(75, yDist + 20, 85, yDist + 15, 85, yDist + 25);
//write the force
 fill(0,0,0);
textAlign(LEFT);
 text(str(int(force)), 115, 37);
 }
}
This video shows the above program working!
Fixing the Graph
I decied to move forward with the latter program. To make the graph readings more pronounced, I changed the Arduino code. I decided to multiply the readings by 100 and cut down the delay.
Here is the updated code.
const int  force = A0;
int reading;

void setup()
{

Serial.begin(9600);
}

void loop()
{
reading = analogRead(force);
Serial.println(reading*100);
delay(100);
}
Satshakit
Once my code was set up, I swithced out the arduino for a Satshakit. I made this adapted Satshakit board in week 11 for input week.
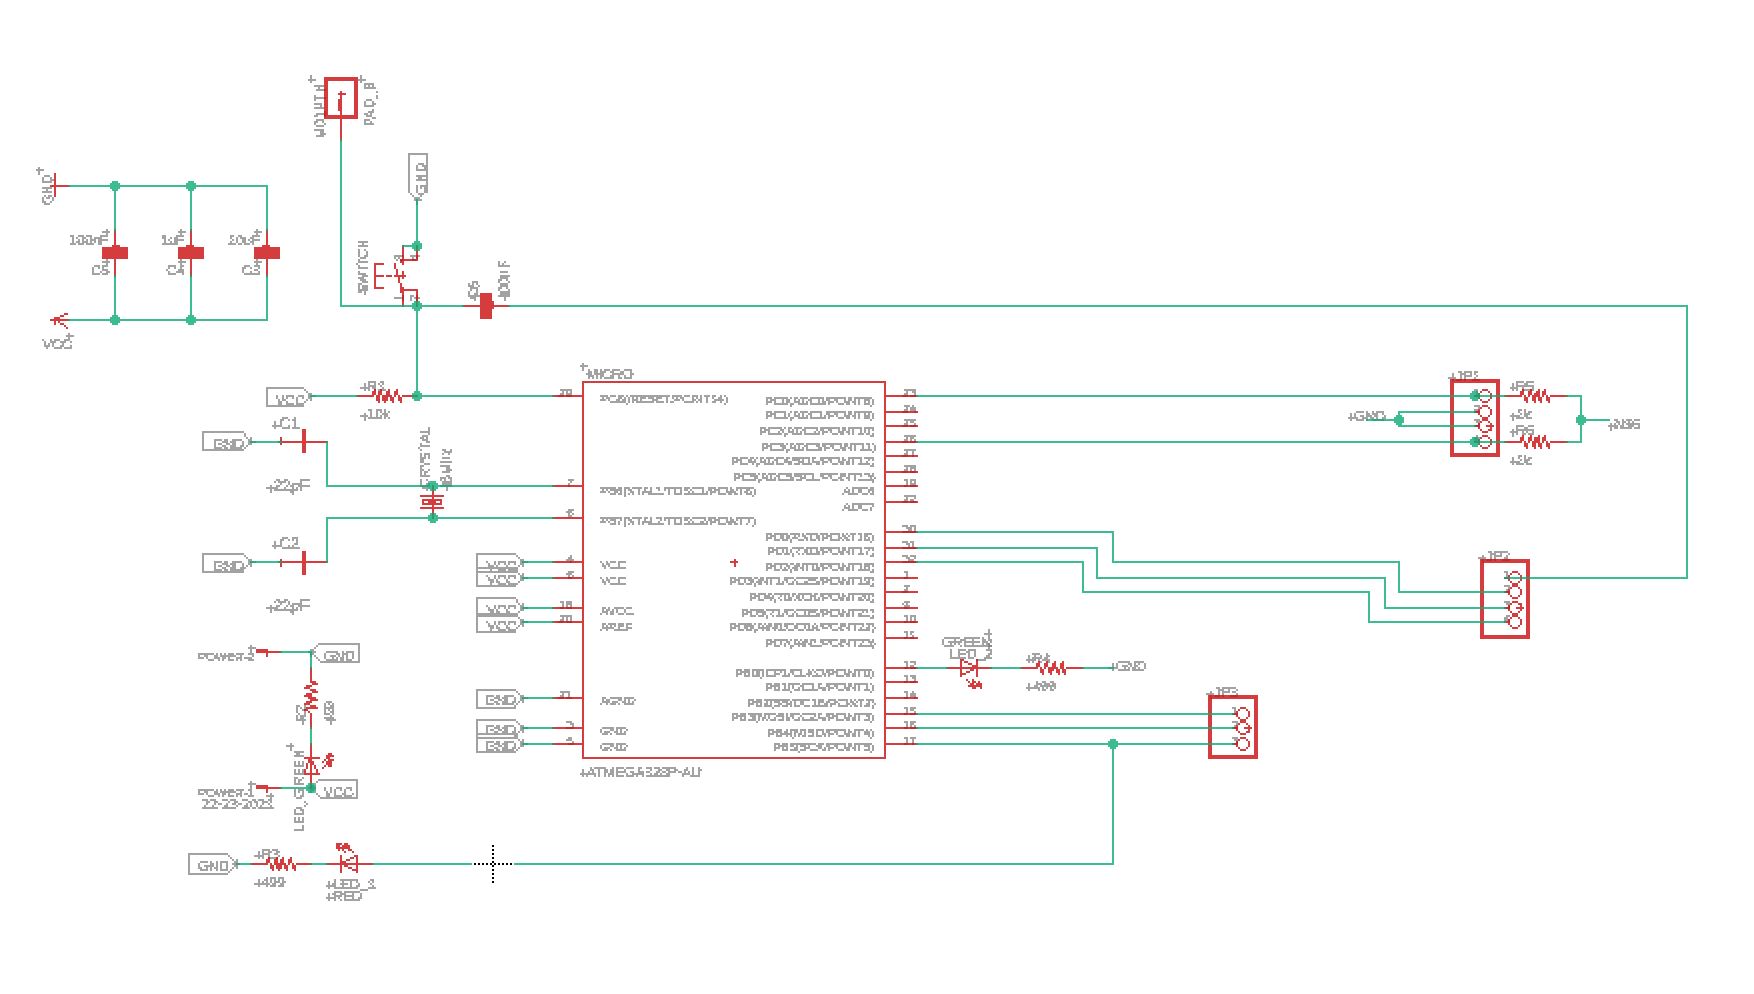
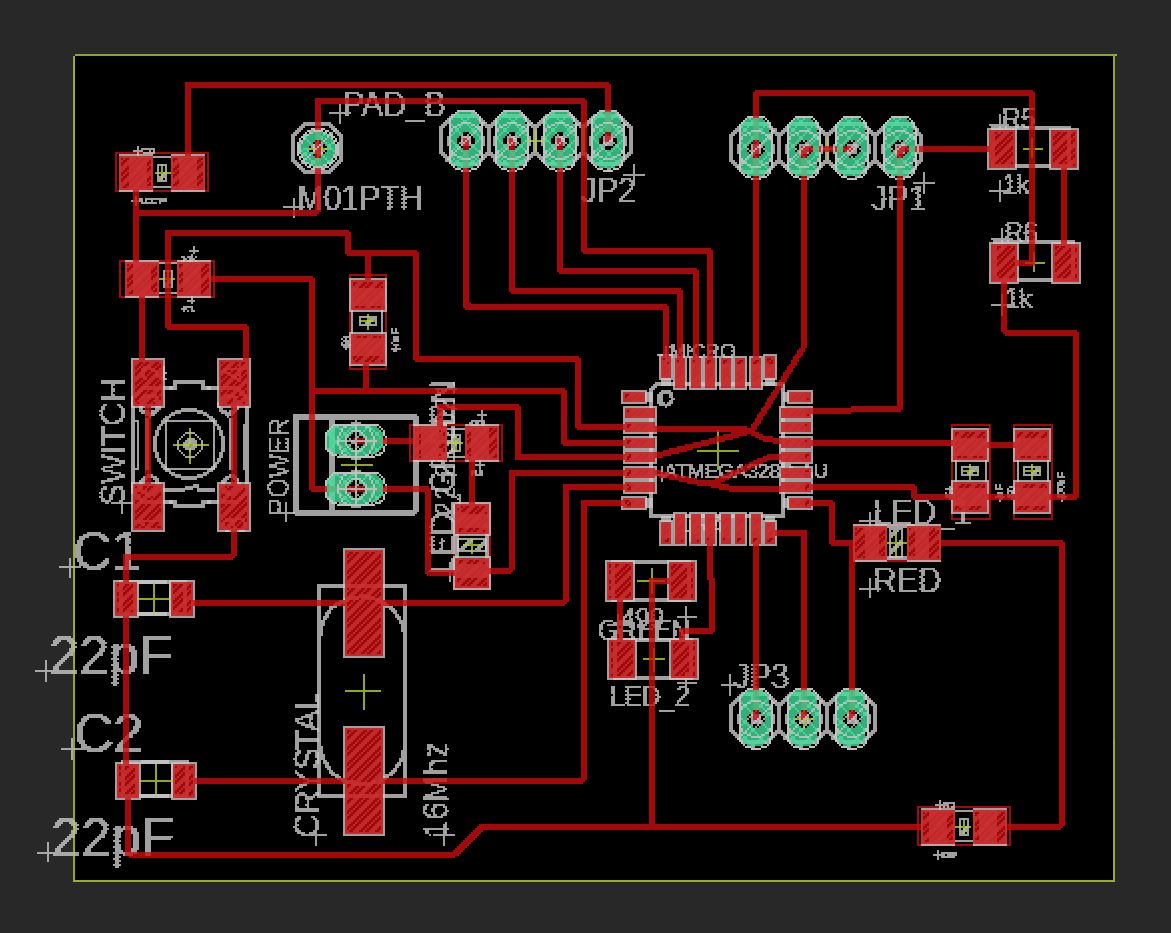
These are the schematics for my adapted satshakit.
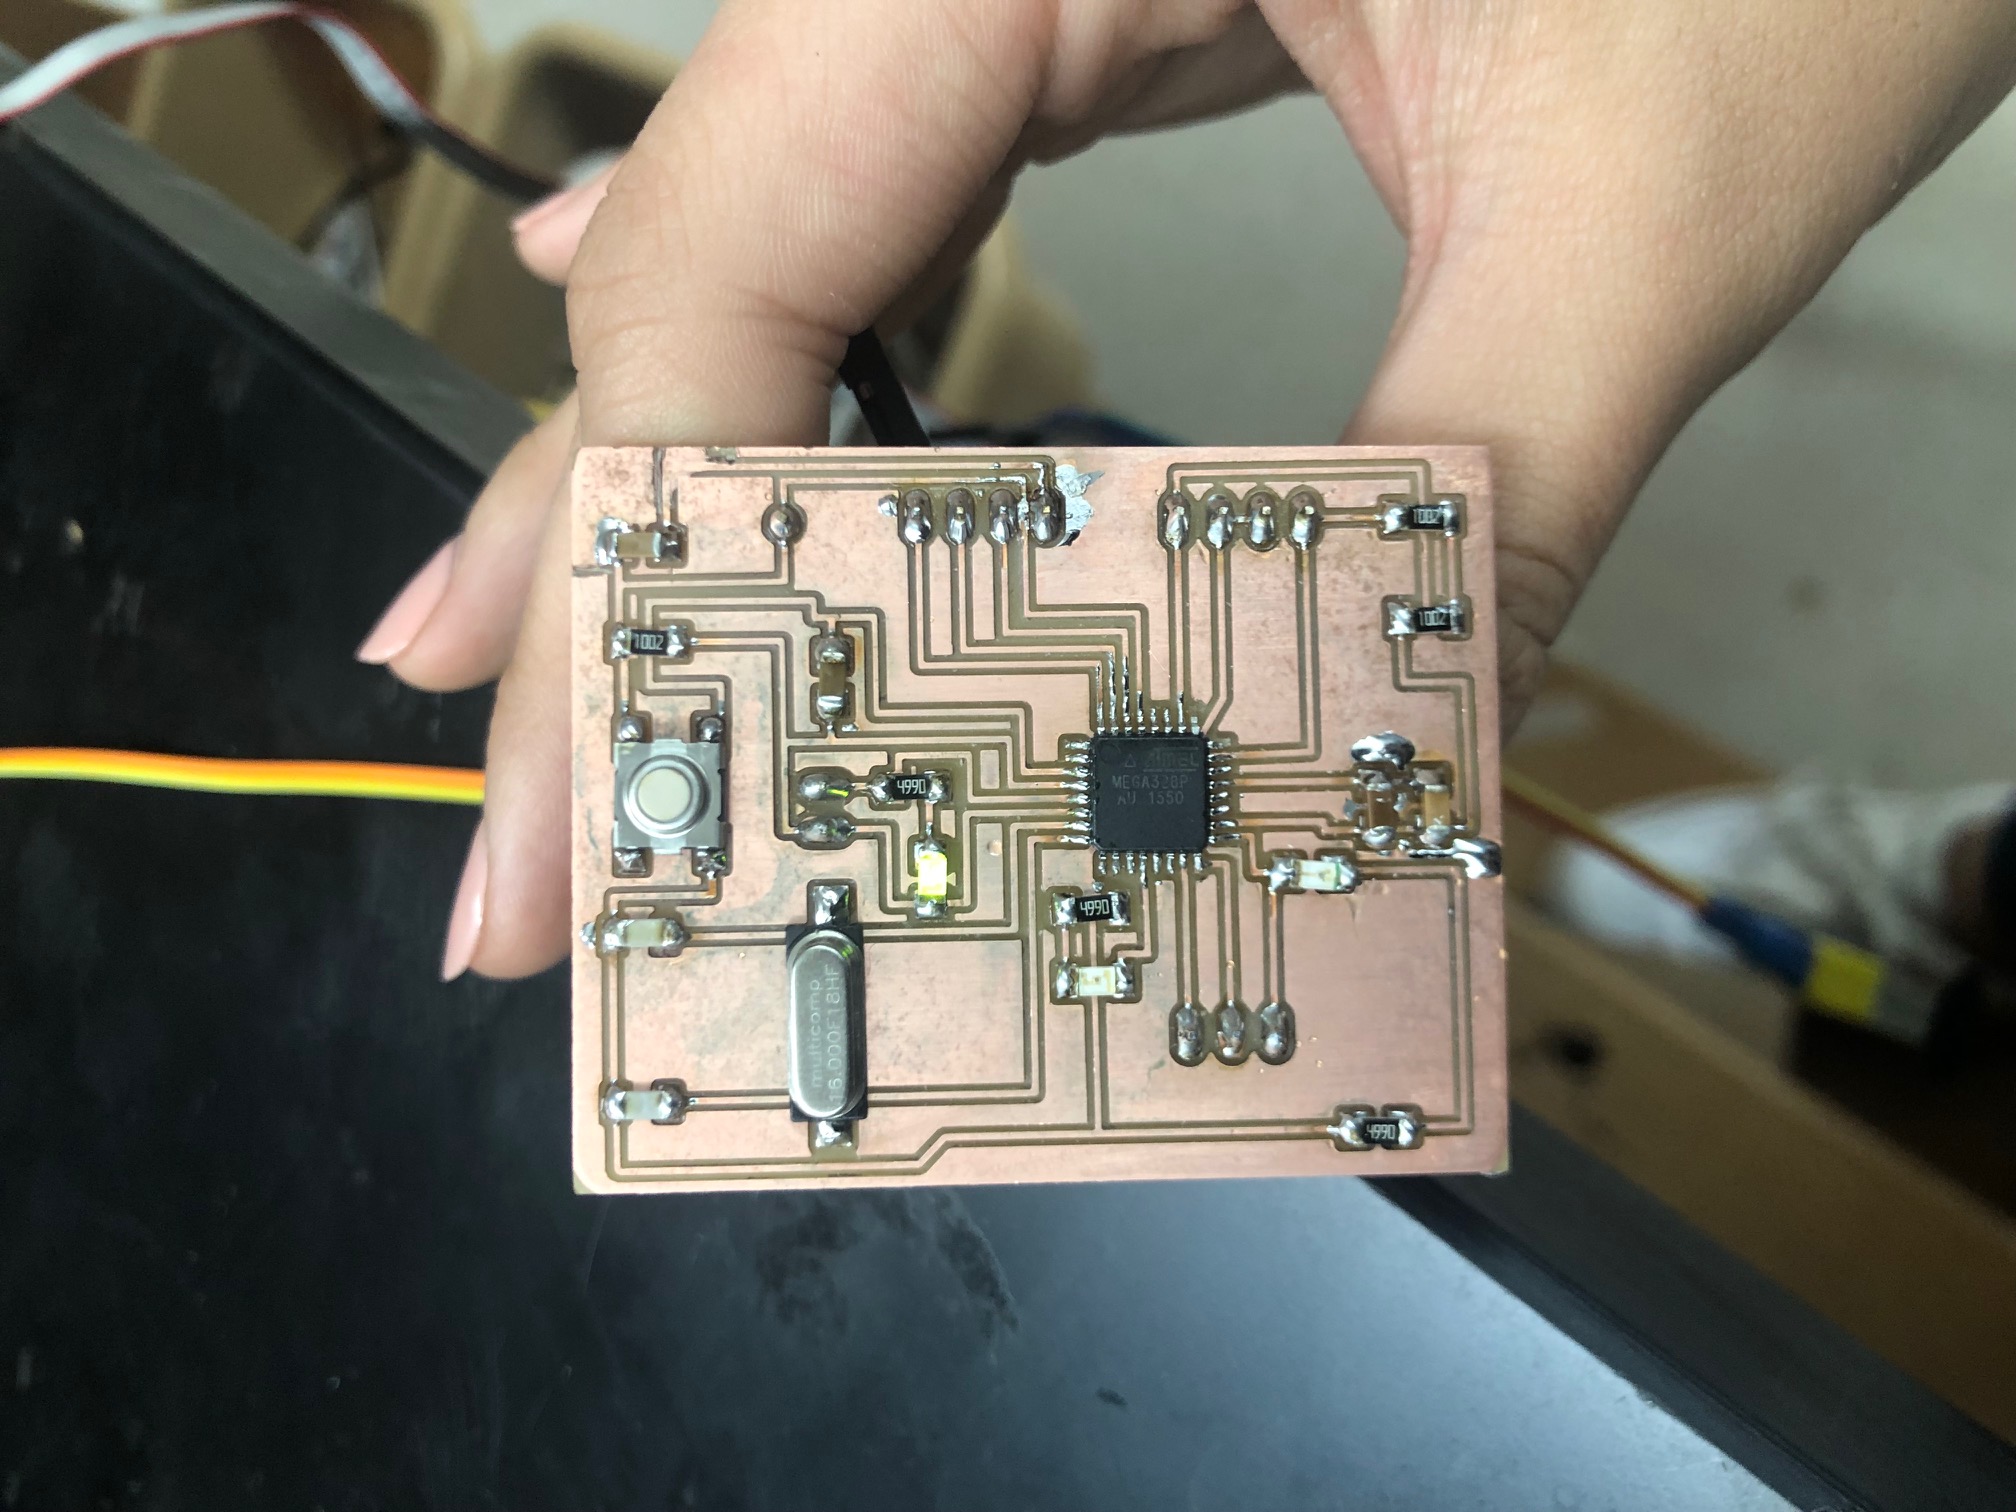
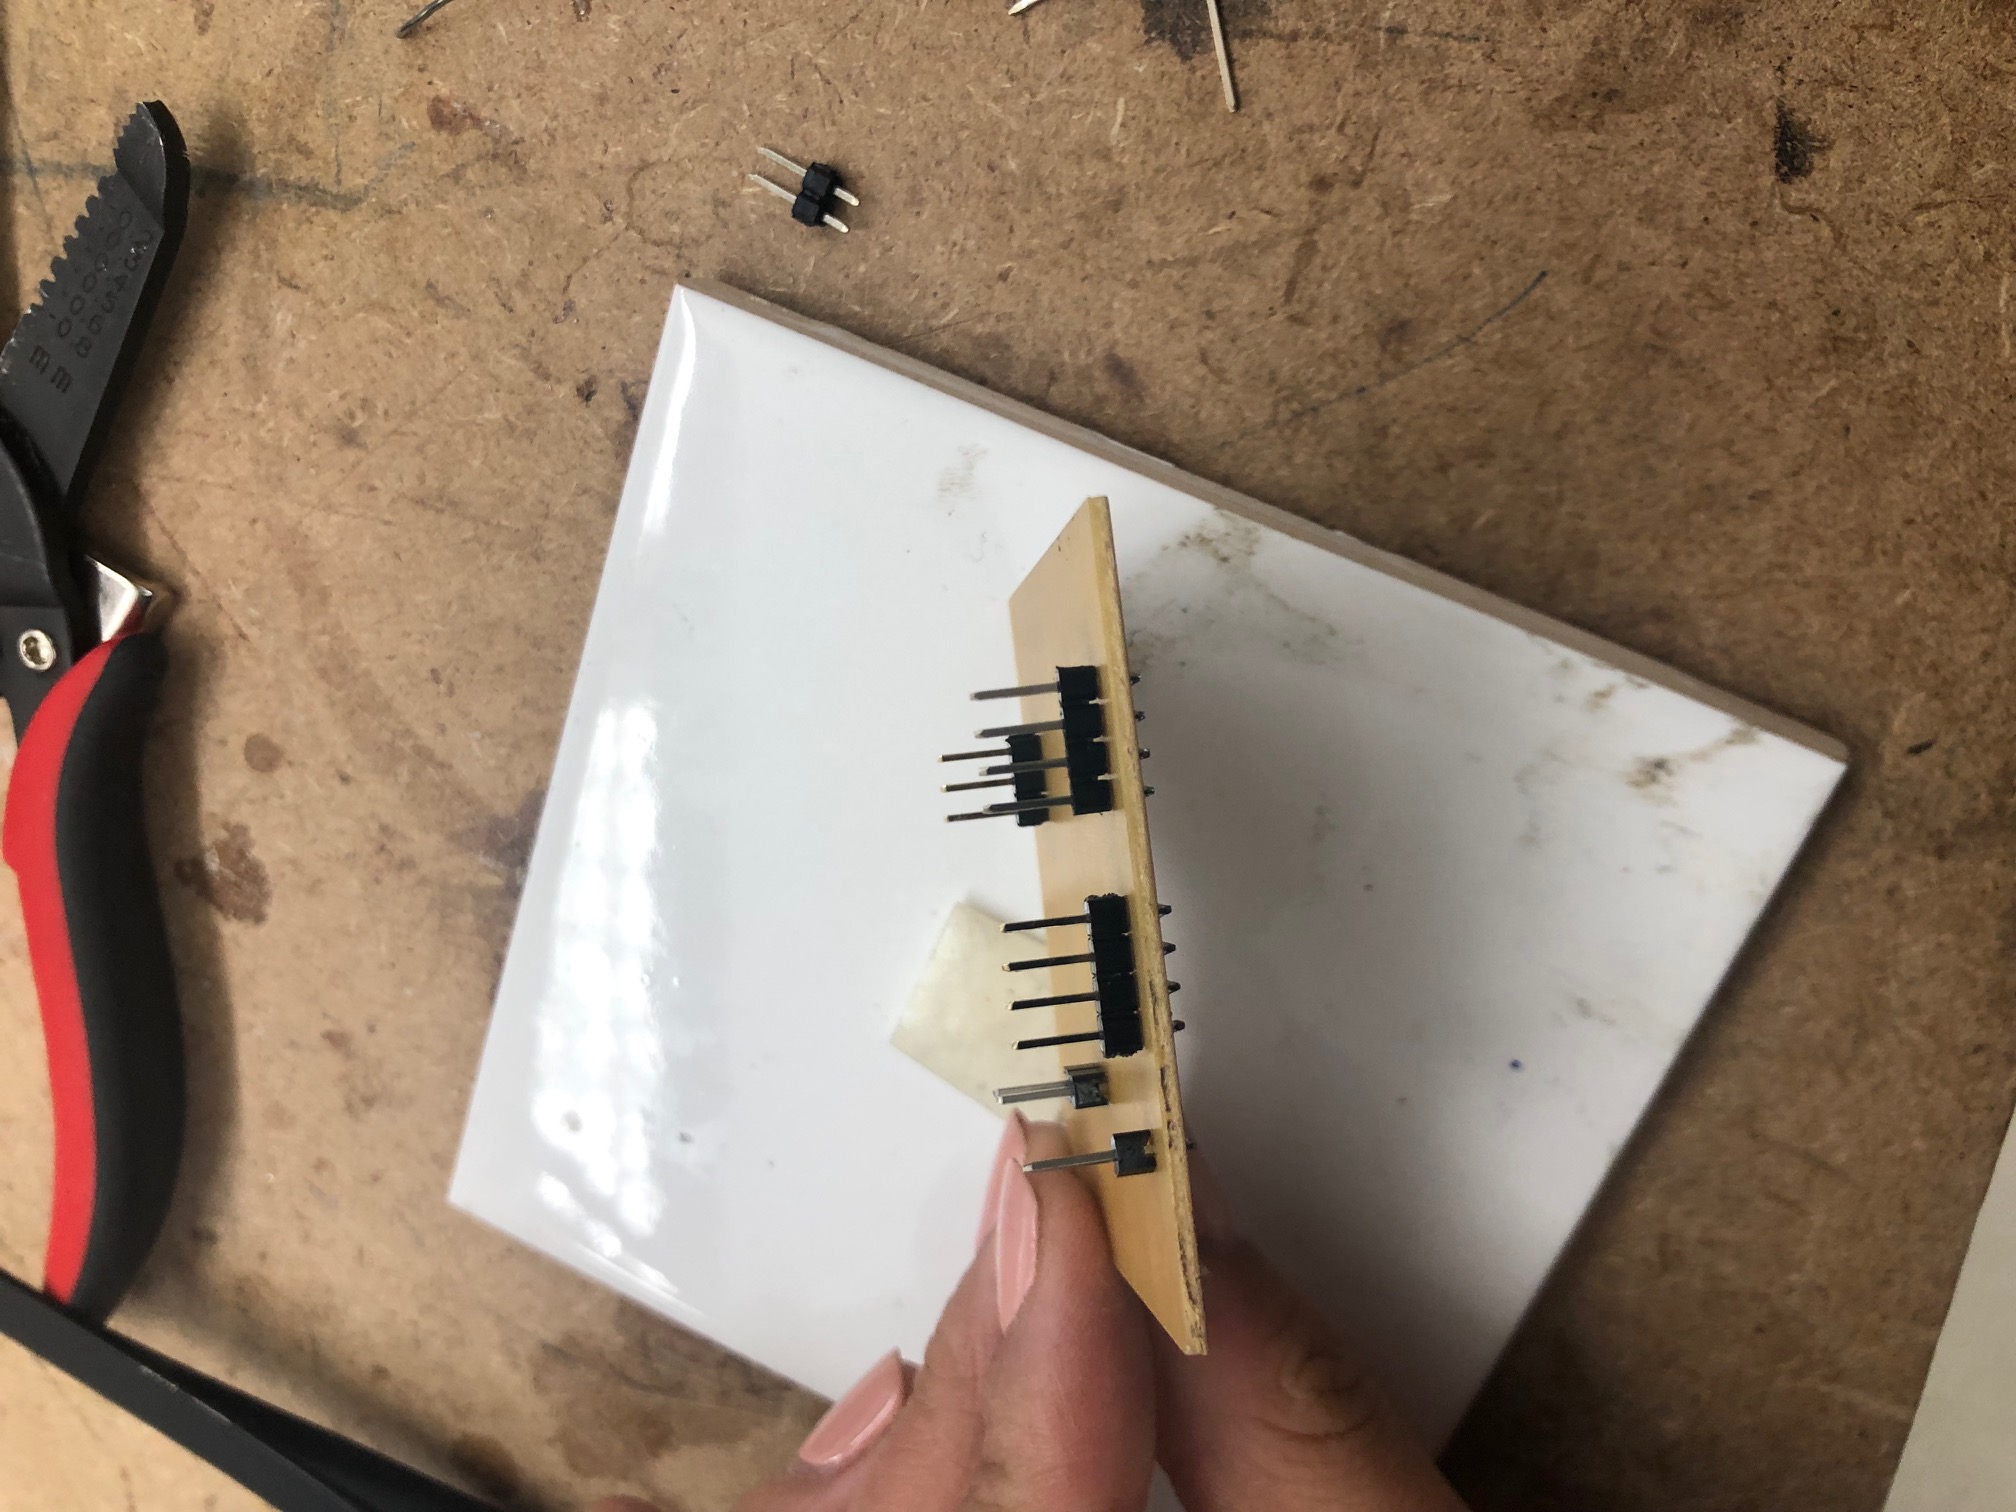
This is my stashakit.
I began by uploading the arduino code to the Satshakit. At first, the serial moniter was not working. I figured out that it was because I had not changed the clock speed to 9600. I also did not hook up the wires correctly ot RX and TX.
Once I fixed thoses problems, I ran it in processing. It did not work. I sat and thought for awhile and realized that I had not changed the com port to 26. I fixed the com port and it worked!
Here is a video of the processing visual and my satshakit. The graph is kinda fuzzy, but it works! IT is supposed to show the compressions of the force sensor on the graph (x axis = time, y axis = force). The bar with the slider on the left move everytime a compression is sensed.
Here is my final processing code.
// This is the code that I adapted from Deepankar Maithani!

//import Serial communication library
import processing.serial.*;
//init variables
Serial commPort;
float force;
int yDist;
float[] forceHistory = new float[100];

void setup()
{
//setup fonts for use throughout the application
//set the size of the window
 size(240,200);
//init serial communication port
 commPort = new Serial(this, "COM26", 9600);
//fill tempHistory with default temps
 for(int index = 0; index<100; index++)
 forceHistory[index] = 0;
}

void draw()
{
 //get the temp from the serial port
 while (commPort.available() > 0)
 {
 force = commPort.read();
//refresh the background to clear old data
 background(95);

 //draw the temp rectangle
 colorMode(RGB, 130);  //use color mode sized for fading
 stroke (0);
 rect (49,19,22,162);
 //fade red and blue within the rectangle
 for (int colorIndex = 0; colorIndex <= 160; colorIndex++)
 {
 stroke(160 - colorIndex, 0, colorIndex);
 line(50, colorIndex + 20, 70, colorIndex + 20);
 }
//draw graph
 stroke(0);
 fill(255,255,255);
 rect(90,80,100,100);
 for (int index = 0; index<100; index++)
 {
 if(index == 99)
 forceHistory[index] = force;
 else
 forceHistory[index] = forceHistory[index + 1];
 point(90 + index, 180 - forceHistory[index]);
 }
//write reference values
 fill(0,0,0);
 textAlign(RIGHT);
//draw triangle pointer
 yDist = int(160 - (160 * (force * 0.01)));
 stroke(0);
 triangle(75, yDist + 20, 85, yDist + 15, 85, yDist + 25);
 }
}
Group Assignment: Compare as many tool options as possible
For this week’s group project, we decided to divide up the different tools between the four of us. Once we all individually research our tools, we shared our research and took notes.
MIT App Inventor (Kai)
- http://appinventor.mit.edu/explore/
- Modular
- Scratch but for apps
Chili Peppr (Kai)
Chili Peppr is a “Javascript software workspaces that talk to your hardware”. We plan to use it in conjunction with the [GRBL workspace](http://chilipeppr.com/grbl0 for our gCode.
Processing (Kai)
Processing is a visual, user friendly interface tool that works in conjunction with Arduino. It works with Java or python (There are additional adaptations of the architecture linked below.)
Different Adaptations of the Program: - Processing Javascript - Processing Python - Processing Android - Processing PI
- Hit play to run the code, visually similar to serial monitor to python
- Might not have visuals - screen running indicates that program is running
- Define window size (in pixel size) - use variables to make it parametric
Processing Python (Maxine)
Processing Python is an interaction of Processing.
Firefly (Maxine)
Simulink (Will)
Simulink, built around simulation and model based design. It is an evolution and add on of Matlab
-Allows you to analyze and understand complex systems by giving you block based diagrams -start model simulation by simply pressing the play button -allows you to simulate and analyze a broad range of signals from digital to analogue to mixed -allows you to compare the progress of your algorithms to that of your targeted goal -has additional capabilities for model based design -you can generate code from a model to prototype and test things in real time
Wiring (Will)
-open source programming framework for microcontrollers -used to create all kinds of creative coding, interactive objects, spaces or physical experiences -includes support for many different hardware architectures -used for learning, prototyping, and finished professional work production
The site is well documented with many helpful resources that can be found here
-Wiring builds off of processing which Kai documented above.
Arduino Firmata (Katie)
Firmata is an Arduino library that utilizes the Firmata Protocol to software communication.
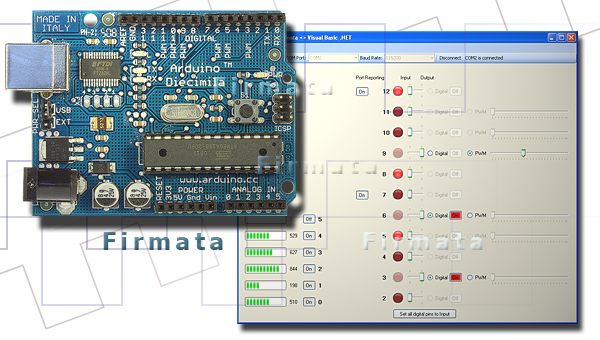
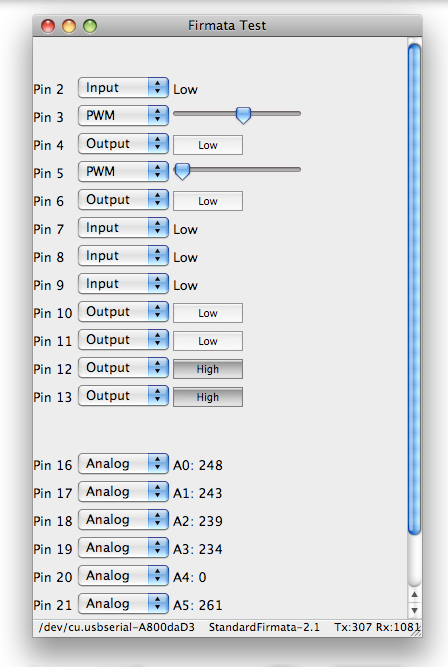
*These photos were found from this source
Here is some example code listed on the Firmata Arduino page.
This code starts the Firmata library.
begin(); //start the library
begin(long); //start the library and override the default baud rate
begin(Stream &s); // start the library using a [Stream](http://www.arduino.cc/en/Reference/Stream) other than Serial (eg Serial1 or EthernetClient)
printVersion(); //send the protocol version to the host computer
blinkVersion(): //blink the protocol version on the build in LED (typically pin 13)
printFirmwareVersion(); //send the firmware name and version to the host computer
setFirmwareVersion(byte major, byte minor); //set the firmware name and version, using the sketch's filename, minus the '.ino'
setFirmwareNameAndVersion(const char *name, byte major, byte minor); //set both the name and version of the firmware
This code sends messages.
sendAnalog(byte pin, int value); //send an analog message
sendDigitalPort(byte portNumber, int portData); //send an 8-bit port in a single digital message
sendString(const char* string); //send a string to the host computer
sendString(byte command, byte bytec, byte *bytev); //send a string to the host computer using a custom command type
sendSysex(byte command, byte bytec, byte* bytev); //send a command with an arbitrary array of bytes
write(byte c); //write a byte to the Stream
This code receives the messages.
available(); //check to see if there are any incoming messages in the buffer
processInput(); //process incoming messages from the buffer, sending the data to any registered callback functions
attach(byte command, callbackFunction myFunction); //attach a function to an incoming message type
detach(byte command); //detach a function from an incoming message type
This examples is for sending and receiving messages.
#include <Firmata.h>

byte analogPin;

void analogWriteCallback(byte pin, int value)
{
  pinMode(pin, OUTPUT);
  analogWrite(pin, value);
}

void setup()
{
  Firmata.setFirmwareVersion(FIRMATA_MAJOR_VERSION, FIRMATA_MINOR_VERSION);
  Firmata.attach(ANALOG_MESSAGE, analogWriteCallback);
  Firmata.begin();
}

void loop()
{
  while (Firmata.available()) {
    Firmata.processInput();
  }
  for (analogPin = 0; analogPin < TOTAL_ANALOG_PINS; analogPin++) {
    Firmata.sendAnalog(analogPin, analogRead(analogPin));
  }
}
Firmata Protocol
The Firmata Protocol is a protocol that aids in software communication with microcontrollers to computers. The Firmata Protocol can be used on any microcontroller and any computer!
Firmata Protocol is “based on the midi message format in that commands bytes are 8 bits and data bytes are 7 bits” (soundanalogous). Ex. “MIDI Channel Pressure (Command: 0xD0) message is 2 bytes long, in Firmata the Command 0xD0 is used to enable reporting for a digital port (collection of 8 pins)” (soundanalogous). “In Firmata, the number of bytes in a message must conform with the corresponding midi message” (soundanalogous).
MIDI Messages Format
This link provides a table for MIDI Messages. It is in binary order!
Python / mbed SDK / RPC (Katie)
To understand interfacing with Python, I looked at this [tutorial] (https://os.mbed.com/cookbook/Interfacing-with-Python).
The tutorial referenced this developmental kit. It is called the mbed SDK. It is a C/C++ platform, but I read the tutorial for interfacing with Python.
Here are the different platforms that can be used to interface with Python.
Windows:
-
Run Python Windows Binary
-
Run Python Win32 Extensions
-
Run Python Serial Port Extension
Mac:
-
Python already installed
-
Run terminal ( sudo easy_install pyserial)
Linux: - Python is probably already installed
- Terminal (sudo easy_install pyserial)
RPC
mbed libraries (this is the company that the tutorial came from) support RPC so you can interface using that. I referred to this tutorialto learn about RPC interfacing.
HTTP
This is an HTTP example of Hello World code which references the Python RPC library.
1 2 3 4 5 6 7 8 9 10 11 | python >>> from mbedrpc import * >>> mbed = HTTPRPC("192.168.0.4") >>> x = DigitalOut(mbed,"LED1")#These objects should already exist on mbed >>> z = DigitalOut(mbed,"LED2") >>> ain = AnalogIn(mbed, "LED3") >>> x.write(1) >>> z.write(0.5) >>> ain.read() 0.786757474 >>> |
I decided to focus on RPC with serial.
Serial
Here is how to connect to the COM port.
1 2 3 4 5 6 | python >>> import serial >>> serdev = 15 >>> s = serial.Serial(serdev) >>> s.write("hello") >>> s.close( |
This is a Serial example of RPC that receives the commands from the serial port and then pass them.
#include "mbed.h"
#include "mbed_rpc.h"

/**
 *  This example program has been updated to use the RPC implementation in the new mbed libraries.
 *  This example demonstrates using RPC over serial
 */

//Use the RPC enabled wrapped class  - see RpcClasses.h for more info
RpcDigitalOut myled(LED4,"myled");

Serial pc(USBTX, USBRX);
int main() {
    //The mbed RPC classes are now wrapped to create an RPC enabled version - see RpcClasses.h so don't add to base class

    // receive commands, and send back the responses
    char buf[256], outbuf[256];
    while(1) {
        pc.gets(buf, 256);
        //Call the static call method on the RPC class
        RPC::call(buf, outbuf);
        pc.printf("%s\n", outbuf);
    }
}