10. Molding and casting
Goal(s):
- Group assignment:
-
Review the safety data sheets for each of your molding and casting materials, then make and compare test casts with each of them.
-
Individual assignment:
- Design a mold around the stock and tooling that you’ll be using, mill it (rough cut + (at least) three-axis finish cut), and use it to cast parts
Introduction
The purpose of this week was to explore the options for making a mold and casting a part into the mold to get an outcome. This exercise was both challenging and interesting as we have the materials but have never tried this technique in our lab.
The importance of this assignment for the project was in the fact that during the design and concept of the Water Bubble Machine, the limiting factor for this project to succeed was the quality of the mold used and the rapdidity of the freezing process in generating consistent shapes for the water bubble ice itself.
As I expect to freeze the water in the mold for a short time in order to get the outer shell frozen only, the result expected is a frozen hollow shell much like the chocolate shell of a Kinder chocolate egg
Safety data sheets of molding materials
For the molding and casting assignment, the following materials were selected for the test casts.
- Hot Glue - Data Sheet
- Silicone Caulking - Data Sheet
- Plaster of Paris - Data Sheet
- Paraffin Wax - Data Sheet
Oomoo is actually the recommended silicone rubber, but our stock of Ooomoo had dried up due to a long duration of storage in less-than-ideal conditions. So, in a pinch, I selected Silicone caulk with to get the comparison
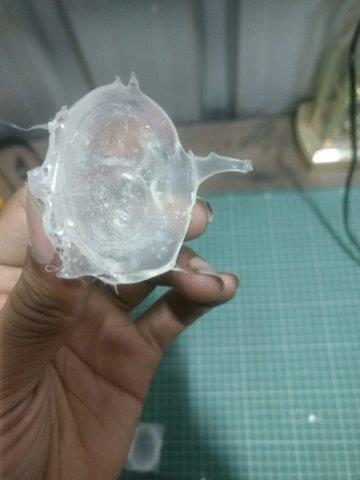
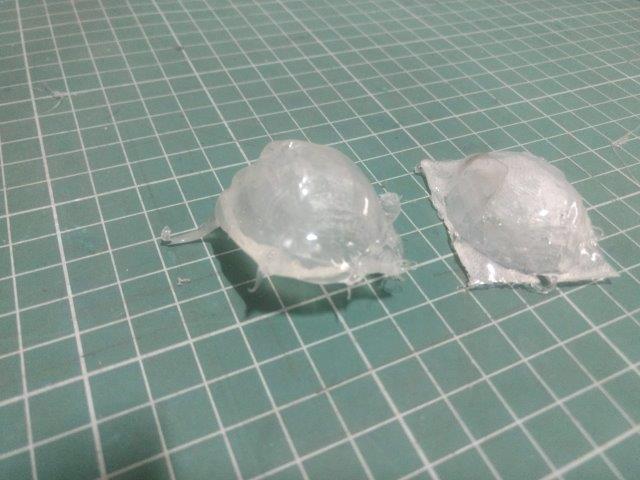
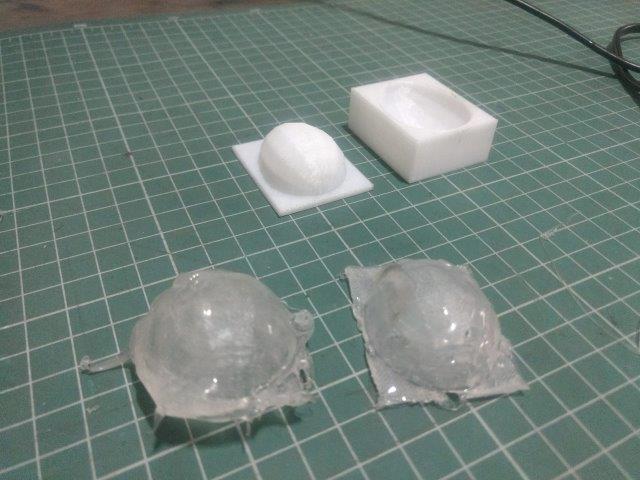
Test Cast
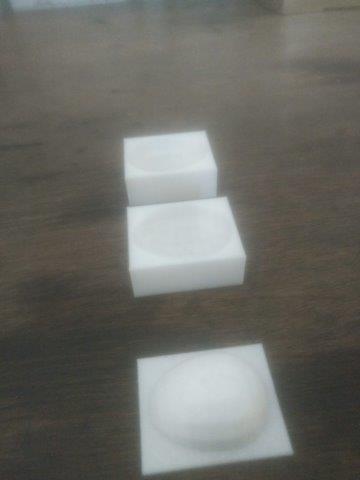
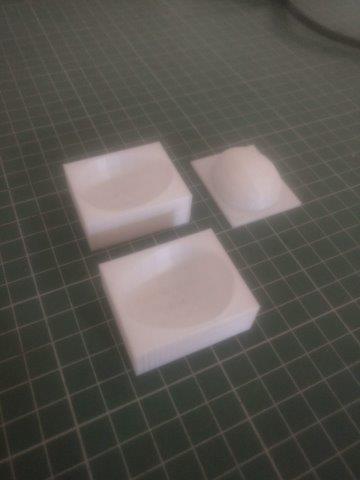
For the test cast, I used an existing silicon mold that was purchased for the purpose of making the Water Bubble from ice.
The test cast with all the selected materials are shown below, with a brief summary of the materials
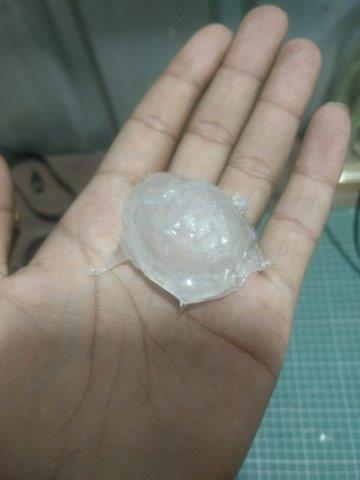
Hot Glue - 100% hot glue

Silicone Caulk - 100% silicone and time to cure
Plaster Of Paris - 1:1 ratio of water to POP (1 kg)
Paraffin Wax - 100% Parrafin Wax (melted and cooled)
From the test cast, it is clear to see that the materials conform very closely to their data sheets in terms of usability and function.
For the purpose of this project, as per the earlier concept for the Water Bubble, I was very sure that the chemical solution that would be used for the project would need to be flash frozen after pouring into a 2-part mould designd to withstand flash freezinf cycles and mechanical movement. For that purpose, I decided to experiment with the possibilities of printing molds using a 3D printer.
3D Printer Molds
For the final mold, I prepared a 2-part egg-shell mold on Google Sketchup (since Easter was coming up) and I used this mold to cast Plaster of paris into egg shells for encasing different materials.
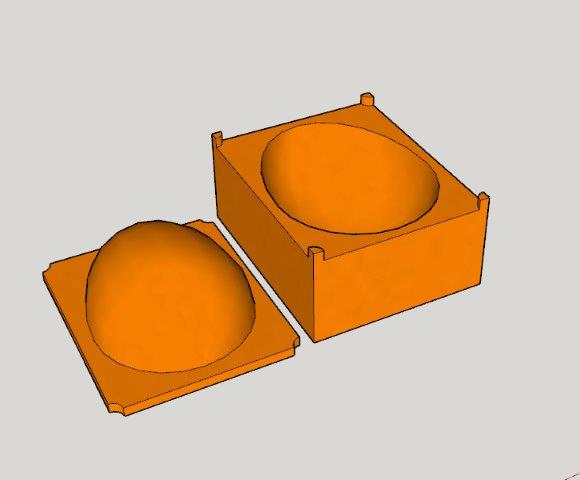
Final print

This lesson was a great exploration into how 3D printing can be used as a tool for miniature production scales especially where industrial production and scales cannot apply economically.
Using 3D printable models to make thermoplastic molds for food based materials works exceptionally well during holidays and cultural festivals for customizing and enlivening the festival moods.
Milling Mold
As per my updates, I also milled the same egg shape using MDF Board in our small-format CNC Router to use as a cast for the Molding exercise.
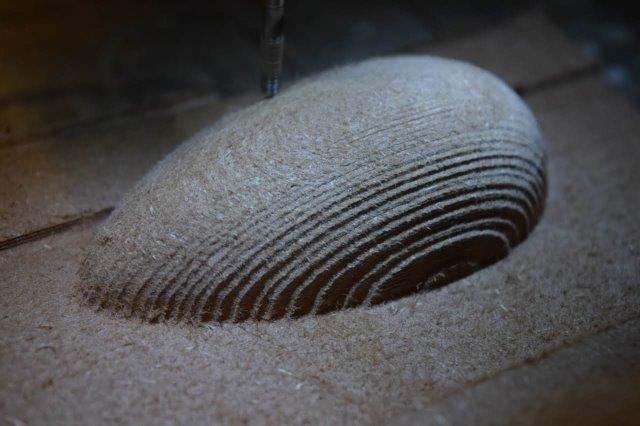
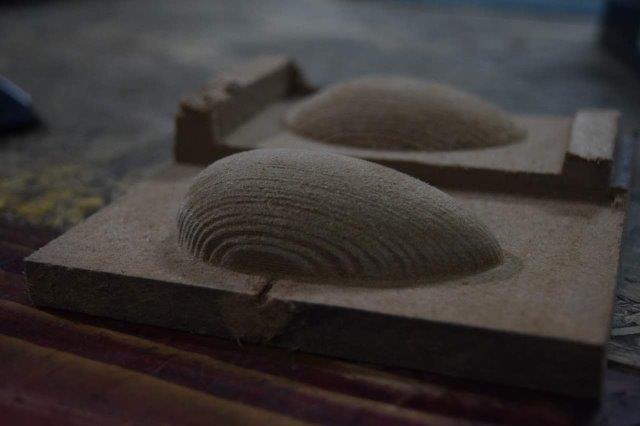
After the mold was ready (roughly), I used this as a mold for casting the silicone glues for making a Master mold
Download
Download my files here