2. Project management
So here is the second week, we are suppose to get the basics of GIT clear. Also, with the help of GIT and Mkdocs we need to buil a webpage which sounds really intresting to me.
GIT
Git is a major part of a developers work flow these days no matter what platform you work on. There are many different ways to install and use Git on Windows and in this post I will cover 5 different ways and talk about the pro’s and con’s of each. At the end you should have a good idea of how to have a great experience with Git on Windows not matter what your scenario. Be sure to let me know your favorite in the comments or if I missed one.
The Five ways:
Below are the 5 basic ways to install git on Windows. There are probably others but these are the ones that I tend to show developers. I personally tend to end up installing git for command line usage and installing a GUI for more complex tasks. There are a few tasks (sqaushing commits) that are easier on the command line and a few that are easier in a GUI (selecting single lines from multiple changes in a file for an atomic commit). Git for Windows
Using Chocolatey - preferred way on Windows 10
Using Cmder - Great for older version of Windows
Your Favorite Git GUI - Visual Studio, Sourcetree, GitHub Desktop, GitKraken, etc
Bash on Windows - In preview for Windows 10 (sign up for the Windows Insider to try it out today) Git for Windows
Git For Windows is the foundation for running Git on Windows. Many of the other options listed are using Git for Windows (previously msygit) under the hood. This option will install the git client, the windows implementation of BASH tools and a few Git GUI tools. If you want just the raw tools then this is the installer for you. If you want some more advance tooling then look to some of the other options. I generally prefer to install this via a different option.
You can install it from Git for Windows.
Pro’s basic tooling shell integration (right click to open BASH Promp / GUI)
Con’s GUI is old school BASH tools are only available in BASH prompt by default confusing installer with lots of options Using Chocolatey This is my preferred way to install the Git for Windows on Windows 10. It installs the same package before but in one line. If you have not heard of Chocolatey stop everything and go learn a bit more. Chocolatey can install the software with a single command; you don’t have to use click-through installers any more! If you are coming from Linux think of it as the apt-get/yum for Windows. Chocolatey is very powerful and I use it in combination with Boxstarter to set up my dev machines. If you are in charge of setting up machines for developers on windows it is definitely worth a look.
I love this option because it is fast to set up (one liner) and with Windows 10’s new command console (it resizes and has copy/paste) I get the a great native experience. Using keyboard shortcuts (Windows key + X then C), I can have a command prompt open quickly and start using git right away. Watch the video to see another cool trick where you can open the command window in any open folder.
Let’s see how you would install git using Chocolatey. I assume you have Chocolatey installed already (it is a one liner in the command prompt). Then simply open Administrator Command Window and type: choco install git -params ‘“/GitAndUnixToolsOnPath”’ This will install git, the BASH tools and add them to your path.
Pro’s fast setup use existing Windows 10 command prompt for native experience
Con’s if done on older version of windows the command prompt experience is poor have to have Chocolately installed (though really easy to set up and over all awesome tool) Using Cmder This was my go to option before Windows 10 and would be what I recommend for anyone not using Windows 10. The command line experience in older versions of Windows is poor (no resize/copy paste) and Cmder brings together a set of awesome tools to make a great command line experience. I always choose the larger install option, as it comes with git (again Git for Windows) and the BASH tools all hooked up. Some of the other features it brings along are portability (which is great if you are running events), keyboard shortcuts like copy and paste, easy aliasing, and more. You install it by downloading the “Full” option on the Cmder page.
Pro’s portable brings copy/paste, resizing and more options to command prompt in older versions of Windows nice looking prompt
Con’s emulator (no quick shortcuts to open without other tools, can be less responsive) Your Favorite Git GUI I don’t want to get into the battle of the best GUI for git as they all have pros and cons. The key here is that all of them come with git installed. If you a fan of GUI’s or just getting started this is great place to get started as you don’t have to worry about the command line or setting up command PATH’s.
I tend install git via Chocolately then use a GUI for my day to day work. That said, I usually use the right tool for the right job when it comes to GUI vs command line. Some scenarios I really enjoy using the GUI are when viewing complex diff’s or helping make atomic commits (I made more than one change because I got carried away and want to commit then one at a time ;-) ).
I don’t have a section on installing the GUI’s in the video as there are to many to show, each one is behaves differently and are relatively easy to install and set up.
Pro’s easy guided git experience through GUI no need to mess with PATH and other tooling
Con’s git not usually added to PATH (can’t kick over to command line when everyone prefers a different UI and may not know how to use yours Bash on Windows
This is one of the more promising solutions for the future. At the time of writing, it is in preview on the Fast ring of the Windows Insider program. I talk about why this is a promising solution on my Thoughts on Build 2016 post along with a demo. This allows us to run git directly on BASH on Ubuntu on Windows. This means that we are not using a Windows implementation of BASH but the real BASH. More in-depth details on the from the developers themselves can be found at the discussion on Linux Command Line on Windows. This option is going to be really exciting for open source projects where developers might work on a variety of platforms.
The set up for this requires you to be on the Windows Insider program at the time of writing. Once you have the latest insider build installed you can follow the instructions at https://blogs.msdn.microsoft.com/commandline/2016/04/06/bash-on-ubuntu-on-windows-download-now-3/.
Pro’s real BASH and git it is the real BASH! fast
Con’s still in preview requires the insider preview build
Challenges
As i am from commerce background, i have no idea even of the basics of the basic of this GIT thing and Mkdocs.Also I am facing challenges to do the same. But, I am here to learn new things so lets do it carefully in the coming days.
Start
The GIT setup was downloaded from the official site and installed on my windows desktop.
Once the installation was completed, Damn i have no idea whats there in front of me but somehow looked for help from fellow mates, instructors, and websites which helped me. Then, Added my Git username and email ID, looked for the current status of the repo ” git status”
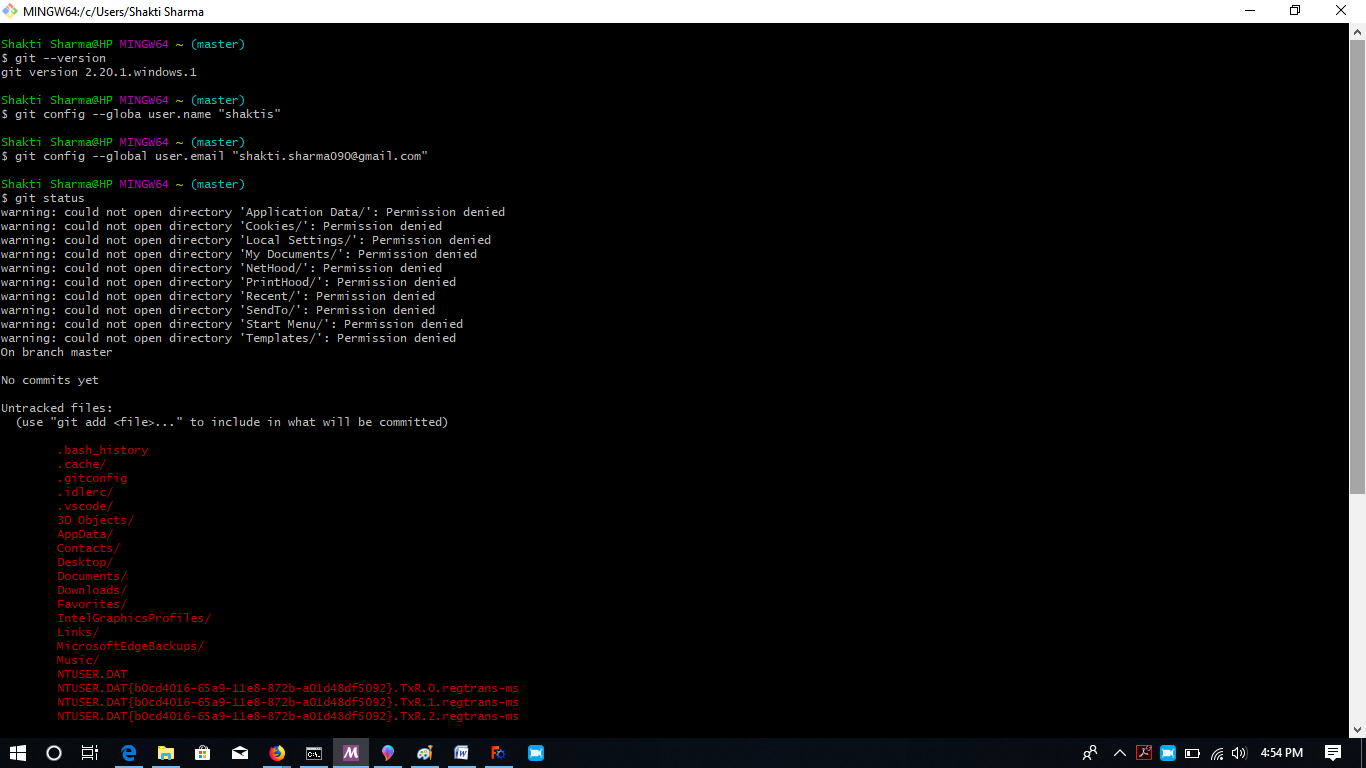
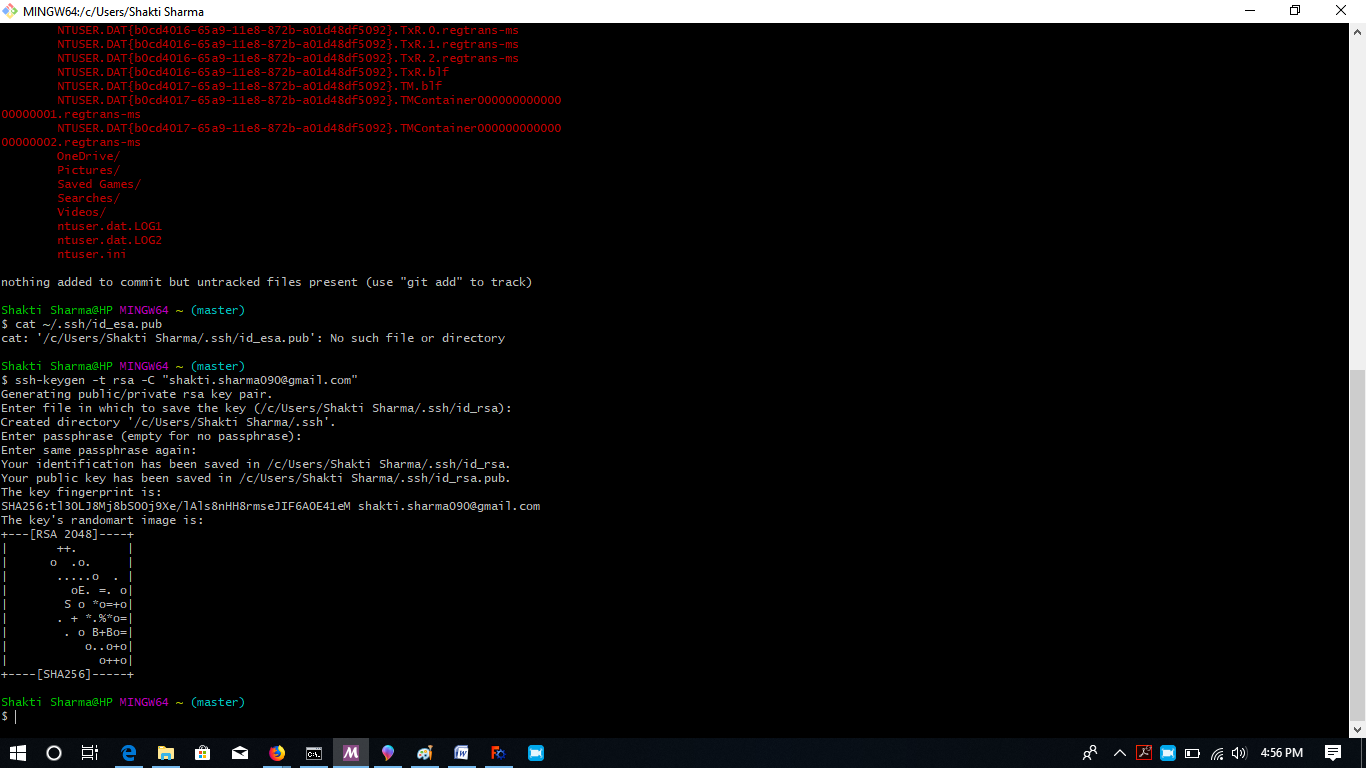
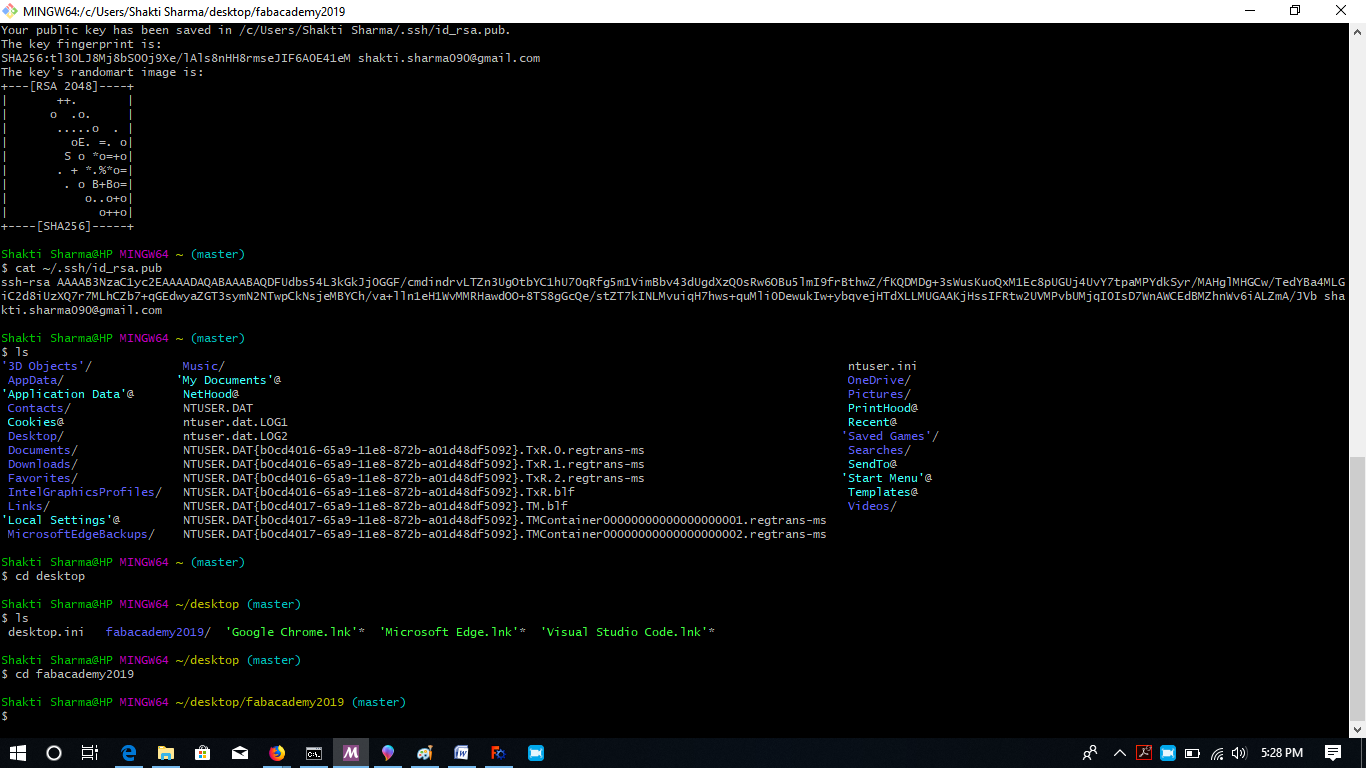
Checked if SSH KEY was already there or not using this command: ‘ cat ~/.ssh/id_rsa.pub ‘. After that generated the SSH key using the command: ‘ssh-keygen -t rsa -C “$your_email” ‘
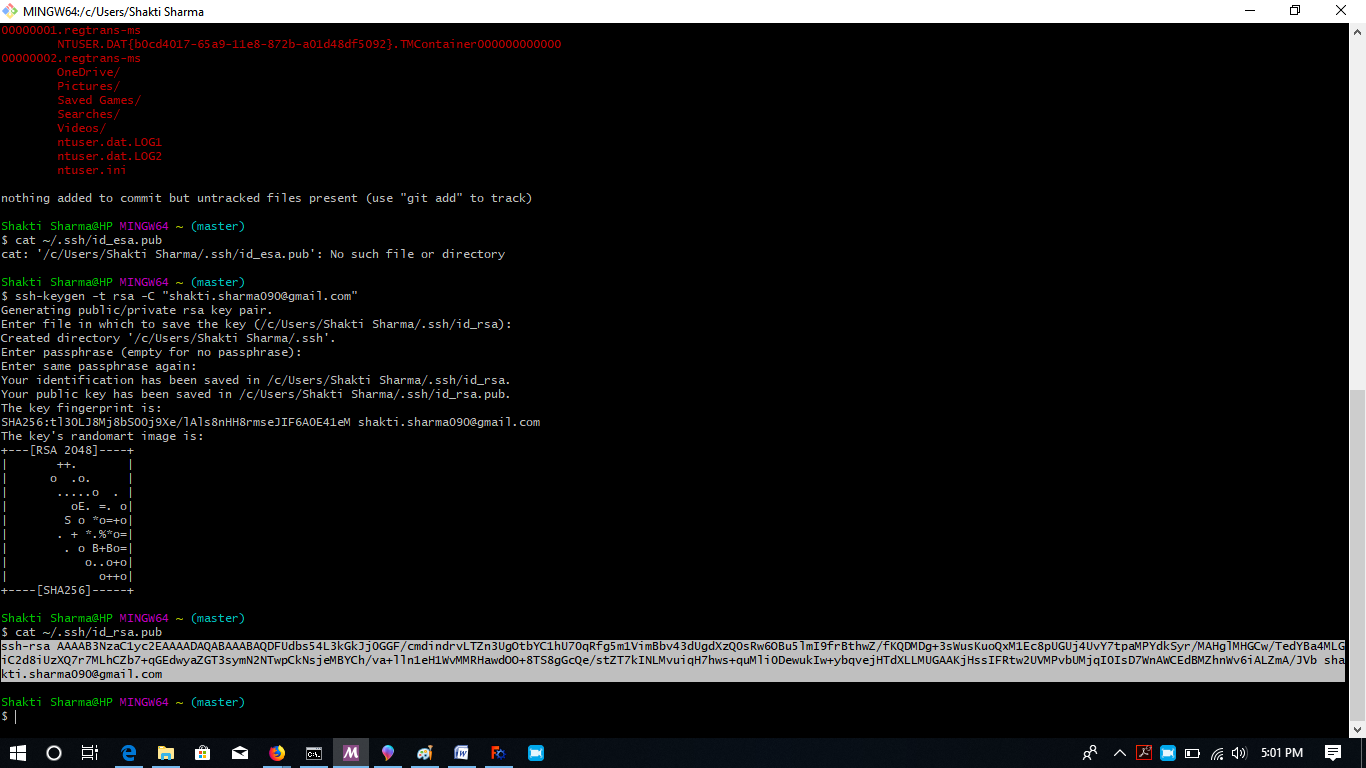
From here copy the SSh Key and paste in the web version of GIT.
You can use the command ‘ls’ to see the list of folders and navigate to the desired one.
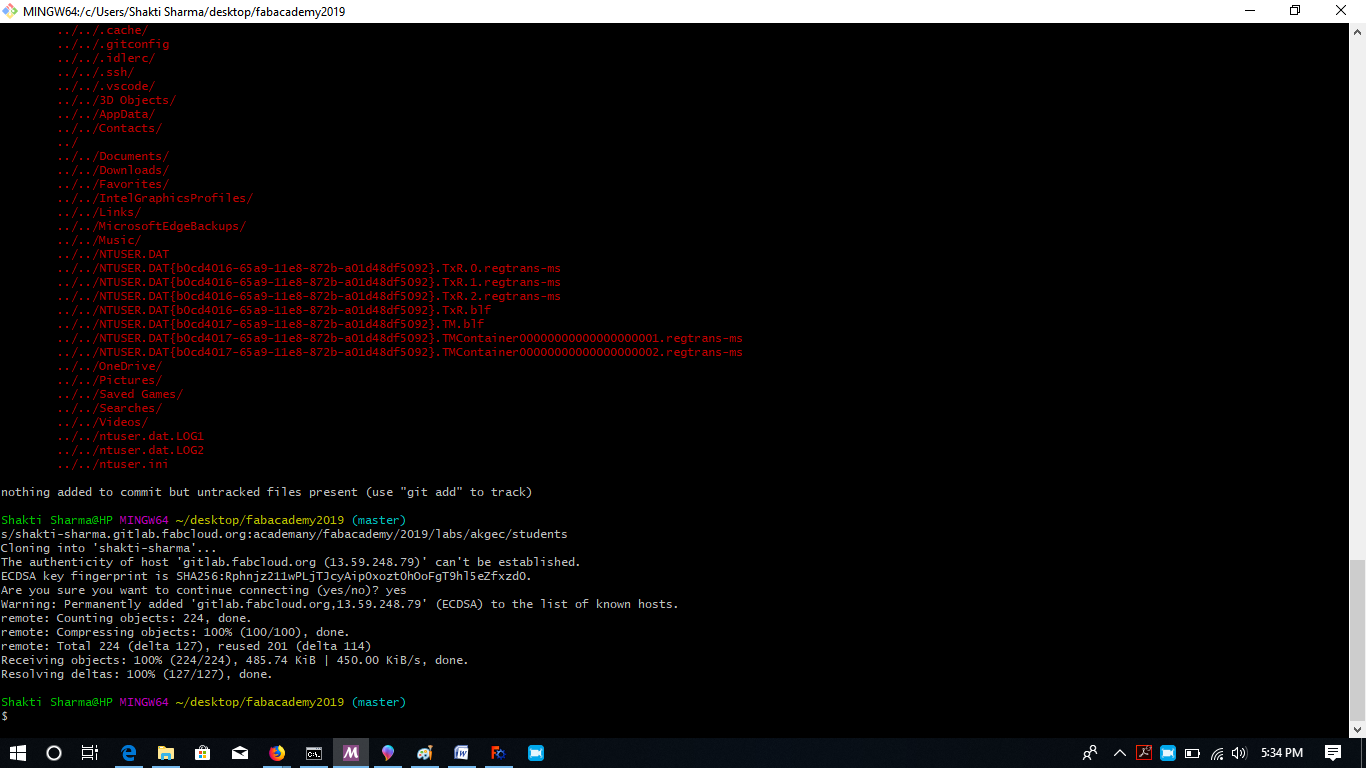
Now its time to clone the student repository to local repository by using the command: ‘git clone git@git.fabacademy.org:fabacademy2017/yourlabname/yourstudentnumber.git’
View
HONESTLY!! i will need a bit more time to get this GIT and Mkdocs more clear. I think this week i might not be able to perform as good as i could have. Looking forward to polish up my skills and update the necessary assignments well on time As i mentioned i might take my time on GIT so i did, its more clear now, i had few problems in generating the SSHkey but later on i figured it out, after generating the SSH key and pasting it in the Private SSH key space. i cloned my remote repository to local repository.