Group Task
Embedded Programming
Preparation
As an additional architecture we decided to play around with and
old Raspberry Pi 1.
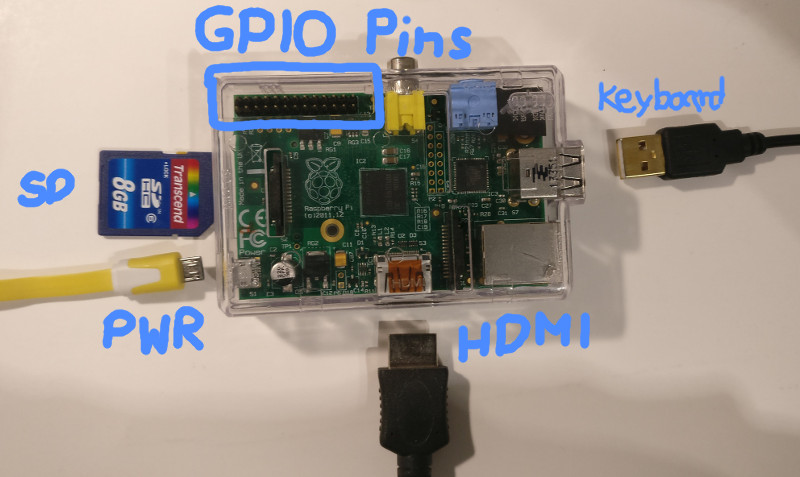
The Raspberry is powered with through a micro-USB port similar to a smartphone.
Besides that it needs an SD card with the operating system (Raspbian in our case),
a keyboard as input device and a monitor.
Besides these standard computer peripherals
we attached a white LED to GPIO 7 in series with a small current limiting resistor (68Ω).
Experiments
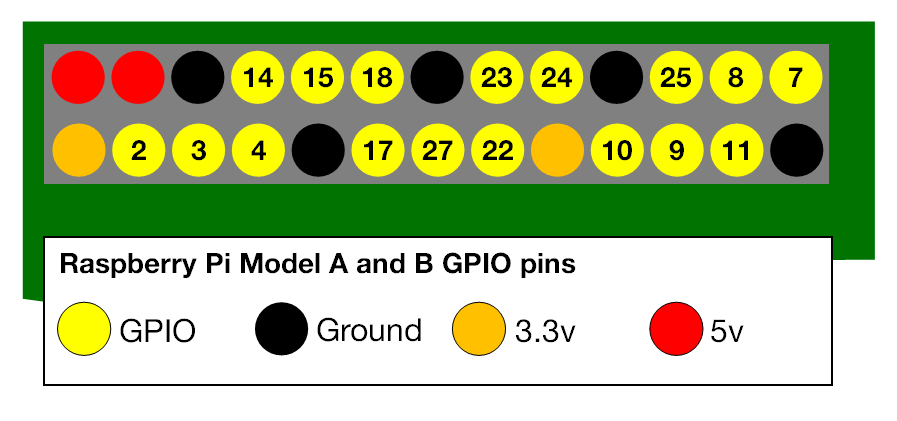
Based on this setup we made ourselves familiar with the control of the GPIO pins.
Like almost everything in Linux GPIO pins are controlled through the filesystem.
More specifically files located under /sys/class/gpio/.
In this directory there is an export-script/program, which requires the number of your desired GPIO pin
in order to make its functions available.
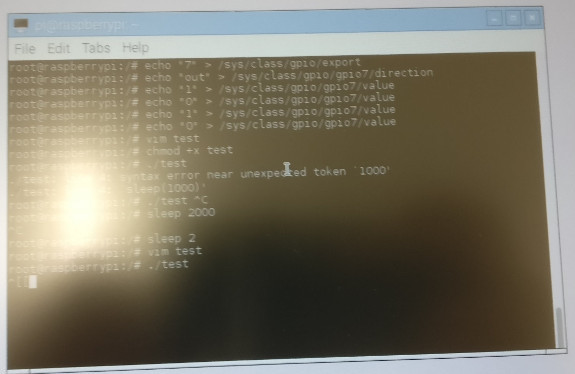
Running echo "7" > /sys/class/gpio/export in the terminal makes for example our GPIO pin 7 available.
Now, we can access the pin through the according directory: /sys/class/gpio/gpio7/.
In a similar fashion as before we entered
echo "out" > /sys/class/gpio/gpio7/direction
to make sure
our pin is configured as an output (compares to DDR register or pinMode on AVR)
and finally
echo "1" > /sys/class/gpio/gpio7/value
turns on the LED by providing a HIGH signal on GPIO pin 7.
Blink-Example
These basics allow you to control any GPIO pin based on filesystem interactions.
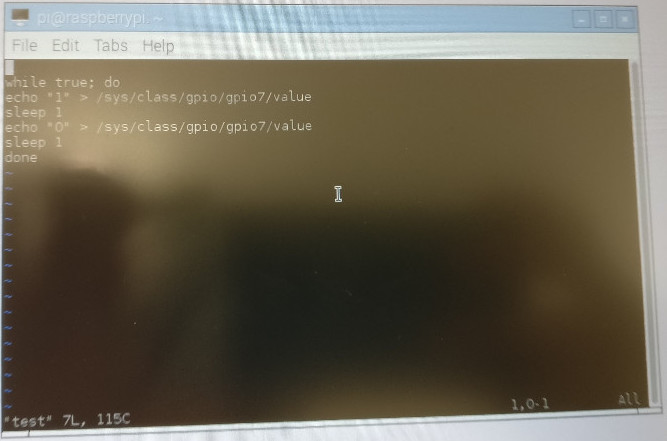
As a small step to go beyond the manual control from the terminal we wrote a small 'Blink' bash-script.
        while true; do

        echo "1" > /sys/class/gpio/gpio7/value

        sleep 1

        echo "0" > /sys/class/gpio/gpio7/value

        sleep 1

        done