| HOME | ABOUT ME | FABLAB UPM | FINAL PROJECT |
| week 1 Principles and practices, project management |
| week 2 Computer-aided design |
| week 3 Computer-controlled cutting |
| week 4 electronics production |
| week 5 3D scanning and printing |
| week 6 electronics design |
| week 7 computer-controlled machining |
| week 8 embedded programming |
| week 9 molding and casting |
| week 10 input devices |
| week 11 composites |
| week 12 output devices |
| week 13 networking and communications |
| week 14 mechanical design, machine design |
| week 15 interface and application programming |
| week 16 applications and implications |
| week 17 invention, intellectual property and income |
| week 18 project development |
| week 19 project presentation |
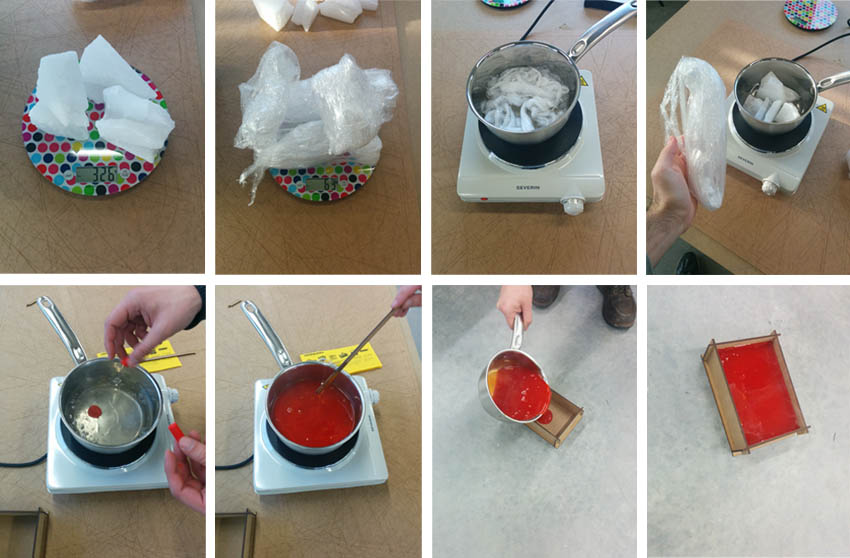
Week 9: Molding and Casting Goal: Design a 3D mold, machine it, and cast parts from it. Step 1: getting the machinable wax Let's get machinable wax from the following components: Paraffin, Polyethylene and crayons. Quantities : Pure paraffin. 320 gr. First, heat the wax until fully melted, then I gradually add the LDPE. I used the plastic used in the kitchen for wrapping food. Polyethylene needs more time to dissolve. PROBLEM: The amount of LDPEthat I have used is excessive, and the last parts of polyethylene have not dissolved properly. I read this problem appears spending 20% polyethylene or more in the mix, when the 15% is more than enough for a good result (in the FabLab we did the two mixes, mine just over 20% and my partner's with something more than 15% and his result was better). However wax didn't have problems for drilling. Once melted the LDPE I added a piece of wax crayon for getting the color we want. This last step is pretty fast, if you spend too much time the smoke starts to smell burnt. Then pour the wax into the form (I built one in DMF wood cut with laser with the dimensions needed) and let it cool. IMPORTANT: hot wax produces too much smoke and odors, work in a well ventilated area.
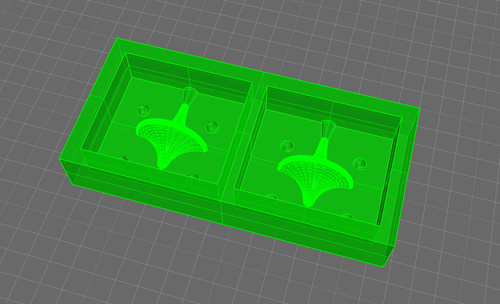
Step 2: designing the model in CAD
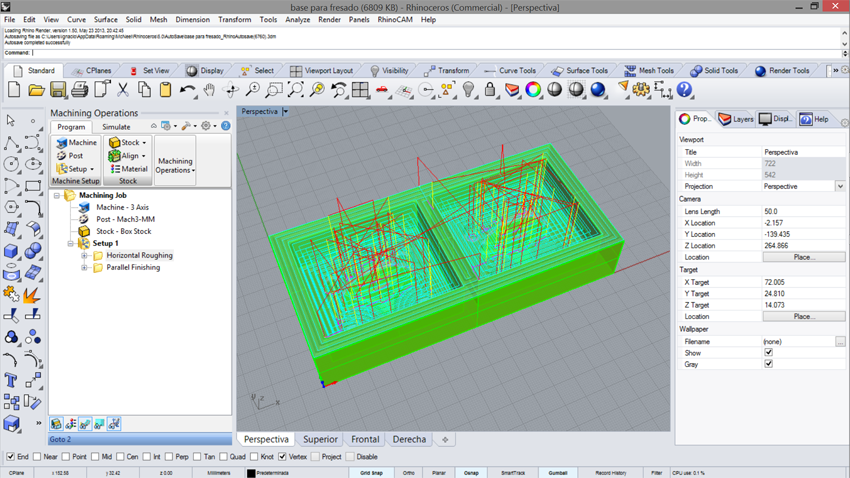
Step 3: Drilling the wax To mill the piece instead of the Modela I used large format drill machine because I wanted to try using RhinoCAM to set machining parameters. IMPORTANT: My piece of wax has shrunk too much in cooling process, so I have to pay attention to calibrate the Z axis because it is not the same in the center of the piece as in the ends. I have used a 3mm Ball Nose drill with speed of 1500 mm / min because all my surfaces are curved. The only flat surface is the juncture of the two countermoulds, so it is not important how the finish look in this part.
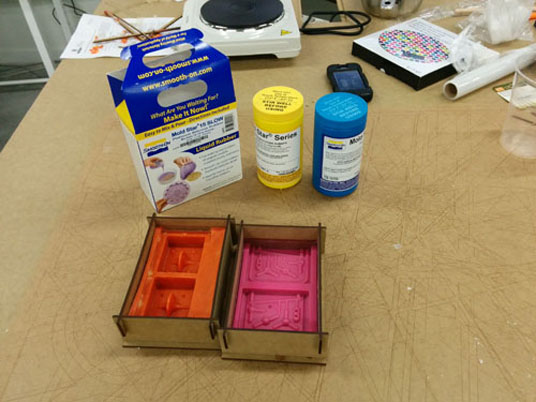
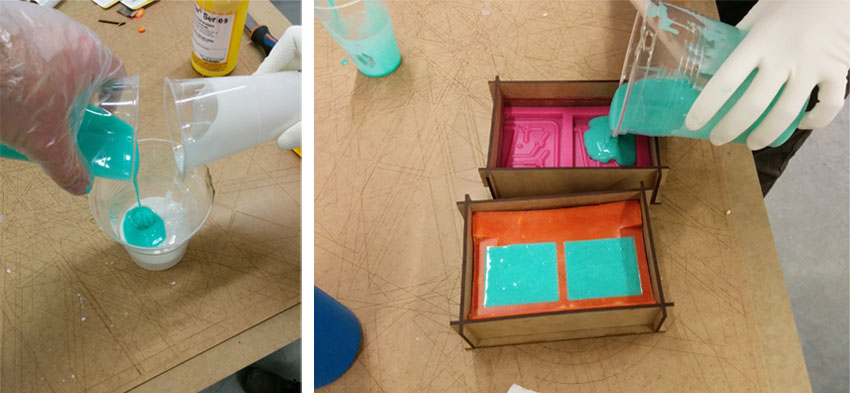
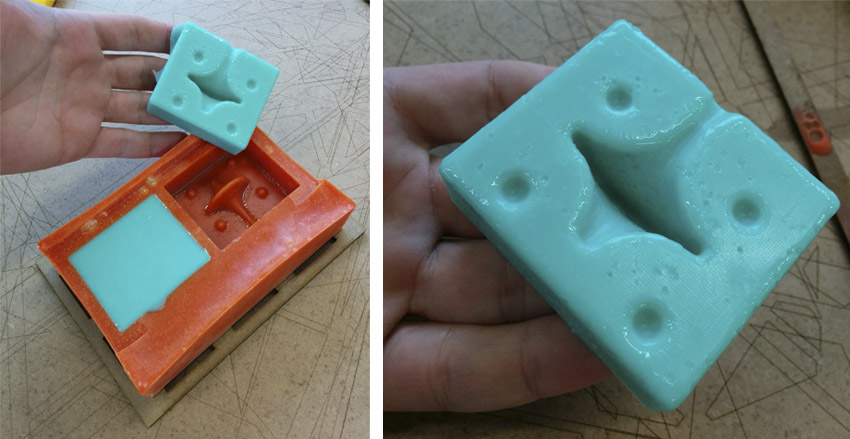
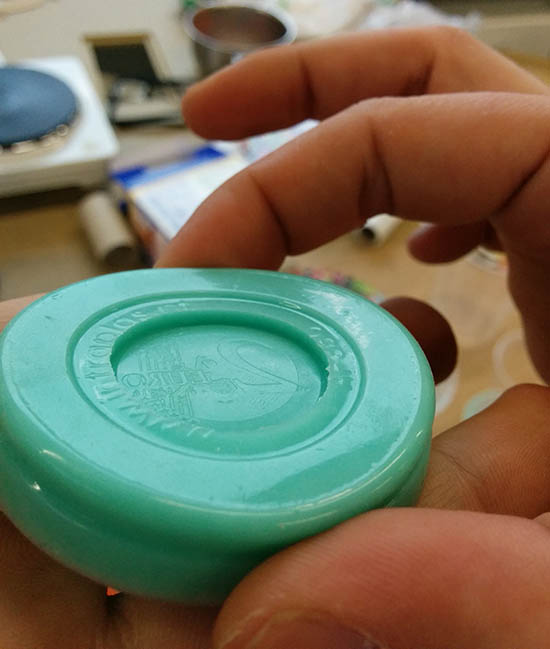
Step 4: Countermould in Silicone
|