using_epilog_laser_cn
Using the Epilog Laser Cutter
使用Epilog激光切割机
I. Introduction
I. 简介
This guide will introduce you to the Epilog Mini 24 Laser Cutter,the machine that we have at the AS220 Labs, and is a 35 Watt CO2 Laser system. The laser cutter can etch and cut into a number of different materials.
这份指南介绍你怎么使用Epilog Mini 24激光切割机, 我们有一个这样的机器在AS220 Labs, 它是一个35 Watt CO2激光切割系统. 它可以雕刻和切割不同的材质。
Organic materiasl work best but there are a number of plastics and polymers that cut fine on the machine. The following guide will discuss basic setup for running a job on the machine. For you to get the most out of the guide, it’s best that you are familiar with a few basic concepts on the machine.
有机材料的效果是最好的,但一些塑料和高分子材料也可以使用. 接下来将会讨论运行机器的基本设置. 为你更好的利用指南, 你最好熟悉一些机器的基本概念
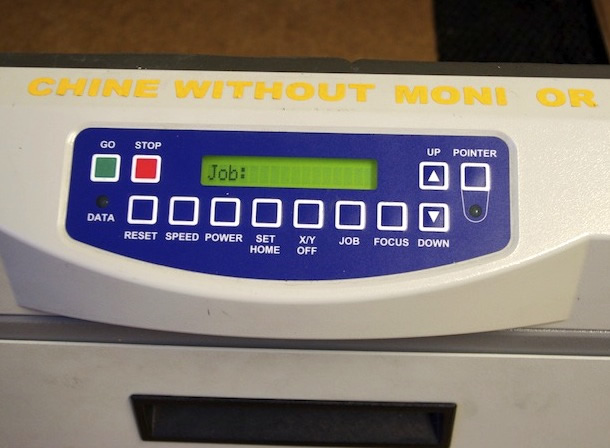
Control Panel - user interface to program settings and adjust machine settings for specific jobs.
控制面板 - 为特定工作调整程序设置和机器设置的用户界面
I-Beam (Y) and X Carriage - mechanical system that directs the laser beam down onto the material for cutting and/or etching.
I型架(Y)和X轴活动头 -
机械系统直接控制激光点在材料上切割或者雕刻
II. Starting the Machine
II. 开动机器
- The power to the machine and the air compressor can be found on the power strip located behind the machine on right.
- Turn on the power strip and both will automatically turn on.
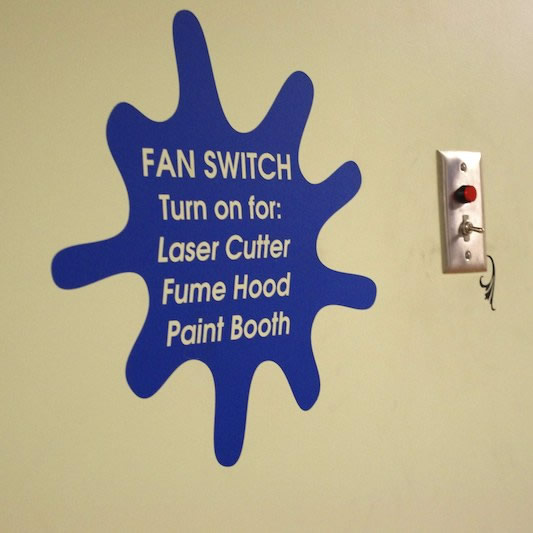
- The exhaust fan must also be turned on, the power switch is located at the entrance of the fab lab on the right (right next to the big blue sign that says “fan switch” ).
- 机器和空气压缩机的电源开关可以在机器右边的电源板找到
- 打开电源板后,两个都会自动打开
- 排气风扇也必须打开, 电源键在实验室入口的右边 (右边有一个蓝色标志写着 “fan switch” ).
III. Setting Home
III. 设置Home坐标
- To calibrate the machine for your material and job, you must set the home position on the machine.
- To do so, you must turn on the red laser pointer using the control panel.
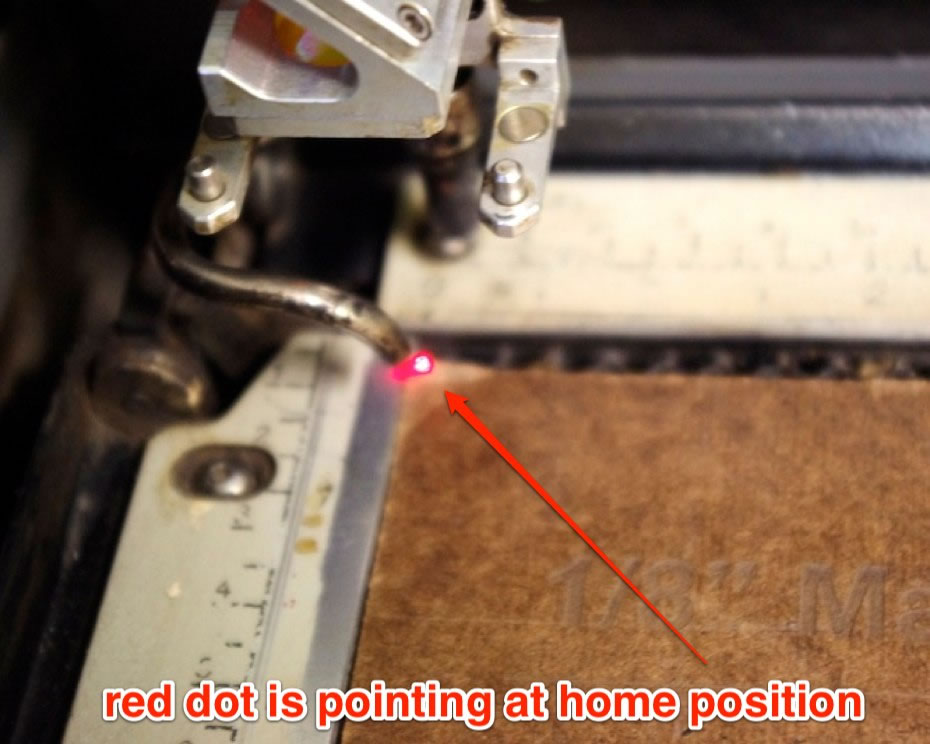
To do this, press the “Pointer” button on the control panel. This will turn on a red laser pointer, indicating where the laser beam is pointing.
为材料和作业校准你的机器,你必须在机器上设置home坐标
- 为了能够这样做,你必须用控制面板打开红色的激光指示器
- 你需要按下在控制面板上 “Pointer” 按钮.它会打开红色激光指示器, 指示在激光发射的地方

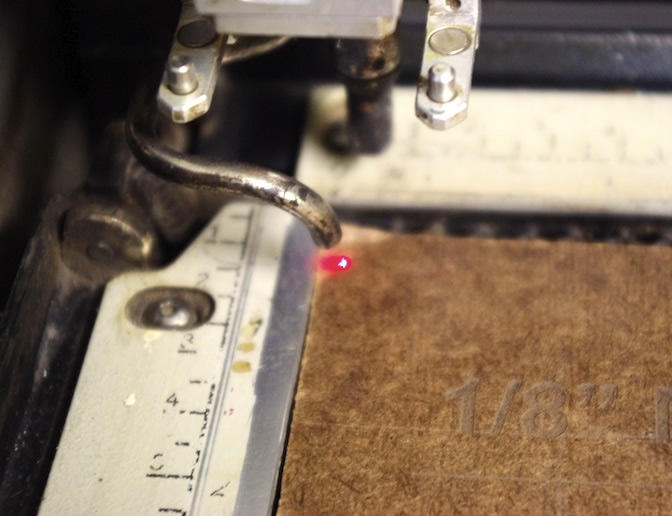
- The dot will appear on your material, and will be your guide when moving the X and Y axis.
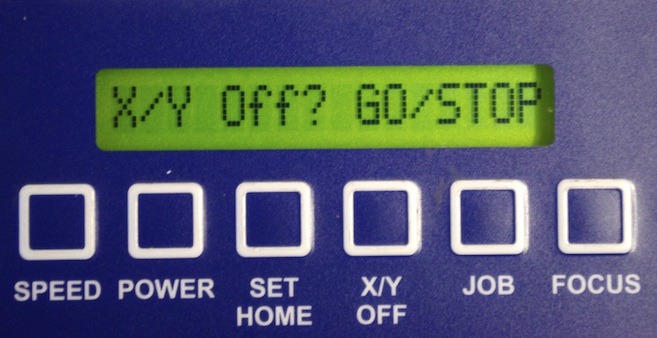
- Next, you must disable the X/Y stepper motors so that you can correctly position home. Do this by pressing the “X/Y” button on the control panel, this will bring up a message on the screen saying, “X/Y Off? GO/STOP”.
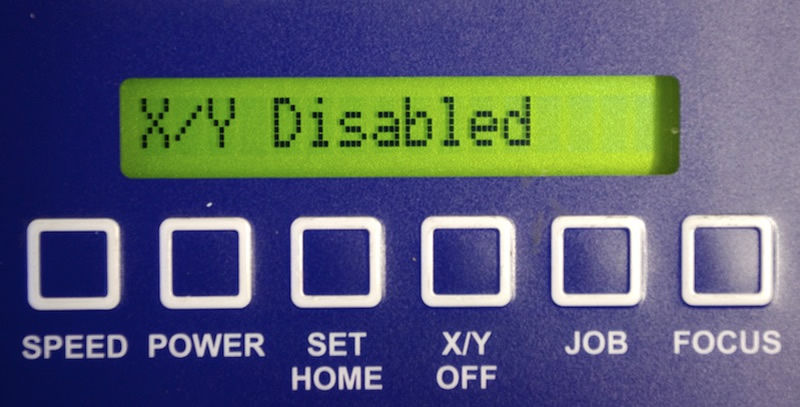
- After seeing this screen, press the green “GO” button and the stepper motors will disable and you will be able to move the laser I-beam.
You will a screen that says, “X/Y Disabled” for confirmation.
这个点会出现在你的材料上, 它会帮助你去移动X和Y轴.
- 接下来,你必须停止X/Y轴的步进电机以便你可以正确调整Home位置.你需要按下 “X/Y” 按钮在控制面板上, 接着在屏幕上会出现信息提醒, “X/Y Off? GO/STOP”.
- 在看到这个界面后, 按下 “GO”按钮 ,步进电机会停止工作,这时你才可以移动I型架. </span>
- 这时屏幕会显示 “X/Y Disabled” 的确认信息.
- You’ll want to get the red dot as close to the left corner of your material as possible.
- This will ensure that you job won’t bleed off the edges of your material.
- Once you’ve got the red dot as close as you can get it, set the home by pressing the “Set Home” button on the control panel and the setting will be stored for as long as the machine is running or until you set a new home position.
- 你会让红点尽可能靠近材料左上角.
- 确保你的作业不会超出你材料的边缘.
- 一旦你让红点尽可能的靠近它, 通过控制面板上的 “Set Home”按钮设置起始点, 设置将会保存在机器运行期间直到你设置了新的起始点位置.</span>
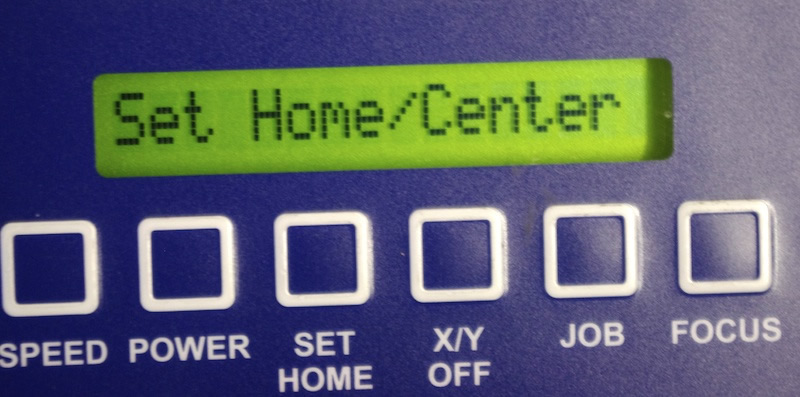
- Once you press the “Set Home” button, you will see a screen on the display that says “Set Home/Center”, this indicates that home position has been set.
- You can now press the “Reset” button to get out of that screen.
- 一旦你按下 “Set Home” 按钮, 你会见到屏幕上显示 “Set Home/Center”, 这说明起始点已经设置好了.
- 你可以按下 “Reset” 按钮退出这个页面.
IV. Manual Focus
IV. 手动聚焦
- It is best to manually focus the laser cutter on your material rather than using the autofocus feature, this will provide the best results.
The cutting bed needs to be raised up or down to be in focus on your material, you will have to use the control panel to make this adjustment.
使用手动调焦的激光切割会比自动调焦的好,它会提供更好的效果。
- 调整切割机床使得激光聚焦在材料上, 你将使用控制面板去调整.
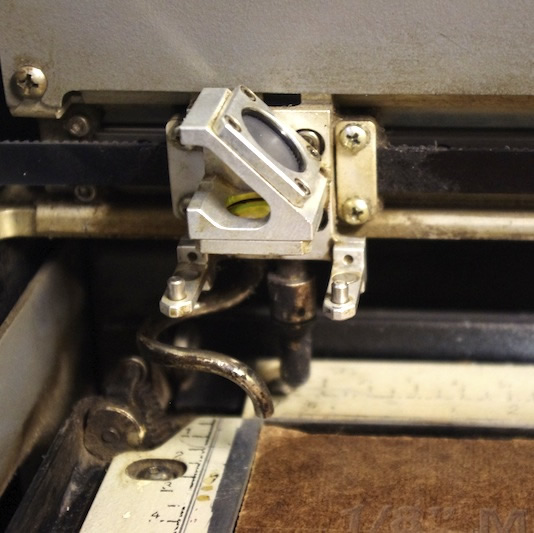
First, take the manual focus tool (metal triangle) and position it on the cutting head so that it’s pointing down towards the material. 首先使用手动调焦工具 (金属三脚架),放置在激光切割头上,以便它指向材料。

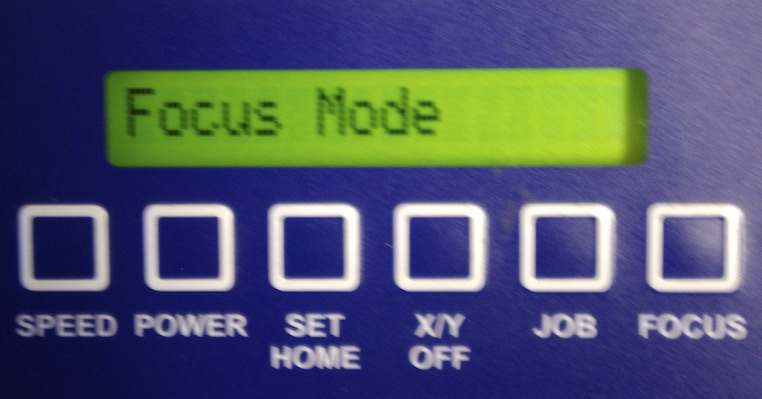
Next, put the machine into focus mode by pressing the “Focus” button on the control panel. This will display “Focus Mode” on the display screen and now the up and down arrow controls will control the height of the bed, adjust them so that the tip of the manual focus tool is touching the material that you are focusing on. It should look similar to the photo above. 接着在控制面板通过 “Focus” 按钮进入对焦模式 . 这时屏幕上会显示“Focus Mode” ,接着用箭头状的控制部件调整机床的高度, 调整它们,使手动聚焦工具的顶端接触你所关注的材料. 它应该和上面的照片看起来一样.
Once you have focused the machine, press “Reset” on the control panel you will go back to the default screen on the control panel. You are now ready to send a job from the computer to the laser cutter.
一旦你校准好机器, 在控制面板按下 “Reset”按钮,接着你会进入默认的主页. 你现在可以通过电脑发送工程到激光切割机.
Laser Cutter Maintenance
激光切割机维护
Cleaning the X-Axis Linear Encoder
http://www.epiloglaser.com/tl_cleaning_linear_encoder.htm http://support.epiloglaser.com/article.aspx?cid=8205&aid=11964
Checking Table Level on the Mini and Helix Lasers
http://support.epiloglaser.com/article.aspx?cid=8205&aid=12200
http://support.epiloglaser.com/article.aspx?cid=8205&aid=12501
http://support.epiloglaser.com/article.aspx?cid=8205&aid=11959
Auto Focus Plunger Replacement on the Mini/Helix
http://support.epiloglaser.com/article.aspx?cid=8205&aid=12261
X-Axis Rail Assembly Replacement on the Epilog Mini
http://support.epiloglaser.com/article.aspx?cid=8205&aid=12399
Z-Axis Belt Replacement in the Epilog Mini
http://support.epiloglaser.com/article.aspx?cid=8205&aid=12332
Y-Axis Belt Replacement on the Epilog Mini/Helix/FiberMark
http://support.epiloglaser.com/article.aspx?cid=8205&aid=12497
Aligning the Laser Beam of the Mini and Helix
http://support.epiloglaser.com/article.aspx?cid=8205&aid=12189
X-Axis Belt Replacement on the Mini
http://support.epiloglaser.com/article.aspx?cid=8205&aid=12244
Cleaning Your Optics
http://support.epiloglaser.com/article.aspx?cid=8205&aid=11940
 All content © 2013 Anna Kaziunas France(except where otherwise noted). Some rights reserved.Licensed under a Creative Commons Attribution-NonCommercial-ShareAlike 3.0 Unported License