WEEK 3
[Computer-controlled Cutting]
This week I designed and fabricated two press fit structures using computer-controlled cutting machines.
The idea for the first piece was to copy the volume of a classic bedside lamp and add a new digital fabrication design to it. I already wanted for some time to work with the Autodesk 123D software, so after some "googling" I decided that this would be the right tool for a quick and clean job.
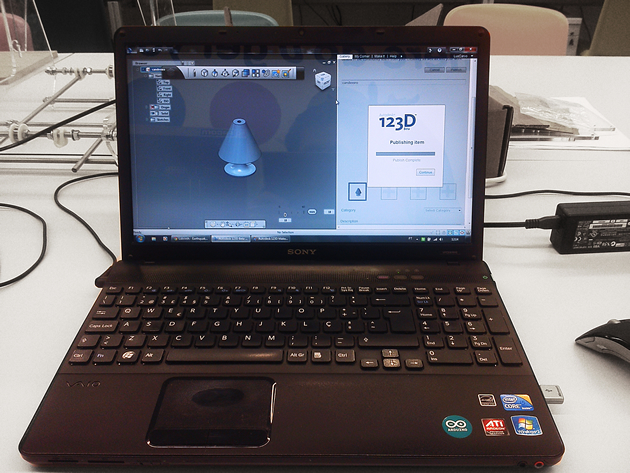
After I finished my design process I sent my model to an Autodesk cloud so that it can be proudly shared with the community. You can find it under http://www.123dapp.com/Search/Index.cfm?keyword=cANDEEIRO.
Now that I have my lamp in "bits" I need to turn it into "atoms", wich means: I need to prepare my model for a bidimensional cutting and/or engraving process. Once again, Autodesk helped me out with another platform called 123D Make. Here I can apply four types of construction techniques in my design. I obviously chosen the radial slicing technique, because my lamp model was generated using a revolution command.
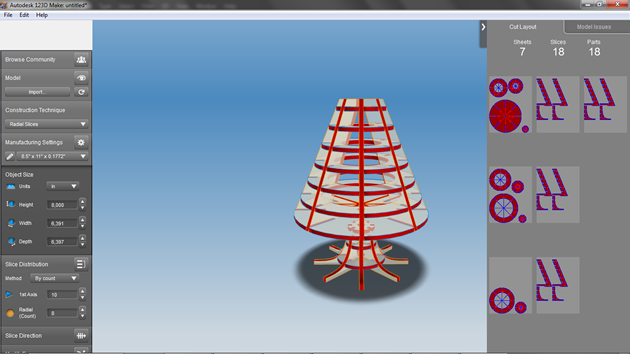
Here is how it looks after applying the radial slice, see image above. Well, it's not as good looking as I would expect, although I have lots of costumization options in the left-side bar of the software. So after some experiments, I came out with a solution that fited my expectations.
Notice that the software in the right-side bar is constantly reorganizing the pieces in the paperspace. That´s awesome!
You can download my PDF_file if you want to laser cut it at your Fablab. These files were edited in Inkscape because I'm a bit perfectionist and I wanted an heaven greater costumization. That's something you can also do too.

With the pdf files exported, I can now start printing these documents.
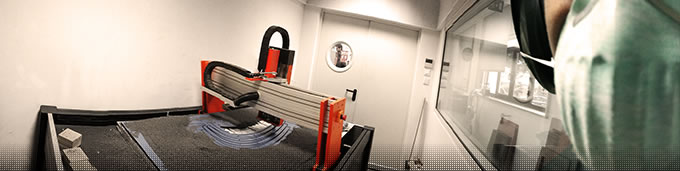
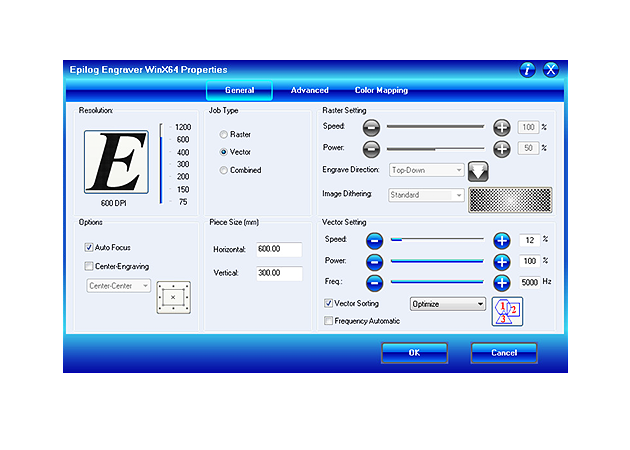
For this job I will choose the Epilog Mini-24, a machine with a laser indicated for cutting and engraving harder materials like wood, acrylic, cardboard...
So, hitting the Epilog properties in the "print menu" the job setup pops up. Here you can adjust three vital settings: speed, power and frequency of the laser cutter. These settings adjusted correctly will give you a nice and clean cut on the material you chosen. I will choose an acrylic so I need to adjust my settings for more power and less speed.
The values will be different on each machine, so don't try to copy mine, just make the necessary tests first with some extra material, so that you can finetune your cut.
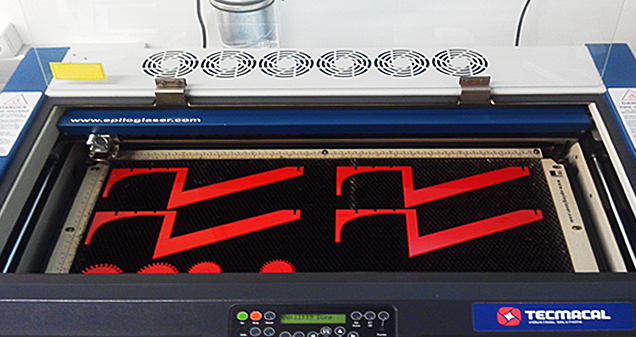
Now that I tested my material with the right settings it's time to cut the "real deal".
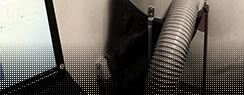
For this machine, there are some precautions we need to have. First, turn on all the extractions. Second, check if the origin point is in the right position. Third, before sending any kind of file, please confirm if the machine's power is on and connected to a local network or a computer... Fourth, after you hit GO avoid looking at the laser. Preferably step back and return when the process is finished. Fifth, wait one or two minutes, after the job is finished, before opening the door. It allows for the extraction to pull out all the gases inside.
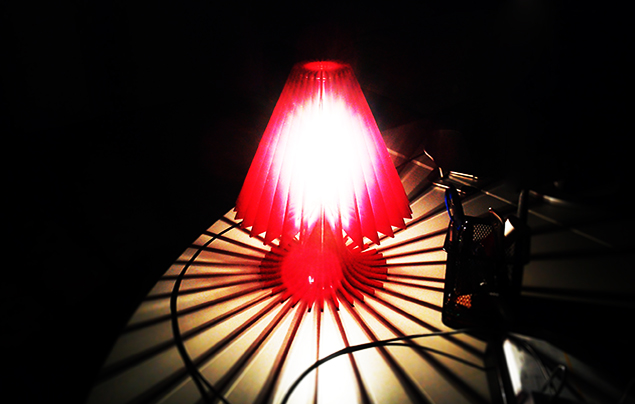
Finally, with the cutted pieces it's time to mount my press fit lamp. As you see in the images, I've already bought the lamp, the socket, the cable and the plug and integrated them in the design.
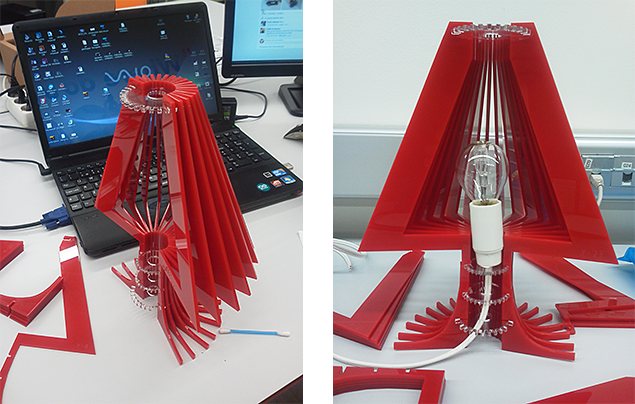
The final product overcame my expectation, because when I turned the light on, it drew an awesome pattern around my room.