Assignment Tasks
🔬 Group Assignment
- Review safety data sheets for each molding and casting material
- Make and compare test casts with each material
- Compare mold making processes
👤 Individual Assignment
- Design a mold around the chosen process
- Produce it with a smooth surface finish that does not show toolpath marks
- Use the mold to cast parts
Extra Credit
- ⭐ Use more than two mold parts
- ⭐ Make your own materials
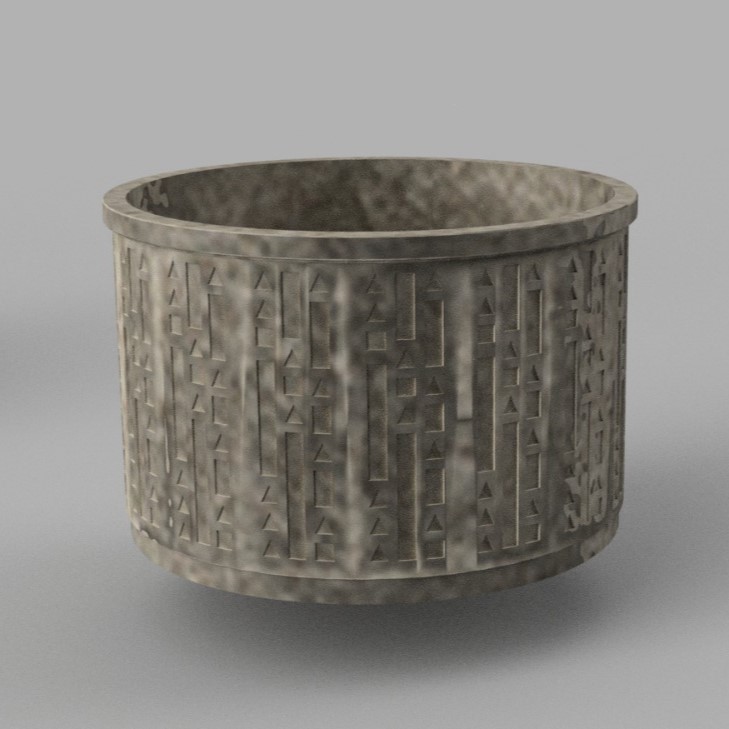
Project Idea — Decorative Plant Pot
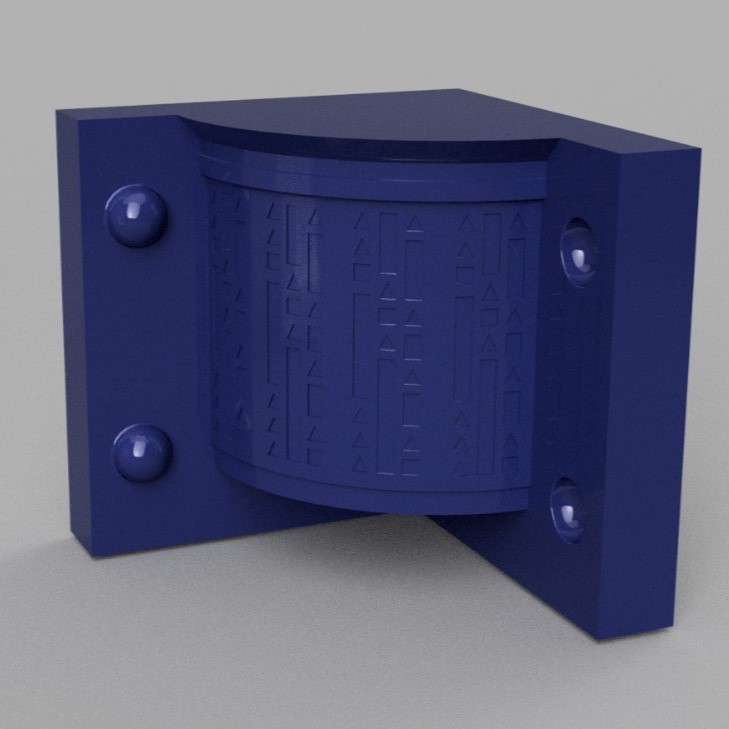
For this assignment, I wanted to create something functional and personal — a small decorative plant pot for my work desk. Rather than a plain geometric shape, I incorporated local cultural motifs into the surface design, adding meaningful detail and making the mold more challenging and interesting to produce.
The workflow I chose was slip casting using a multi-part gypsum mold. The mold was produced by 3D printing a master form, then casting gypsum around it in four separate sections — allowing for a clean, smooth surface finish with no visible toolpath marks.
Final digital plant pot
Step-by-Step Documentation
Designing the Mold in Fusion 360
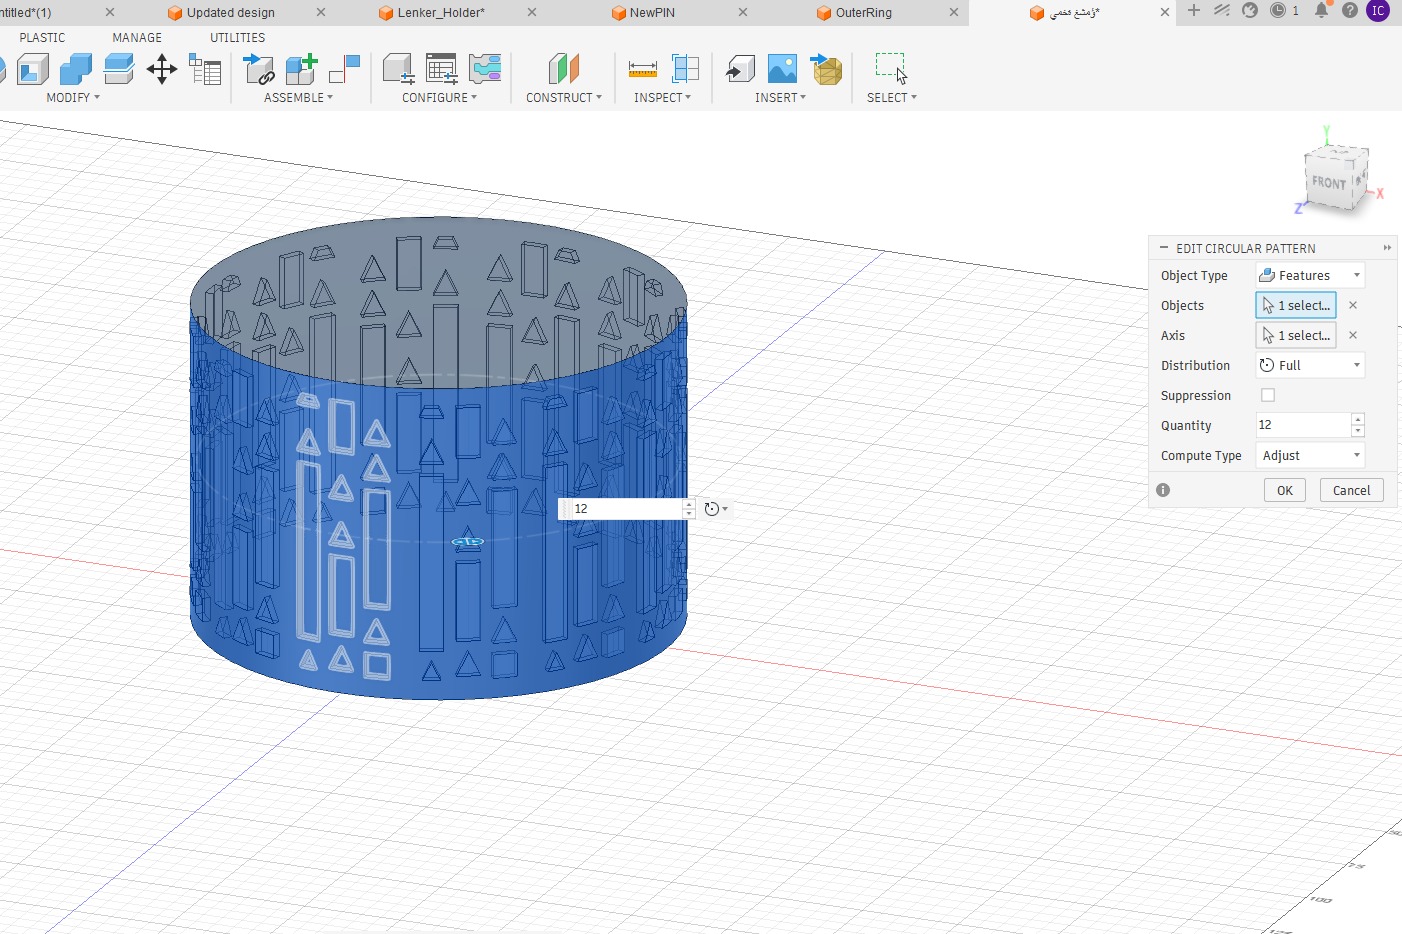
I designed the plant pot form in Fusion 360, incorporating the decorative motif details directly into the 3D model. Because the finished pot needed to release cleanly from the mold, I planned the geometry around a four-part split — four sections that could be assembled around the form and disassembled without damaging the cast piece. This also fulfills the extra credit requirement of using more than two mold parts.
Digital Design Process
-
Base cylinder & motif sketch
Started with the cylindrical pot body and sketched a single column of the cultural motif — combining geometric primitives to capture the decorative local pattern as one repeatable unit.
-
Circular Pattern around the body
Used the Circular Pattern feature with the motif as the source, the cylinder's central axis as the rotation axis, and a quantity of 12 set to Full distribution. This wrapped the motif evenly around the entire surface in one operation.
-
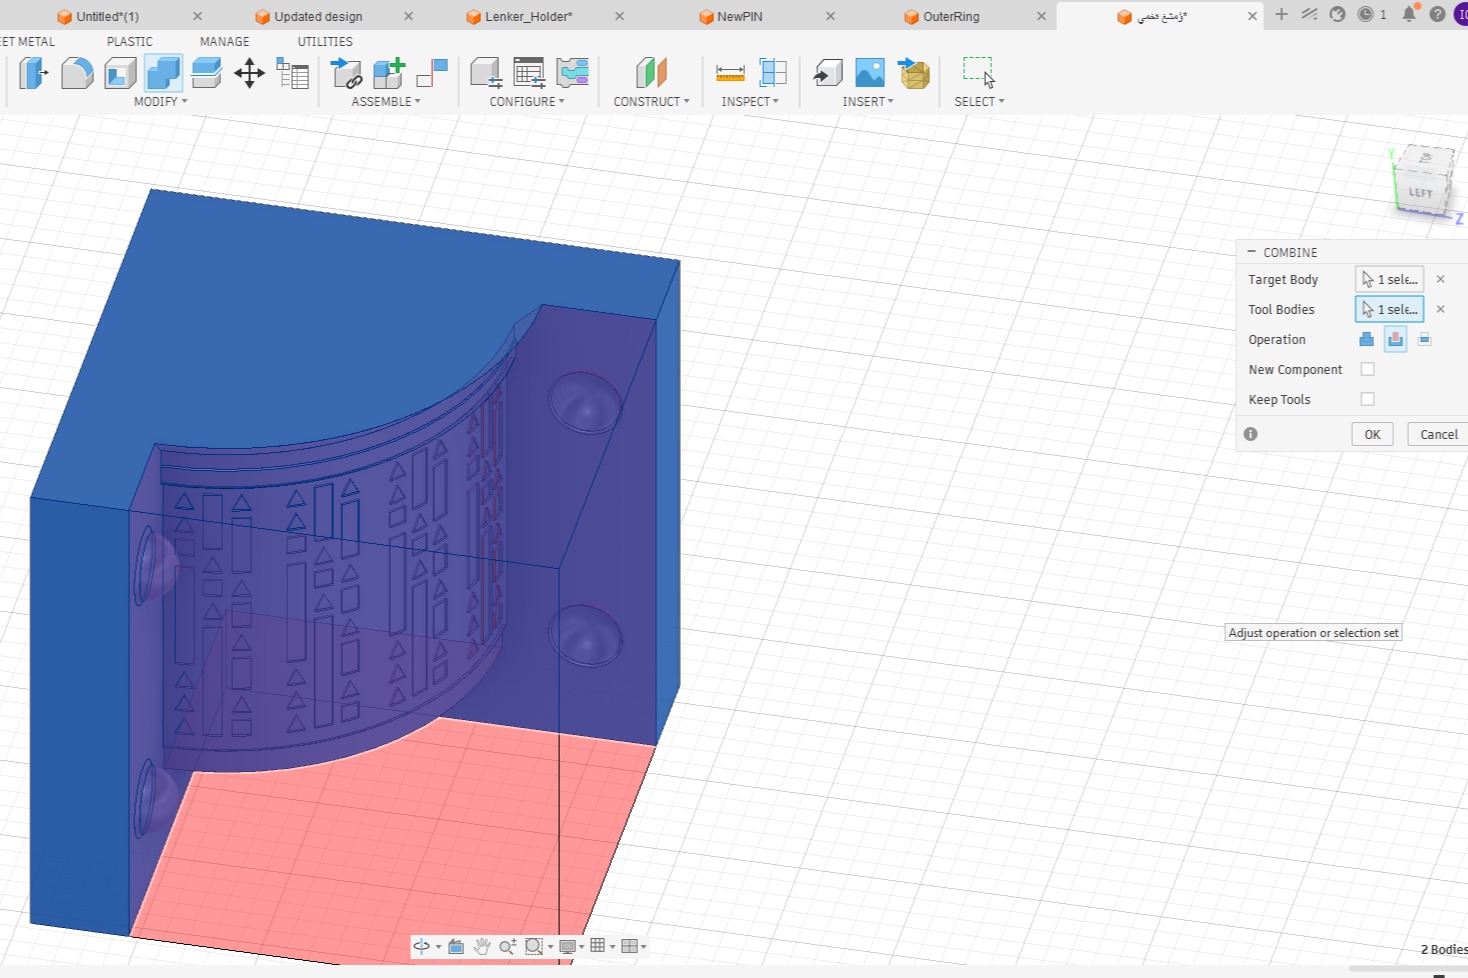
Combine — engrave the pattern
Ran a Combine (Cut) operation between the patterned tool bodies and the cylinder, recessing the motif into the pot wall to give the cast piece its raised/sunk surface texture.
-
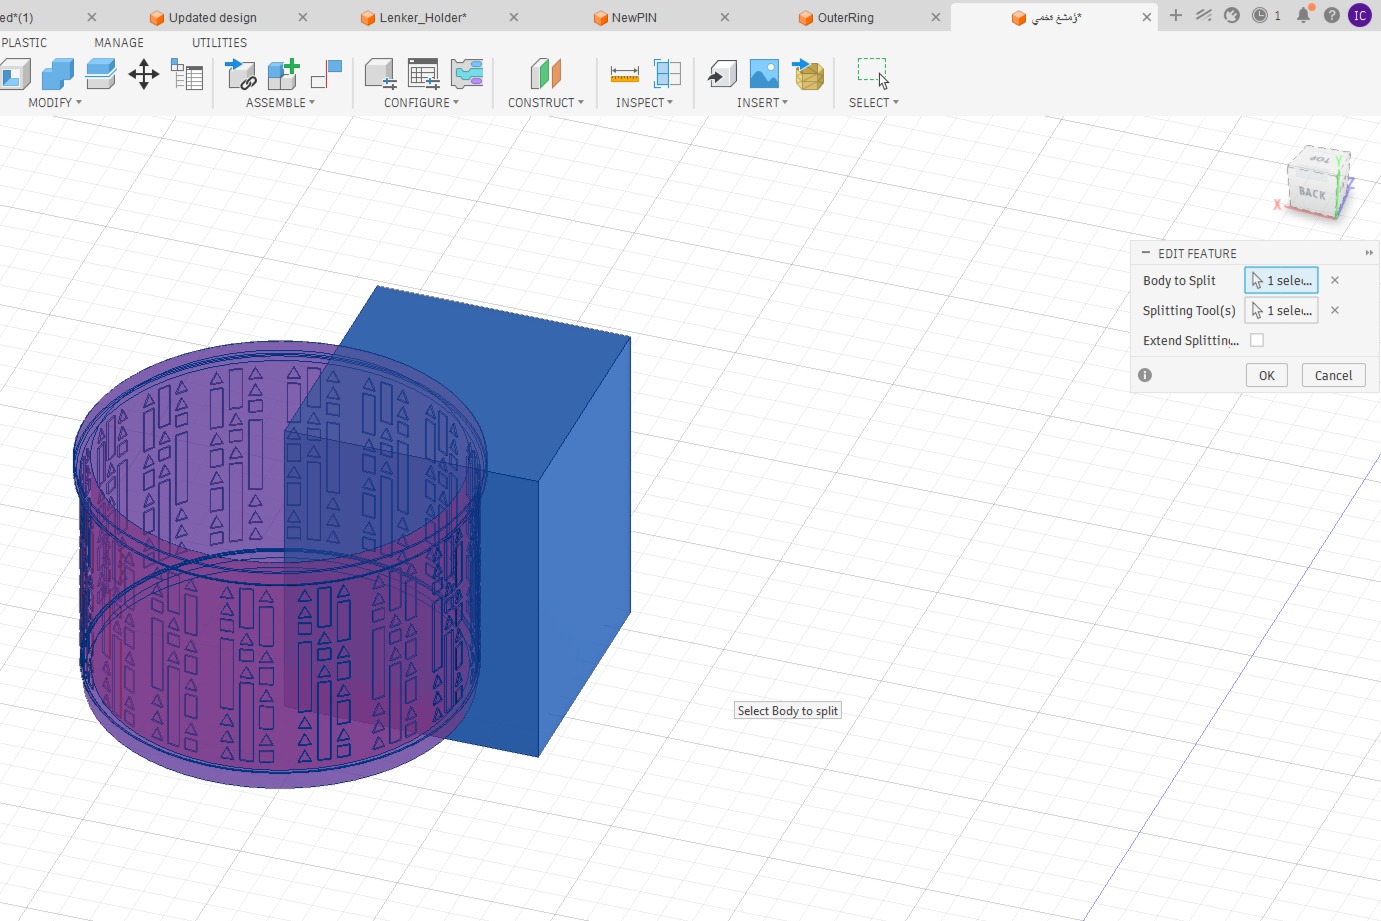
Split Body — four mold sections
Used the Split Body tool with a pair of orthogonal construction planes to divide the patterned cylinder into four equal quarter sections. Each quarter became one of the gypsum mold pieces, designed to assemble around the form and disassemble without damaging the cast piece.
-
Export STL for 3D printing
Exported a single mold section as an STL ready for SLA printing — the master form used to cast all four gypsum mold parts.

Download the STL file to explore or 3D print the mold design.
3D Printing the Master Form
A single mold section was 3D printed using SLA (resin) printing, chosen for its ability to reproduce the fine surface details of the cultural motifs accurately and with a smooth finish. This master form was then used four times — casting gypsum around it once per section — to produce all four identical mold parts.
Formlabs Form 3L
Draft V2 Resin
SLA (Stereolithography)
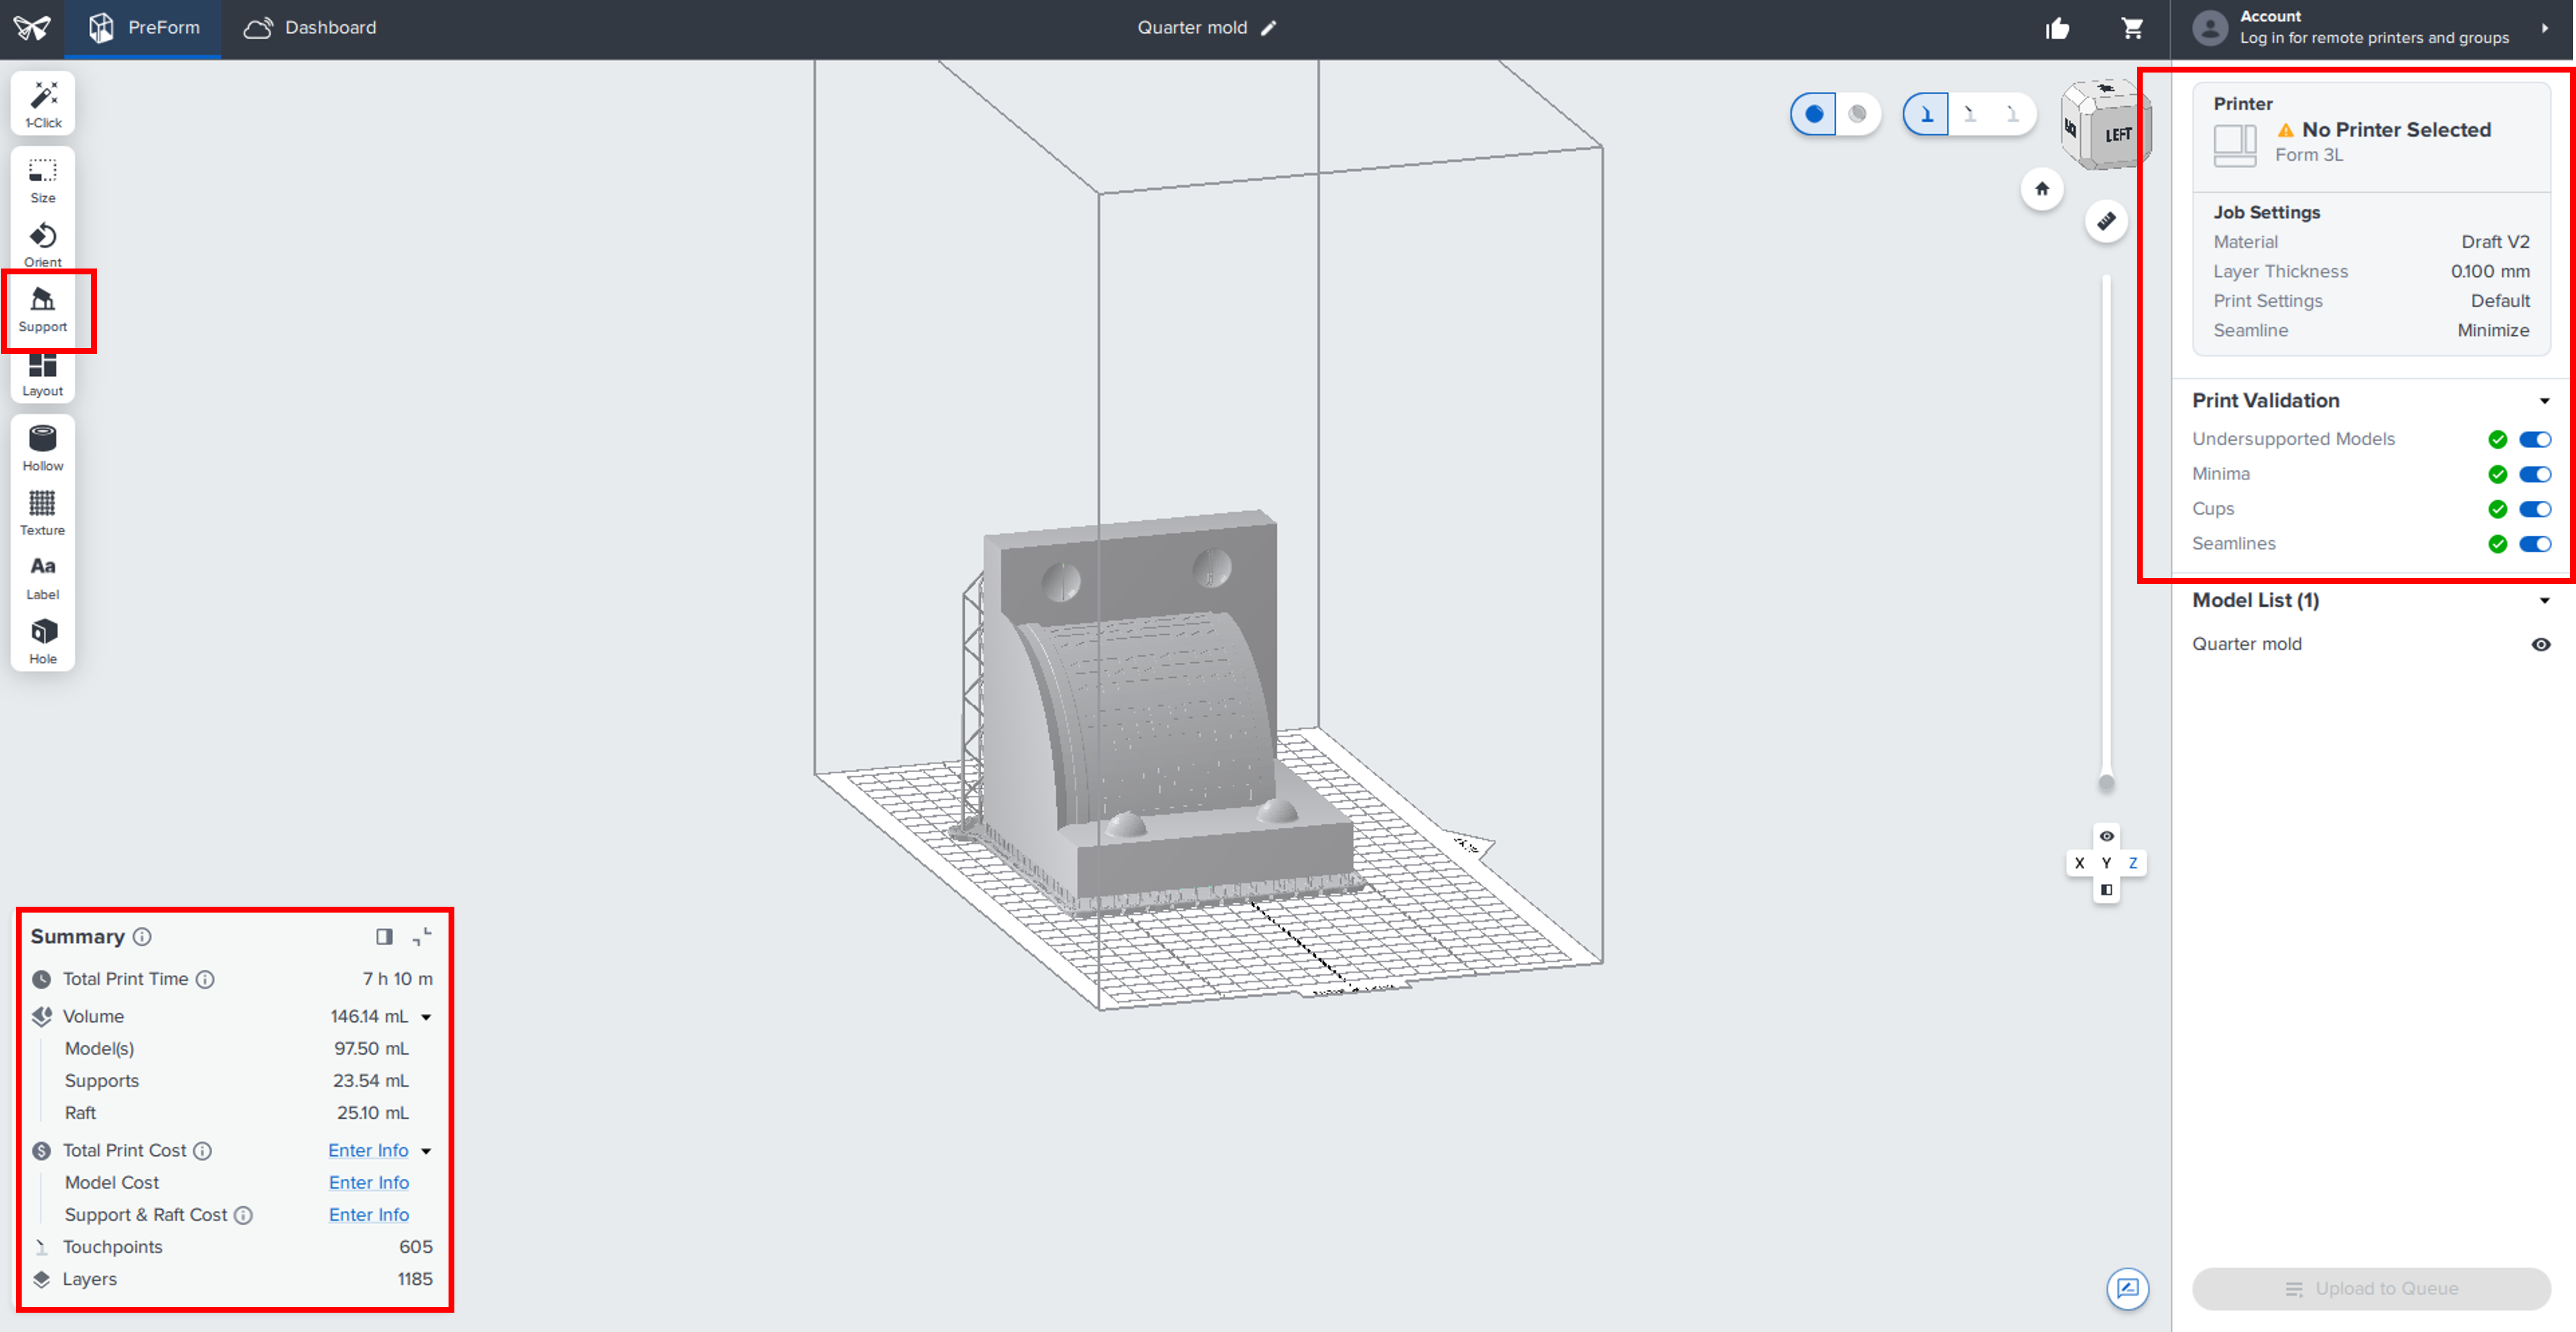
Default support and slicing settings with no modifications. All validation checks passed; total print time: 7 hours.
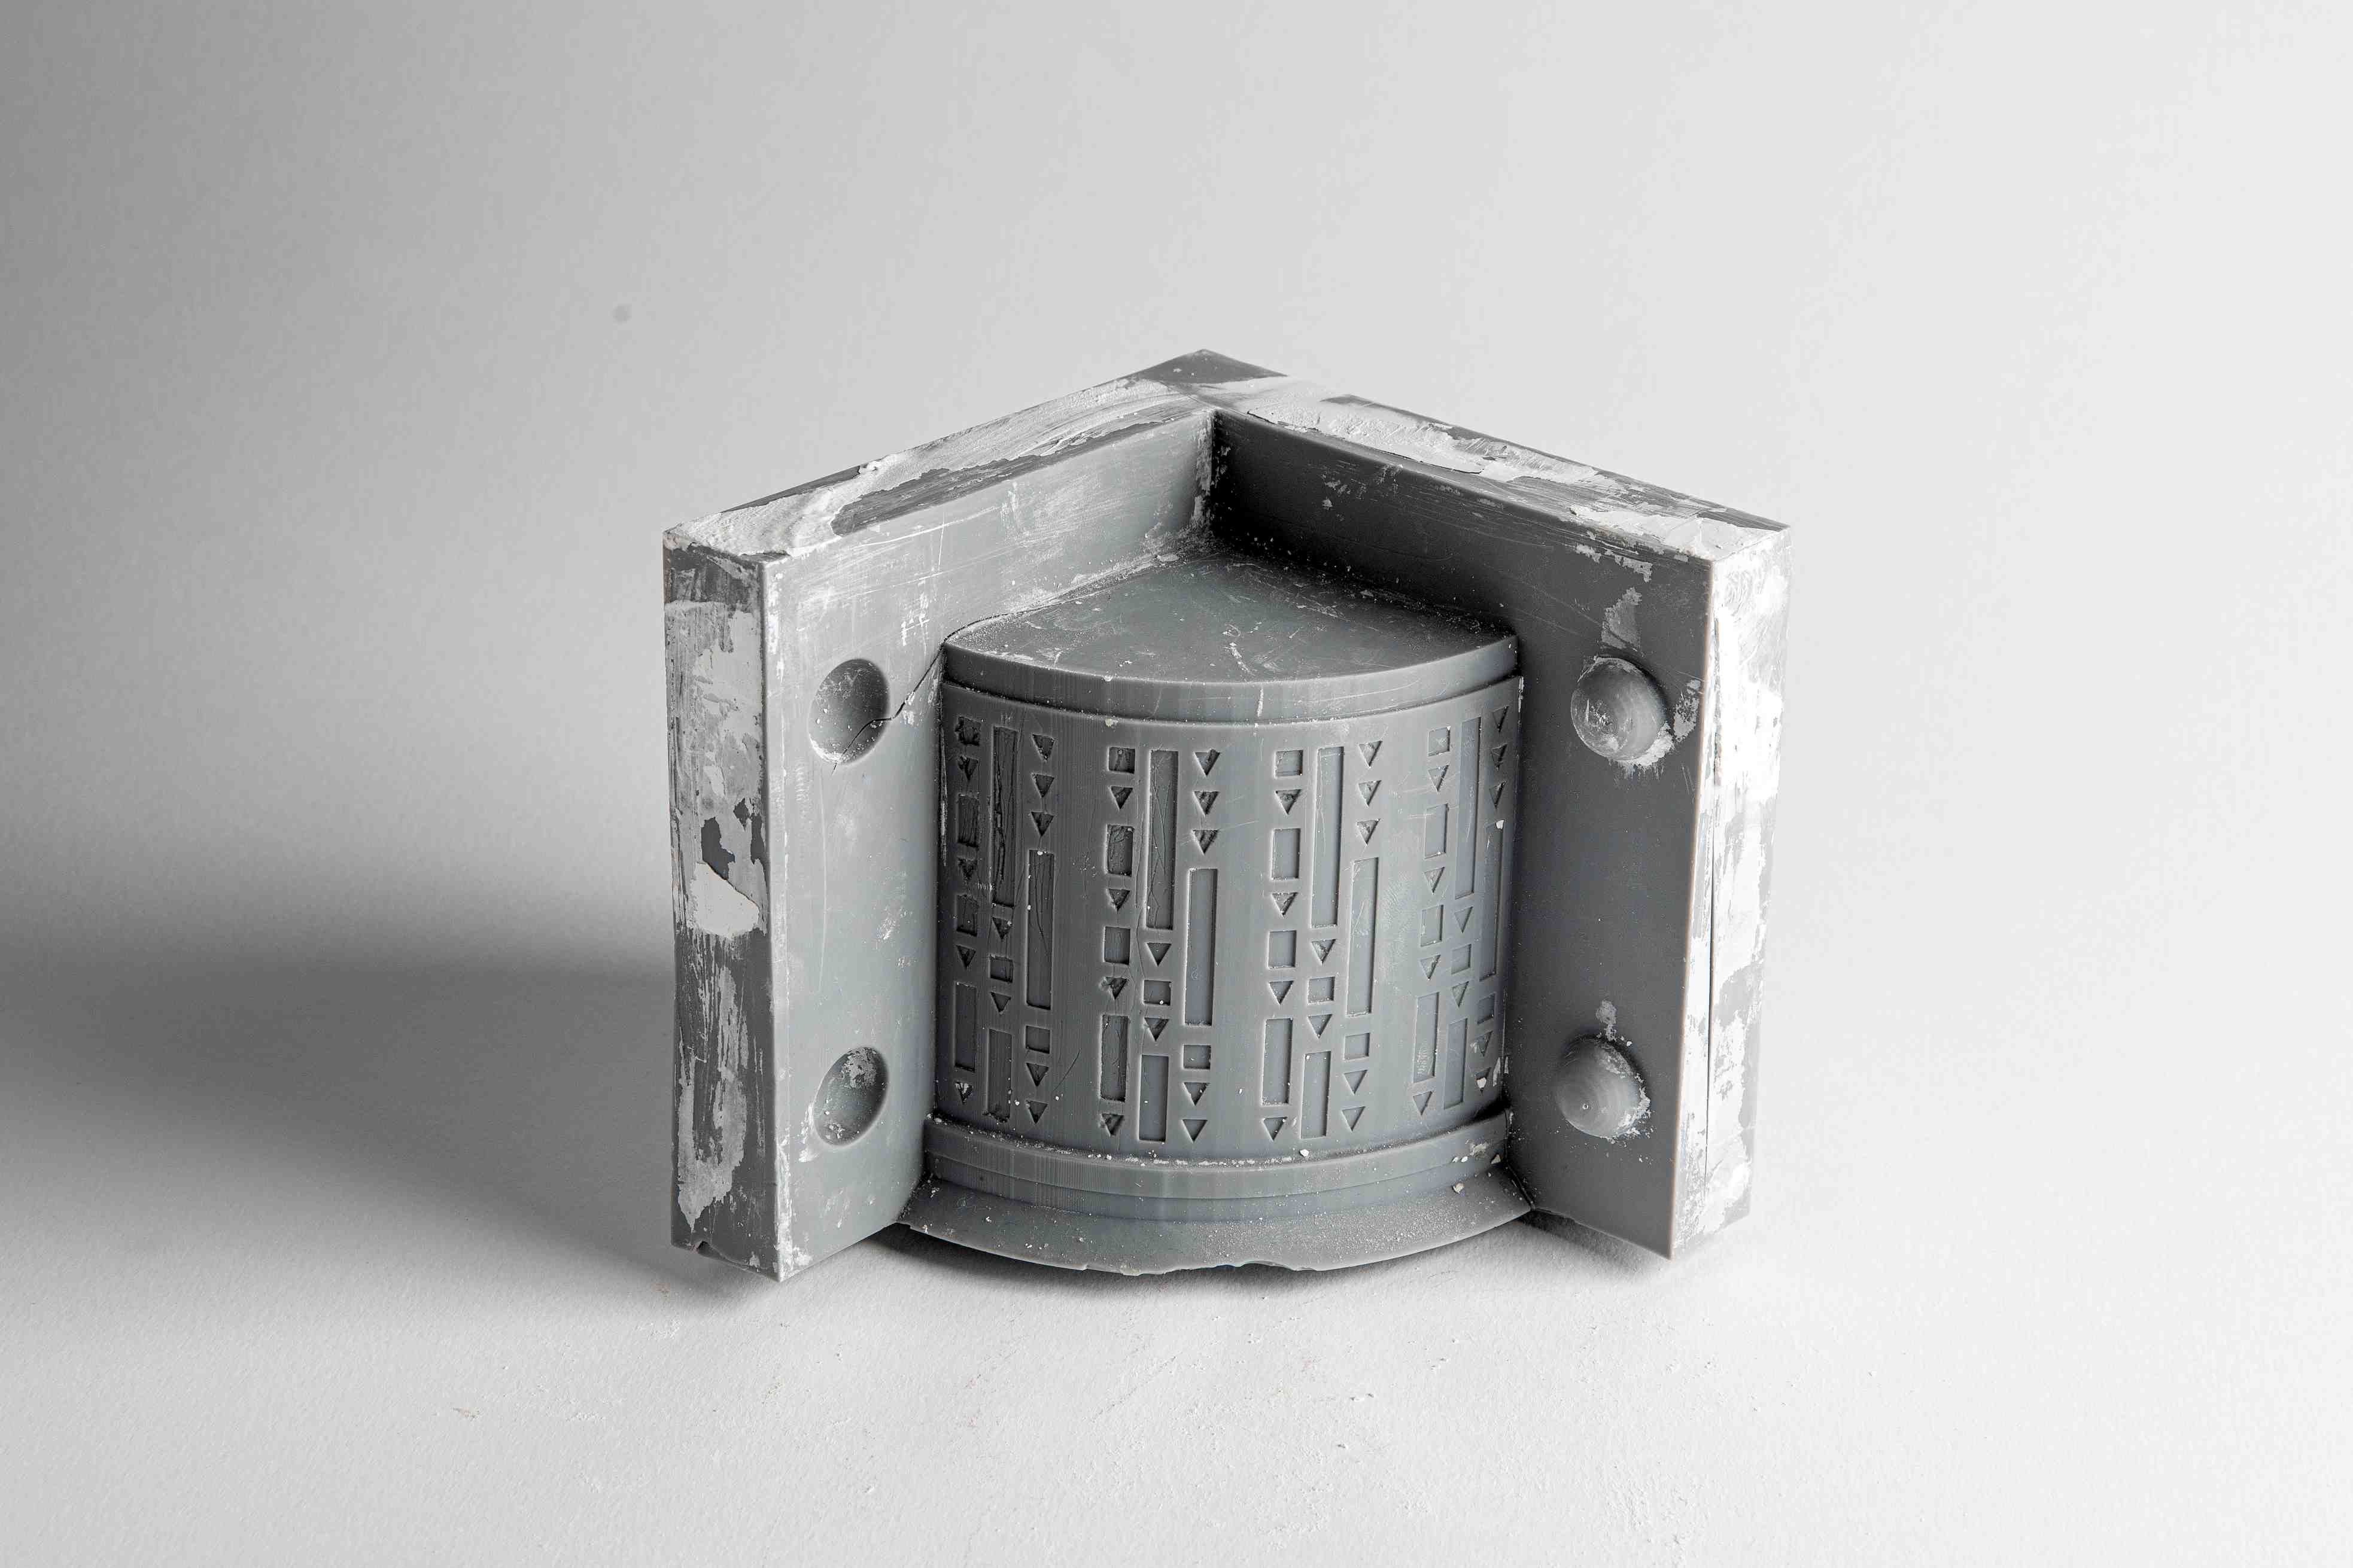
Formlabs Form 3L — SLA printed master form in Draft V2 Resin showing the decorative motif pattern
Making the Gypsum Mold
Preparing the Form & Walls
Before pouring, I applied wax as a release agent to the 3D printed form to prevent the gypsum from bonding to it permanently. The form was then enclosed using acrylic walls to contain the pour and create clean, straight edges that make disassembly easier.
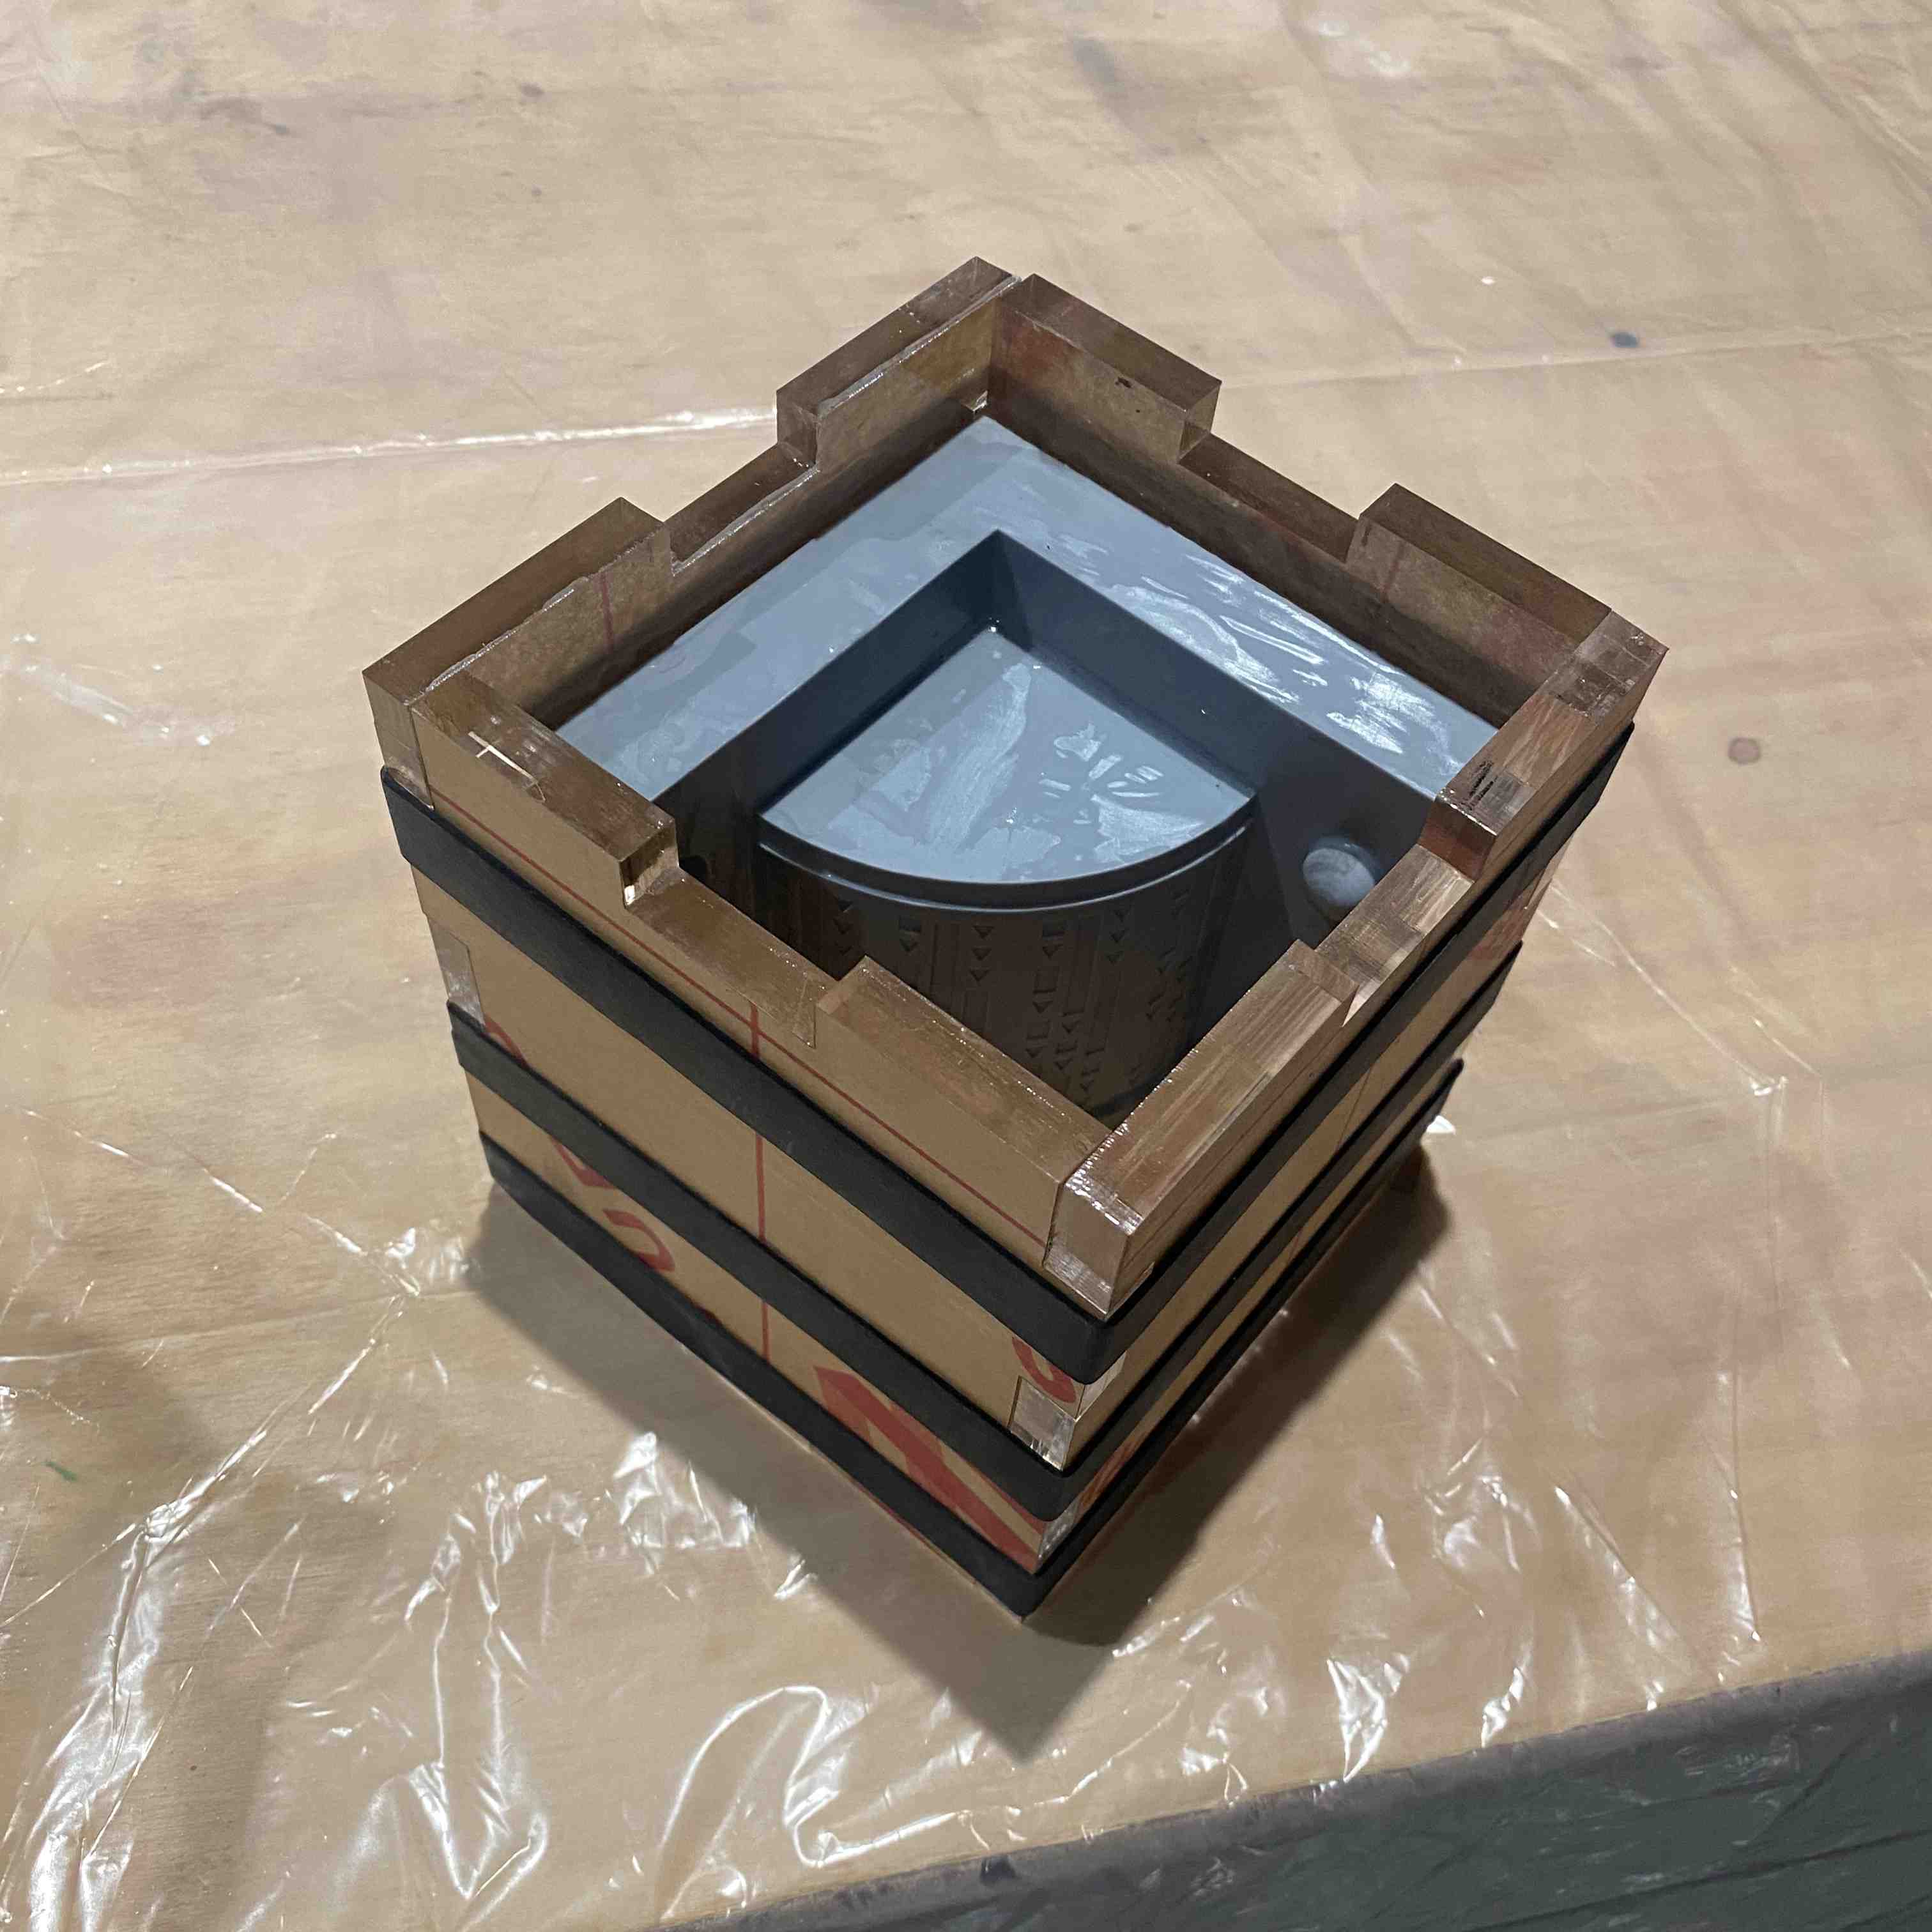
Left: Wax applied as release agent · Right: Form enclosed in acrylic walls before pouring
Mixing the Gypsum
Always add gypsum powder to water — never the other way around. Mix slowly and steadily to avoid introducing air bubbles, which can weaken the mold and leave voids on the casting surface.
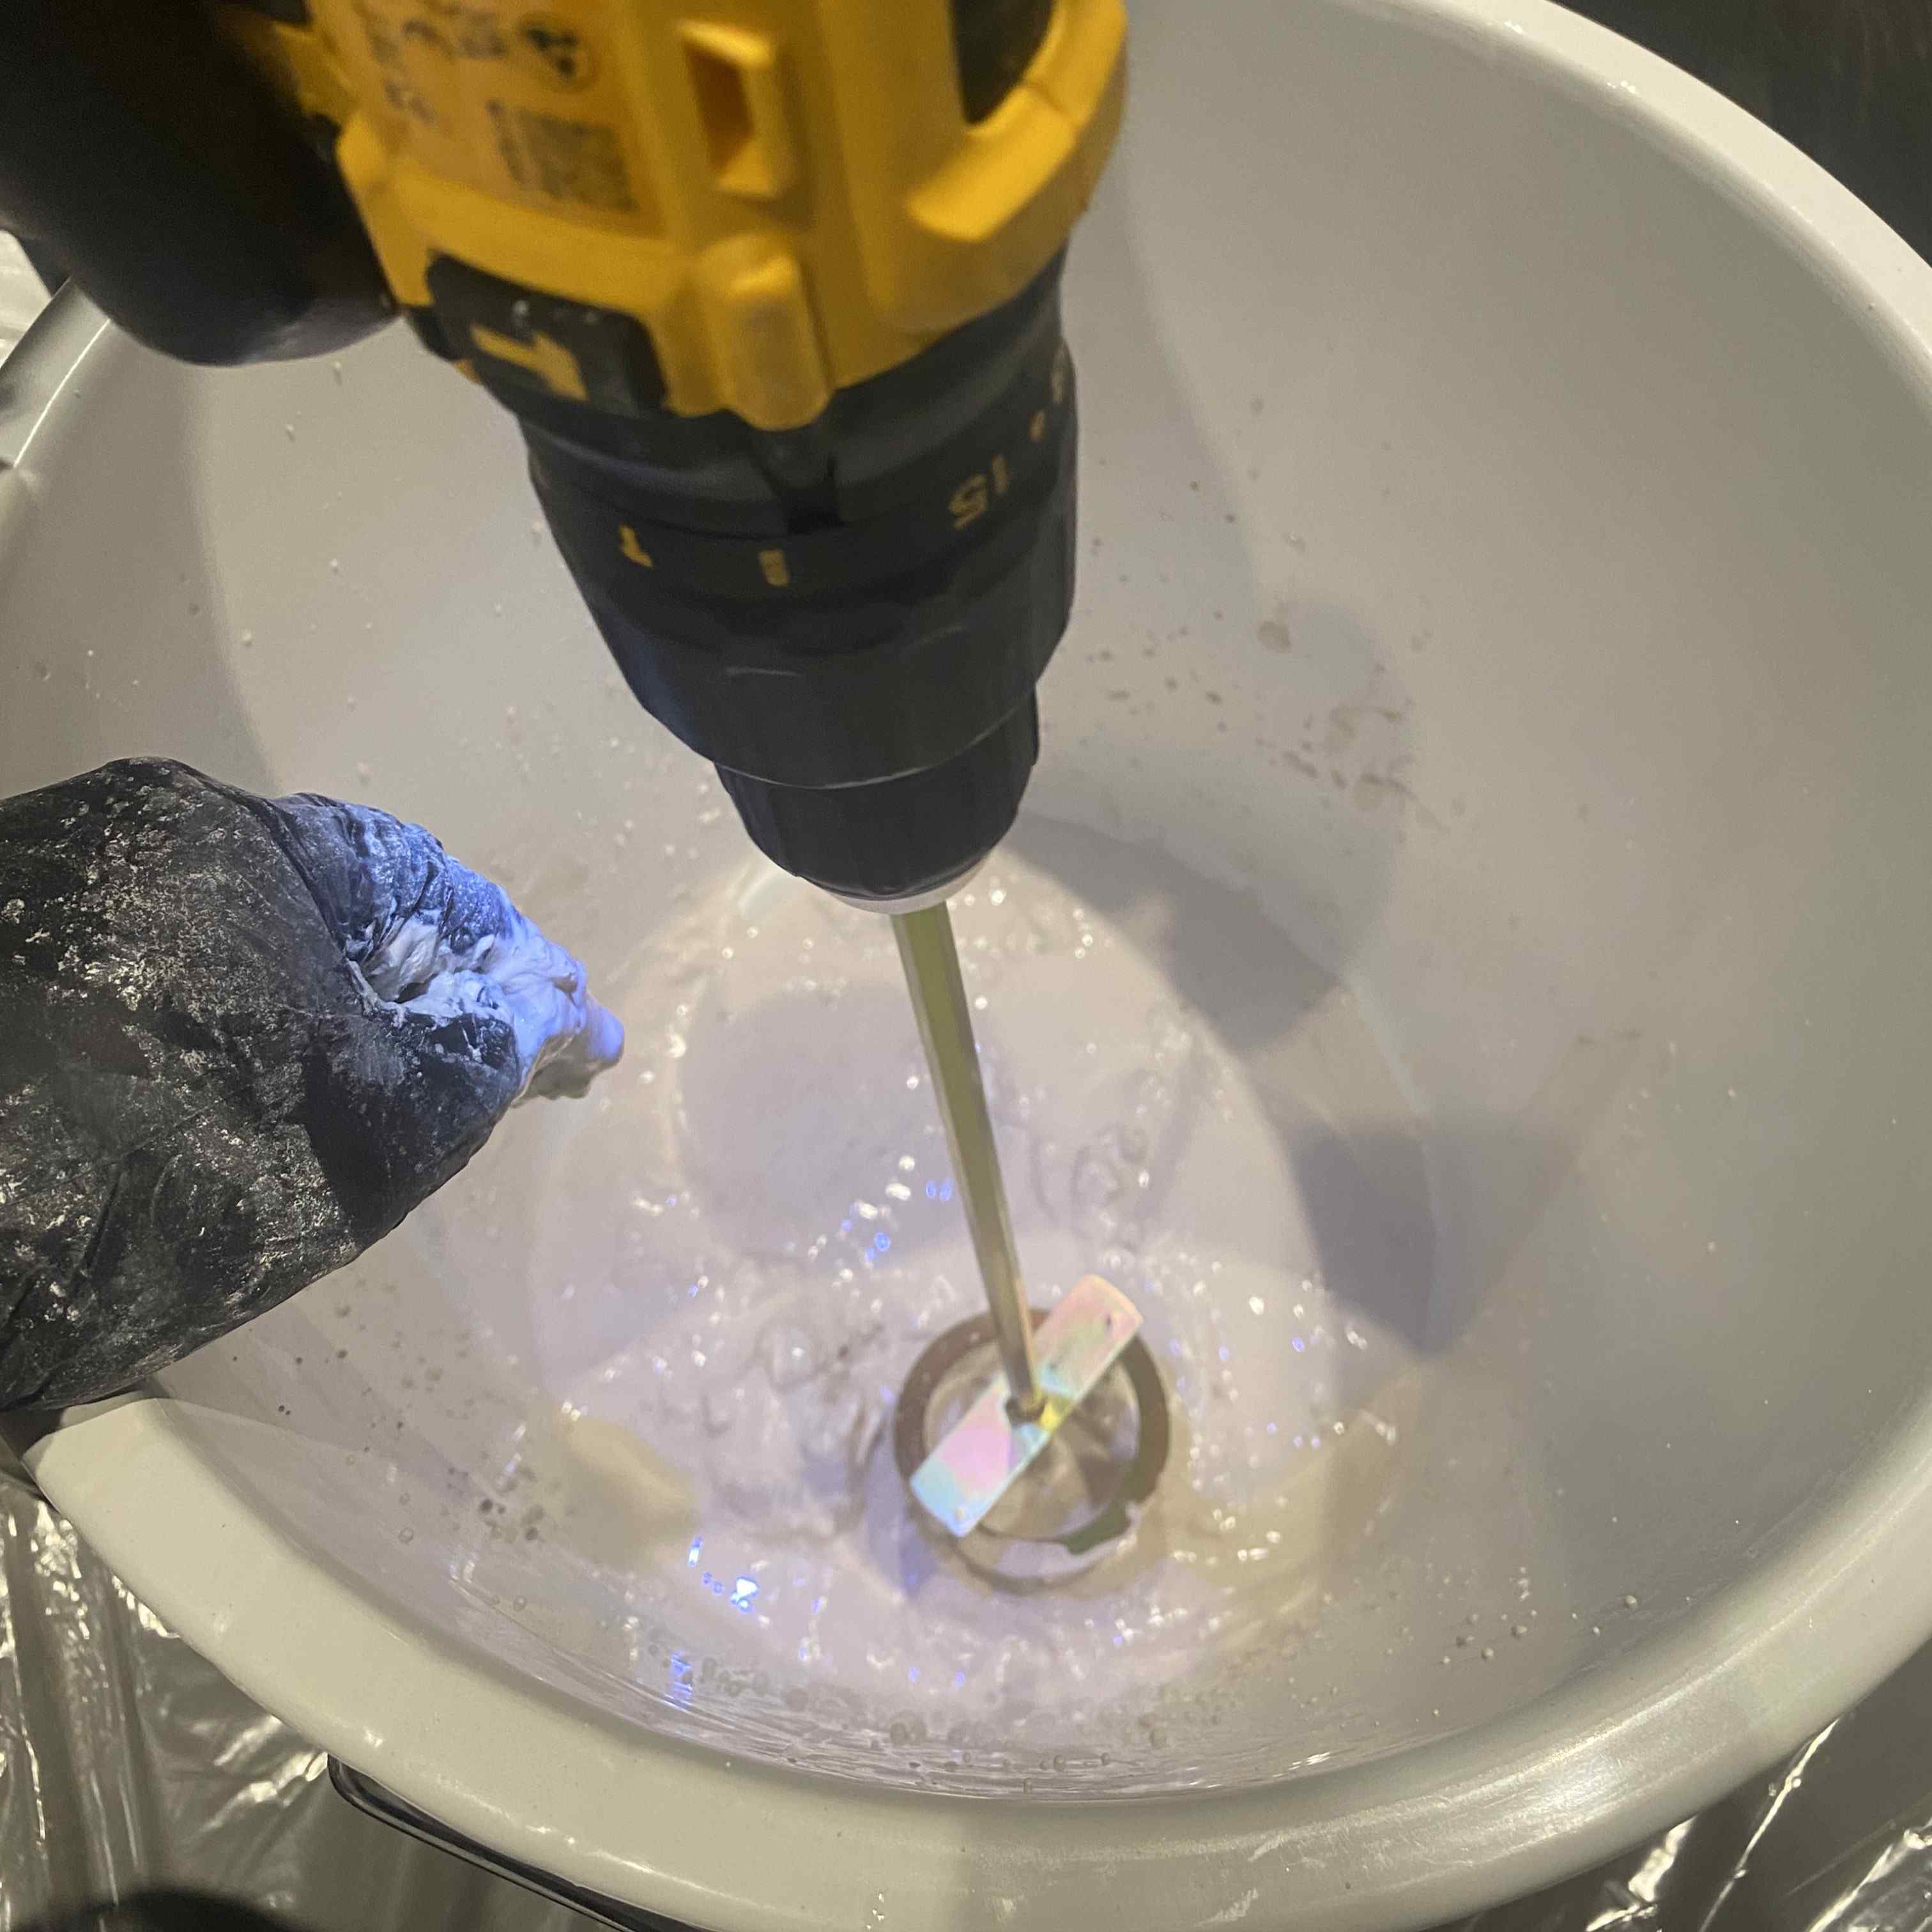
Mixing gypsum using a drill mixer for a smooth, bubble-free consistency
Pouring & Setting
The mixed gypsum was poured slowly and steadily to minimize bubbles. After approximately 10 minutes, the gypsum hardened and cooled — a reliable sign it had fully set. The acrylic walls were then carefully removed. This process was repeated four times to produce all mold sections.
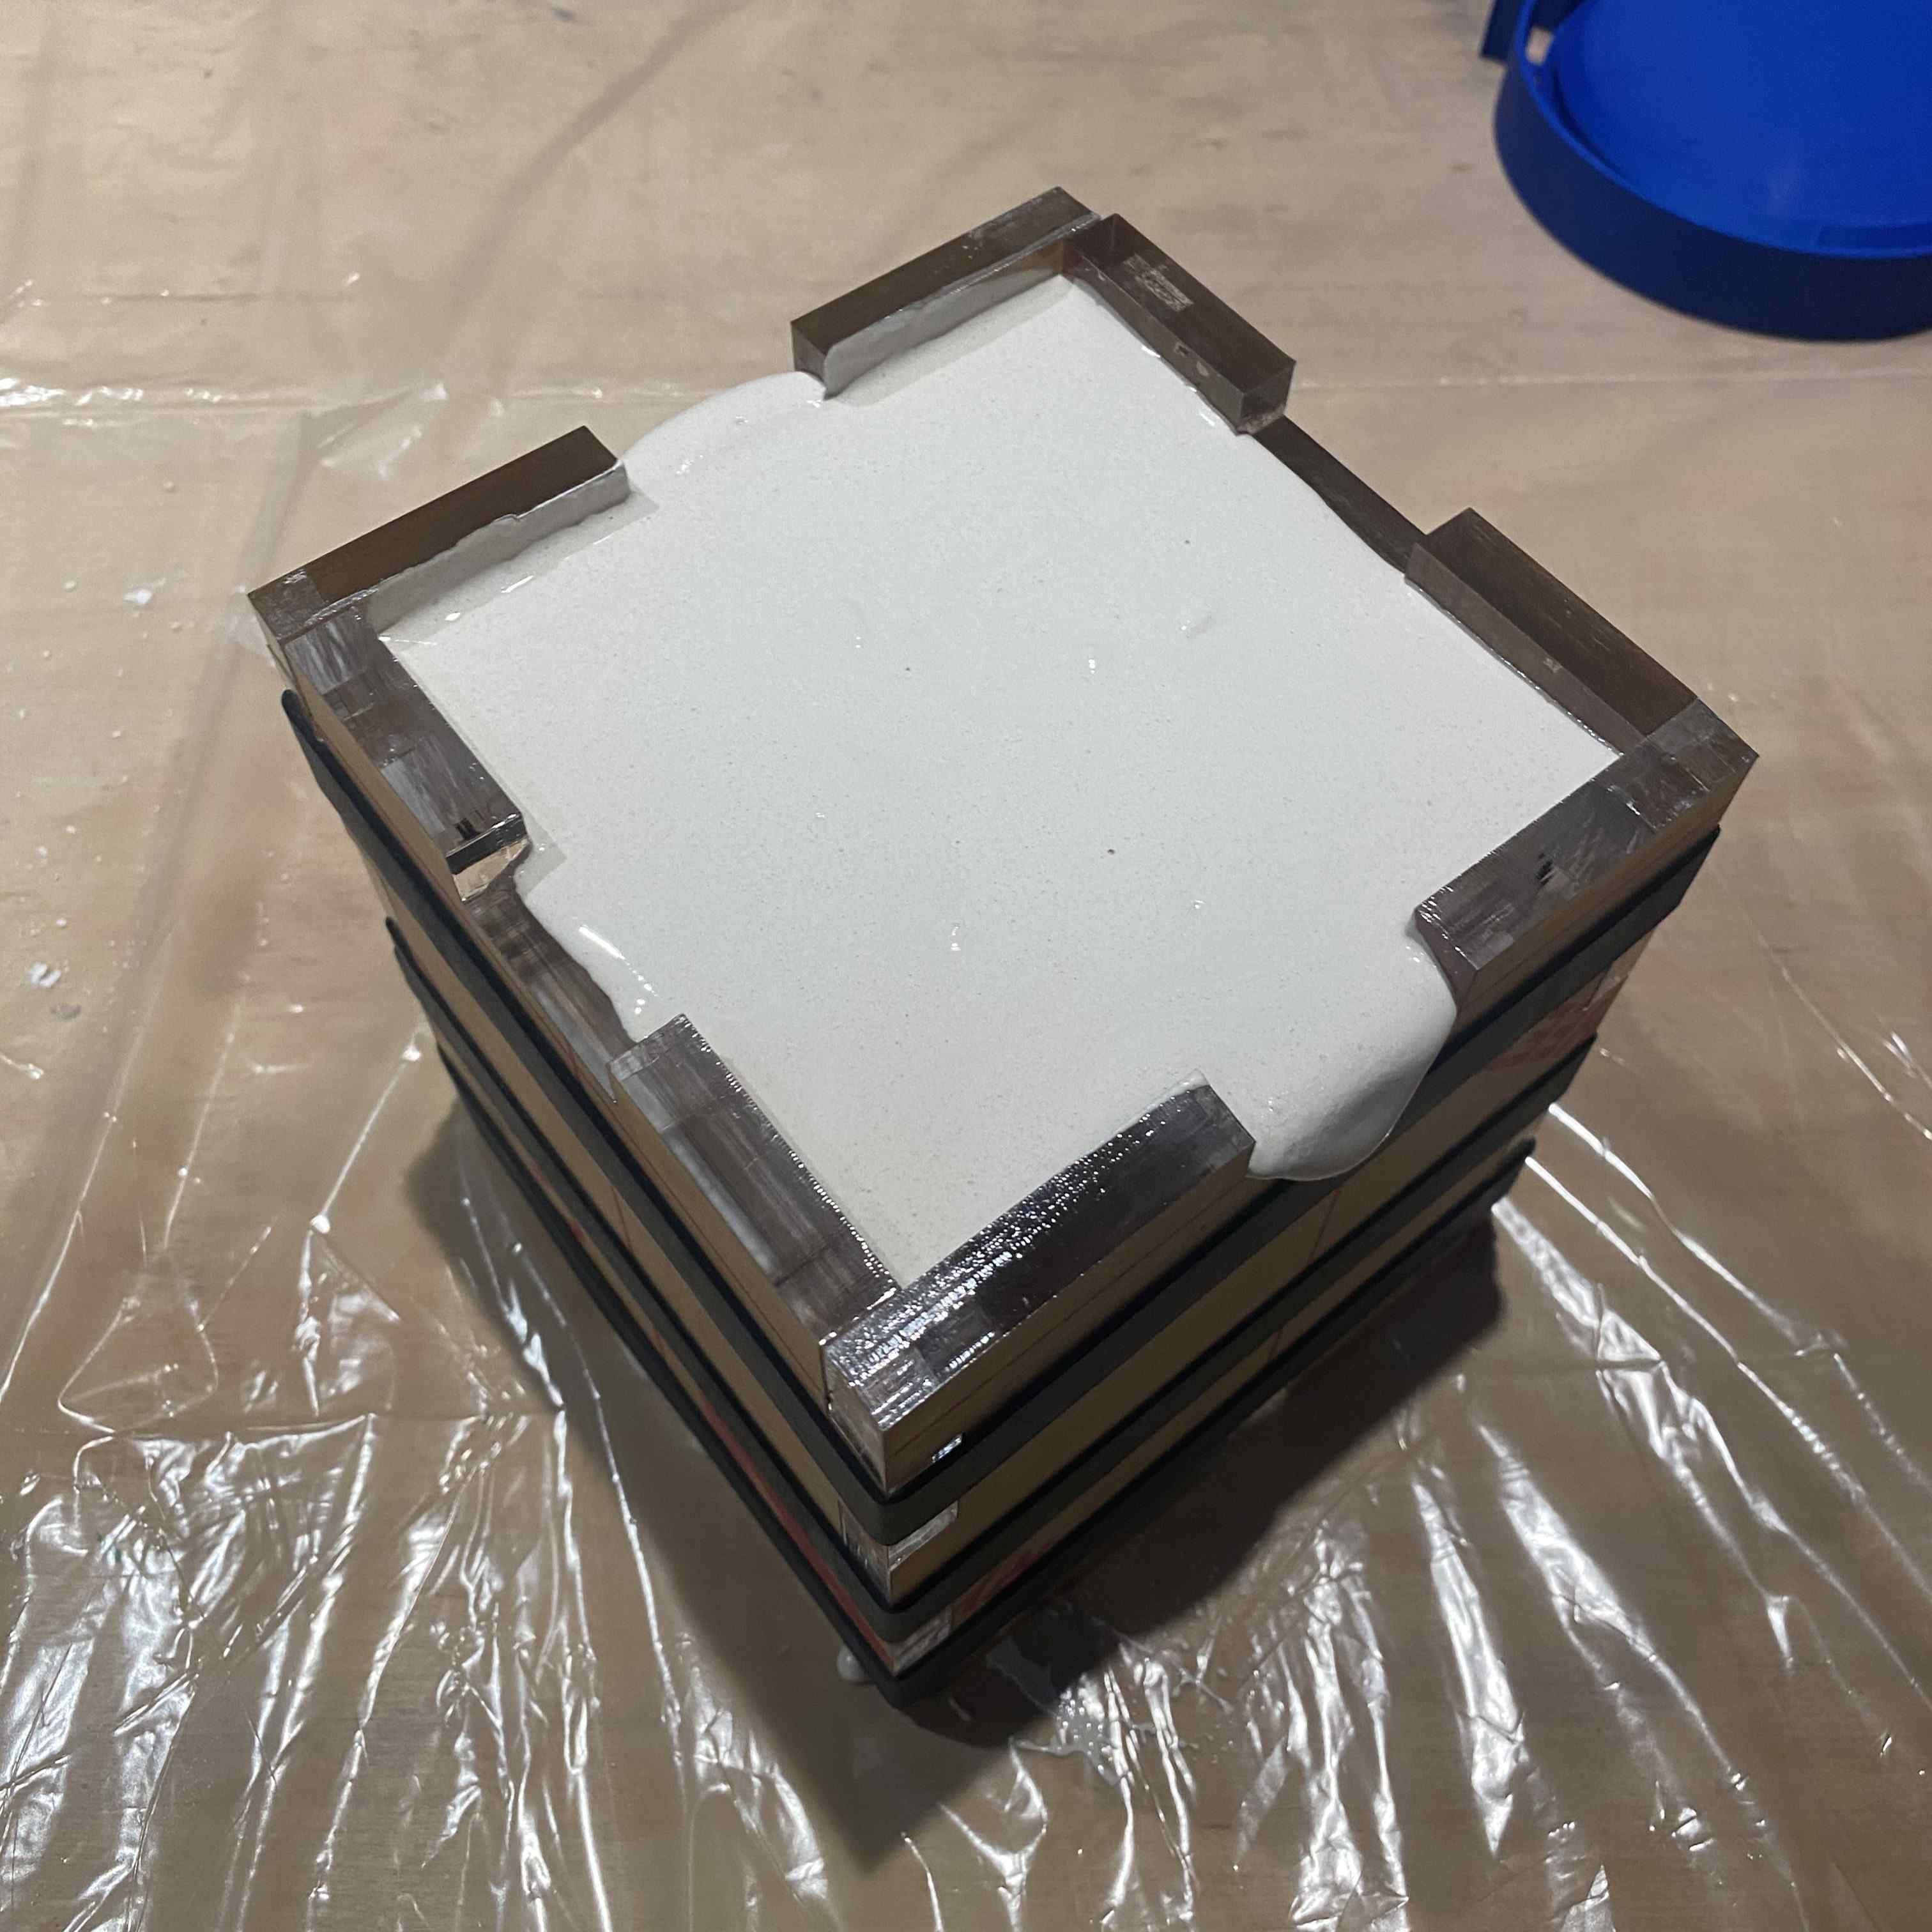
Gypsum poured and setting inside the acrylic wall enclosure
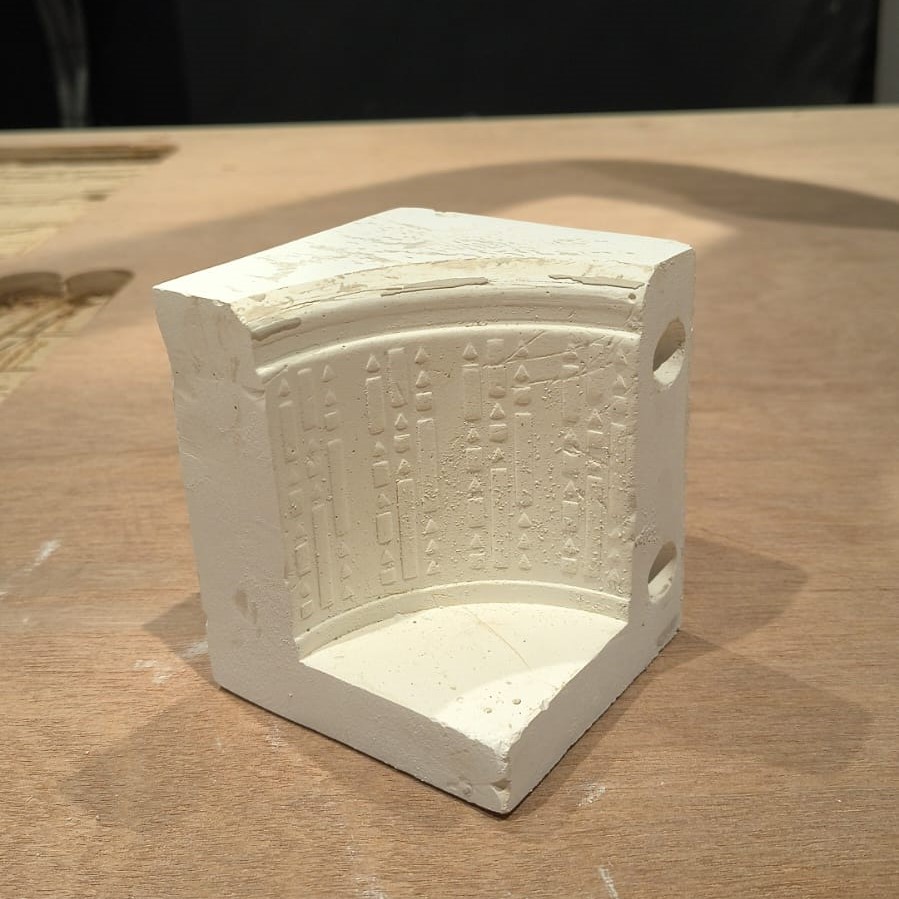
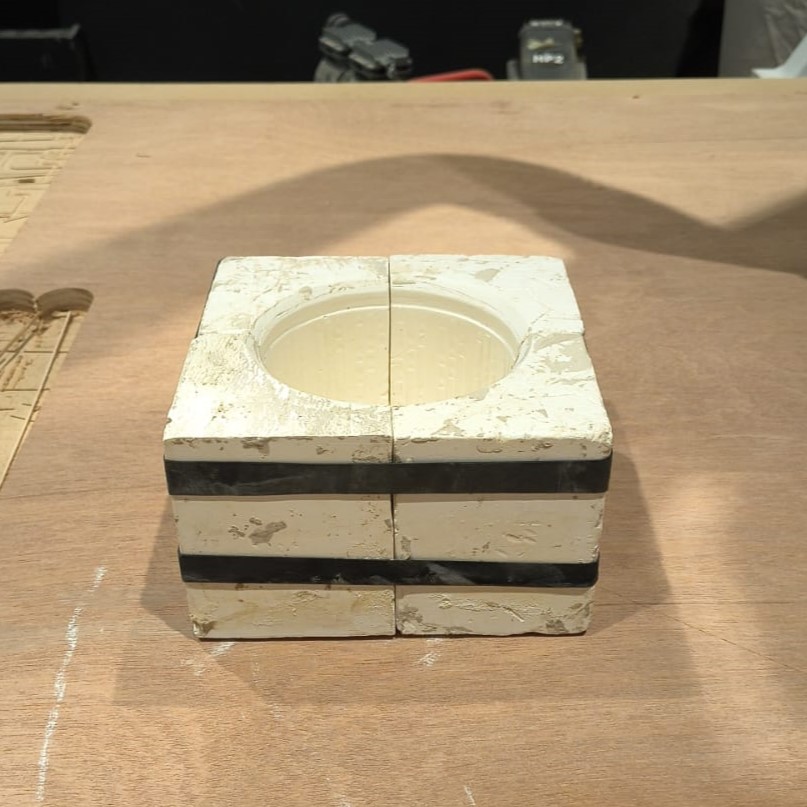
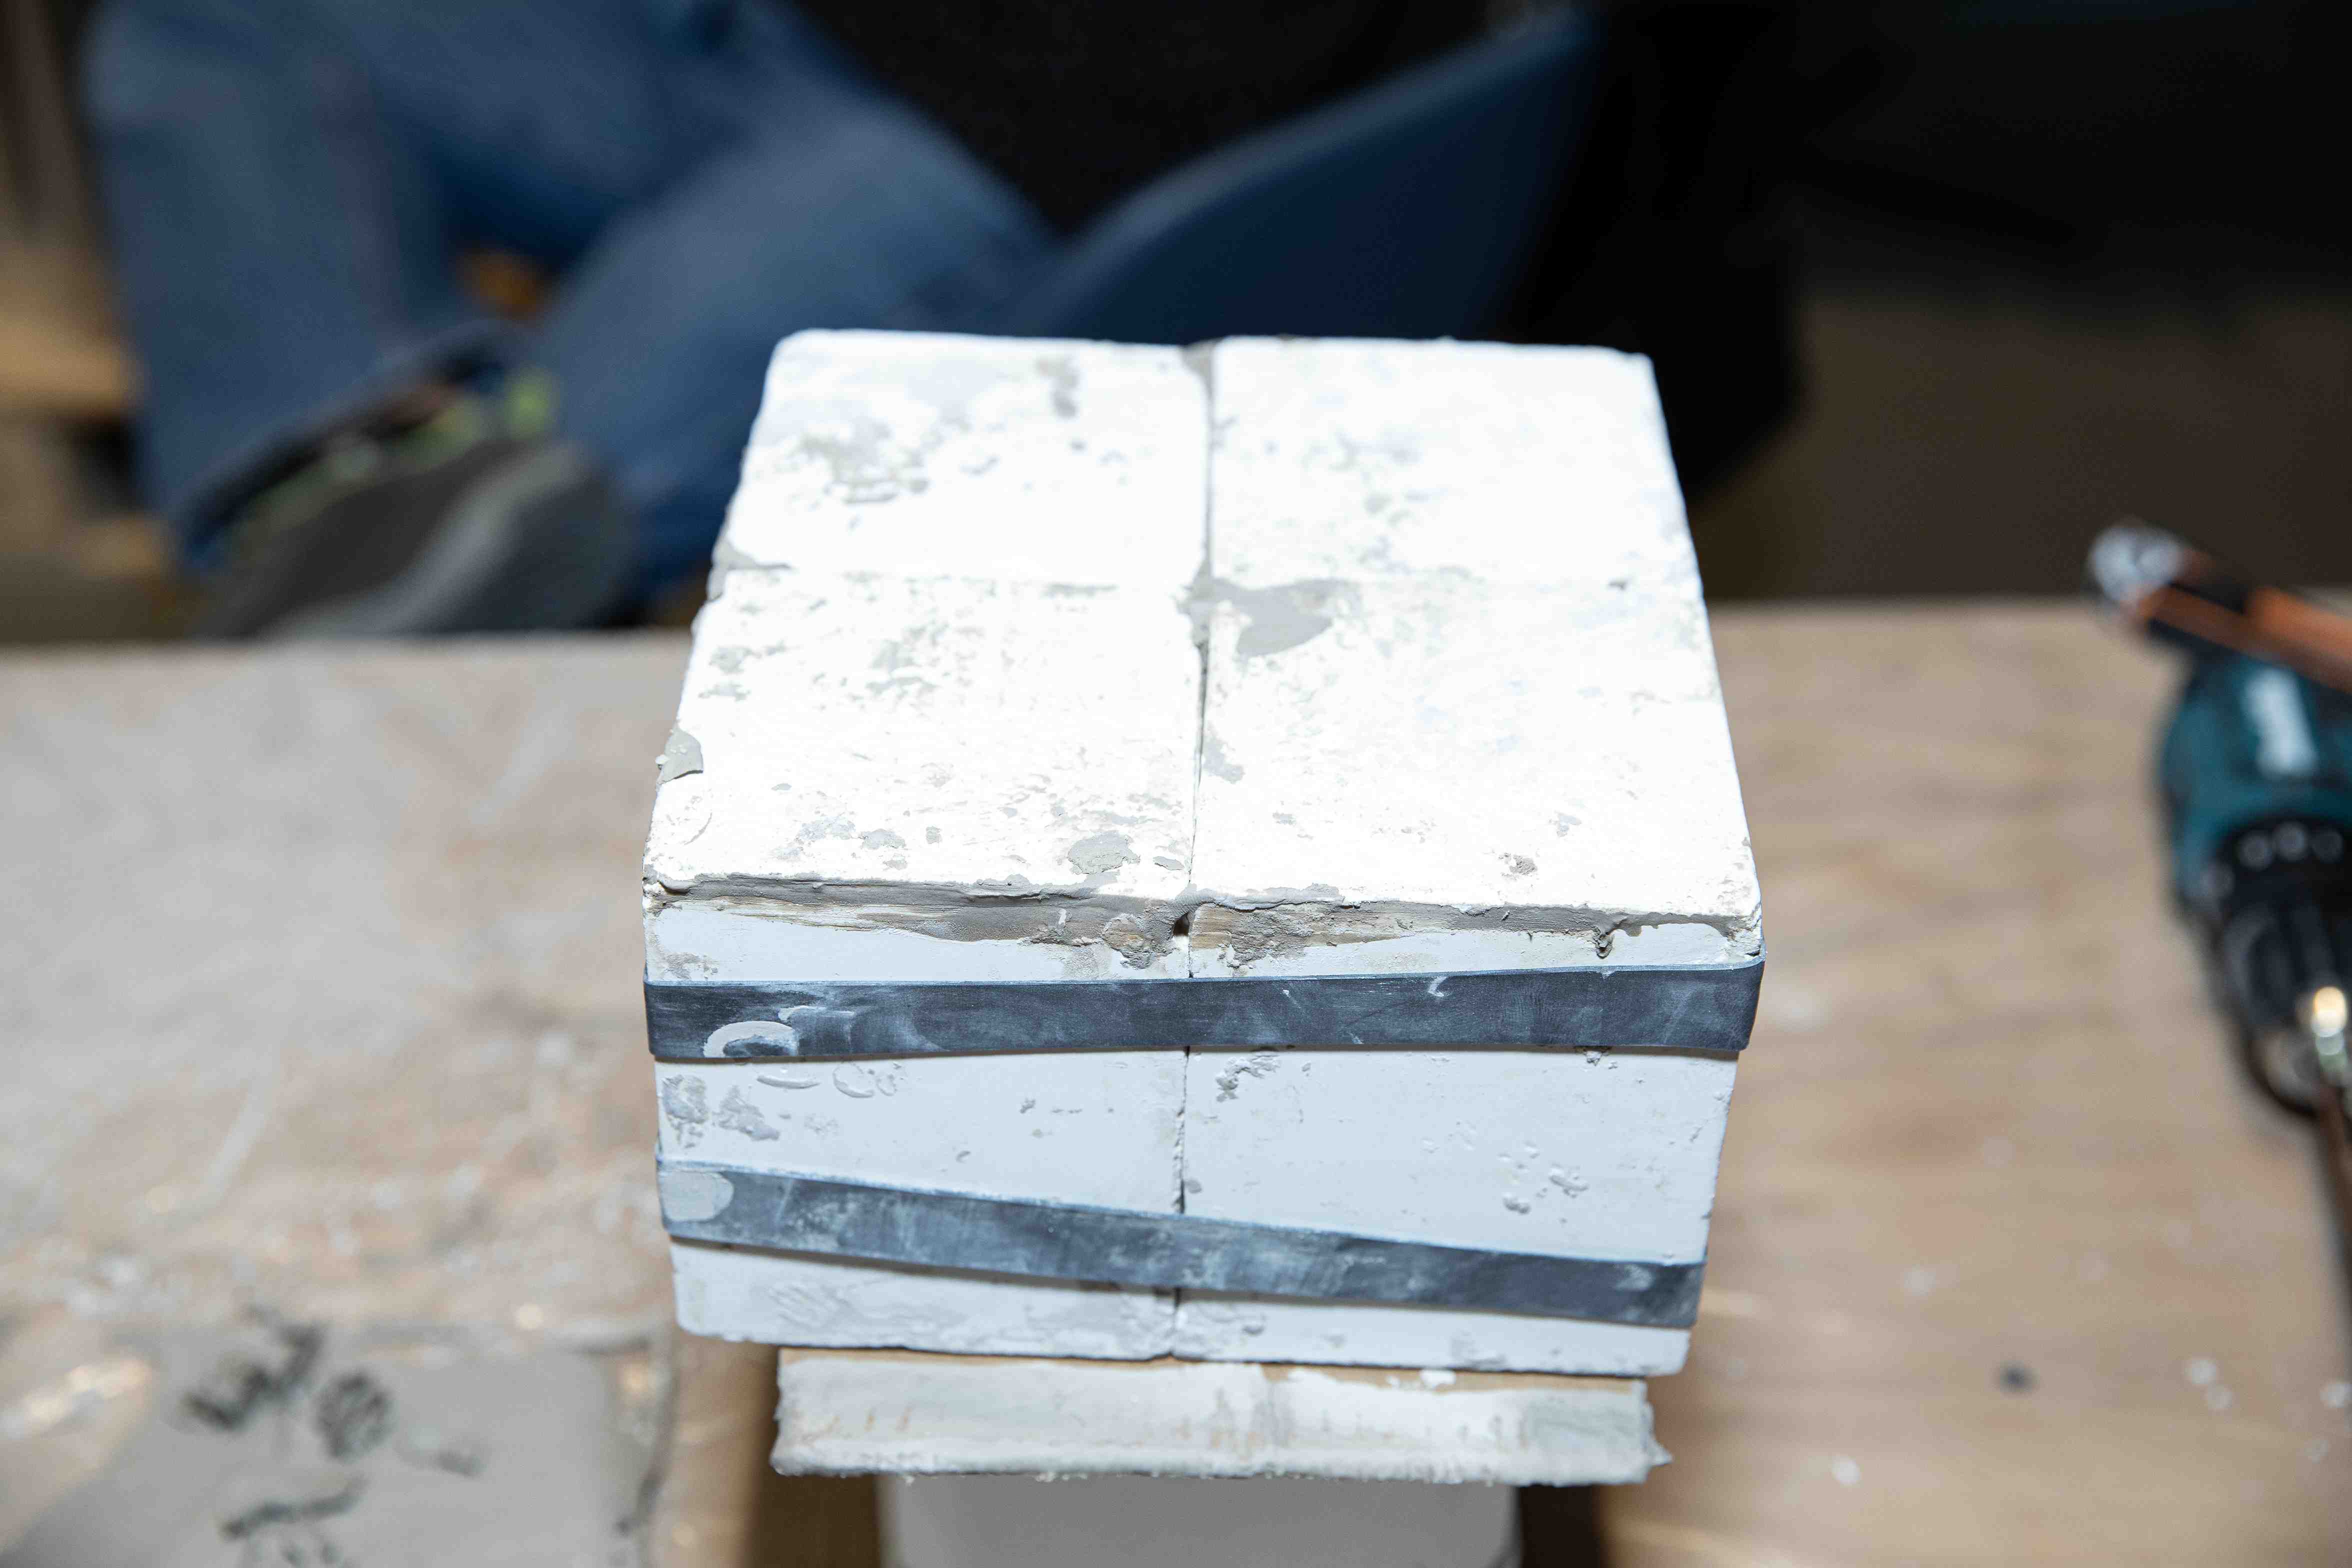
Left: Single gypsum section after demolding · Right: All four sections completed
Slip Casting the Plant Pot
With all four gypsum sections ready, I assembled the complete mold and secured the parts together. Liquid clay (slip) was thoroughly mixed before use, then poured steadily into the top opening of the mold.
Gypsum's natural porosity is what makes slip casting work — it draws moisture out of the liquid clay, building up a solid wall of consistent thickness against the mold surface. The longer the slip sits, the thicker the wall becomes.
- Poured slip to the top of the assembled mold
- Left it to sit for 30 minutes while the gypsum absorbed moisture and built up the clay wall
- Poured out the remaining liquid slip from the center
- Turned the mold upside down to drain any remaining slip
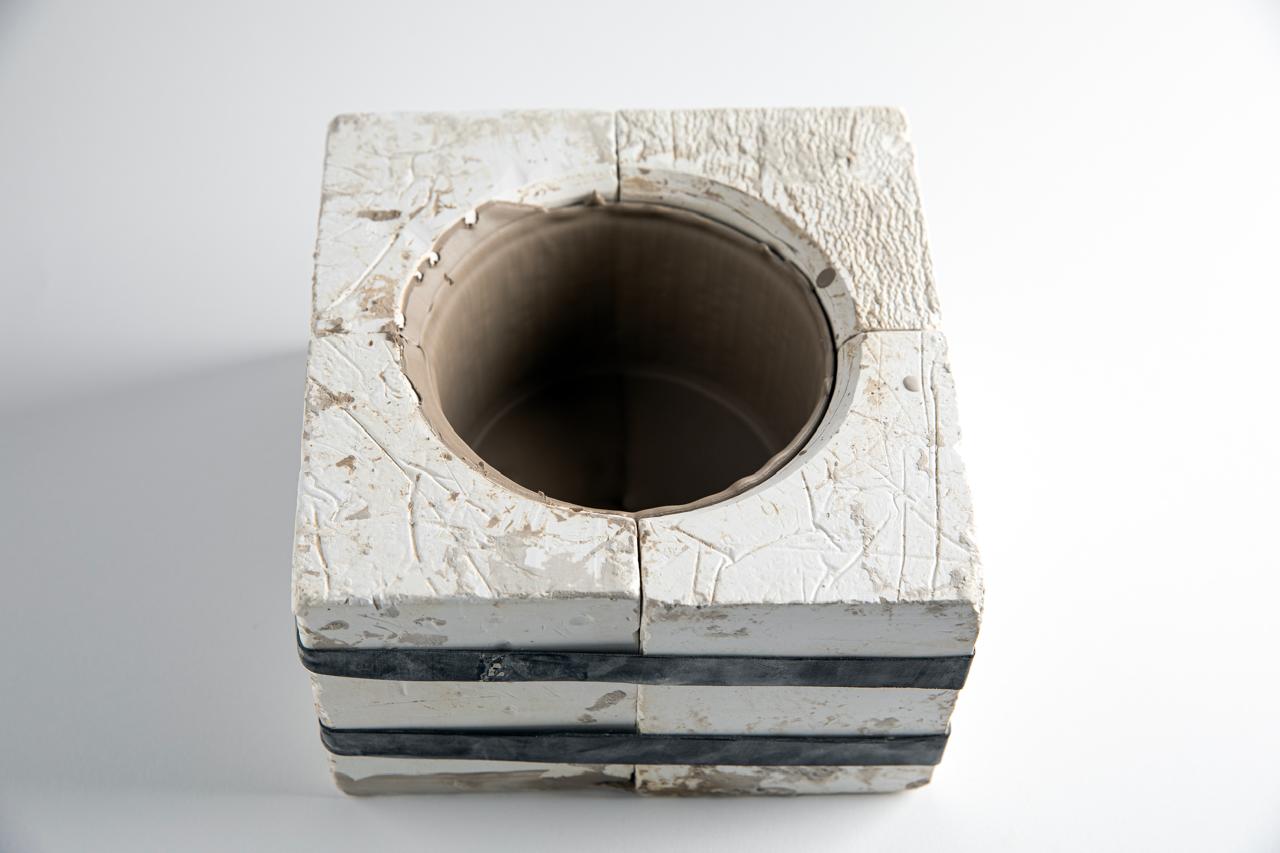
- Left the mold to dry until the clay visibly separated from the gypsum walls
- Carefully removed all four mold sections to reveal the cast pot
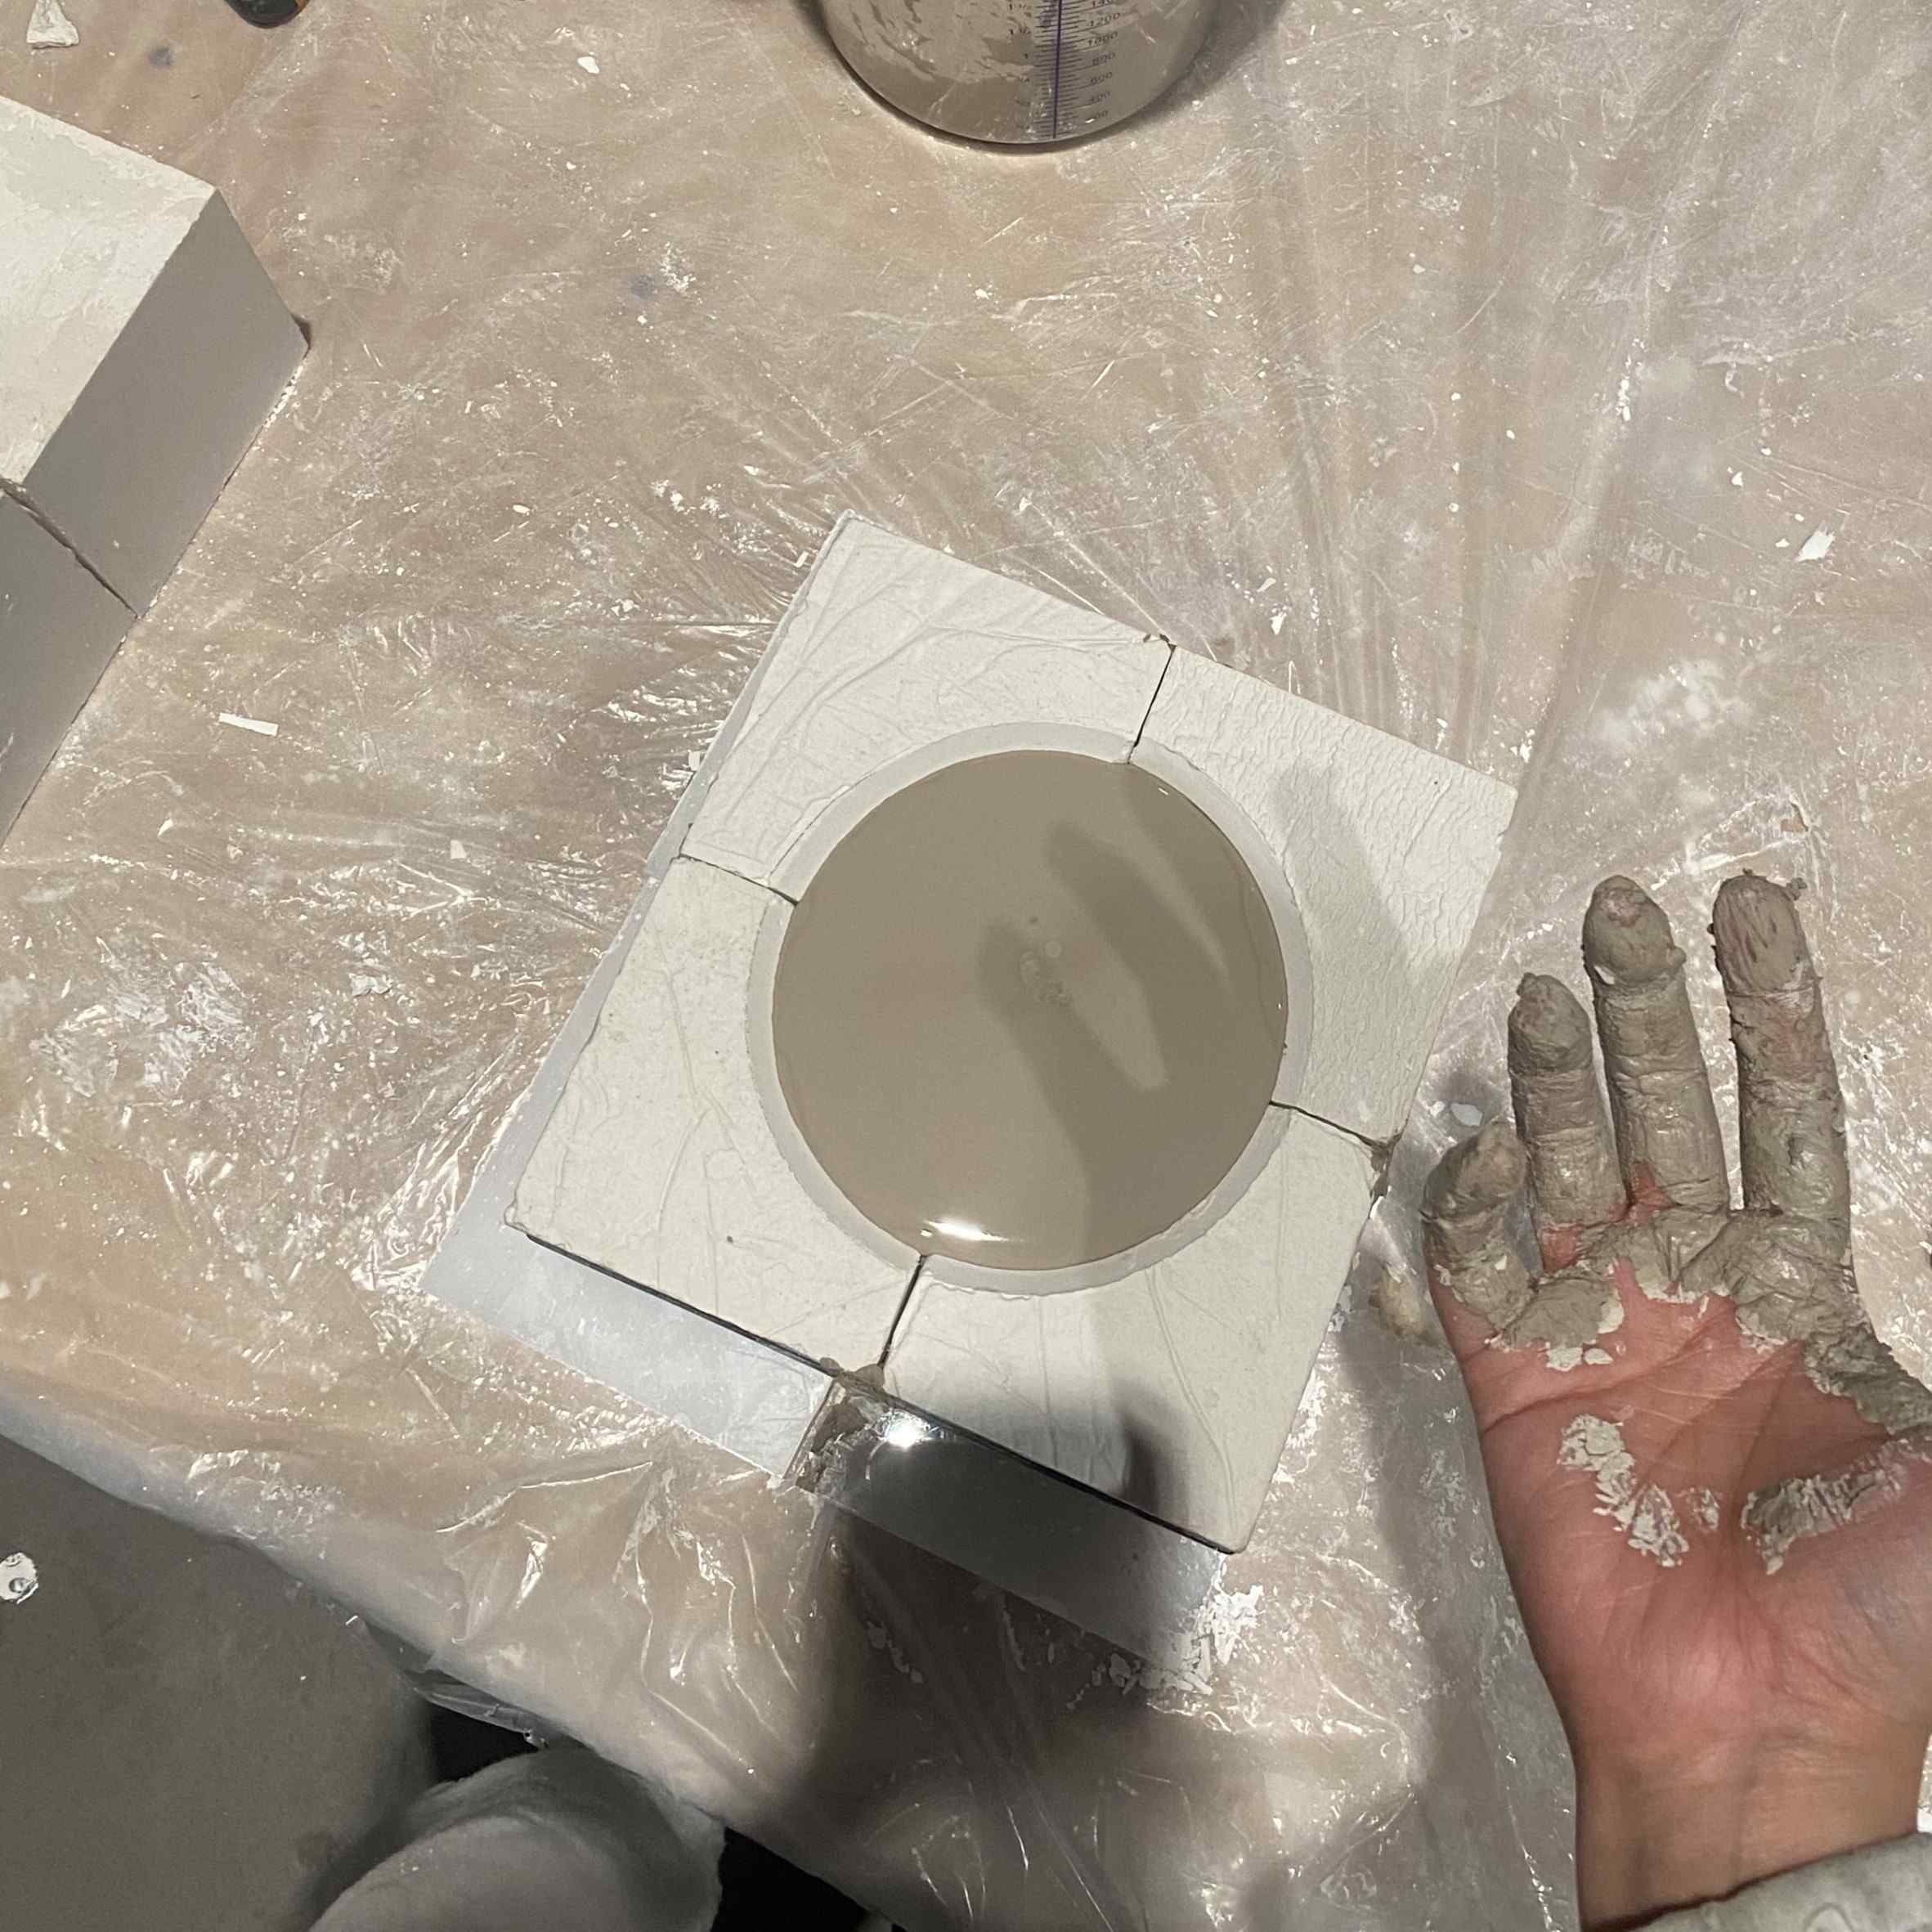
Left: Pouring slip into the assembled mold · Right: Mold filled and left to sit
Left: Mold turned upside down to drain · Right: Clay separating from gypsum walls
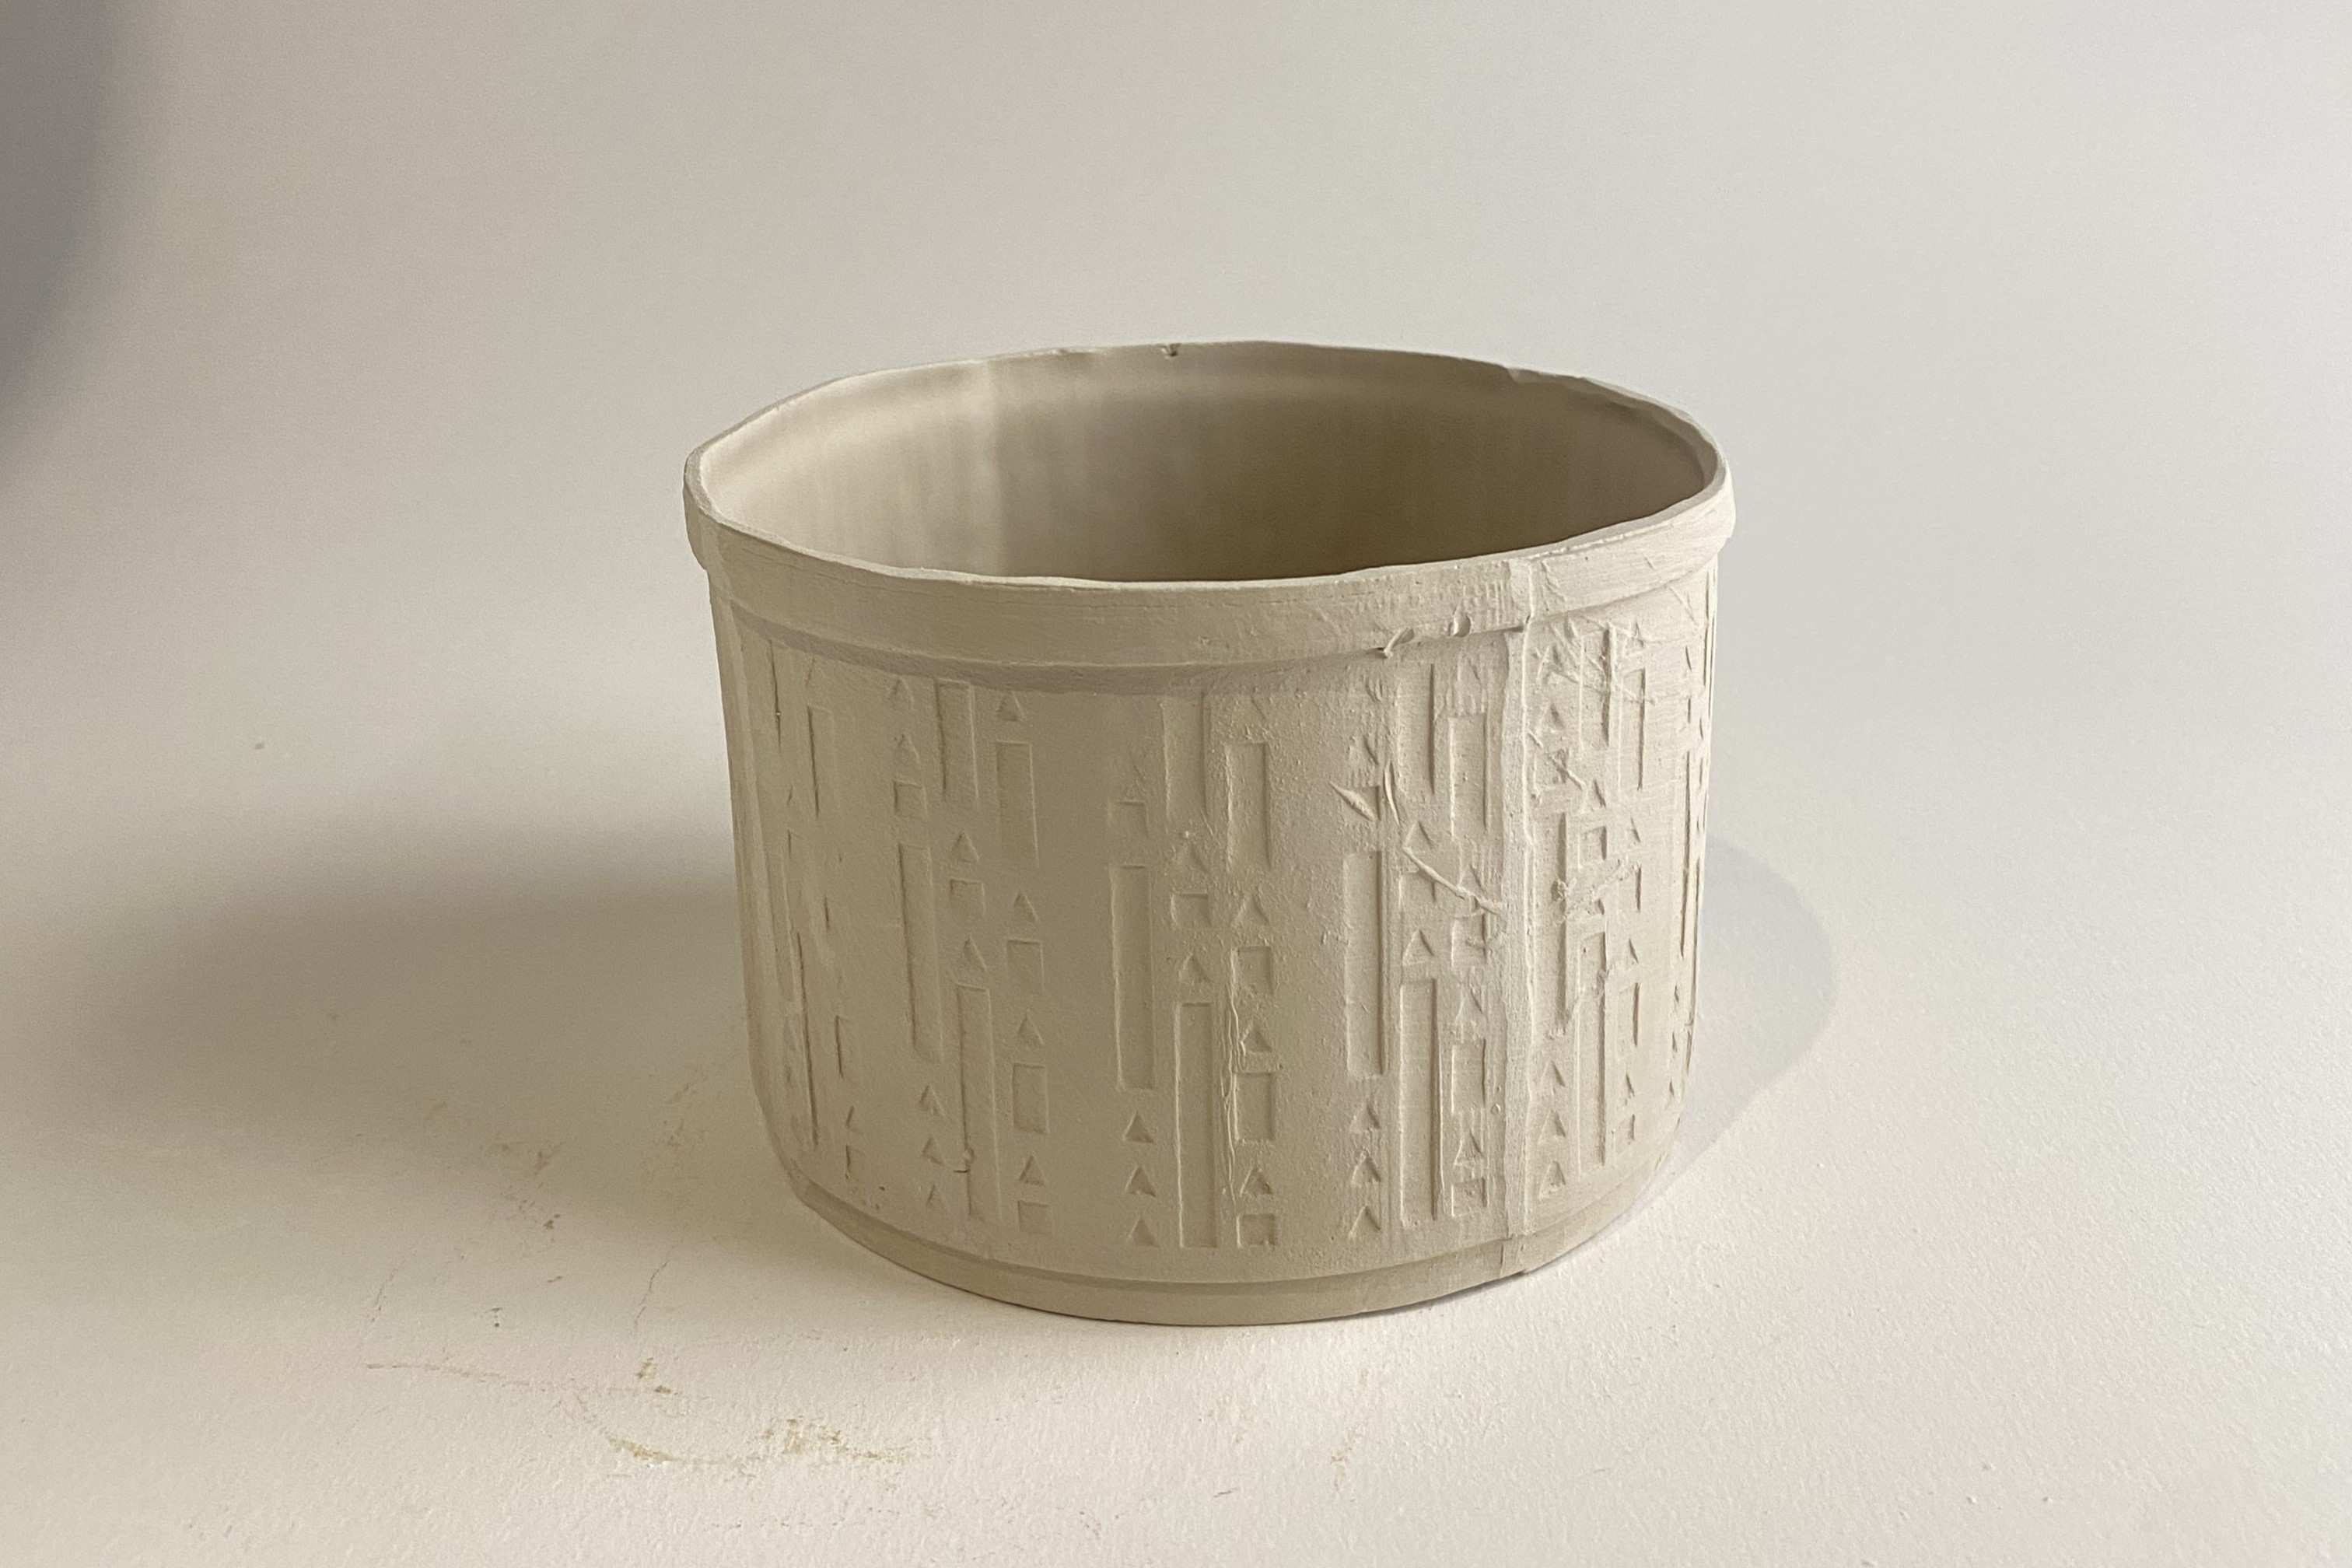
Final cast pot — out of the mold and drying before bisque firing
The pot must dry completely to remove all remaining moisture before bisque firing in a kiln. Skipping this step risks cracking or shattering under heat.
Gypsum Mold Making — Process Summary
Prepare the Gypsum
Mix 700g of gypsum powder per litre of water. Add powder to water slowly while stirring to achieve a smooth, lump-free consistency.
Pour the Plaster
Pour slowly and steadily from a low height to minimize air bubbles. Tap the mold gently to release any trapped air.
Wait for It to Set
Leave undisturbed until the gypsum has fully hardened and cooled — approximately 10 minutes. Do not rush this step.
Pour the Liquid Clay
Mix slip thoroughly before pouring. Fill the mold to the top and leave for 30 minutes before draining the excess.
Benefits of Gypsum Molds
Repeatable Production
The same mold produces identical shapes and sizes every time, making it ideal for consistent output.
High Precision
Captures fine surface details that would be difficult or impossible to achieve by hand.
Cost Efficiency
An upfront investment in a quality mold reduces the cost and effort of producing multiple identical pieces.
Design Flexibility
Complex, custom, and decorative forms that are difficult to produce manually can be cast with ease.
Common Mistakes & How to Avoid Them
| Problem | Cause | Solution |
|---|---|---|
| 🫧 Air Bubbles in the Mold | Pouring too quickly or insufficient mixing | Pour slowly from a low height and gently tap the mold to release trapped air |
| 💔 Cracked or Broken Mold | Removing the mold before it has fully set | Wait the full setting time and handle each section carefully when separating |
| 🔒 Difficulty Separating from Mold | Insufficient or unevenly applied release agent | Apply wax, oil, or liquid soap thoroughly and evenly to all mold surfaces before pouring |
Reflection
This week introduced me to a completely different side of fabrication — one that involves chemistry, timing, and patience as much as design skill. Slip casting in particular requires an understanding of material behavior over time, rather than just geometry and toolpaths.
Designing a four-part mold pushed me to think carefully about how the finished object would release from each section, and how the parting lines would be positioned to minimize visible seams. The cultural motifs I incorporated added personal meaning to the assignment and made the surface finish more important than it might otherwise have been.
The result — a functional, handmade plant pot produced entirely through digital fabrication and traditional ceramic techniques — felt like one of the most complete and meaningful pieces I've made during Fab Academy so far.