Week 01 Project management
Welcome to Fab Academy week 01, in which I struggle through git, reaquaint myself with web markup, and just acclimatize myself to the class. And, documenting as I go....
Useful links
- A link to my final project page on my website
- W3 HTML chools (open in new window)
- GitLab Pages examples
**Fab Academy Student Agreement**
*The Fab Academy is responsible for:*
- - Teaching principles and practices of digital fabrication
- - Arranging lectures, recitations, meetings, and events for the class
- - Evaluating and providing feedback on student work
- - Offering clear standards for completing assignments
- - Certifying and archiving student progress
- - Supervising class preparation
- - Reviewing prospective students, instructors, and labs
- - Providing central staff and infrastructure for students, instructors, and labs
- - Fund-raising for costs not covered by student tuition
- - Managing and reporting on the program's finances, results, and impacts
- - Publicizing the program
- - Promoting a respectful environment free of harassment and discrimination
- - Encourage a diverse, accessible, and equitable community
*I am a Fab Academy student, responsible for:*
- - Attending class lectures and participating in reviews
- - Developing and documenting projects assigned to introduce and demonstrate skills, in enough detail to be able to reproduce them
- - Honestly reporting on my work, and appropriately attributing the work of others (both human and machine, including AI prompts)
- - Being prepared to answer questions about my work
- - Allowing the Fab Academy to share my work (with attribution) in the class for purposes compatible with its mission
- - Working safely
- - Leaving workspaces in the same (or better) condition than I found them
- - Participating in the upkeep of my lab
- - Ensuring that my tuition for local and central class costs is covered
- - Following locally applicable health and safety guidance
- - Recognizing limits on lab and staff time
- - Promoting a respectful environment free of harassment and discrimination
Signed by committing this file in my repository,
Jeff Ritchie
Week 1 Documentation
Slowly going through the documentation on Git to build on the gitlab environment. I am struggling to understand whether I need to download git to my personal and work computers or whether I can continue using gitlab in the browswer environment. I went into this week thinking that I understood at least half of the material covered. Clearly, that is not the case.
I realized as I was working through the tutorials that I needed to document this stuff- document as you go. Hmm. I went back to the documentation to make sure that I was following the instructions. I thought it might be helpful to read the accounts of previous students, so I read Nadieh’s account and documentation, which helped a lot.
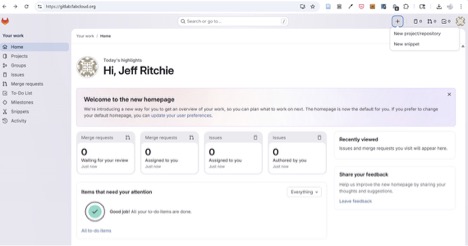
It looks like most students create individual projects for each week, so I figured I’d experiment with gitlab. Clicked on the new project/repository.
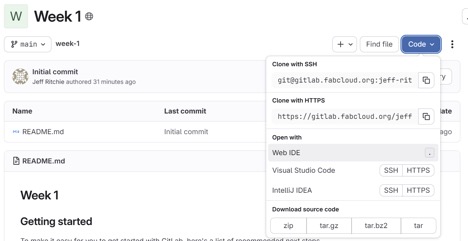
In the project, I opted to use the open web IDE button to edit the Week 1 project.
Using the Gitlab Web IDE, I entered my first comment.
Welcome to week 1, in which I struggle through git, web markup, and just getting acclimatized to the class. And,
documenting as I go....

I was not sure how to “save” the changes I made- but saw the purple button and remembered commit and push are things we are supposed to do.
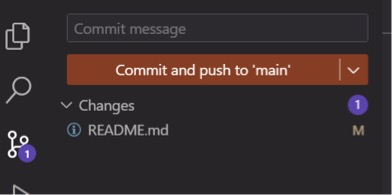
So, I committed and pushed. At the bottom is a confirmation that registered the input.

And just like that, I’ve made a change on the page. I then went on to edit and change the copy in the HTML using basic HTML commands, without using ids or classes in CSS.
I then committed and pushed the changes.
I again reviewed the page for the week and figured that I would review the gitlab documentation- as it is what we are using in class. I had used github in a unity programming class a few years ago and am a little worried that having github installed might cause some problems with the work in this class. I’ve pretty much forgotten nearly everything I’d learned about github… sigh.
In the tutorials, the first step looks to be installing git on my computer. I have a pc at home and my work laptop is a mac- so it looks like I will be learning how to install it on both. According to the gitlab docs documentation, gitlab uses ssh to securely communicate with git-
“After you install and configure Git, generate and add an SSH key pair to your GitLab account.” Macs require that you use Homebrew, You run the following command in the terminal
/bin/bash -c "$(curl -fsSL https://raw.githubusercontent.com/Homebrew/install/HEAD/install.sh)"
Then run the following command-
brew install git
to verify that it is installed, run
git --version
then, configure your git. I chose global setup
first enter the name you’re using in gitlab.
git config --global user.name "Sidney Jones"
then enter your fab academy email address
git config --global user.email "your_email_address@example.com"
check the configuration -
git config --global --list
  		git config user.name && git config user.email
Okay, so now I need to add an SSH key to both my work and personal computers. I first checked for an existing SSH key pair in the .ssh/ directory, and I don’t have any. I will use ED25519 which gitlab says is preferred.
We are to use the following command in the terminal to generate an SSH key:
ssh-keygen -t ed25519 -C "ssh-for-gitlab-fabcloud"it prompts you to identify the file to save to- which I then used
cat ~/.ssh/id_ed25519_fabcloud.pubI’ve been warned not to post my private key- which is something I’d likely do. It does require a passphrase—or empty for none. I invented an inspirational passphrase.
I then received the error message
Saving key " cat ~/.ssh/id_ed25519_fabcloud.pub" failed: No such file or directory
Okay. So, I clearly don’t know what I’m doing. I used
cd /.ssh/to change the directory I’m viewing and then
lsto see the files in the directory. There are two files- but they are titled gitlab, not fabcloud.
cat ~/.ssh/id_ed25519_fabcloud.pubdoesn’t work, but the file I have listed is
ssh/id_ed25519.pubSo, I changed the command to
cat ~/.ssh/id_ed25519.puband it seems to work…so far. I copied the public key and pasted it in the in SSH Keys section of the gitlab site and it looks like I am in business. Go to preferences
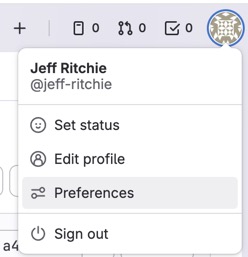
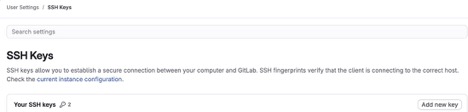
Select SSH Keys
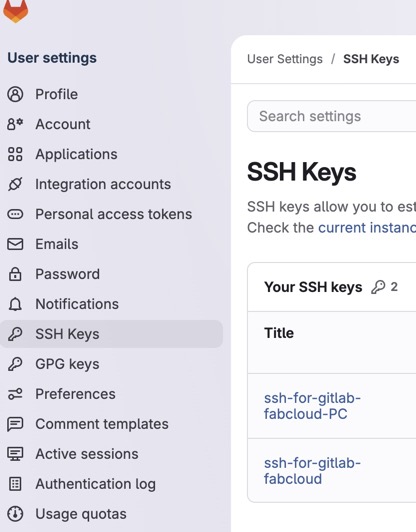
And then add new key
Then paste the ssh keys into the form.
I used the following command in terminal to see if I was connected-
ssh -T git@gitlab.fabcloud.organd had to enter the pass pre I’d set up earlier and I’m in.
To clone the site, I used
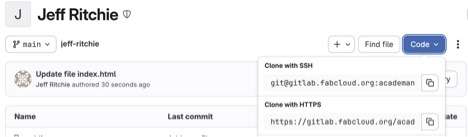
Clone with SSH- I copied the URL and then entered the following command (you’d add your URL where my URL was)
git clone git@gitlab.fabcloud.org:academany/fabacademy/2026/labs/unccharlotte/students/jeff-ritchie.git
It failed. There was no directory on my computer.
I then used bash mkdir and created a directory in the terminal.
Bash Mkdir jeff-ritchieI changed to that directory using the cd directory name command
cd /jeff-ritchieand then ran the command
Git initI then did this on my PC. I created a new SSH key using the steps outlined above.
Agreement
I copied the student agreement and created a new document, entitled Student Agreement, in my website. I’ve pasted and then signed the document. Then I realized that no one could see it. Rather than change the <nav> structure, I added it to the week 1 assignment and formatted it as an unordered list.
I then thought that maybe we were supposed to use git commands to copy and recreate this document in our directory.
I started working through the GIT simple cheat sheet. As a test, to see how well I understood git, I created a test file in fusion and saved it to my git directory on my work laptop. I used
git commit -am “commit message”as a command to see if I could now see the test file on the gitlab.fabcloud. It doesn’t show up. This is the problem I need to now solve- how best to work on files locally and then upload them to the gitlab without using the web IDE.
I reviewed the tutorials listed at https://fabacademy.org/2019/docs/FabAcademy-Tutorials/week01_principles_practices_project_management/git_cheat_sheet.html I then attended the GOT. I decided that since I have github already installed on both my work and home computer, I’d sync gitlab to github. This link (https://itnext.io/how-to-use-github-desktop-with-gitlab-cd4d2de3d104) was shared in the GOT, which showed how to connect github on gitlab.
The steps it described to take were Create a personal acces stoken – copy it someplace safe Copy the URL for my gitlab Then open the add button on github
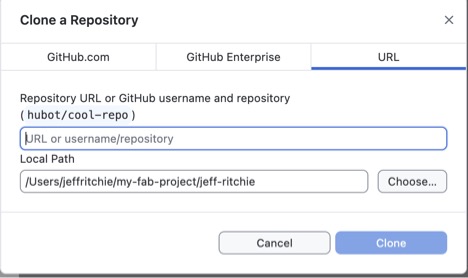
Copy and paste the URL into the form that pops up
You’ll be prompted for your user name and password- this is the username that fab academy set us up with and the personal access token we copied will be used as the password.
I repeated the same process for my PC.
I tried to push the files on my latop to the gitlab, but I had to resolve changes.
In addition, the
.ds_storesmac directory files continually throw off git. I googled ".ds_store git" and found a way to ignore the files globally.
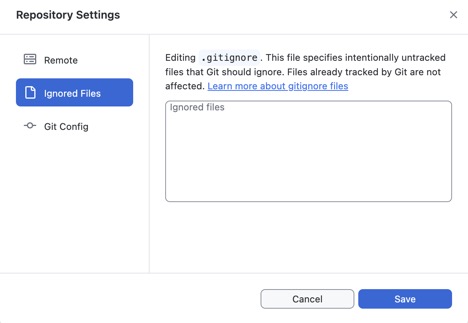
This creates a .gitignore document. Ignoring this file seemed to do the trick. I had added a directory and the test file on my work laptop. Typed in
git pushon my terminal and these changes showed up on gitlab. I changed the name of a file and pressed the commit file button on hubspot
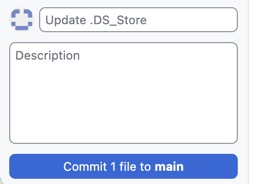
HubSpot prompted my to push commits to the origin remote-
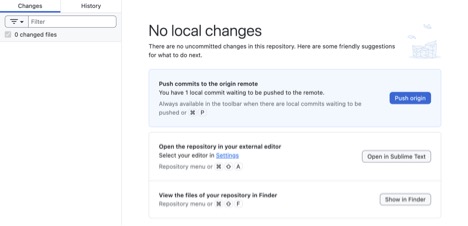
I pulled up gitlab on my personal computer – the files were there. So, I can use on my work laptop (mac) both the terminal and hubspot to manage my files. Is it cool to say Huzzah?
On my PC, I tried to add the gitlab data to hubspot, but for some reason Hubspot doesn’t seem to want to pull or push files. In the interest of time, I will just use the terminal on my pc.
Web Markup
In the interest of time, I’ll just use straight HTML and CSS on the site rather than add a new template. I have an okay background in HTML and CSS and taught a web markup class a long time ago. For this section, I relied on the w3schools site and notes I have on web markup and css.
Hypertext Markup Language –
All markup language involves tags or elements. Aside from a few exceptions, most tags have an Opening tag at the start and a Closing tag at the end of the text or object to be marked up. These tags include an abbreviation and the Less-than and greater-than symbols. Most elements can be modified by attributes-which take the form of name="value" placed inside of a tag.
When you structure an HTML document, you need to include container tags- tags that are usually found in most html documents. For instance, the first container tag is the HTML tag, which defines the type of document that you are creating.
<html>
Whole webpage
</html>
This HTML tag tells the browser that the document is an HTML document.
Headings
HTML uses a number of different tags to differentiate between the text that appears on the page. The first type of tag is the Heading tag.
<h1>This is heading 1</h1>
<h2>This is heading 2</h2>
<h3>This is heading 3</h3>
<h4>This is heading 4</h4>
<h5>This is heading 5</h5>
<h6>This is heading 6</h6>
Carriage Returns or Breaks
To insert a carriage return or break in the text is a lot like hitting the return key on a typewriter (yes, I have used a typewriter). HTML doesn't recognize the return key in your markup though. In order to tell the browser that there is a carriage return, insert the tag
<br>which is an empty tag and doesn't require a closing tag.
Paragraph
<p></p>- MUST be used in the beginning of each paragraph and at the end of each paragraph.
<p>This is a paragraph</p>
HINT
- HTML doesn't recognize anything other than a single space between characters.
- The only way that you can format text is through tags.
LISTS
In HTML5 there are two different kinds of lists: unordered (bulleted) and ordered lists (there are actually more, but I’m simplifying things). With lists, you need to know two tags—the list tag (either
<ul>
</ul>
or
<ol>
</ol>
and the list item tag
<li></li>
A list must always have items.
Unordered lists
<html>
<head>
<title>Unordered Lists</title>
</head>
<body>
<h1>Unordered Lists</h1>
<ul>
  <li>are easy</li>
  <li>are nested within the ul tag</li>
  <li>can include a lot of stuff </li>
</ul>
Ordered lists
<html>
<head>
<title>Ordered Lists</title>
</head>
<body>
<h1>Ordered Lists</h1>
<ol>
  <li> are easy</li>
  <li> are nested within the ol tag</li>
  <li> can include a lot of stuff </li>
</ol>
ANCHOR ELEMENT
Anchor elements
<a></a>are used to identify a hyperlink.
Uses the href attribute- is the hyperlink reference- assigns the value for the browser to pull up Absolute Hyperlinks absolute location of a resource on the web. Usually a URL. Relative Hyperlinks- links to files/resources located relative to the current file being accessed. Only file names and folders RELATIVE TO THE CURRENT FILE. We were told to just use relative links.
CSS or Cascading Style Sheets
The pages in fab academy use an external css file to modify the HTML. I’ll just focus on the basics. As an aside, a really fun way to practice your CSS is CSS Diner-
CSS RULES
CSS targets elements in html/xml, etc.---composed of selectors and declarations. Selector- before the curly brace link between html document and style- specifying what elements in HTML are affected by the declaration Declaration- within curly braces. made up of two parts— property and value
Selector Declaration
p {font-size: 16px;
         Property: value;
            Color: blue;
       }
property and value are separated by : colon — the colon acts like an equal sign assigning the value to the property.
; semicolon tells that the browser to complete the declaration -like a sentence period
SELECTORS can include multiple elements through:
- a comma <!--and, and, and, and -->
- for example ul, li, p{font-size: 16px; Color: blue; }
- >white space <!--indicates second element within the first –aka descendent select -->
- for example div p {font-size: 16px; color: blue; } <!--any paragraph inside of a div -->
- a + <!--adjacent sibling combinatory- elements that are preceded by another element-->
- for example div + p {font-size: 16px; color: blue; } <!--any p following a div? -->
For my proposed final project, see my final project page