The first official Fab Academy week! We already had a bootcamp the week before to get some exposure to several core concepts that we’ll have to learn and use during the Fab Academy. This week is all about planning, websites, version control, and documentation.
Assignments
Our tasks for this week are:
- Make a website and describe how you did it
- Introduce yourself
- Document the steps for uploading files to archive
- Push the website to the class archive
- Sign and upload the Student Agreement
Setting up a Connection to Gitlab
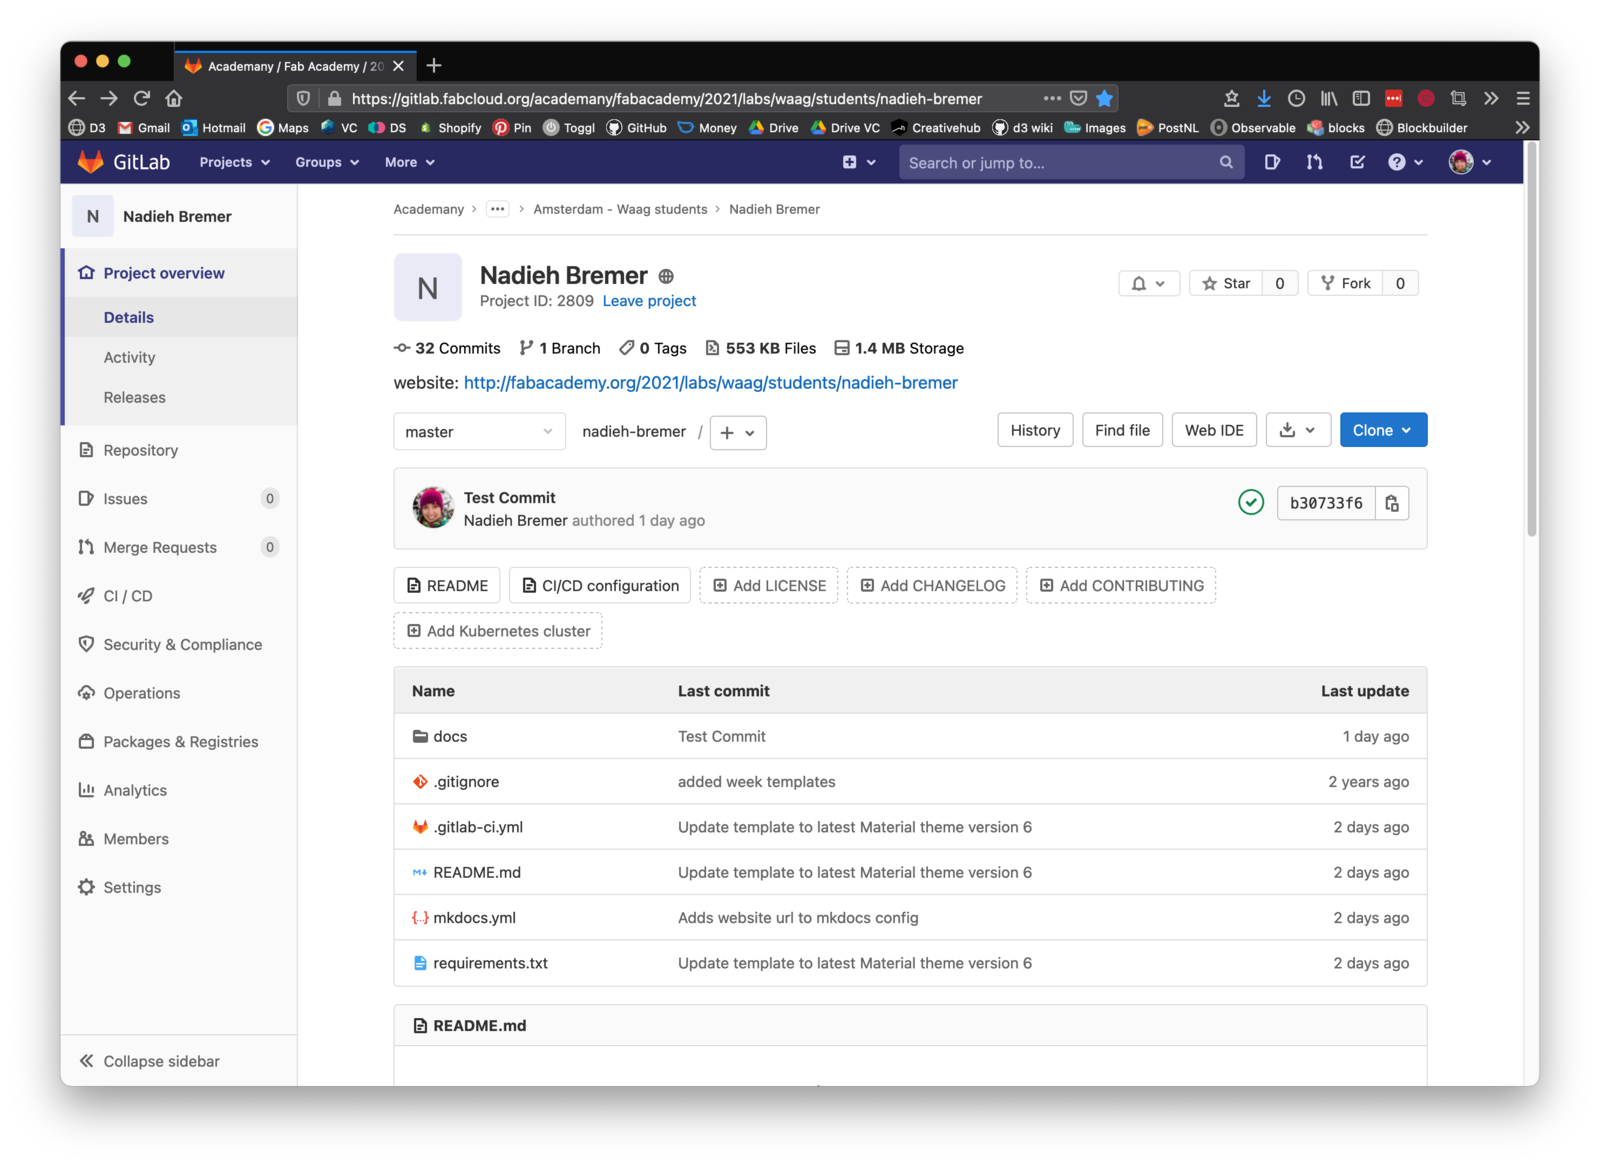
Through the Fab Academy each student received their own Project / Repository on GitLab in which they’ll need to document their entire process. Mine can be found here.
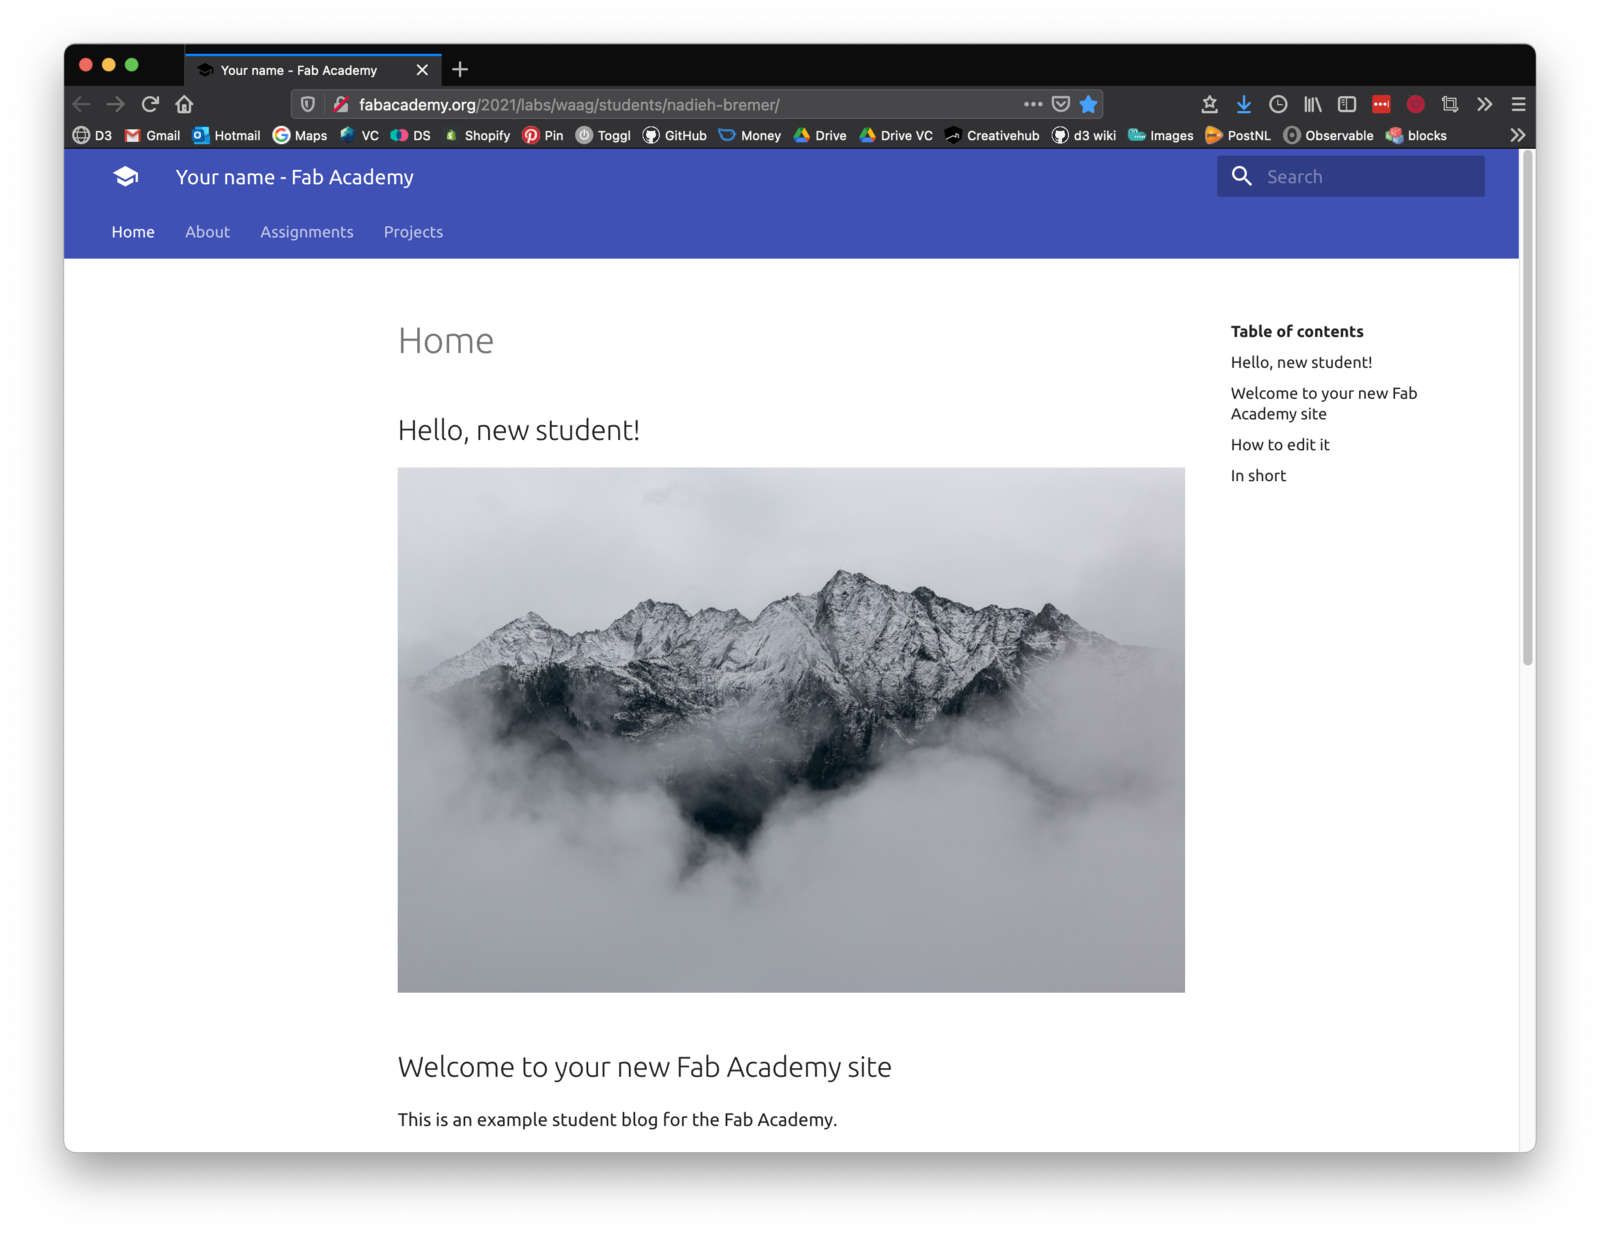
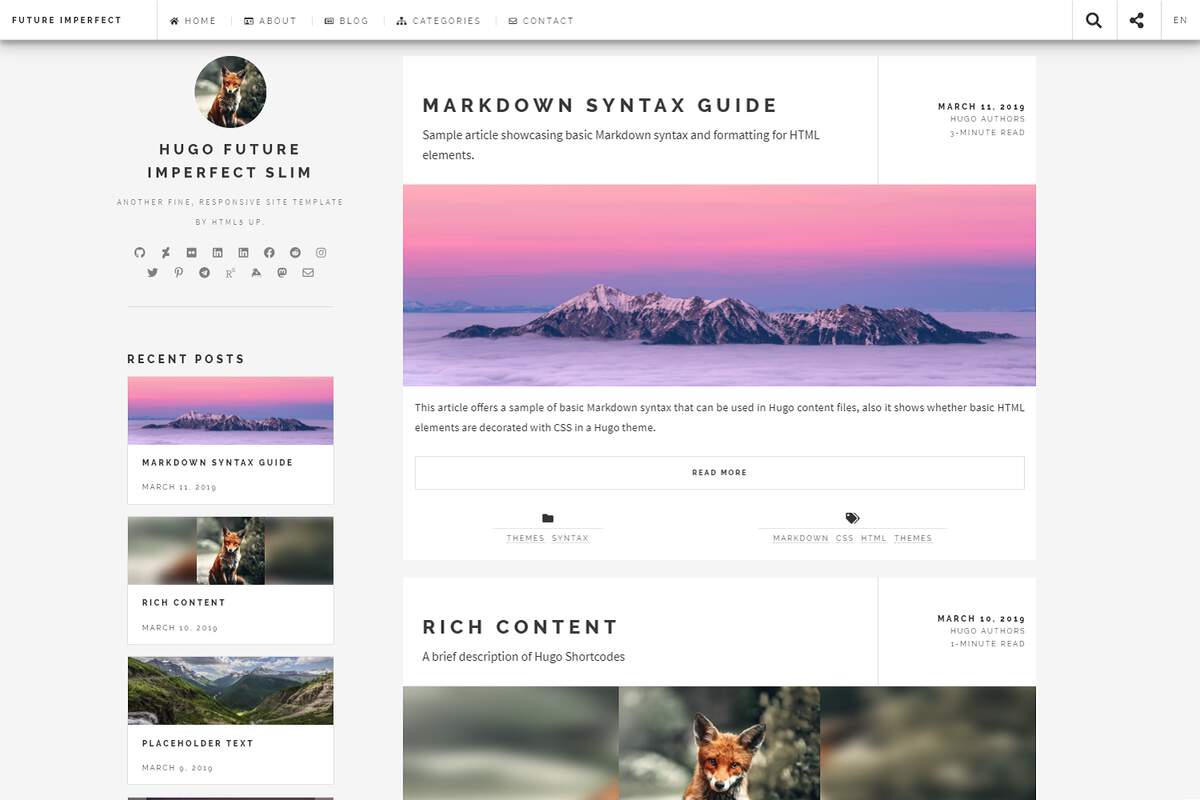
This uses MkDocs together with the material theme to create a basic website, which you can see below.
However, although you can make changes to the files online within the GitLab environment, it’s much easier to do this on your local laptop, and then pushing the changes to the repository via Git, which is system that lets you do version control. It does require some steps to set-up though.
My laptop, a MacBook Pro (2017), comes with Git preinstalled. I checked which version I had by running git --version (in the terminal), which was git version 2.24.3 (Apple Git-128).
I already had my Git username and email configured, but if not, I would’ve run the following commands to set it up:
$ git config --global user.name "Your Name Comes Here"
$ git config --global user.email you@yourdomain.example.com
Using HTTP - Dead end
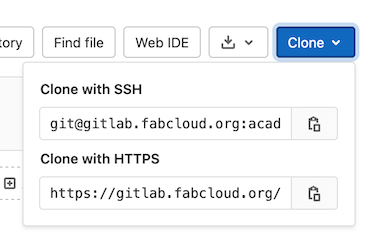
To get my website repository on my laptop I can use HTTP or SSH. There is a big blue “clone” button on the GitLab page that reveals the link to use for either option.
I first tried the HTTP way because I wasn’t familiar with SSH. In my terminal I went to my Fab Academy folder, and pasted+ran the following code:
$ git clone https://gitlab.fabcloud.org/academany/fabacademy/2021/labs/waag/students/nadieh-bremer.git
This created a folder called nadieh-bremer. I made some dummy textual change to the docs/assignments/week01.md file, and wanted to push these changes back to the online repo.
Committing and Pushing in Visual Studio Code
I generally only use GitHub Desktop for all my version control, and was therefore not quite familiar with how to do it otherwise, although I did know that my preferred text editor Visual Studio Code has an integrated method to do this.
After making the dummy change and saving the file, the version control icon in the sidebar of Visual Studio Code (VSC) got a marker to notify me that something has changed. By opening up that sidebar and selecting the file, VSC shows me exactly what the changes are with the old file and the new one.

By pressing the “+” icon to the right of “Changes” I can stage all these changes. My changed file then becomes part of “Staged Changes”. Next, I enter a message in the input field above it and commit these changes locally by pressing ⌘+Enter.
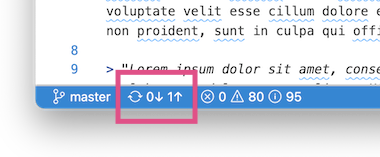
For now this commit is saved locally on my laptop. To get these changes back to GitLab, I need to push these. In the lower left side of my VSC window there’s a small set of icons relating to version control, such as the branch that I’m currently in (master) and to the right of that the status of the possible changes to the repo that are found online and those that I have locally. By clicking on the status area it will sync my local commits with those online (here is a blog post that explains the steps of committing and pushing changes within VSC in even more detail). Farther down in this blog, I explain how to work with Git in the terminal.
However, when I clicked the button, VSC asked for my GitLab username and password. And although I did figure out my username, I had no idea what password to use, since I signed up to GitLab using my FabLabs.io credentials.
I tried to get it to work via a different route by installing the GitLab Workflow extension for VSC. After installing it immediately asks for a “Personal Access Token”. Thankfully, the GitLab Workflow page explains all the steps needed to get one (from your GitLab account), and how to add it VSC (using the GitLab instance of https://gitlab.fabcloud.org).
The connection with my VSC and GitLab using the Personal Access Code was working. I could see the up-to-date state of my repository within a new VSC GitLab Workflow sidebar widget. However, it didn’t let me push the commits online. And thus I had to try something else.
Using SSH
Since I hadn’t been able to push my changes online using the HTTP route, I explored the SSH way (and learned that it is actually the preferred route). I needed to set-up an SSH key. Because I also use GitHub for my (data visualization) work, I specifically wanted to make sure that I could work with both GitLab and GitHub side-by-side. Thankfully, I found some excellent tutorials online to help me out. Such as the very aptly named “Manage GitHub, and GitLab accounts on single machine with SSH keys on Mac”, which I used, together with the SSH help page on GitLab (and two other tutorials that are relevant, but I didn’t end up using that much).
I checked my SSH folder ~/.ssh and saw that no key pairs existed yet. I set-up two different SSH key pairs, making sure to name them differently. I used ED25519 since GitLab mentions that this is more secure than RSA.
$ ssh-keygen -t ed25519 -C "my-email@email.com" -f ~/.ssh/id_ed25519_github
$ ssh-keygen -t ed25519 -C "my-email@email.com" -f ~/.ssh/id_ed25519_gitlab
This creates a public and secret key file within the ./ssh folder (thus two files for the GitLab version and two for the GitHub version).
Because I don’t want to type in my SSH key passphrase every time I make use of it, I added both keys to my ssh-agent by running
$ ssh-add ~/.ssh/id_ed25519_github
$ ssh-add ~/.ssh/id_ed25519_gitlab
Within the ssh folder I created a config file.
$ touch ~/.ssh/config
And added the following text to the new file (although I’m not 100% sure I did this correctly):
Host *
   AddKeysToAgent yes
   UseKeychain yes

# Personal GitHub account
Host github.com
   HostName github.com
   User git
   IdentityFile ~/.ssh/id_ed25519_github

# Personal GitLab account
Host gitlab.com
   HostName gitlab.com
   Preferredauthentications publickey
   IdentityFile ~/.ssh/id_ed25519_gitlab
For the final steps, I had to add the public keys to GitLab (and GitHub). I copied the GitLab public key with
$ pbcopy < ~/.ssh/id_ed25519_gitlab.pub
On the GitLab page I went to Settings and then SSH Keys. Here I pasted the key, named it MacBook Pro Nadieh, left the expiration date blank, and saved it.

To test that I had set-up the SSH key correctly I ran the following code to add my GitLab account to the known hosts on my laptop.
$ ssh -T git@gitlab.fabcloud.org
After typing yes it returned
$ Welcome to GitLab, @nadieh.bremer!
I followed a similar process for my GitHub account (but with the github public key), which is explained here.
With my SSH key set-up for GitLab, I deleted the previous nadieh-bremer folder on my laptop that I had downloaded via HTTP (and removed the GitLab Workflow VSC extension), and re-downloaded it with the SSH URL instead (see the first image in the HTTP section above).
$ git clone git@gitlab.fabcloud.org:academany/fabacademy/2021/labs/waag/students/nadieh-bremer.git
Opened the week01.md file, made some dummy changes, saved, and followed the steps from the Committing and Pushing section again. Thankfully, this time I was able to push the changes online!
Choosing a Static Site Generator
Our assignment this week is to create a website for our documentation. A static site generator is a great choice for this. Once set-up it’s very easy and straightforward to make changes, add new posts, and more.
MkDocs
The default page set-up on our Fab Academy repo uses MkDocs. To get a better sense of this tool, I installed MkDocs using Homebrew. I already had Homebrew installed, but I ran brew update and brew upgrade to make sure that every tool that I had already installed was up-to-date (you can use brew outdated to see what can be updated). Using brew install mkdocs I installed MkDocs and went through the first steps of “Getting Started” section of the MkDocs page to set up a folder with the default MkDocs site and having a live-server running (with mkdocs serve).
I played a little with the configurations and I checked out the available MkDocs themes. However, none of them were in a style/design that I was happy with. Although the Material theme is quite complete, for me, it was too focused on austere technical documentation. I wanted something more visually appealing and to add some new functionality.

Hugo
My personal website uses Hugo. Quite an old version though, and even more so, I used a “wrapper” around it, called Victor Hugo, which is now outdated (I built my site four years ago). It’s basically hanging together with “bandages” because I don’t understand it enough to truly fix it.
I saw that Hugo has made some great leaps in the last four years; you can now use SASS, use a live-server during development, and build your site as well. In short, with the current Hugo I wouldn’t need some overkill wrapper like WebPack around it to create, maintain and deploy a full website. Plus, I saw that both Hugo and GitLab have documentation to deploy a Hugo website on GitLab.
Finally, there are several Hugo themes that looked interesting. I therefore decided that I wanted to build my Fab Academy website with Hugo, both because it seems to have features that I’m looking for, and because I want to learn and build a website with just Hugo, so I can afterwards also refactor my personal website afterwards to the up-to-date version of Hugo as well (Update: I did, and it worked! (ノ◕ヮ◕)ノ*:・゚✧ ).
Use brew install hugo for installation. You can check the version with hugo version, which returned Hugo Static Site Generator v0.80.0/extended darwin/amd64 for me (as you can see, this is the extended version of Hugo).
Creating my Website
To set-up my Hugo based website, I started by following the steps outlined in the Quick Start page. In the terminal I moved to my Fab Academy folder and created a new (Hugo) site with
$ hugo new site fabacademy-docs
Which created a new folder called fabacademy-docs that had the following structure:

and initialized version control for this folder with:
$ cd fabacademy-docs
$ git init
Choosing a Theme
The next step was to choose a theme for my website. Browsing through the available themes I had a few requirements:
- It had to be responsive and thus scale and look nice on both (big) desktop screens and mobile.
- A blog needed to be part of the theme, with a main landing page for all the blog entries. A bonus would be the inclusion of a splash image per blog post that showed both at the top of the blog post and the blog link on the main blog landing page.
- It had to have a decent image viewer so all the images in the blogs could be viewed in a larger size as well (without moving away from the page, i.e. merely opening the image file in the browser).
- Although the functionality, design and visual style itself didn’t have to be perfect, I was looking for something where I could see some starting potential to work with.
Below are some of the themes that I investigated more thoroughly:


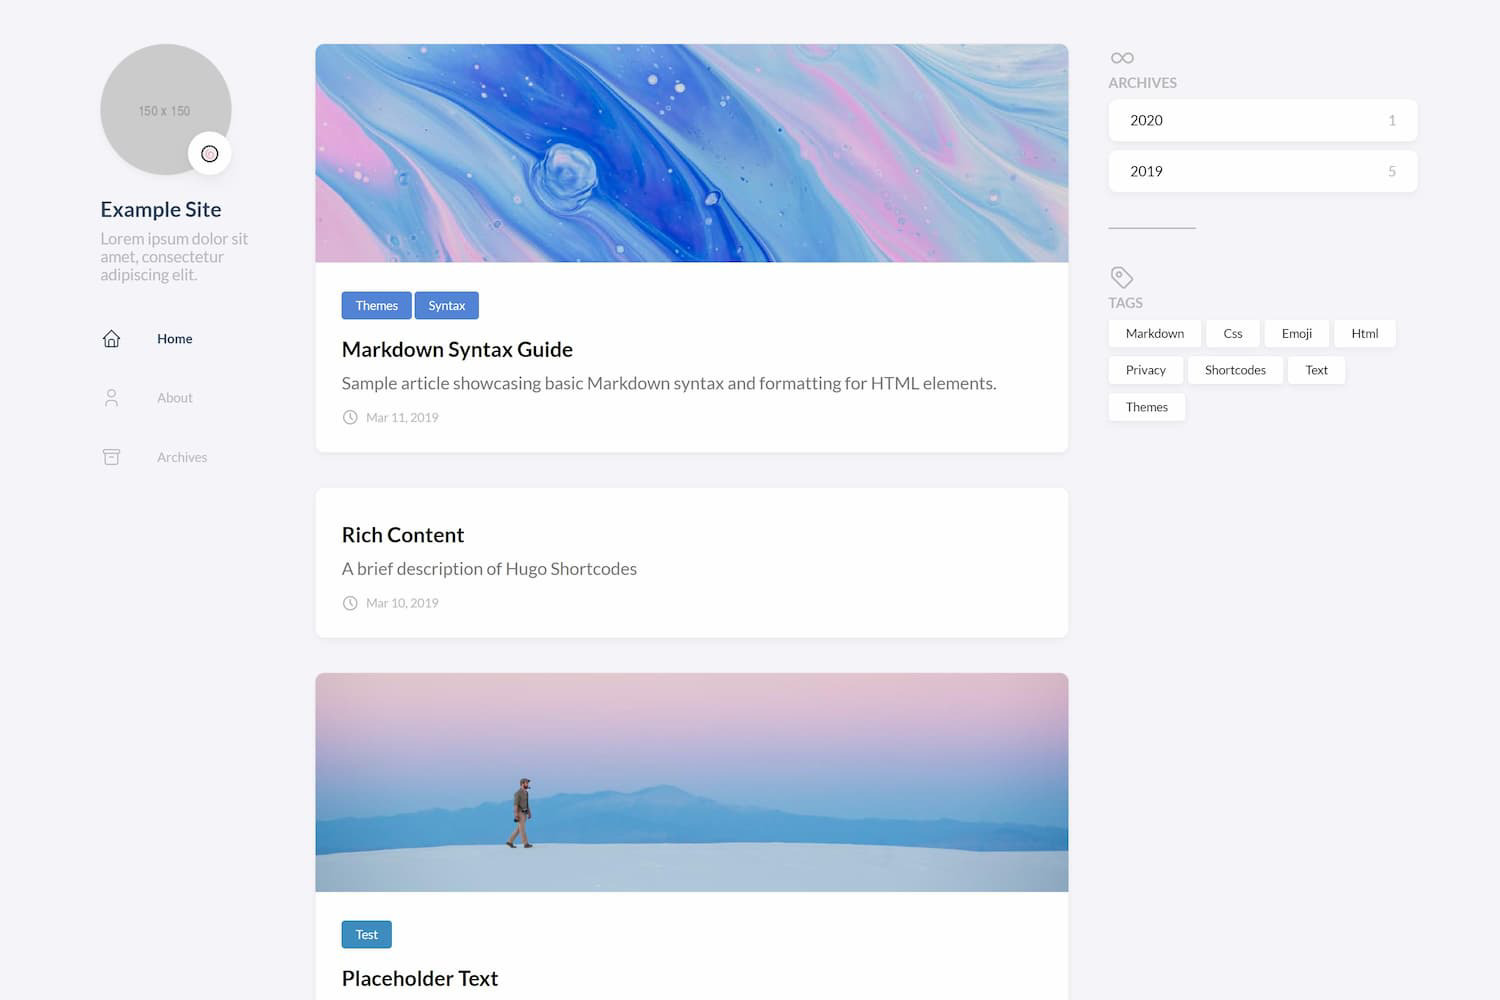
When I came across the Stack demo I was intrigued by the layout, with the main menu along the left side. This would let the blog text itself take up as much vertical space as possible. Some pages had a sidebar along the right as well, which I felt/hoped I could (partially) repurpose into a “Table of Contents”. It even has a toggle to switch between Light and Dark Mode! When I also discovered that it had quite extensive documentation and options to make changes, using many CSS Variables to easily adjust the styling, I knew that this was the theme I wanted to try.
Within my website folder I downloaded the Stack theme as a submodule (since my fabacademy-docs folder in itself is already a Git repository).
$ git submodule add https://github.com/CaiJimmy/hugo-theme-stack/ themes/hugo-theme-stack
This put all the theme’s files in fabacademy-docs/themes/hugo-theme-stack.
To recreate the demo page, I copied all the files in the theme’s exampleSite folder into the main fabacademy-docs folder. Now I was finally ready to have Hugo create a locally served version of my website with
$ hugo serve -D -F
Where the -D makes sure to include pages marked as draft, and the -F will include any page with a date set in the future. You can find all the options possible for hugo on the “Basic Usage” page, which also explains a little more about using Hugo in general (while working on my blog I was actually stuck for a almost an hour because the new blog entry that I added wasn’t showing up, until I finally realized that Hugo doesn’t include blog posts with a date set in the future, which I eventually solved by adding the -F flag).
Using Hugo
With Hugo you make use of your written content (the markdown files), together with html templates. You create an HTML file template that will be used for all your blog posts for example, and a different one that will be used for your general pages, such as the about page. Using each page’s specific metadata (see front matter below) each blog page is built up uniquely to its content. These templates are located within the layouts folder.
A really useful addition are layout partials. As the name suggests, these are small HTML snippets, where each serves a specific function. For example, you can have a partial to place the social media links or a partial to create the search box. And you can combine partials to create a bigger overarching one, such as a footer partial (in which you have the social media icons, but also the search box, and possibly more). This way you are basically building up each page like Lego blocks, combining specific partials, together with the written content, to fill up each page.
Within each of these templates, you can use Hugo’s code and functions (and there are many many functions). For example, in the partial below, the h3 (that display’s the Fab Academy week number) is only created if the page that calls this partial has a week variable in its front matter.
<div class="article-details">
    <!-- Do other stuff -->

    {{ if .Params.week }}
    <h3 class="article-week">
        Week {{ .Params.week -}}
    </h3>
    {{ end }}
</div>
while yet other functions let you loop through all of the blog posts for example, which is used to build up the blog landing page.
Site Parameters
The config.yaml file in the main site directory is used as the default site configuration file, and let’s you set site-wide parameters. The number of possible options seems almost endless, but this page outlines many of the options. A small section of my config.yaml looks like
baseurl: http://fabacademy.org/2021/labs/waag/students/nadieh-bremer/
title: Nadieh's Fab Academy
languageCode: en-us
relativeURLs: true
canonifyURLs: true

permalinks:
    post: /blog/:slug/
    page: /:slug/

params:
    twitterHandle: NadiehBremer
    dateFormat:
        published: Jan 02, 2006
These parameters, with many more that are generated by default, are available to use in any of the templates via e.g. {{ .Site.Title }}.
Content
The written content of the website (the markdown files), go into the content folder. The home page is called _index.md and you can name any other top level pages however you like, such as about.md or contact.md. Groups of pages, such as the different entries of a blog, go into a folder, say, content/blog. Within the blog folder, I create an _index.md file that will become the landing page of my blog, and any other markdown files within the blog folder will become entries in my blog.
Images
Generally, all images would go into the static folder. However, my theme makes use of Hugo’s option to run each image through a function that creates the image gallery. That functionality only works if the images are placed within the same folder as the blog’s markdown file. I’ve therefore had to create a separate folder within content/blog for each blog entry. This per-blog folder contains the markdown file (now called index.md) and all of the images (and videos).
Front Matter
Similar to the config.yaml file having site-wide settings and variables, each page can also have its unique variables, the front matter. Any variable that I create in the front matter can be used by the templates that define the design of my site with e.g. {{ .Params.week }} (and there are several default page variables). The front matter of this blog post looks as follows:
---
title: Principles and Practices + Project Management
author: Nadieh Bremer
description: Setting up our website and learning about version control
week: 1a
date: 2021-01-27
lastmod: 2021-02-01
draft: false
slug: week-1a
image: header.png
categories:
    - Web Design
    - Version Control
tags:
    - html
    - css
    - ...
---
Shortcodes
Another extremely useful aspect of using Hugo is to apply shortcodes, which you can sort of see as tiny partials. I personally use them within my markdown code to create subtle extensions to markdown; do things that markdown can’t do.
For example, a shortcode that is part of Hugo itself that I often use is {{< relref >}}. This creates links to internal pages without the need to use a full/absolute URL. This is extremely handy when working on your website on your own local hosted server while hosting it somewhere online.
A normal markdown [link](https://www.link.com)
A Hugo internal reference [link]({{< relref "blog/_index.md" >}}) to my blog page
I also created a tiny shortcode myself, called kaomoji.html. You place the this file within the layouts/shortcodes folder. It only contains this line:
<span class="kaomoji">{{ .Get "emoji" }}</span>
Using CSS I styled it as follows:
.kaomoji {
    white-space: nowrap;
    color: var(--accent-color-text);
}
this makes sure that my “kaomoji” doesn’t get wrapped halfway when it’s at the end of a line. In my markdown file I then use it with:
hapy {{< kaomoji emoji="(ノ◕ヮ◕)ノ*:・゚✧" >}} sparkles
Which is then transformed into: happy (ノ◕ヮ◕)ノ*:・゚✧ sparkles
PS: Making Hugo shortcodes show up as text in here (and not get executed by Hugo), you need to add a /* after the start of the shortcode and a */ before the end (see here).
Other handy built-in shortcodes are: showing tweets, instagram posts, youtube and vimeo videos.
And that was a really short fly-by of how you create a website with Hugo. But let me get back to my process of creating this website.
Changing the Style
Generally you don’t need to touch the files within the themes folder, but go on and create a blog post, make changes to the theme’s possible settings in the config.yaml file and so on. However, I knew that I wanted to make some drastic changes. Not only to the design, but also the what elements are visible per page (e.g. the addition of a table of contents), and new features. I therefore copied all the files within hugo-theme-stack to the top-level folder of fabacademy-docs, thus basically having no “theme” anymore, which I felt would make it easier for me to precisely cut, prune, change and add to the base theme and turn it into my own “mutation”.
I adjusted several of the site’s CSS variables (found in assets/scss/variables.scss) to get a different color scheme, one with a clear pop of hot pink color. I added a different font (Lobster Two from Google fonts) to give a bit more fun (and perhaps female) flair to what will become a very technical blog. And I specifically redid the blog’s title section to stand out more. See the difference between the original and new blog appearance below:
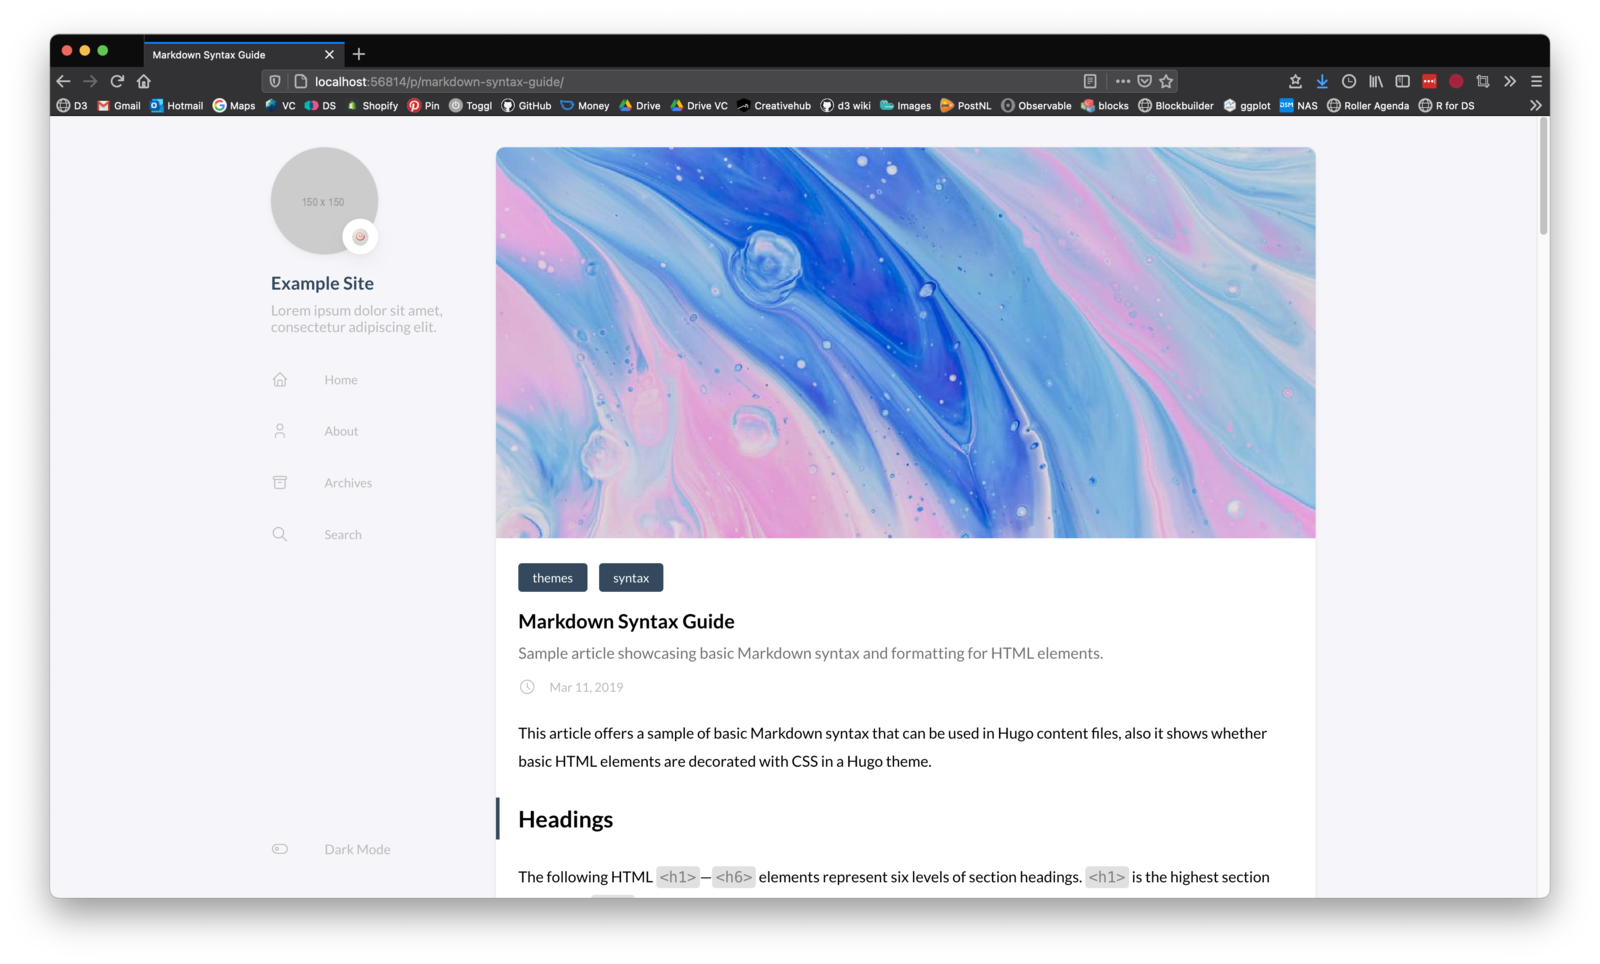

I adjusted the left sidebar menu to reflect the contents that I’ll need for the Fab Academy (such as having a Final Project page). I took the archives section along the right side and instead turned it into a list of all the blogs entries.

And there are many more places where I’ve fiddled with the CSS, but the two described above are the two biggest changes.
Updating the Features
Although I’ve tweaked lots of small things, the biggest changes in terms of features that I’ve made are:
- The original right sidebar of the blog page contained an archive section that showed a drop down menu per year of blog publication. I remade that into showing each blog separately, using the week number and blog’s title.
<section class="widget blog">
    <h2 class="widget-title section-title">WEEKLY ASSIGNMENTS</h2>

    {{ $pages := where .Site.RegularPages "Type" "in" "blog" }}

    <div class="widget-blog--list">
        {{range $pages}}
            <div class="blog-item">
                <a href="{{ .RelPermalink }}">{{ .Params.week }} | {{ .Title -}}</a>
            </div>
        {{ end }}
    </div>
</section>
- I wrote a new partial that creates a right sidebar for the blog pages that shows the Table of Contents of the blog, using the
h2andh3headers (if the page is wide enough). This makes use of the handy{{ .TableOfContents }}shortcode from Hugo.
<aside class="sidebar right-sidebar sticky">
    <section class="widget toc">
        <h2 class="widget-title section-title">TABLE OF CONTENTS</h2>
        <div id="toc-wrapper">
            <h3 class="page-title">{{ .Title }}</h3>
            {{ .TableOfContents }}
        </div>
    </section>
</aside>
- To make the table of contents more dynamic, I added a snippet of JavaScript to the html code above (wrapped in
<script></script>tags), adapted from this blog post, that checks which header the reader has scrolled to, and adds an.activeCSS class to that entry in the ToC that you can style differently, having it stand out. - I created a partial that adds a “previous” and “next” button below each blog post to easily go to the respective blog post (if they exist). It makes use of the extremely handy standard Hugo page variables of
.PrevInSectionand.NextInSectionthat point to the previous/next page in the same section (in this case, blog posts). Combined with the use of Flexbox in the CSS styling to get them to be situated nicely in the center of the page.
<div class="prev-next--wrapper">
    {{if .PrevInSection}}
        <a href="{{ .PrevInSection.Permalink }}" class="prev-post">
            {{ (resources.Get "icons/back.svg").Content | safeHTML }}
            <span>Previous</span>
        </a>
    {{ end }}

    {{if .NextInSection}}
        <a href="{{ .NextInSection.Permalink }}" class="next-post">
            <span>Next</span>
            {{ (resources.Get "icons/next.svg").Content | safeHTML }}
        </a>
    {{ end }}
</div>

- I created a partial that adds a small twitter and instagram logo to the bottom of each page that links to my personal accounts. Thankfully, the theme’s documentation mentioned that they got their icons from Tabler icons, which has about 900 more icons to choose from.
- After seeing it on the site of a previous Fab Academy student, I created a separate page to gather all the commands that I think I’ll be using often, such as Git and ImageMagick. To make it one step easier, I added a short script to the page that lets you click on any of the cells featuring
codeand the entire cell’s content is then automatically copied to the clipboard for direct use in the terminal or a file. - And finally, I created an actual landing page (the theme’s original homepage is the blog page), and set-up a page where I can write about my progress for the final project.
Pushing it to Gitlab
At this point I knew that this was the blog template that I wanted to keep using, and thus it was time to move my Hugo files to my Fab Academy GitLab repository. I deleted all the (non-hidden) files that were currently in my nadieh-bremer folder, and copied over all the files from fabacademy-docs.
I then followed the “Host on GitLab” steps, and specifically looked at the .gitlab-ci.yml from the Hugo example on GitLab to figure out how I had to update my repository’s version from working with MkDocs to working with Hugo. This yaml script defines what steps GitLab needs to follow to build your site. You tell it what image GitLab needs to use for the build (Hugo for me) what command it should use for the build (hugo -D -F and notice how there’s no serve in there anymore), what the name will be of the statically generated website folder (public) and what branch to use (master).
It took three tries to figure out the correct Hugo image to set. The two (different) ones described in the two links above are apparently not the extended version of Hugo. Instead I had to set it to (found here):
image: registry.gitlab.com/pages/hugo/hugo_extended

variables:
  GIT_SUBMODULE_STRATEGY: recursive

pages:
  script:
  - hugo -D -F
  artifacts:
    paths:
    - public
  only:
  - master
As a note, you can see how GitLab is running these commands, and if they failed, by going to the CI / CD -> Pipelines tab in GitLab.

Writing the blog
With my local website folder now connected to the one on GitLab, it was time to create my website’s pages.
Markdown
The content of each page and documentation post is written in markdown, making the process much faster and easier than if we had to write these posts in raw HTML. The parts of markdown that I use most often are:
## H2 header
### H3 header
#### H4 header
_italics_
**bold**
`inline code`
```html
<!-- syntax highlighting in longer code blocks -->
\```
- list item
- list item
[link](https://www.url.com)

There’s a bigger Markdown Cheatsheet that I’ve often used in the past. Here are the possible language options for the syntax highlighting.
Optimizing Images
Besides the text, I have many images. These are generally quite big in resolution and >1Mb file size, which is much larger than is needed for this blog. To make the images smaller I used ImageMagick. I already had it installed, but otherwise I would’ve used brew install imagemagick.
I generally wanted to bulk decrease the size of any png that was larger than 1600px (which is twice the maximum width of my blog) and to lower the quality somewhat. After googling for a bit, and tried the following commands:
# mogrify -> overwrites the original file

# Wrong: this resized all the PNG images in the folder
# that I run the command in to 1600px width
# (keeping the aspect ratio the same)
# but it upscaled those that were originally smaller
mogrify -resize 1600 -quality 65 *.png

# Correct: This downsized only those images of more than 1600px width
mogrify -resize 1600\> -quality 65 *.png
I generally had png files with transparency and thus couldn’t convert them to jpg. However, I did specifically convert a few png images that didn’t have transparency to jpg for a further reduction in file size.
# This set of png images could be turned into jpg
# because they had no transparency, further downsizing the file size
convert -format jpg hugo_theme_*.png
Optimizing Videos
I didn’t have any videos to share in the week’s blog, but once I do, I’ll be using ffmpeg to optimize and downsize the video files, before uploading them to my blog with a command such as:
# Start at the 4th second and keep the 5 seconds after
# Scale the video to 1280x720px
# Reduce the quality (lower values of crf is higher quality)
ffmpeg -i input.mp4 -ss 4 -t 5 -vf scale=1280x720 -crf 24 output.mp4
Git with the Command Line
Although I prefer using the Visual Studio Code GUI to make (easy) commits to GitLab, I also learned how to do this with the command line. I found the Git-it tutorial very useful, but also the tutorial on the main Git page. I prefer to start with a git status to see the latest state of my local repo. It compares the repo to the one on GitLab, but also tells me what files are changed, new, or removed. In case there are updates online that aren’t yet on my laptop, I would run git pull to pull those in. Once I’ve made changes to my website’s files, I can stage all the changes with git add . (or git add [file] for one specific file). When I’m ready with the changes intended, I can commit the staged changes with git commit -m "[message]". This commit is reflected only on my laptop. To update the version online, I have to finally run git push. Generally the full set of commands would be:
$ git status
$ git add .
$ git commit -m "descriptive message"
$ git push
$ git status
I’m keeping track of my (main) used Git terminal commands on my commands page.
Checking directory file sizes
A handy tool that Neil shared was ncdu which lets you quickly see and explore the file sizes of any directory through the command line. I installed it with brew install ncdu, went to my nadieh-bremer folder, ran ncdu and saw that my content folder was already 6Mb, and that the .git part (my history) was 7Mb already! Exploring the .git folder further with ncdu didn’t reveal to me where these Mbs were coming from though. I therefore did a git checkout HEAD~12 to step back 12 commits to the point where I had made my first (dummy) commit. I checked the .git file size and saw that it was 6Mb. So I hadn’t increased it that much, it was already a bit big when I got my repository from the Fab Academy. Although I might be interpreting this wrong ¯\(°_o)/¯
Reflections
What went wrong
- I tried to set-up an HTTP connection to my GitLab repo, but couldn’t figure out the right settings for the password.
- Although I made my images smaller in file size and resolution, I didn’t make them small enough, resulting in this week being 5Mb in size.
What went well
- Even though I was completely new to SSH, setting it up was eventually a rather painless process.
- Switching from MkDocs to Hugo and having it work correctly with the new
.gitlab-ci.ymlfile in only 3 tries. - Starting with a base theme, but then updating it stylistically and with (some non-trivial) new features that I had in mind took quite some effort, and quite some experimentation (Hugo syntax isn’t the easiest to get a hang of), but I did manage to incorporate everything that I had in mind.
What I would do differently
If I had waited with playing with my website and uploading it to the GitLab repo until I’d seen the lectures of week one, I would’ve known what was expected for the assignment and thus how small my images should’ve become. That way I would not have started with an already rather big first week in terms of file size. So I shouldn’t get ahead of the schedule. Although I think that this was a unique week because we had the bootcamp in the week before. I don’t see myself (being able to) get ahead in any of the following weeks.
Wrapping up
This was basically the only week in which I have some background knowledge. I’m not sure if I’ve explained too much (or too little), but I’m looking forward to the next 19 weeks that will feature completely new topics for me!
Go the the next blog to read about the second part of this week, Principles and Practices in which I explain my ideas for the final project.