Group Assignment
As a group we compared as many interface tool options as we could, like a plain web page with a backend, Processing, Python and phone app builders, looking at how easy each is to install and how directly it reaches a board we made. The results are on our group page: group assignment page. I chose a web page with a Python Flask backend because it is simple and runs in any browser.
Individual assignment
write an application that interfaces a user with an Input or output device that you made
Summary
This week, I built a simple web application to control an LED using a microcontroller. I made an html page with ON and OFF buttons, and used Python Flask to send commands to the microcontroller through a serial connection. this project showed me how a user can control hardware using a web interface
Interface design for web-controlled LED systems focuses on creating a simple webpage with ON and OFF buttons
Next, I created an HTML page for the interface, including ON and OFF buttons to control the LED through a web browser
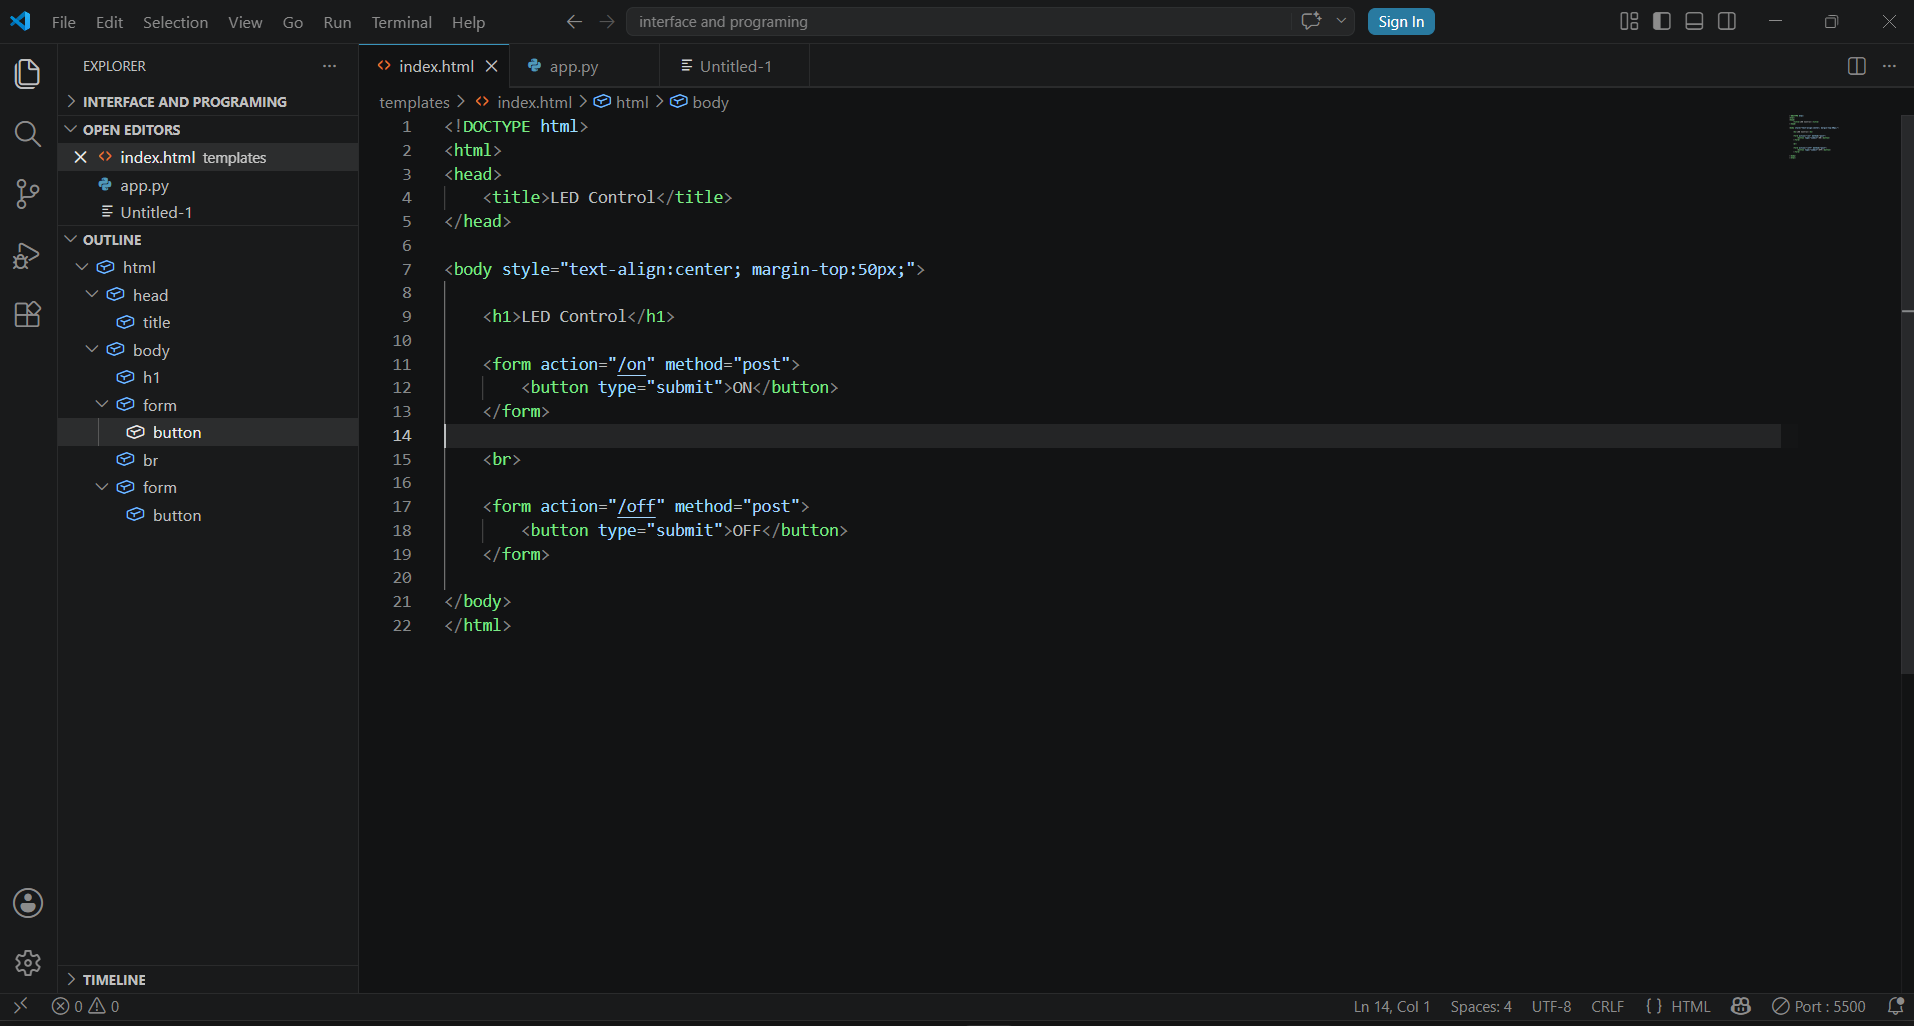
Using Python Flask, I created a lightweight web server that enables communication between the frontend interface and the microcontroller. It responds to ON and OFF routes by sending serial instructions to the LED system
The following code implements the Flask backend for LED control
from flask import Flask, render_template, redirect
import serial
import time

app = Flask(__name__)

arduino = serial.Serial('COM10', 9600)
time.sleep(2)


@app.route('/')
def home():
    return render_template('index.html')


@app.route('/on', methods=['POST'])
def led_on():
    arduino.write(b'ON\n')
    return redirect('/')


@app.route('/off', methods=['POST'])
def led_off():
    arduino.write(b'OFF\n')
    return redirect('/')


if __name__ == '__main__':
    app.run()
I tested the LED
Before running the code, I tested the LED on the Arduino to confirm that the hardware was working correctly
Arduino ide
I wrote an Arduino program to control the LED using simple commands. Then I tested it in the Serial Monitor by typing the commands to see if the LED worked
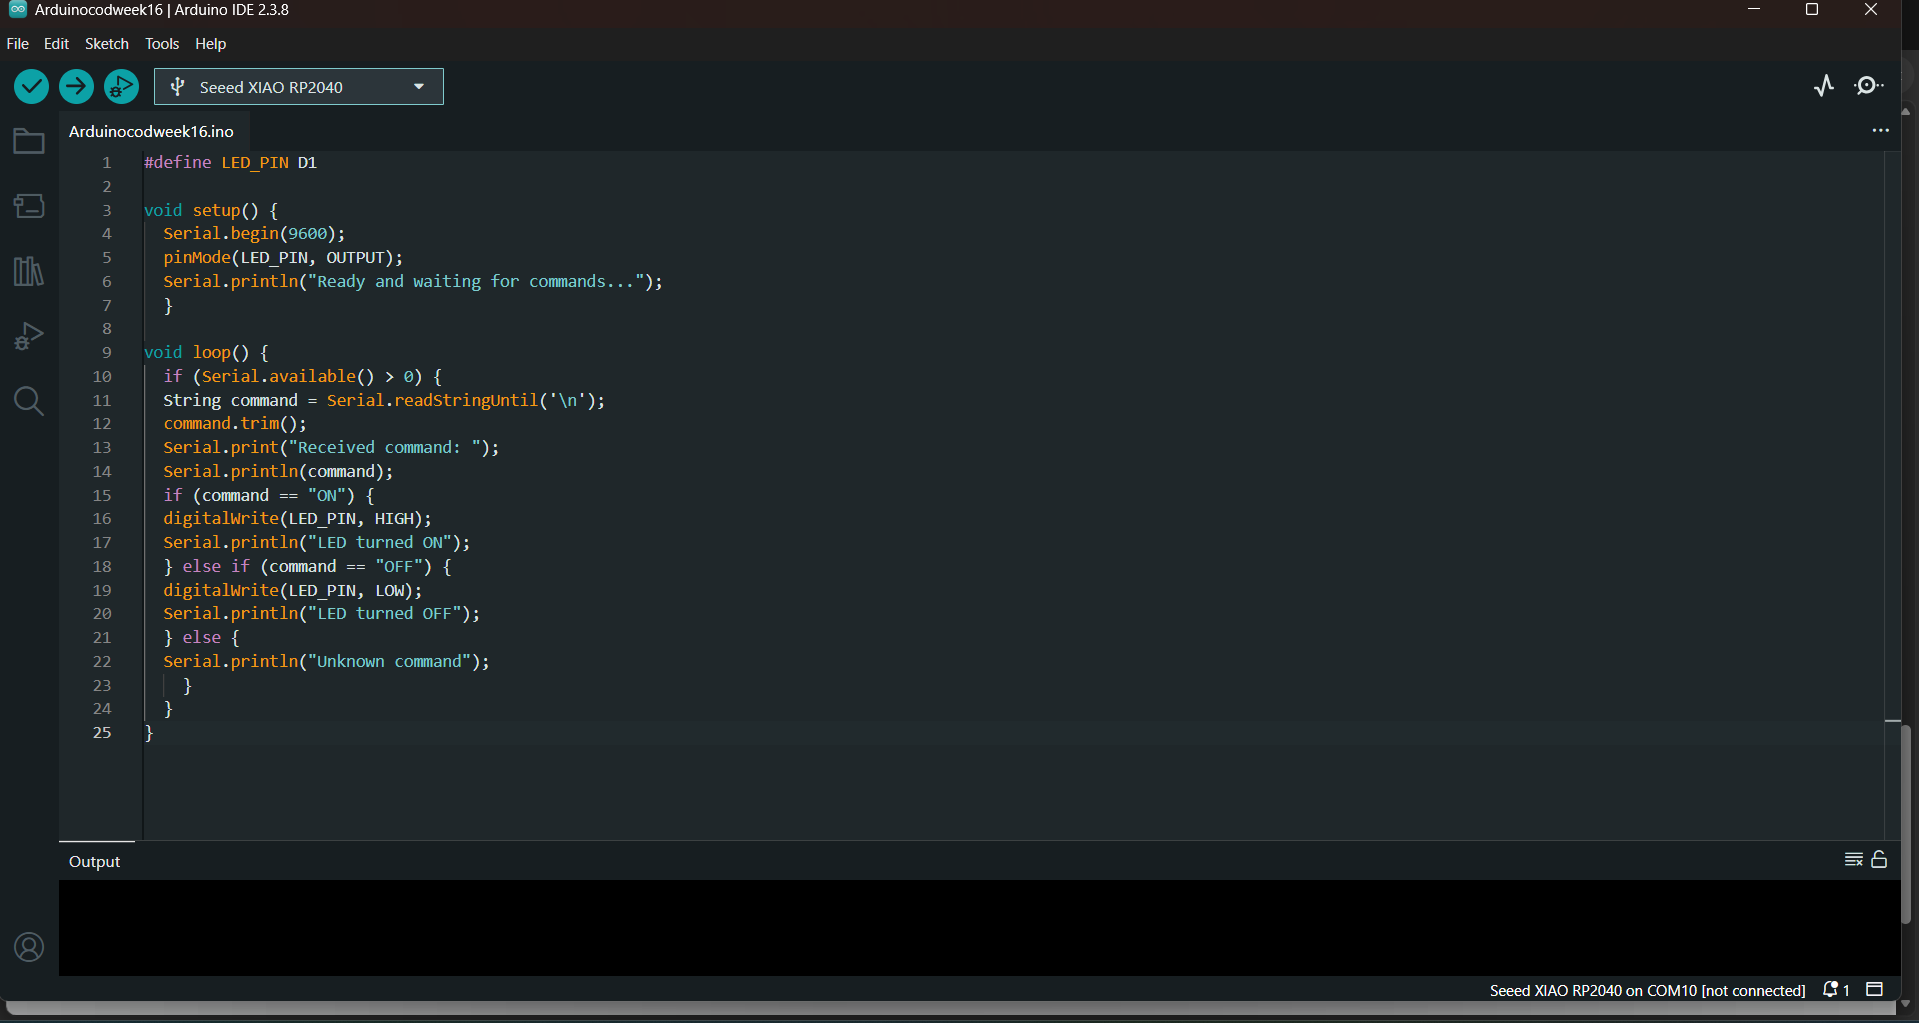
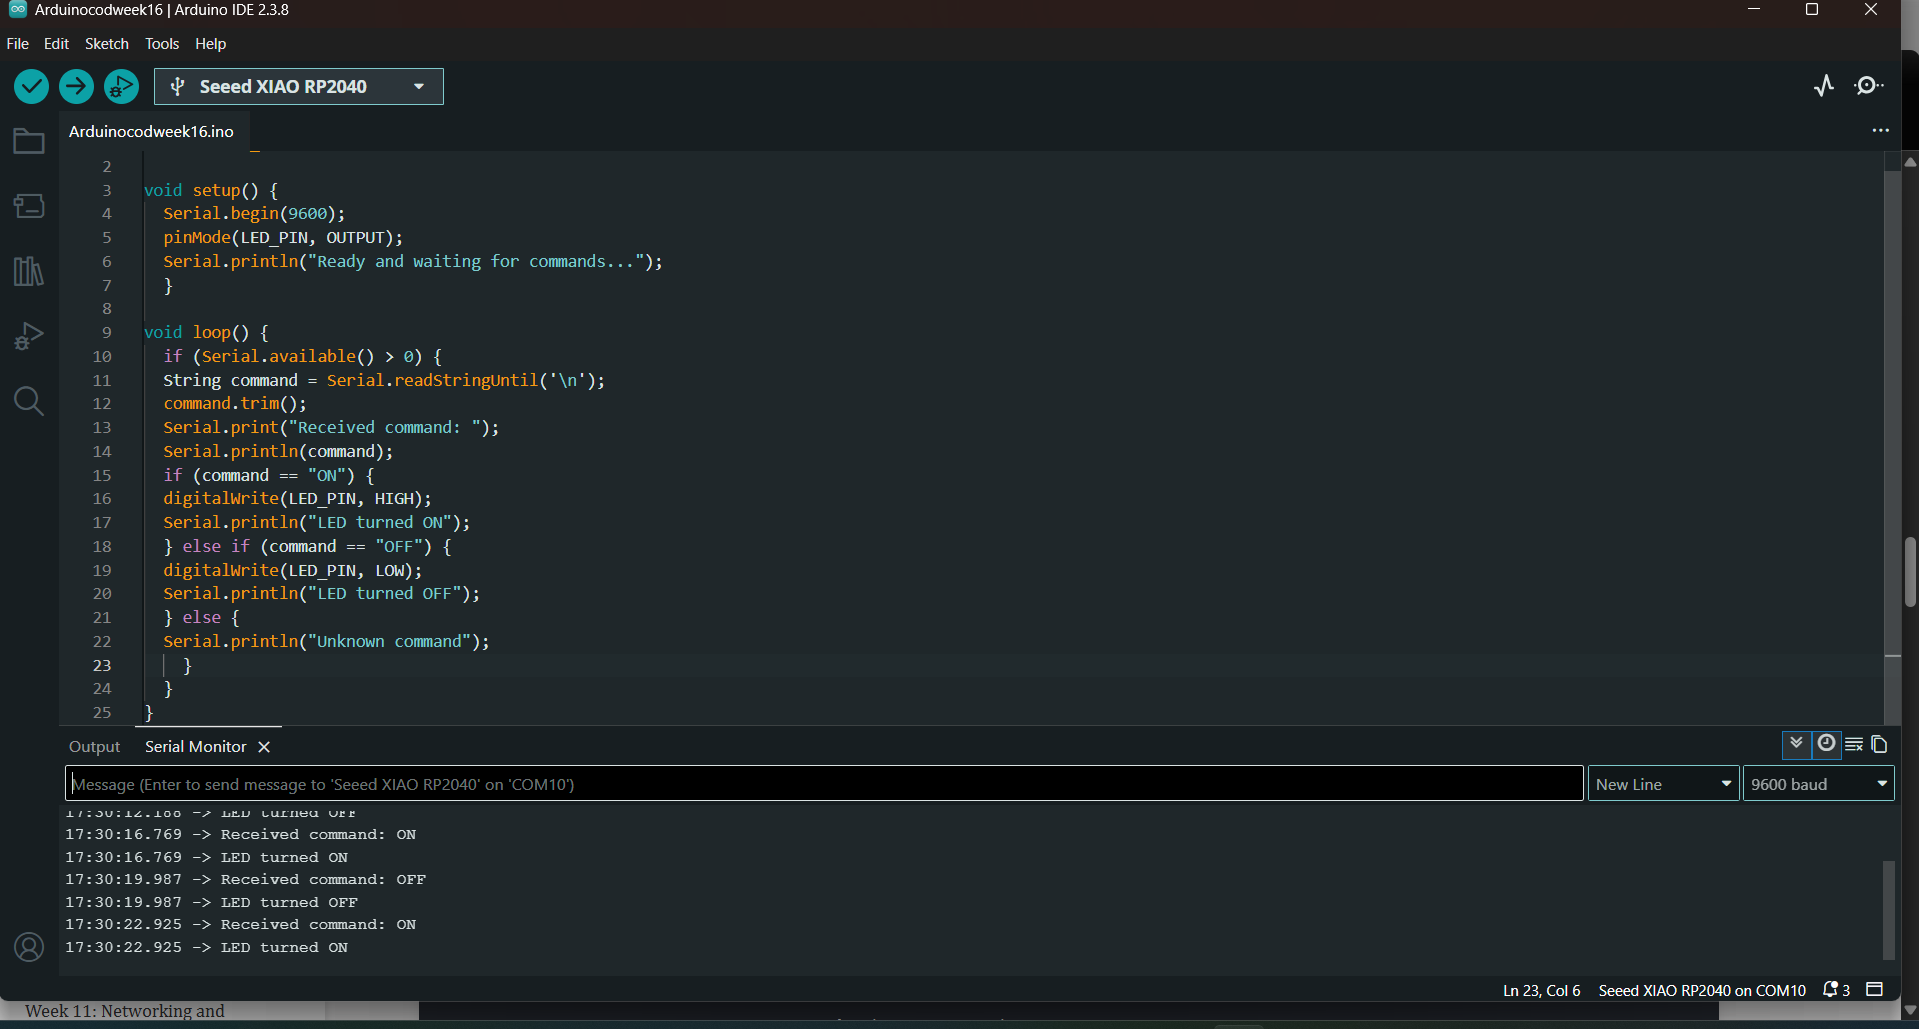
arduino code
#define LED_PIN D1

void setup() {
  Serial.begin(9600);
  pinMode(LED_PIN, OUTPUT);
  Serial.println("Ready and waiting for commands...");
  }

void loop() {
  if (Serial.available() > 0) {
  String command = Serial.readStringUntil('\n');
  command.trim();
  Serial.print("Received command: ");
  Serial.println(command);
  if (command == "ON") {
  digitalWrite(LED_PIN, HIGH);
  Serial.println("LED turned ON");
  } else if (command == "OFF") {
  digitalWrite(LED_PIN, LOW);
  Serial.println("LED turned OFF");
  } else {
  Serial.println("Unknown command");
    }
  }
}
I run the code to test the LED control system
Since Python was already installed, I installed the Flask and pyserial libraries to run the code successfully.

Connect the microcontroller to the computer via USB and verify the correct port for example COM10, then run the Flask application.
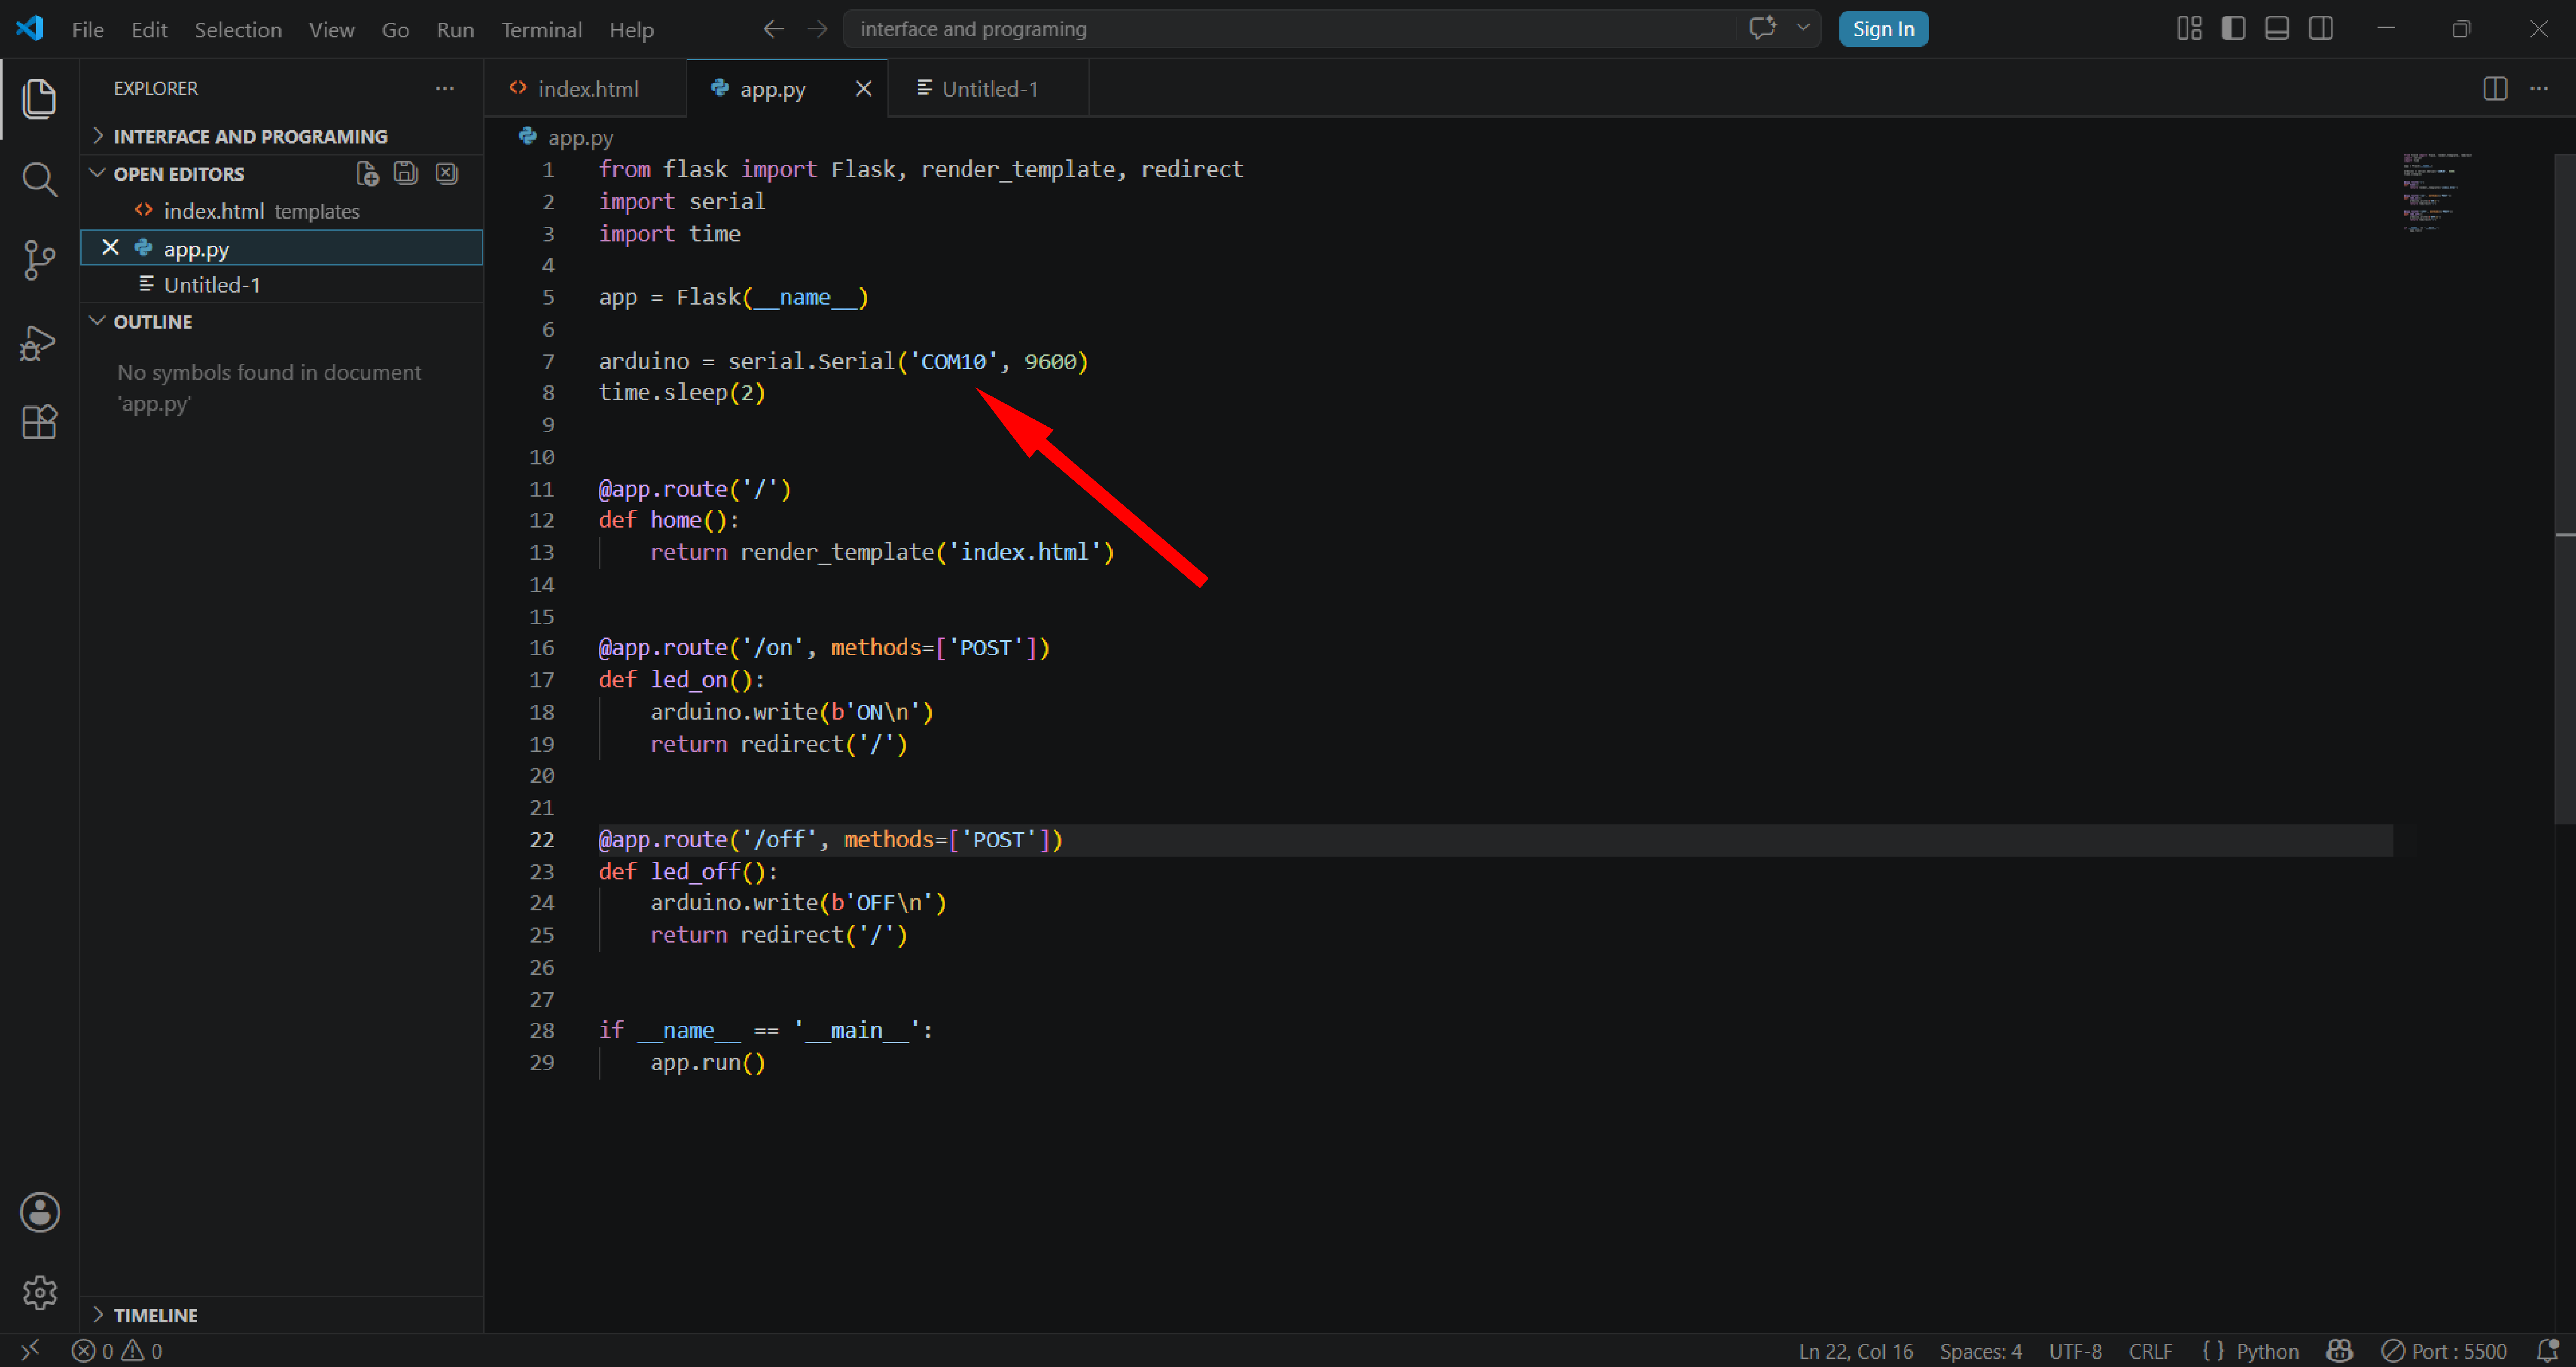

The LED worked correctly using the ON and OFF buttons