Week 16. Wildcard
Summary
As this week was a free topic I decided to learn how to use function of emboidery on a sewing machine, The process that is employed was computerized embroidery from the Brother SNL1850L.
1. Basic concepts
1.1 What is computerized embroidery?
Computerized embroidery is a process where a sewing or embroidery machine uses a digital design file to automatically stitch a pattern onto fabric. Instead of guiding the fabric by hand, the machine controls a specialized hoop that moves precisely in $X$ and $Y$ coordinates while the needle stitches at high speed. It allows for complex, precise, and highly repeatable textile designs that would be nearly impossible to achieve by hand in the same timeframe.
1.2 File types for machine embroidery
When working with embroidery machines, you generally interact with two stages of files:
- Design/Working Files (Vector/Digitized): These are the editable files .SVG files used in software like Inkscape with InkStitch, the one that I used. They store vector shapes, colors, and stitch properties (fill types, density).
- Machine-Specific Files (Stitch Files): These are the final files you export to a USB drive for the machine to read. They contain low-level commands: exact X,Y coordinates for every single puncture, color change commands, and trim cuts. Every machine brand has its own proprietary format:
- DST (Tajima - universal industry standard, though it doesn't store color data well).
- .PES / .PEC (Brother, Baby Lock).
- .JEF (Janome).
- .EXP (Bernina).
1.3 Applications
Computerized embroidery is widely used in both maker environments and the fashion/textile industry due to its versatility:
- Apparel & Merchandising: Adding logos, names, and custom graphics to t-shirts, hoodies, caps, and uniforms.
- Textile Customization & Repair: Personalizing patches, bags, or upcycling old garments with complex designs.
- Smart Textiles & E-Textiles: Stitching conductive threads (like silver or stainless steel fibers) directly onto fabric to create flexible circuits, soft sensors, or wearable antennas.
- Artistic Expression: Creating complex textured patterns, gradients, and mixed-media art pieces combining print and stitch.
2. Design
For the desig part I will use Inkscape that is a software that I used during other weeks but I explain better the functionality of this software on the week 3 page.
2.1 Install Ink/Stitch
Ink/Stitch is an open-source extension for Inkscape that transforms this vector graphics editor into a complete embroidery digitization platform. Instead of purchasing expensive industrial software, Ink/Stitch allows you to use Inkscape's standard vector drawing tools (such as Bézier curves and geometric shapes) and assign them mechanical stitching properties.
The extension acts as a bridge between abstract graphic design and the physical commands understood by an embroidery machine. Its workflow is based on three fundamental principles:
- Vector interpretation: Translates Inkscape elements into actual stitches, for examples lines or fills turning theminto running stitches or fabric fill patterns.
- Parameter control: Allows you to adjust, via visual menus, the thread density, stitch angle, fabric stretch compensation, and the exact order in which each element will be stitched.
- Simulation and export: Includes a realistic 2D and 3D simulator to see how the needle will move before using any thread, and directly generates the final machine files (.DST, .PES, etc.).
How to install it?
Click on the word Ink/Stitch, it will take you to the official website then you will only have to push on the Download button and follow the instructions they are very simple it will almost add the Ink/Stitch extension automatically to Inkscape.
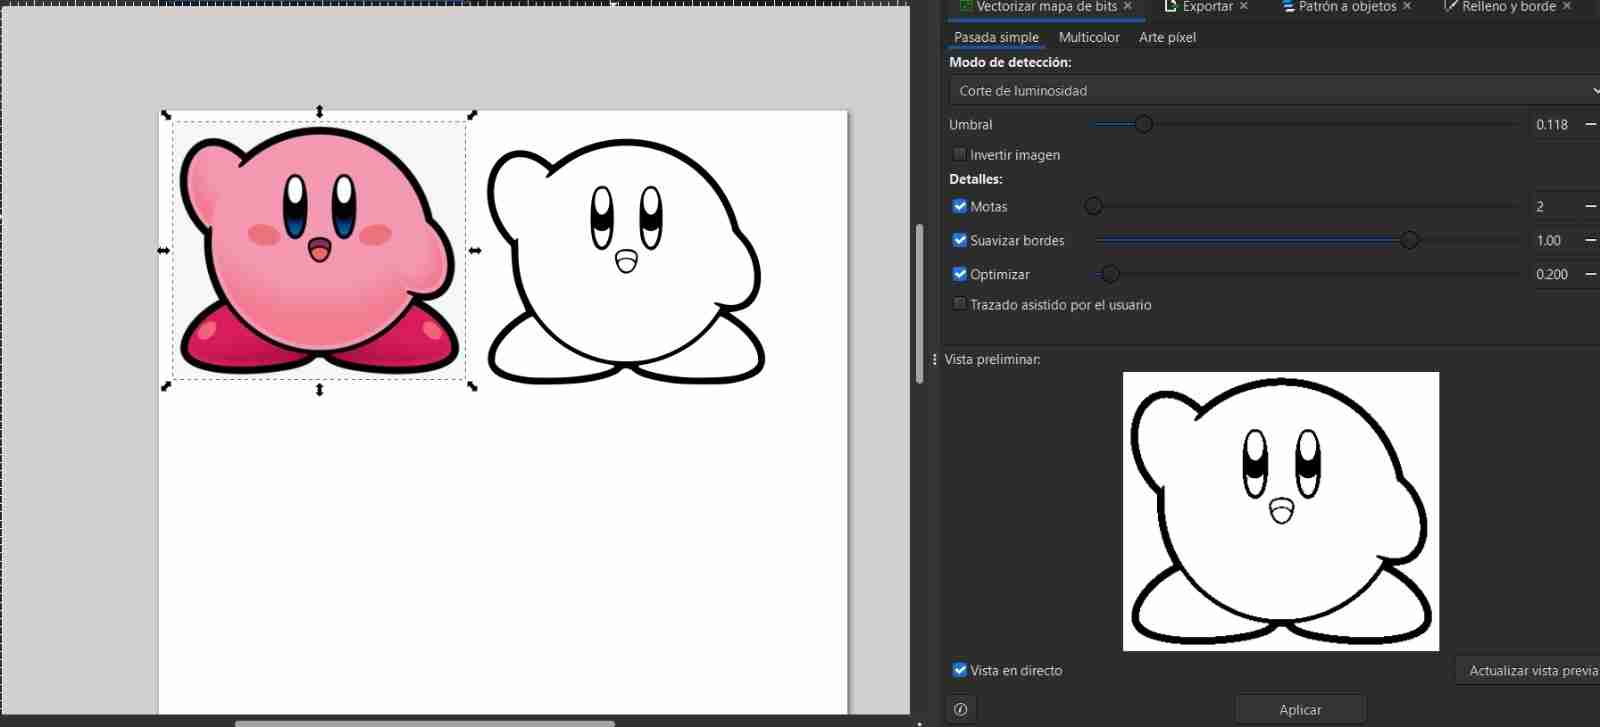
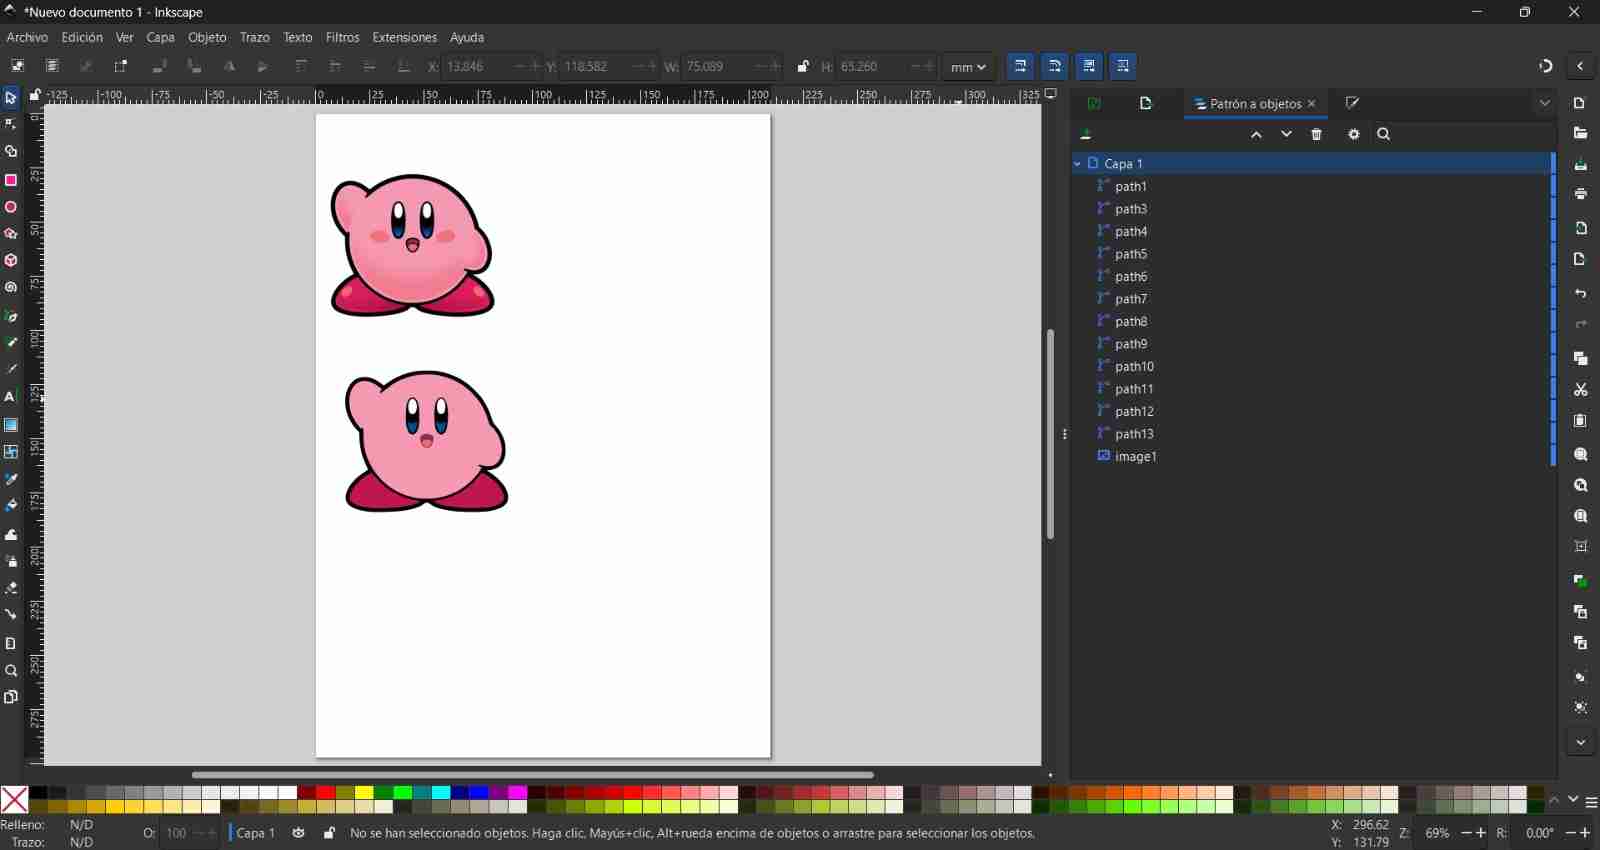
2.2 Vectorize your image
We vectorize our image, moving the threshold until we have the details we want.
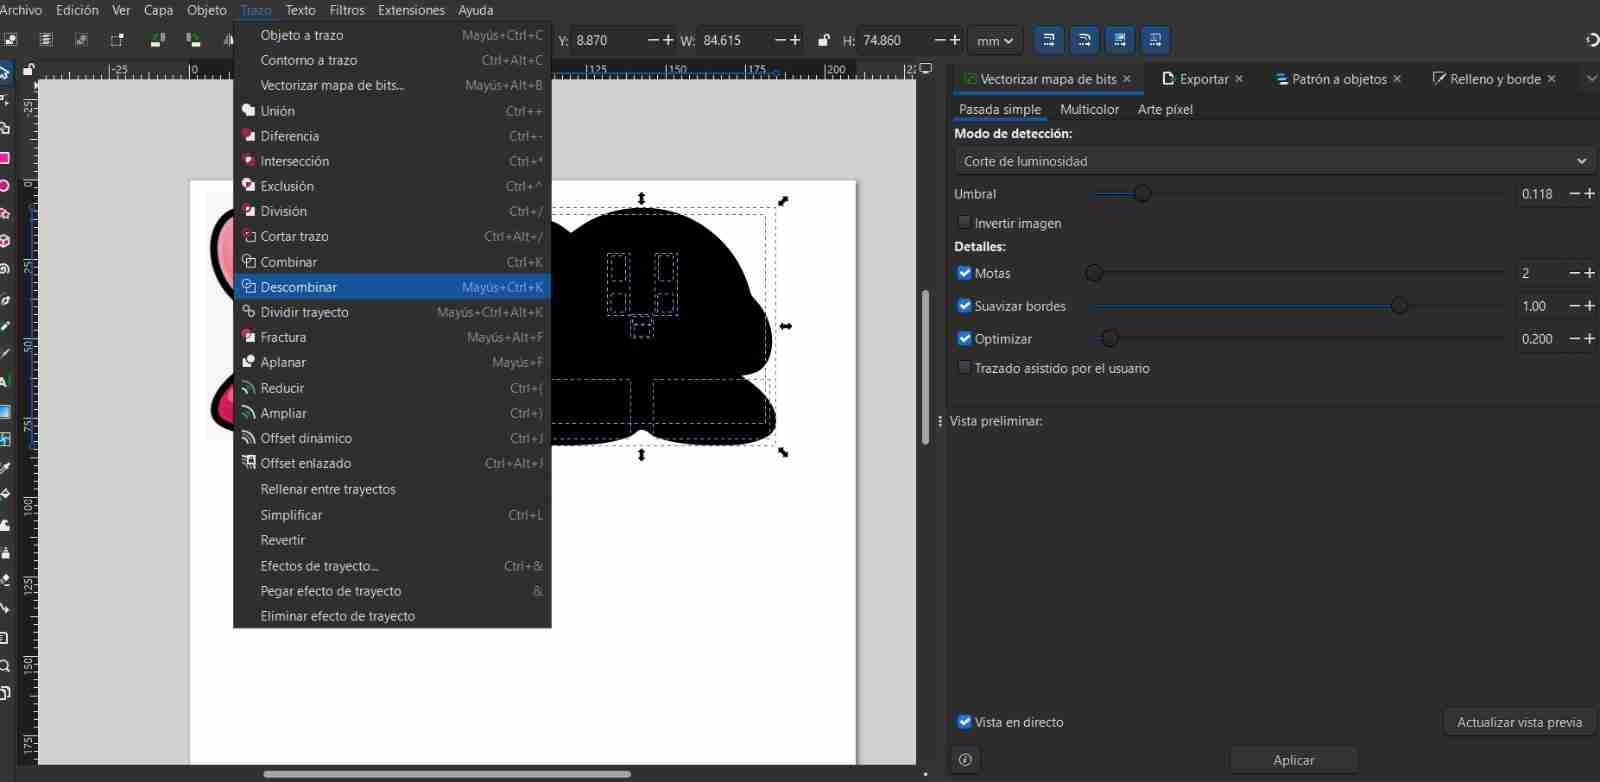
2.3 Uncombine the object
After vectorizing, we uncombine (path, uncombine) to select the colors for our object's body. Our object will then have all parts in black.
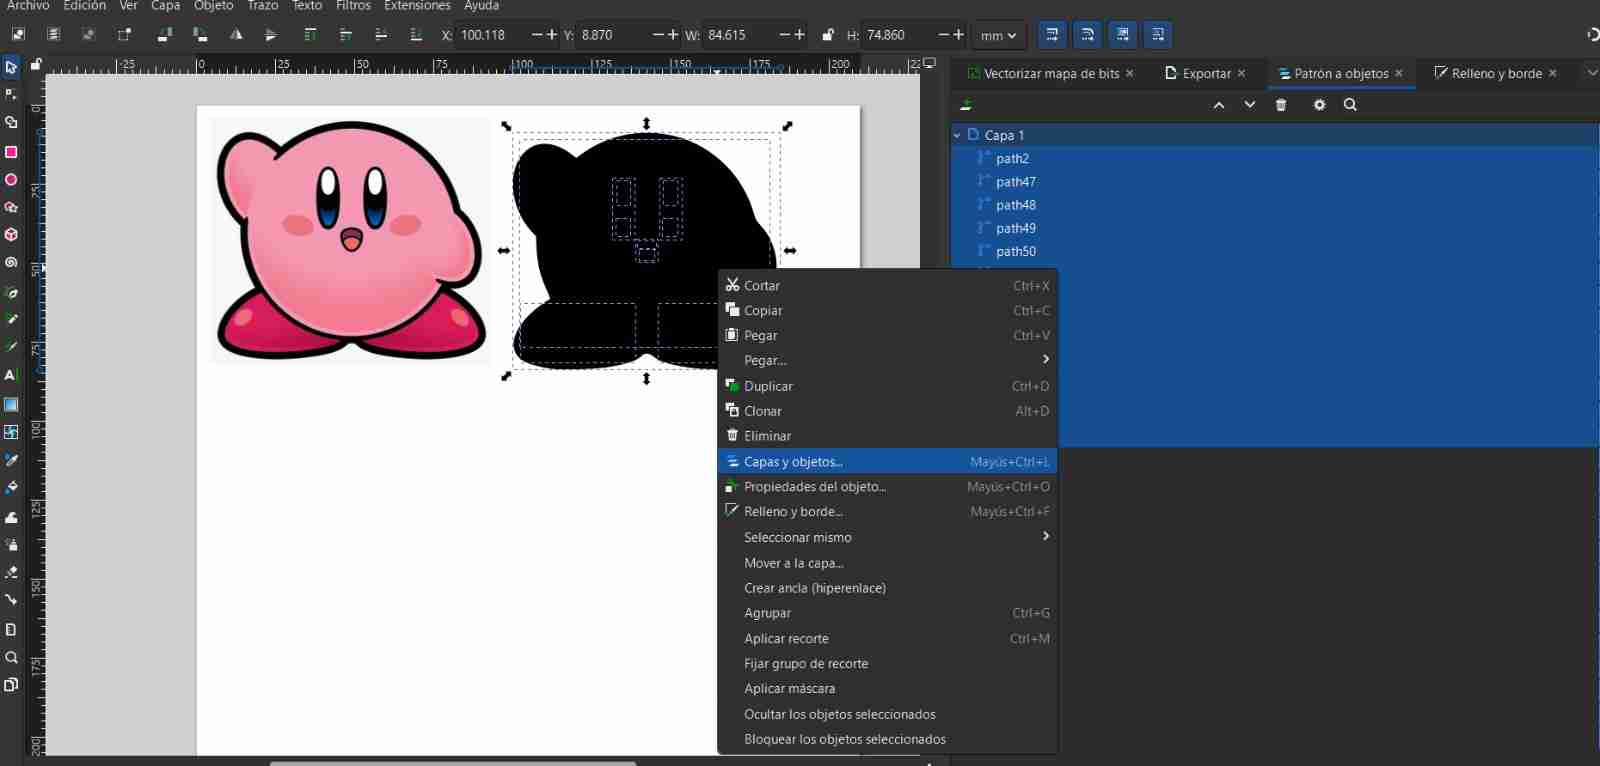
2.4 Add the tab layers and objects
With the body selected, right-click and select Layers and Objects. This will take you to a tab on the right where you can see the order of the body's layers (the higher up, the last, second-to-last, etc. layer that will be embroidered, and the lower down, the layer that will be embroidered first, second, etc.).
2.5 Add the tab fill and border
To add color, we click on object, fill and border.

2.6 Add color
Then we click on the eyedropper (blue) and from there we go to our image and click on the color of the object we have selected to get the exact colors of our image.
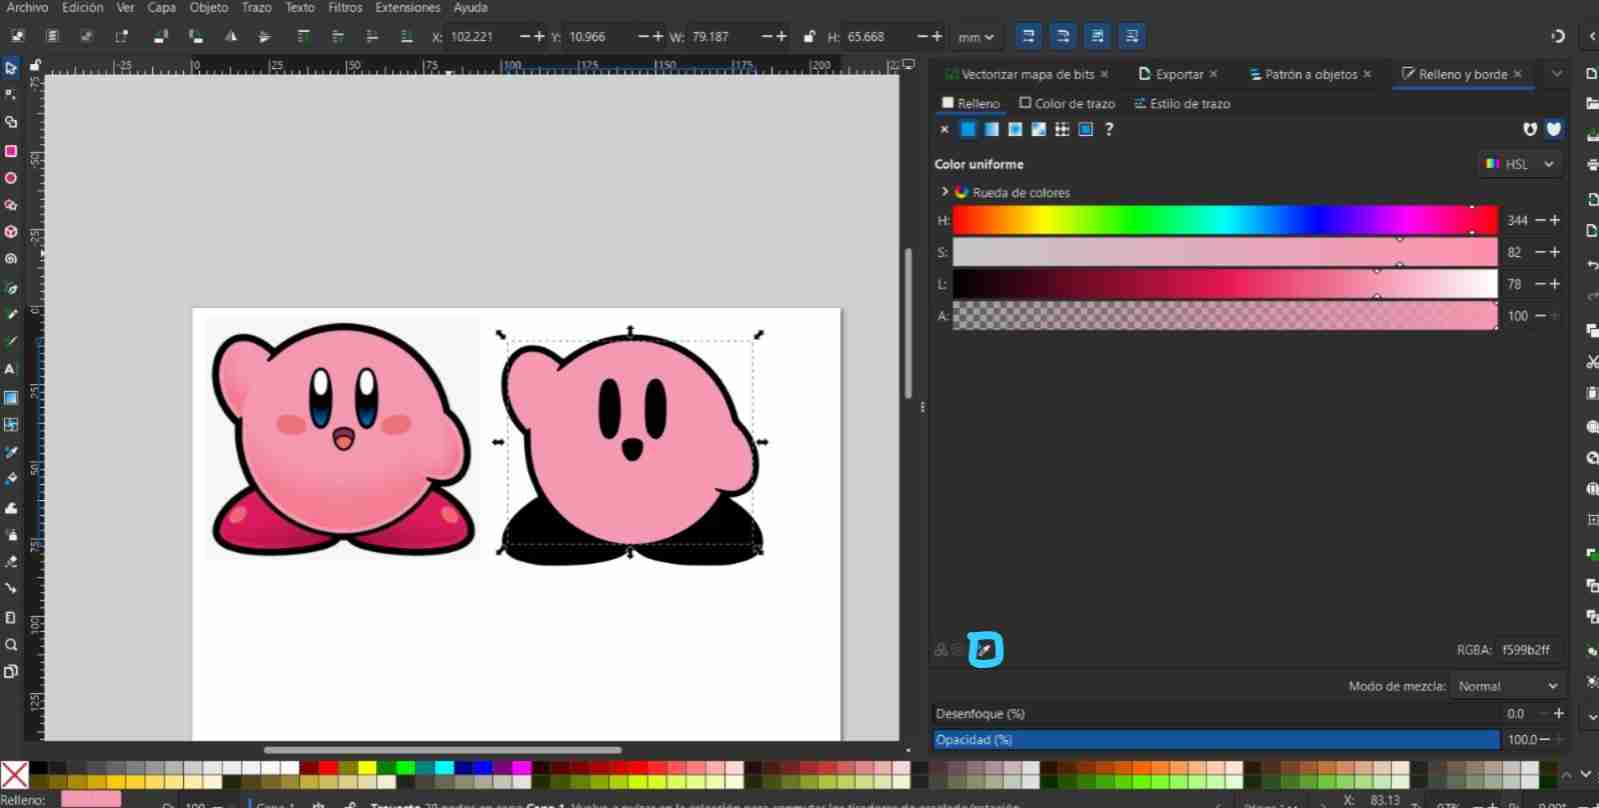
Repeat this step until it is completely colored.
2.7 Use Ink/Stitch
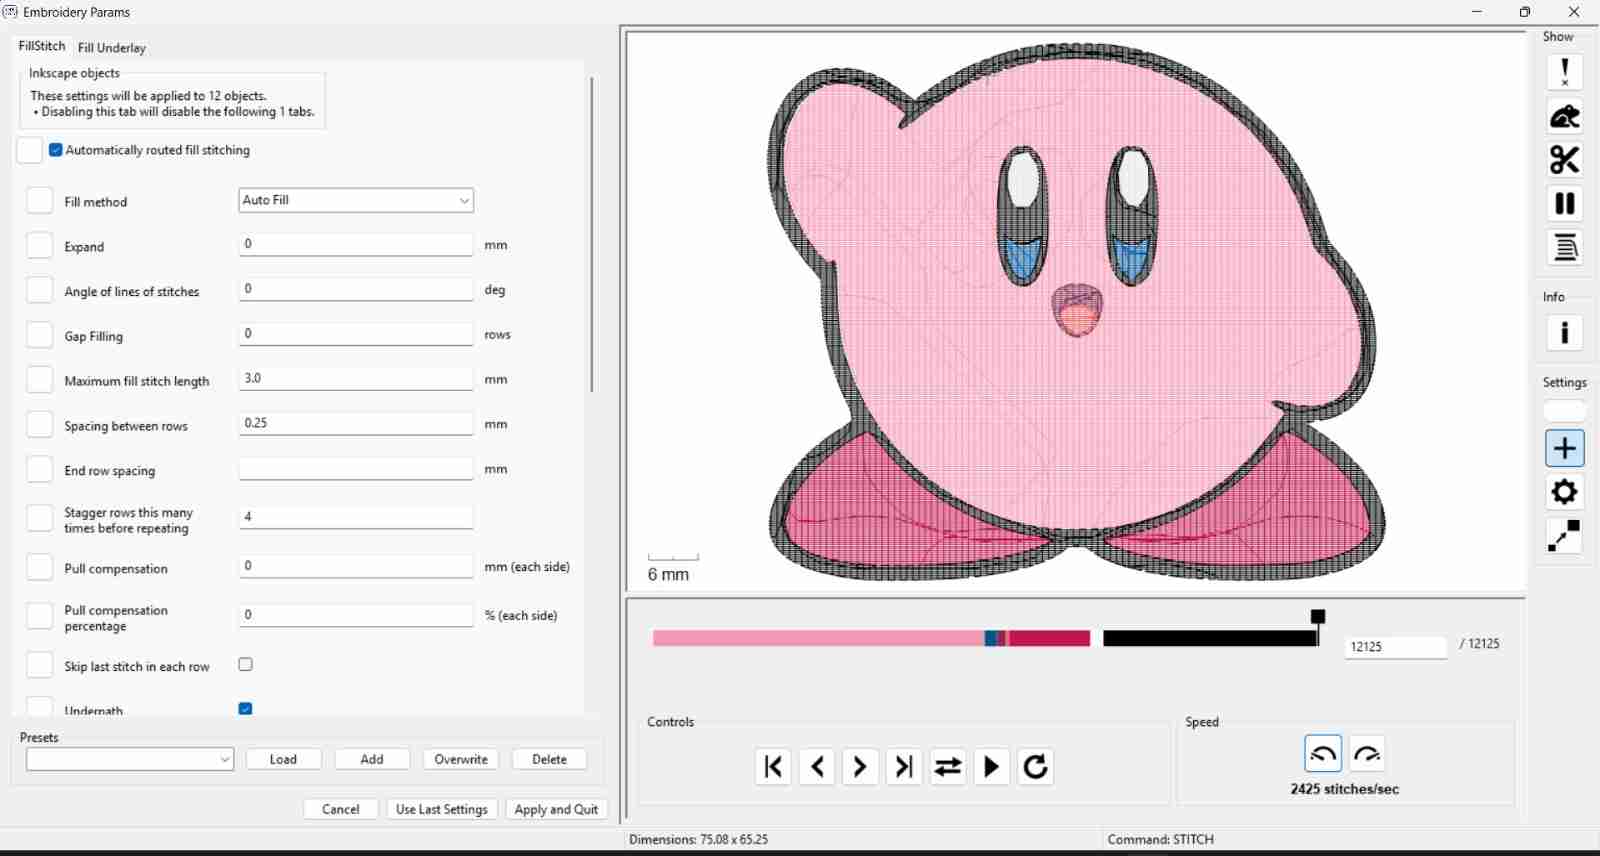
Once we have finished painting, we can see how our embroidery would look using Ink/Stitch. To do this, go to Extensions, Inkstitch, and Parameters.
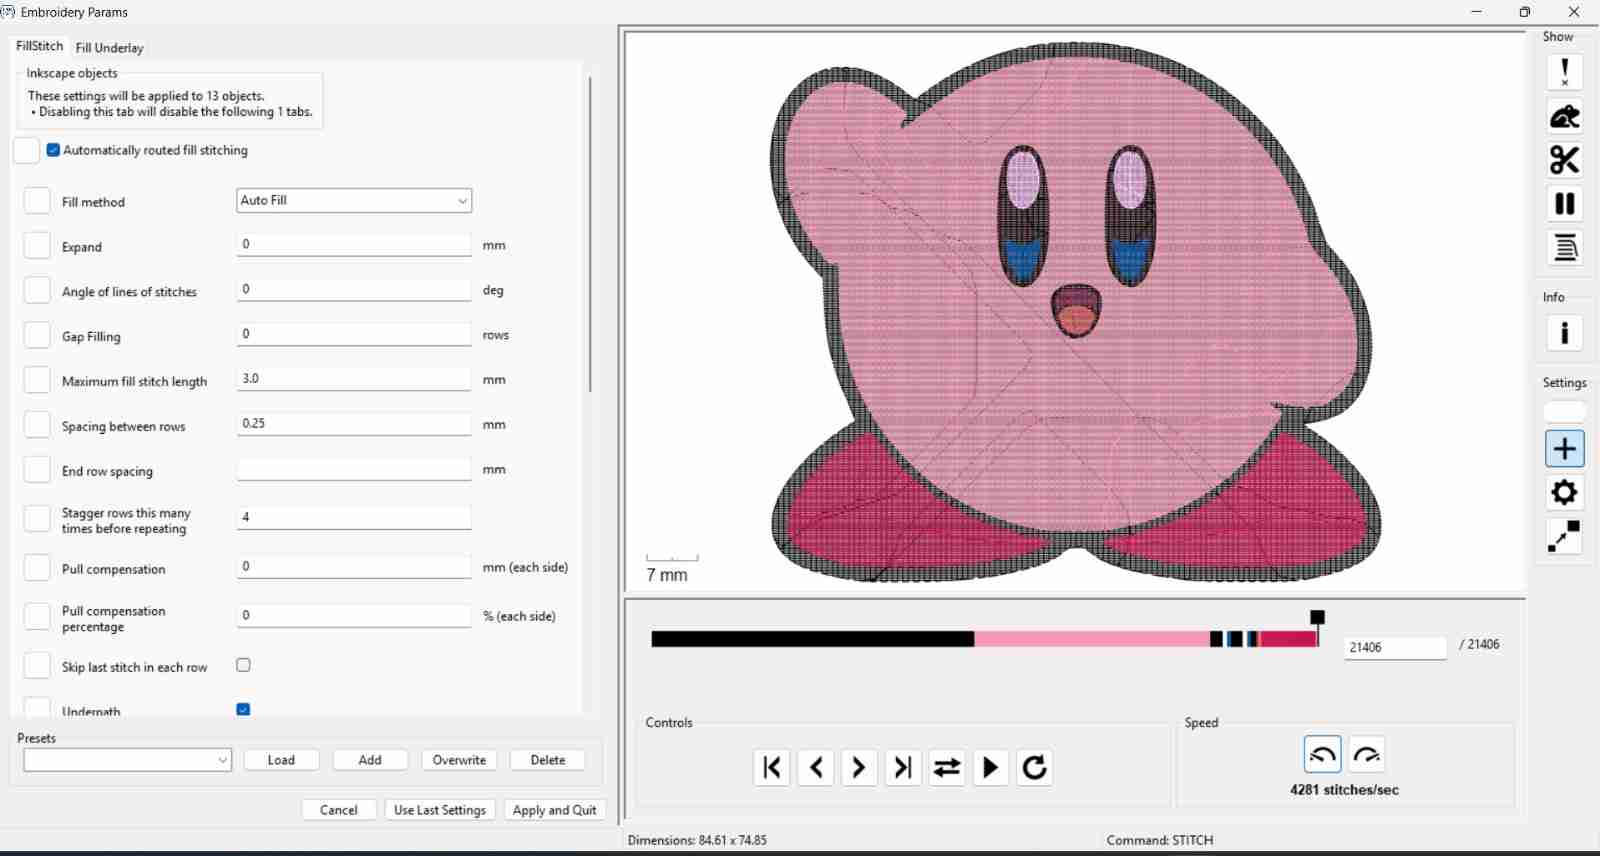
We observe that the colors are stitched one on top of the other, but we don't want this to happen because otherwise the needle could break while embroidering, or also tear the fabric, and our final result might not look as we expect.
We also see that the same colors are sewn in different orders when the correct and faster thing would be to sew the same colors in a single pass, so we are also going to correct this.
2.8 Fixing the Cross stitching colors and order of colors
We differentiate between each layer to avoid overlapping the embroidery.
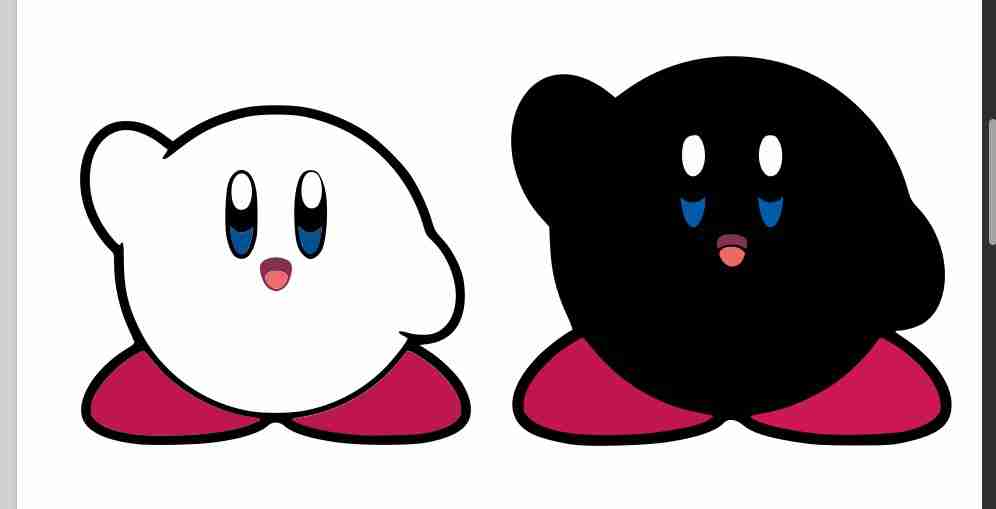
We repeat it until we have all the outlines of objects without overlapping colors
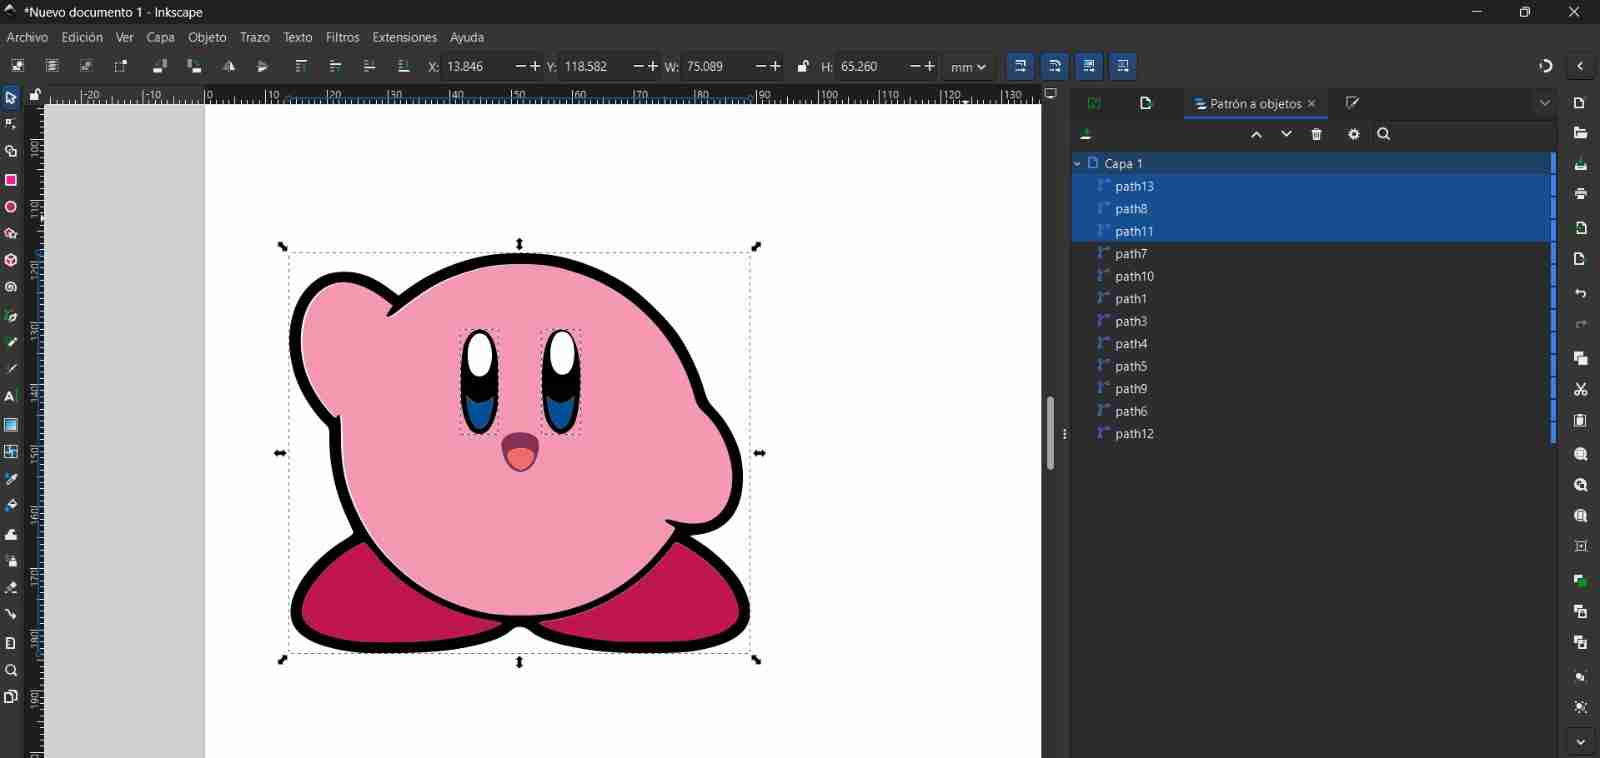
For the colors we will group the layers that are the same color with their respective color so that they are embroidered in the same order.
With all the corrections the final embroidery should appear without overlapping colors and with the colors matching in a single pass.
2.9 Export the file
Once we are satisfied with the result we must export the file that our sewing machine accepts, in my case the Brother SNL1856L accept the .PES format si I will export it in that way, we have to save this file in a USB so we can upload the file to the machine.
3. Assemble the embroidery frame
Before setting uo the machine we need to assmble the embroidery frame, that will be the tool need if we want to embroidery.
It's important to mention that if you're using thin fabric, you should use a second layer of fabric like interfacing to give it rigidity, otherwise the fabric you're embroidering on might tear. However, if you're using thick fabric, as I am, you can embroider directly. The process is the same in both cases: mount the fabrics onto the frames and tension them.
3.1 Join the squares with the fabric
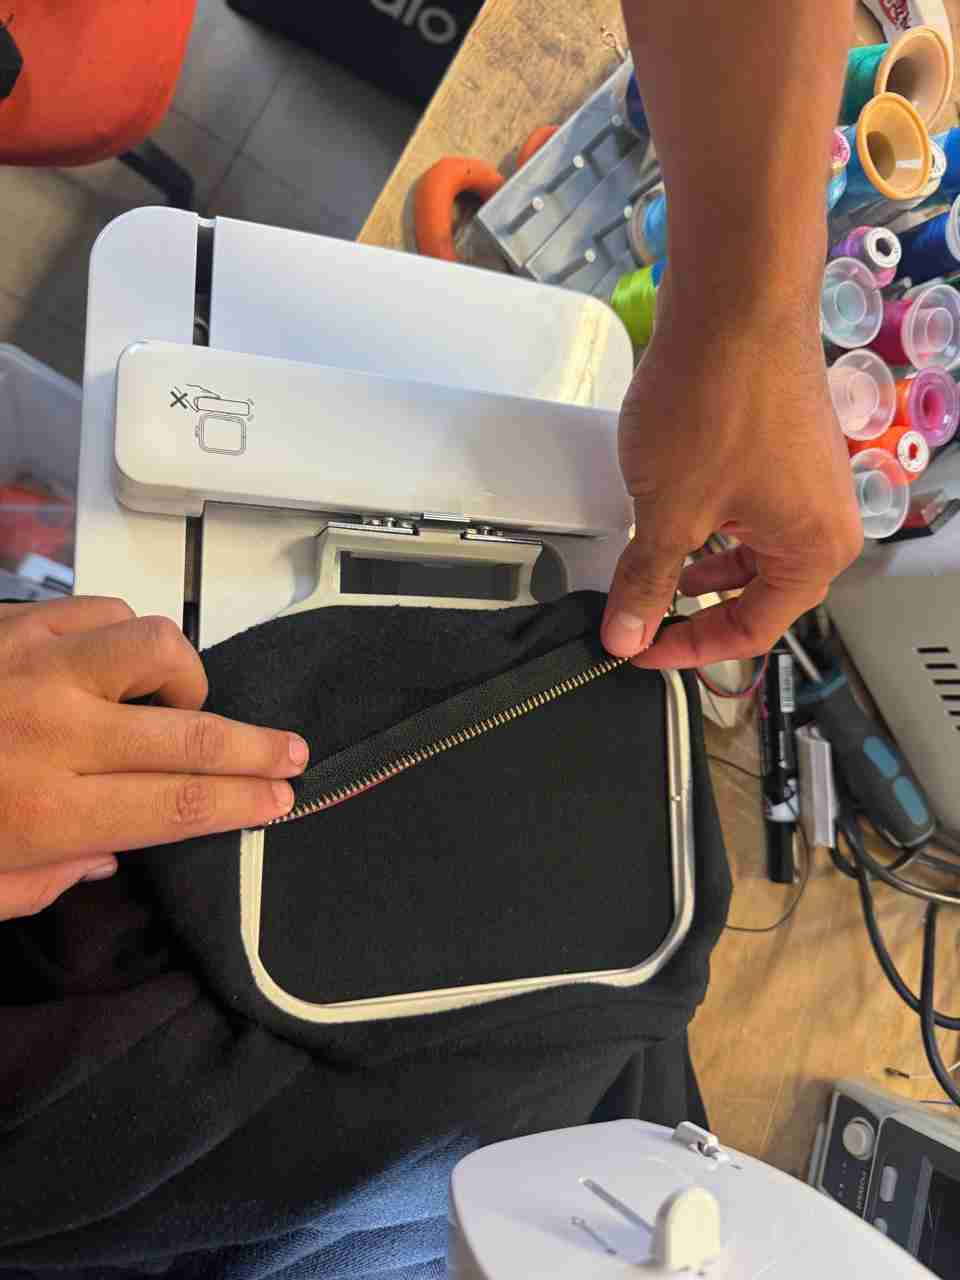
The tool that defines the embroidery area consists of squares, in our case 10 x 10 cm. A small detail is that there are arrows which must point in the same direction for the square to close correctly.
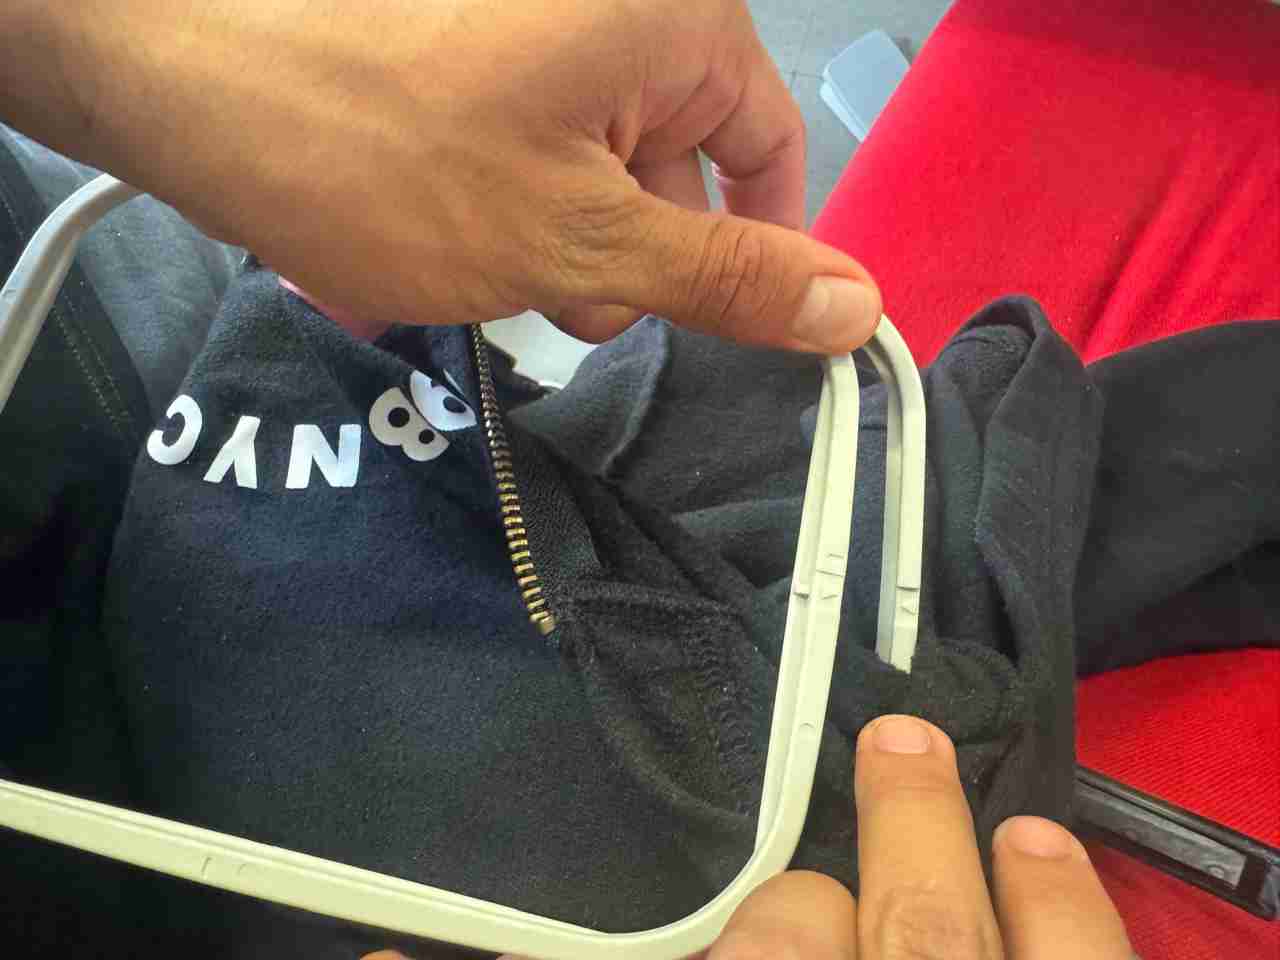
After that we can close the square with the fabric
3.2 Tense the fabric
We need to stretch the fabric taut so that the needle doesn't get caught and wrinkle the fabric, as it's very difficult, if not impossible, to fix that mistake without unraveling everything. However, we also have to be careful not to stretch it too much, otherwise the needle could tear the fabric with each stitch.
To tighten our fabric, we firmly grasp the square we see and pull the fabric outwards. We repeat this step on all four sides until we feel the fabric is taut or stretched.
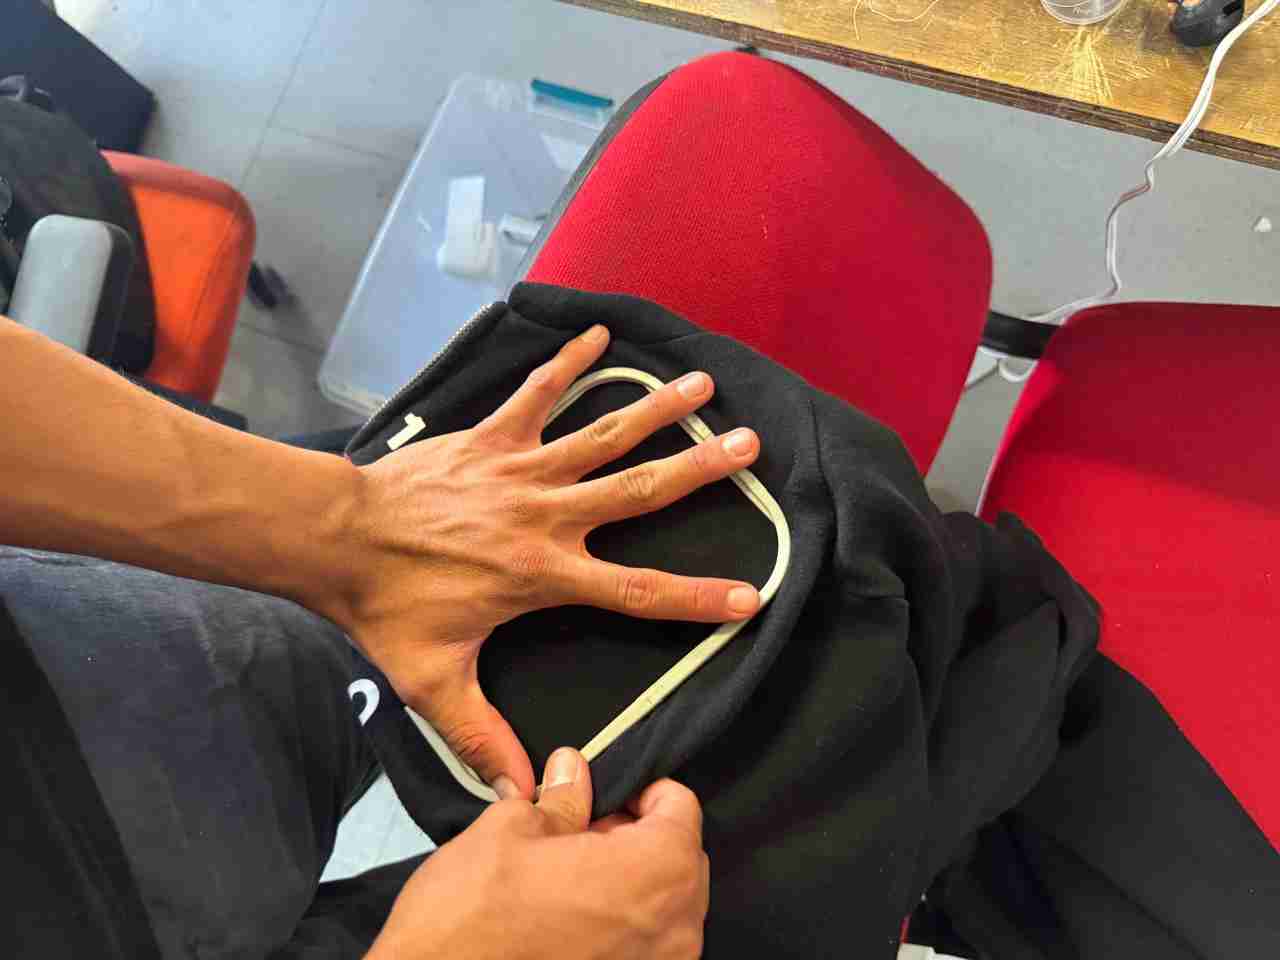
At the end it should look like this.
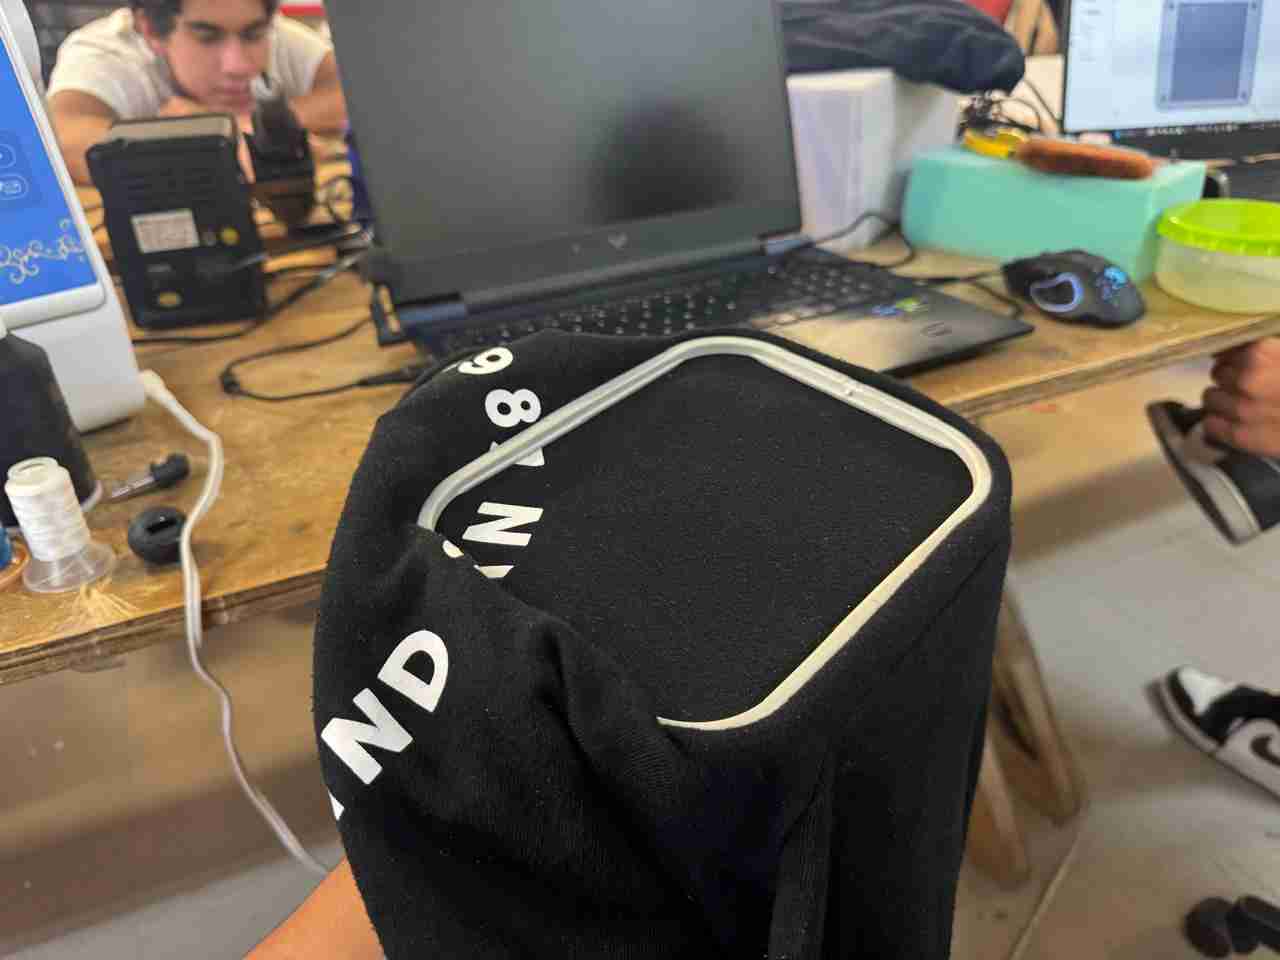
3.3 Place the frames on the accessory drawer
This sewing machine has two accessory drawers, one for regular sewing and one for embroidery. The embroidery drawer contains a metal frame onto which the fabric frame is mounted; once mounted, the accessory drawer is attached to the machine.
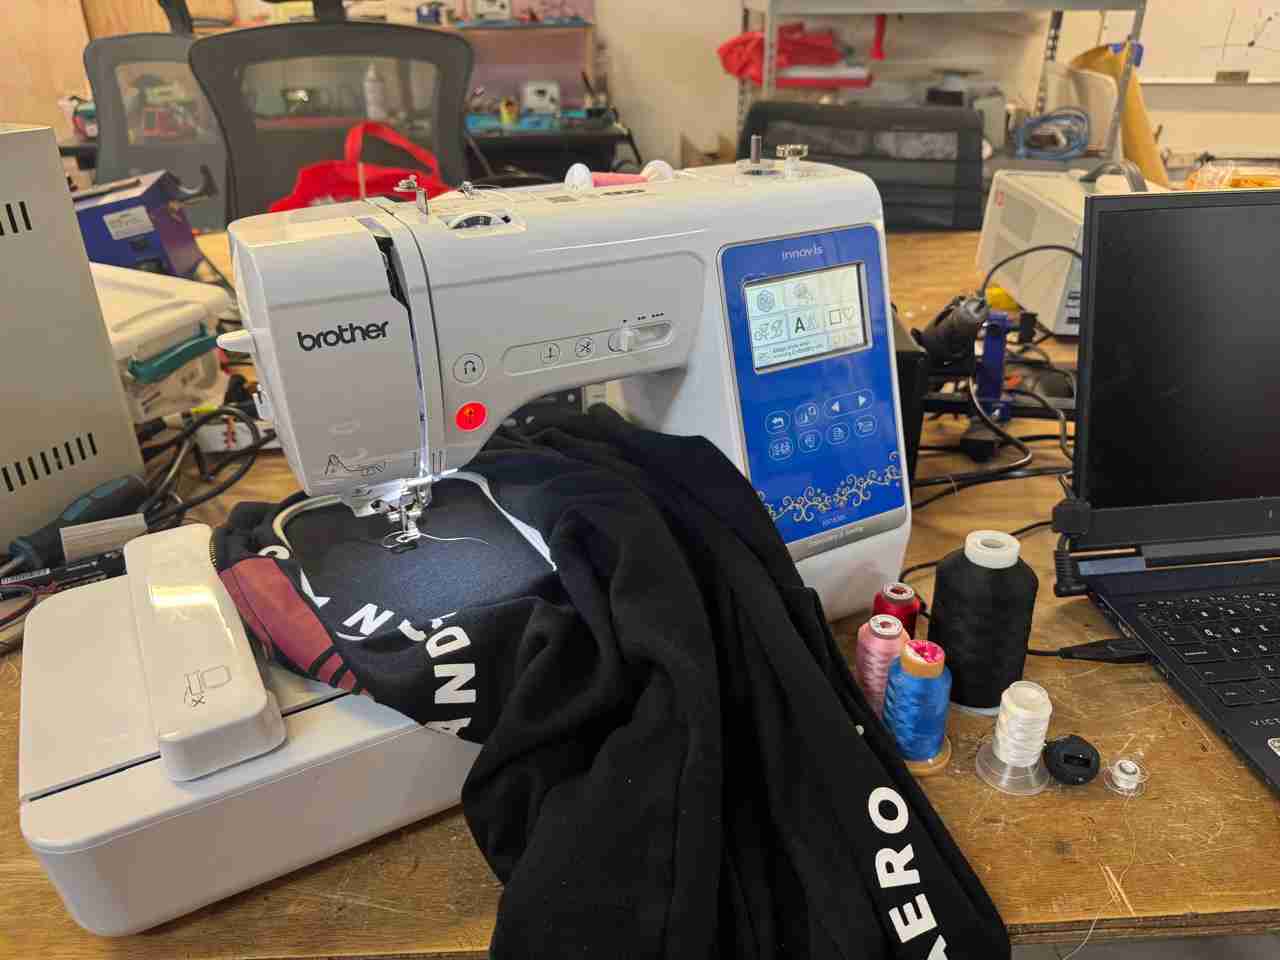
4. Setting up the sewing machine
4.1 Assemble the thread
In general, the steps for assembling the thread are the same, but in case they are not, each machine has instructions on the top.
You also need to check that the needle plate has a bobbin with thread, since you always need 2 threads for sewing or embroidery.
4.2 Connect the USB driver to the machine
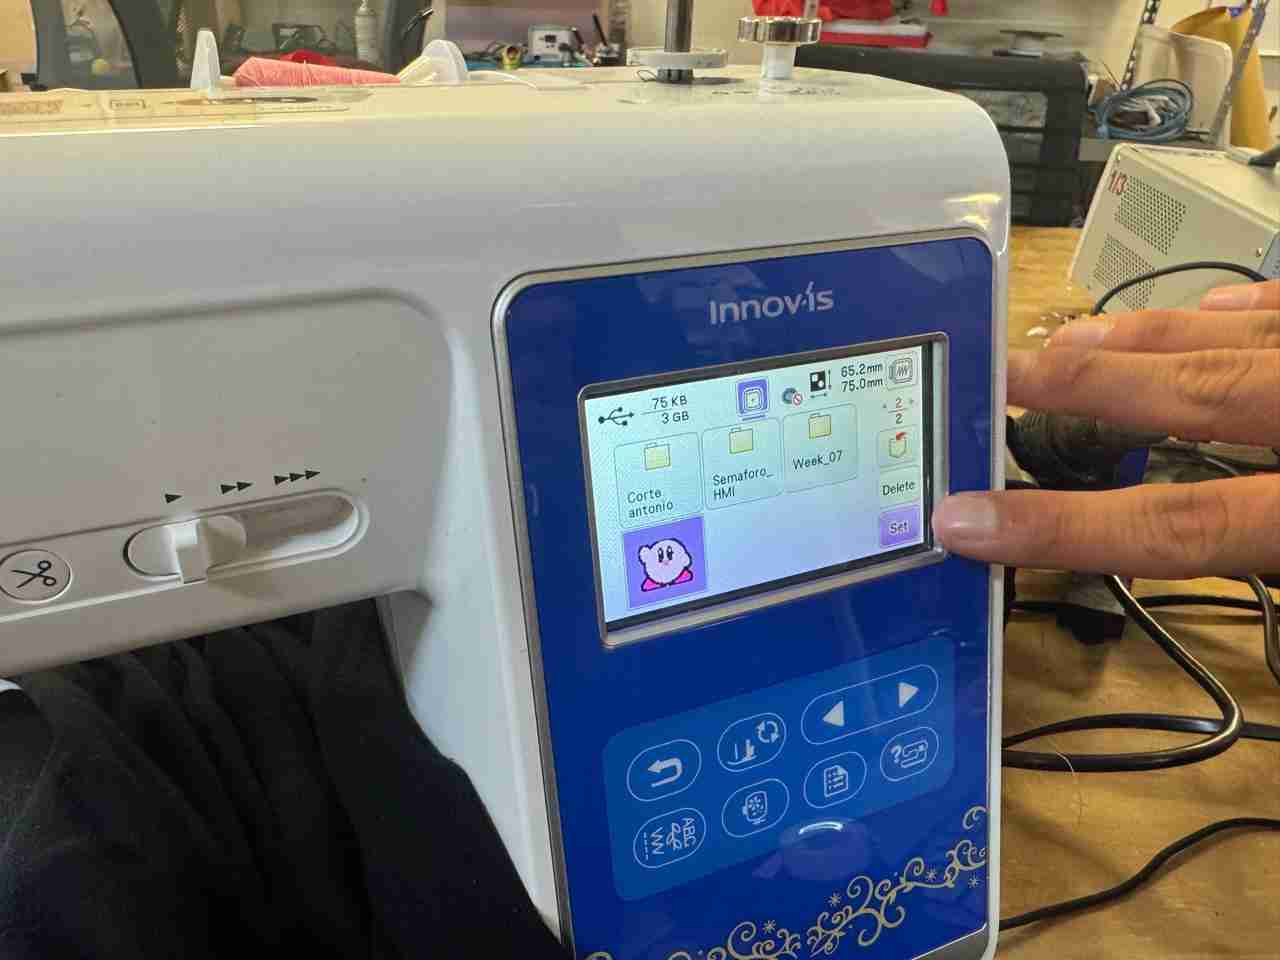
We connect our USB drive with the file, and we must click on the USB logo.
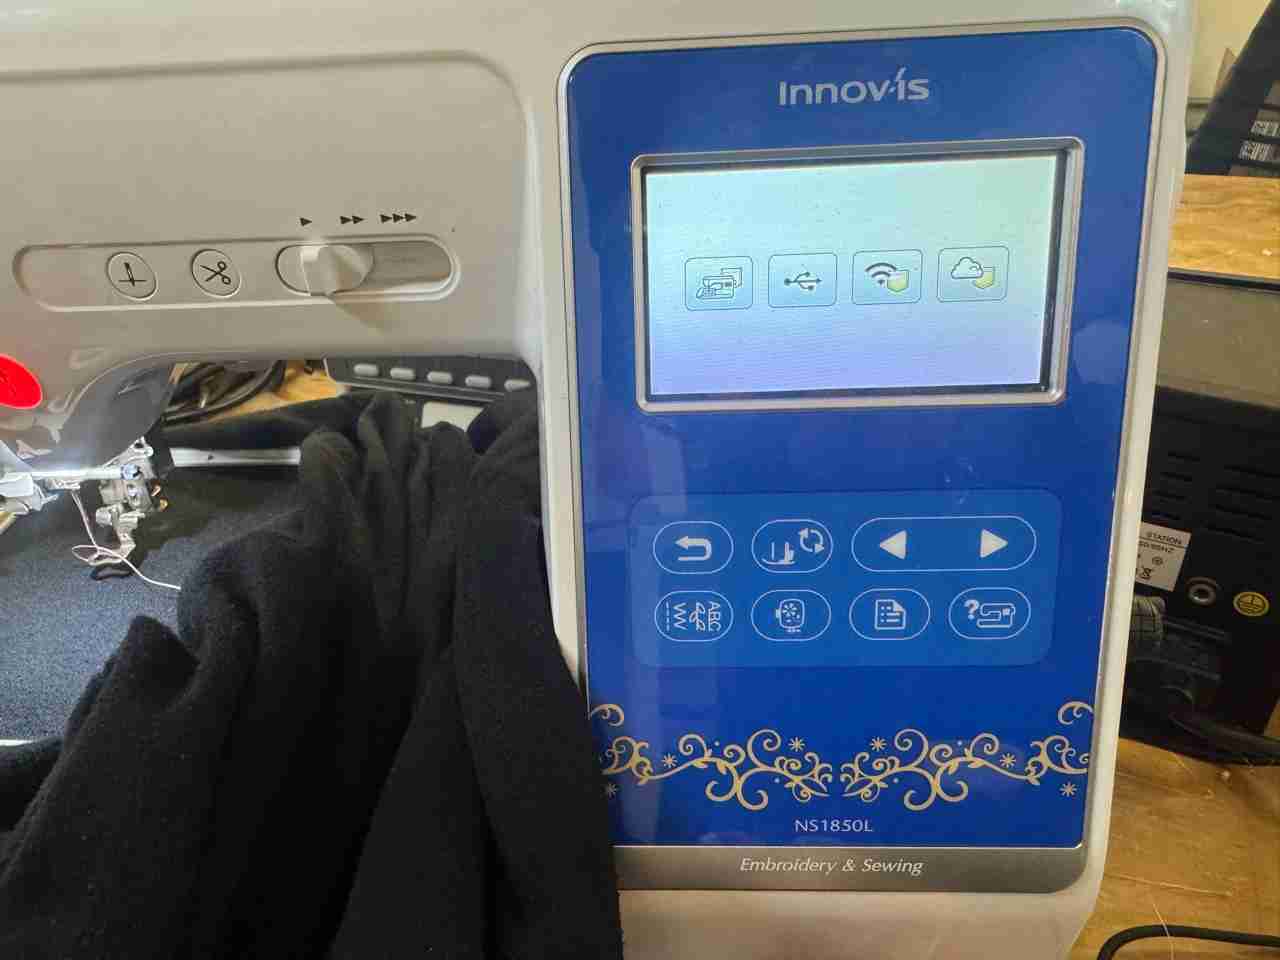
4.3 Seacrh our file
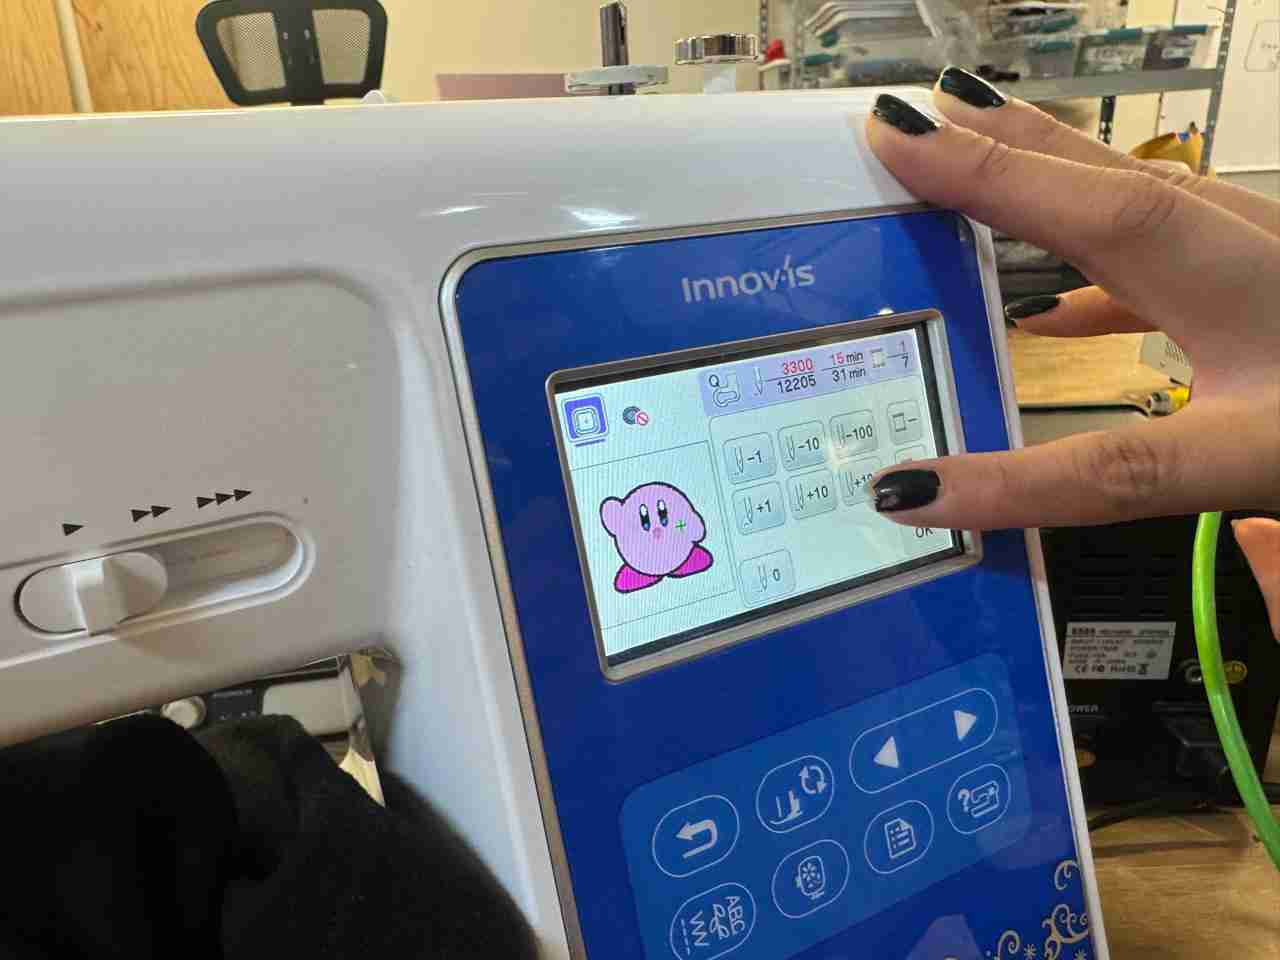
After clicking on the USB logo, we locate our file using the arrow keys on the device. Once we find it (you should see the image that Ink/Stitch showed us a while ago), we press SET.
4.4 Setting up our file
Then we will press Edit End
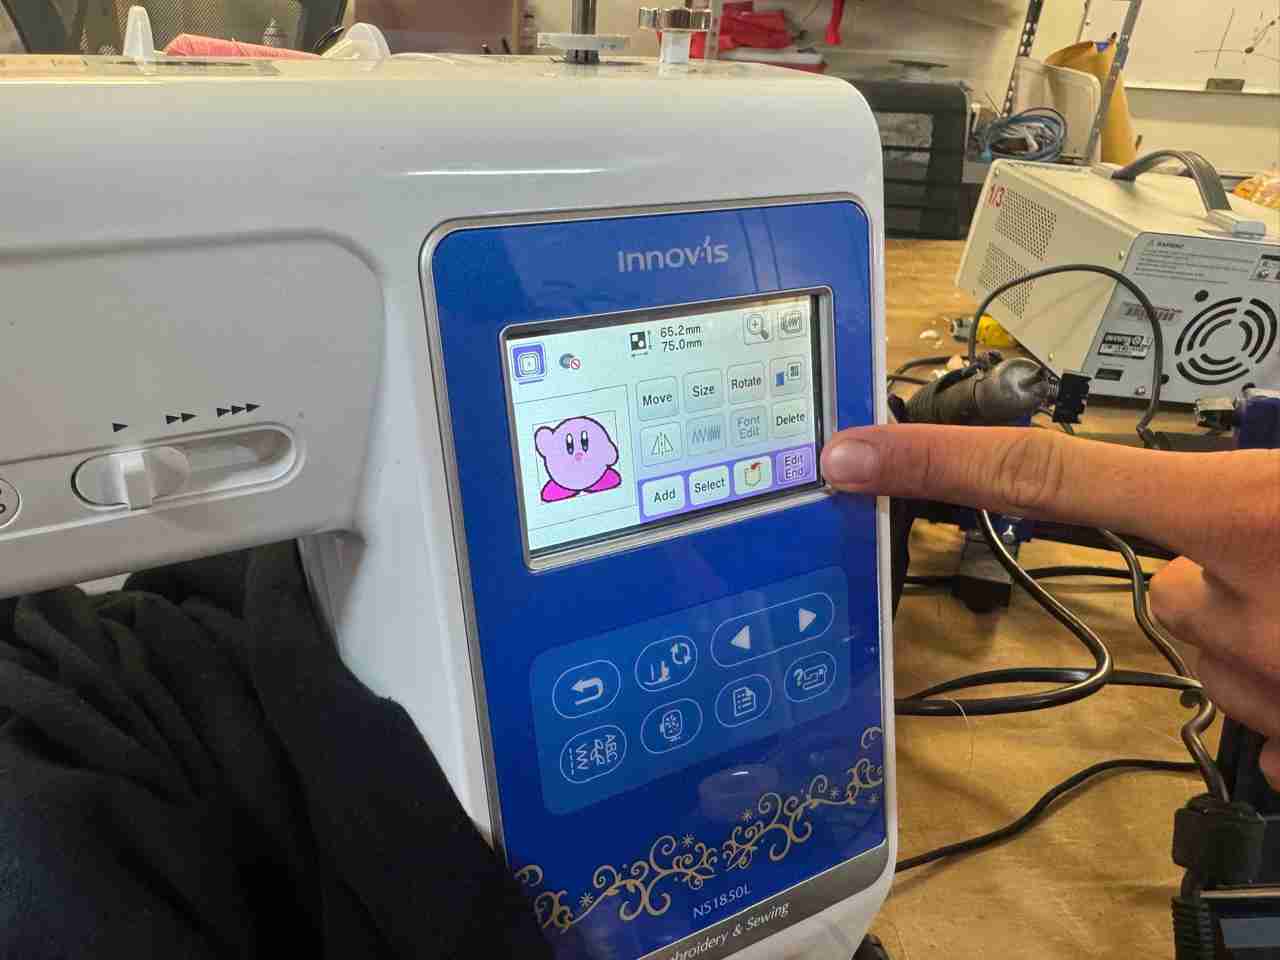
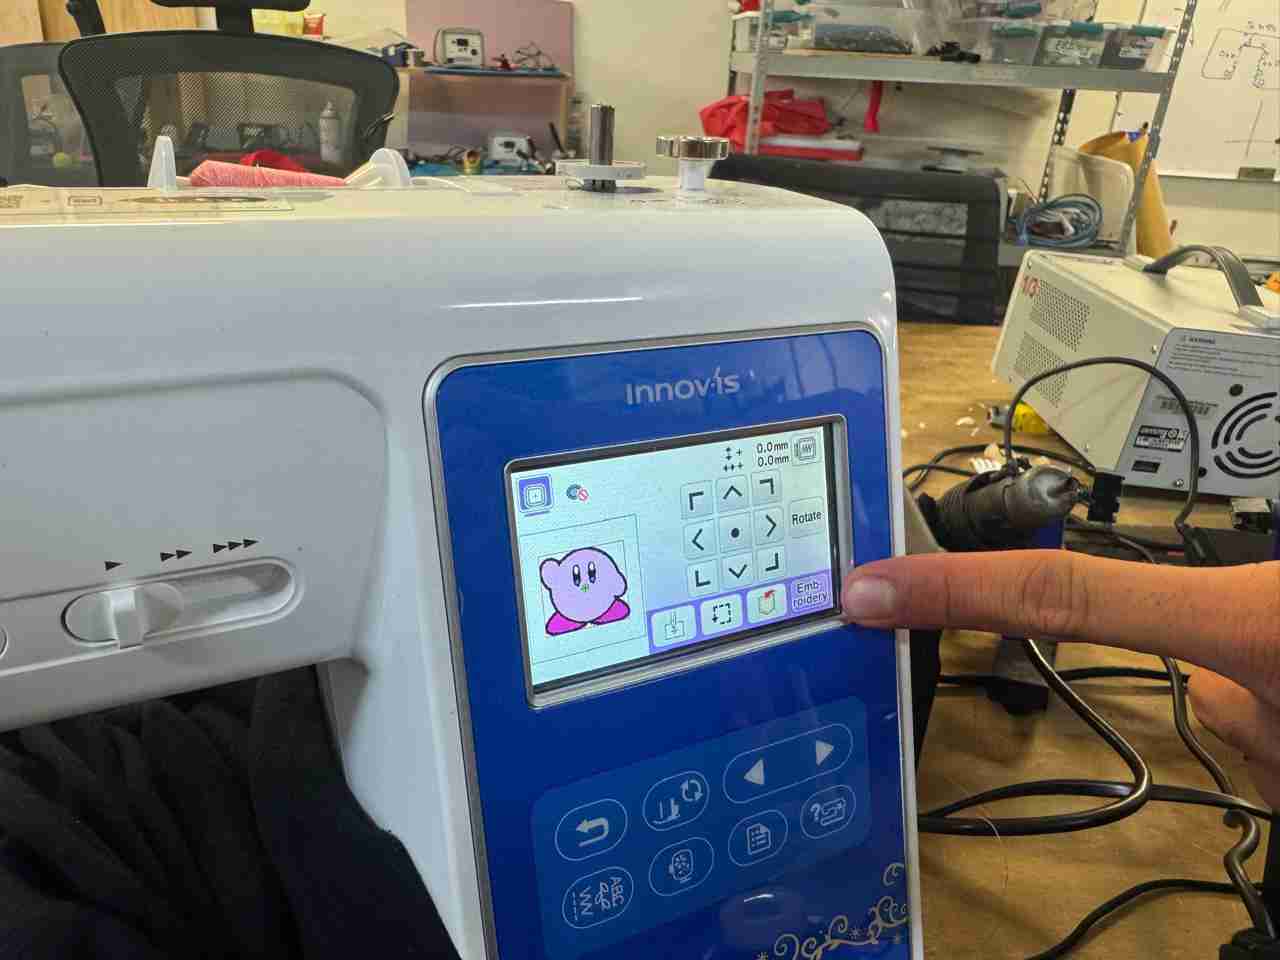
And now Embroidery. In this tab we can move the position of our embroidery, but in my case I liked where I put it, so I'll just click Embroidery.
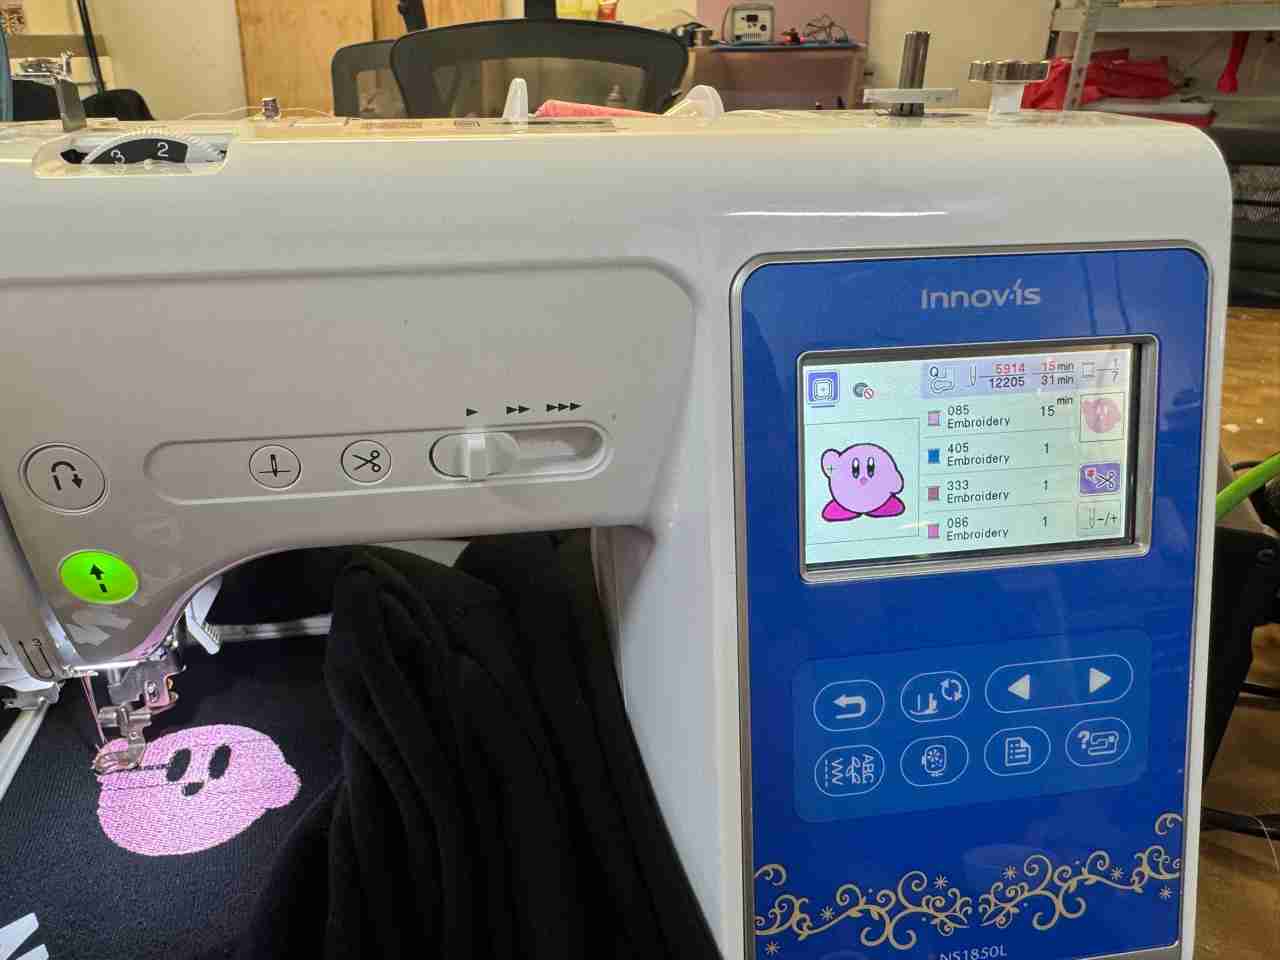
Next, the estimated time, the number of stitches, the number of threads to use, and the color order will appear on the screen. Press the button with a needle icon plus and minus signs, and the embroidery will begin automatically.
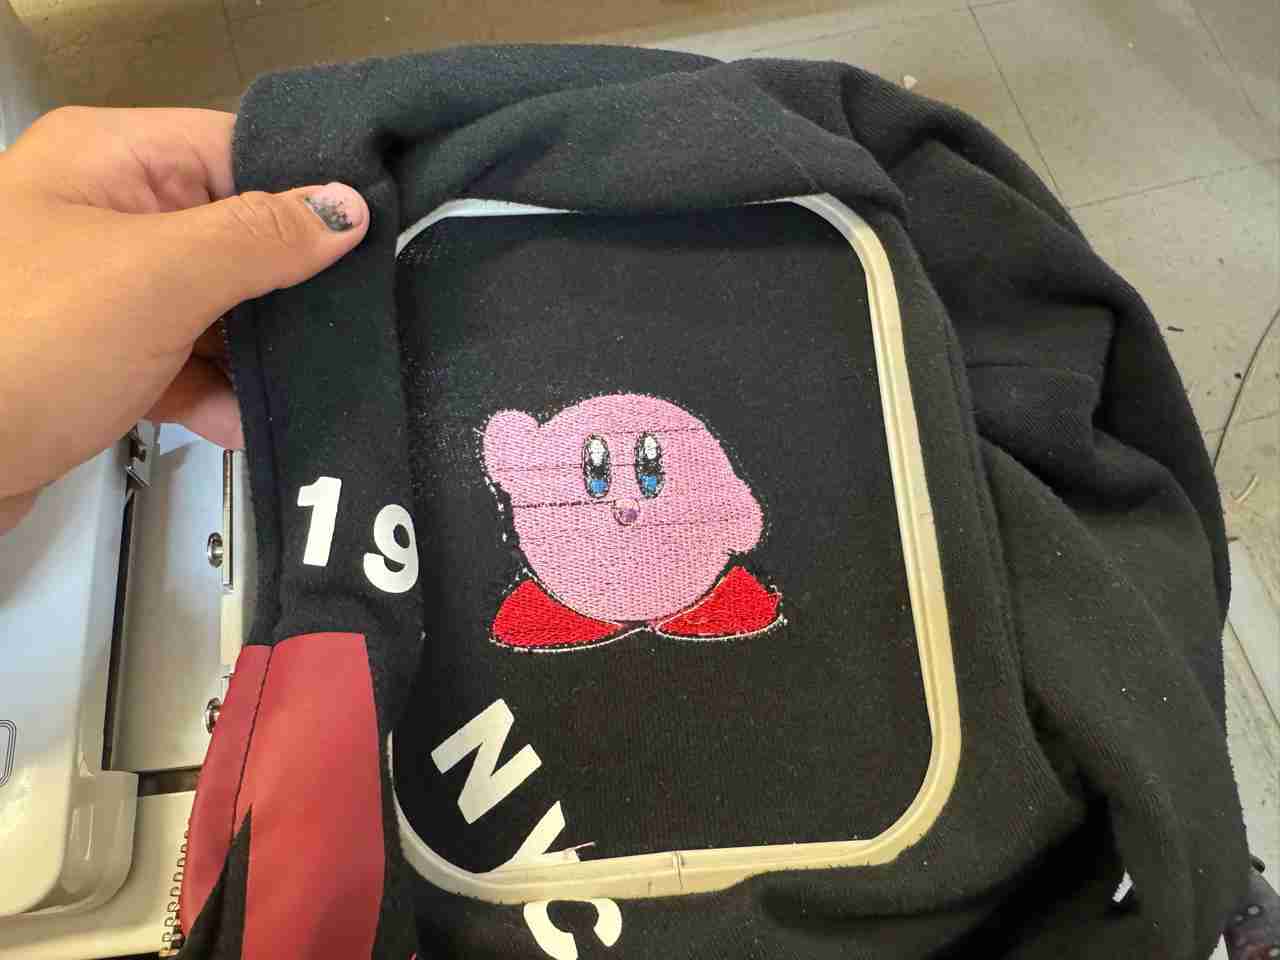
4.5 Look out the embroidery
The embroidery should look like this.
After the start embroidering there are two options: either only changing the thread or running out of thread on the bobbin of the needle plate:
- When the color runs out, the machine beeps to indicate a thread change. Then, simply change the thread and press the needle again with a plus and minus sign to continue.
- If the bobbin thread runs out, the machine will alert you that the bobbin needs changing. You'll need to add more thread to the bobbin and therefore disassemble your embroidery. But don't worry, thanks to the needle pass option, you can return to the color and stitch where you left off.
- We need to reattach our accessory drawer to the machine, and here two options can happen: "Memory warning" or nothing. If we get the "Memory warning" our file will load directly, allowing us to continue with the number of passes. If we don't get nothing, we simply have to reselect our file and go to the same tab we mentioned for the number of passes.
- In this tab, we add or decrease the number of stitches as needed until we reach the number we left off at. Once we reach that number, we click "OK" and the next tab will show us which thread we are currently using. If the information is correct, we click the needle icon with plus and minus signs and continue stitching.
Now we just have to wait for our embroidery to finish.
5. Results
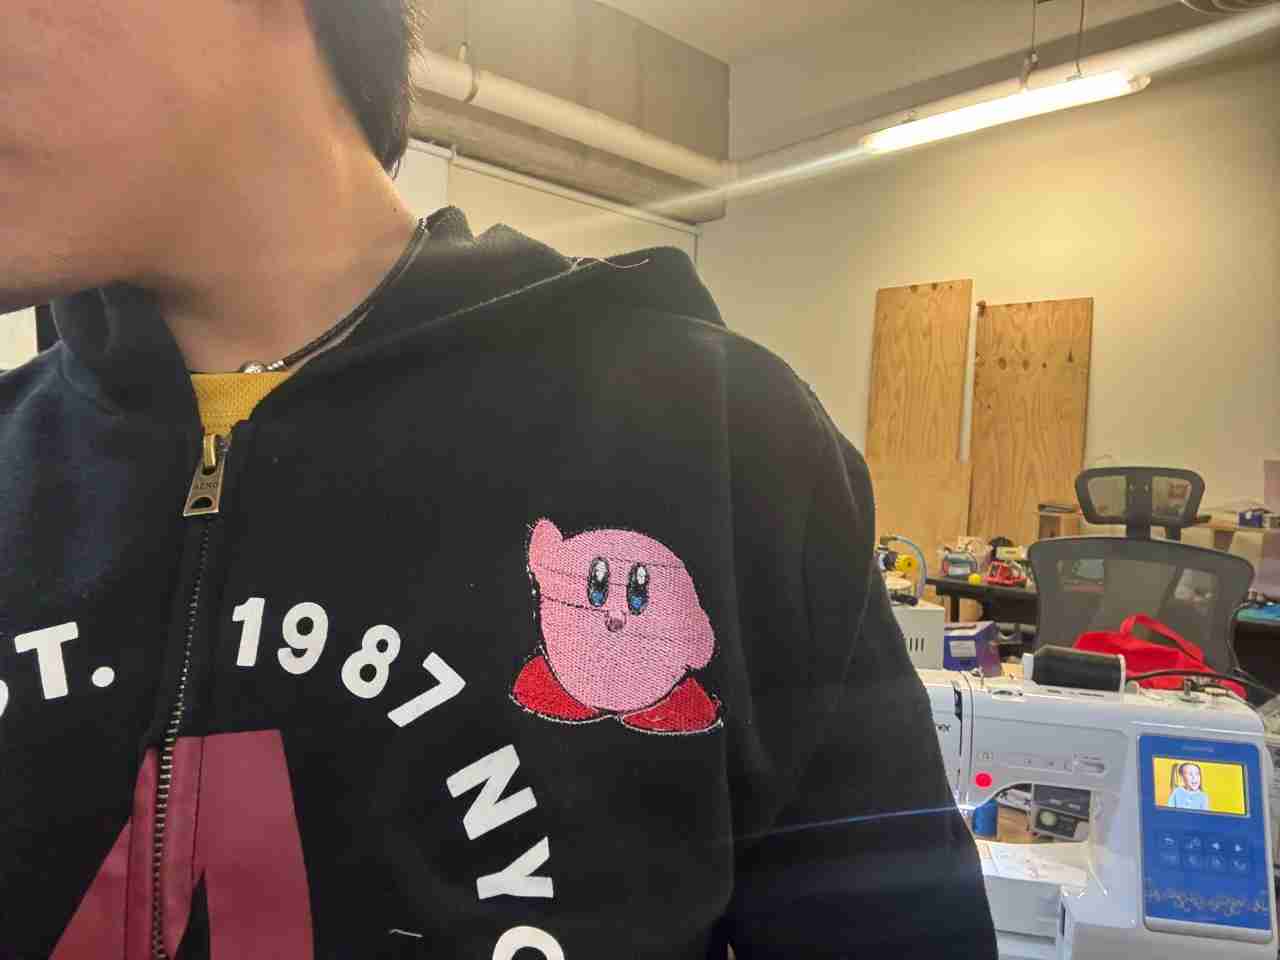
Here is how the embroidery of kirby looks just finished.
And here is how it looks the jacket on me. I really liked how kirby looks.
6. Files created
Click on the "Download ZIP" to download all the files I made for this week assignment.