Week 13. Molding and casting
Summary
This week we focused on learning different ways we can make a mold, the materials and the small details that make it possible to obtain a good mold. This week I applied the Matrix Mold technique to a head I modeled of our university mascot, "Xavi," from which a resin and fiberglass mold was later obtained.
Group assignment
Here is the group assignment to check more information about the topic molding and casting.
1. Basic concepts
1.1 What is a mold?
It is a hollow block containing the negative shape of an object. When filled with a liquid material (resin, metal, silicone, plaster), it solidifies and takes the shape of the cavity.
1.1.1 Parts of a mold
1.2 Techniques to make molds
Depending on the complexity of your piece, there are several methods:
- Block Mold: This is the simplest technique. It consists of placing the piece inside a container (box) and filling it completely with the mold material (usually silicone). It's used for small or medium-sized pieces, so it's very easy to do, but it wastes a lot of material in the corners and areas where there is no piece.
- Skin mold: Instead of filling a block, the mold material (thickened liquid silicone) is applied directly to the piece with a brush or spatula, creating a thin "skin" that follows the object's shape. This is used for sculptures or pieces with a lot of surface detail. It saves a significant amount of material, but because it is so thin, it bends easily; it cannot support the weight of the resin.
- Matrix mold: It's a hybrid technique that combines the two previous ones to solve the problem of deformation. It consists of creating a thin silicone skin that captures the detail, and then building a rigid shell (of plaster or resin) on the outside that provides structural support. It's used for large pieces, high-precision molds, or when saving on expensive materials; it has the flexibility of silicone on the inside and the rigidity of a solid block on the outside, but using much less material.
1.3 Materials to make molds
1.3.1 Mold Materials (The Negative)
These are the materials that capture the shape of your piece. They are mainly divided by their flexibility:
- Platinum Silicone: High precision, long-lasting, and does not shrink.
- Tin Silicone: More economical, but tends to degrade over time.
- Flexible Polyurethanes: More resistant to abrasion than silicone, but require mold release agents because they are very sticky.
- Plaster: Inexpensive and readily available, ideal for ceramic molds.
- Machinable Wax: Used to mill the mold directly on the CNC machine. It is recyclable (you can melt it down and make a new block).
1.3.2 Materials for the Shell
- Plaster or Plaster Casts: Easy to mold by hand over the silicone.
- Epoxy or Polyester Resin with Fiberglass: For extremely lightweight and durable shells.
- Thermoformable Plastics: Such as ABS or PLA (including 3D-printed parts that fit over the silicone skin).
1.3.3 Auxiliary Materials
- Release Agent: Silicone sprays, waxes, or petroleum jelly. These prevent the mold from sticking to the original or the two halves of a mold from fusing.
- Thickeners (Thixotropic Agents): Additives mixed with the silicone to make it thick like a gel and prevent it from running.
- Sulfur-Free Modeling Clay: Used to create partition walls or to fill gaps where you don't want the material to get in. Note: The sulfur in some inexpensive modeling clays inhibits the curing of platinum silicone.
2. Object made
I modeled the head of our university mascot "Xavi" for this week. I used blender for making this and I also saw this video which helped me to learn quickly the idea of modeling using points.
2.1 Reference images
I searched for some images of the mascot but I discovered that it wasn't good looking so I decided to redesign the head so you can look at it look good from every perspective.

2.2 Modeling the head
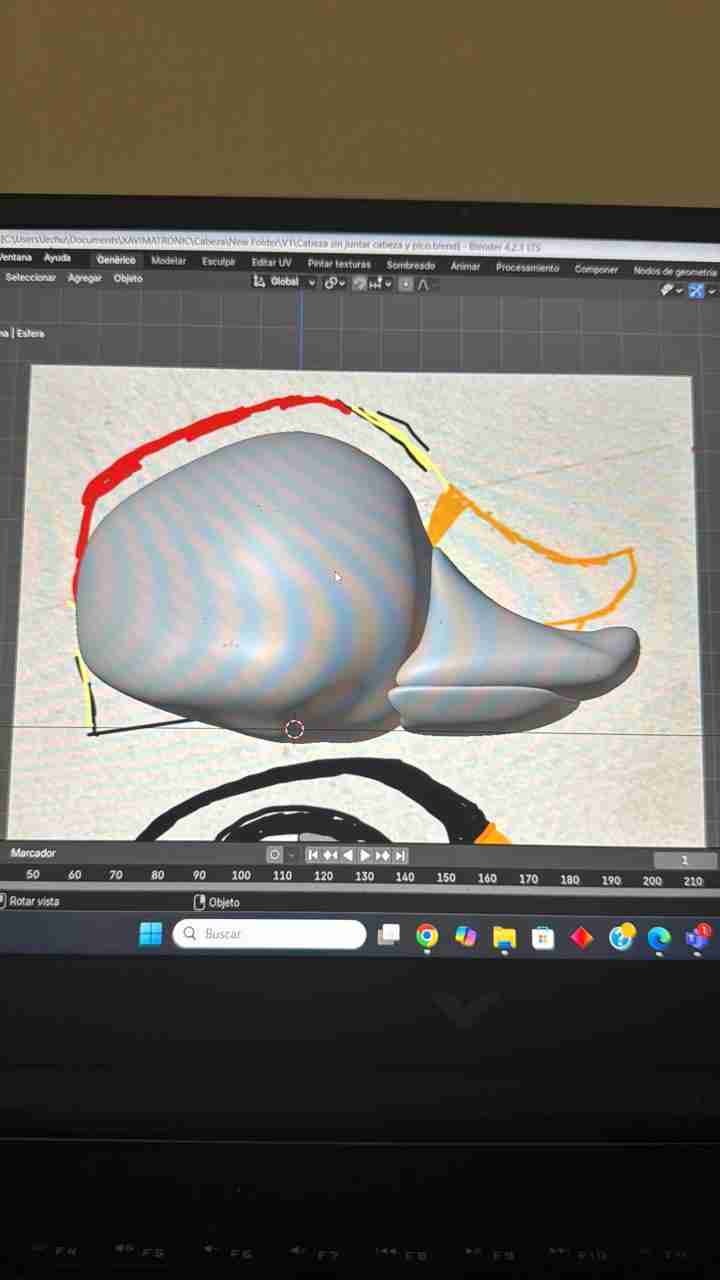
I traced an image showing his head in profile to obtain simple shapes that I could relate to; I understand that everything was made of circles. Thanks to this, and after researching some character theory, I realized that the redesign should include many circular shapes so that he looks friendlier and not strange (to not have the uncany valley).
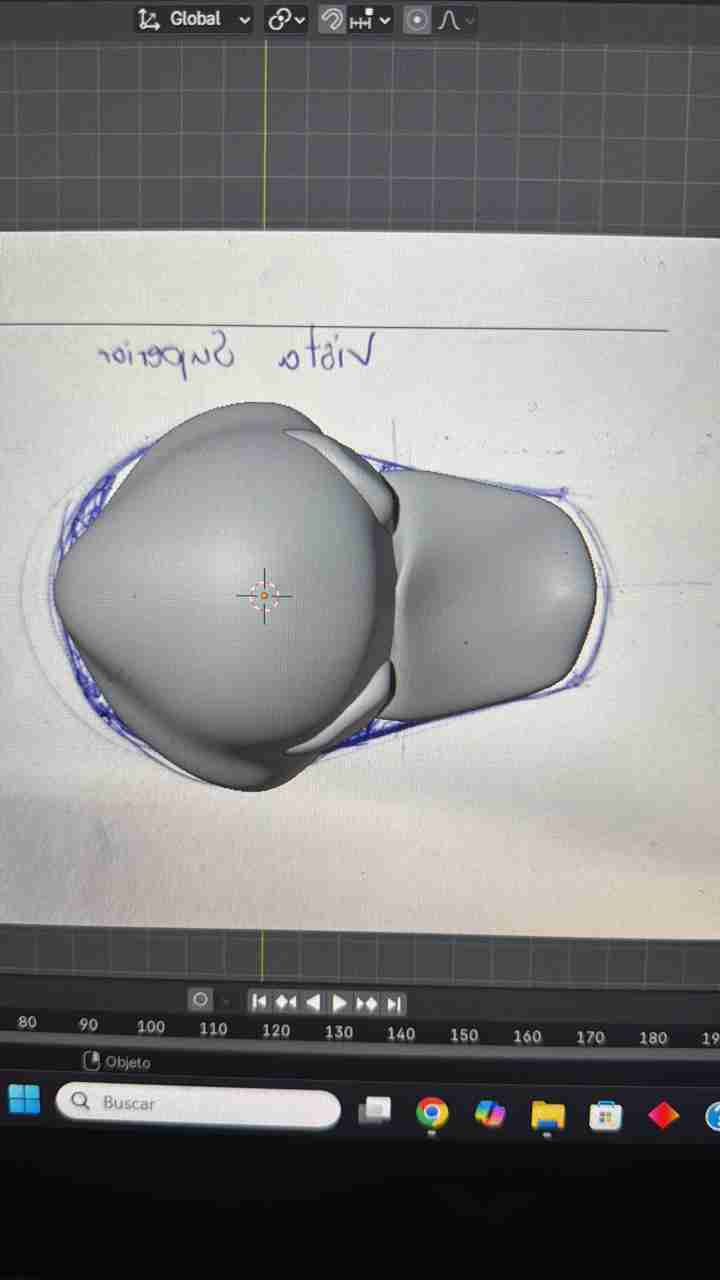
Then I imagined the way it should look from the top view.
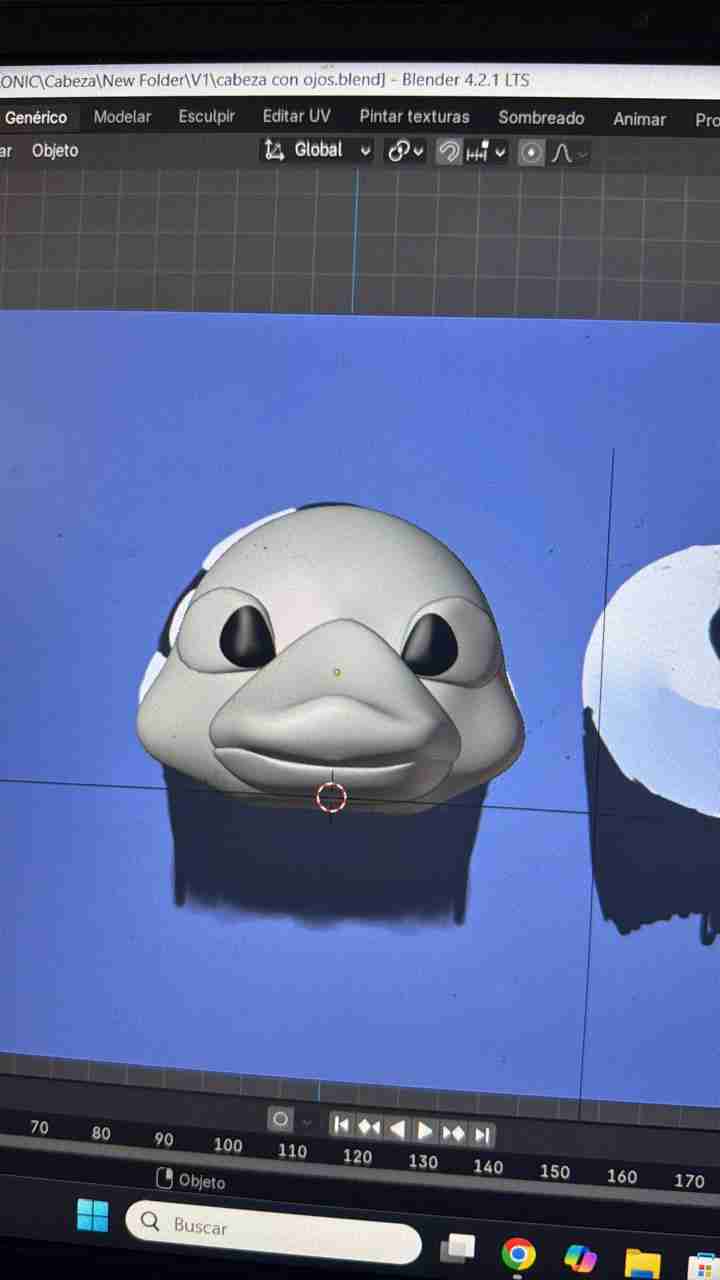
Finally I added the eyes to make the head better looking
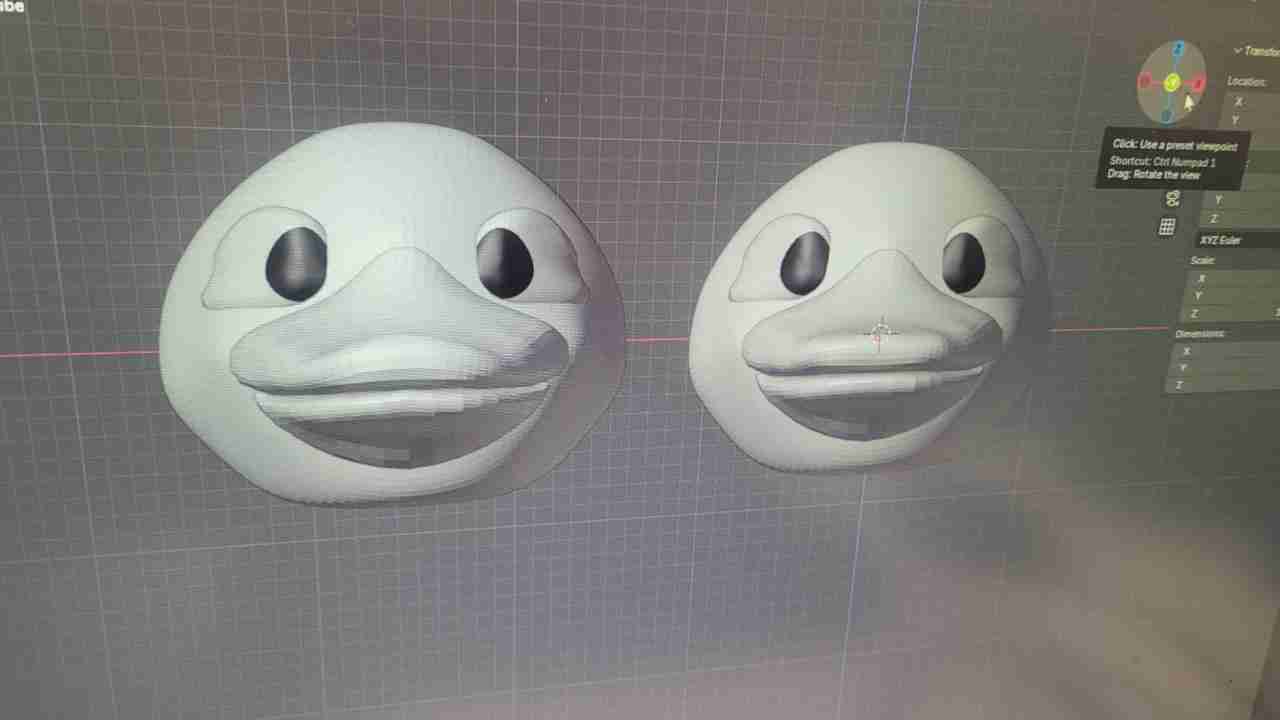
Finally I rounded the head and make 2 versions of the head, one has more roundings that the other, deciding to use the one that has maor roundings.
3. Preparing the mold
3.1 Printing and sanding
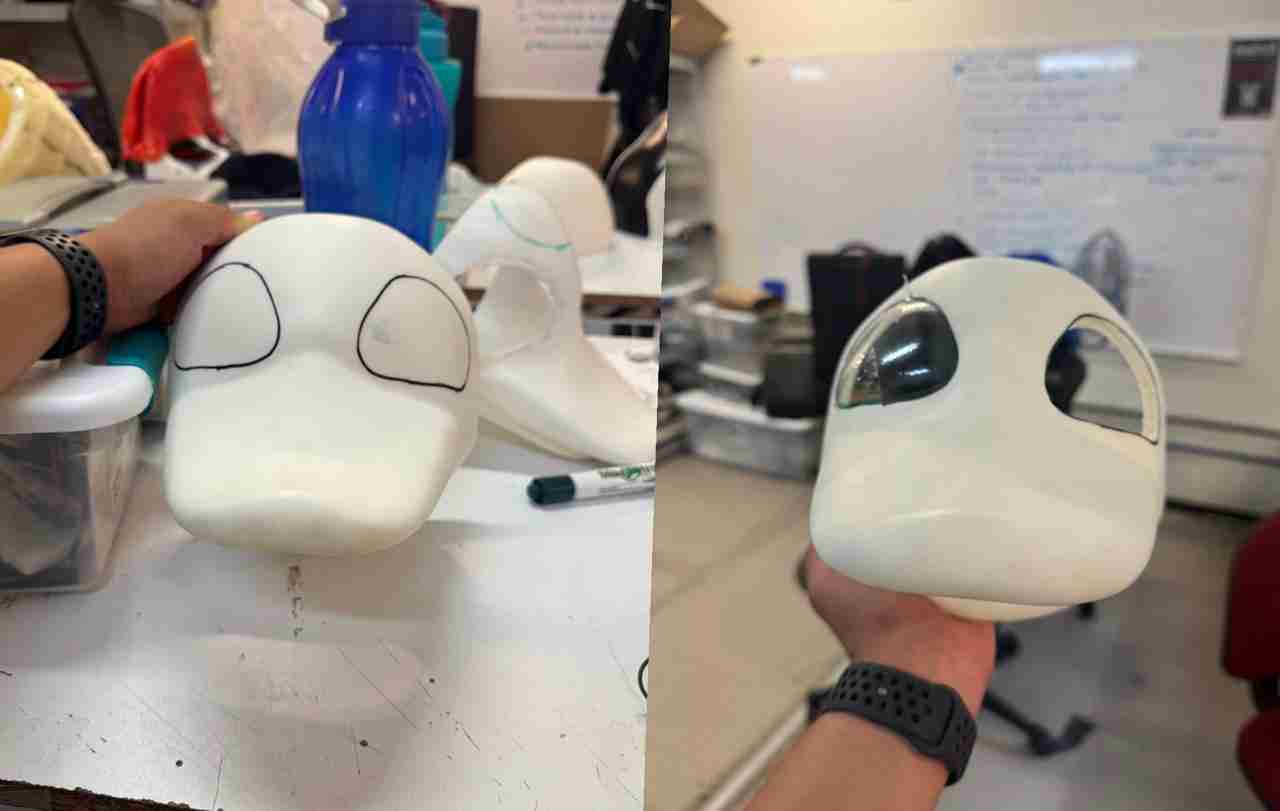
After the design I 3D printed the mold in 2 parts, beacuse if not it would not fit on the printers using press to fit joints to link them. Then I sand both pieces so the mold doesn't have any marks from the print.
I printed the head without the bottom peak so that I can add that bottom peak later but make it movable, although I won't do that this week due to time constraints.As I forgot to make the print with eye holes I cut them with a dremel.
3.2 Filling with modeling clay
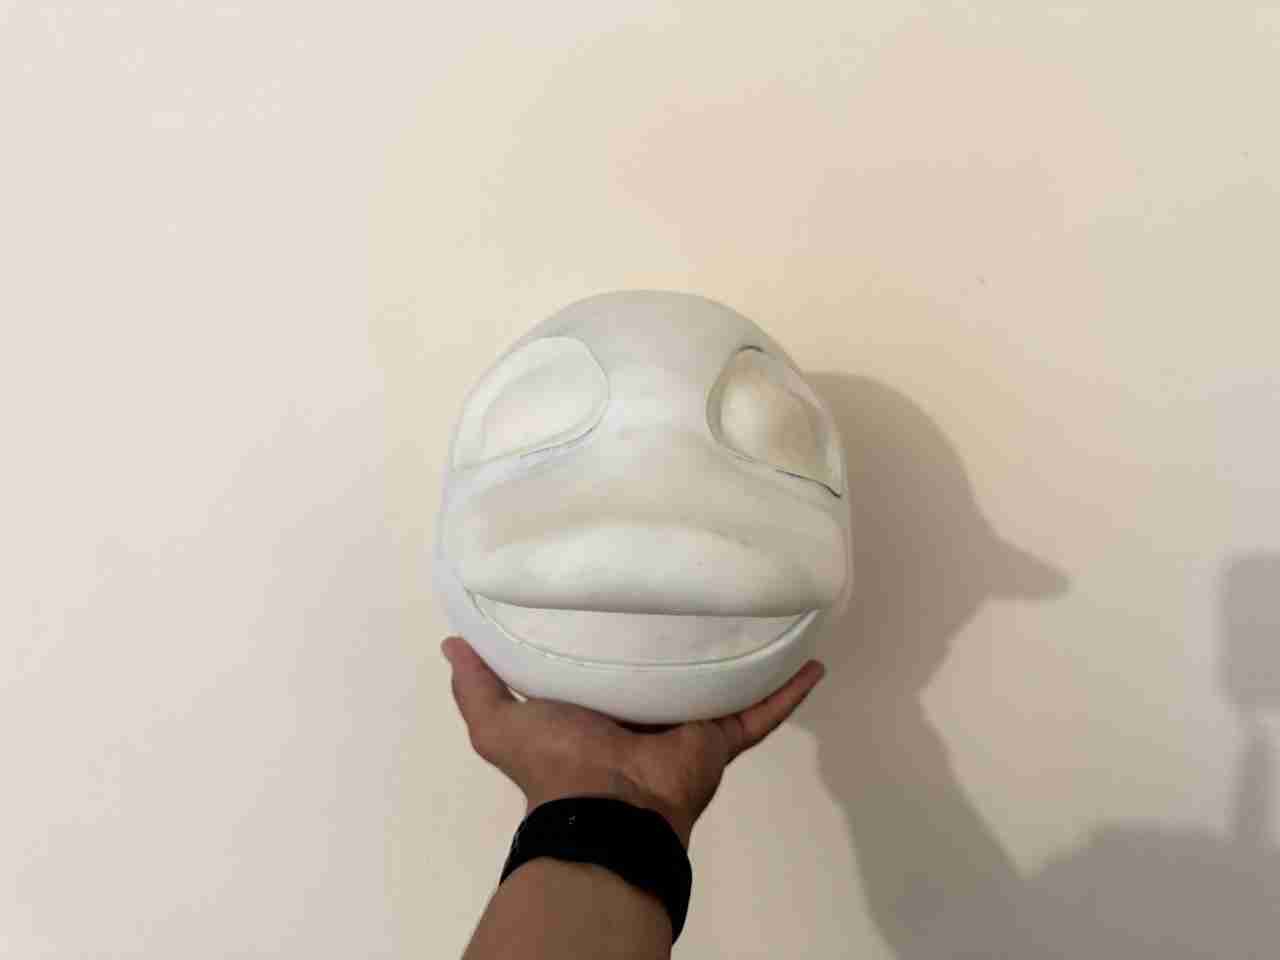
To prevent material from entering the piece with holes, modeling clay is used in a mold and shaped accordingly. Therefore, I will cover the eye area, the bottom peak and the midle line from the joints of the head. The clay can be sanded with thinner and a finger to remove any fingerprints.
4. Making the silicone ruber and countermold molds
For making the pieces I followed the tutorial from Ingeniería y Arte following the instuctions he said and I also looked at the datasheet of the material.
4.1 Materials
For the mold I used:
- Fiberglass and its catalyst.
- Epoxi resin.
- Silicone rubber and its catalyst.
- Thin mesh fabric.
- Thinner.
- Small wooden sticks.
- Plastic bottles for mixing.
- Paintbrushes.
- Latex gloves.
- Modeling clay.
4.2 Create the workspace
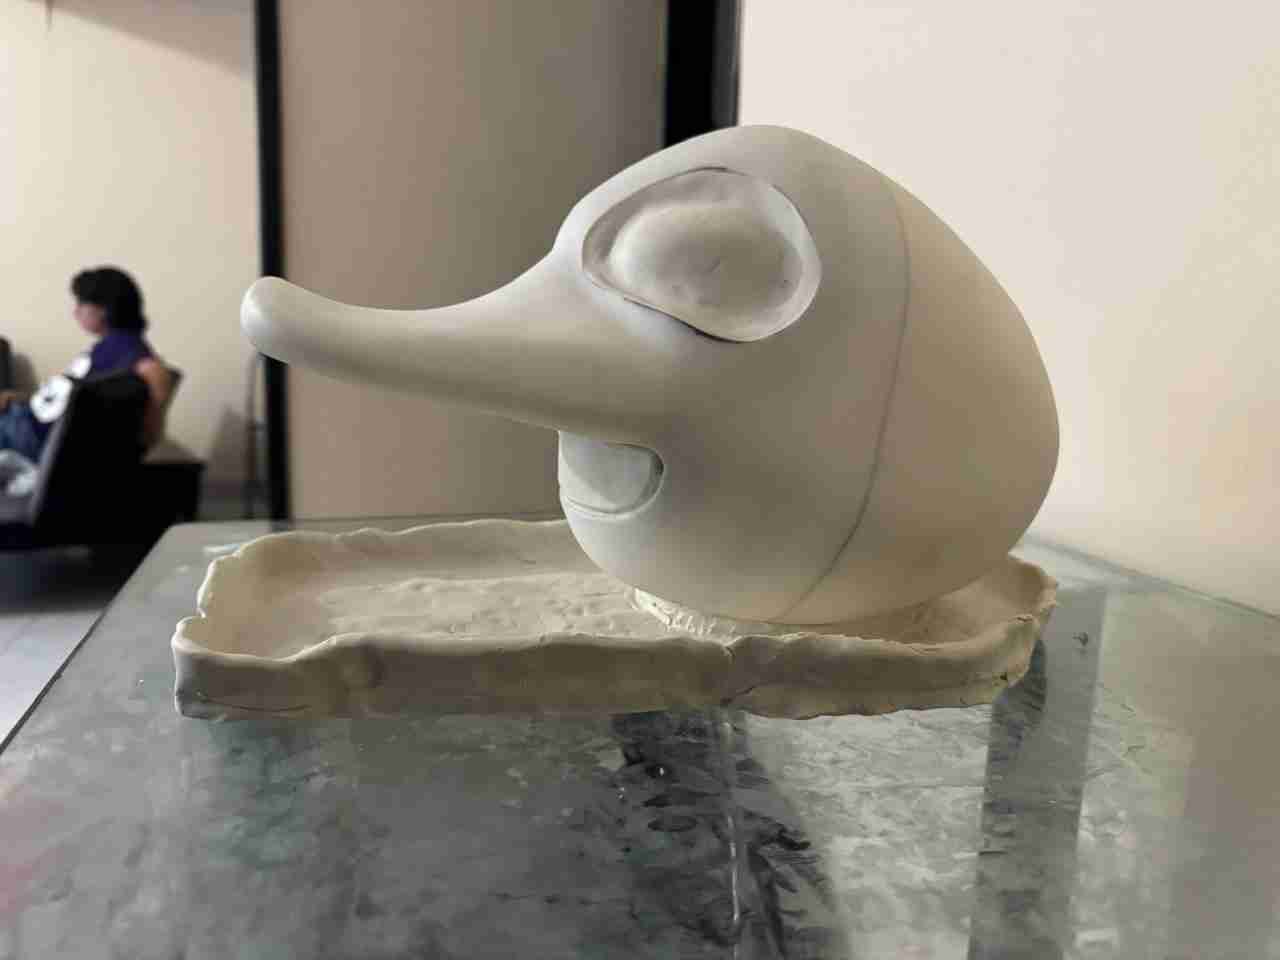
In a table or desk create a bed for the leftover material from our own heads, so as not to dirty our desk.
4.3 Aplly the mix from rubber silicone
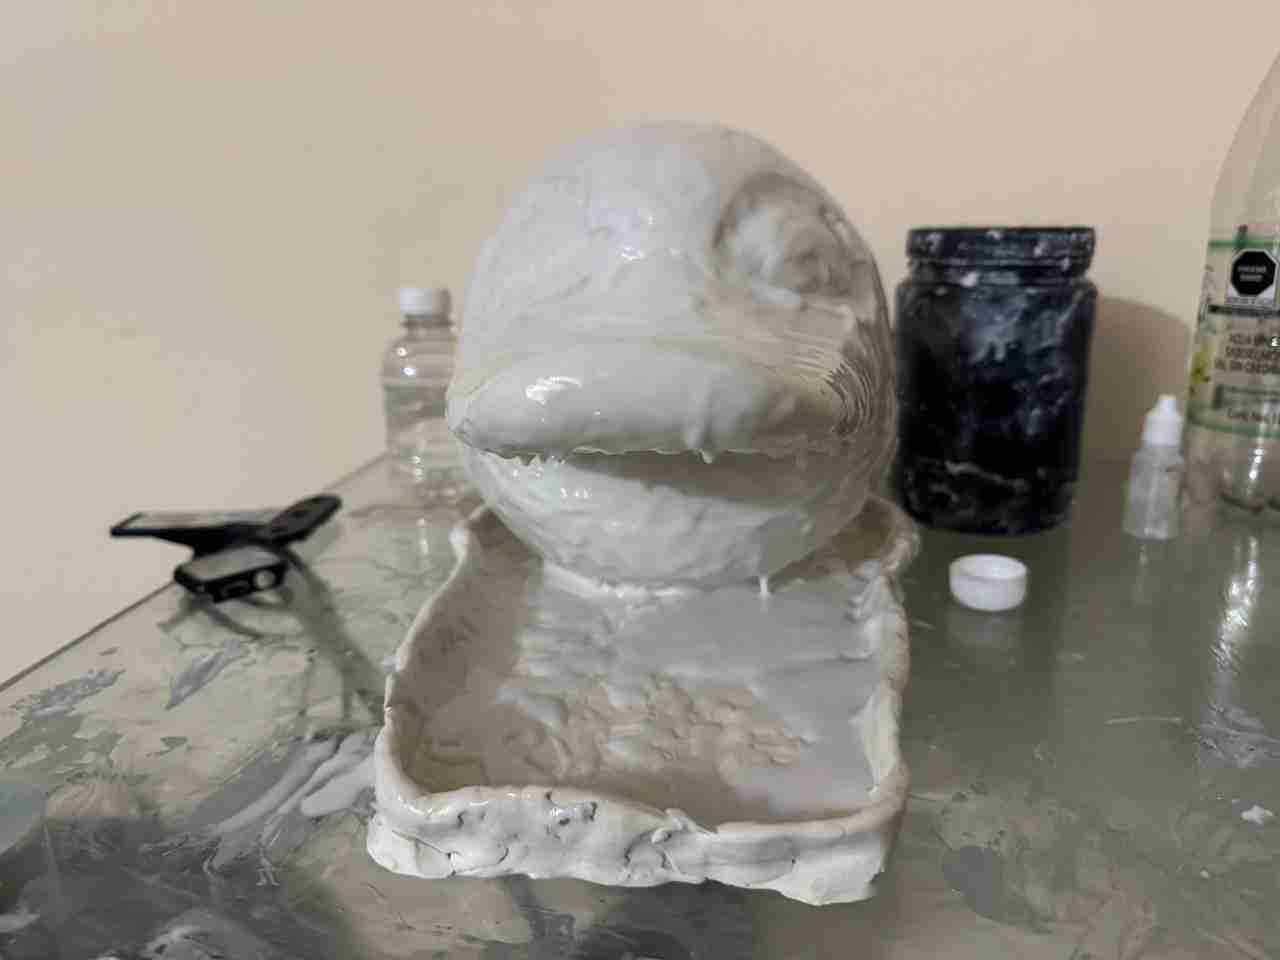
In the place where I bought the silicone they told me that for every kilogram of rubber silicone I have to use 10% of diluent and 2%-3% of catalyst. I used 3 layers of silicone rubber but for the final layer I applied the mesh fabric to give the rubber silicone mold more durability. Each layer it takes approximately 6 hours to dry, so you'll need to be patient. This can be applied with your hands using latex gloves or paintbrush.
Also after apply every layer no matter which mixture you have to leave your paintbrush on thinner if not when the paintbrush dries it will become hard and impossible to use because of that same rigidity that causes mixing in the brush.
4.3.0 Protective gear
Before applying any product, material, mixture, etc. Is important to say that you must use latex gloves, mask and lab coat, If you are not using any of this equipment your hands and clothes will be covered in this material that is hard to remove from the hands and impossible to clean from the clothes. Also the mask helps us to not breathe toxic waste released by the mictures and materials.
4.3.1 1st layer
Once you have all the protective gear mentioned before you can aplly the 1st layers, if at some point you feel the rubber silicone is already dried but have not cured completed yet, you can use thinner to cleans the leftover material.
4.3.2 2nd layer
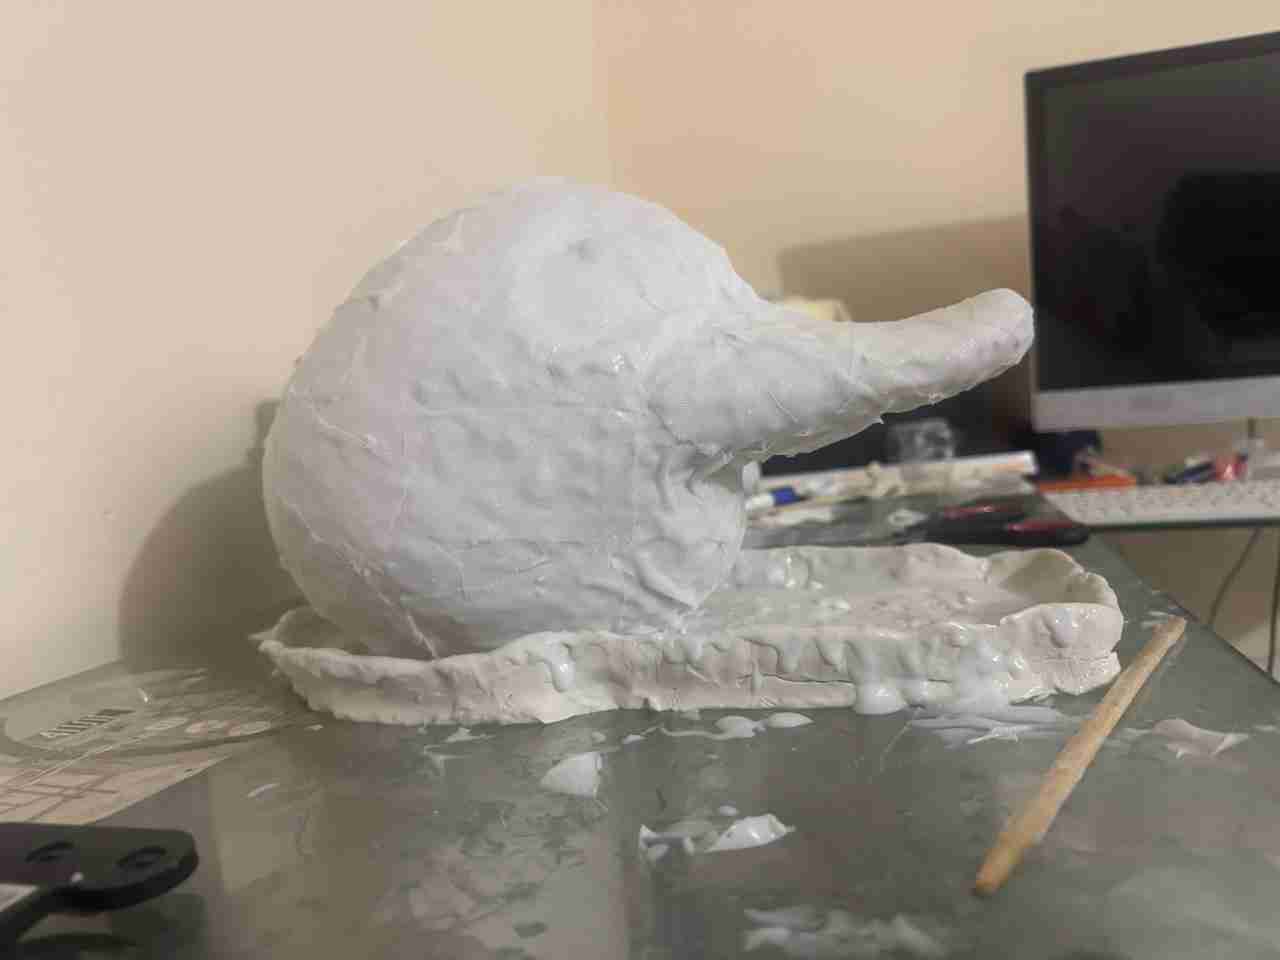
4.3.3 3rd layer
Is important to mention that the fabic must be cutted in suqares to be applied an dthe cover them with more silicone rubber.
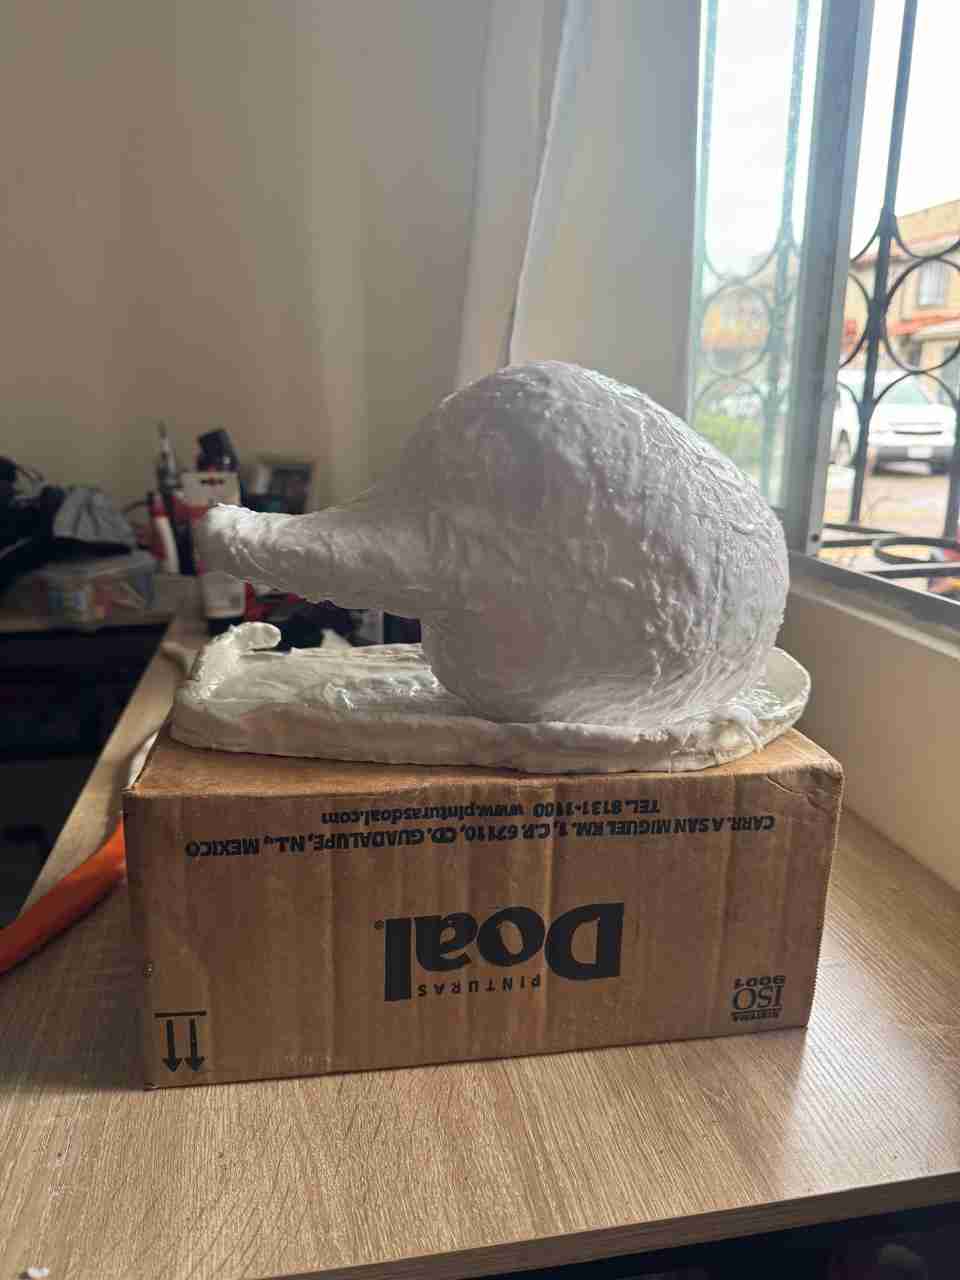
4.4 Make the countermold
4.4.1 Add the modelling clay walls
As our mold will have walls that will be screwed together so that both molds are fixed and do not move while making the molds. So this clay walls helps to create the walls from fiber glass that will be screwed.
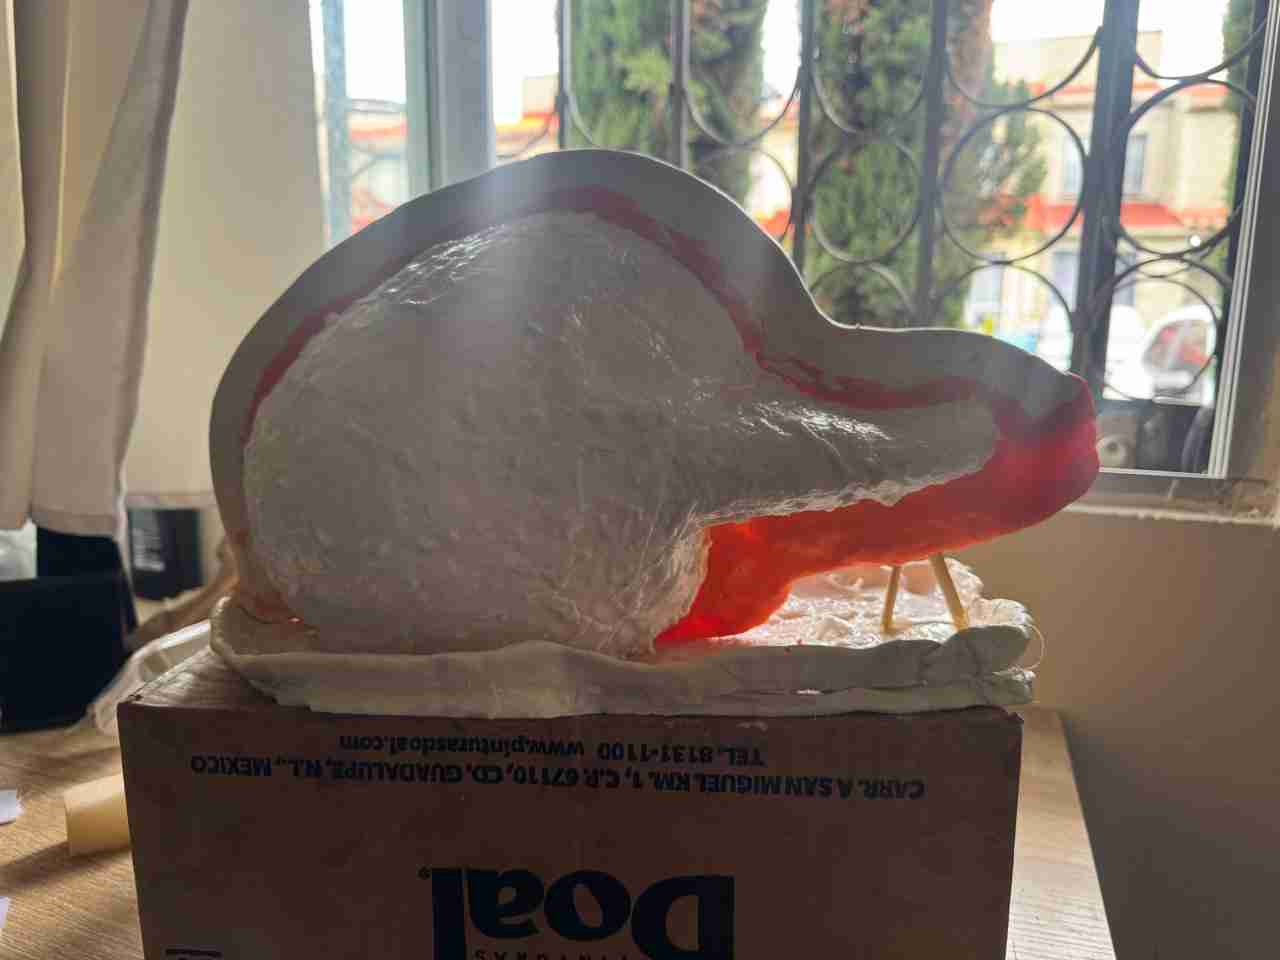
4.4.2 Apply the fiber glass
Remember to use the protective gear mentioned before in order to not get hurt (by the fiber glass) or stained with micture or material. The fiber glass needs 3 things to be applied:
- Fiber glass cutted in squares.
- Epoxi resin.
- Paintbrush.
For the epoxi resin the store where I bought it told me that for everý 50 gr of resin I needed to use 10 drops of catalyst I confirmed that by reading the datasheet of the material. I also noticed that this mixture have a lifetime of 20 minutes so you have to be quickly at the moment of applying. Even though this sound like a disadvantage it also has an advantage which is that it take 30 minutes to dry completely so you can work faster when applying fiber glass.
The process to apply the fiber glass is the next:
- Apply a first layer of resin.
- Cover that first layer with fiber glass.
- Again apply resin until the fiber looks wet and have a brown color.
After this steps wait the 30 minutes until dry and repeat 2 more times.
Also remember that after apply every layer you have to leave your paintbrush on thinner if not when the paintbrush dries it will become hard and impossible to use because of that same rigidity that causes mixing in the brush.
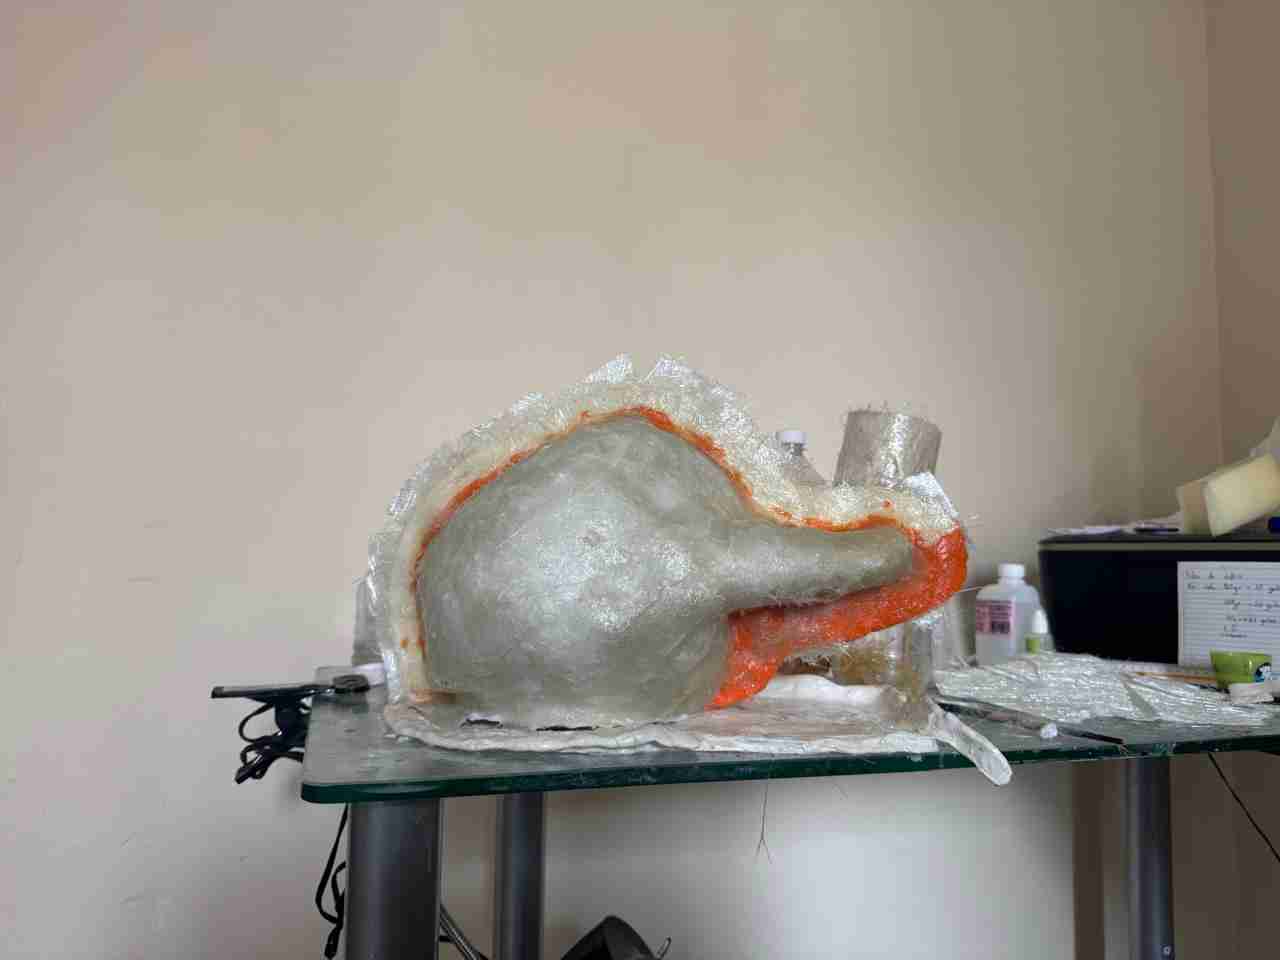
Here is a comparisson between the 3 layers and the side that doesn't vahe fiber glass yet.
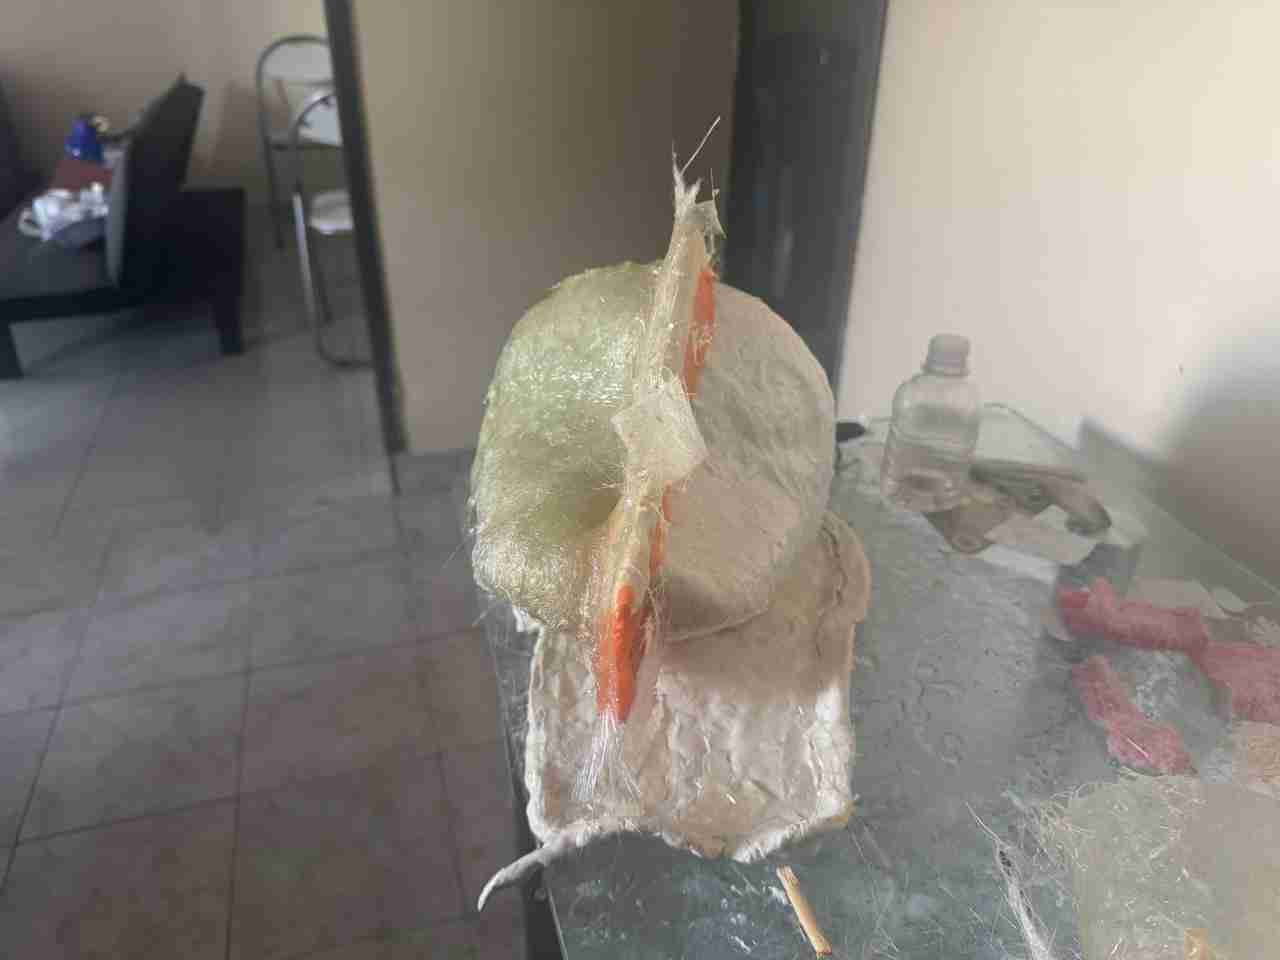
Before start applying remove the wall of modelling clay and leave a samll quantity of clay that will help to remove the countermolds when we are finished.
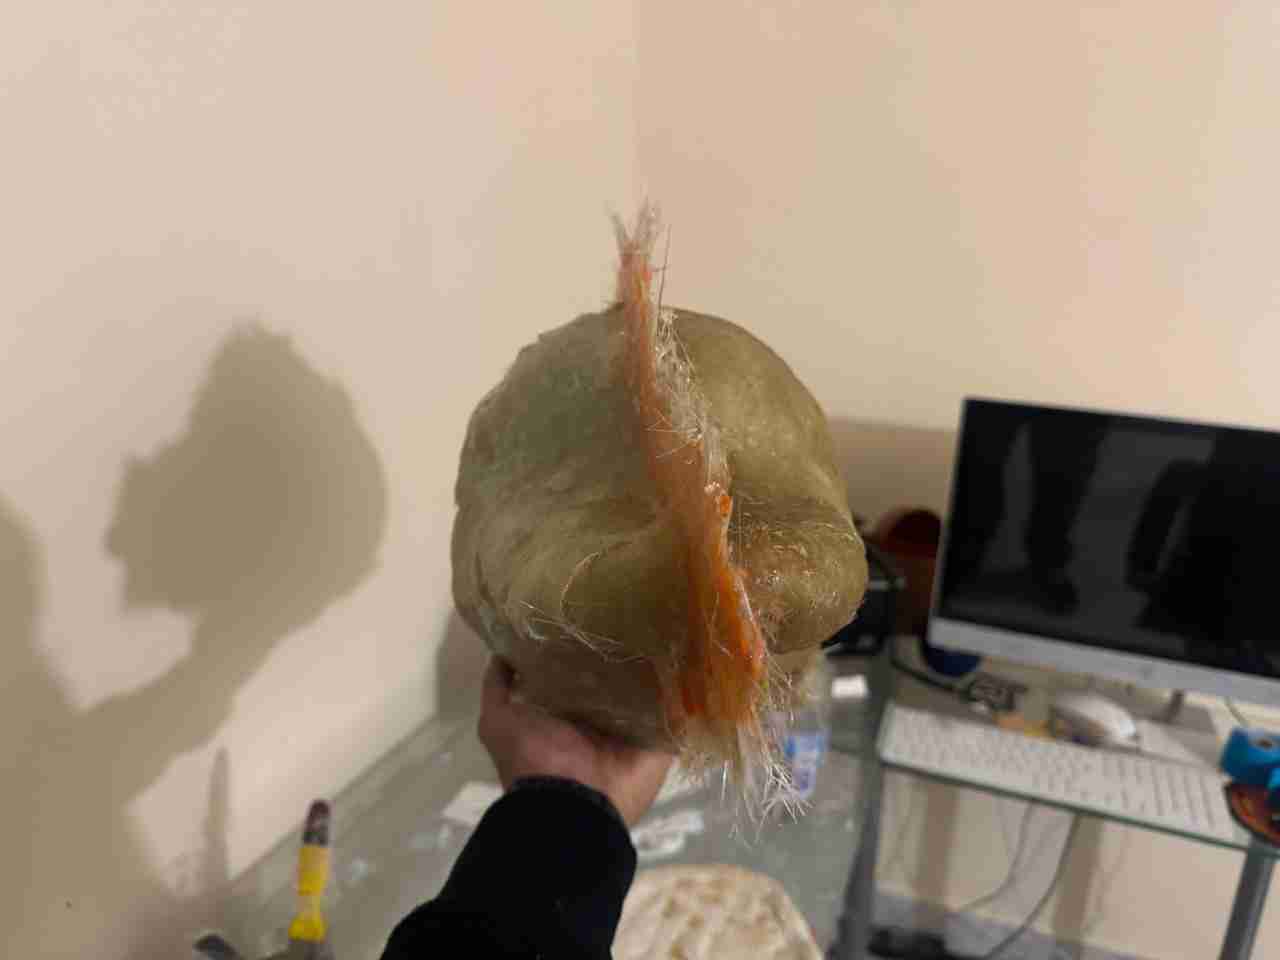
Now you need to repeat the process of applying the fiber glass again 3 times. At the end it shoold look like this.
4.5 Revealing the molds
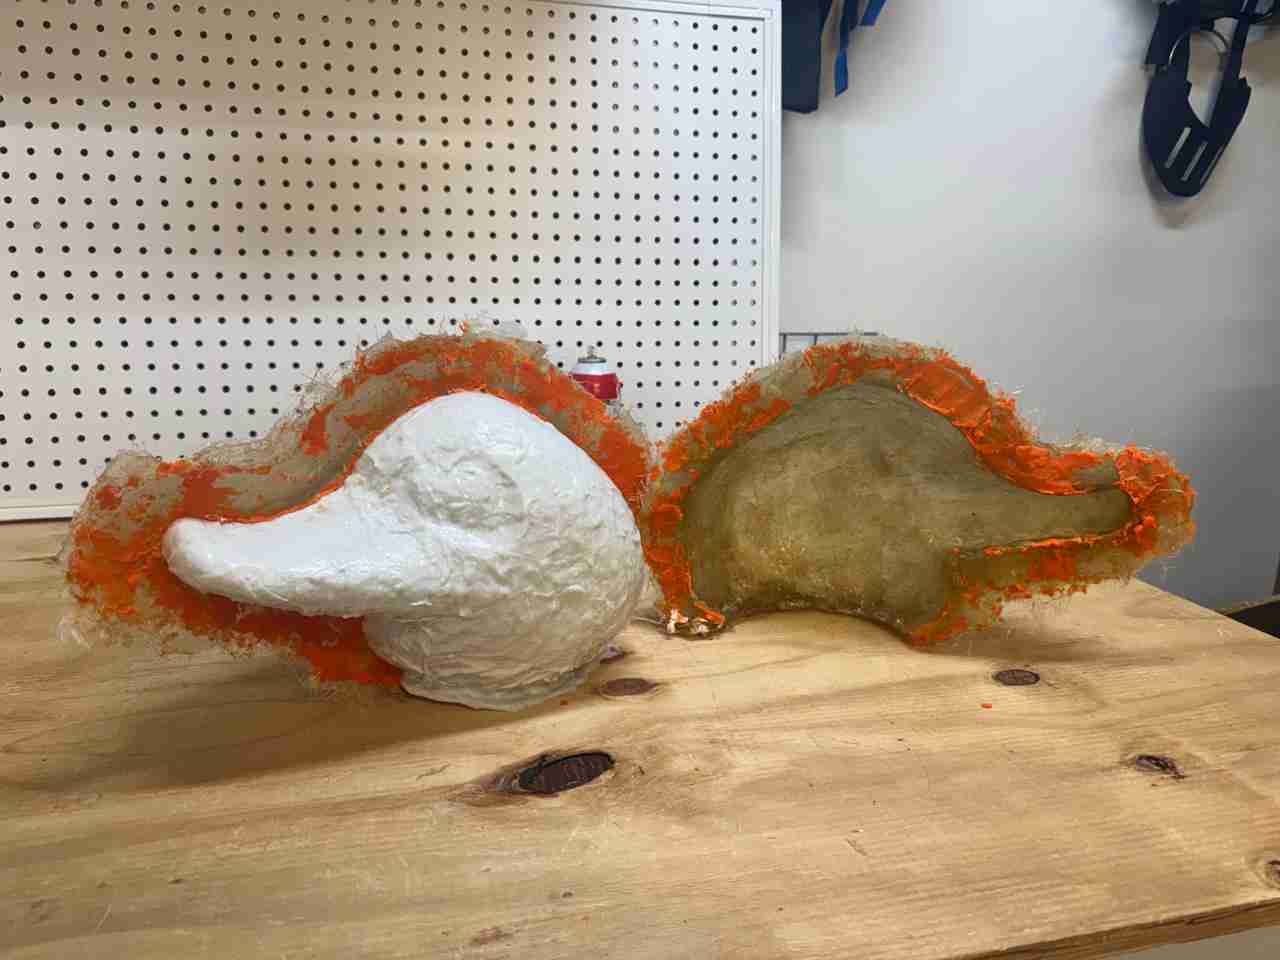
For this part I recommend first to make the holes for the screws with a drill and the size of the respective drill bit you want to use for the screws. Then use a large knife or a razor that allows yout to have more torque to apply, this will help you to separate both countermolds.
For the silicone rubber mold just be careful and patient; you can even use air pressure if the mold is stuck in the original pieces, this will separate the mold without damaging the silicone rubber.
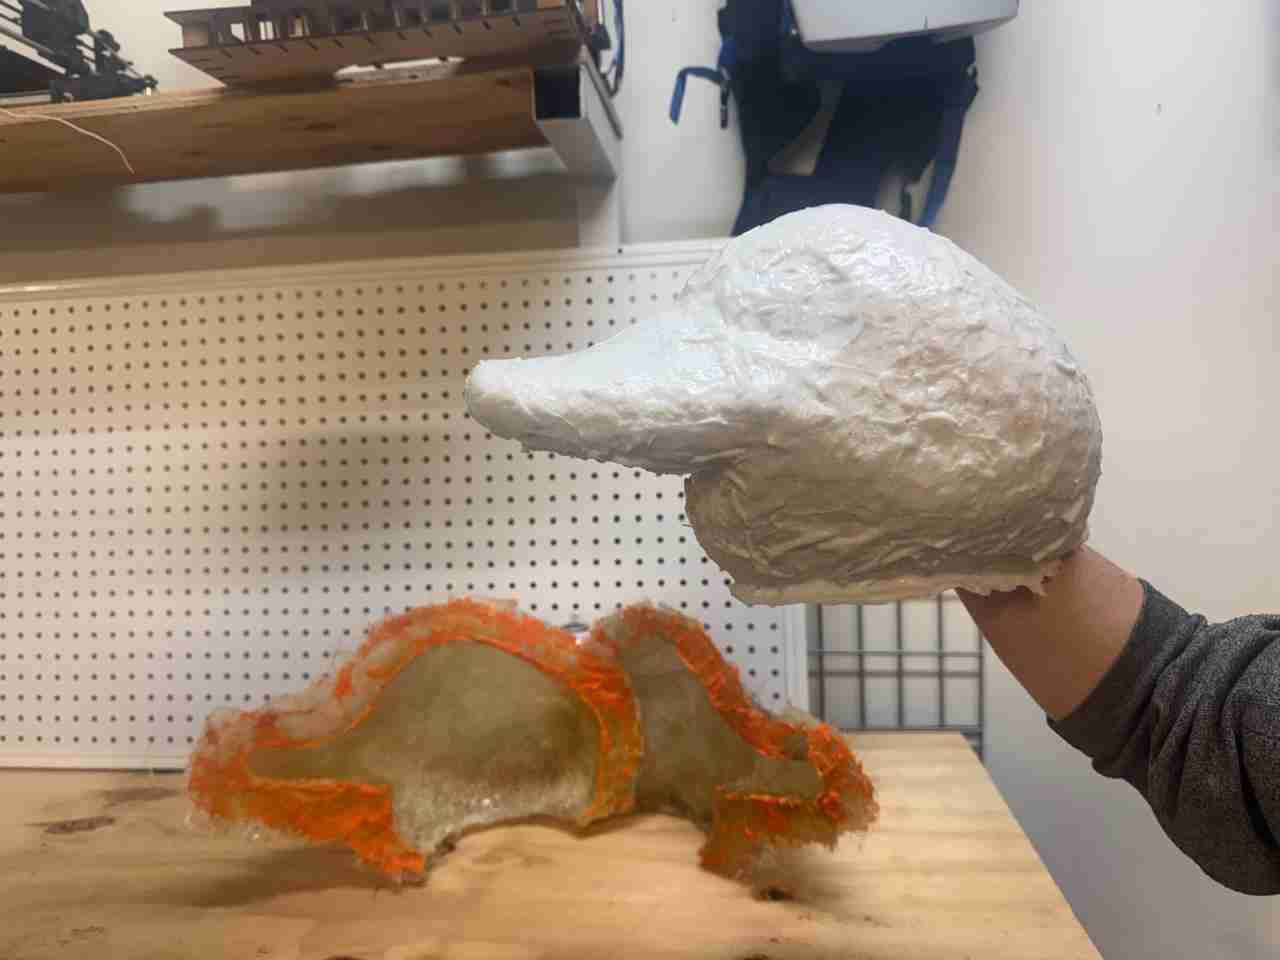
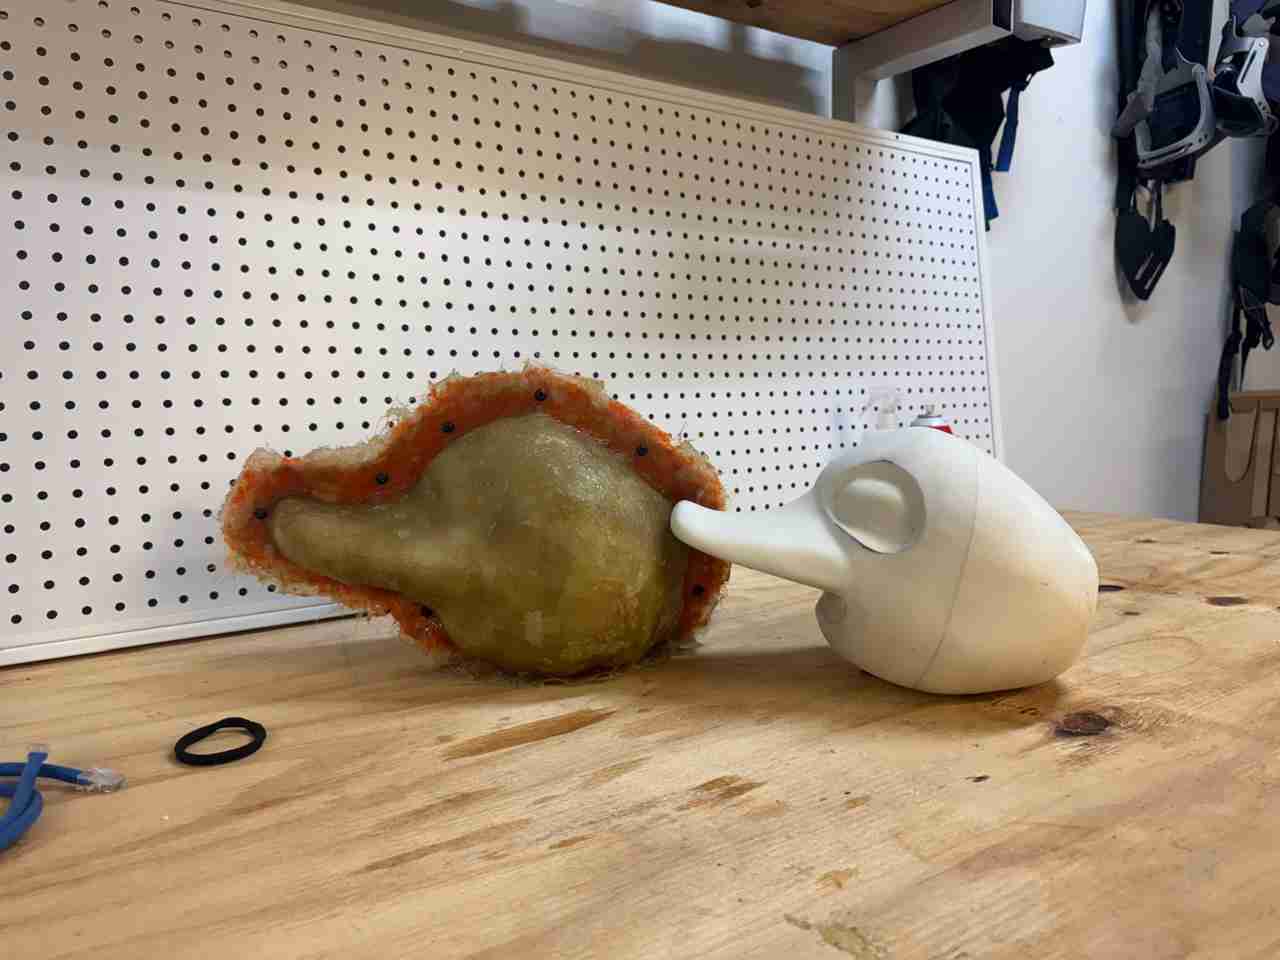
Comparisson of the original piece with the countermold.
5. Making the mold
For making the mold I followed the tutorial from Ingeniería y Arte following the instuctions he said.
5.1 Materials
- Fiberglass and its catalyst.
- Epoxi resin.
- Thinner.
- Small wooden sticks.
- Plastic bottles for mixing.
- Paintbrushes.
- Latex gloves.
5.2 Assemble the silicone robber mold with the countermold
To make the mold you have to assemble all the pieces together, having at the inner part the silicone rubber and in the exterior the countermolds. Then screw the contermold to ensure no movement from the molds.
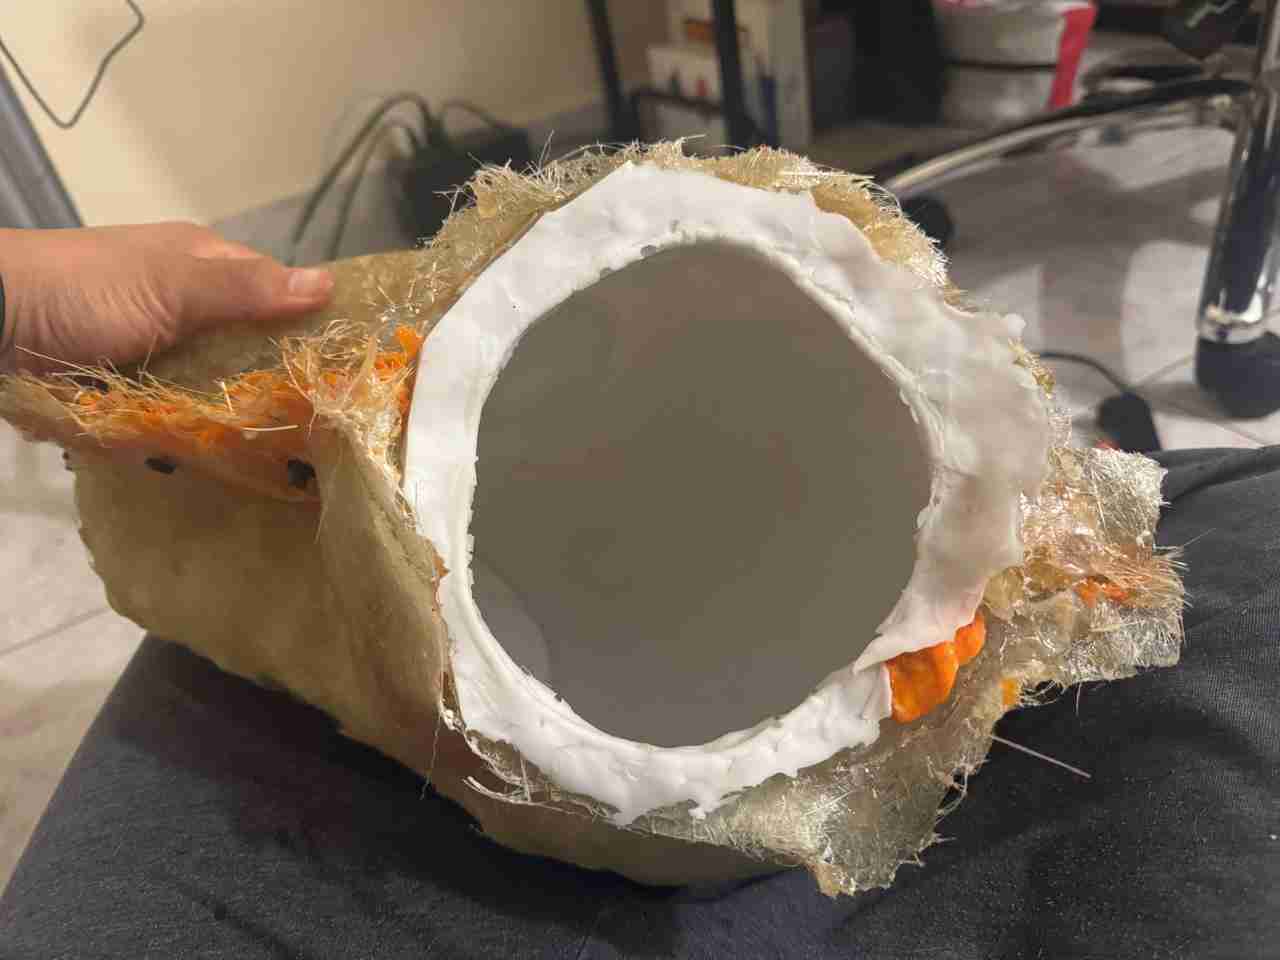
5.3 Apply the fiber glass
Repeat the same process as before, also same 3 layers of fiber glass.
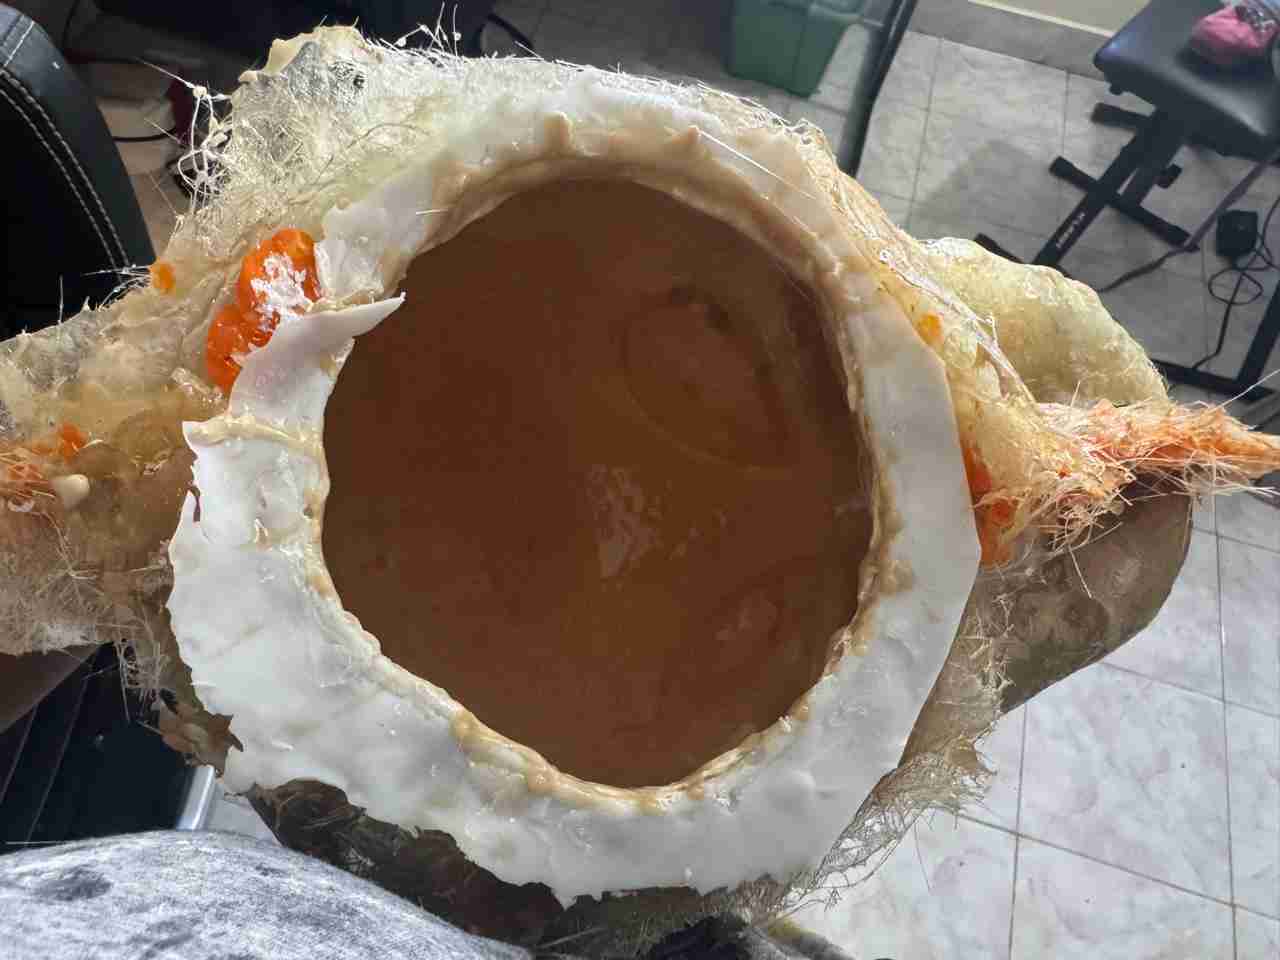
Same as the previos process the fiber glass should start looking like color brown.
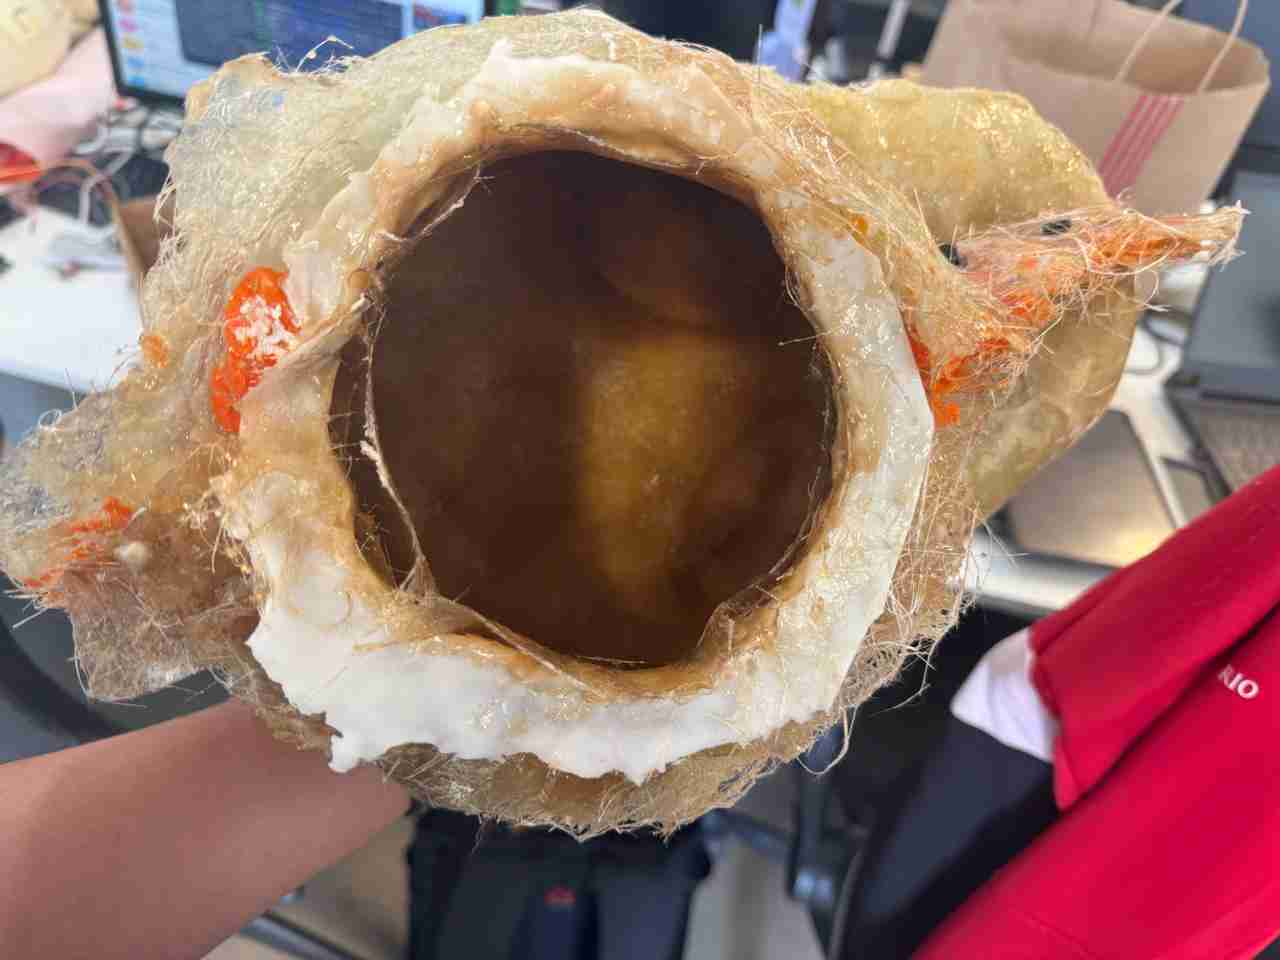
5.4 Reveal the mold
Same as we did on step 4.5 we will have to separate our molds with patience and being carefully.
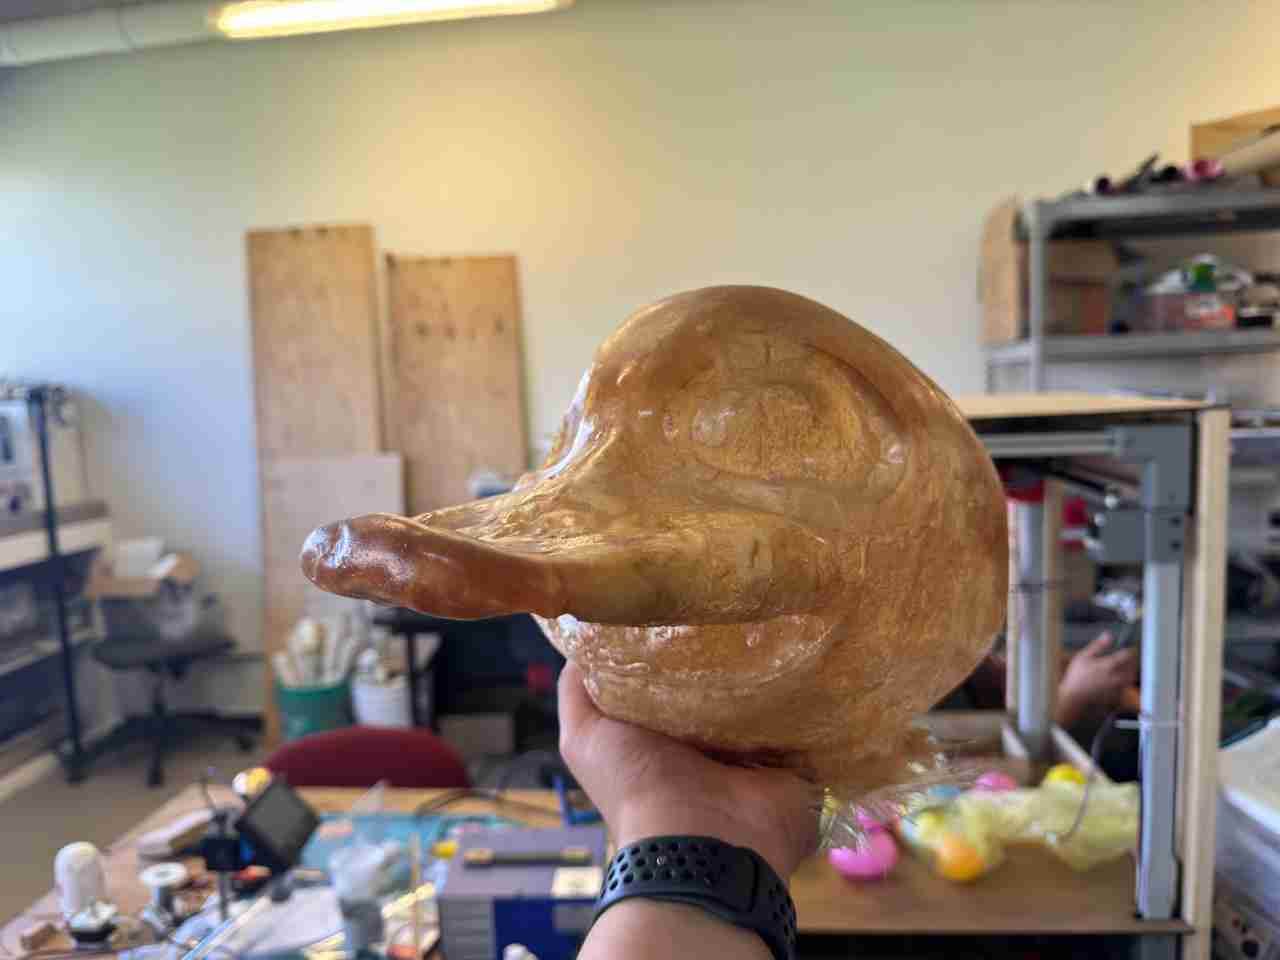
6. Results
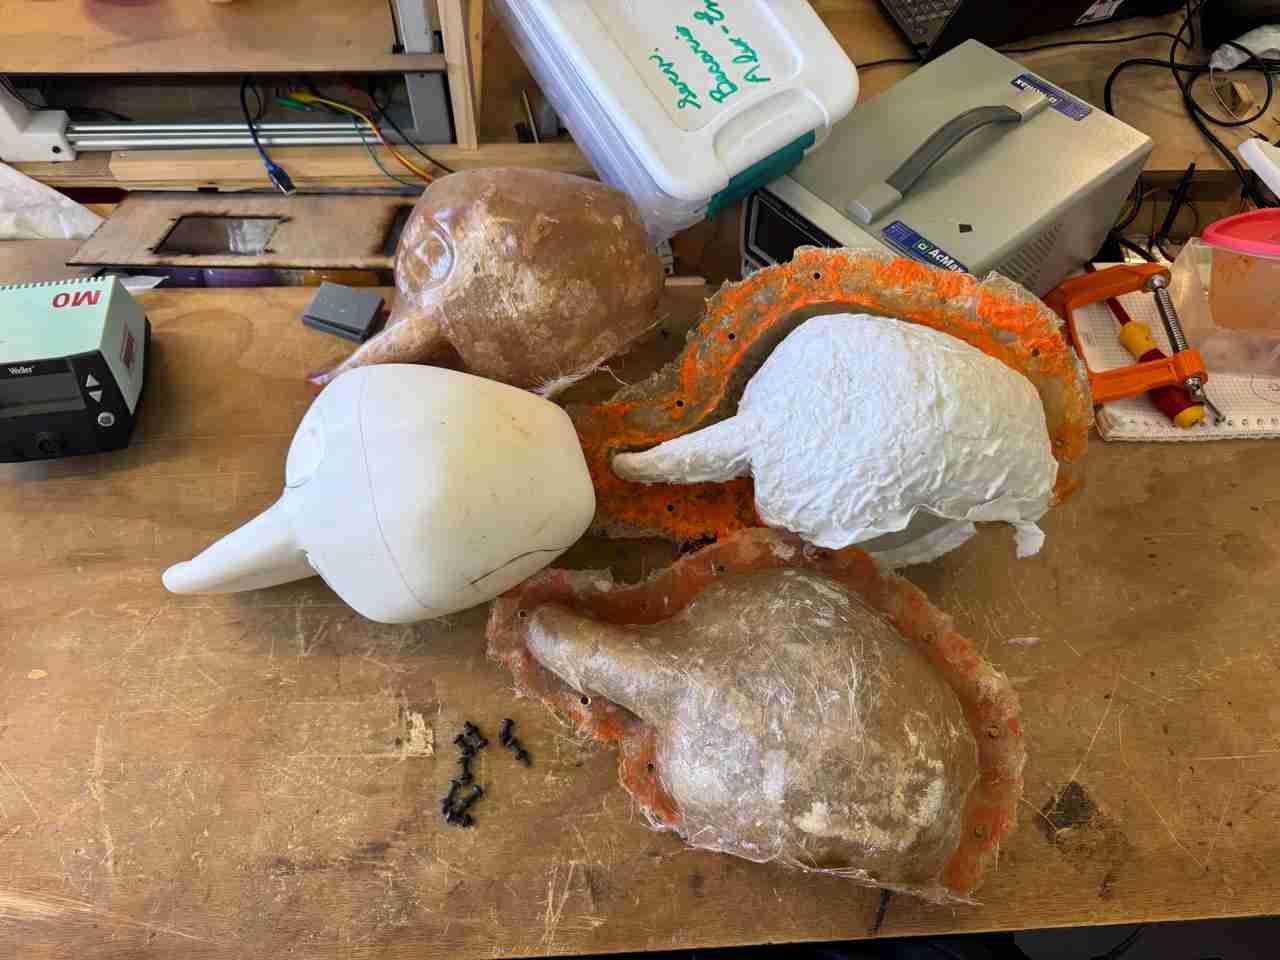
Here are the results of every mold obtained.
7. Files created
Click on the "Download ZIP" to download the file I made for this week assignment.