
✦ Introduction to Molding & Casting
During this week I focused on the design and fabrication of a mold to produce a casted object. The goal was to understand the workflow from digital modeling to physical reproduction using molding and casting techniques. My process involved designing a 3D geometry, preparing it for mold creation, and considering aspects such as draft angles, material flow and air release. Also, for this week I will be consulting our Group Assignment.
✦ Understanding Molds
Molding and casting are manufacturing processes that are used to replicate objects by creating a negative cavity of a desired shape and filling it with a material that solidifies.

✦ Design Process
For this assignment, I designed a balloon dog-inspired figure, composed of simple organic volumes. The design was built using multiple primitives, later refined to achieve smoother transitions between parts.
✦ OnShape Modeling
A 3D model was developed in OnShape to design the mold geometry, alignment features and casting cavities before fabrication.
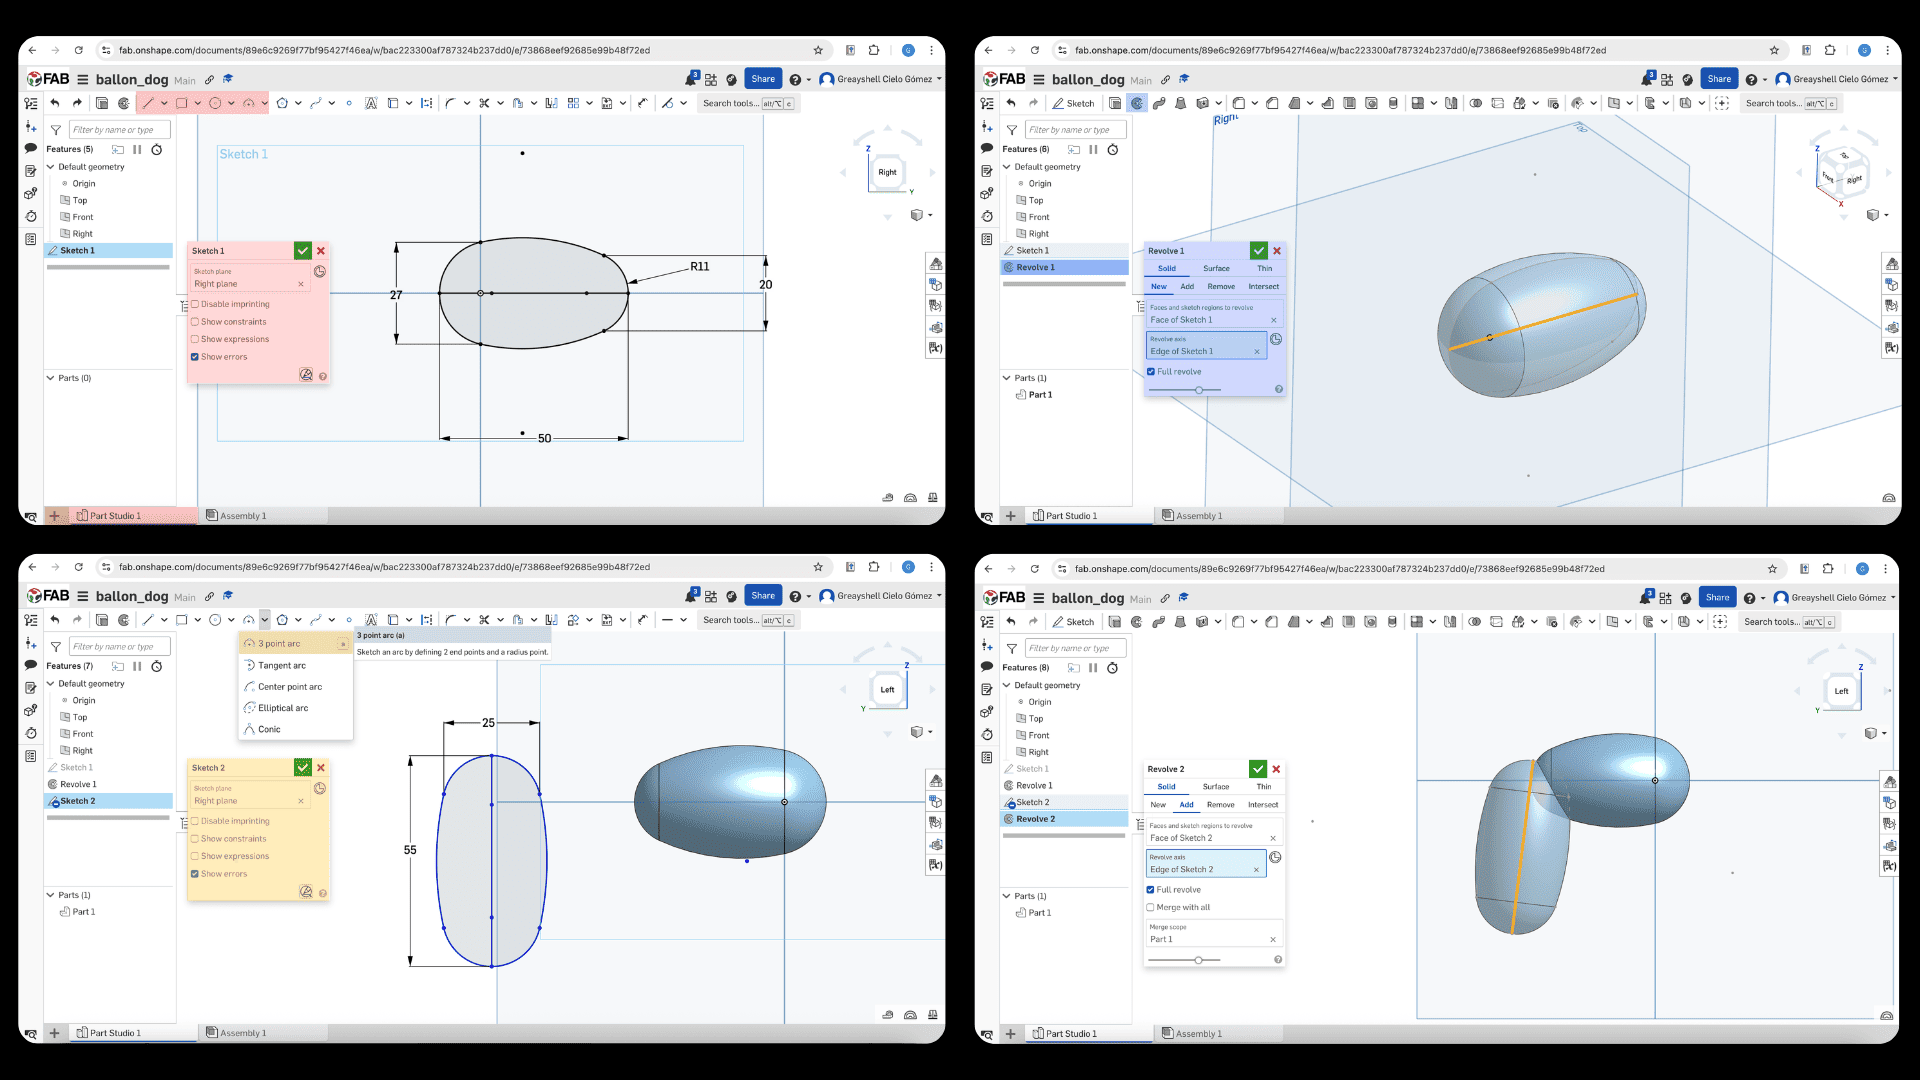
01. INITIAL BODY GEOMETRY
The modeling process started by creating simple revolved shapes that defined the main proportions of the balloon dog’s body and legs. I used the Tranform Tool to move the pieces where I wanted them.
02. HEAD & PAWS CONSTRUCTION
Then I put additional revolved geometries and positioned them to form the paws and ears, maintaining the rounded balloon-like appearance.
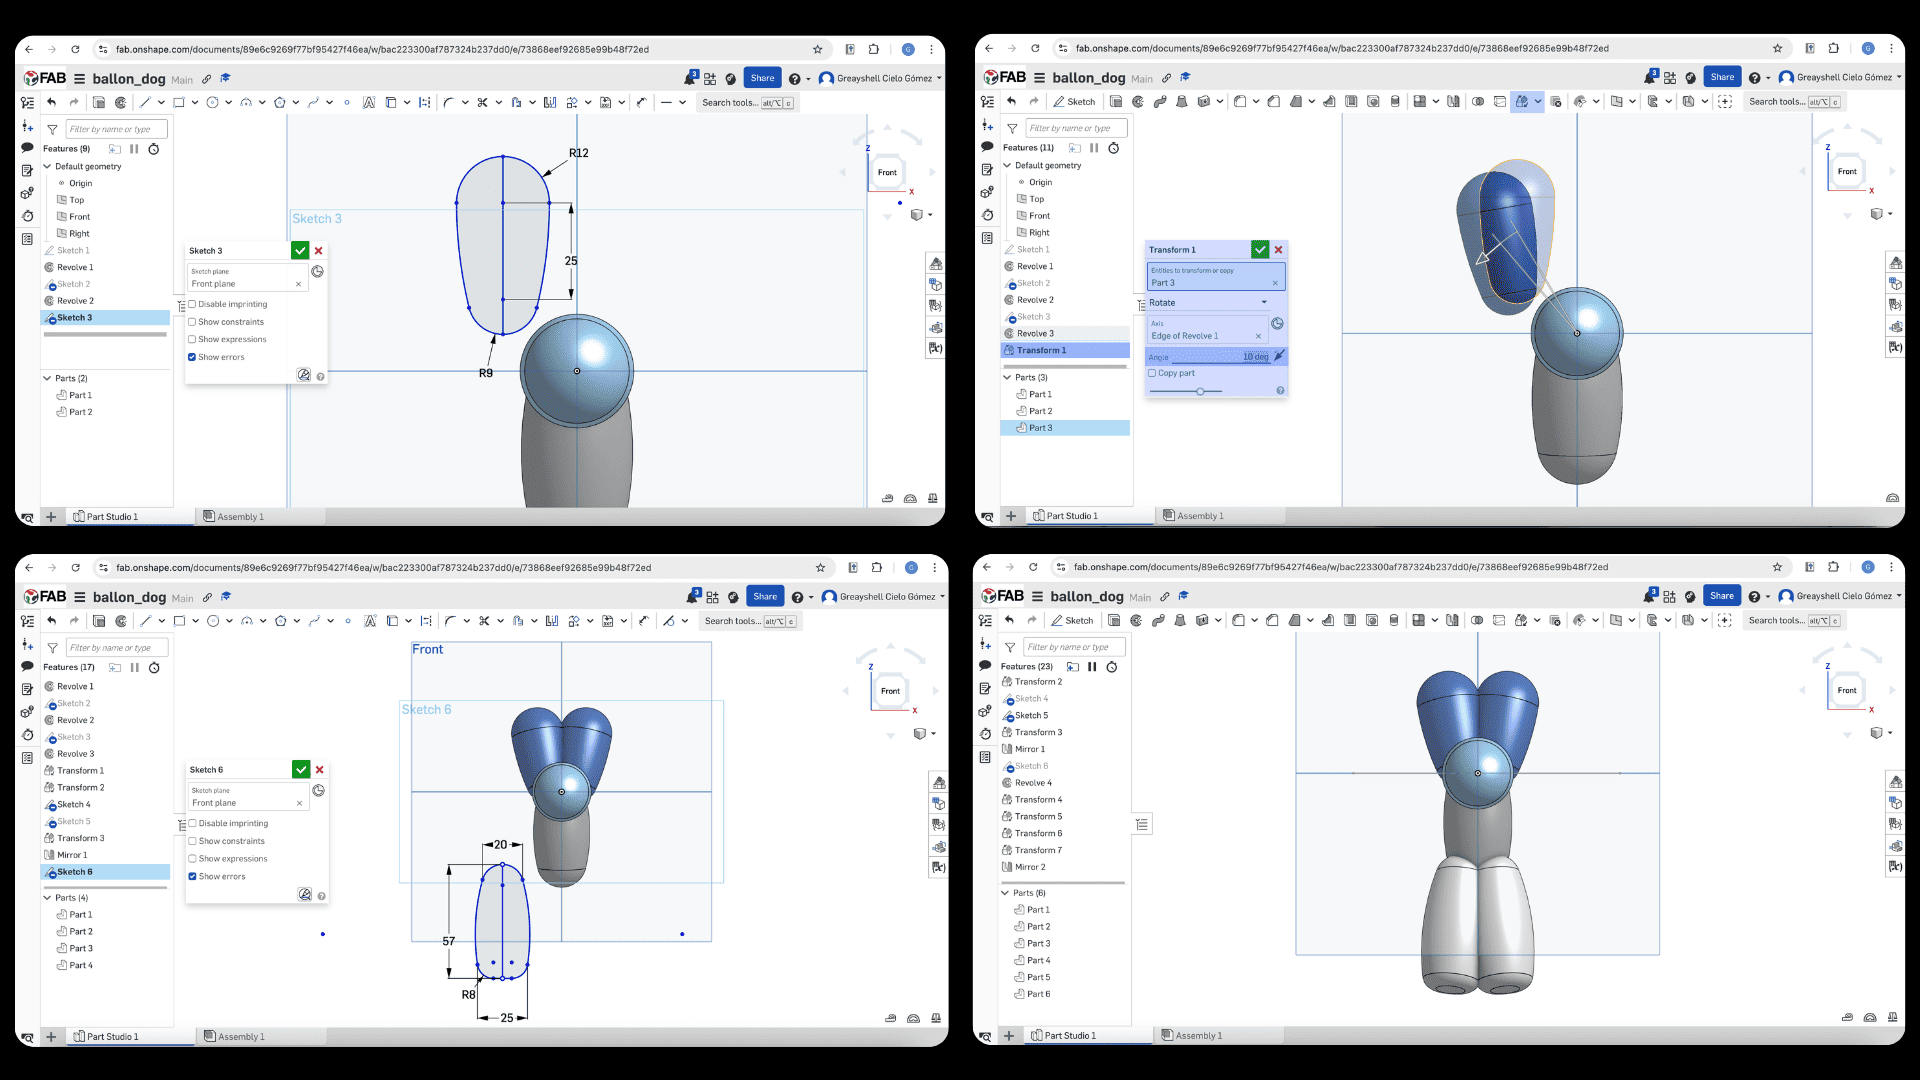
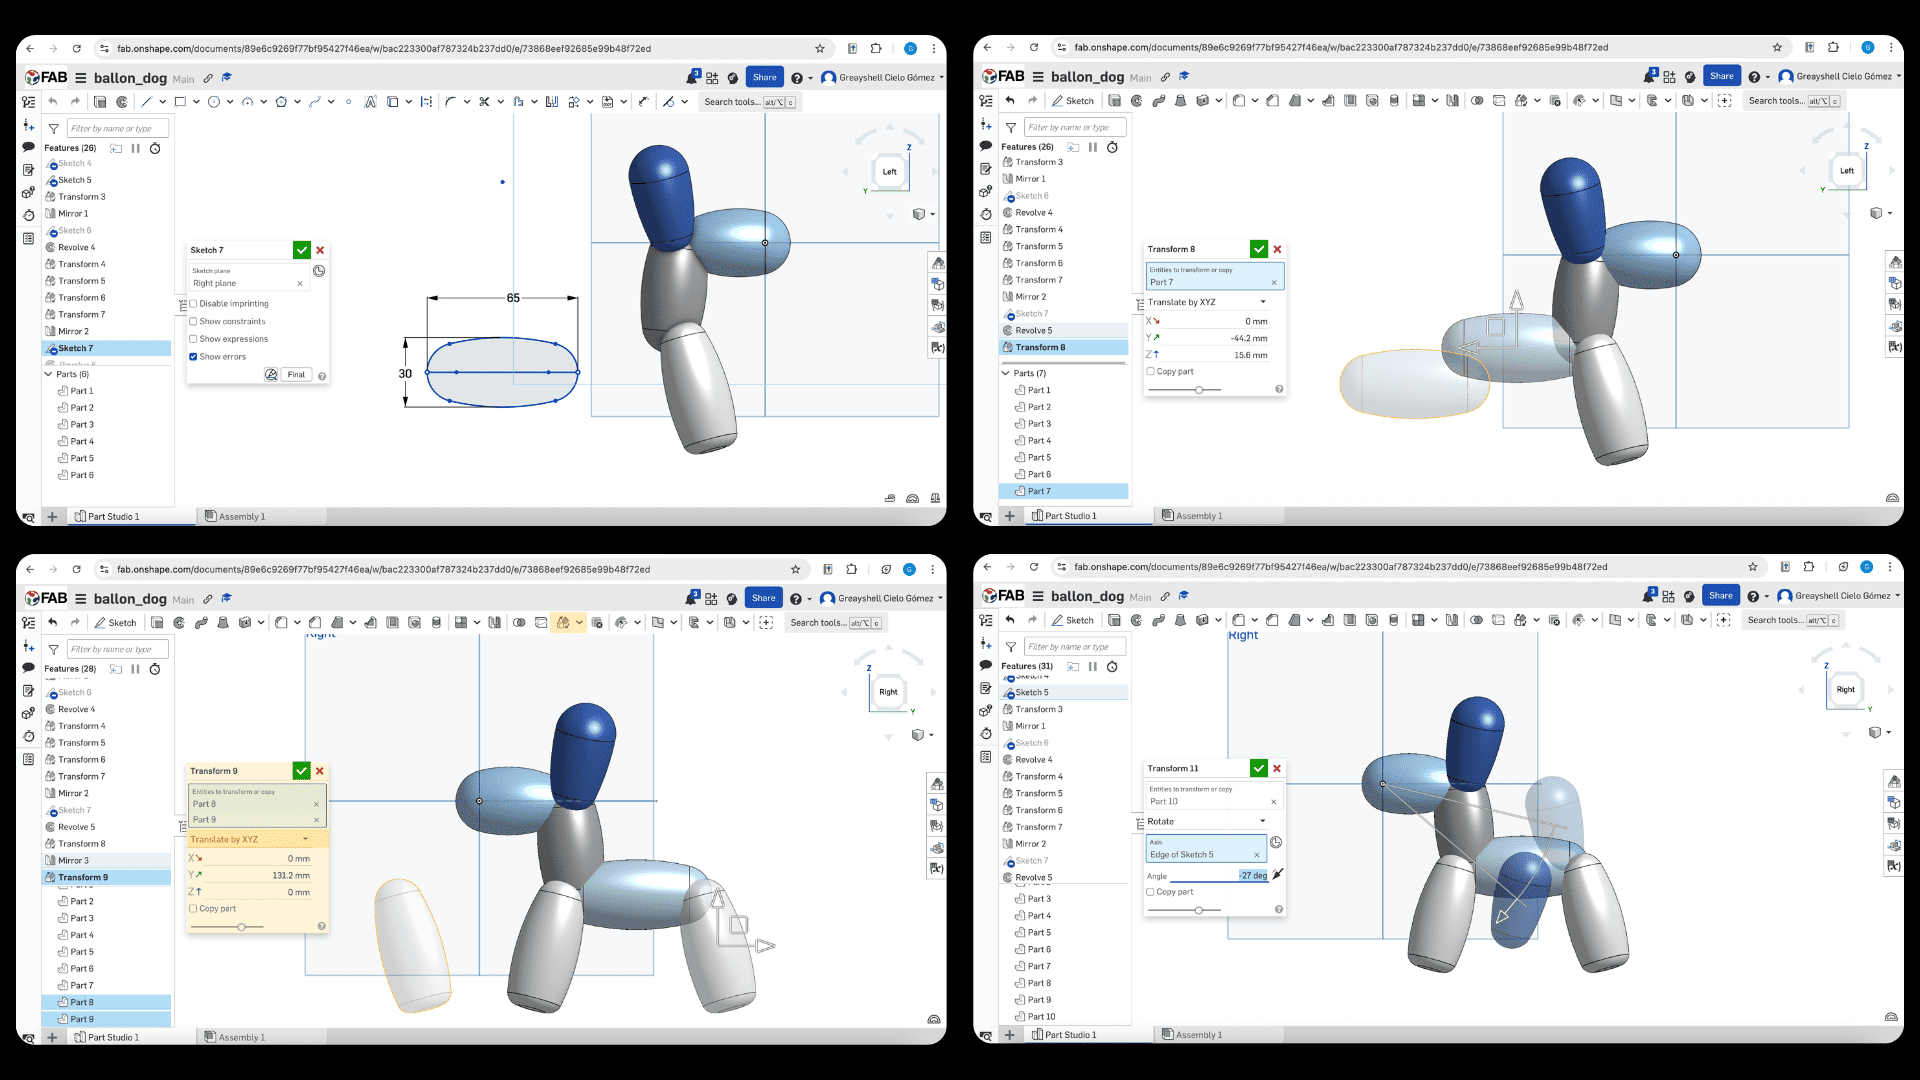
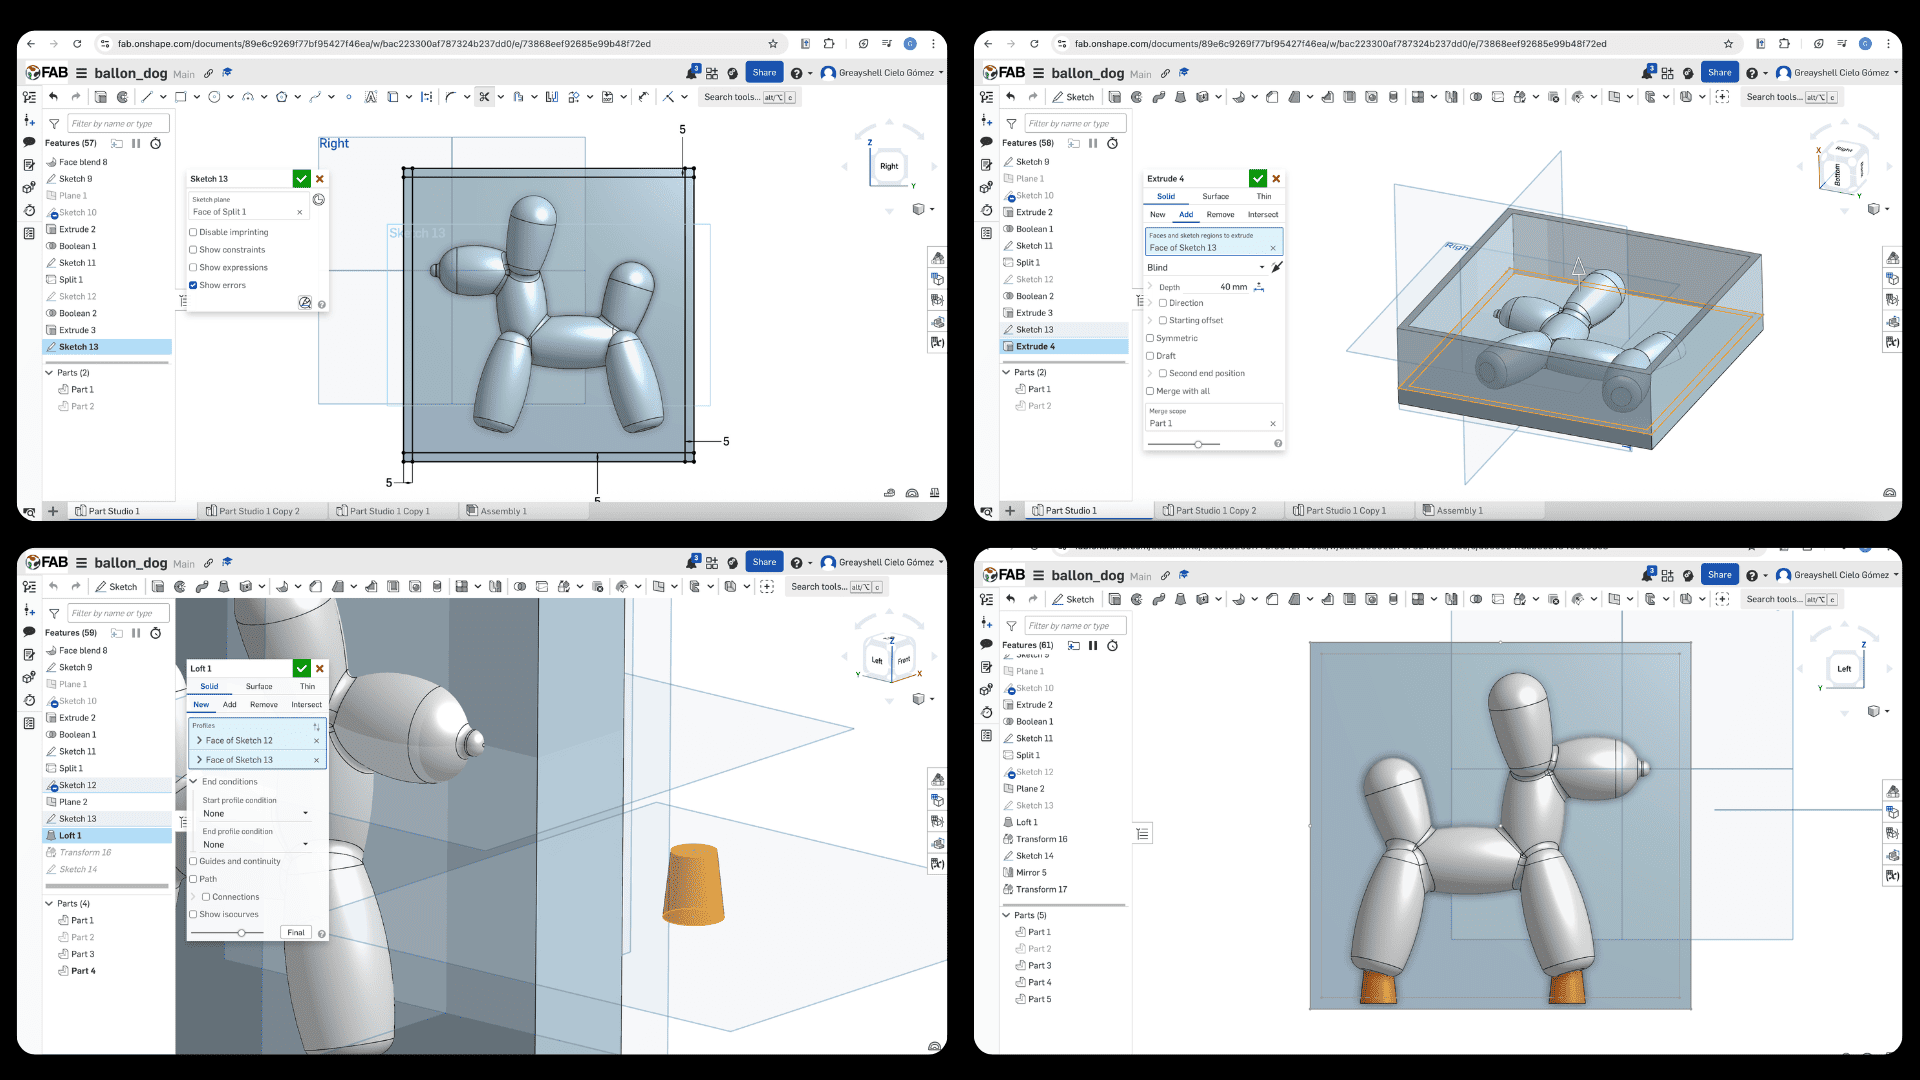
03. BODY ASSEMBLY PROCESS
Different components like the ears and paws were duplicated, rotated and translated to progressively build the full balloon dog structure.
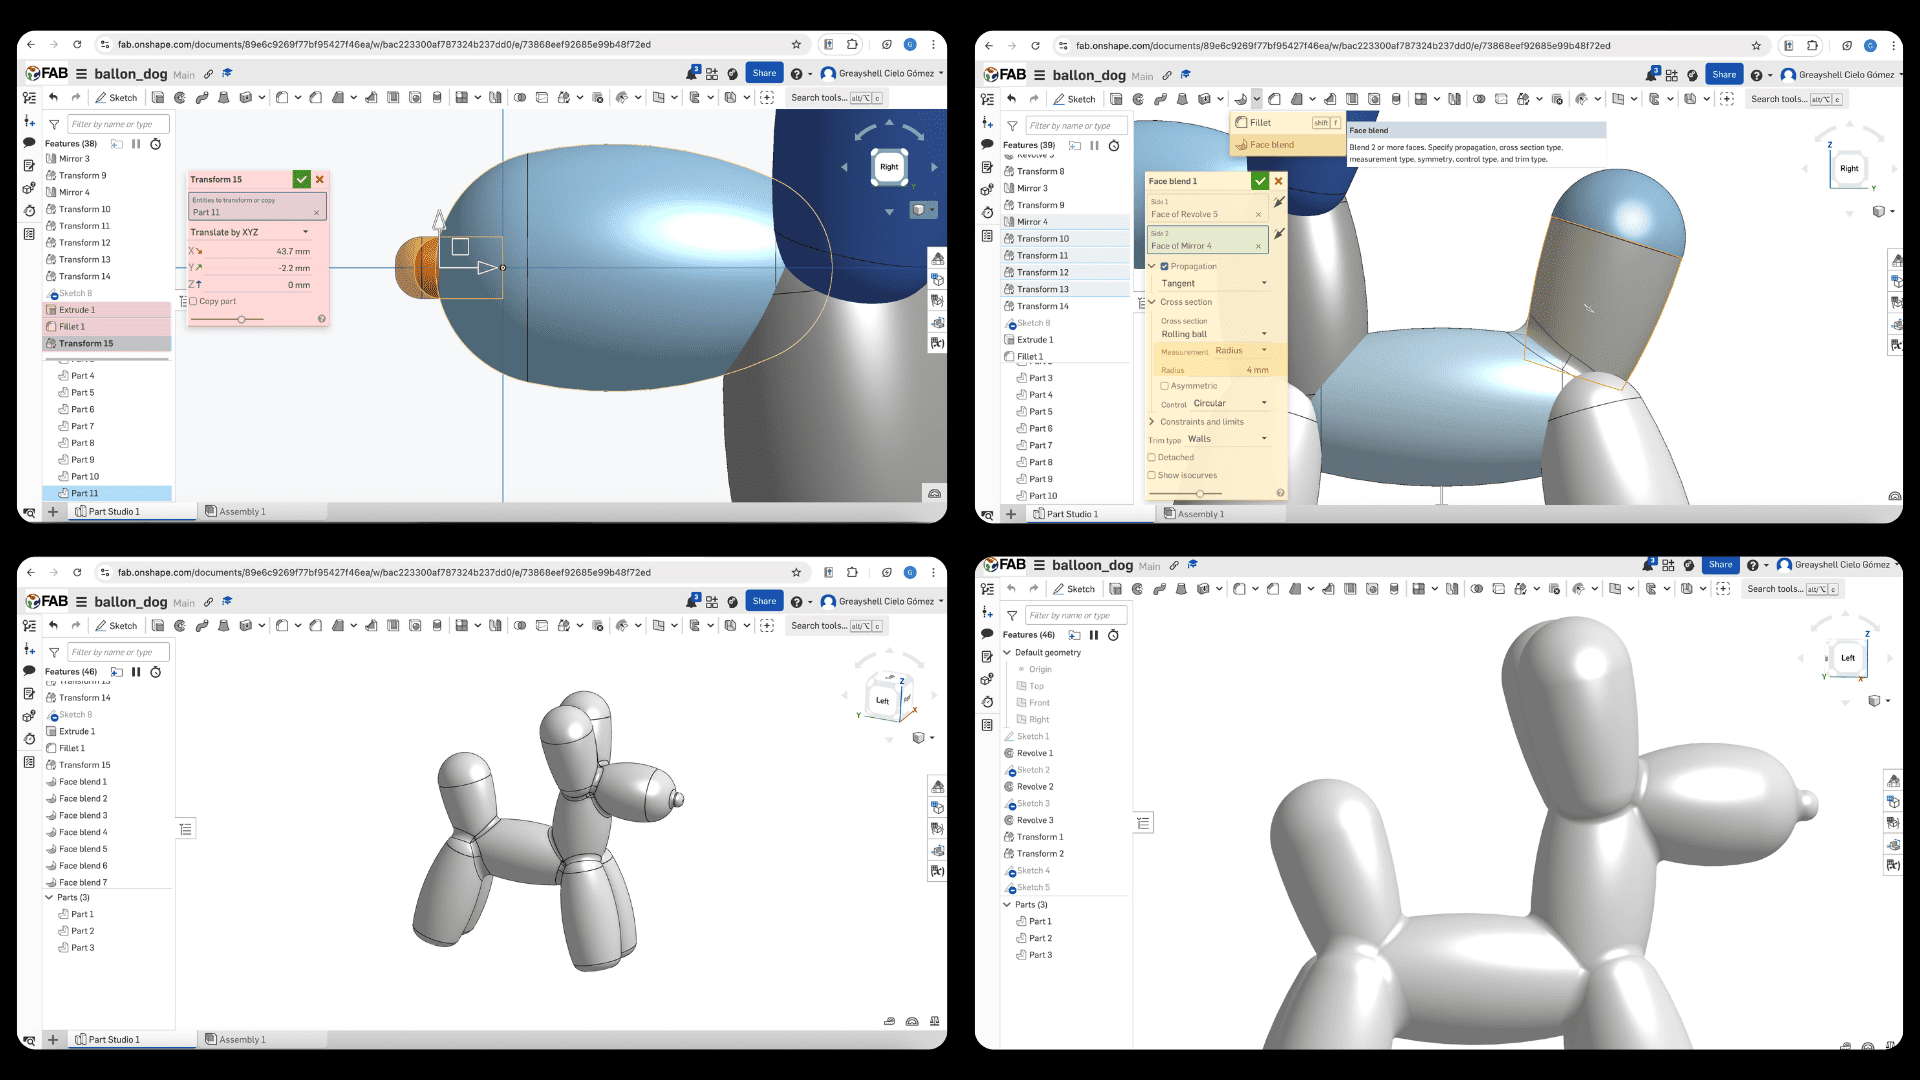
04. SHAPE REFINEMENT
Then I add the nose and applied fillet operations to make soften transitions between parts and achieve a smoother continuous surface. To see the complete figure I went to Camera and render options and select Shaded without Edges.
05. MOLD BLOCK CREATION
A surrounding block geometry was created around the balloon dog to generate the mold cavity. A 13 mm margin was left above and below the model, and 19 mm on the sides to ensure enough silicone thickness and allow safe demolding without damaging the shape.
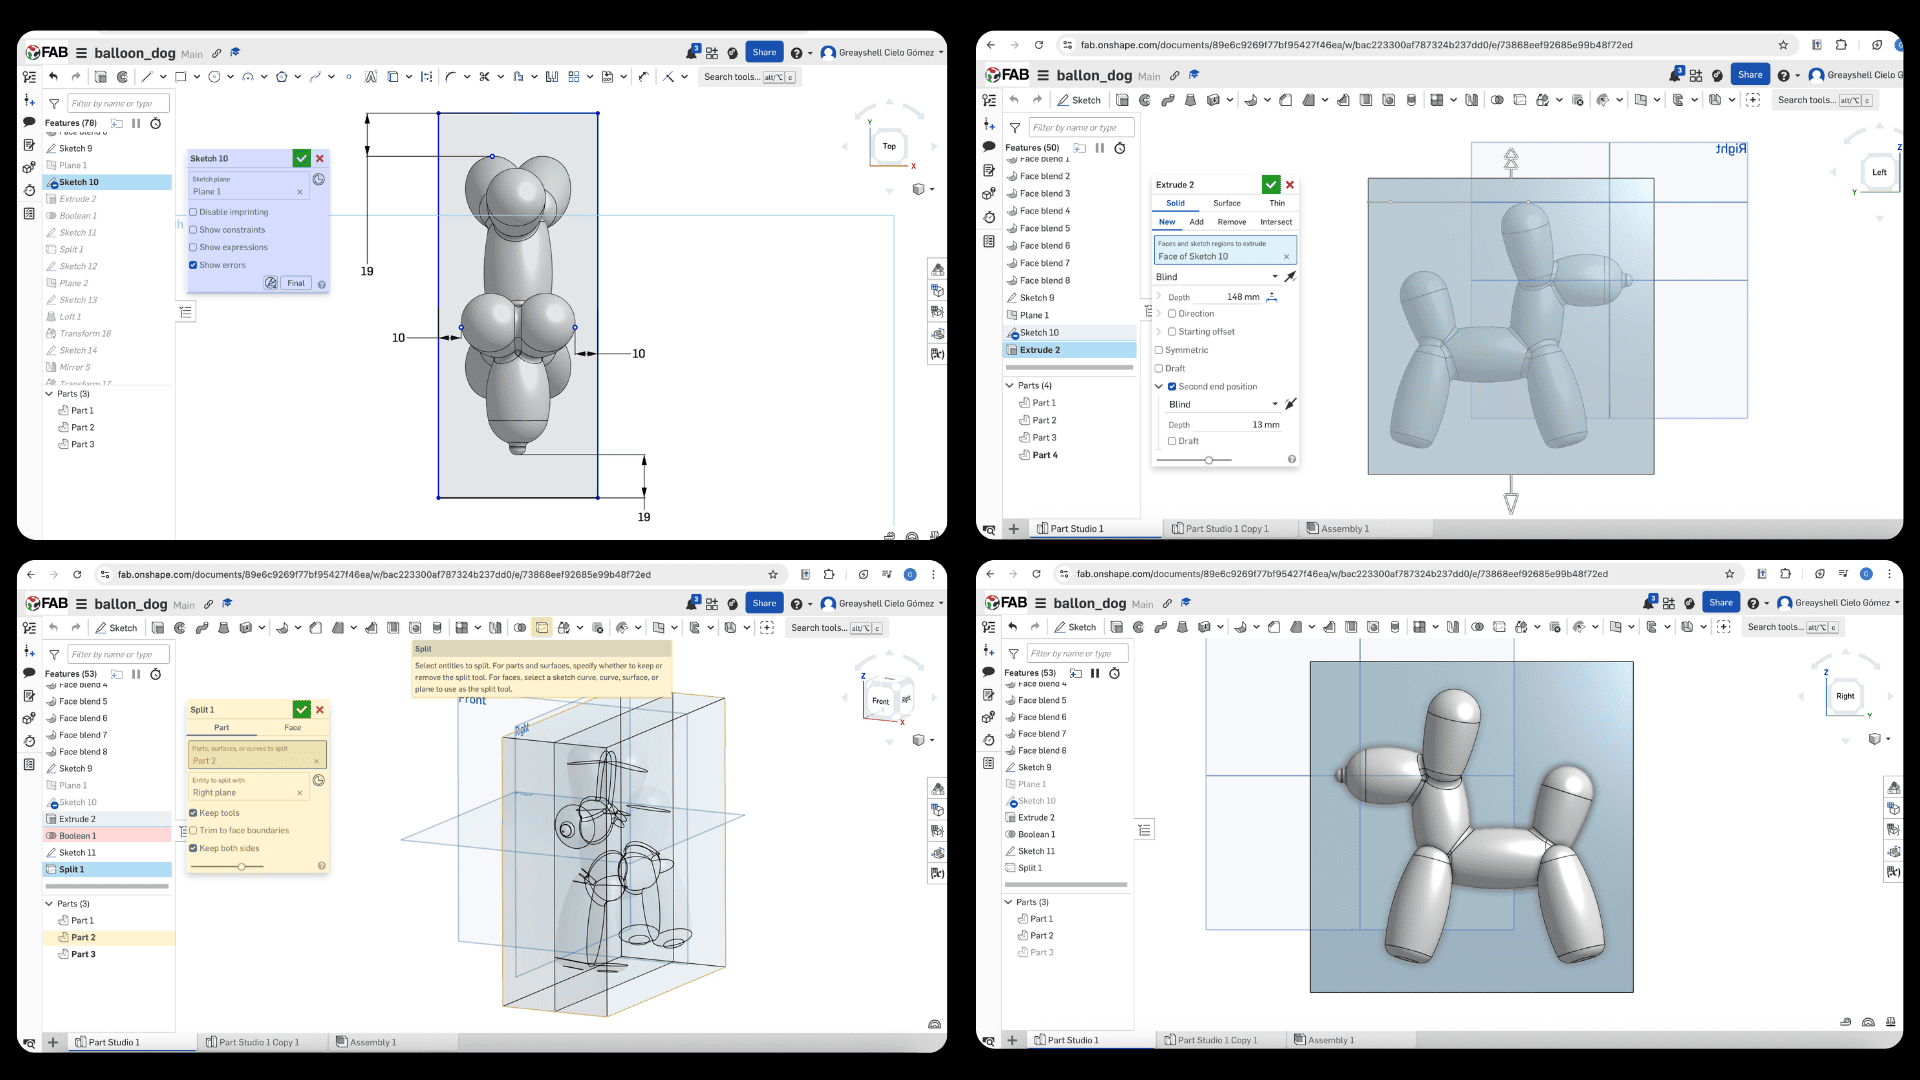
06. MOLD SEPARATION
The mold geometry was divided into two sections using Split operations, allowing the final mold to be opened and casted correctly. I also added two cylinders on the paws that will serve as an entrance to place the plaster.
07. FINISHING FEATURES
Finally, I put some alignment pins, edge fillets and chamfers to improve the mold assembly. It's important not to leave any spikes or gaps so that the silicone doesn't get stuck in the mold.
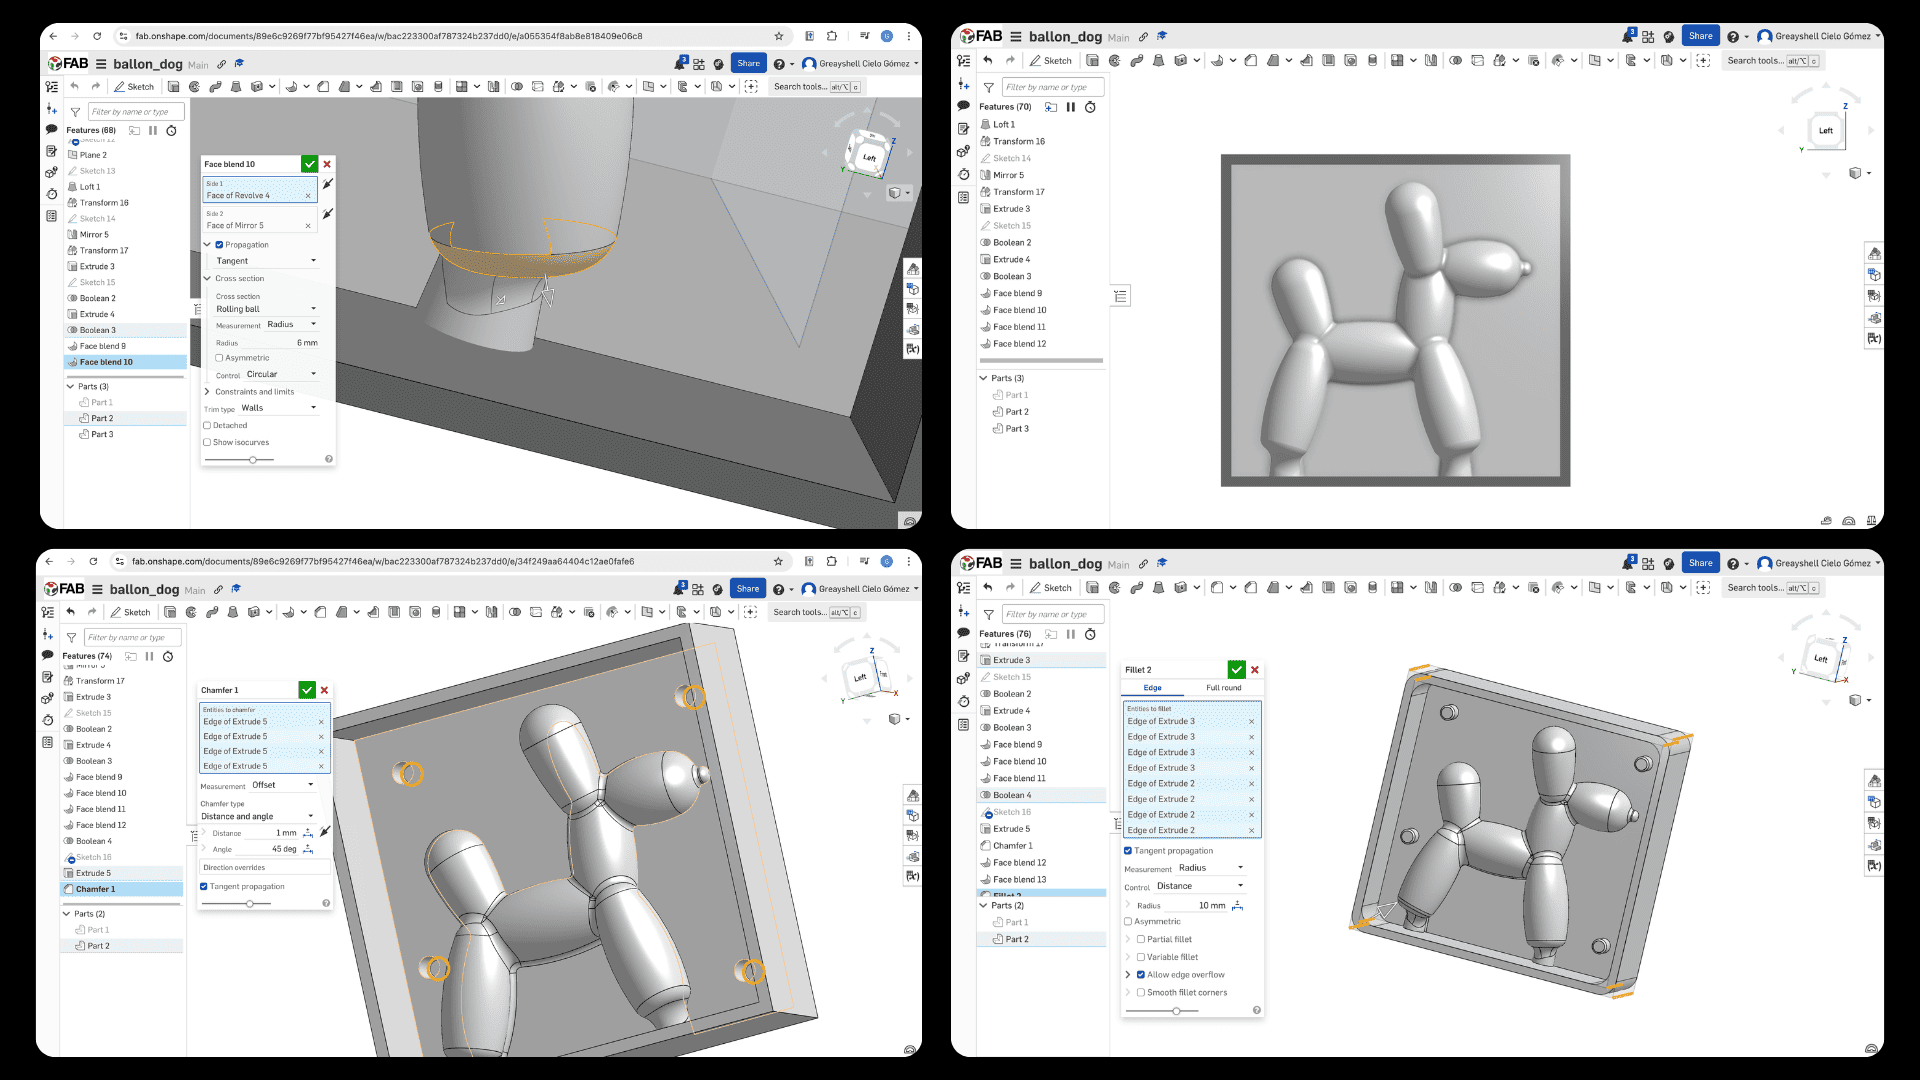
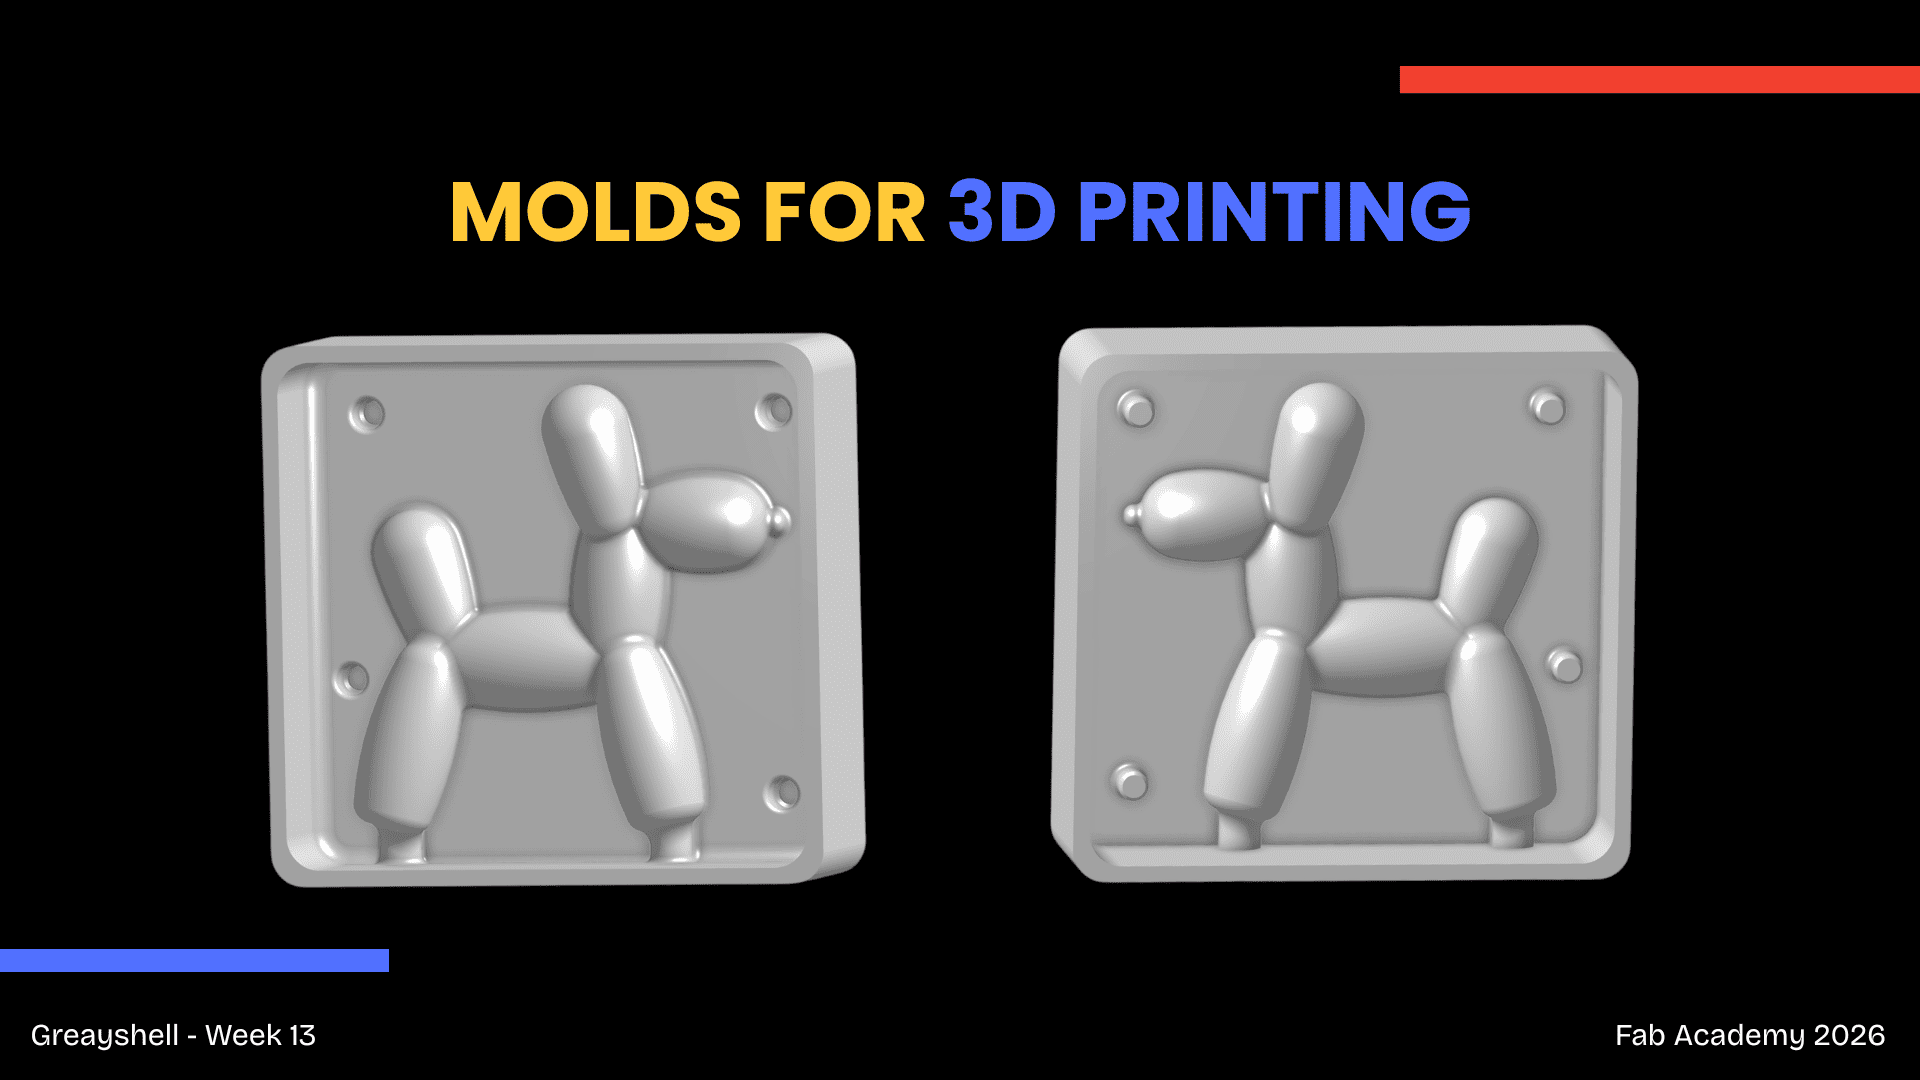
✦ Final Model
The final result consisted of a two-part mold prepared for 3D printing. This printed mold would later be used to cast silicone and obtain the final flexible mold for the plaster casting process.
✦ 3D Printing Process
Once the mold design was completed, both mold halves were exported as STL files and prepared for 3D printing.
Basic Printing
Information
- Material used: PLA
- Total Filament: 119.13 g
- Internal Solid Infill: 15.4%
- Supports: No
- Print time: 2h33m (each)
✦ Surface Finishing Process
The mold surfaces were sanded and refined to reduce visible layer lines from the 3D printing process. Plastern and Thinner was applied as filler material, followed by different sandpaper grits to achieve a smoother. I also, applied small amounts of clay to seal little gaps in the mold parts to prevent leaks.
.jpg)
✦ Silicon Casting Process
The next step was casting the silicone to obtain the flexible mold that would later be used for the final piece. It's important to wear safety protection.
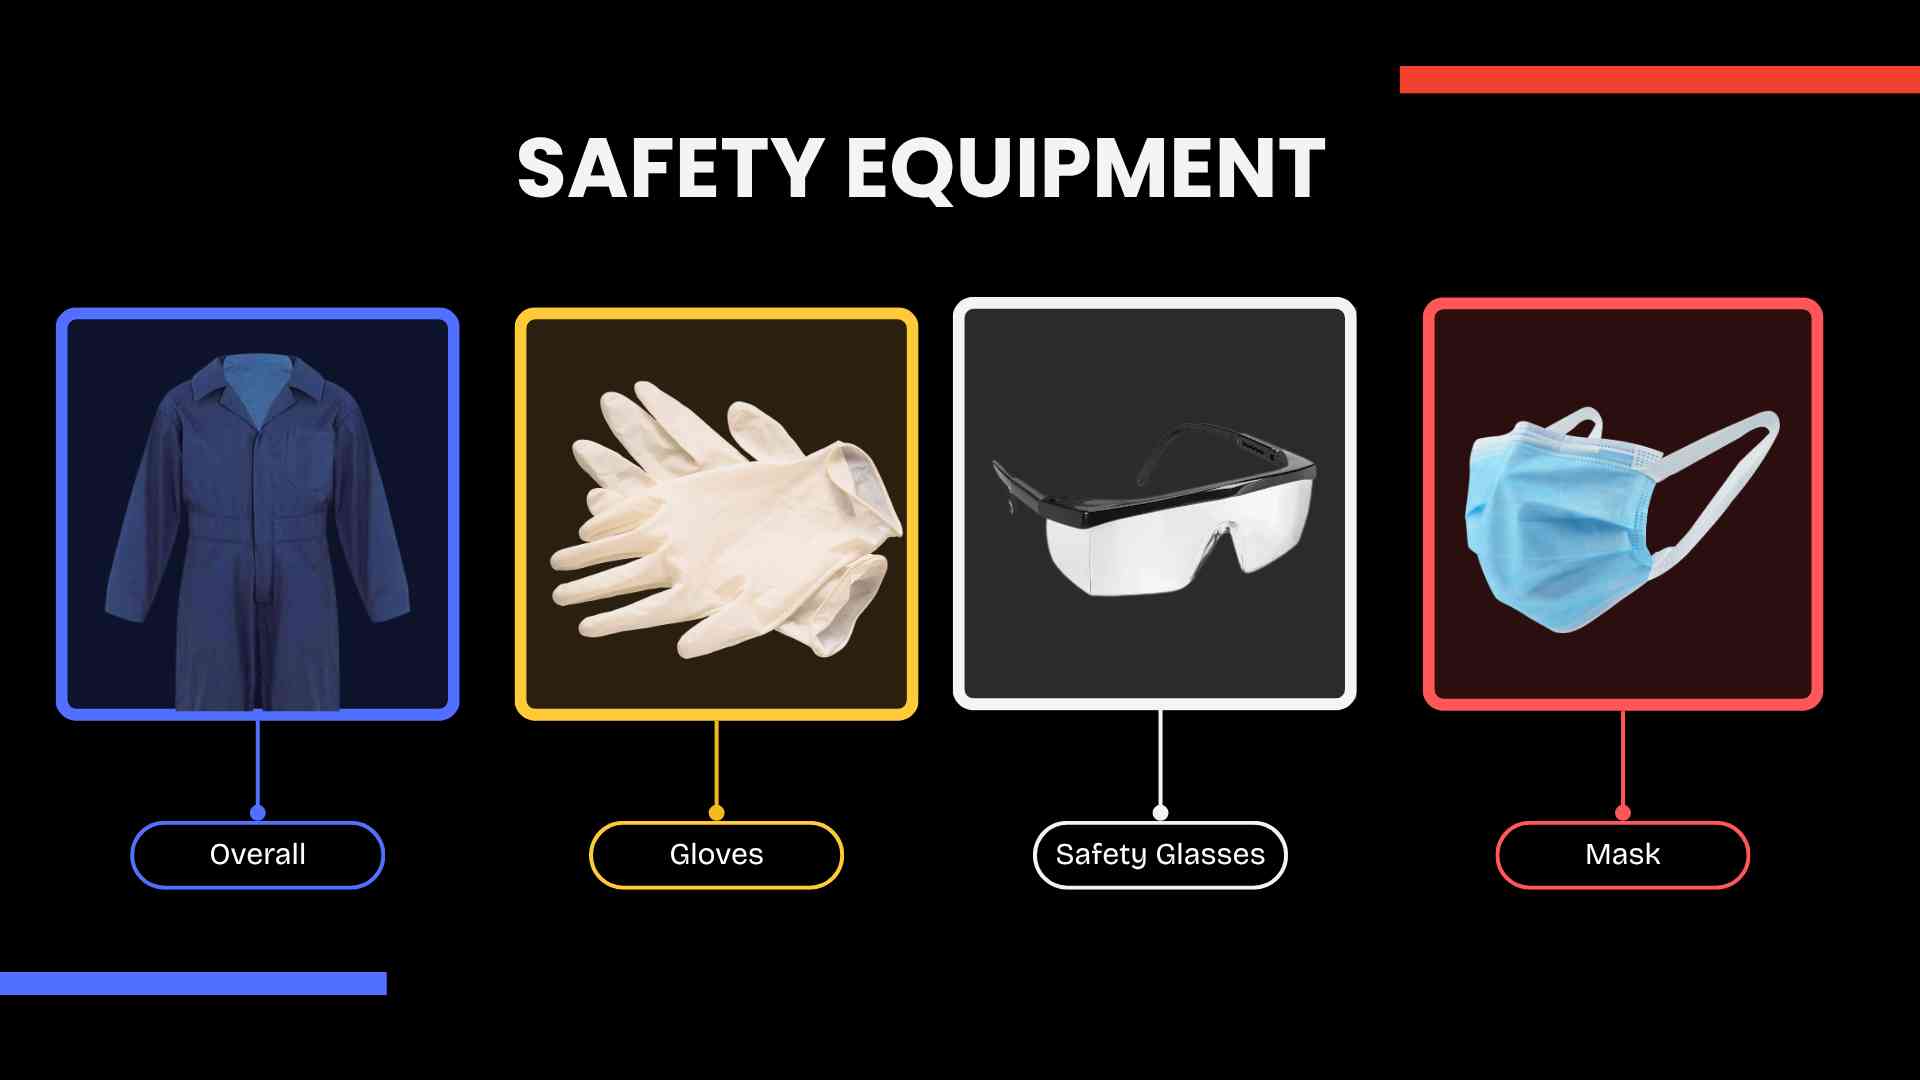
✦ Silicon Casting Process
The next step was casting the silicone to obtain the flexible mold that would later be used for the final piece. It's important to wear safety protection.
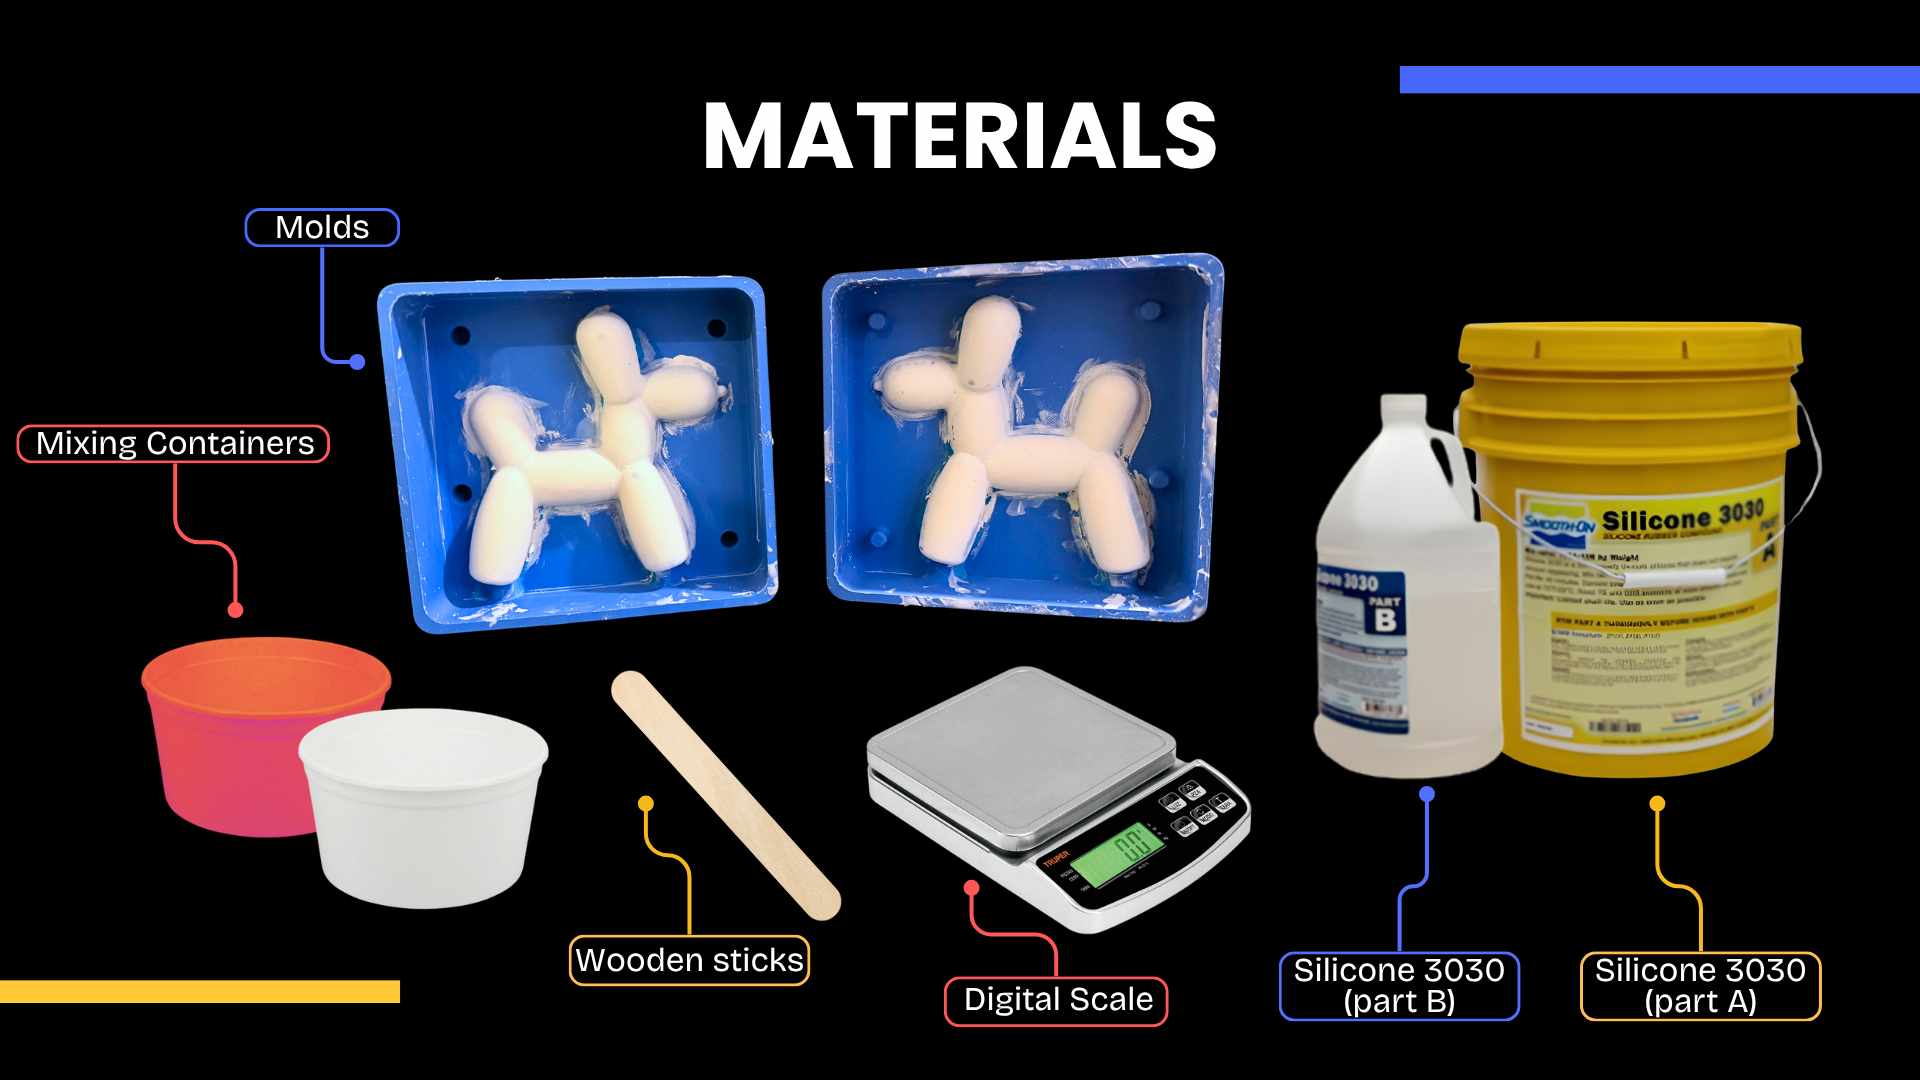
01. PREPARE THE MATERIALS
Materials used during the silicone molding process, including the 3D printed molds, mixing containers, wooden sticks, a digital scale, Silicone 3030 parts A and B.
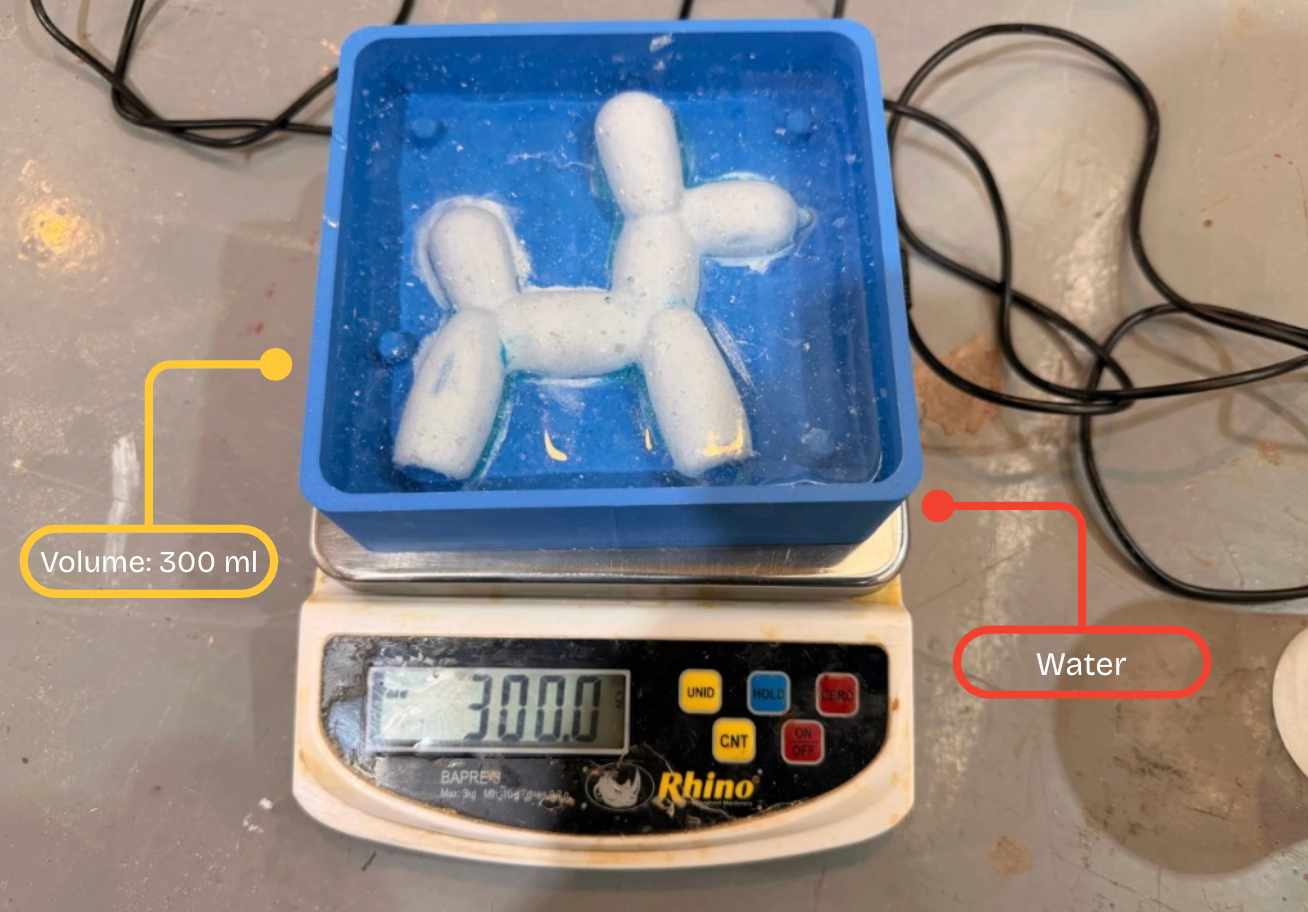
02. VOLUME CALCULATION
To estimate the amount of silicone required, the mold cavity was filled with water and measured using a digital scale. The total volume obtained was 300 ml, which was later used to calculate the silicone and catalyst proportions.
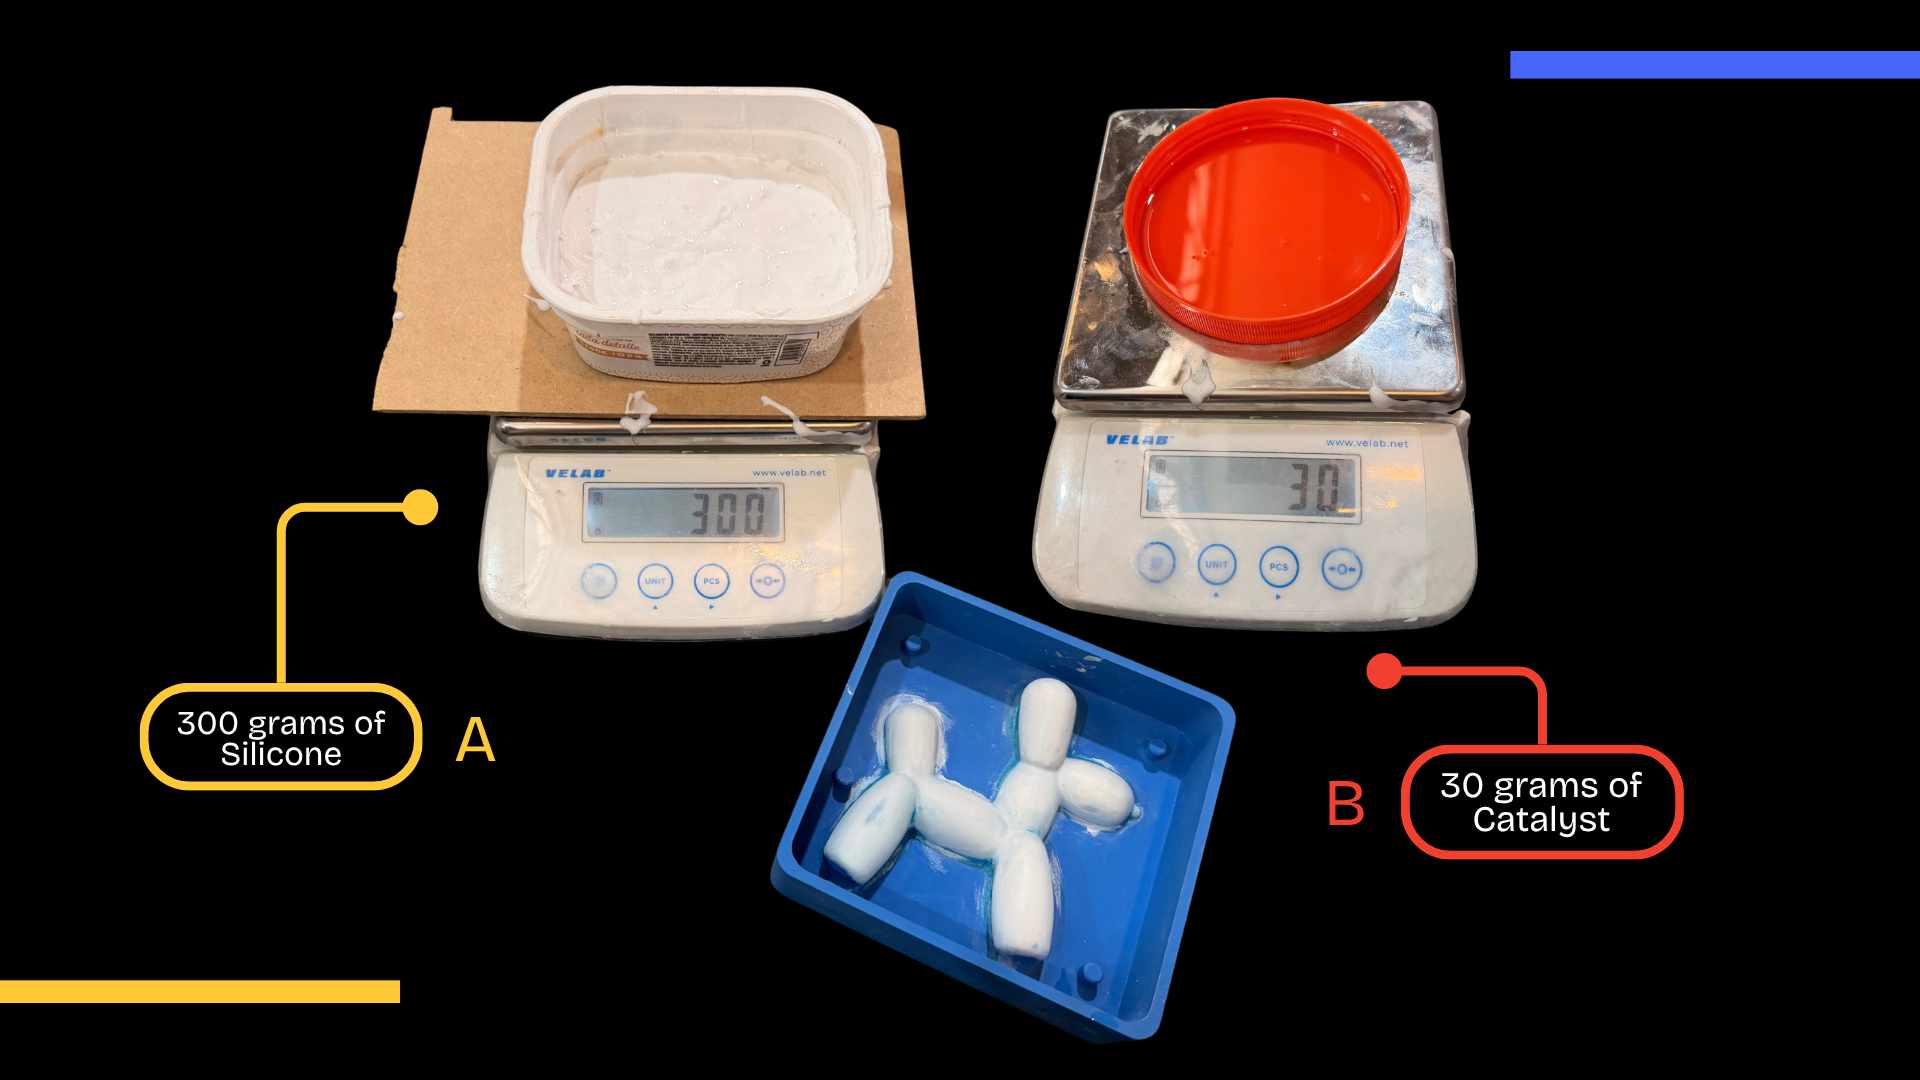
03. SILICONE MIXING PROCESS
Based on the measured volume, 300 grams of silicone (Part A) and 30 grams of catalyst (Part B) were prepared following the 10:1 mixing ratio. Both components were mixed before being poured into the molds.
05. MOLD CURING PROCESS
The silicone mold was left to cure for approximately 24 hours to ensure complete solidification and then proceed with the demolding process. For this las step, I used sticks to unmold it more easily.

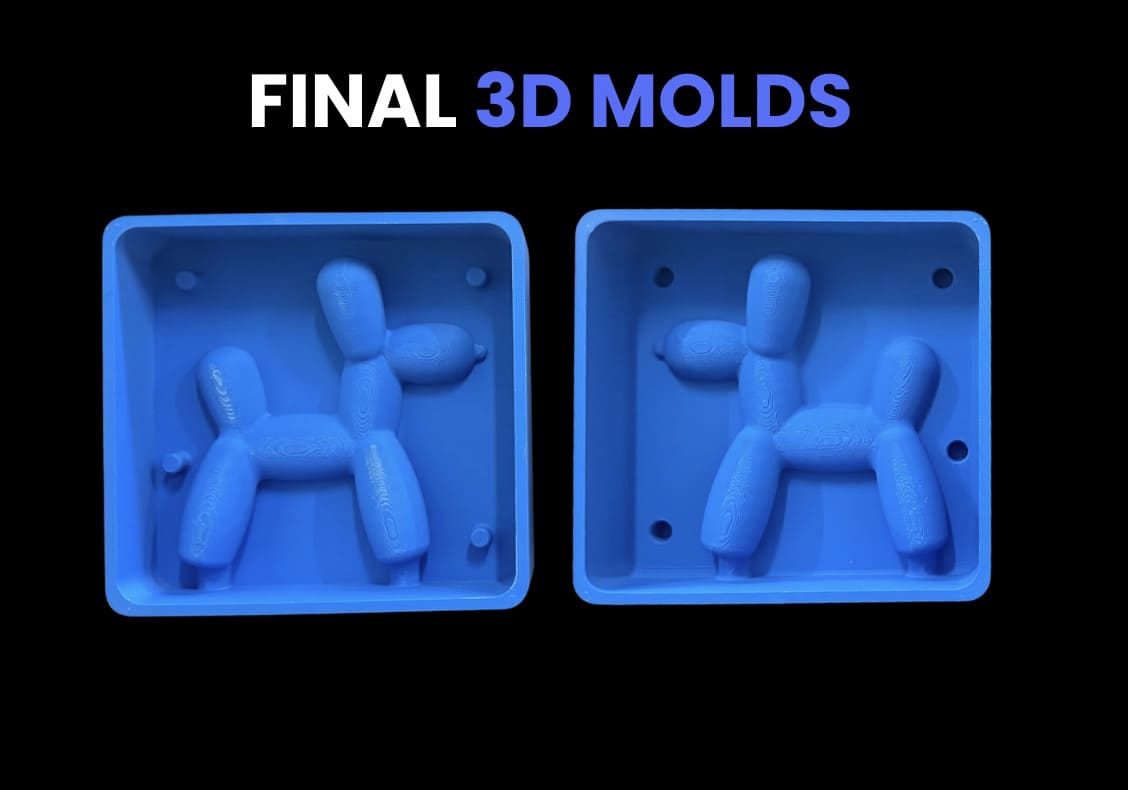
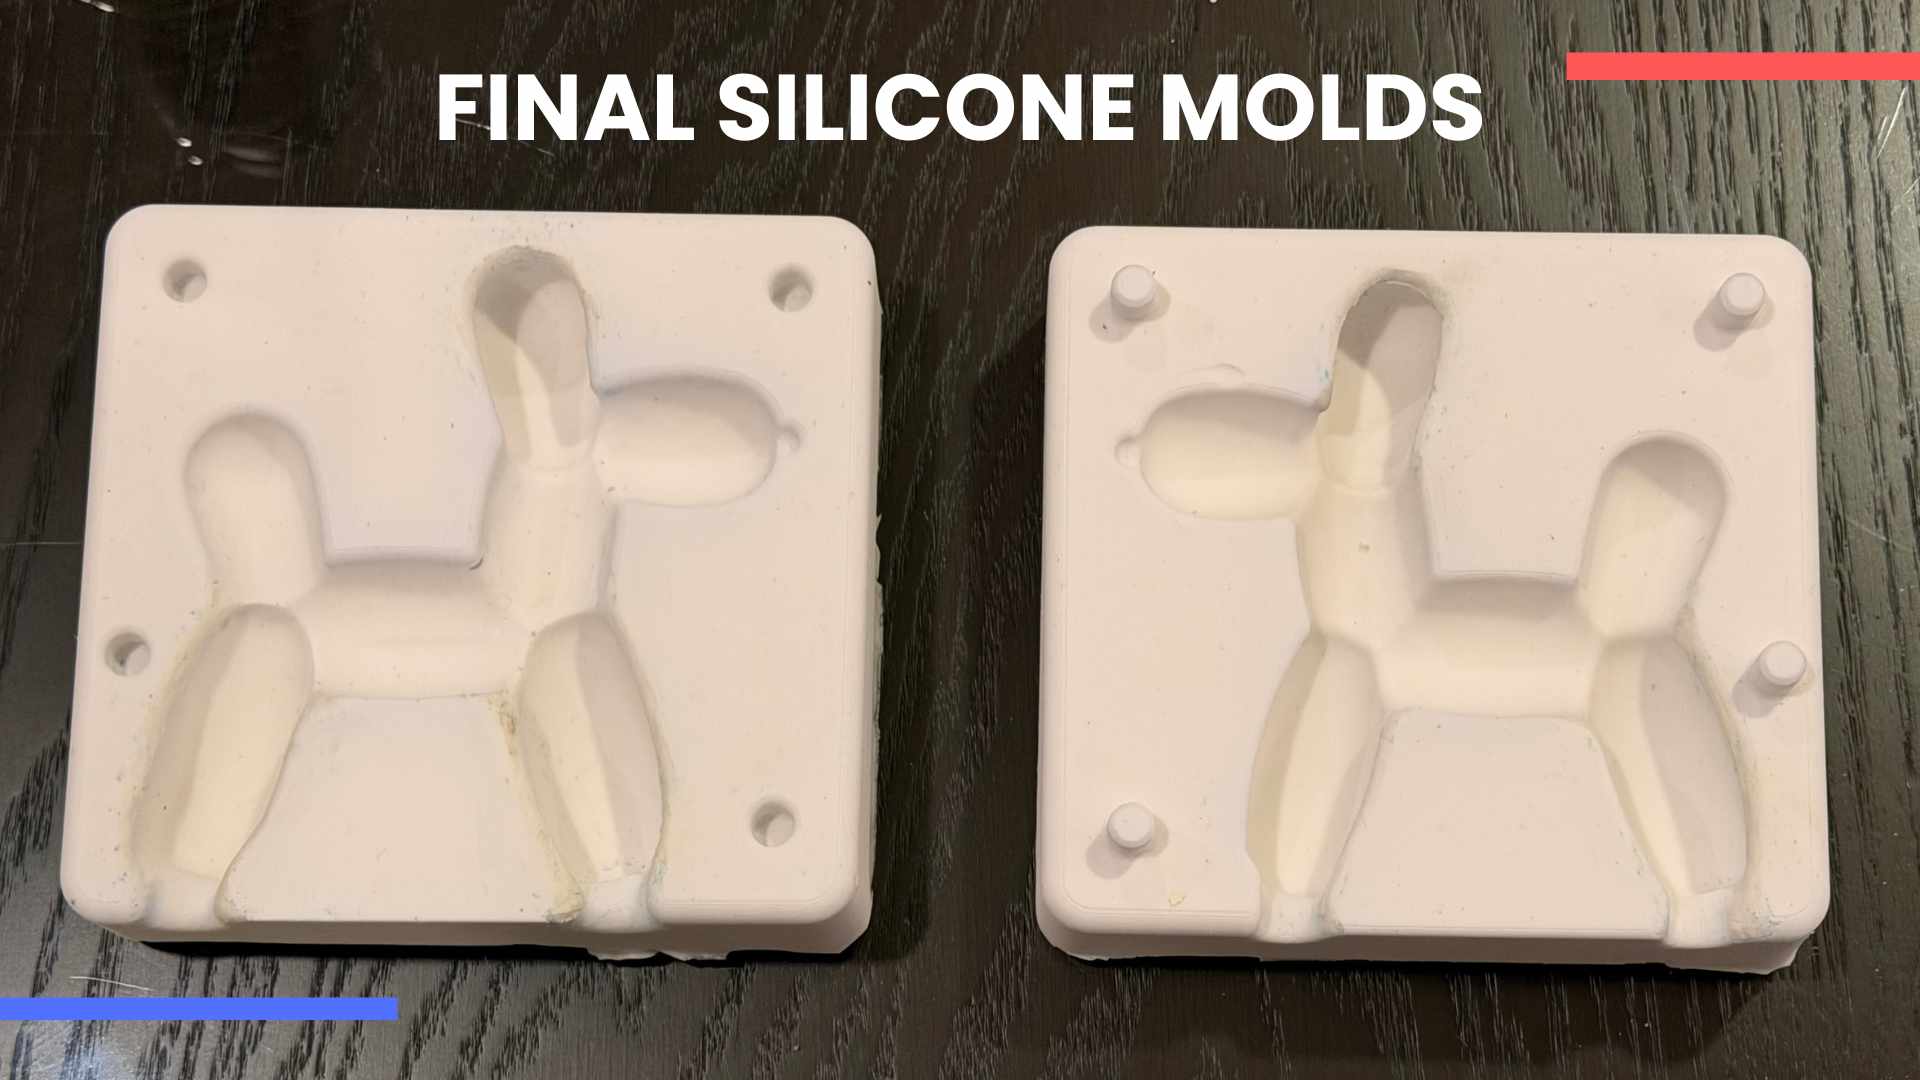
06. FINAL SILICONE MOLDS
The final silicone molds were obtained after the curing process. Also, the molds preserved the balloon dog geometry, included the alignment pins and casting channels for the plaster casting process.
✦ Casting Plaster Process
Process of pouring the casting plaster into the silicone mold to obtain the final reproduced geometry after curing and demolding.
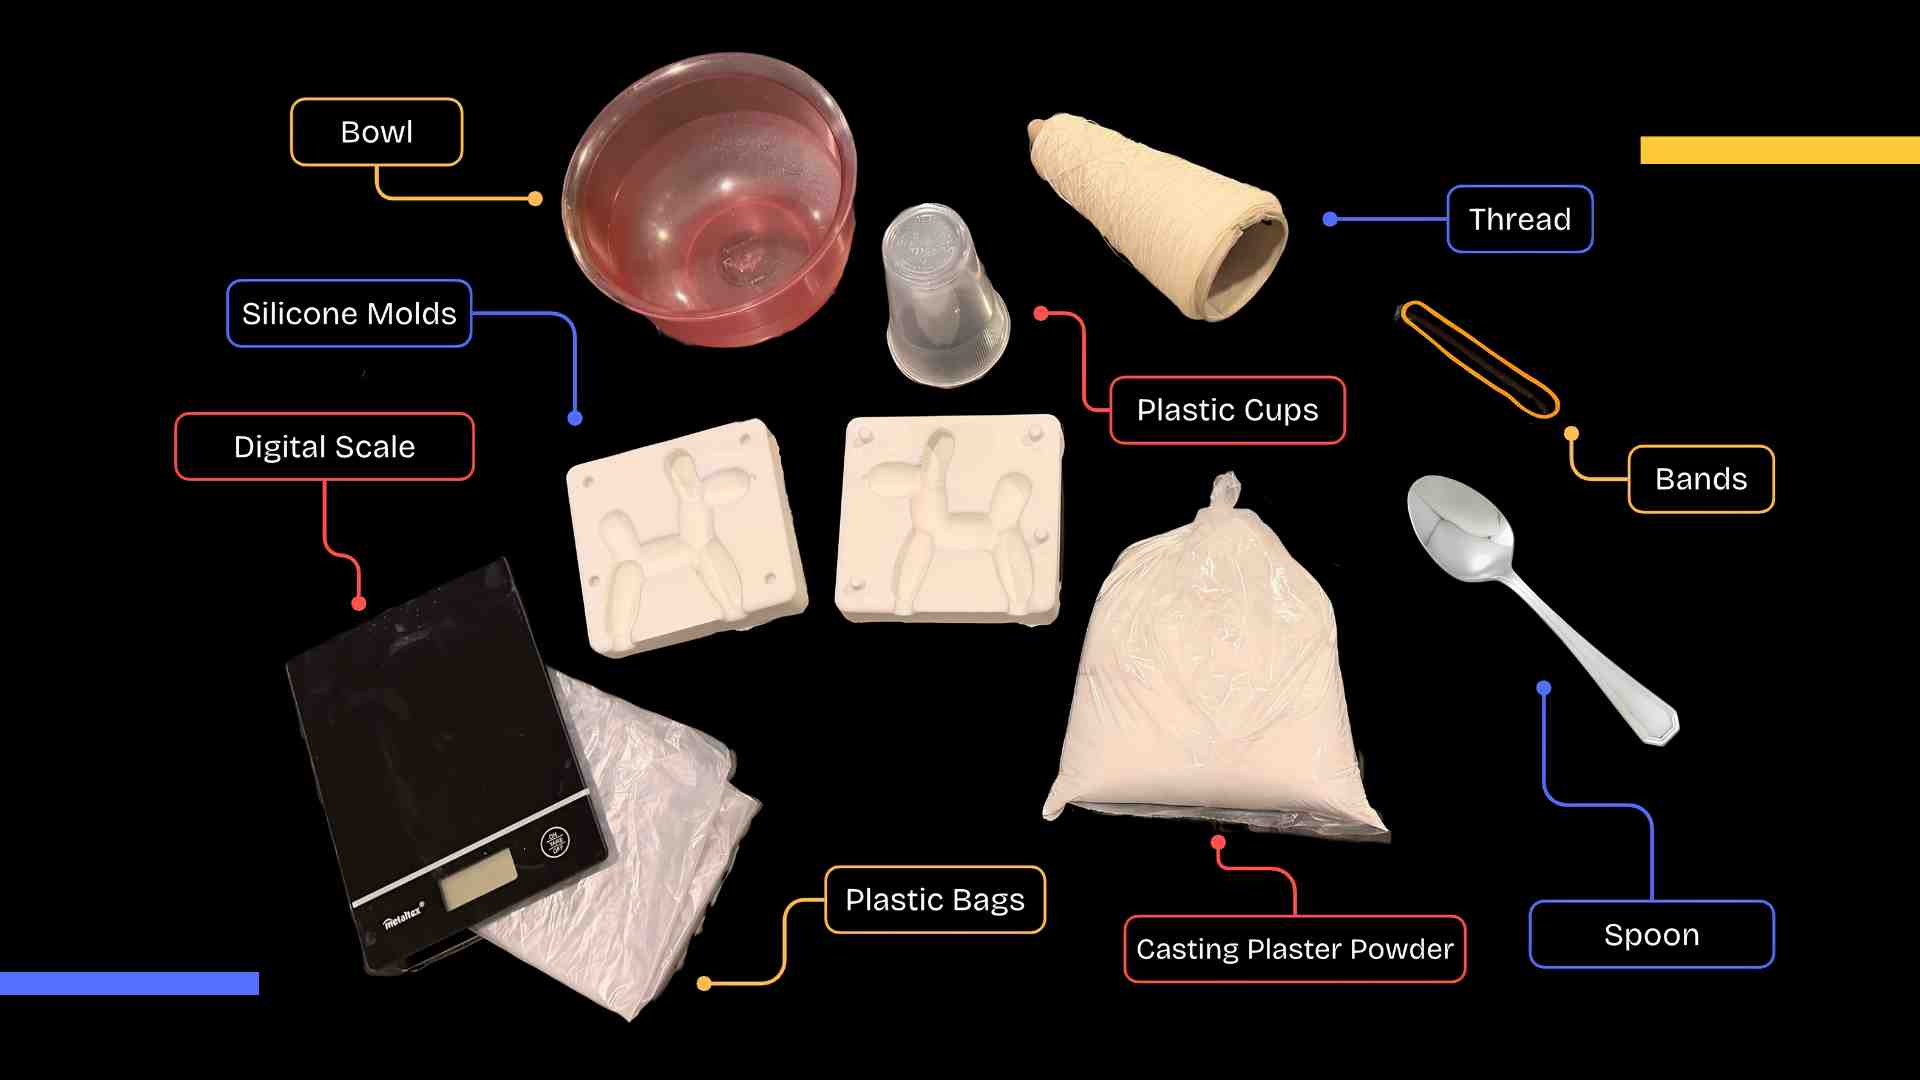
01. CASTING MATERIALS
For the plaster casting process, I prepared the necessary materials including the silicone molds, casting plaster powder, plastic cups, a bowl, a digital scale, thread, rubber bands and mixing tools.
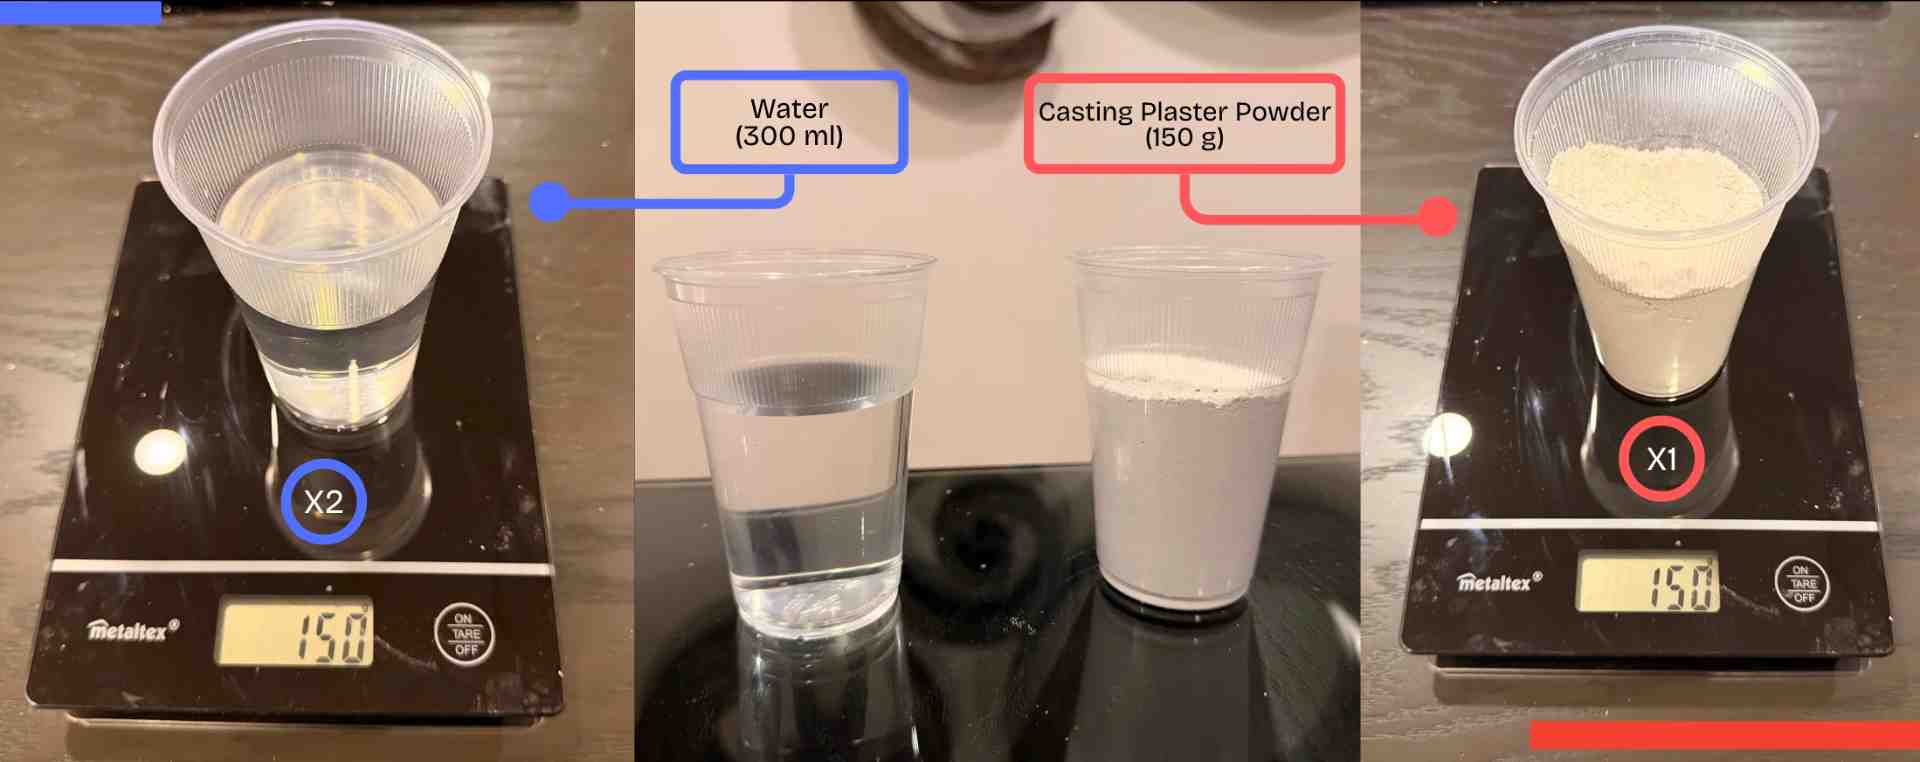
02. PLASTER POWDER PREPARATION
I measured the plaster mixture using a 2:1 ratio between water and casting plaster powder. For this process, I used 300 ml of water and 150 g of casting plaster powder before mixing both components until obtaining a smooth consistency.
04. MOLD SECURING PROCESS
Before pouring the plaster mixture, I aligned both silicone mold halves and secured them using masking tape and thread to prevent movement and material leakage during casting.
06. ADDITIONAL MOLD REINFORCEMENT
To further secure the mold during the curing process, I wrapped the assembly with a plastic bag and rubber bands. This helped keep both mold halves tightly compressed while the plaster cured inside.
✦ Final Casted Piece
After curing and demolding, I obtained the final plaster reproduction of the balloon dog geometry, preserving the shape and details generated from the silicone mold.
✦ Download Here!
In this section, you can find the downloadable source files developed during this week.