Software
Inkscape and Ink/Stitch
Fab Academy 2026
Exploring computerized embroidery using Ink/Stitch, Inkscape and a Brother Innov-is NS1850D embroidery machine.
Inkscape and Ink/Stitch
Innov-is NS1850D
Vectorization, embroidery path generation and textile fabrication
Download and configure Inkscape and Ink/Stitch.
Convert the artwork into a vector graphic suitable for embroidery.
Configure embroidery parameters and export a .PES file.
Prepare the machine and stitch the design onto fabric.
Computerized embroidery is a digital fabrication process that is conceptually very similar to CNC machining or 2D plotting.
Instead of using a cutting tool, the machine uses a needle and thread to follow predefined toolpaths and create patterns on fabric.
The embroidery machine interprets a stitch plan generated from a digital file, usually stored in formats such as .PES, .DST or .EXP. These files contain information about stitch direction, density, sequence and movement.
During operation, the needle remains fixed while the embroidery frame moves the fabric underneath, accurately reproducing the programmed design.
The first step was downloading and installing the software required to create embroidery files.
I downloaded Inkscape directly from its official website to ensure compatibility with the Ink/Stitch extension.
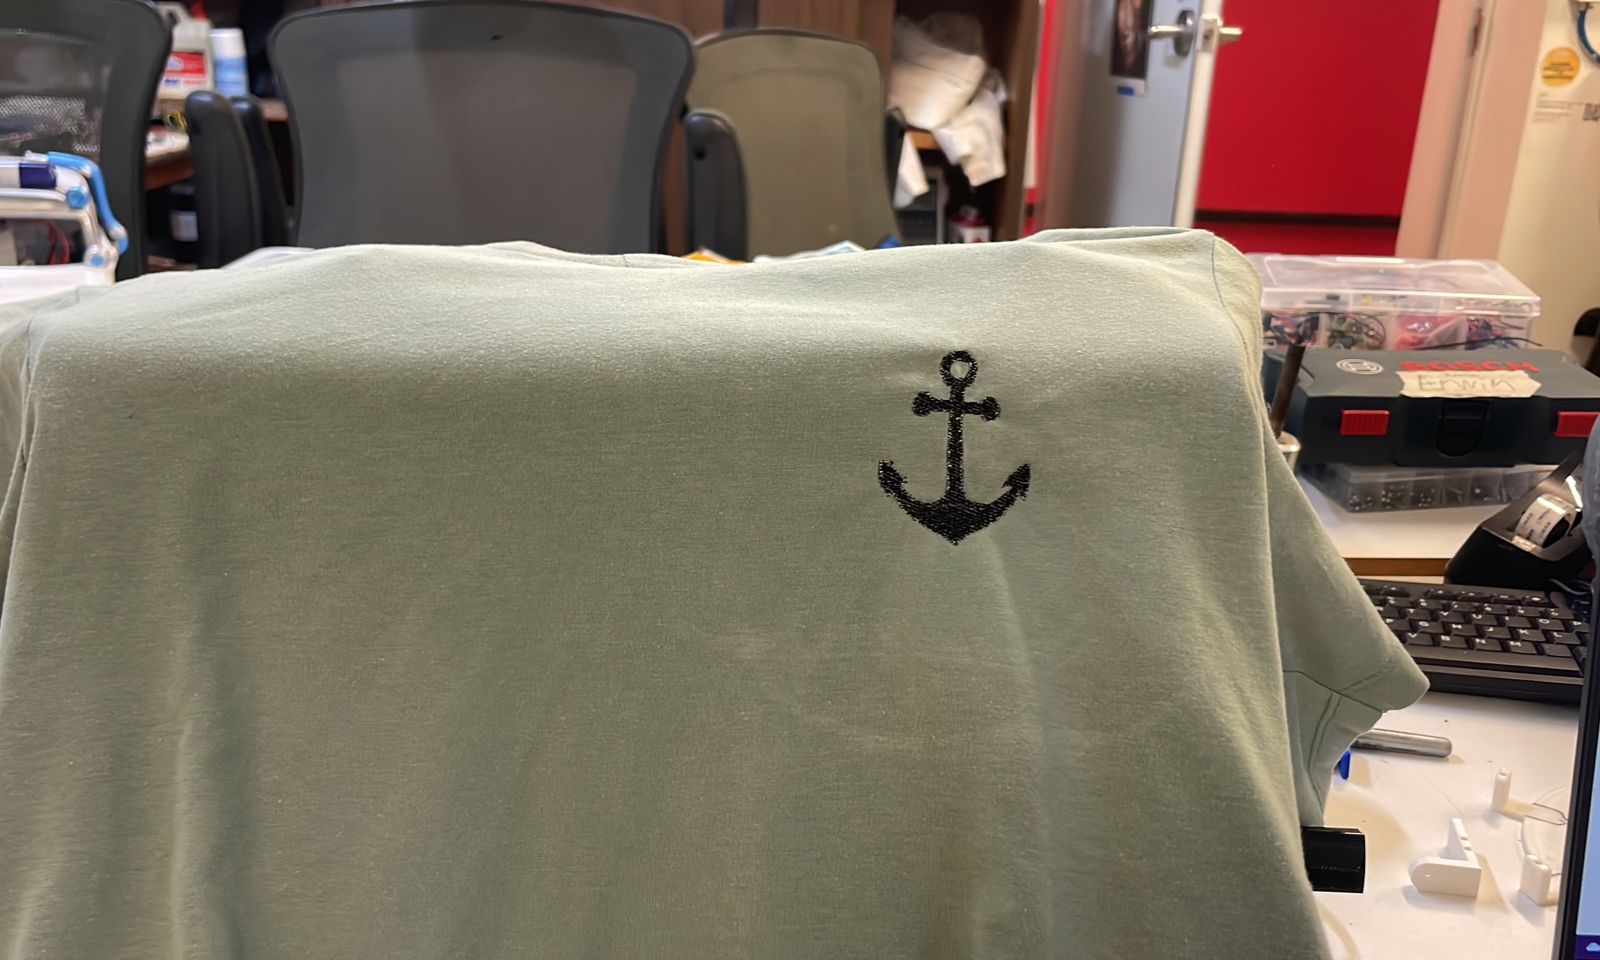
For this assignment I reused the same anchor design that I originally created during Week 02 for vinyl cutting.
Since both processes start from vector graphics, the workflow was very similar, you can see my week 02 page to see how I made it.
View Week 02 - Computer Controlled Cutting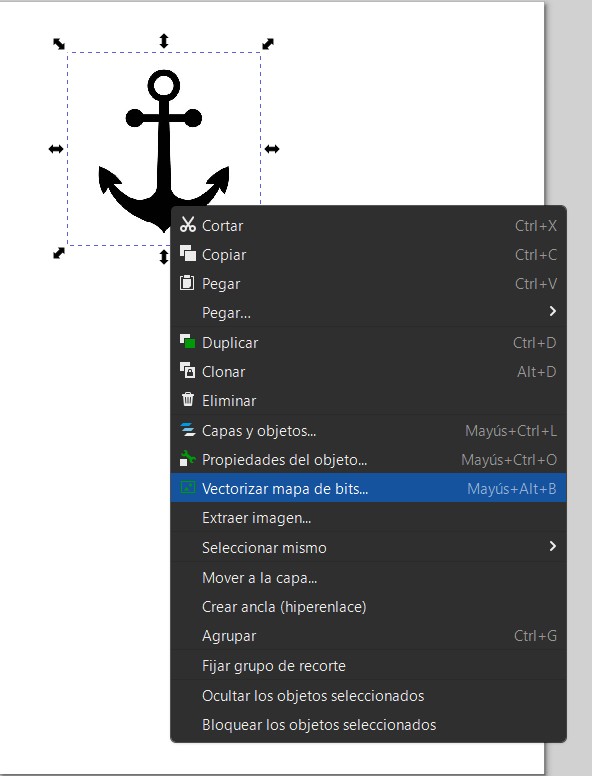
To transform the vector graphic into an embroidery-ready design, I used the Ink/Stitch extension inside Inkscape.
After selecting the anchor design, I opened:
Extensions → Ink/Stitch → Params
This menu allows configuration of stitch type, density, direction and sequence for each embroidery object.
Since it was my first time using embroidery software, I decided to use the default Ink/Stitch parameters to avoid introducing unnecessary errors, but after I asked CHATGPT to explain what each of them does, here is a summary of the 6 most important parameters:
Defines the embroidery fill pattern used to cover an area, affecting both appearance and stitch behavior.
Controls the direction of the fill stitches, influencing texture, light reflection, and fabric stability.
Determines the density of the embroidery by setting the distance between stitch rows.
Sets the longest stitch allowed in the fill pattern, helping maintain stitch quality and consistency.
Compensates for fabric and thread tension to preserve the intended dimensions of the design.
Optimizes internal thread paths to reduce visible jumps and improve the overall embroidery finish.
Once the embroidery settings were configured, I exported the project as a .PES file, which is compatible with the embroidery machine used during this assignment.
The generated file was copied to a USB drive and then transferred to the machine.
.PES embroidery file generated with Ink/Stitch.
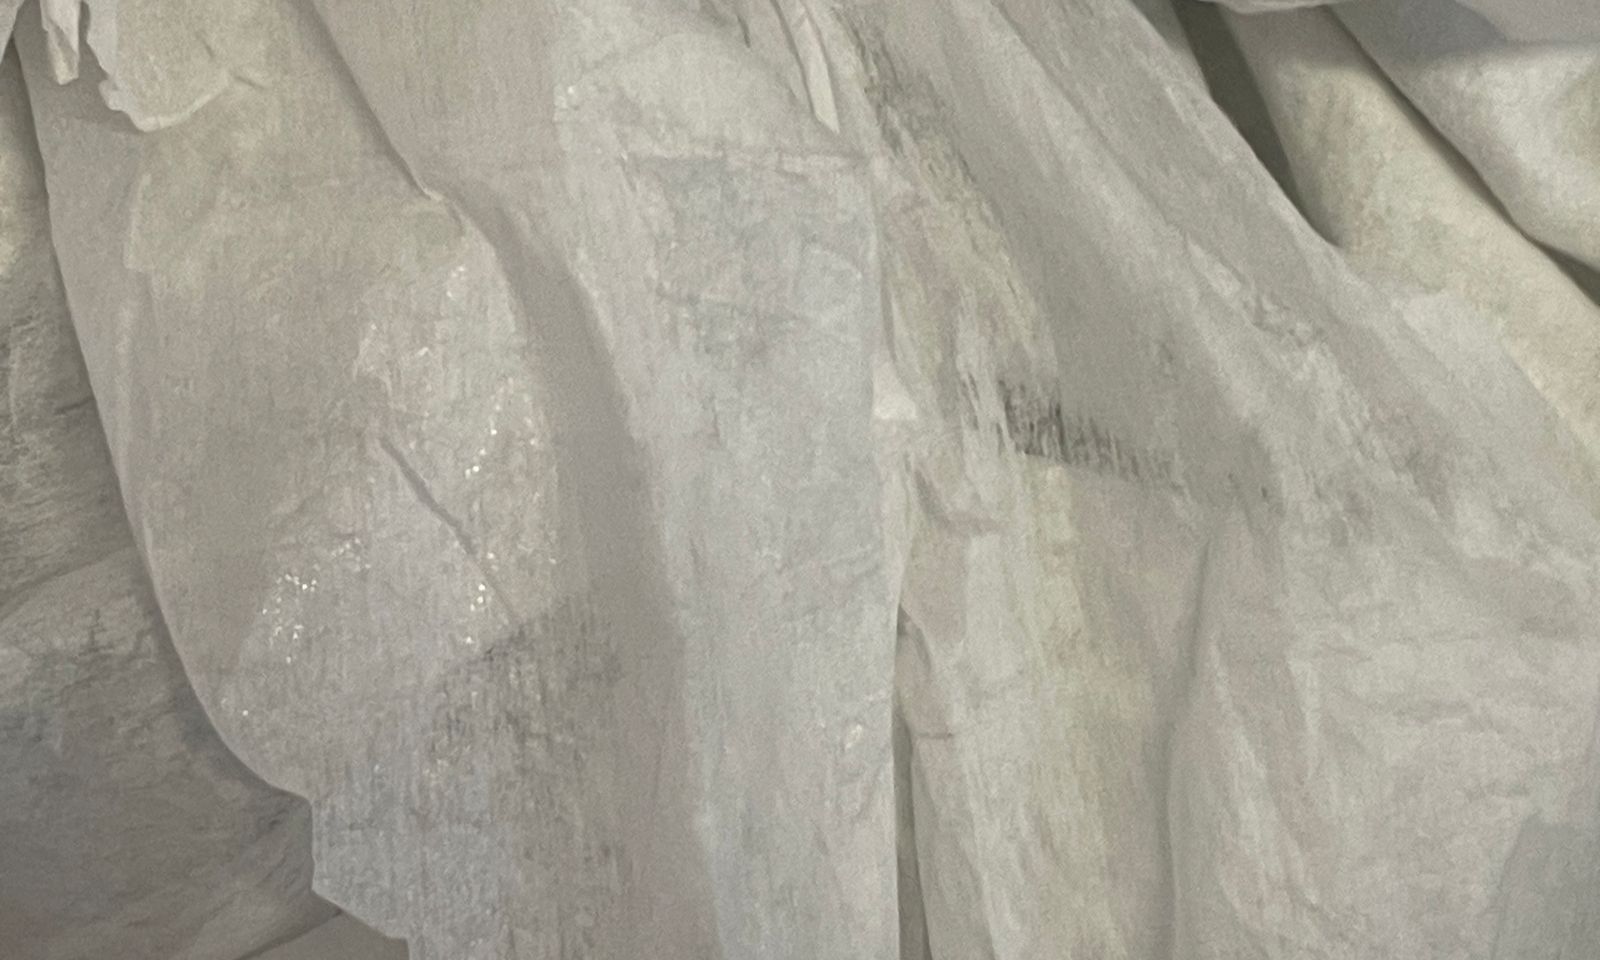
Before embroidery, I cut a piece of stabilizer backing and placed it underneath the fabric.
The stabilizer helps prevent deformation and improves stitch quality during the embroidery process.
I then mounted the fabric inside the embroidery hoop, making sure it remained tight and evenly stretched.
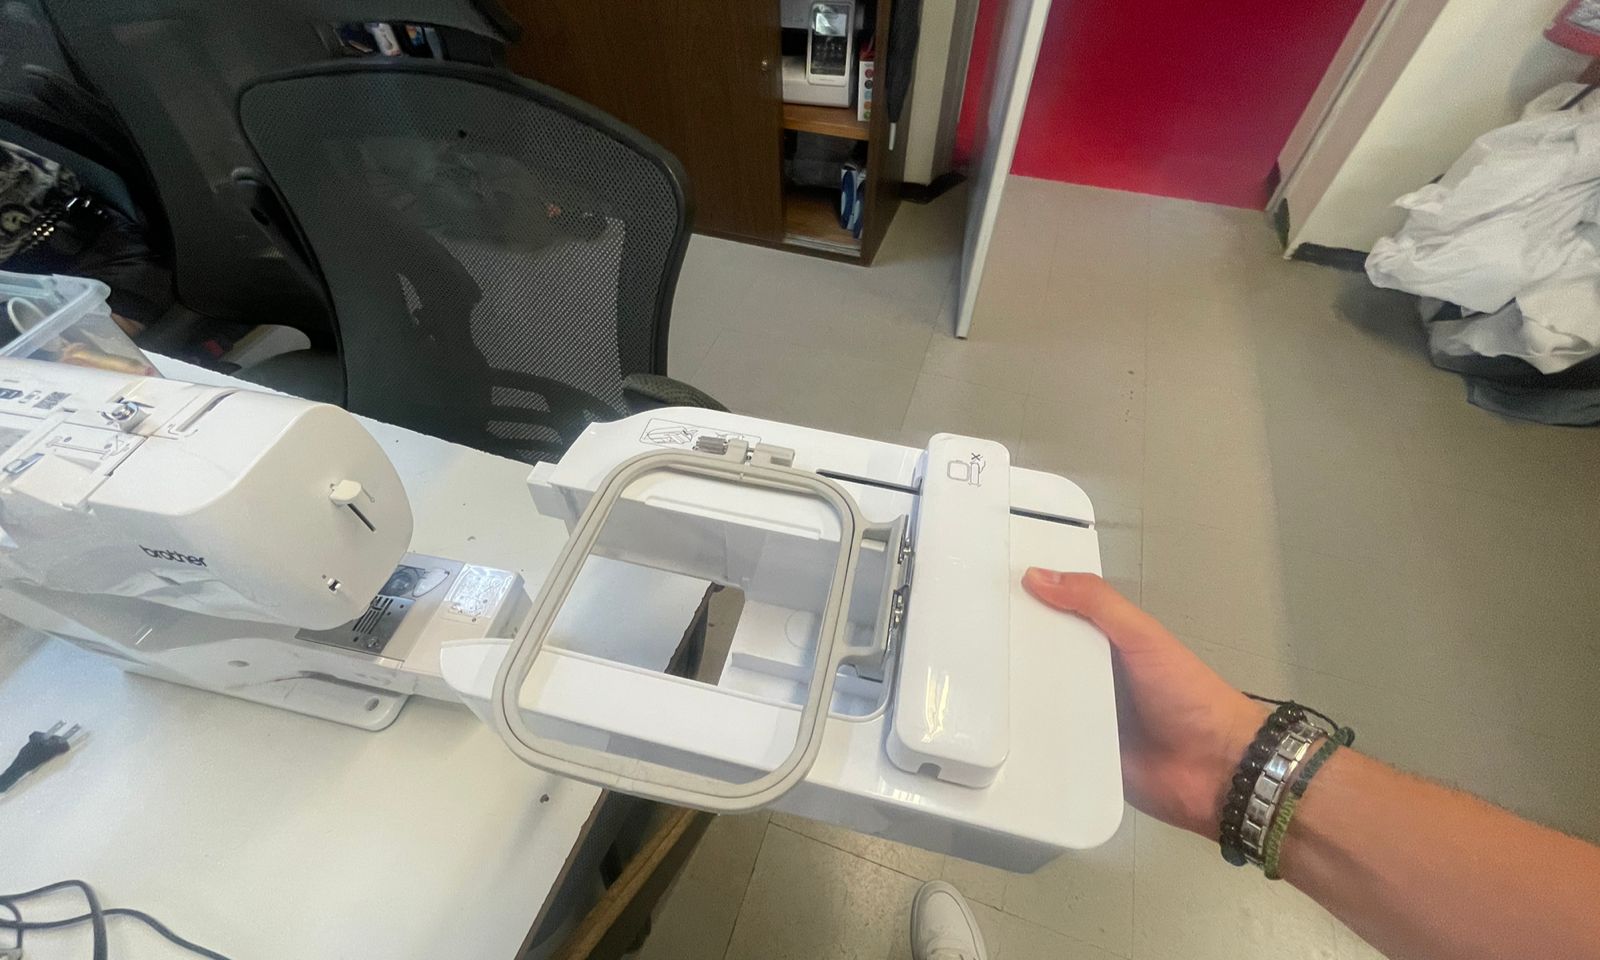
The embroidery machine used during this assignment was a Brother Innov-is NS1850D.
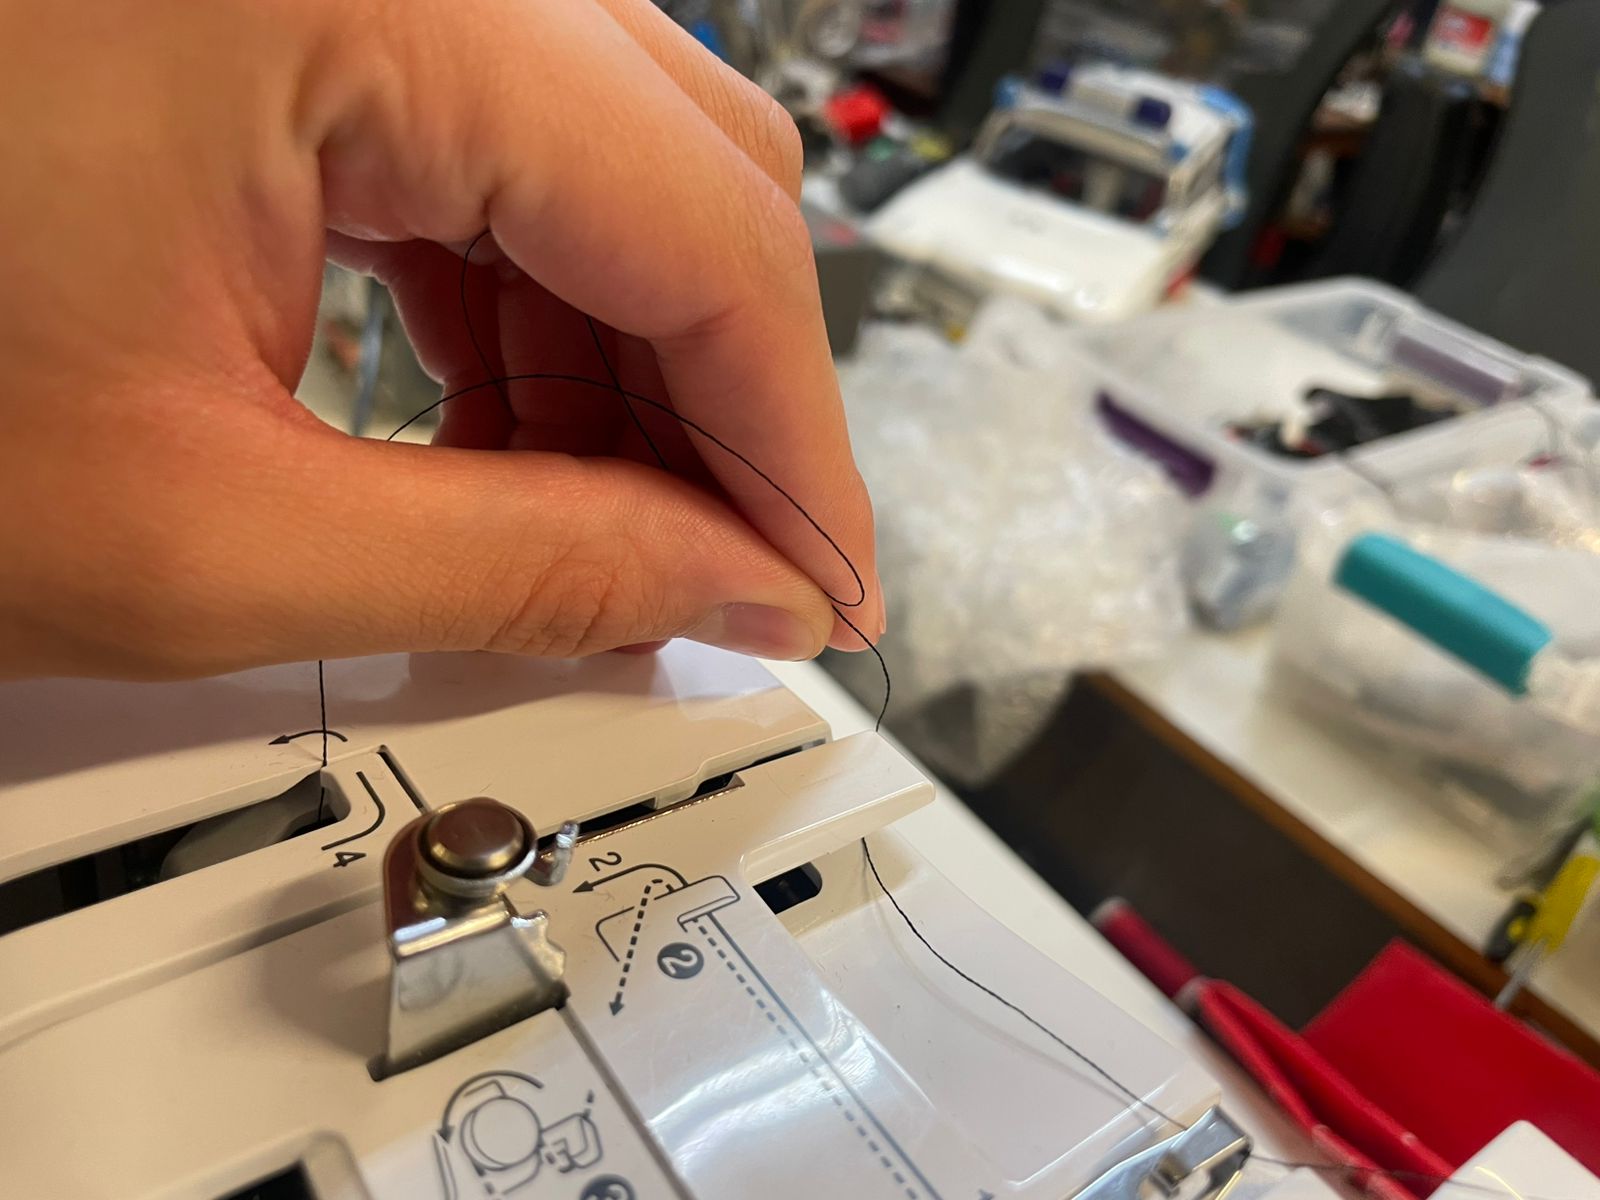
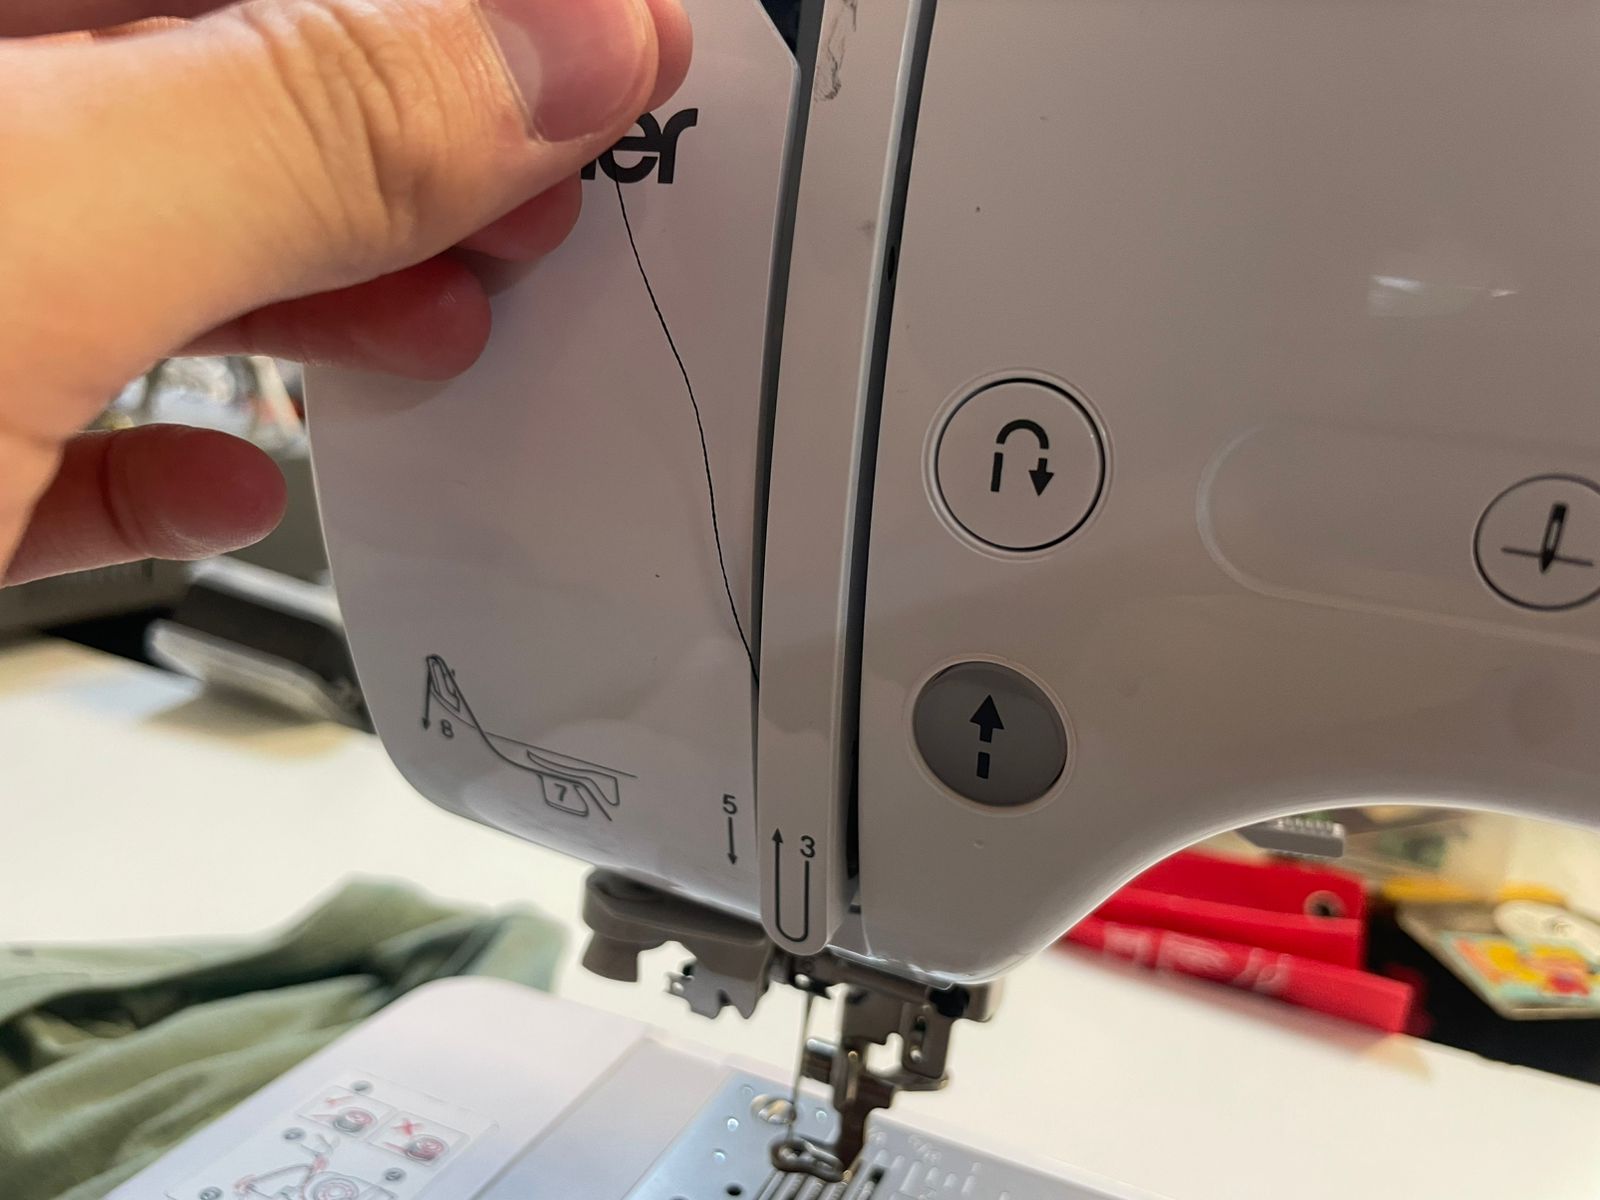
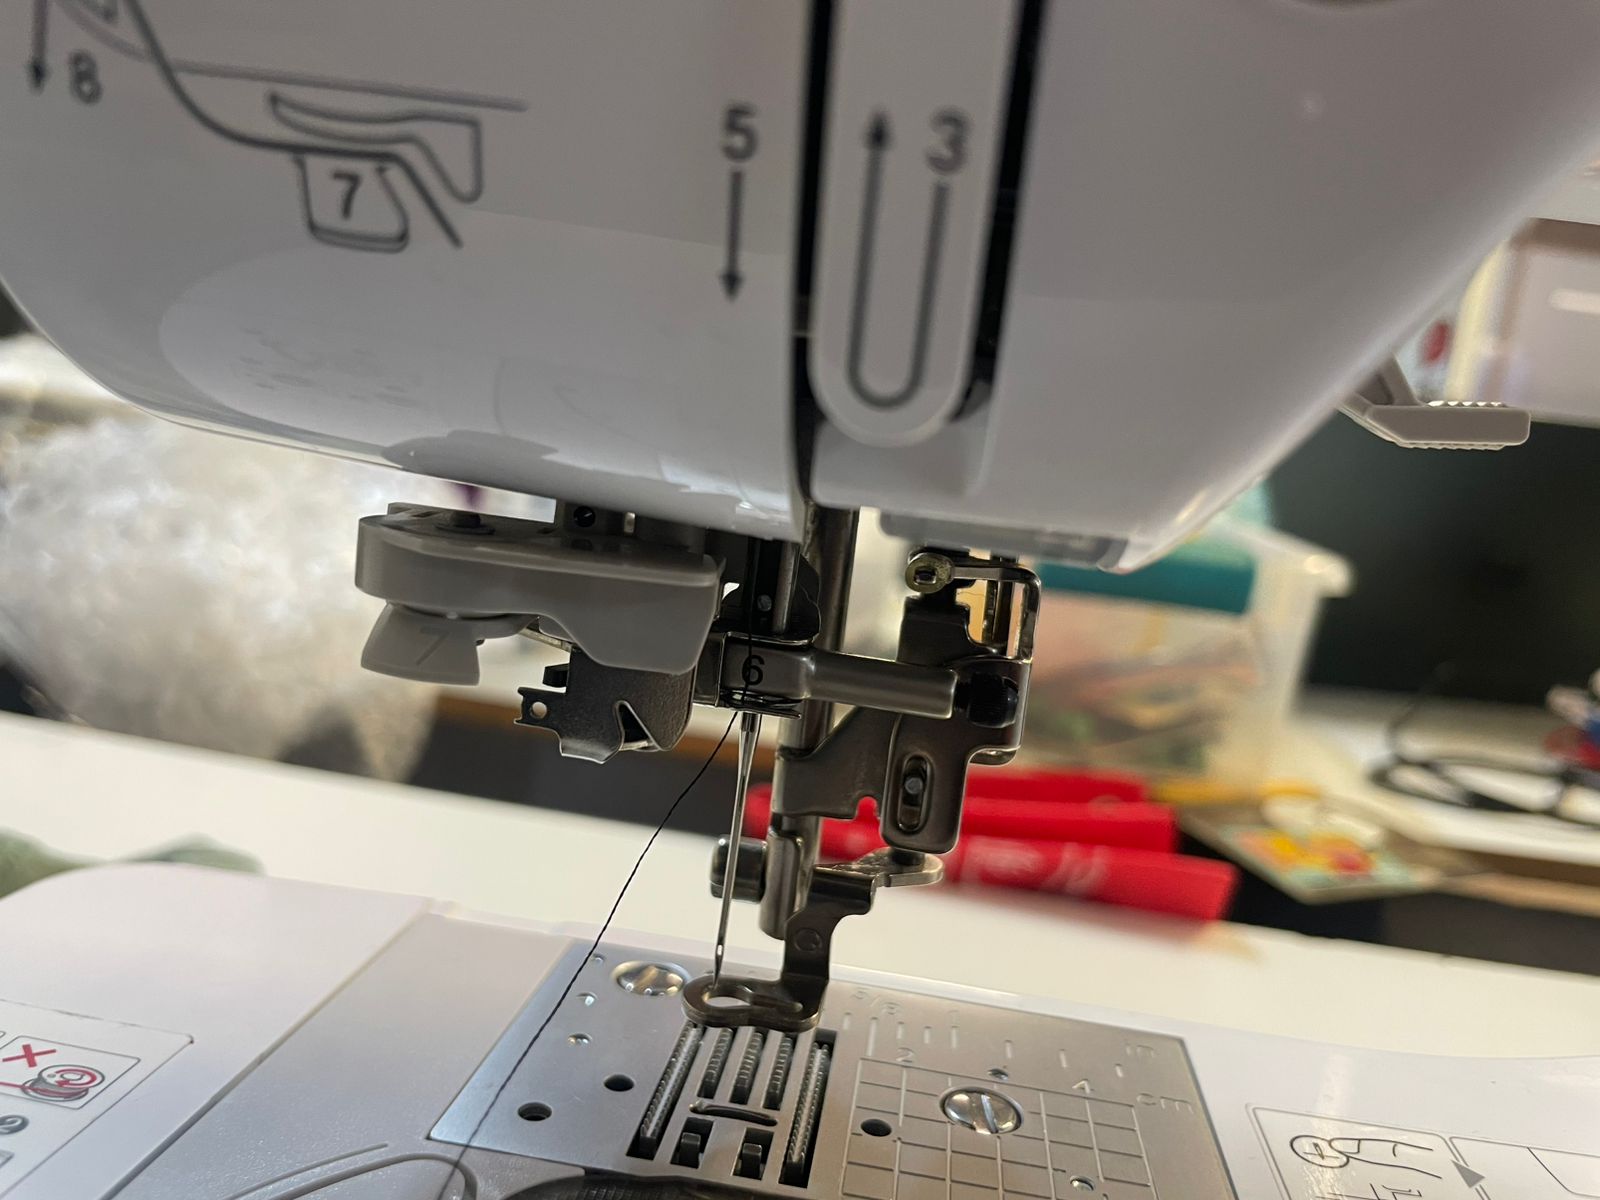
Before starting the embroidery process, I threaded the machine and prepared the embroidery frame.
The machine includes numbered guides and directional arrows that make threading intuitive and beginner-friendly.

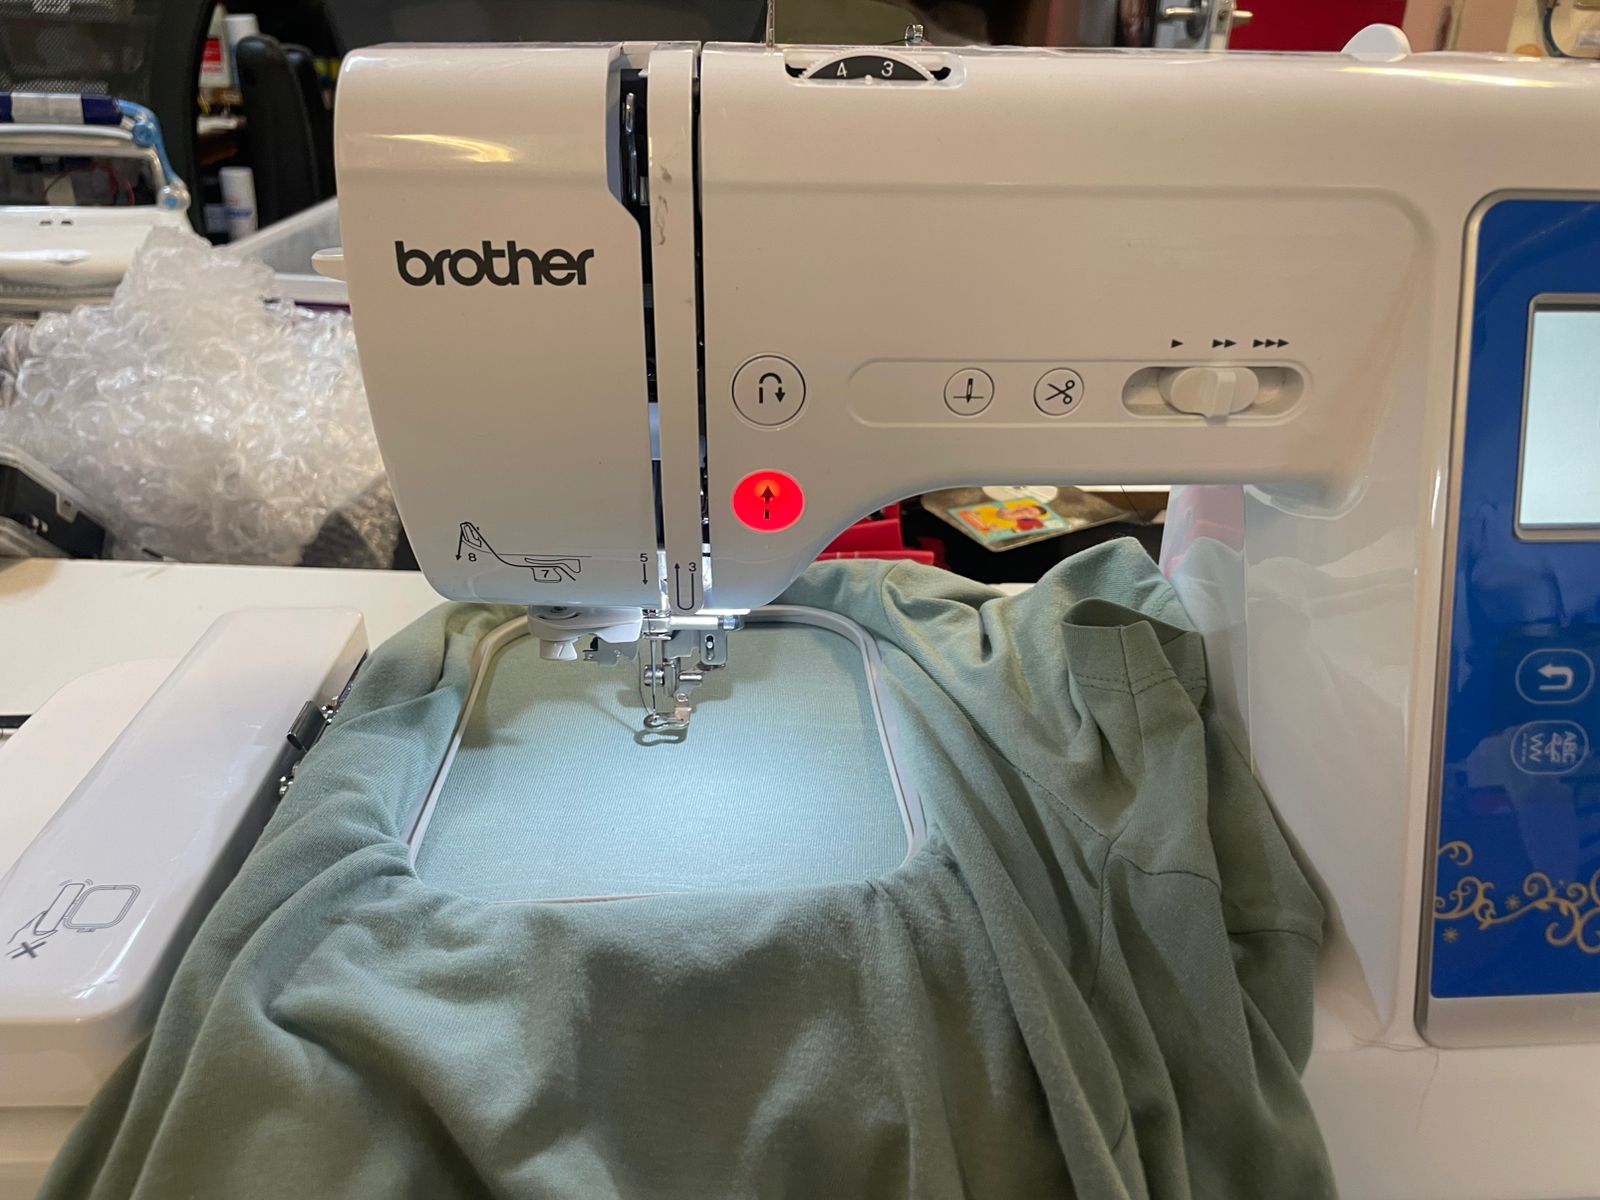
After securing the fabric, I loaded the file from the USB drive and lowered the embroidery frame mechanism.
Finally, I pressed the green start button and the machine automatically executed the embroidery path.
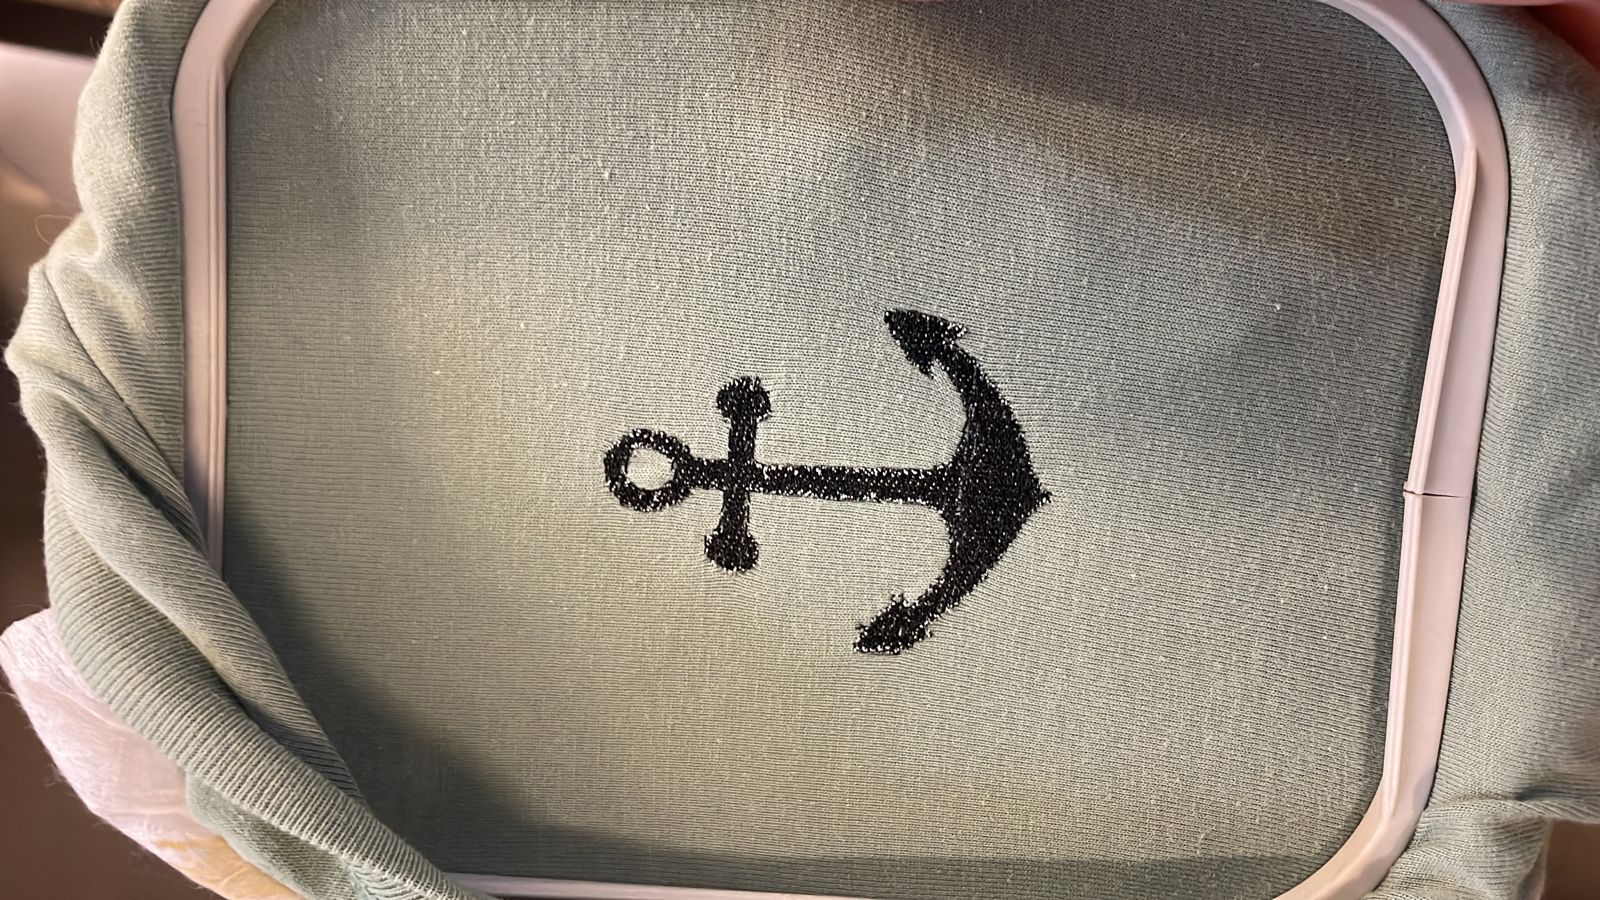
After the embroidery process finished, I removed the fabric from the hoop and inspected the final result.
The anchor design was successfully reproduced using thread, demonstrating how vector graphics can be transformed into textile products through digital fabrication.
Through this assignment I learned that computerized embroidery follows many of the same principles used in other digital fabrication processes.
Just as CNC machines and vinyl cutters follow toolpaths generated from vector graphics, embroidery machines execute stitch paths generated from digital files.
Using Ink/Stitch helped me understand how design parameters such as stitch density, direction and sequencing influence the final result.
This week also showed me how digital fabrication can be applied to textiles, expanding the range of materials and manufacturing methods available for future projects.