Molding and Casting
Task:-
Group assignment:
- Review the safety data sheets for each of your molding and casting materials
- Make and compare test casts with each of them
- Compare printing vs milling molds
Individual assignment
- Design a mold around the process you'll be using, produce it with a smooth surface finish that does not show the production process toolpath, and use it to cast parts.
Overview of Group Assignment
As part of the group assignment, we learnt about the molding and casting materials available in the lab,
including Aditya Silicone Rubber RTV - 1010, Aditya Ultra Clear Cast Epoxy - 37, and Mould Releasing Spray 1083.
We studied their safety information, mixing ratios, working times, and curing times.
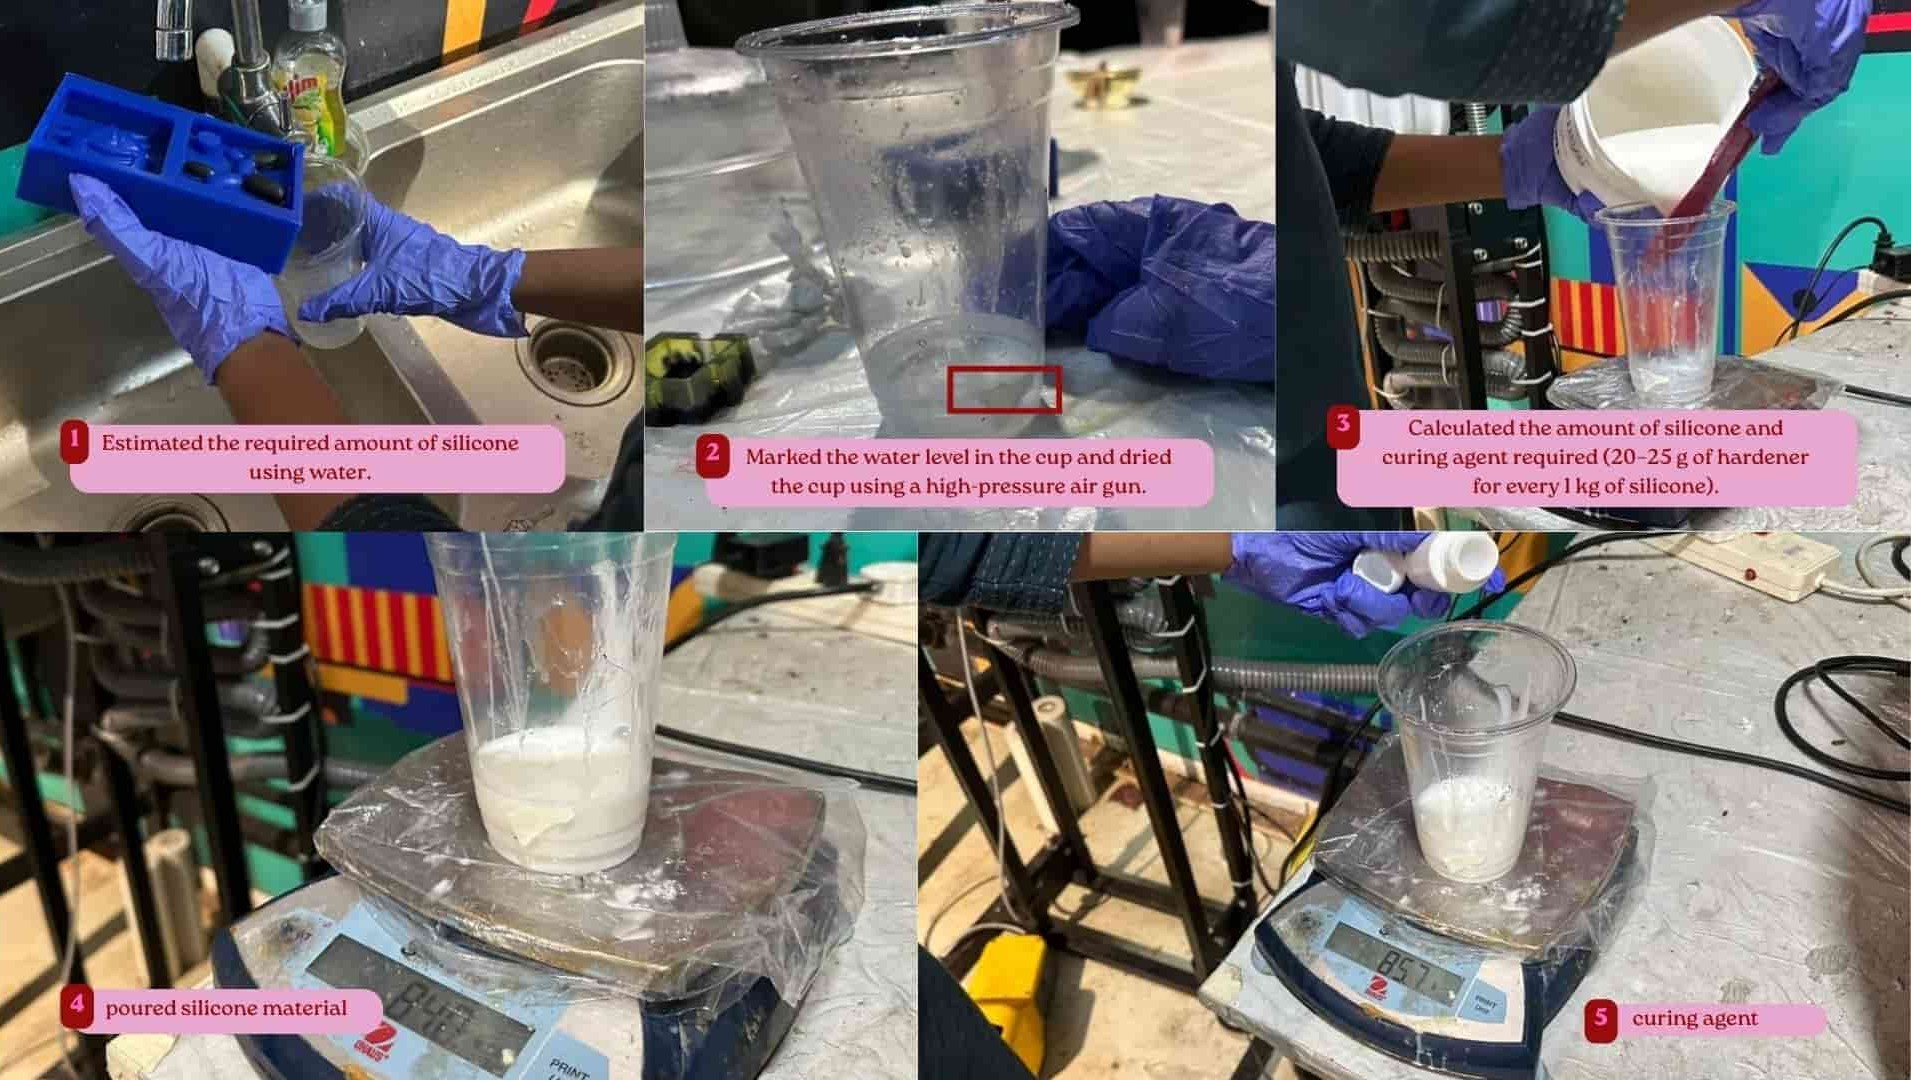
The silicone mold was prepared by mixing 20-25 g of hardener for every 1 kg of silicone (2-2.5%),
with a working time of 8-10 minutes and a curing time of 12-24 hours.
For casting, the epoxy resin was mixed in a 2:1 ratio (Part A : Part B = 100 : 50 by weight) and
cured in 12-24 hours (around 18 hours in our test).
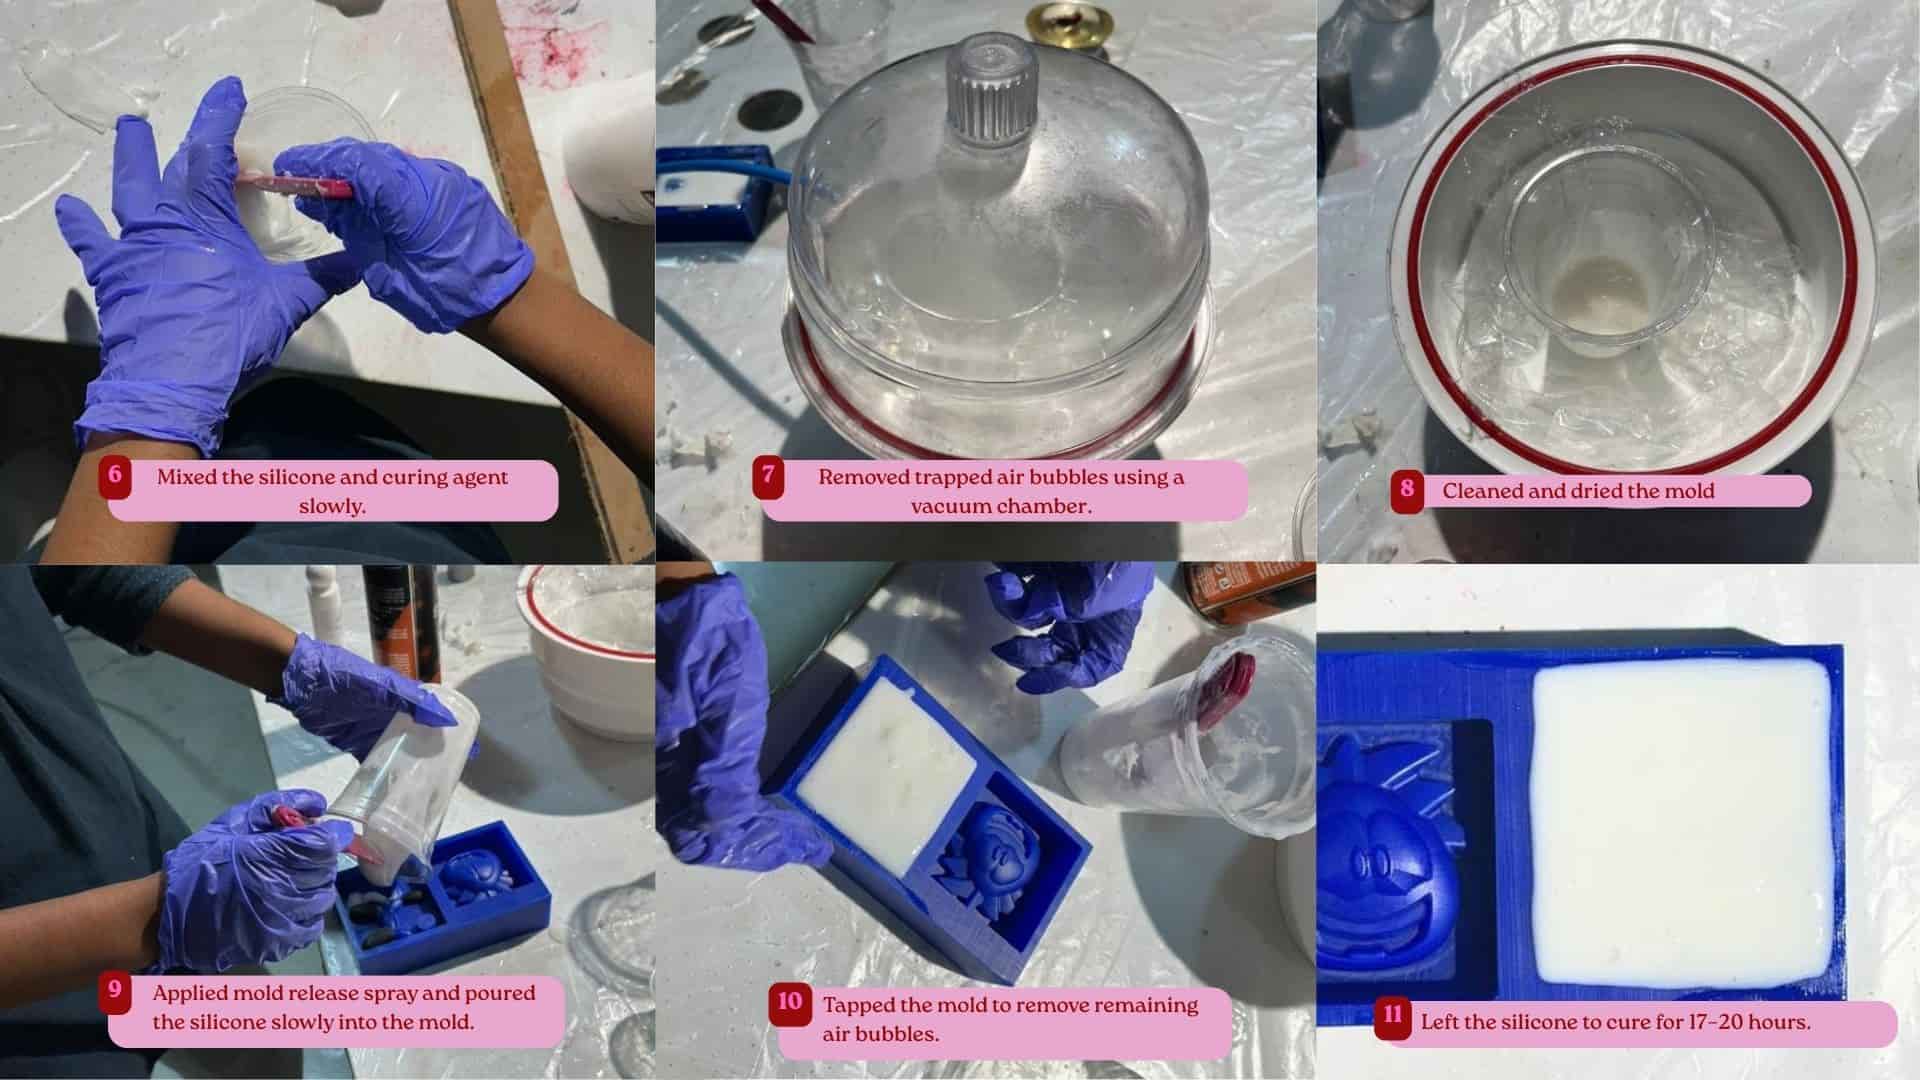
Through the practical exercises, we learnt about proper mixing, pouring, vacuum degassing for silicone,
and the use of Mold Releasing Spray 1083 for easy demolding.
This activity helped me understand molding and casting workflow, measurements and timing.
For detailed information, refer to: Molding and Casting Group Assignment Overview
Individual Assignment
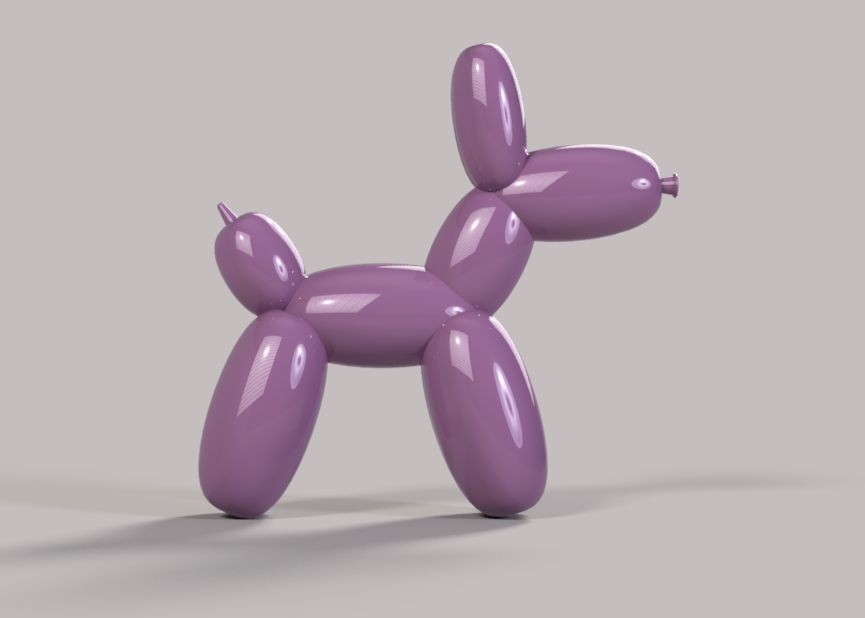
I first tried designing a girl doll, followed by a dancing wardrobe and a telephone model. After exploring these different ideas, I finally decided to make a balloon dog.
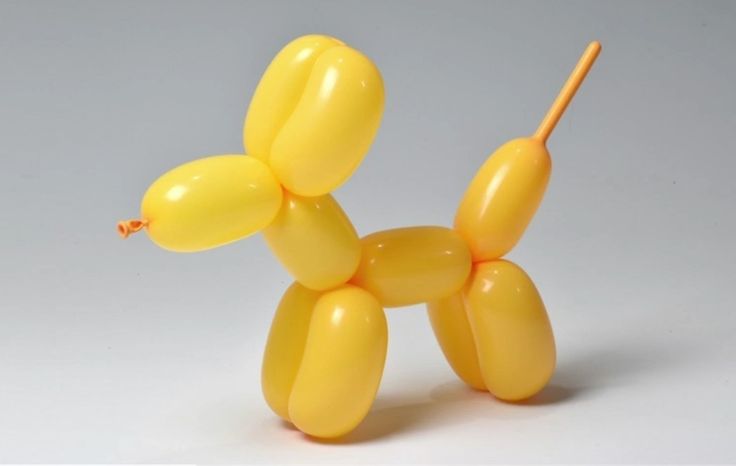
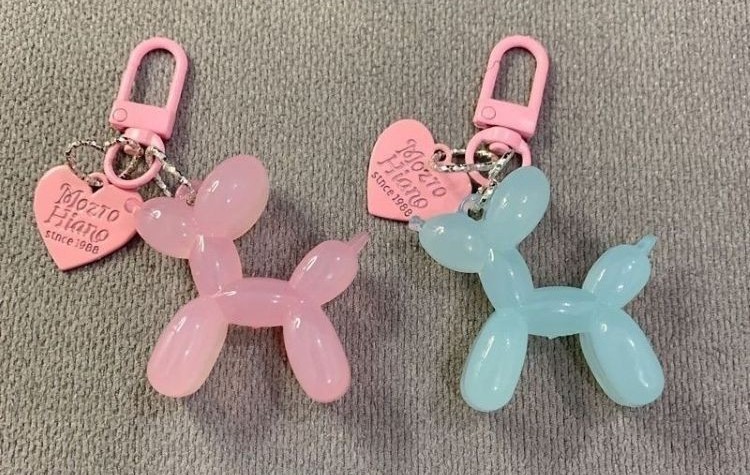
Source: img1_Pinterest img1_Pinterest
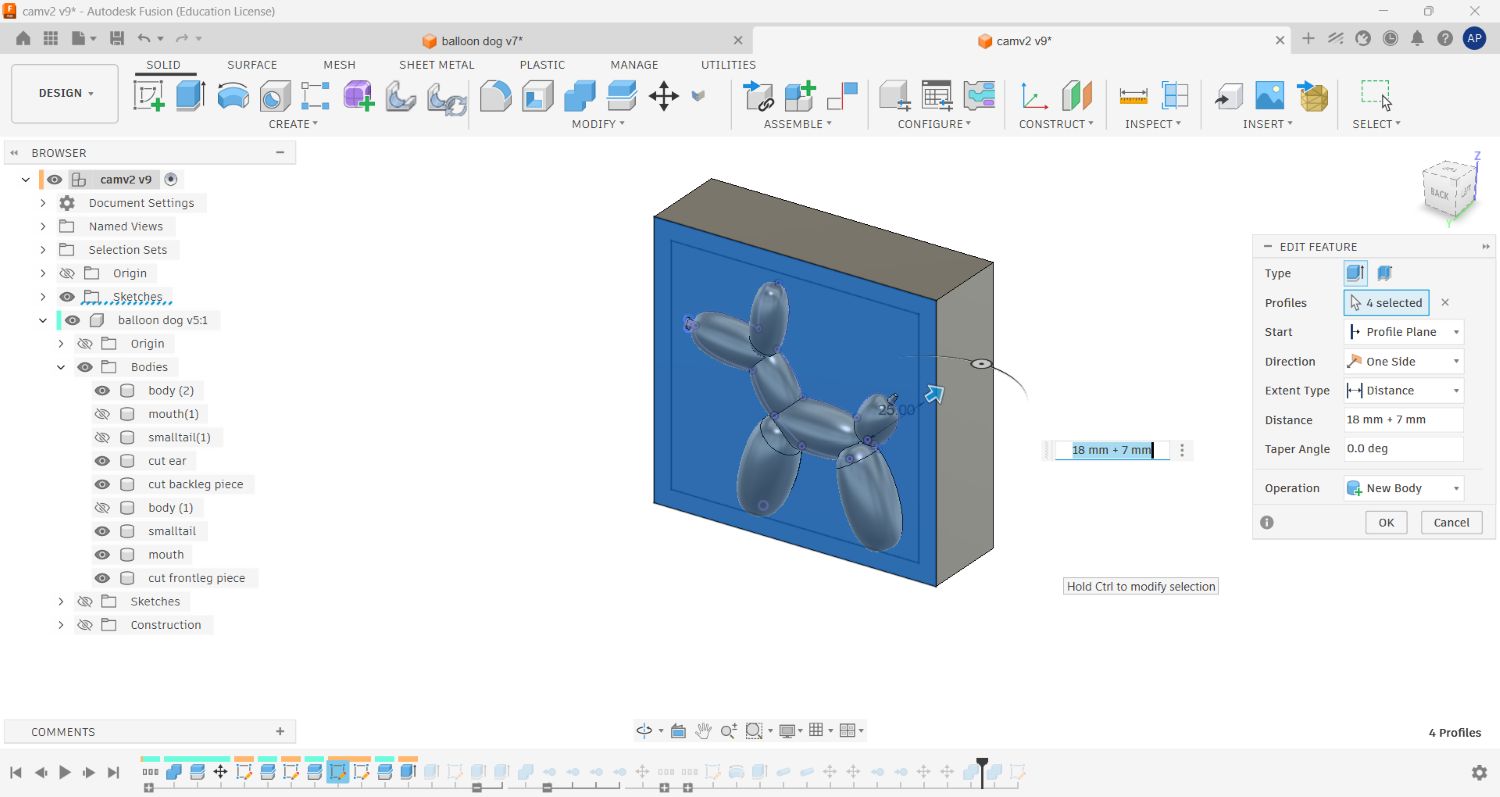
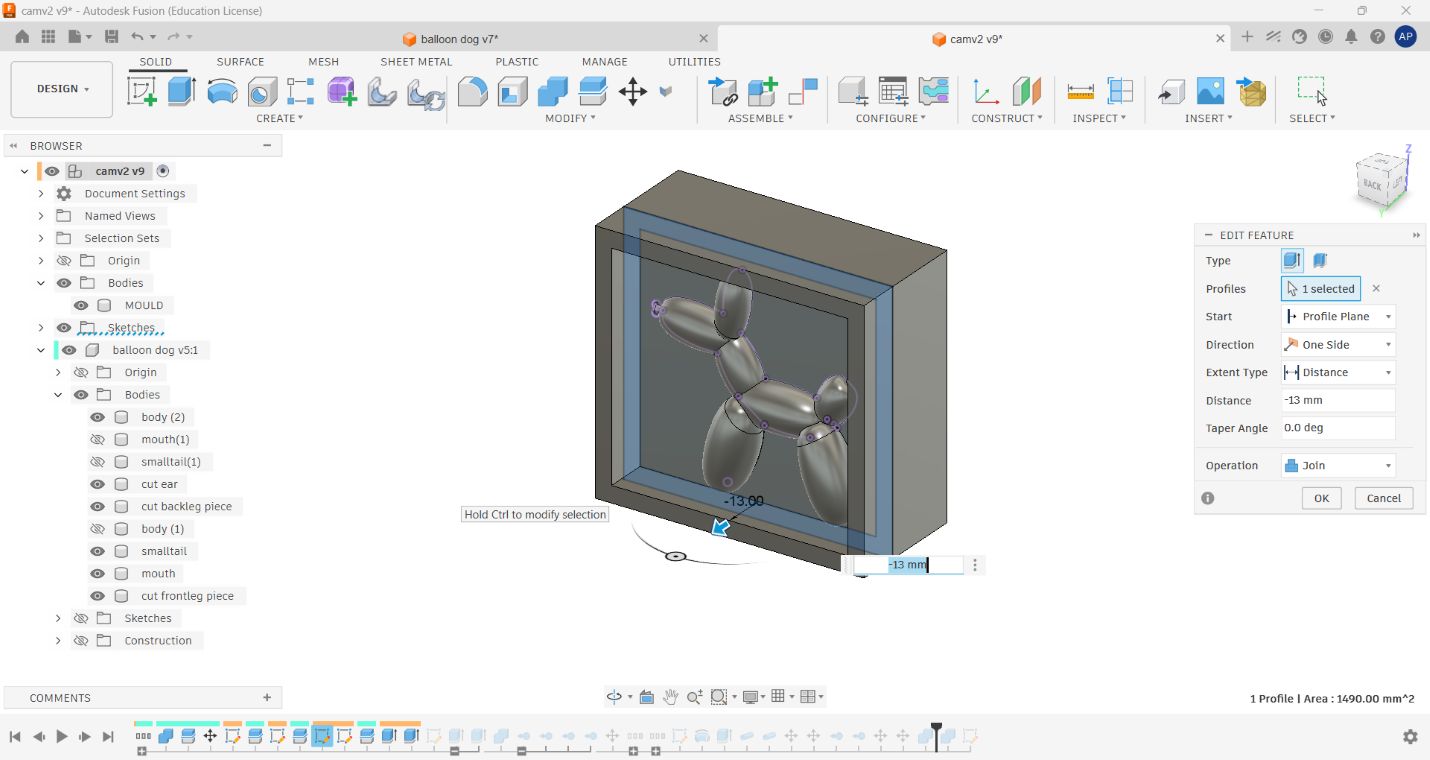
After finalizing the balloon dog concept, I designed the model in Fusion 360. For now, i decided to create a one-sided mold for this assignment. However, while designing the mold, I also included a runner and vent so that I can later fabricate the second half and convert it into a two-part mold for complete casting.
Design the mold: Fusion 360
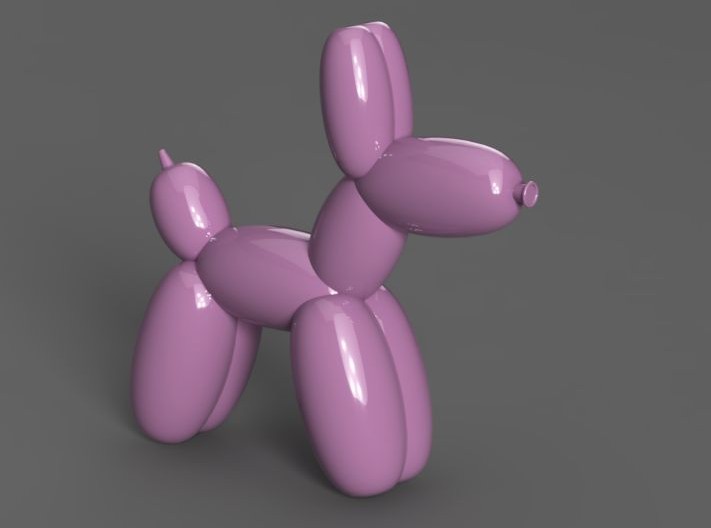
Creating Balloon dog 3d model
I used the Loft tool in Fusion 360 to create the balloon-like shapes. First, I sketched three circles—a larger circle in the center and two smaller circles at the ends. I then used the Loft feature to connect them into a balloon segment.
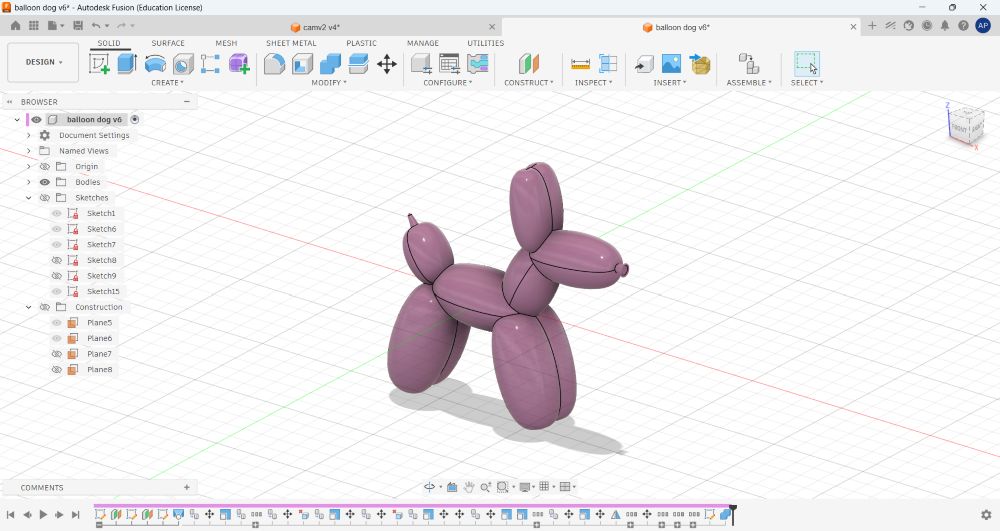
After creating one segment, I copied, pasted, scaled, and moved it to form the different parts of the balloon dog. Finally, I modeled the tail and mouth to complete the design.
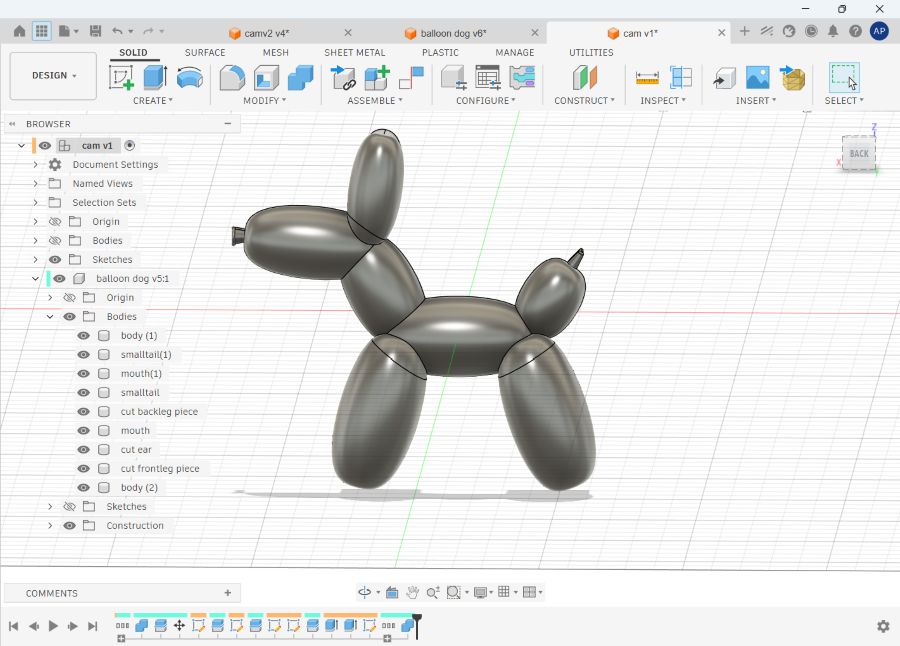
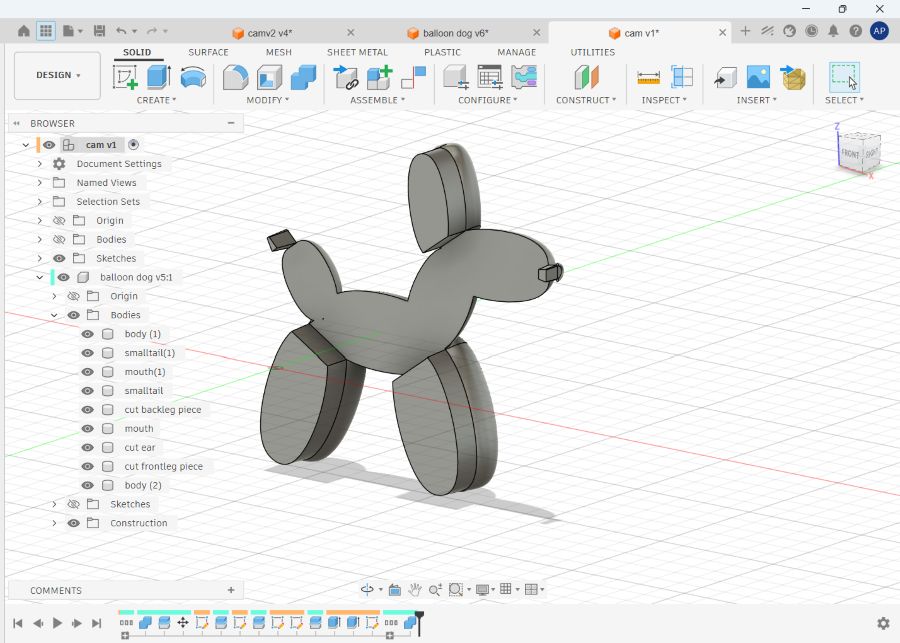
Spliting the bodies for 3d printing and preparing to make it's mold
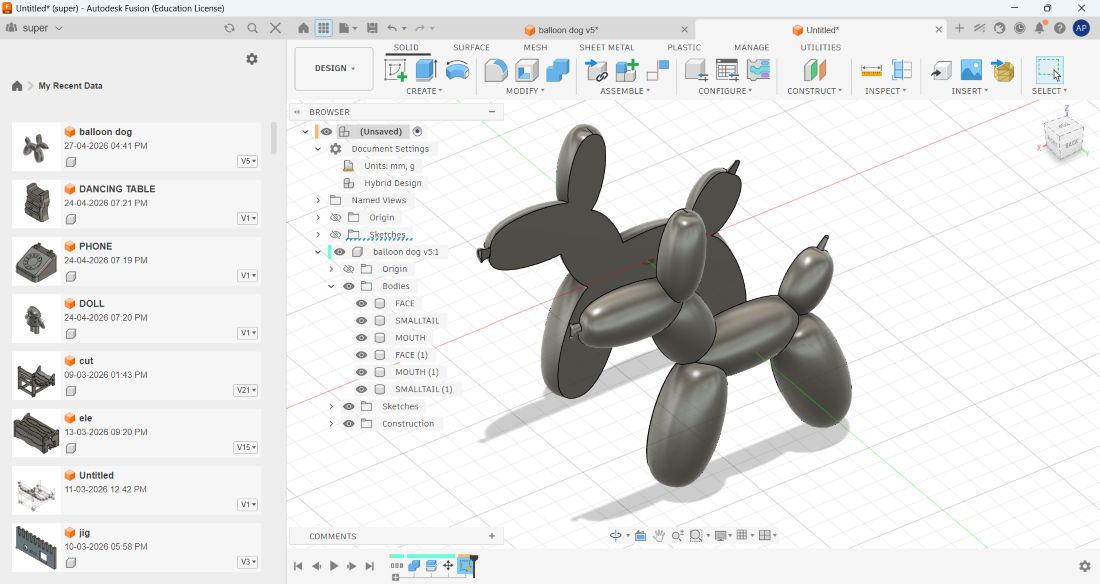
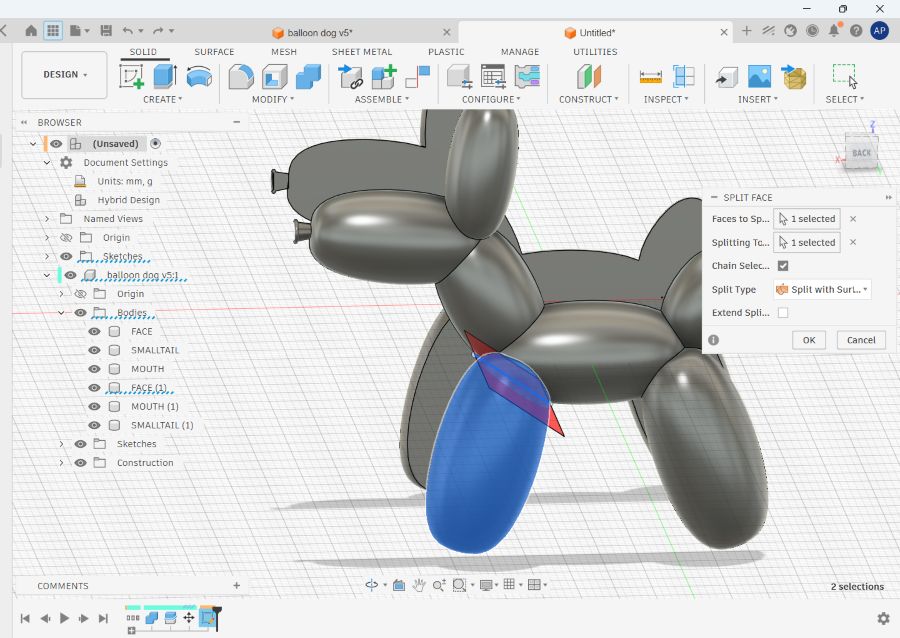
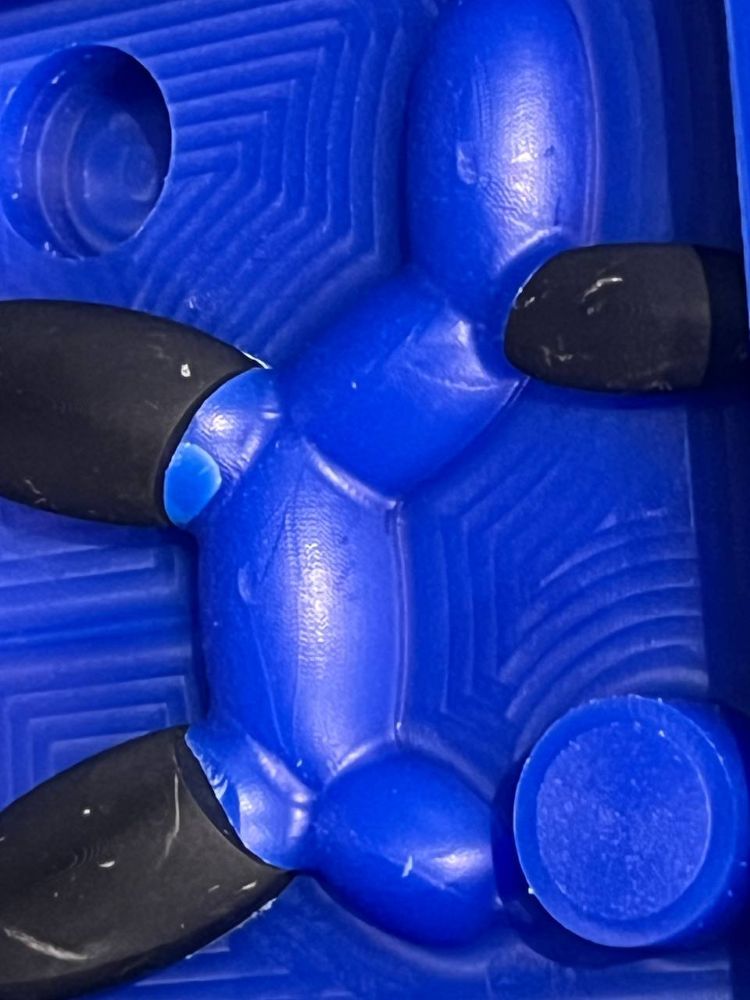
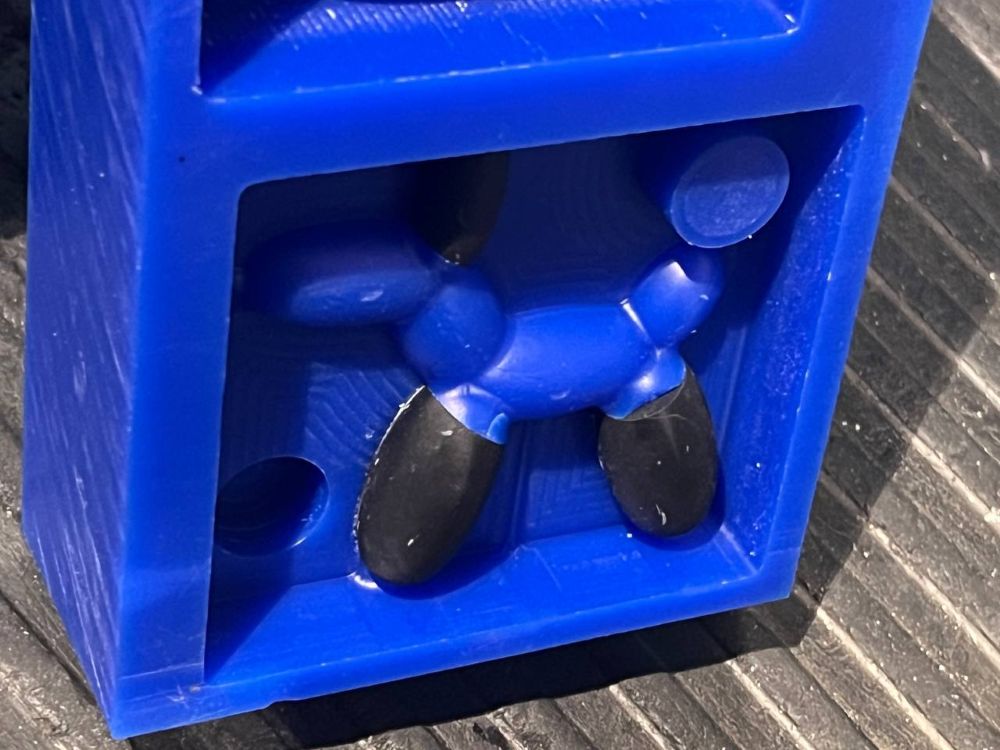
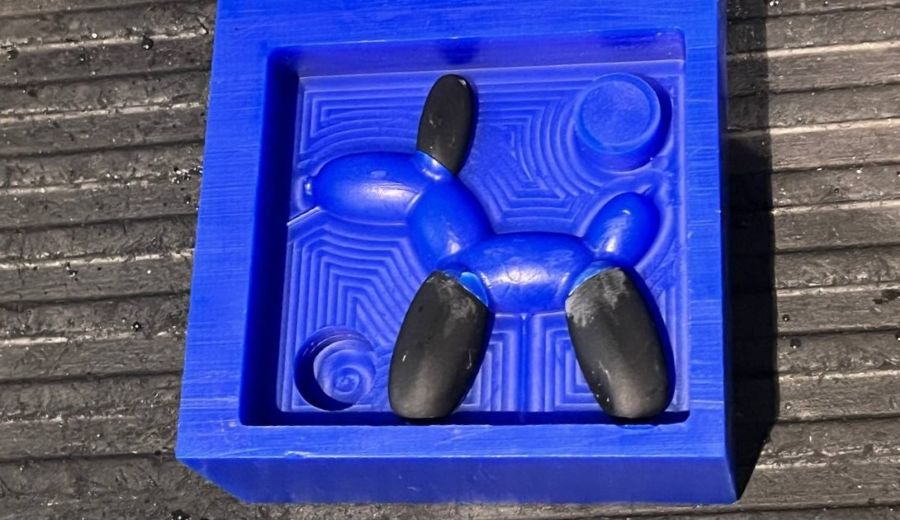
I palnned to use two fabrication methods because the milling tool could not reach all the curved surfaces of the balloon dog. For achieving this shape, the main mold was milled in wax, while the curved parts like legs, ear were 3D resin printed and inserted into the wax mold.
Creating the mold
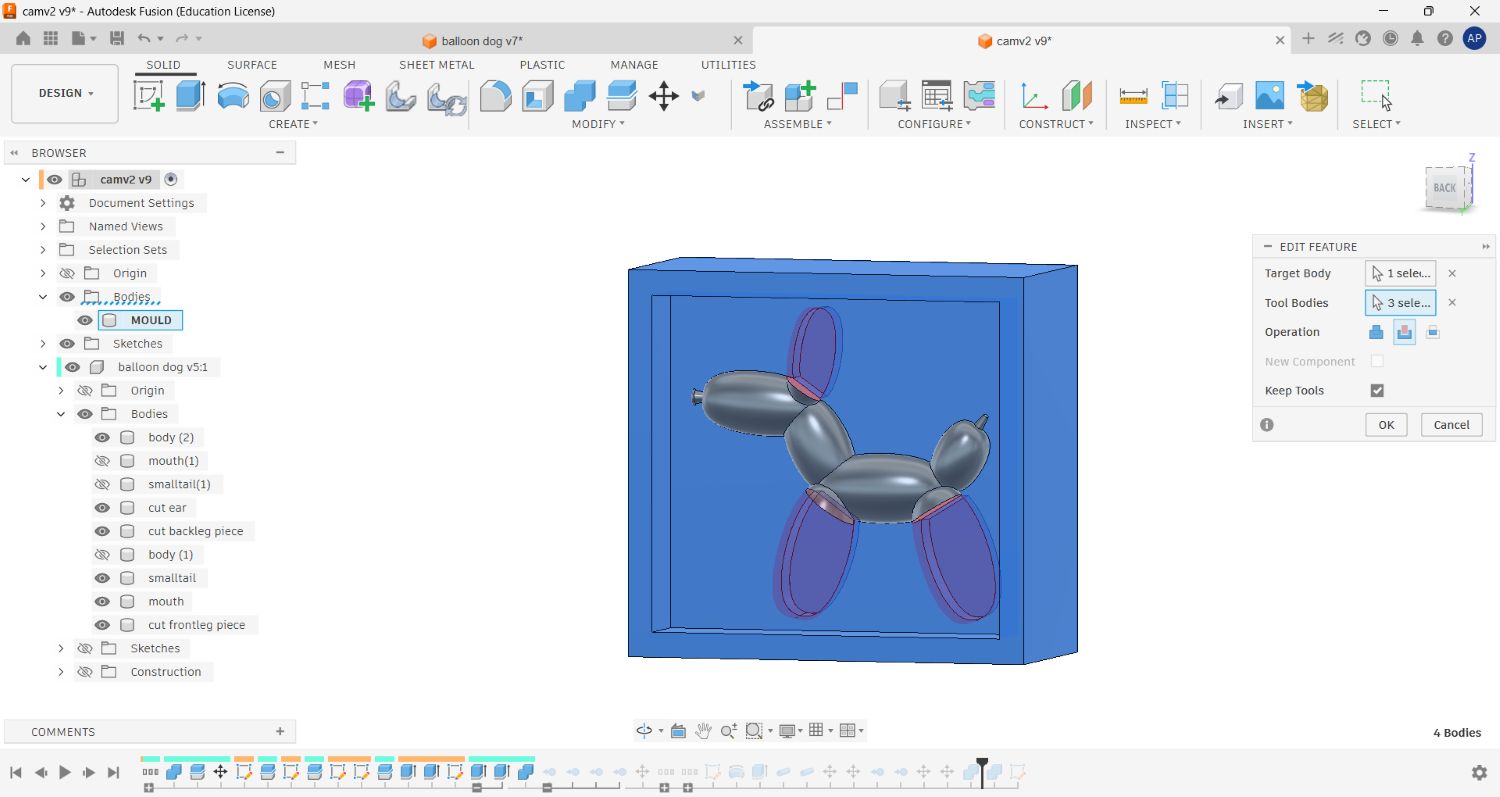
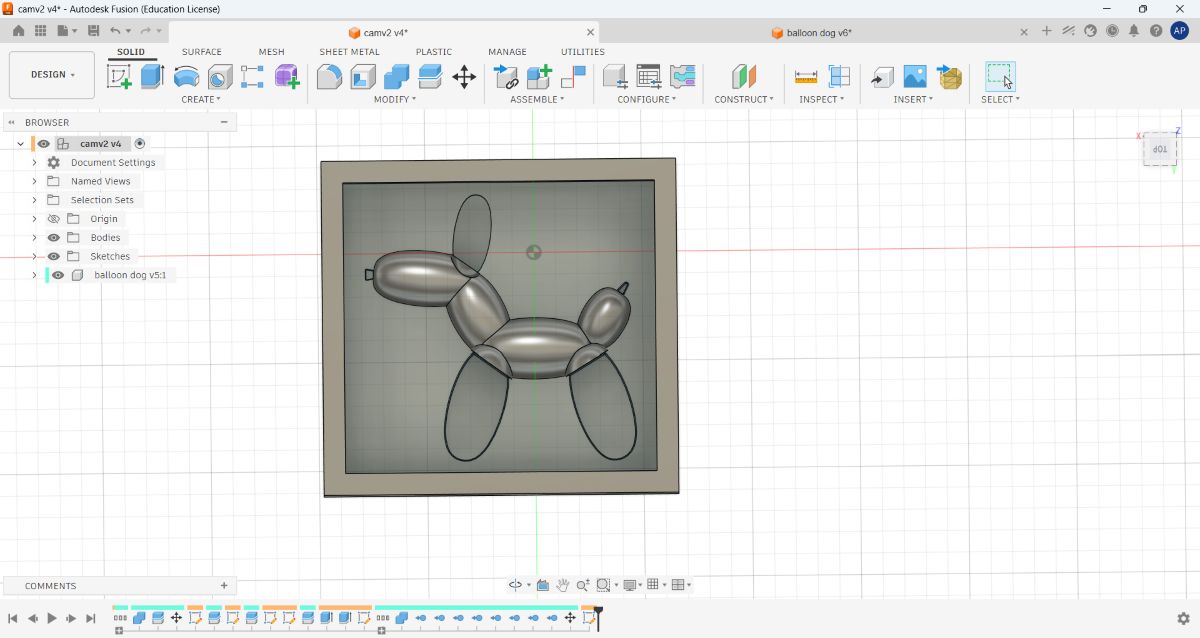
CAM: Fusion360
Importing the tool library
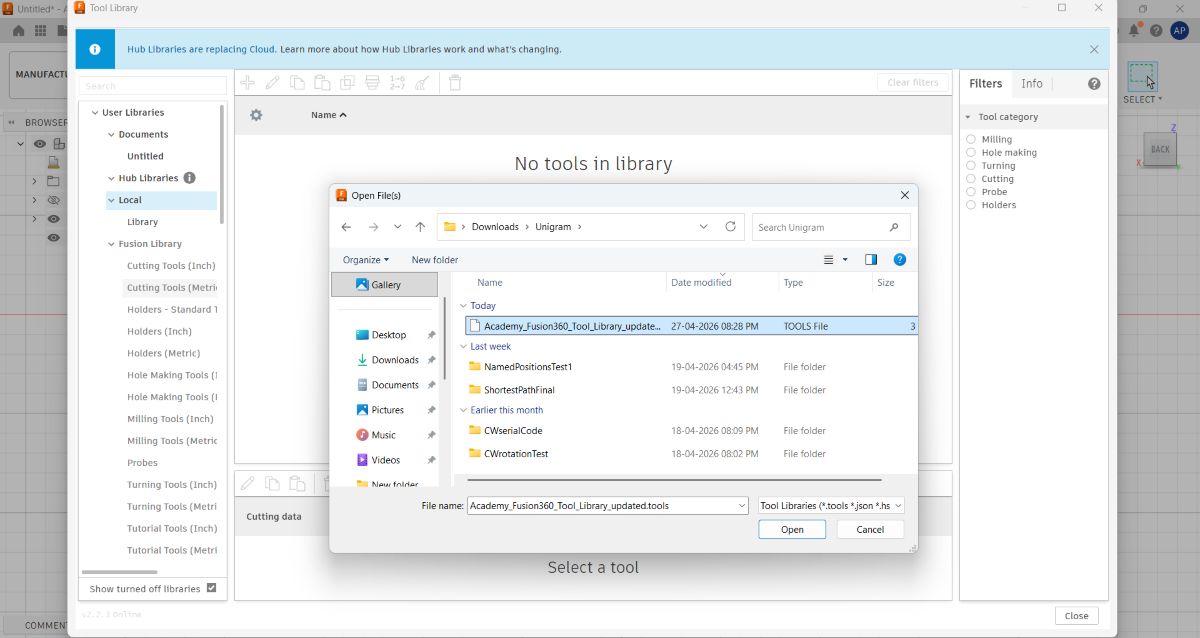
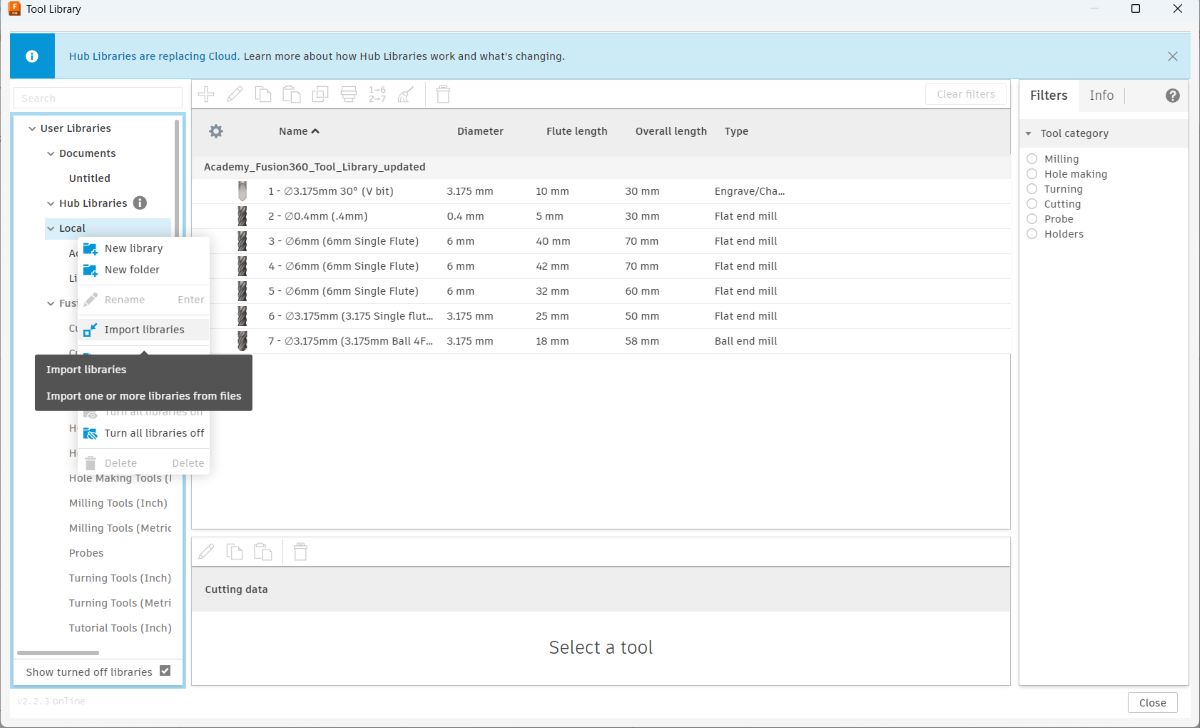
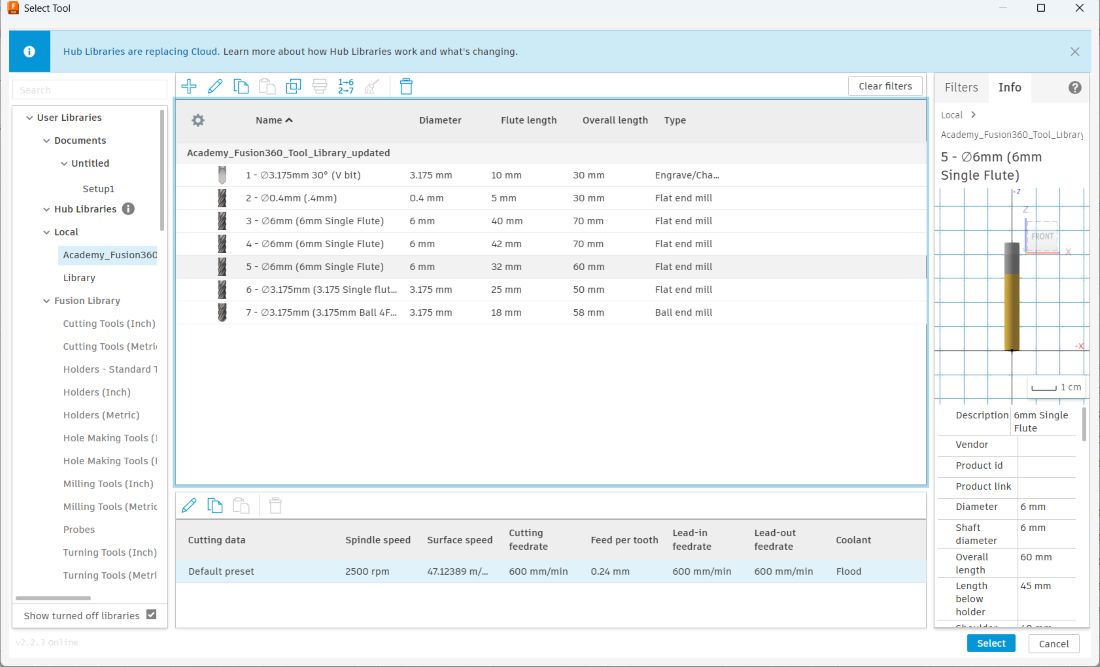
Imported the tool library provided by instructor, the tools which we will be mainly using 6mm single flute flat end mill, 3.175mm single flute flat end mill, 3.175mm 4 flute ball end mill.
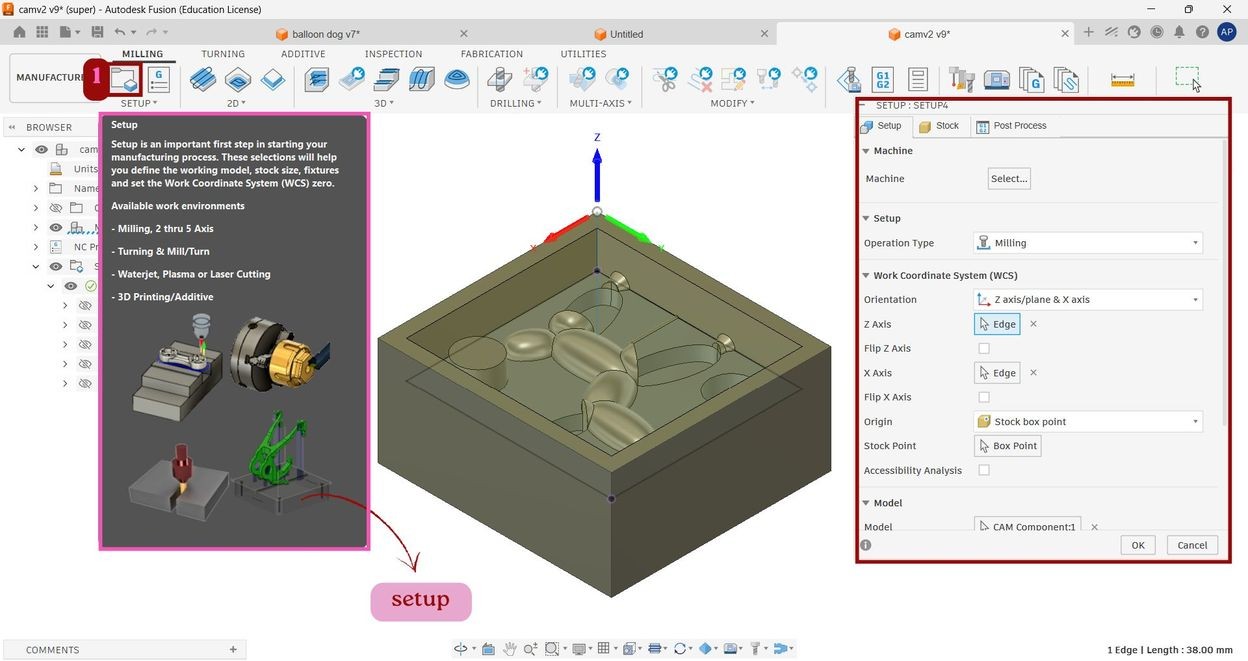
I started by creating a Setup in the Manufacture workspace. I selected the ProtoTRAK machine, chose Milling as the operation type, selected the CAM component as the model, and set the X, Y, and Z axes (Work Coordinate System WCS) along with the stock origin. After this it is ready for generating toolpaths.
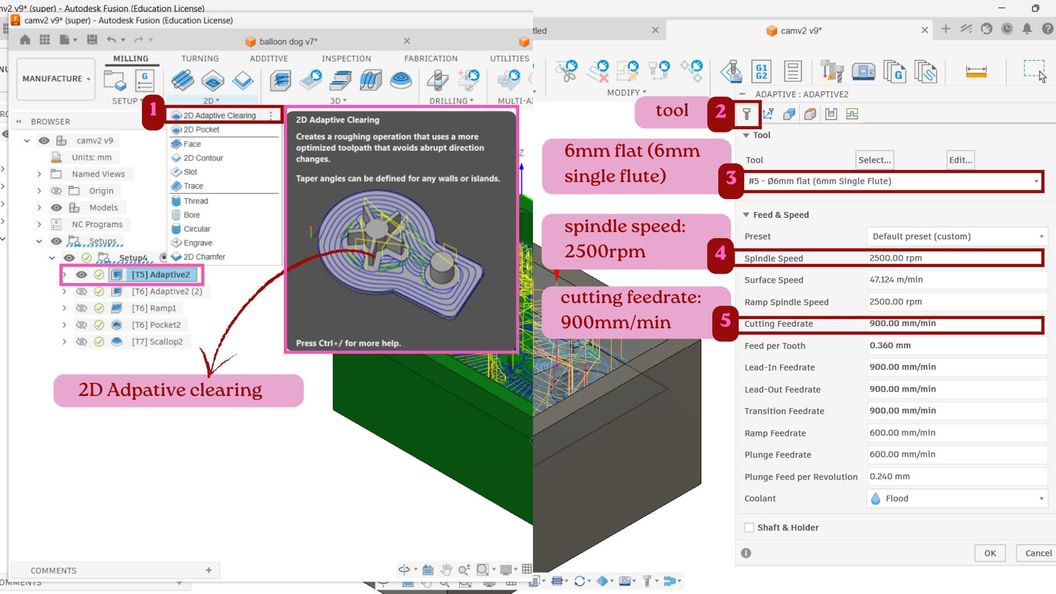
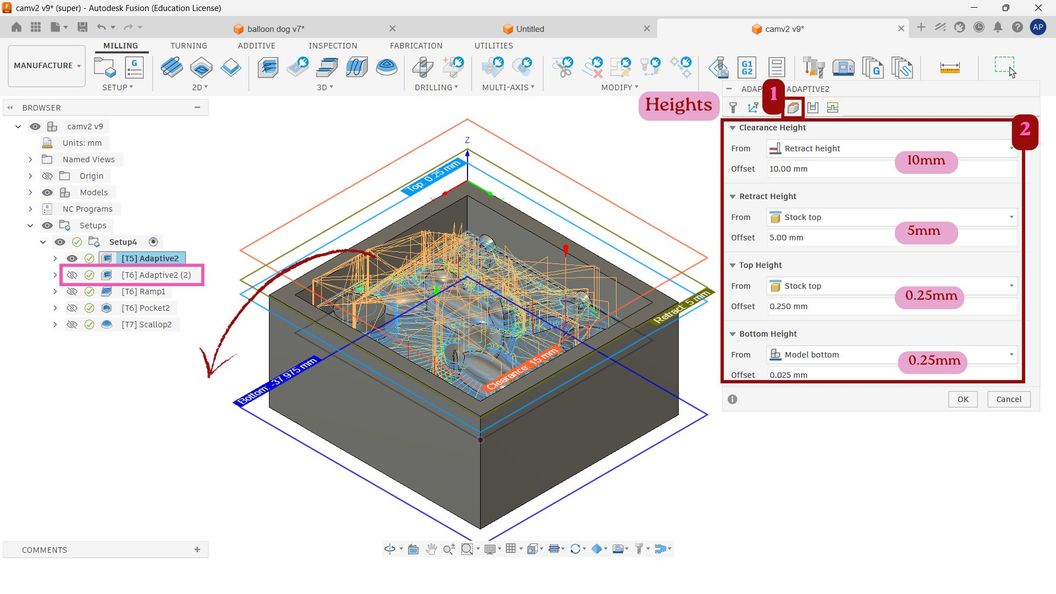
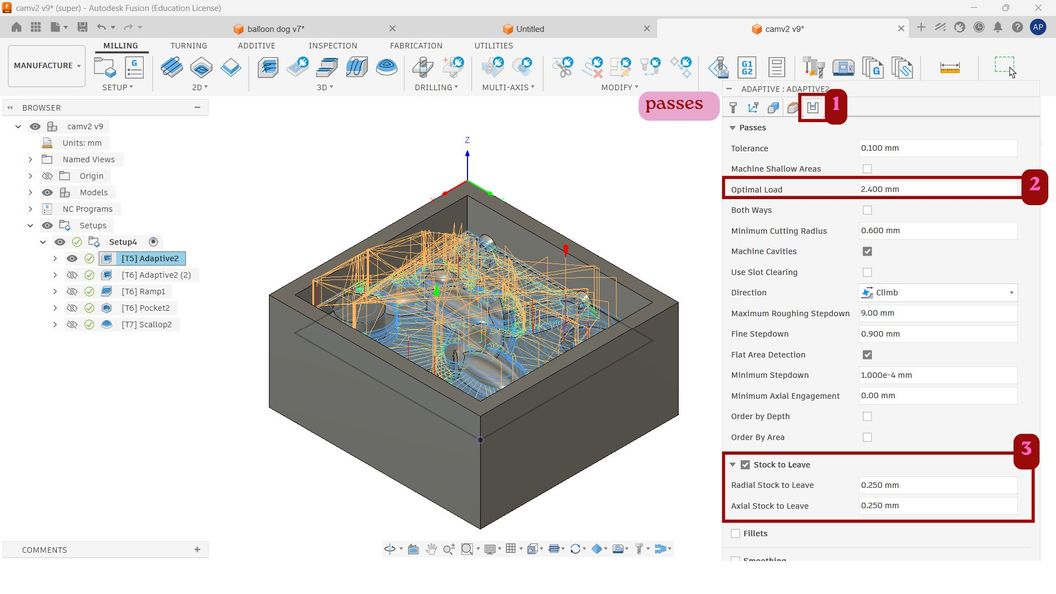
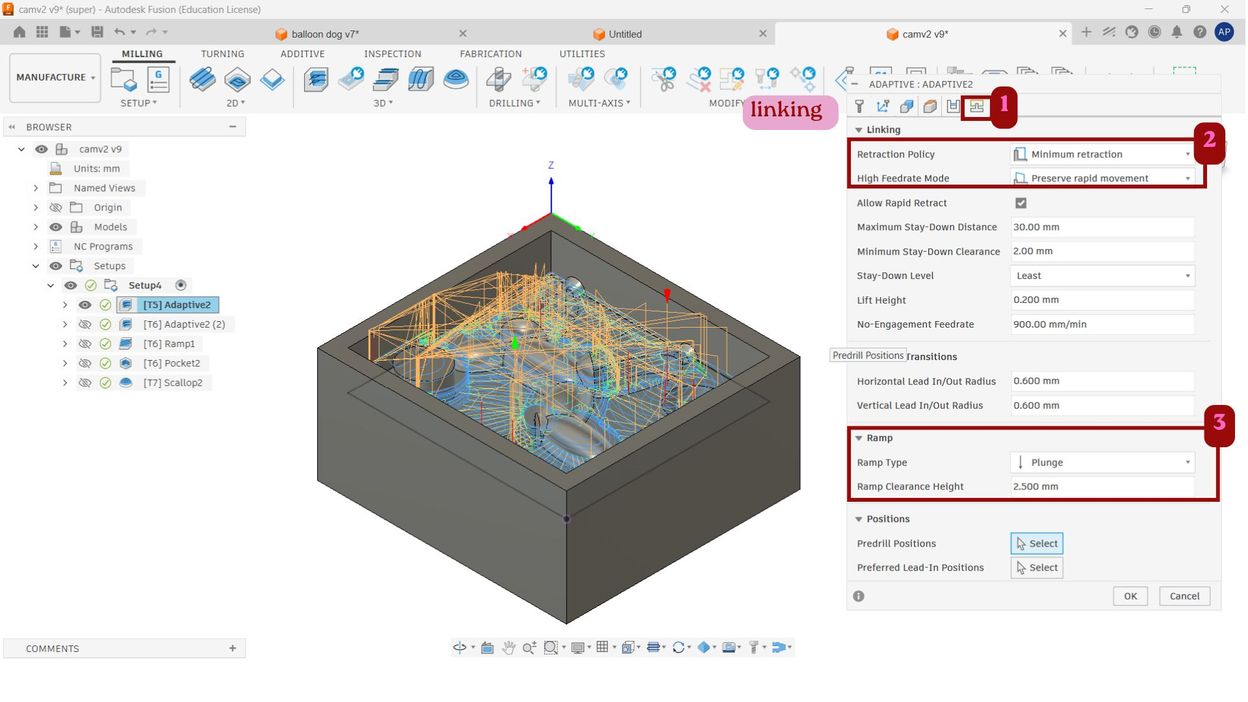
2D Adpative clearing with 6mm single flute flat end mill
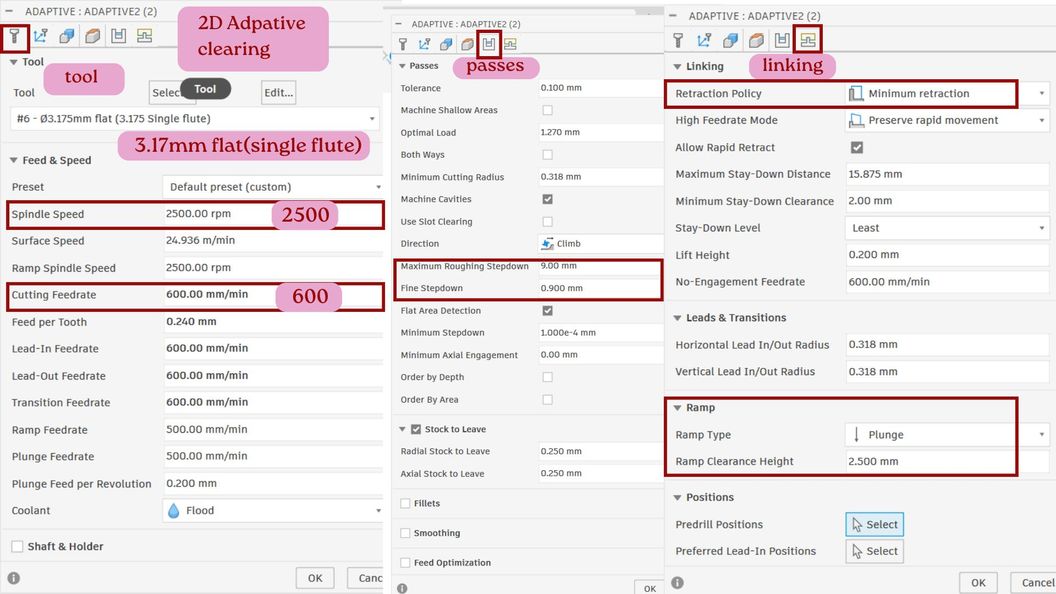
2D Adpative clearing with 3.175mm single flute flat end mill
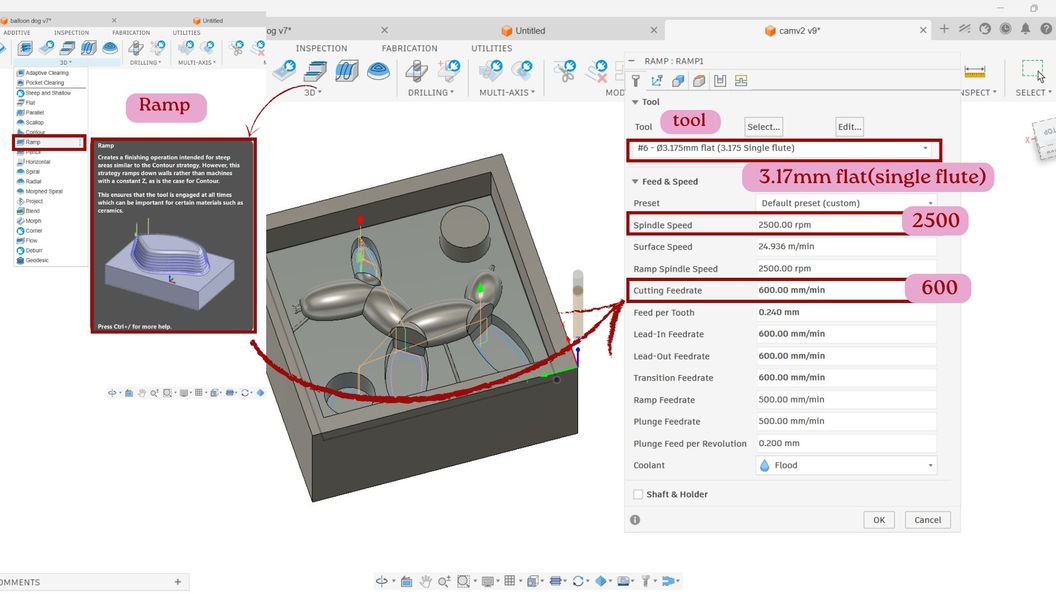
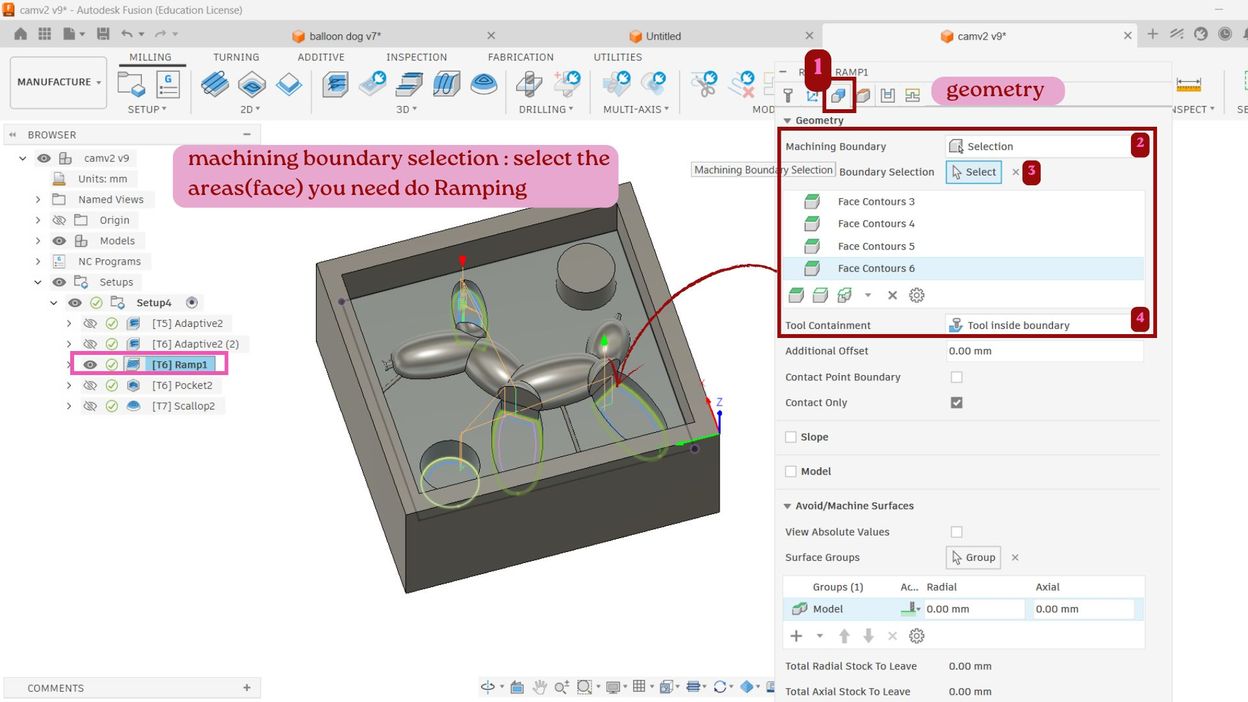
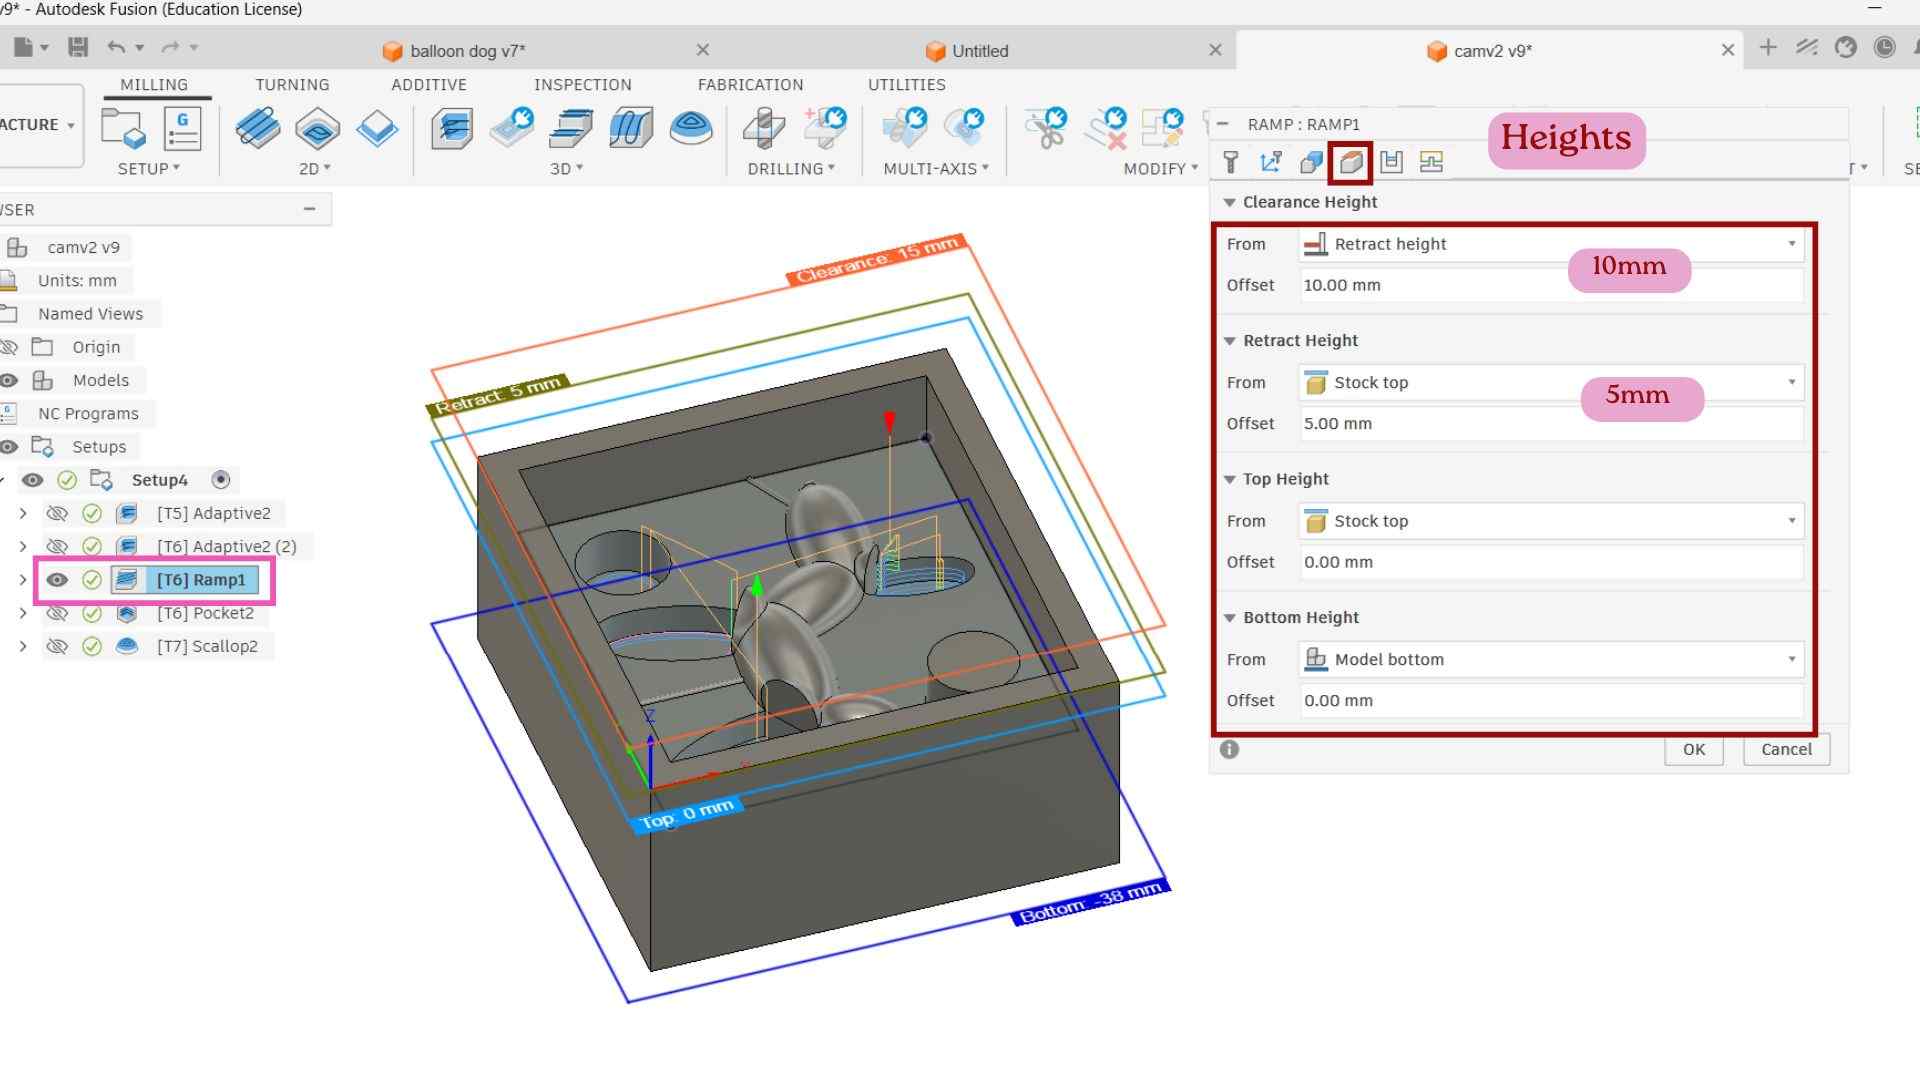
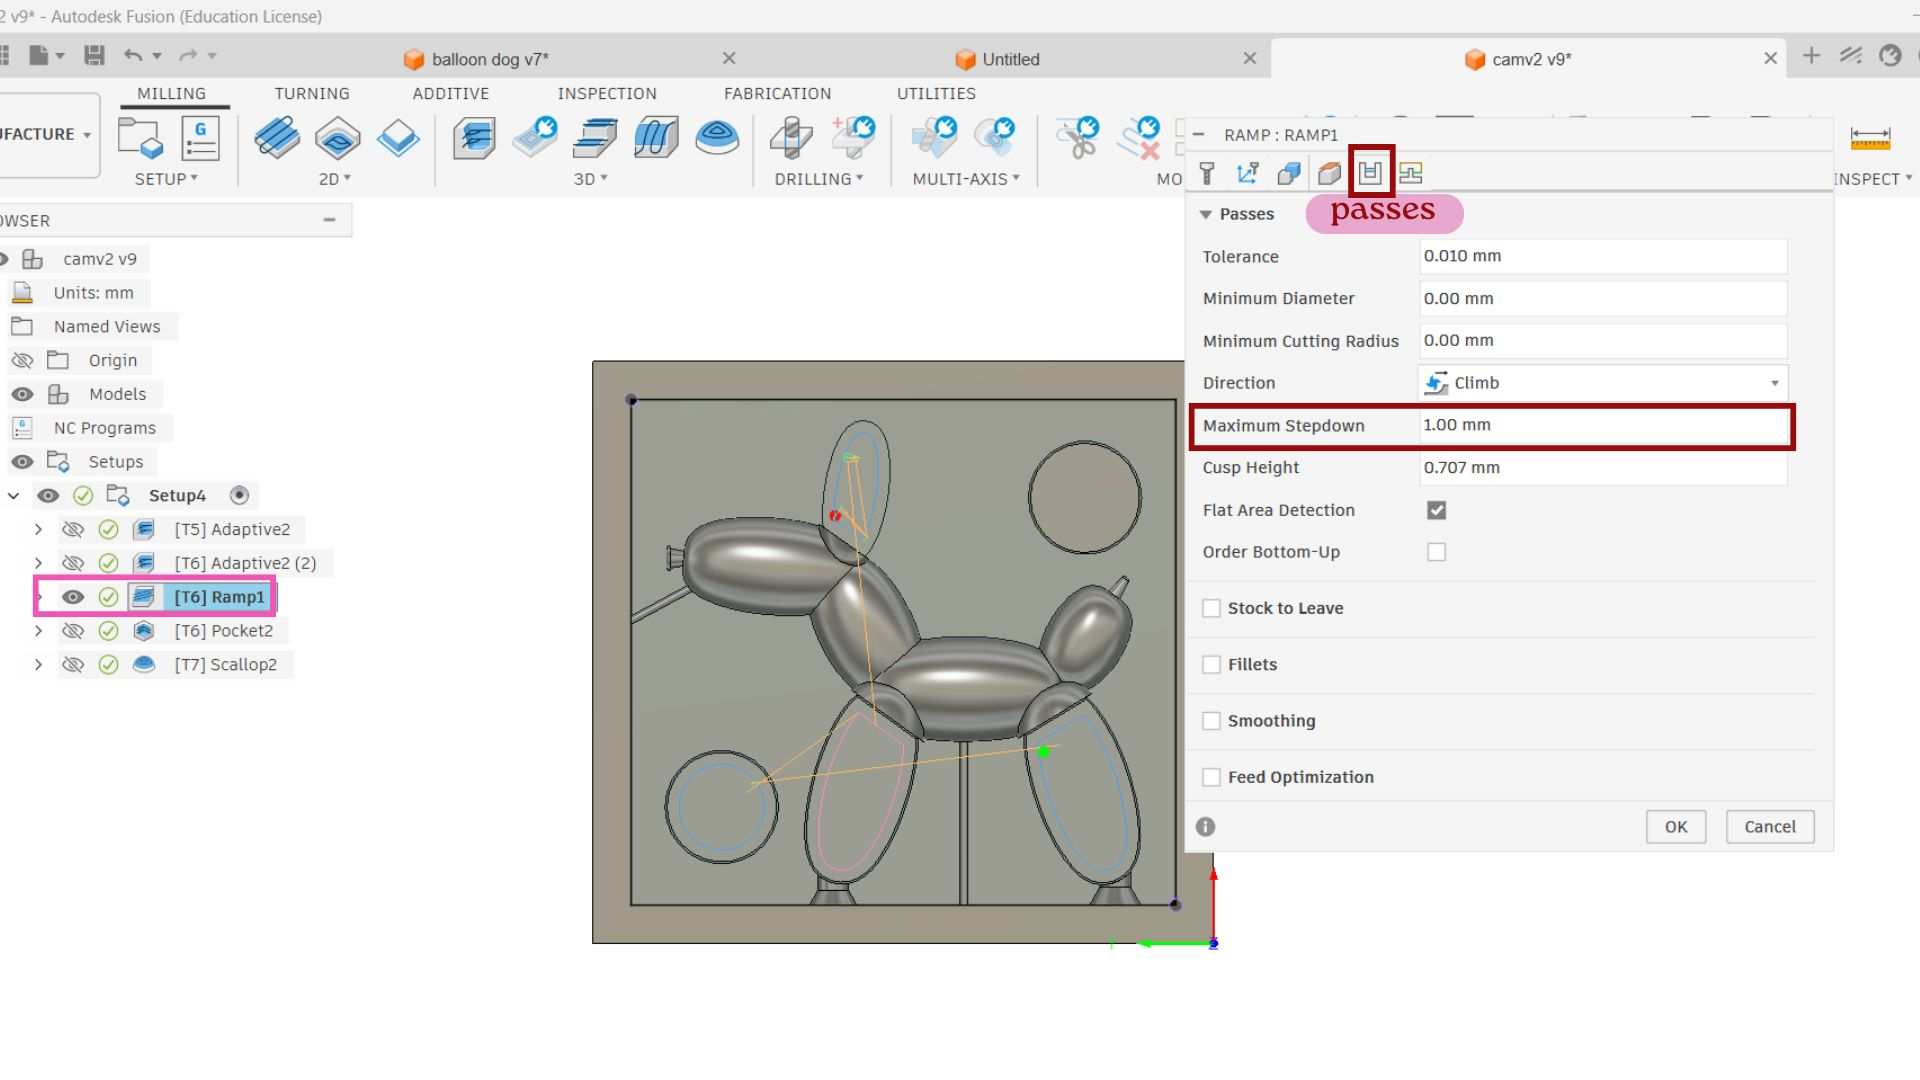
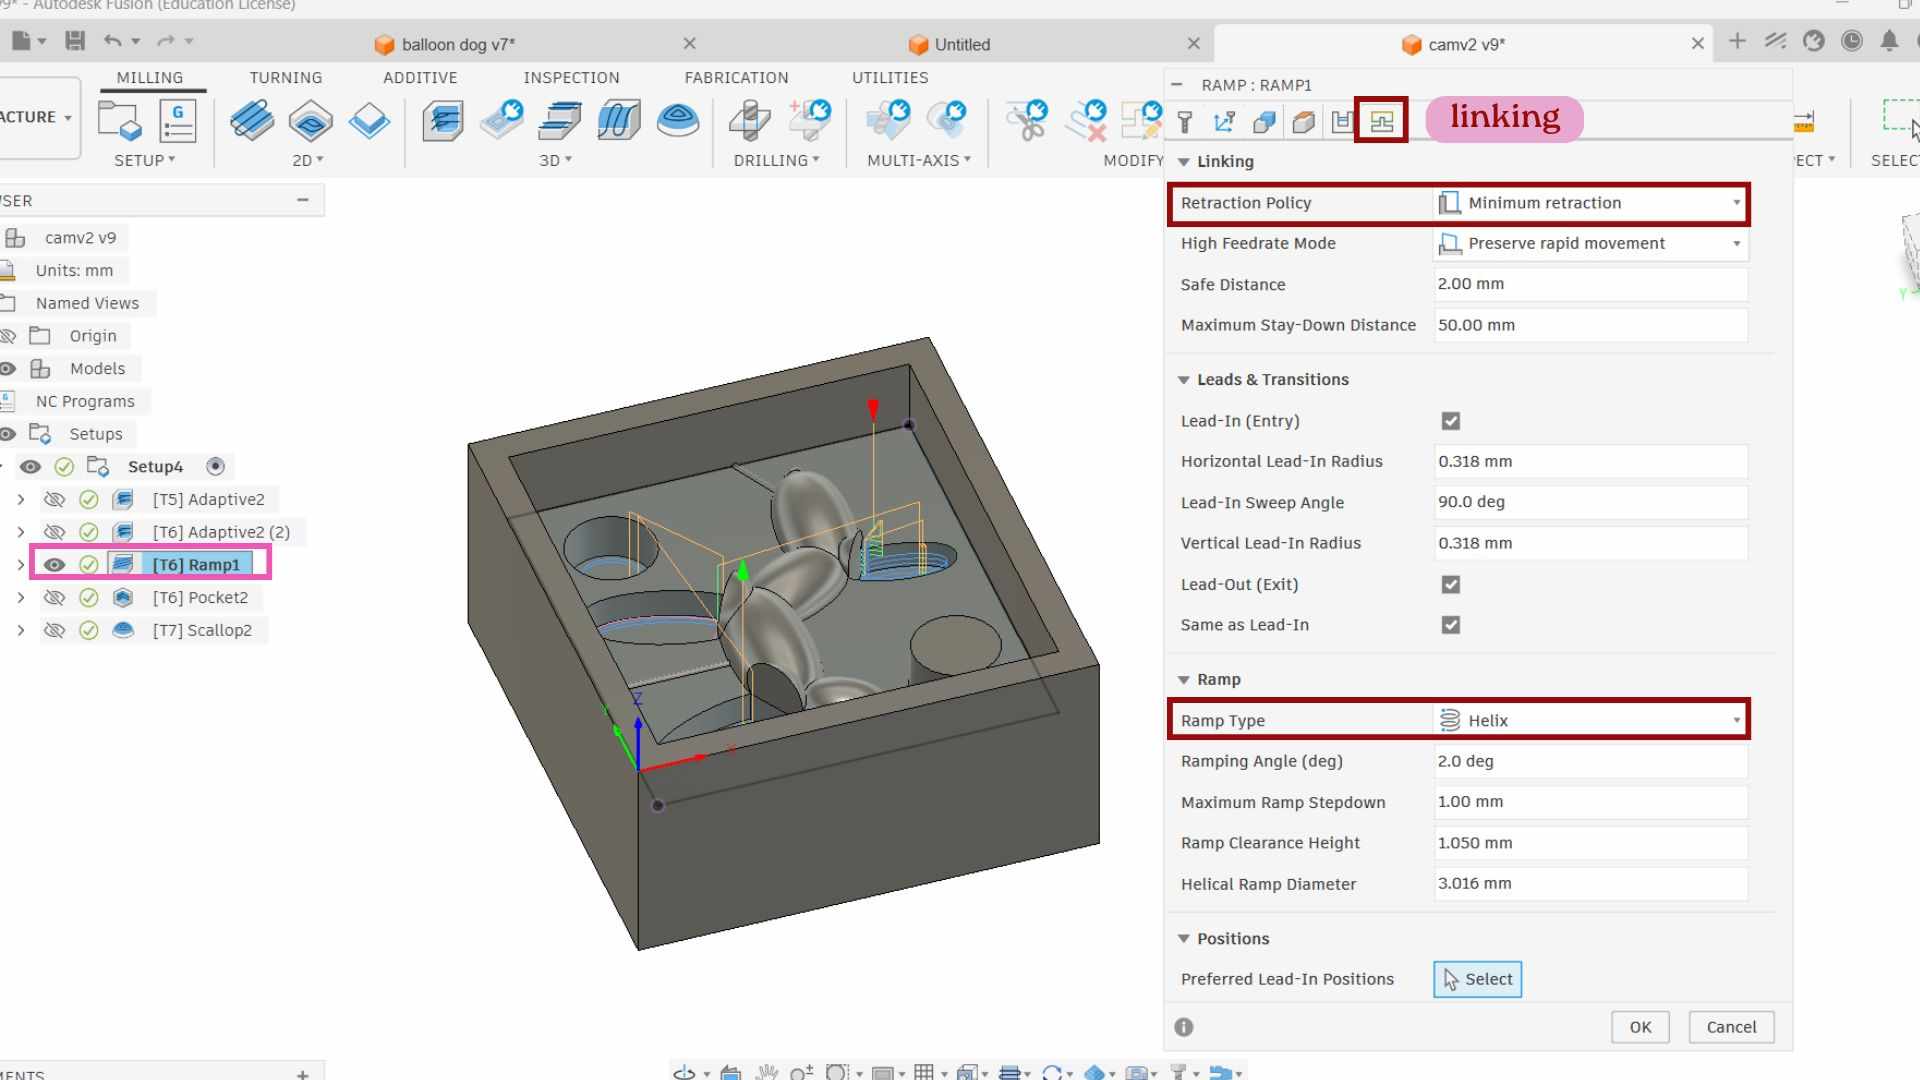
Ramp with 3.175mm single flute flat end mill
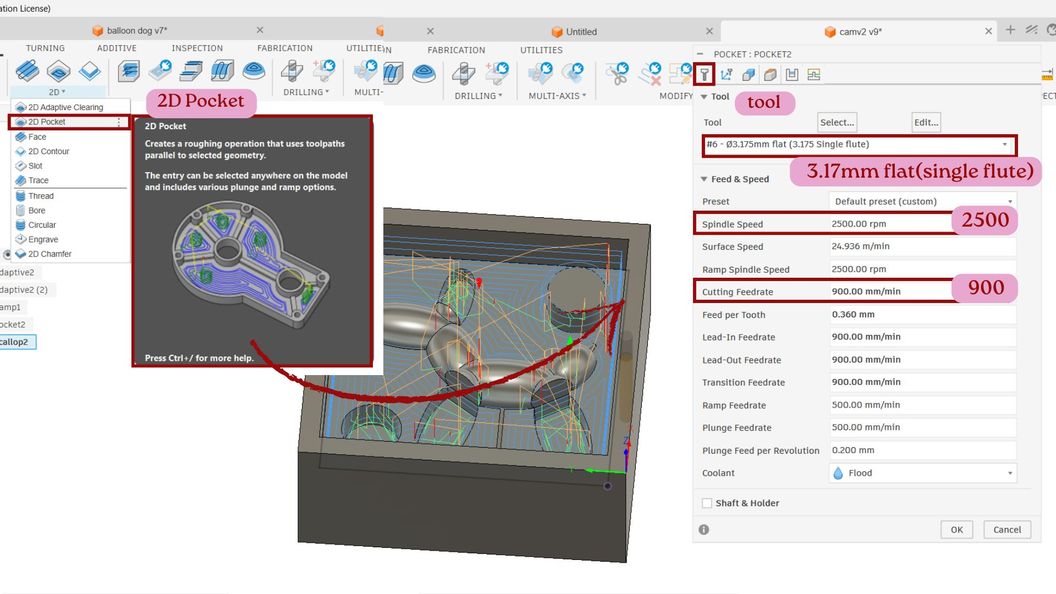
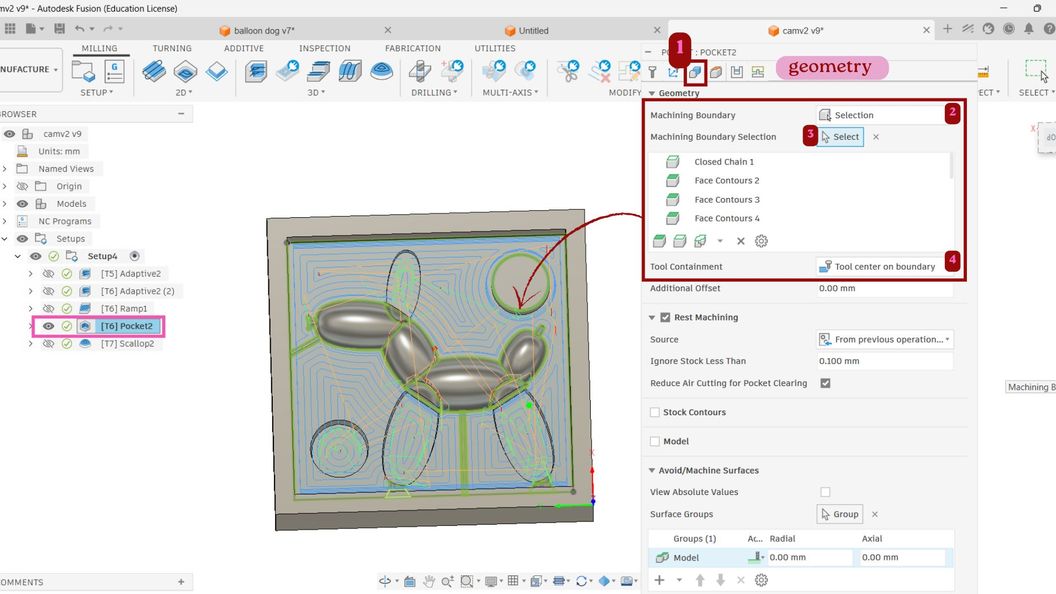
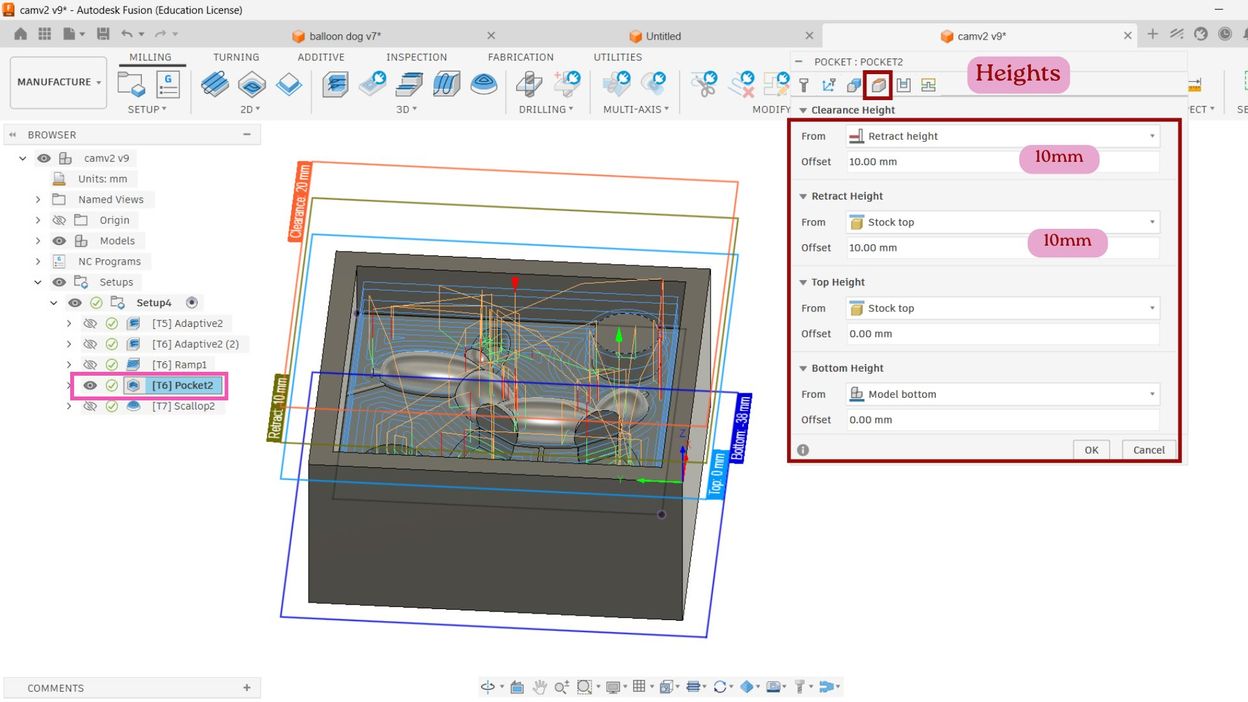
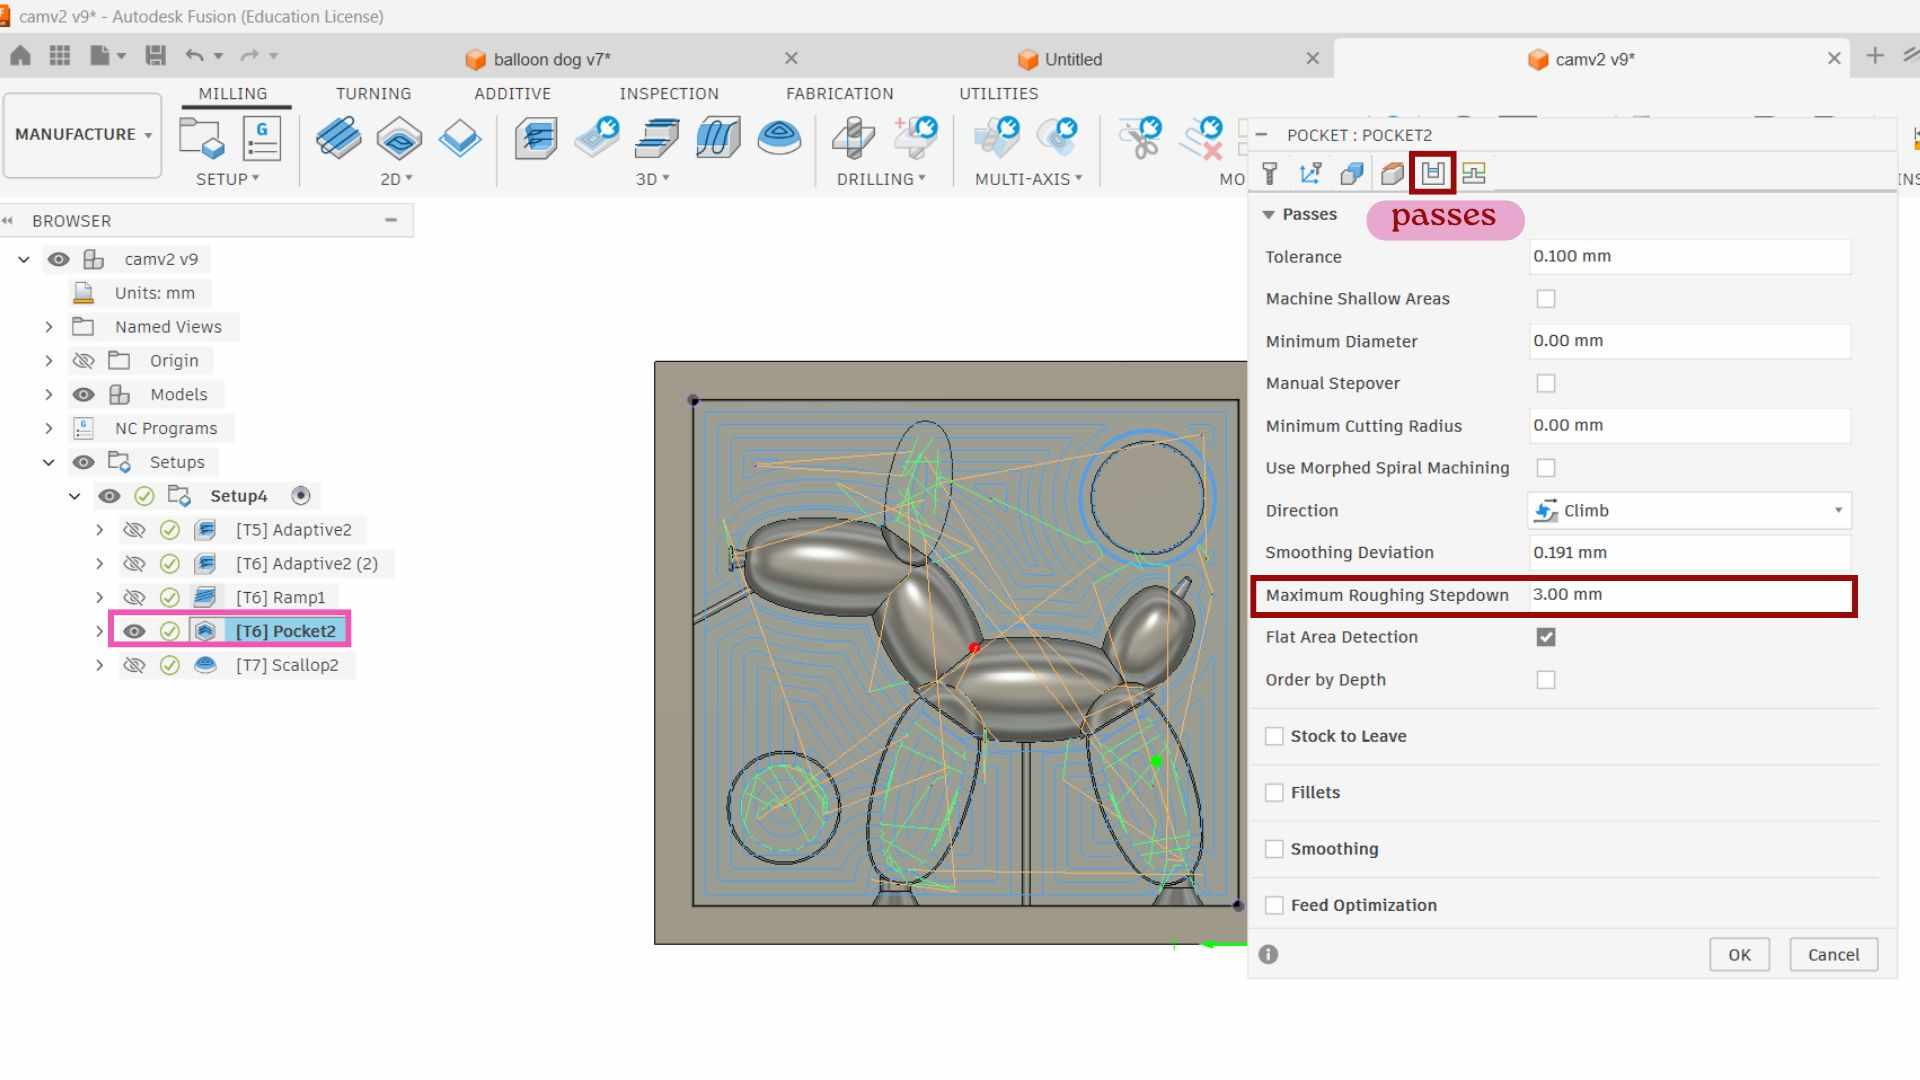
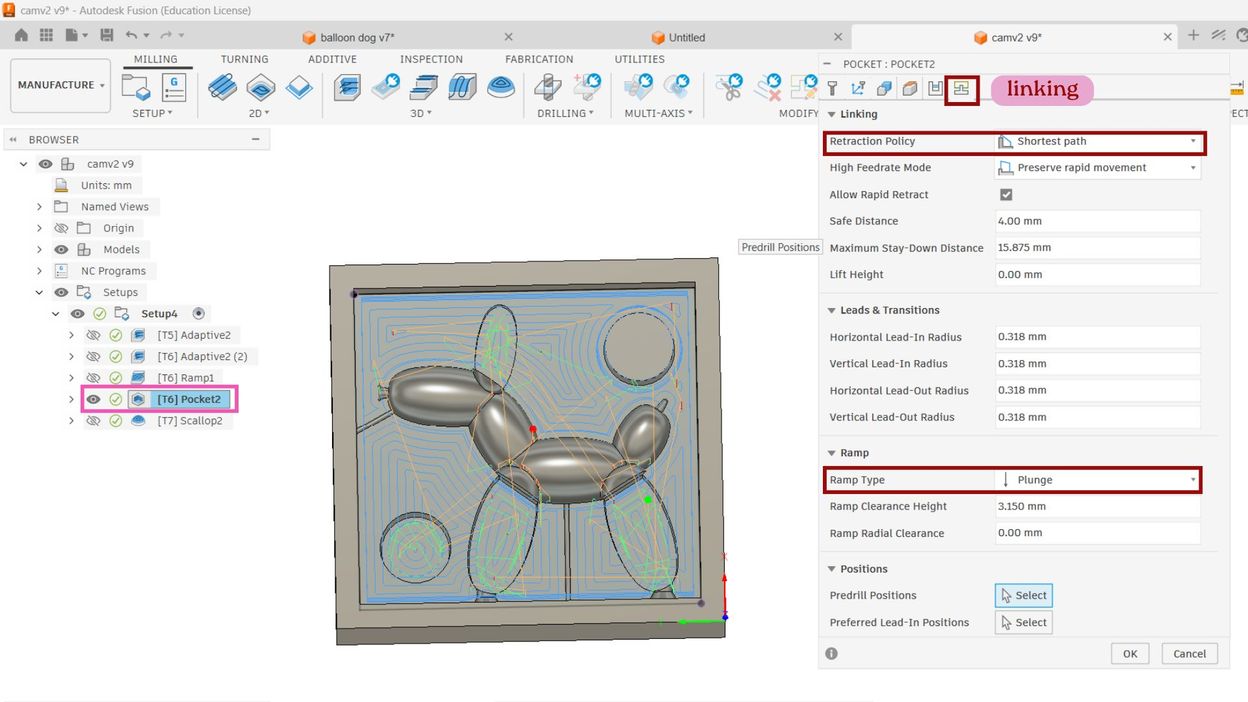
Pocket with 3.175mm single flute flat end mill
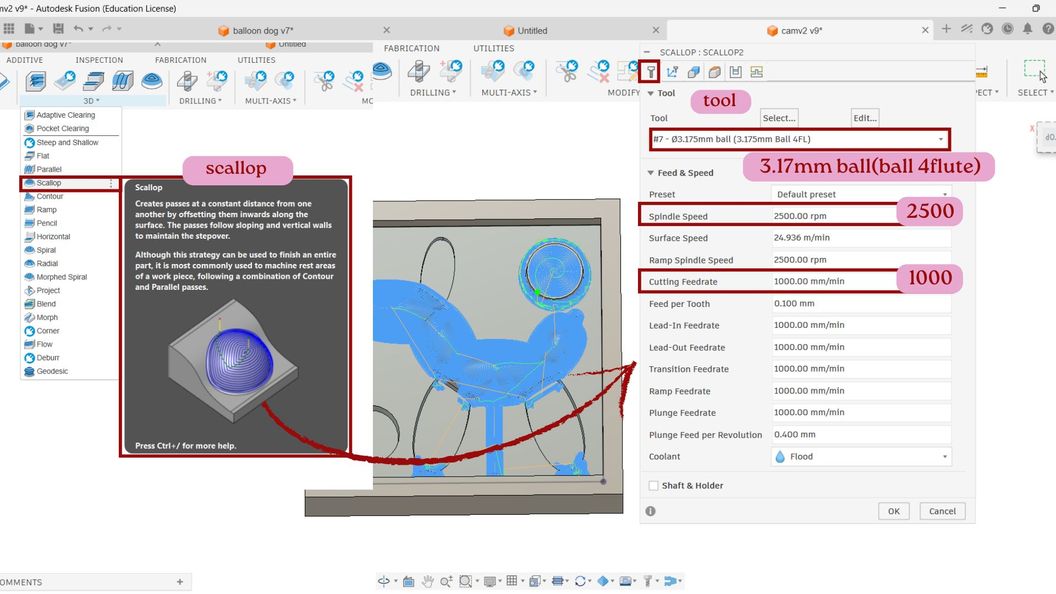
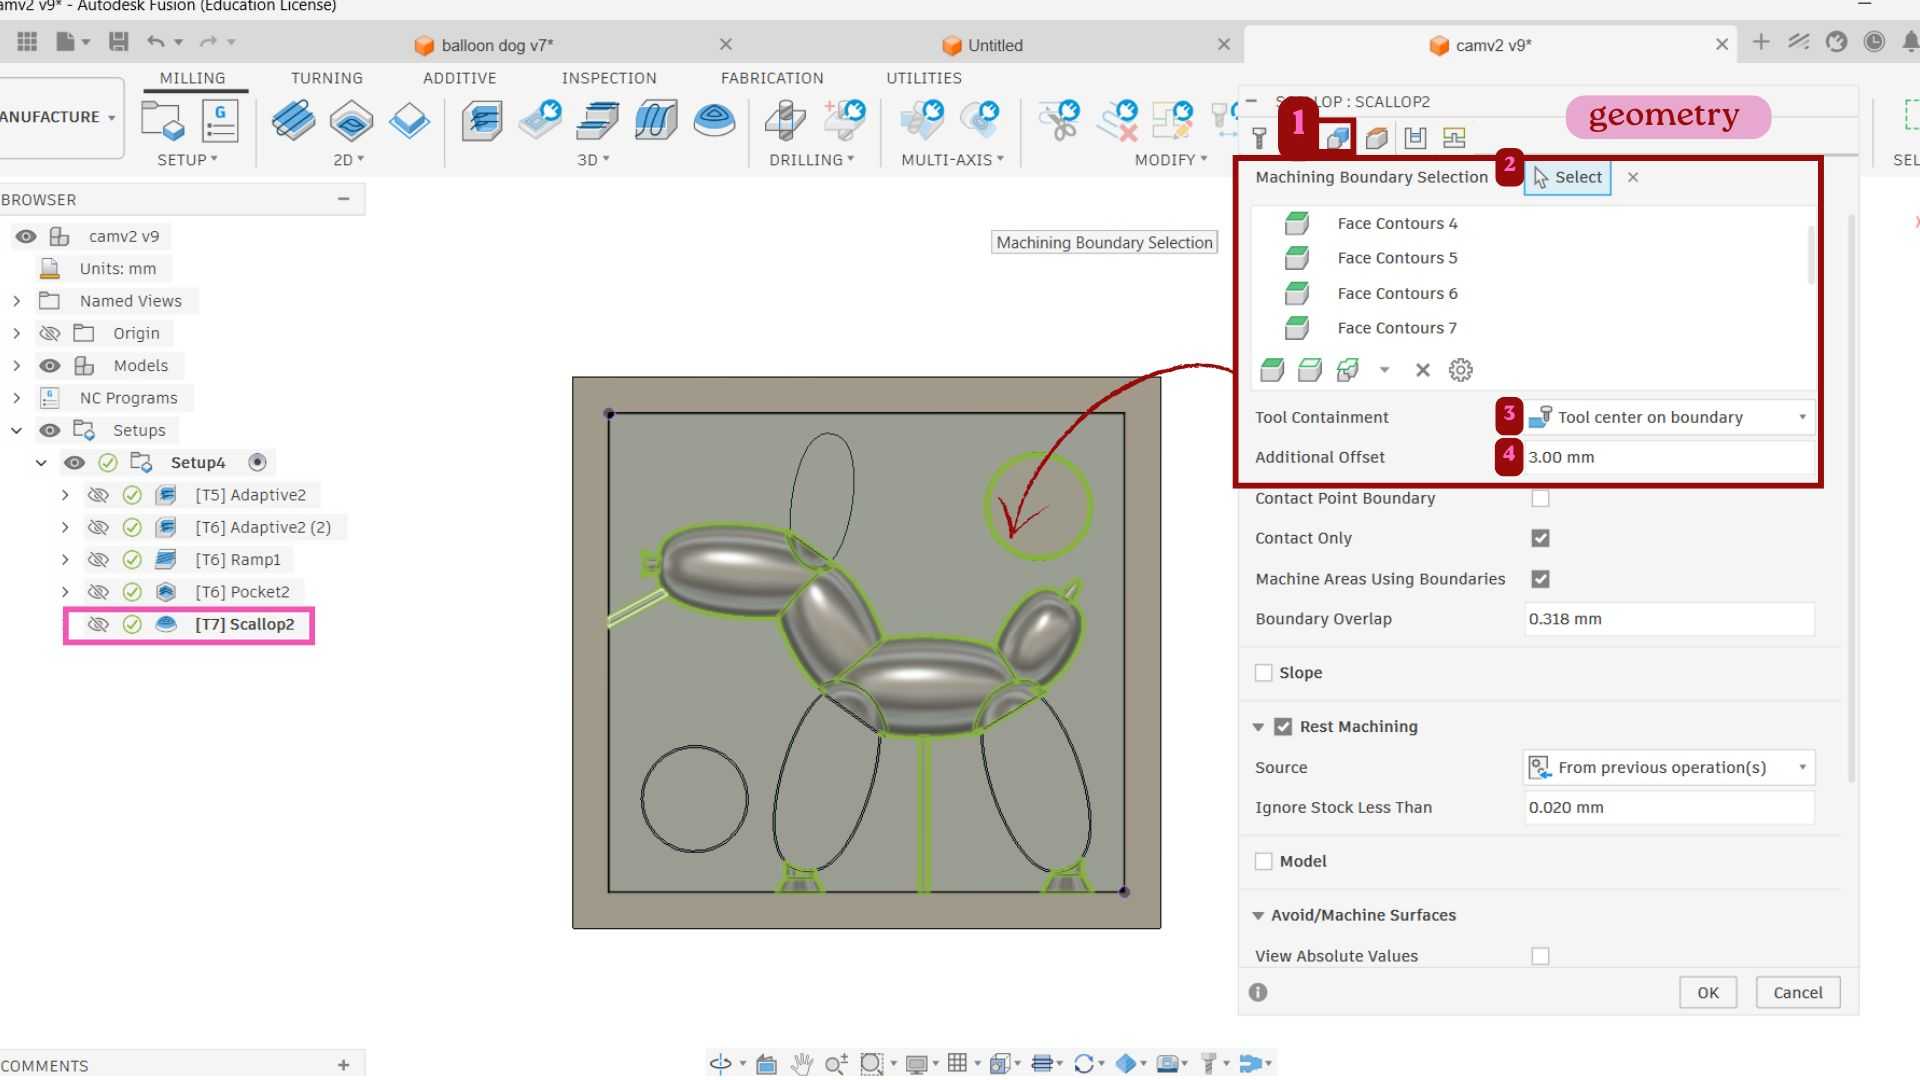
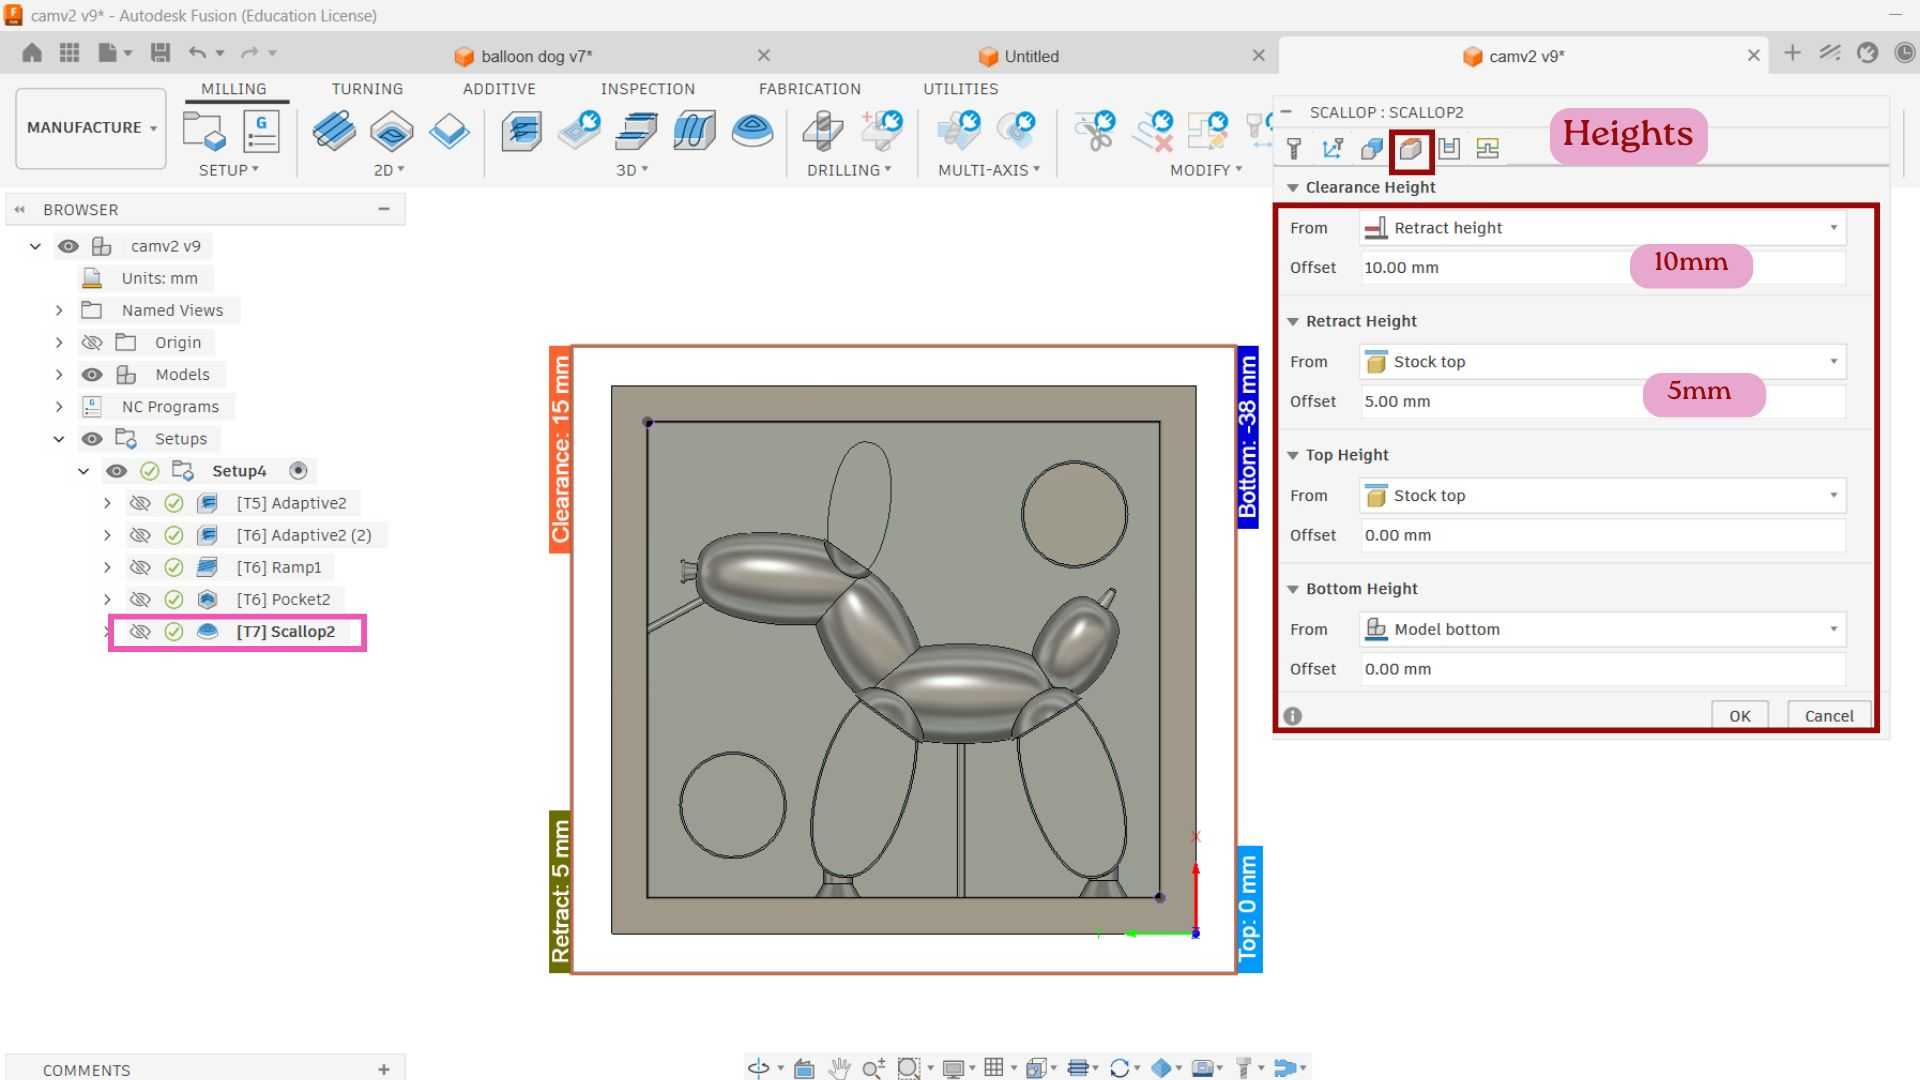
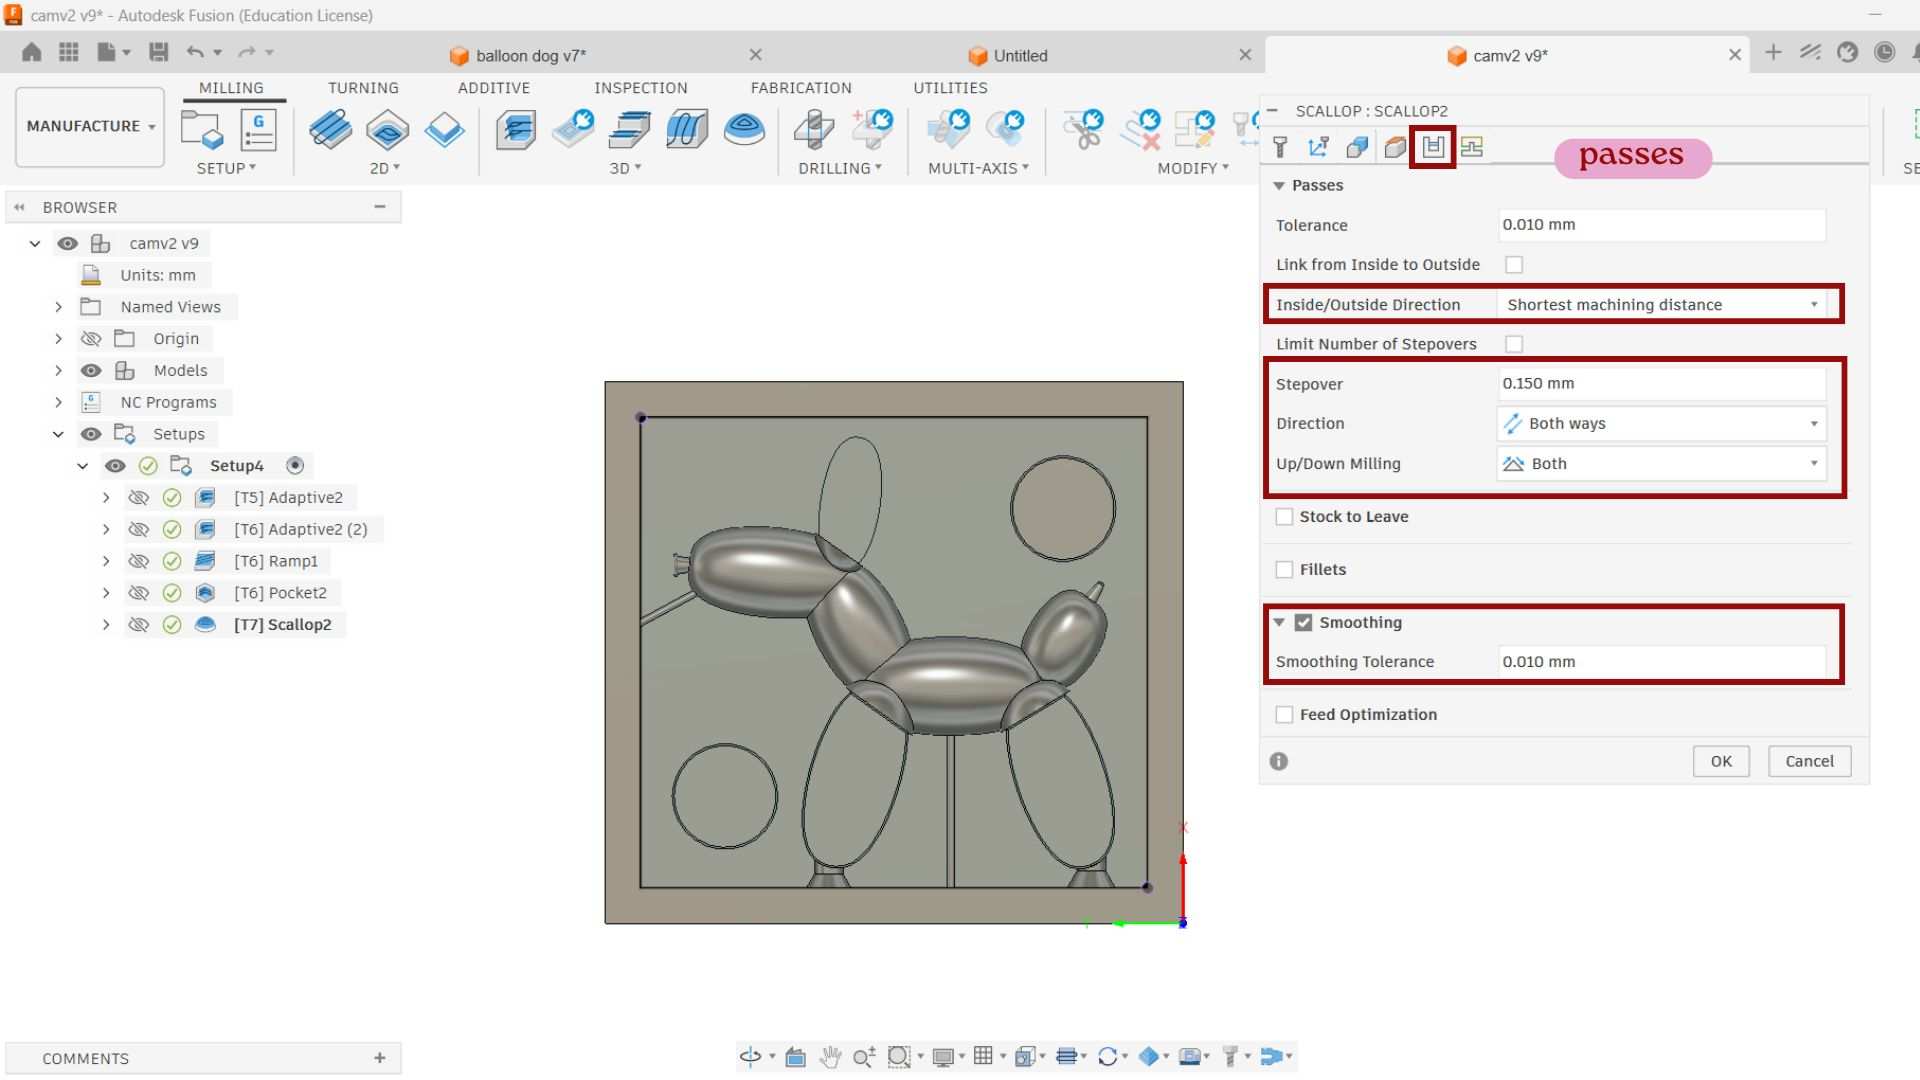
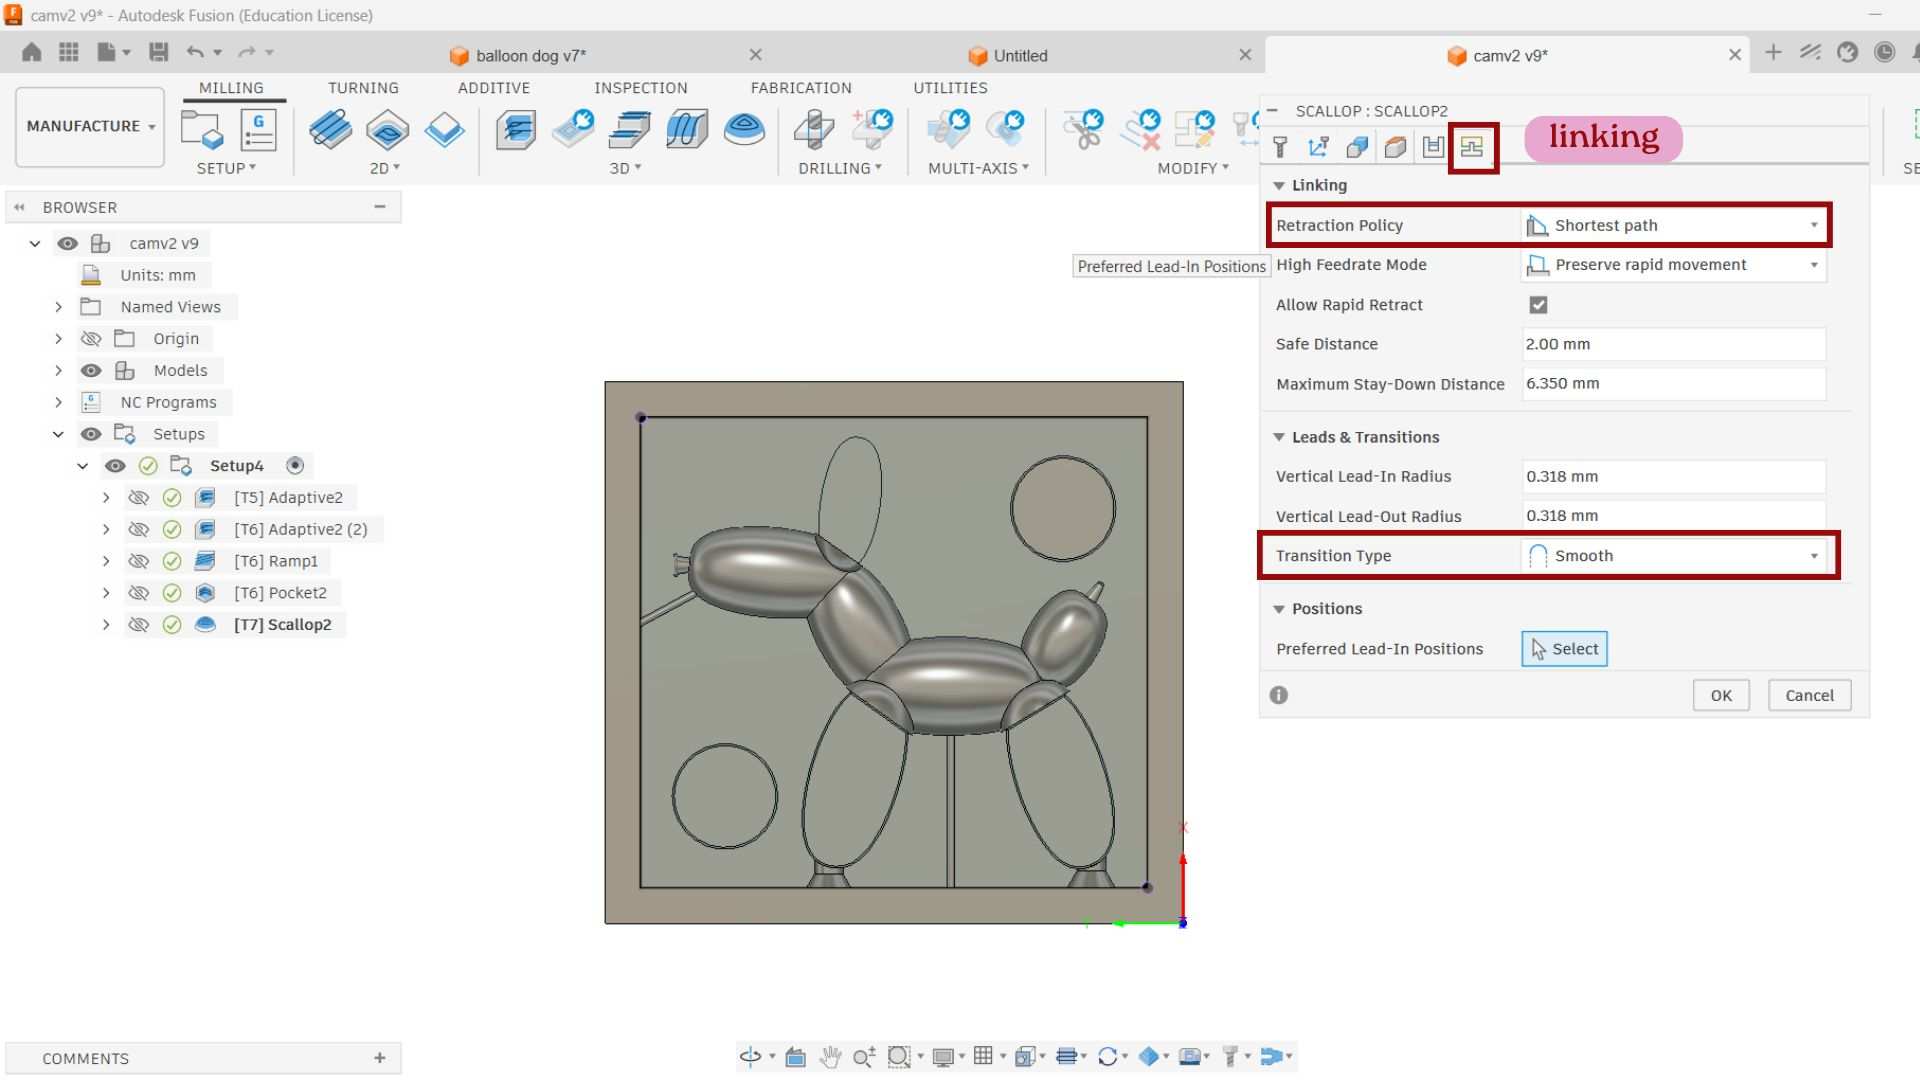
Scallop with 3.175mm 4 flute Ball end mill
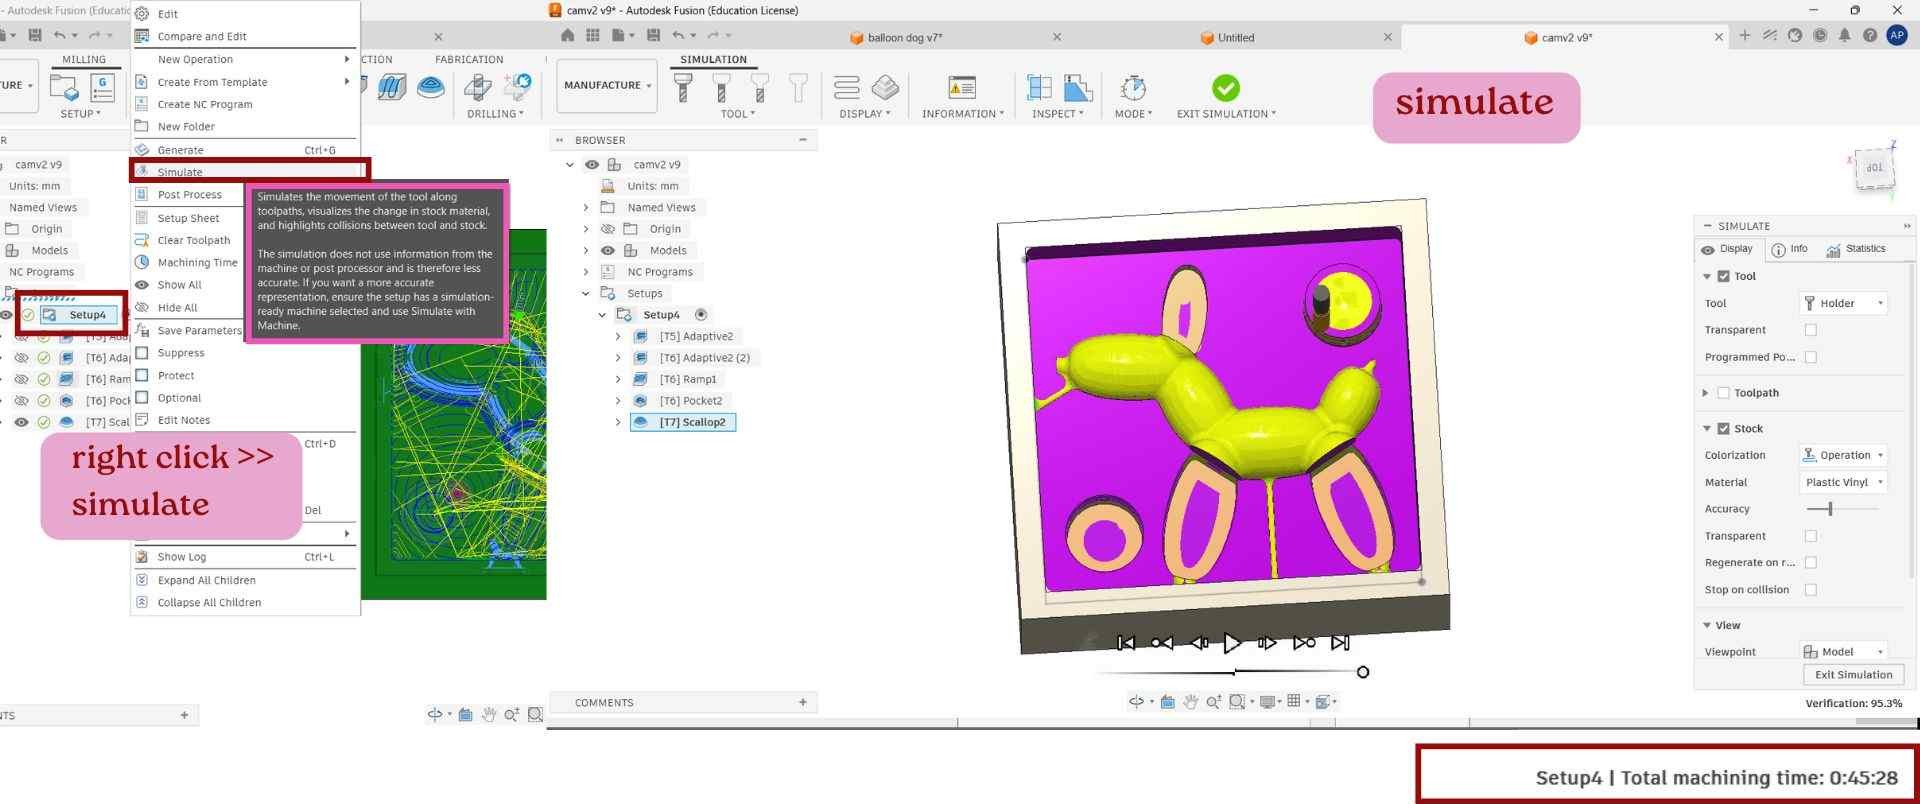
Simulate the generated toolpaths
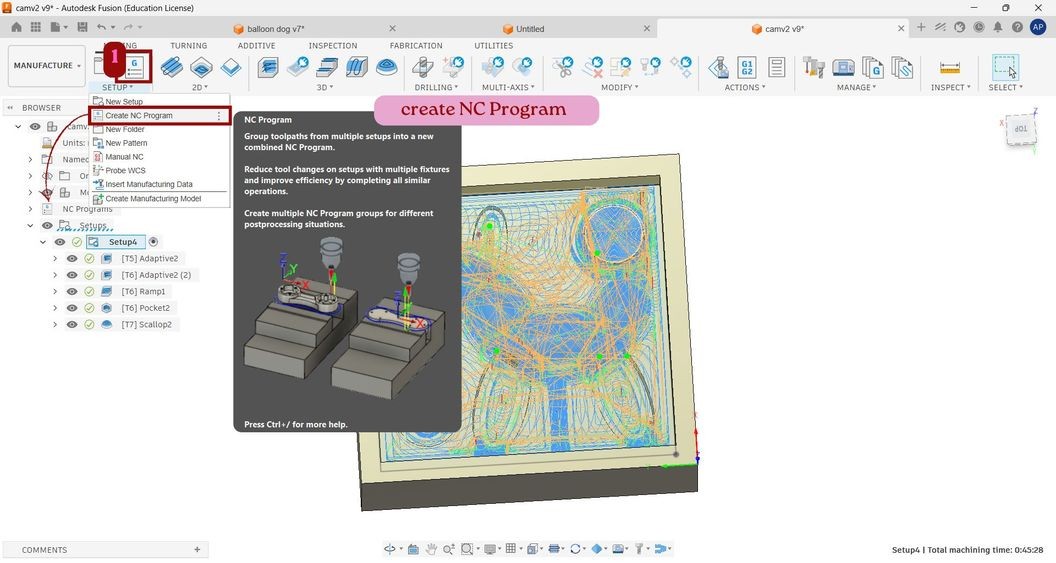
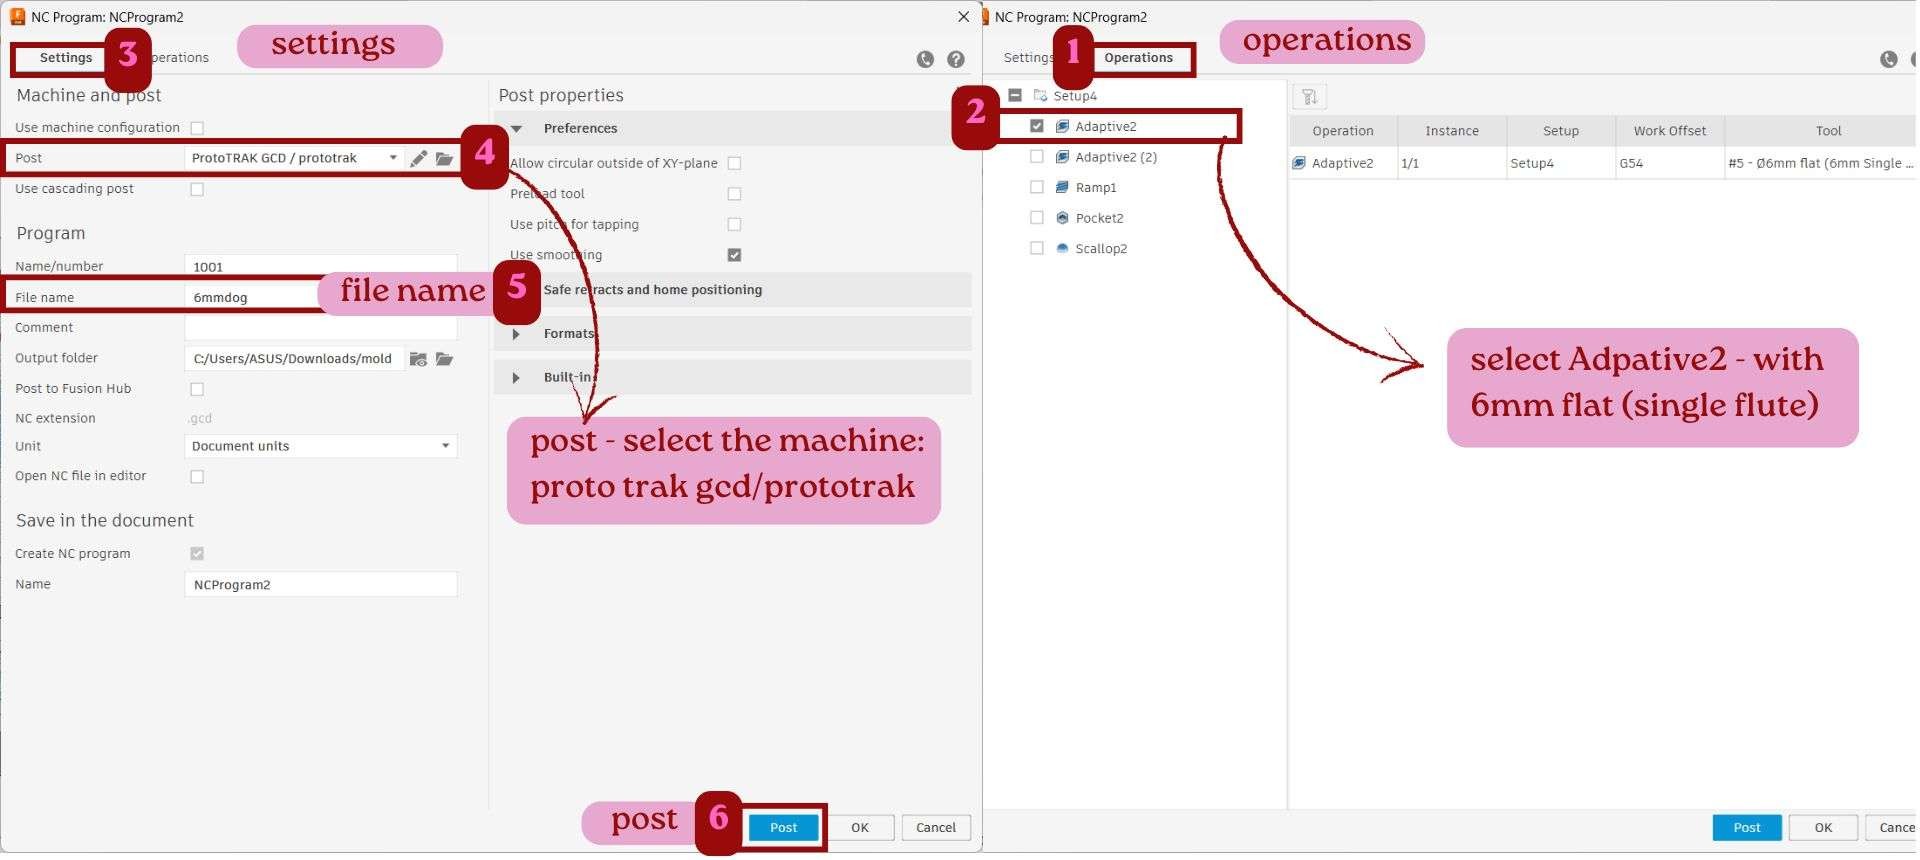
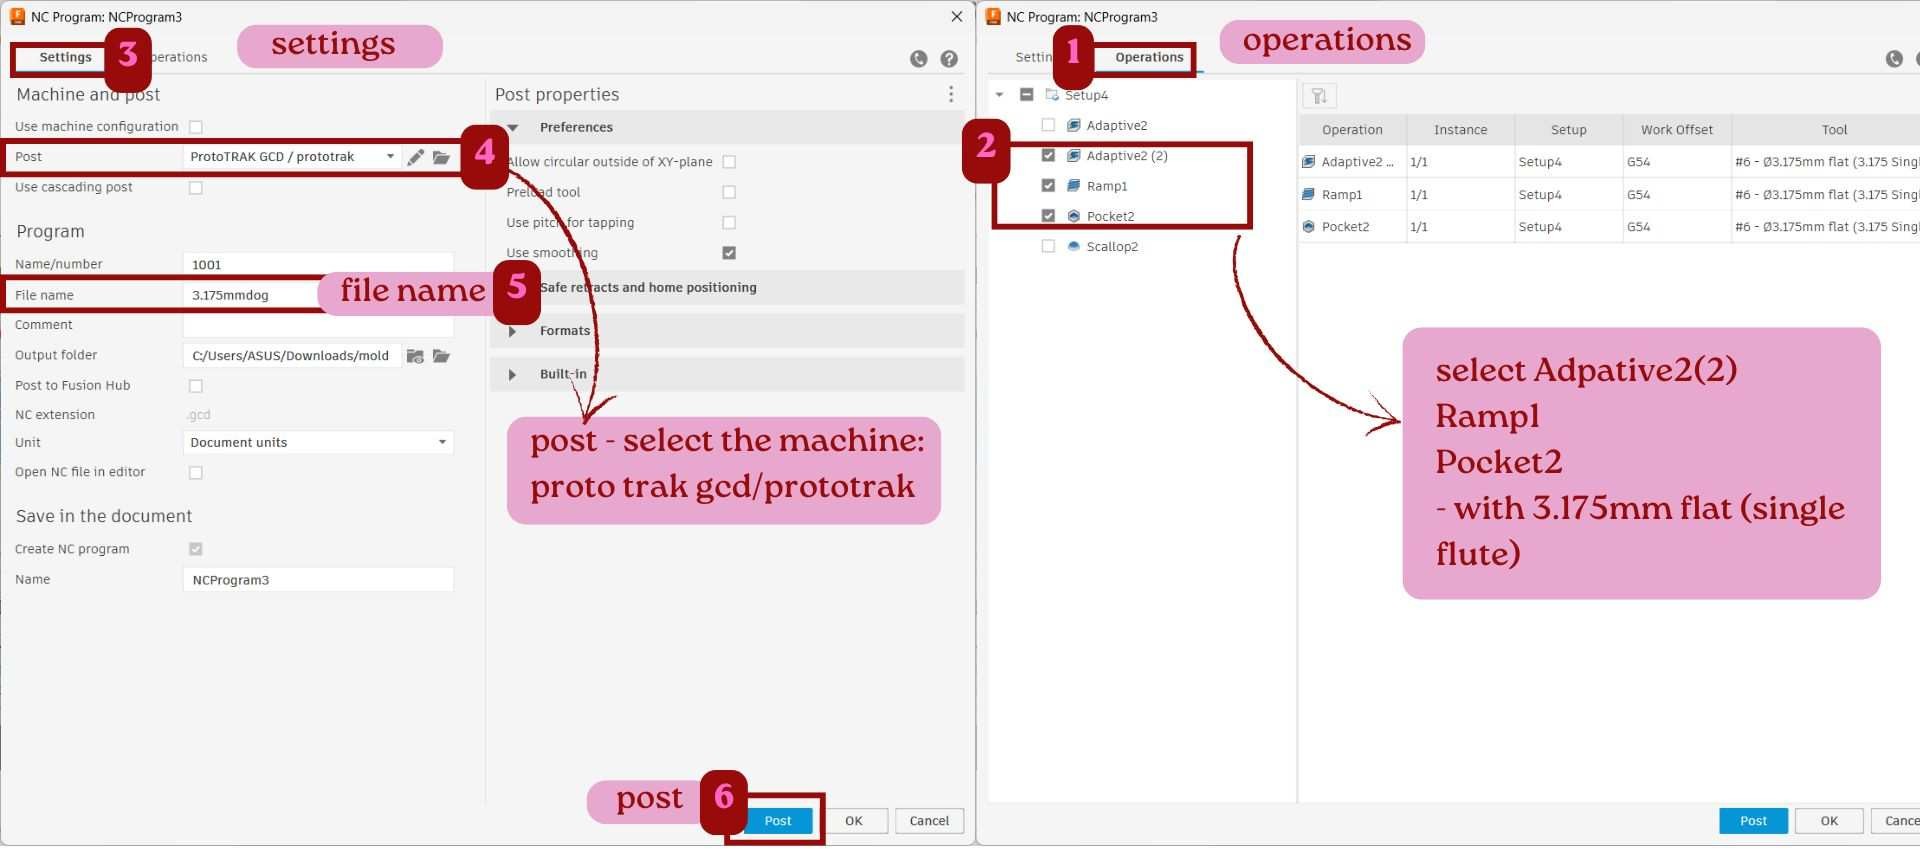
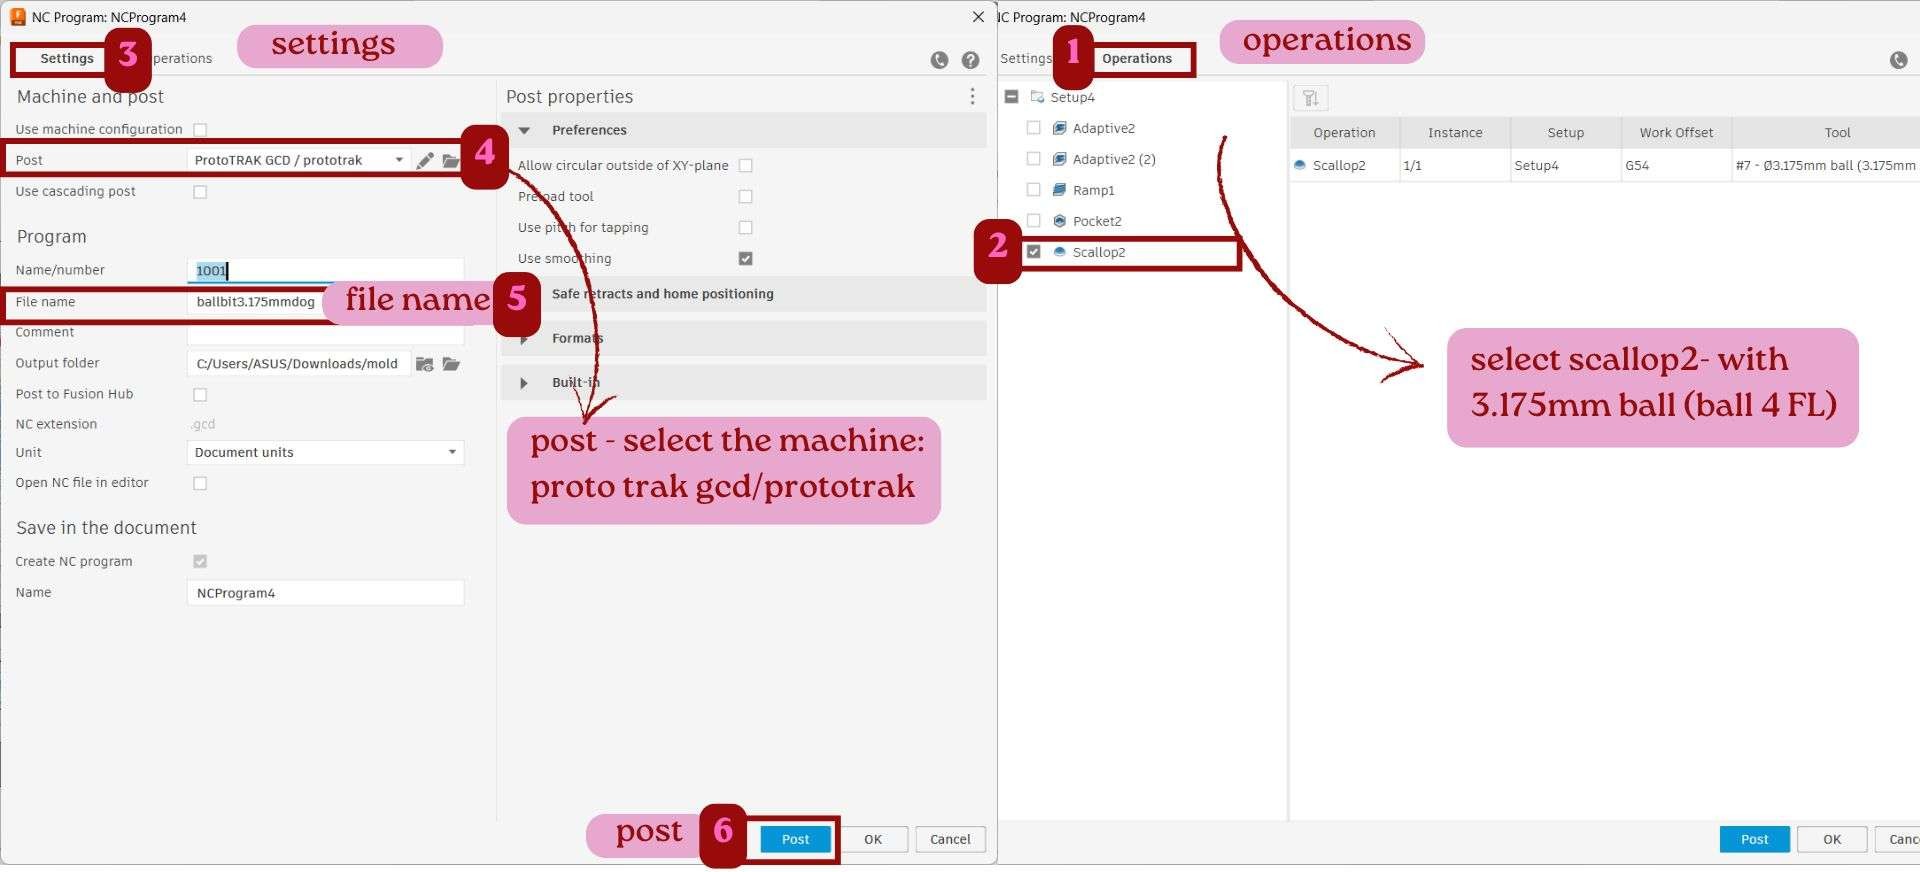
NC Progam for creating g-code for machining
3D Printing: Resin Print
CHITUBOX: Slicer
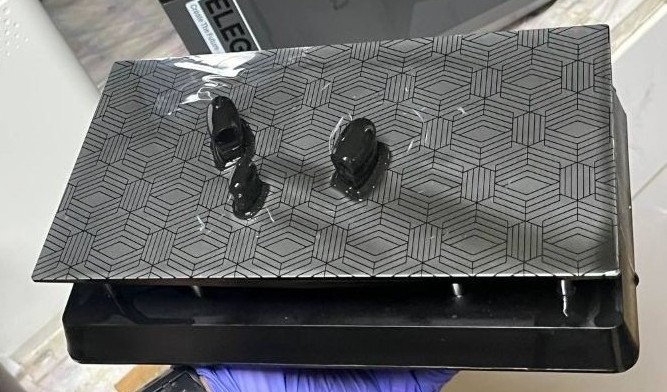
I used CHITUBOX to prepare the model, generate the supports, and slice the file before sending it to the printer.
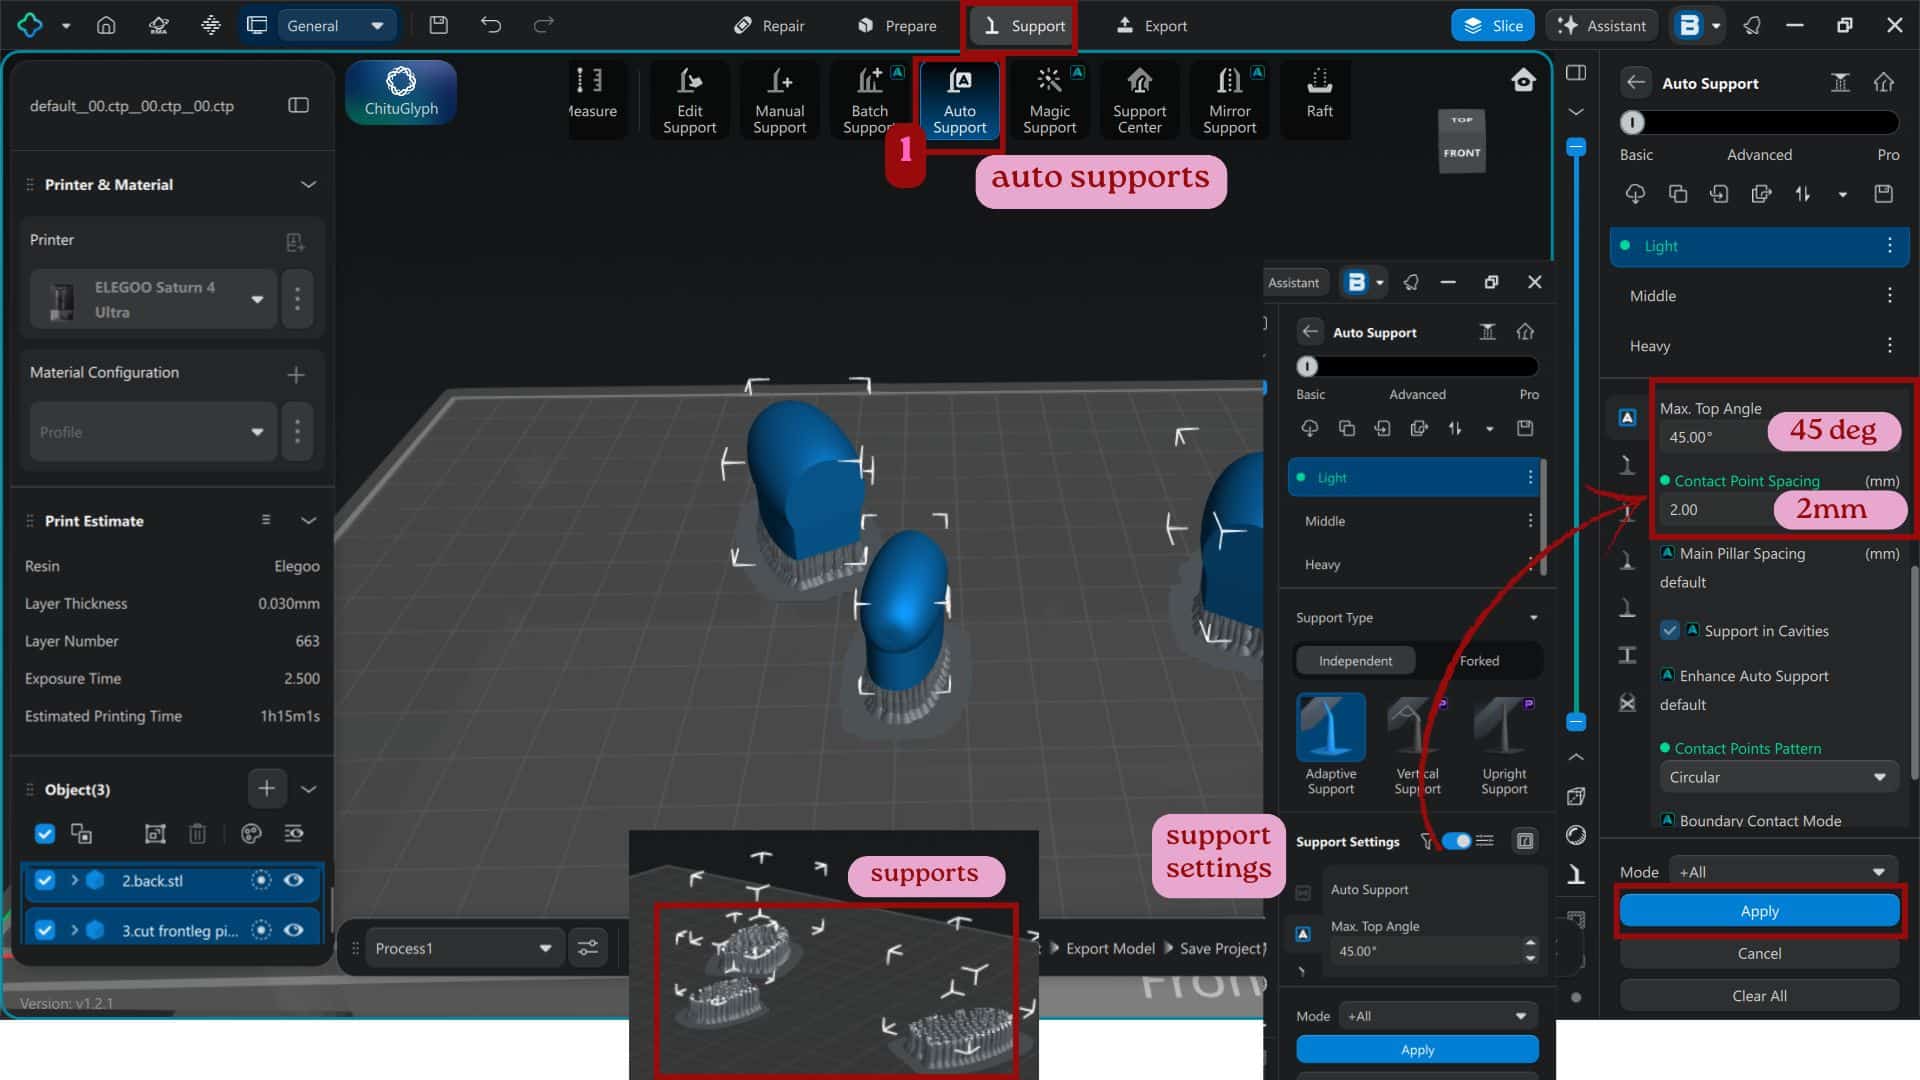
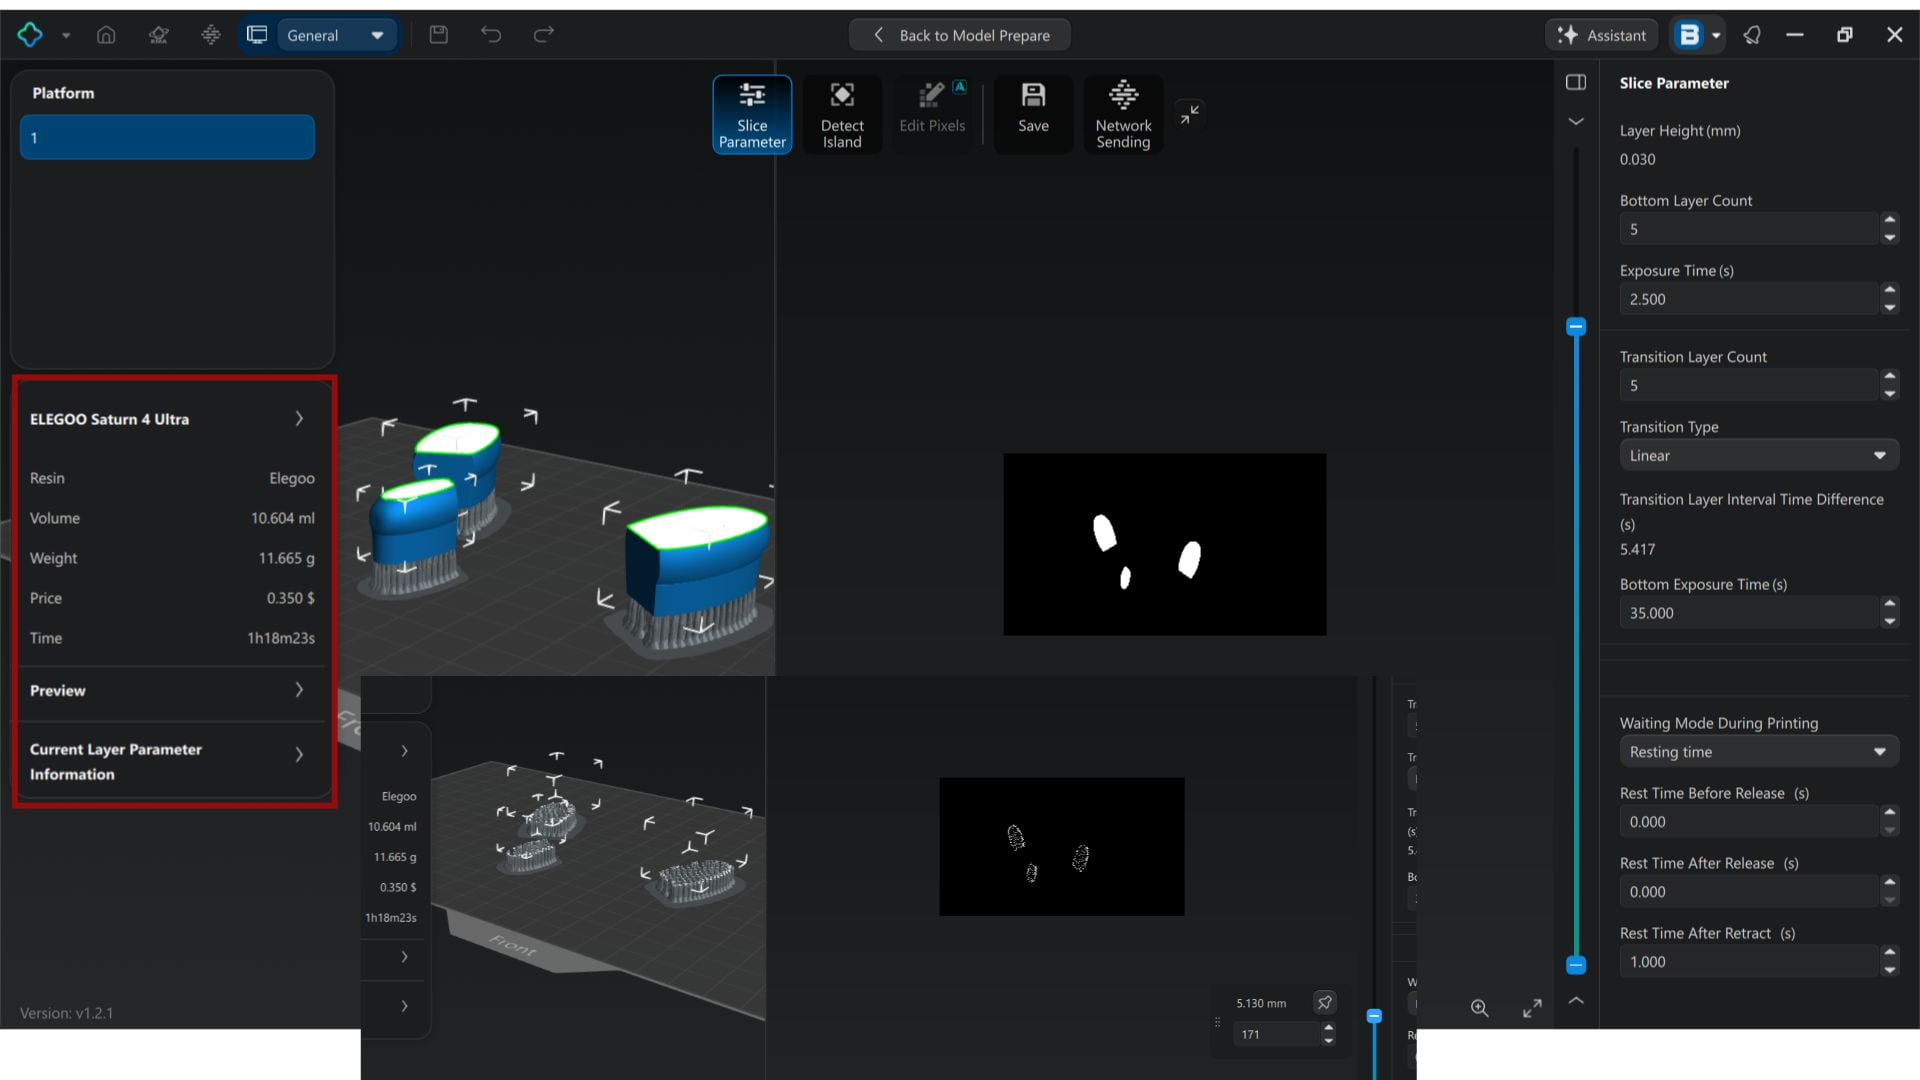
I used the ELEGOO Saturn 4 Ultra 16K Resin 3D Printer to print the curved mold parts.
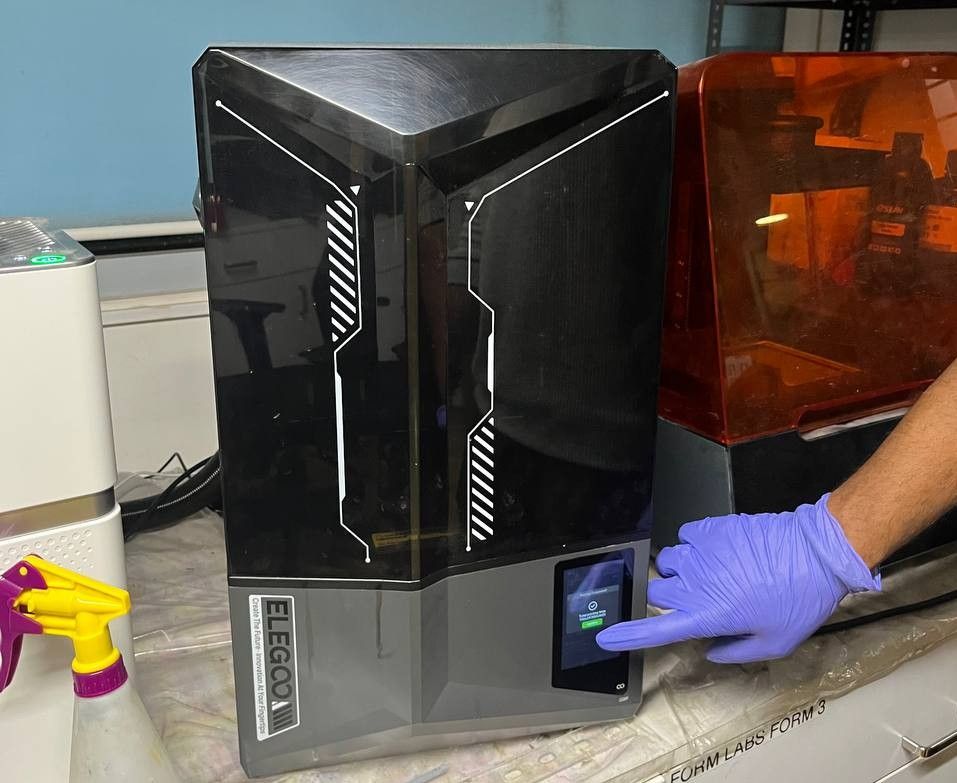
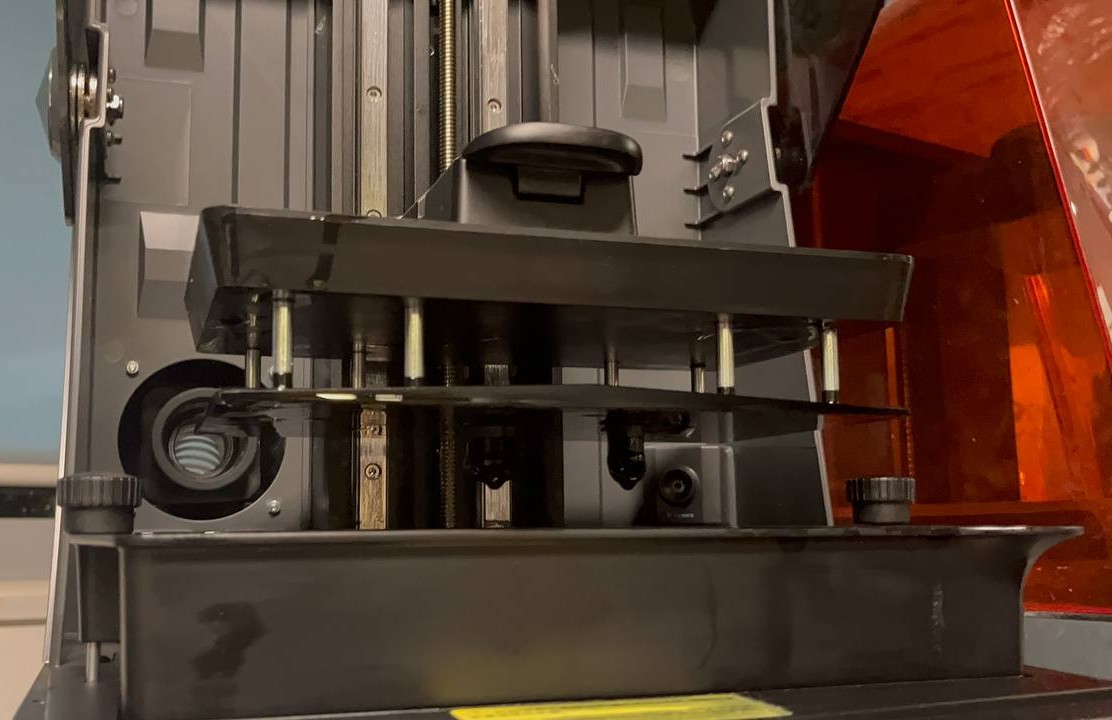
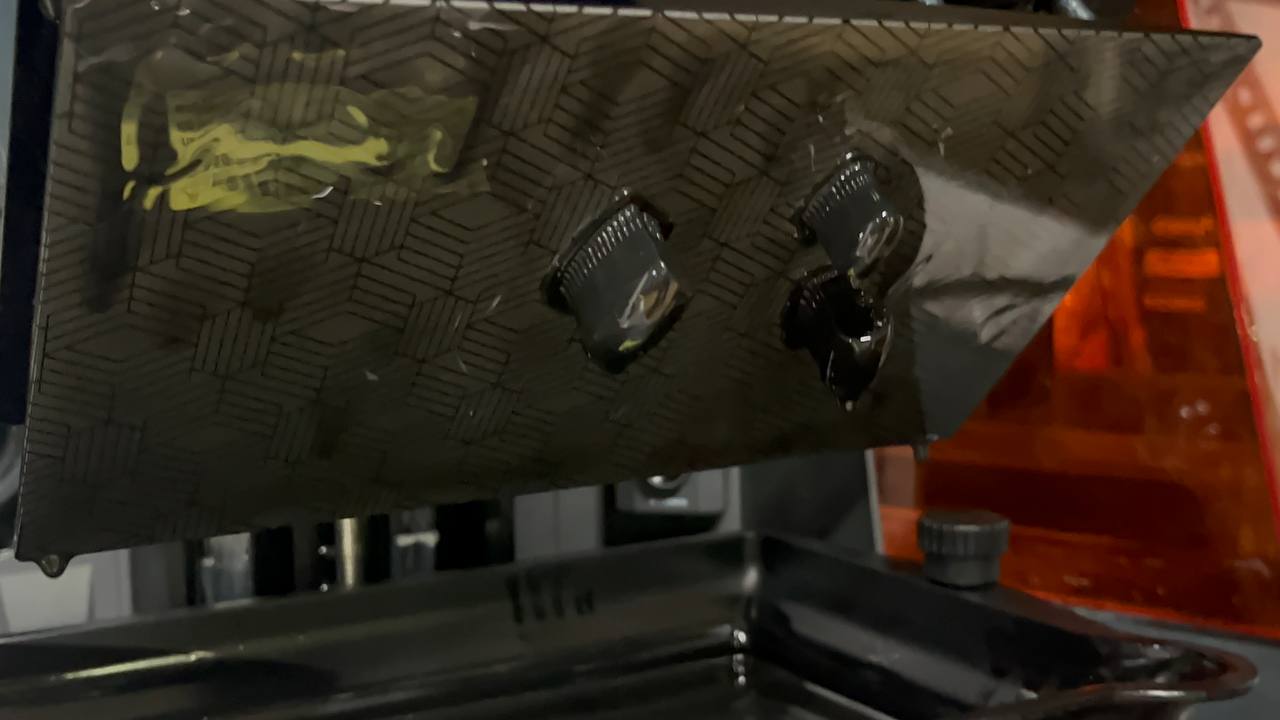
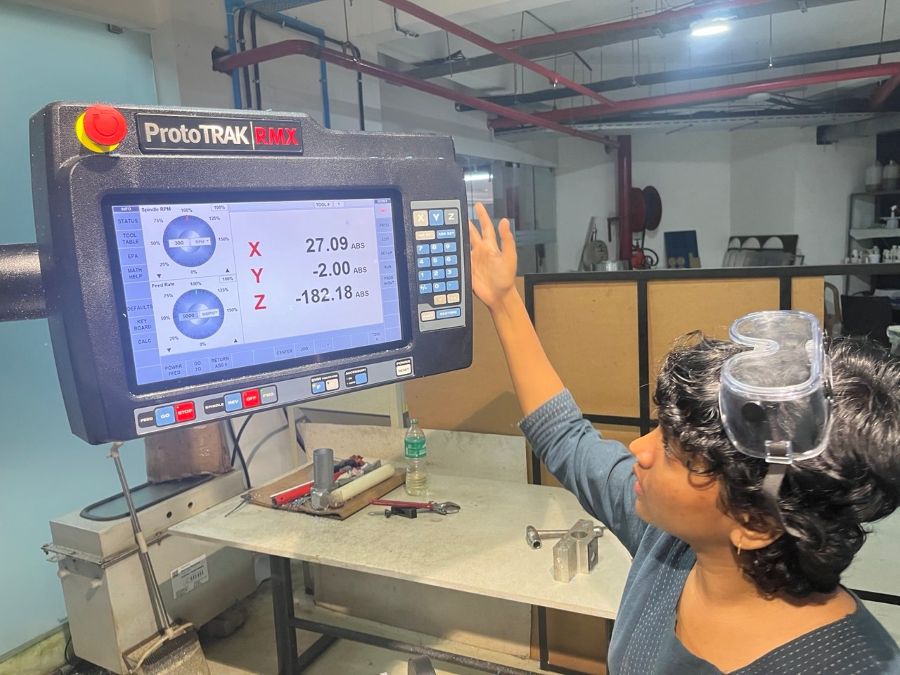
Wax mold making: ProtoTRAK DPM RX2 milling machine
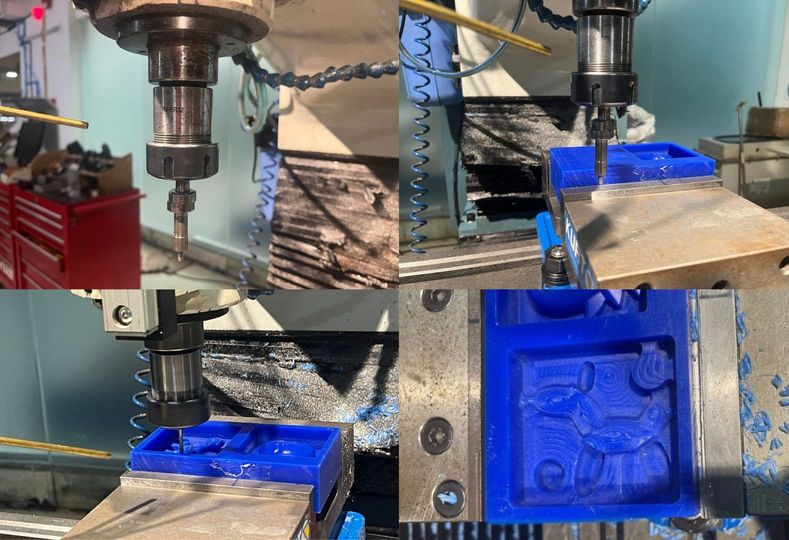
Machine Used: ProtoTRAK DPM RX2 Milling Machine, used for milling the wax mold from the CAM toolpaths generated in Fusion 360
Before machining, I checked the lubricant, coolant, and air pressure, then powered on the ProtoTRAK DPM RX2 milling machine and pressed RESET to initialize it.
The wax block was clamped securely in the vice, and an edge finder was used to set the X and Y origin.
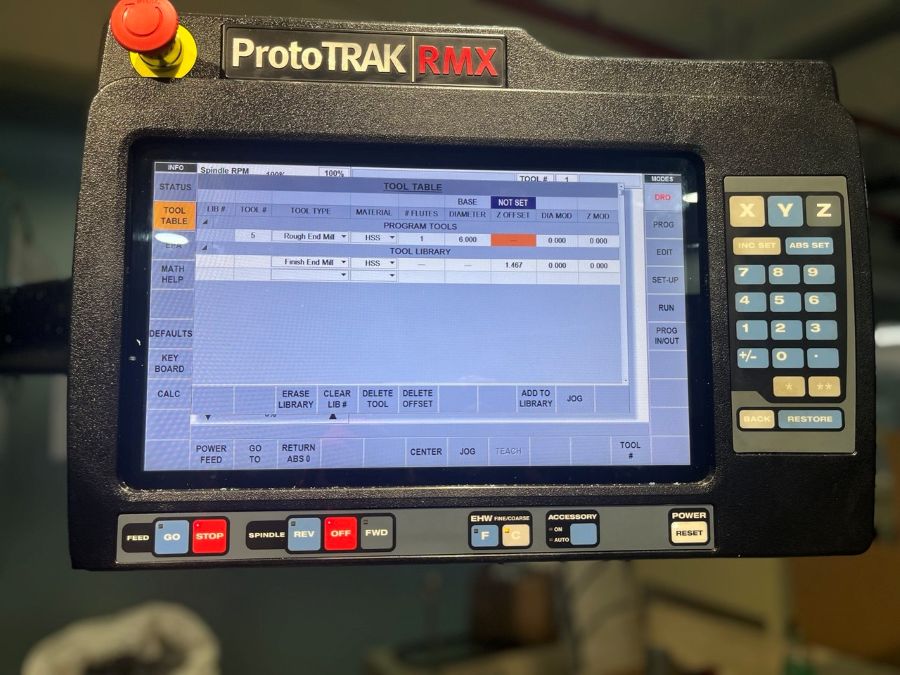
After setting the Z-axis reference and configuring the DRO, I loaded the toolpath generated in Fusion 360, entered the tool details in the Tool Table, and verified the toolpath in TRAKing mode. Once everything was aligned correctly, I started the machining process in CNC RUN mode.
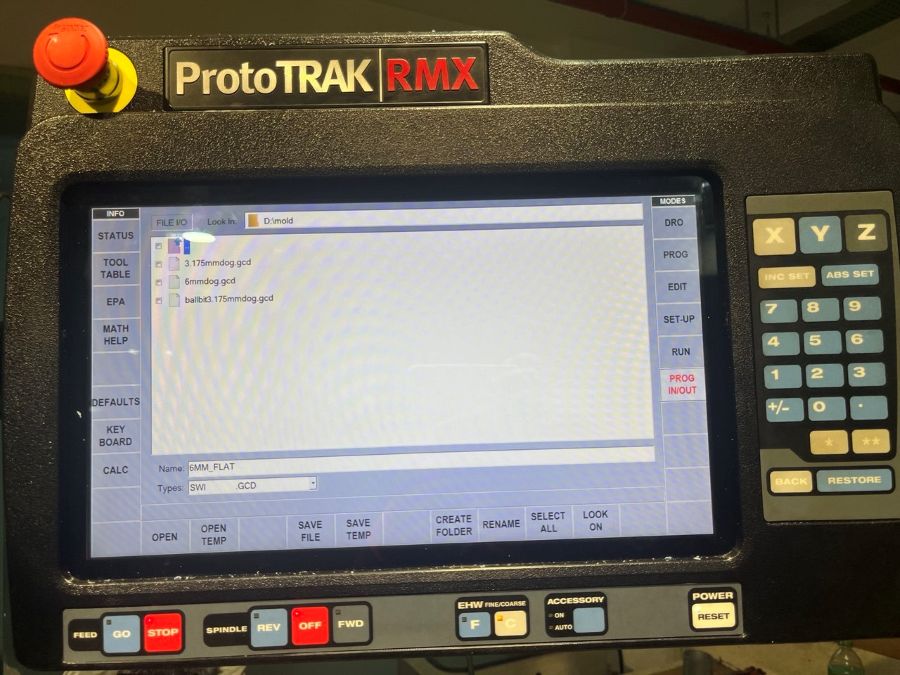
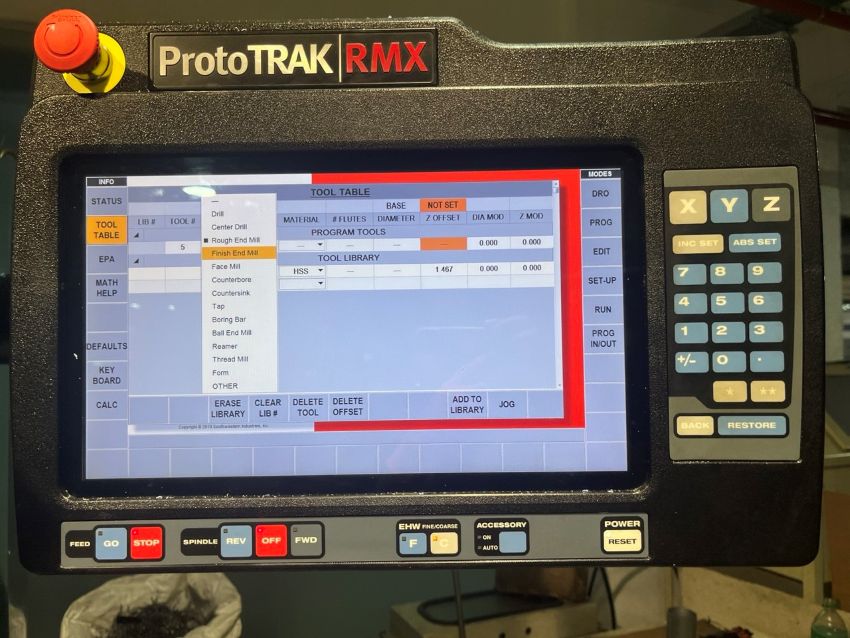
I first performed 2D Adaptive Clearing using a 6 mm single-flute flat end mill for roughing, followed by 2D Adaptive, Ramp, and Pocket Clearing using a 3.175 mm single-flute flat end mill. Finally, I used a Scallop toolpath with a 3.175 mm 4-flute ball end mill to achieve a smooth surface finish.
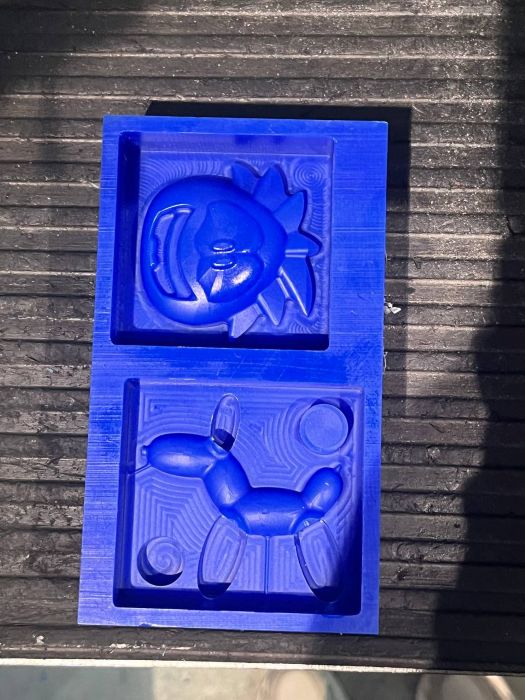
Combining wax mold and 3D printed parts
Making Silicone Mold
Material used:
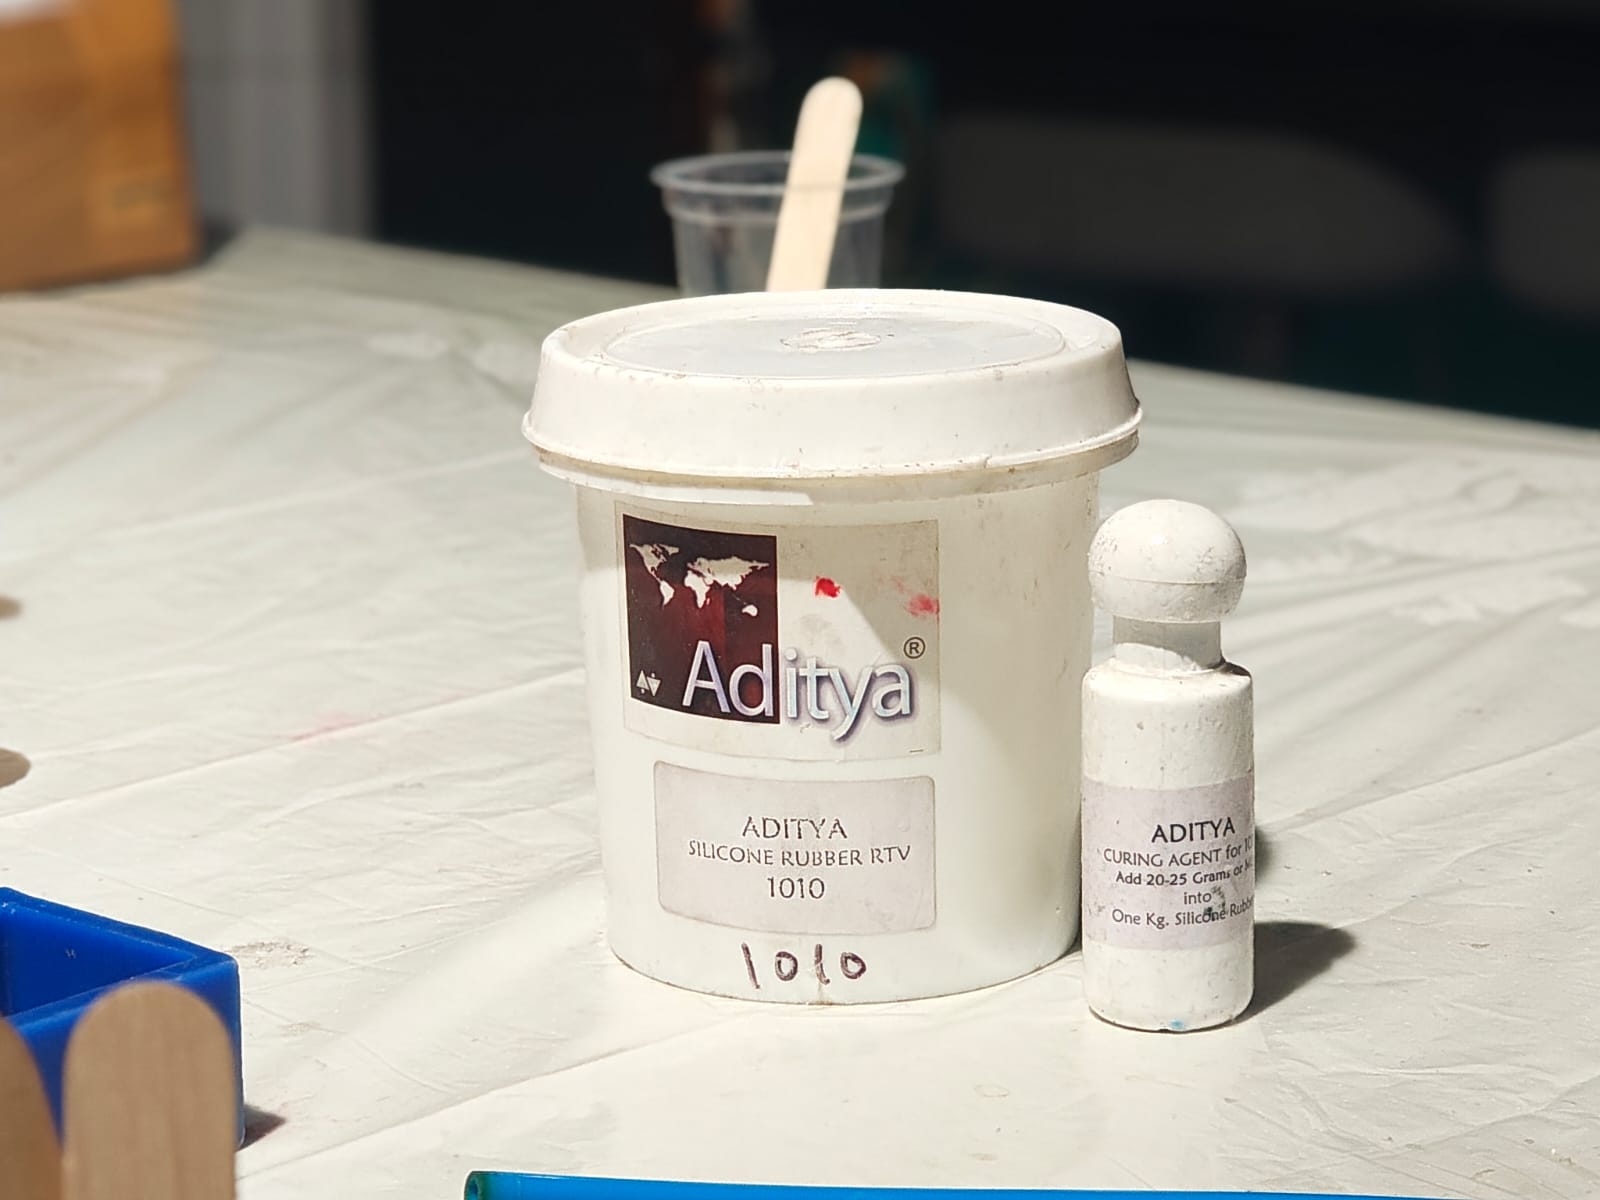
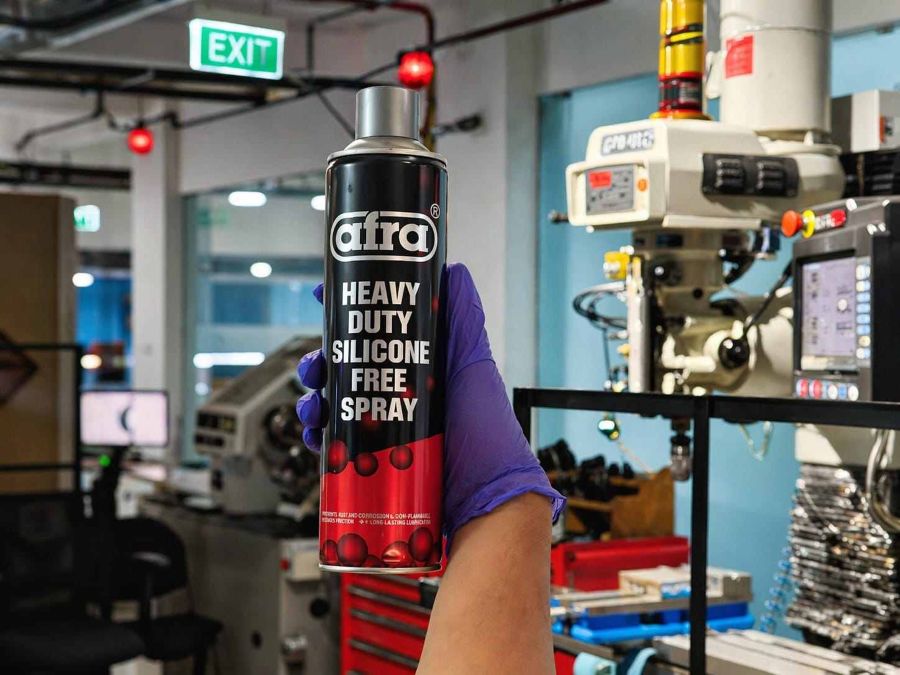
Image Source: group_assignmetns
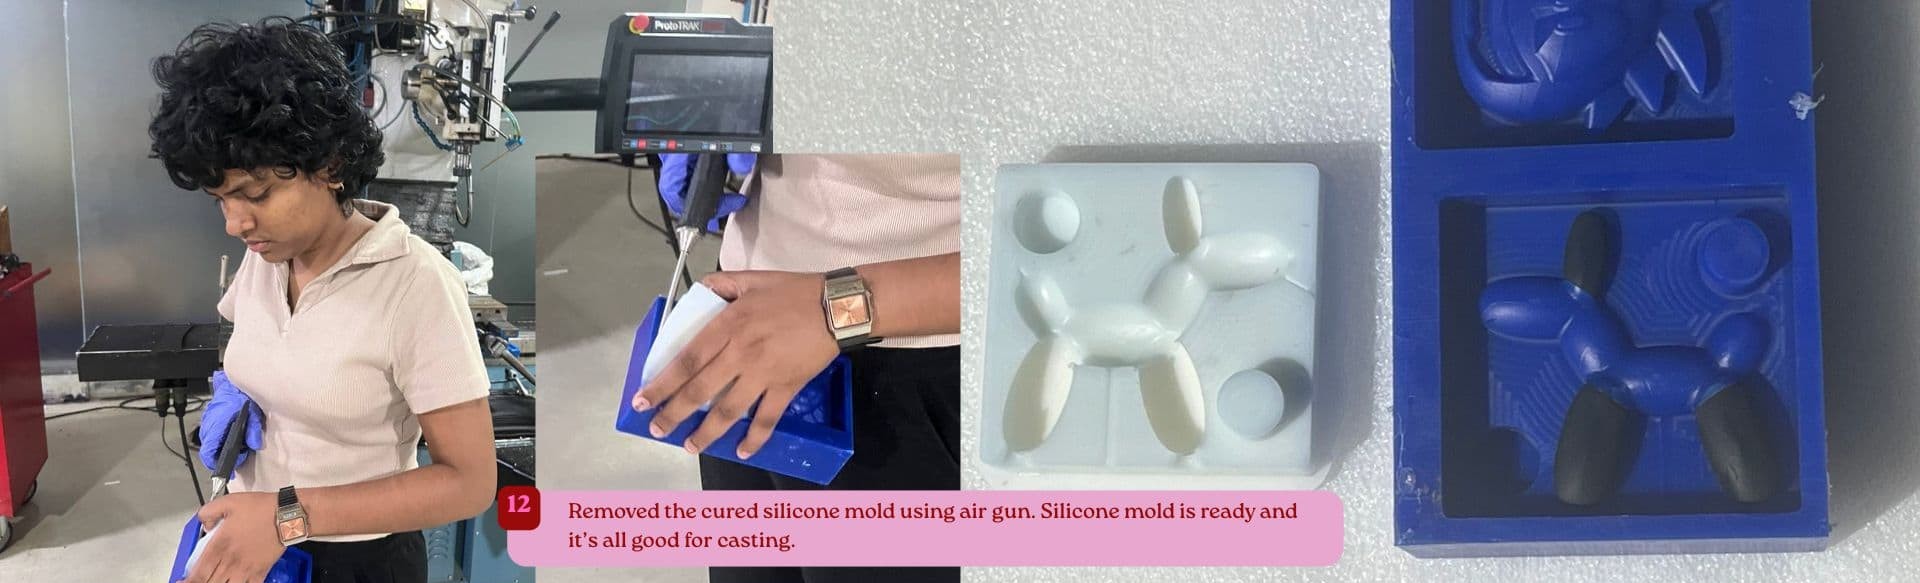
For making the silicone mold, I used Aditya Silicone Rubber RTV - 1010, Aditya curing agent, mixing cups, a weighing scale, a vacuum chamber, mold release spray, and my wax mold with the 3D resin-printed insert. While handling the silicone and curing agent, I wore nitrile gloves for safety.
Casting: Cerrotru, Resin, Wax
Casting Material: Cerrotru
For the casting, I used Cerrotru, a reusable low-temperature alloy made of 42% tin and 58% bismuth. We remelted Cerrotru from previous castings and poured it into the silicone mold.
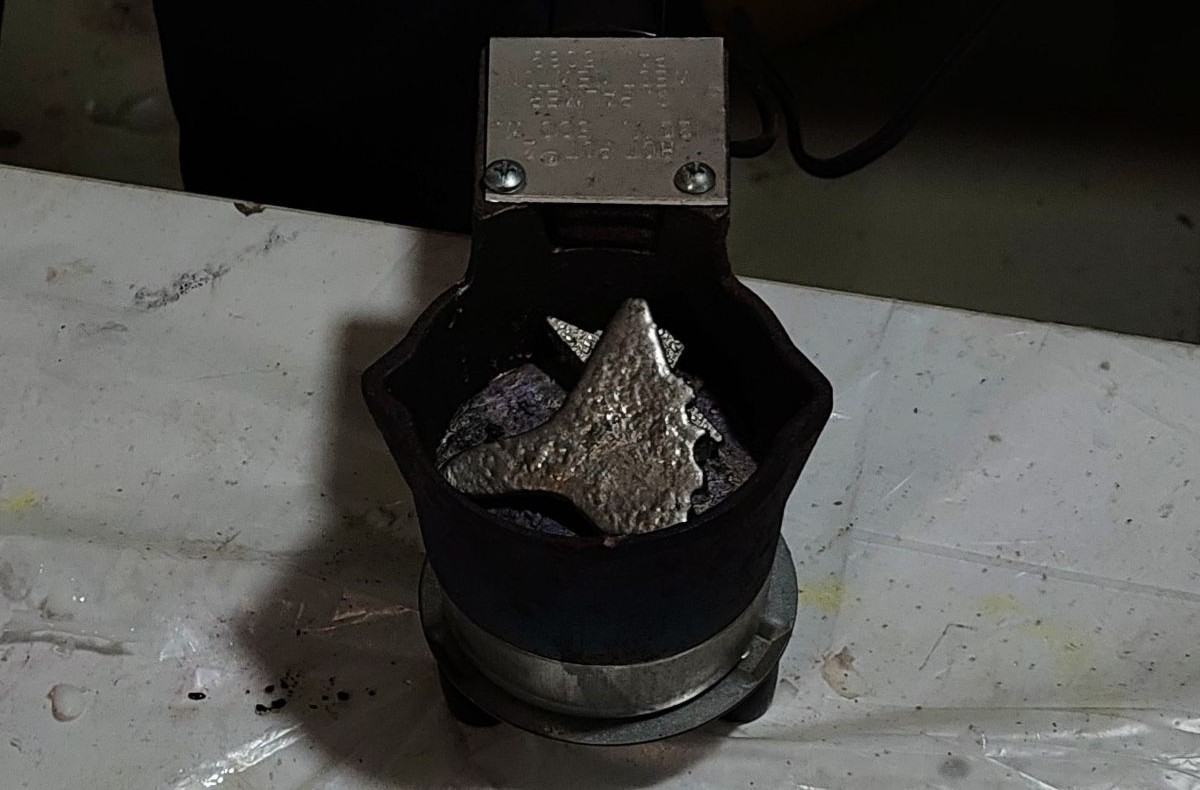
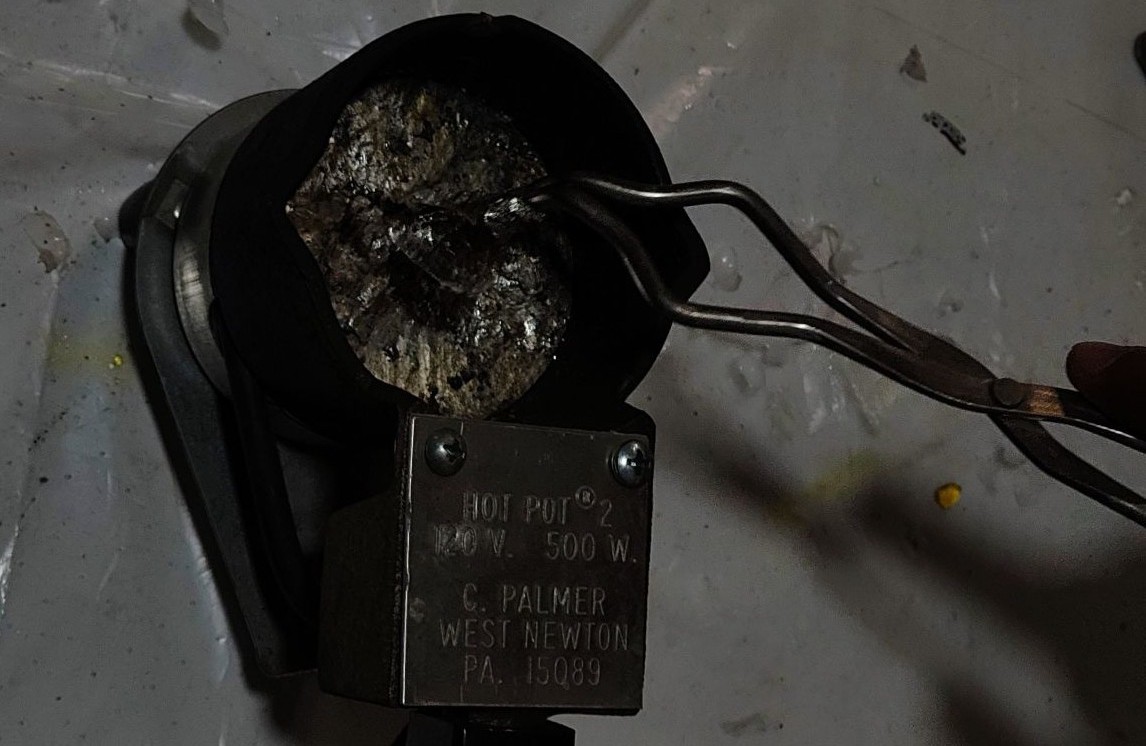
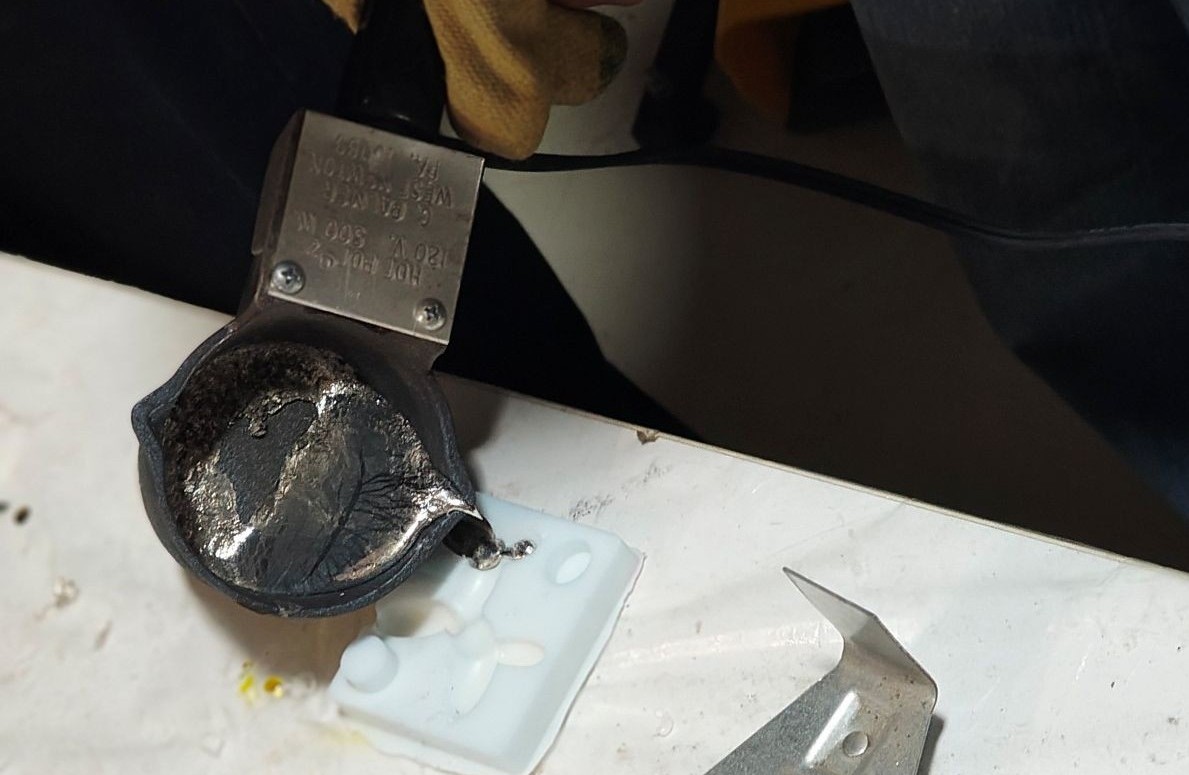
The Cerrotru alloy was melted in a pan which was powered by a 110V power supply.
I used heat-resistant gloves and tongs to safely handle the hot pan and pour the molten metal into the silicone mold. After pouring, I tapped the mold to help release trapped air.
After pouring, waited for casting to cool for about 10 minutes before removing it from the silicone mold. Although the metal had solidified, it was still hot and i put them under tape, water cools it down. I recommend to keep it few more minutes and allow it cool down, so you don't burn yourself.
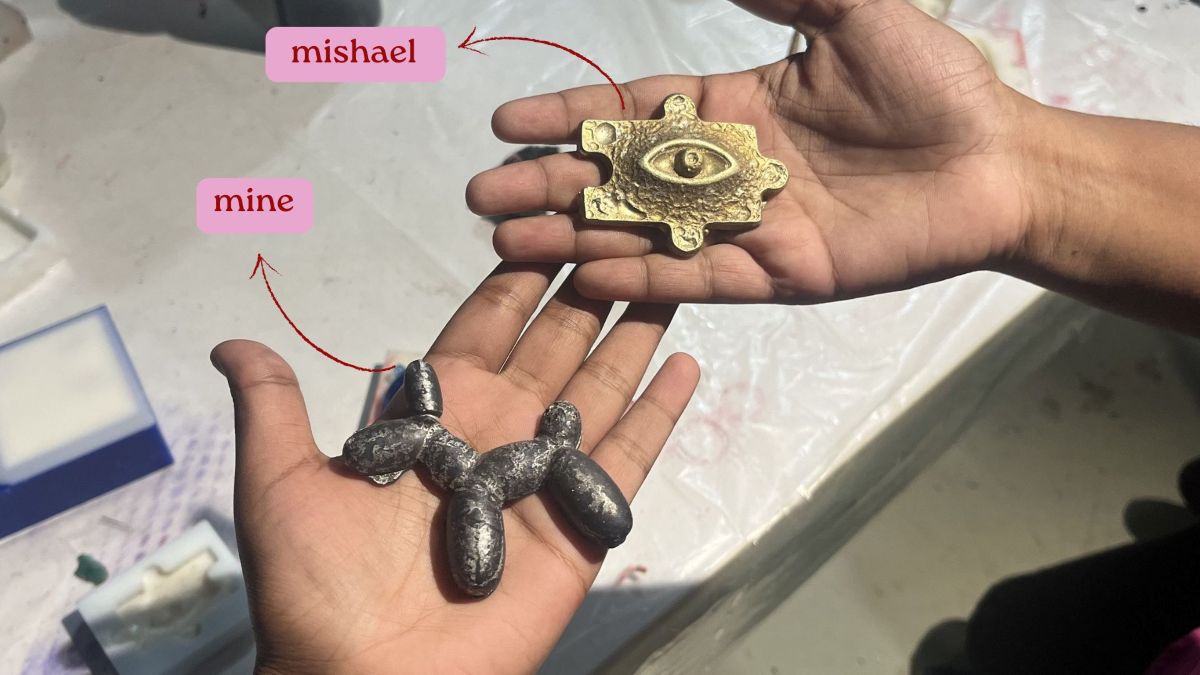
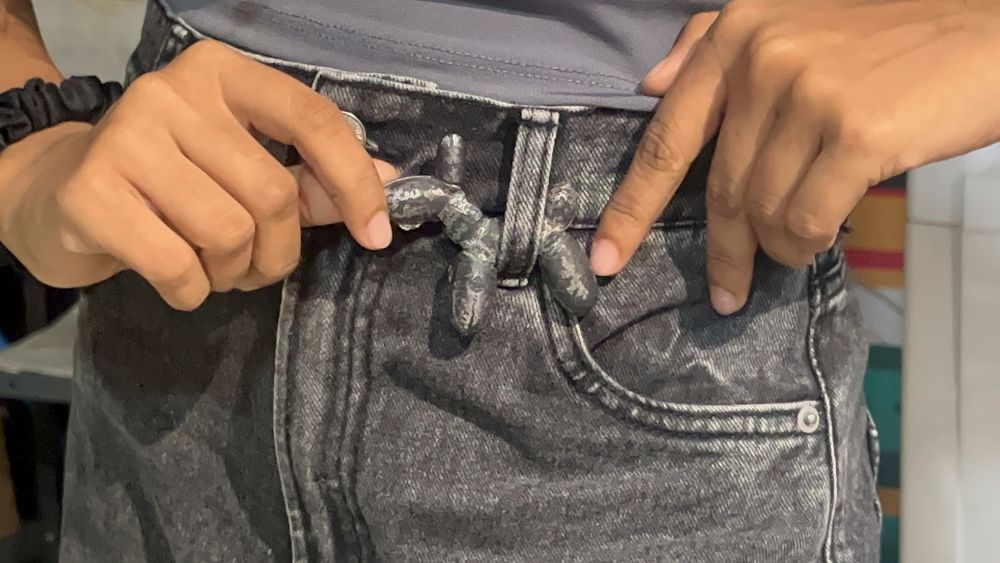
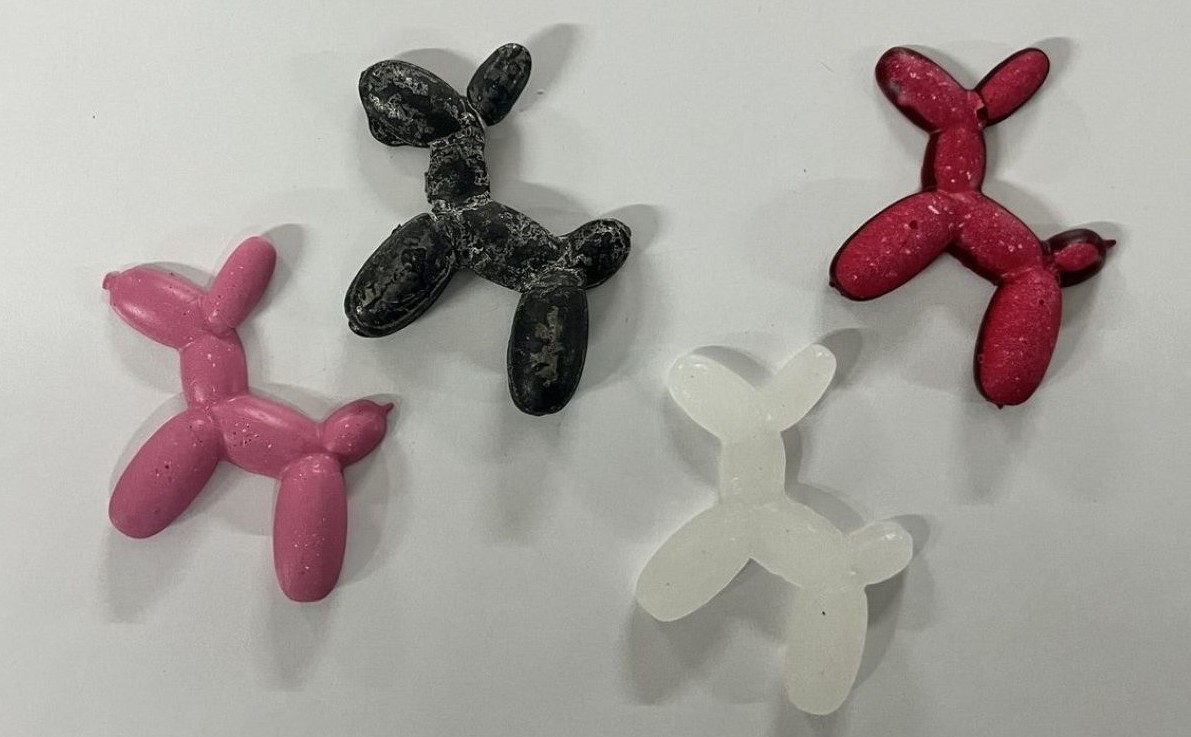
The overall shape was formed well. There are some extra materials in the edges and a few small air bubbles. I'm pretty happy about the result. I really liked how Mishael's casting turned out.
Casting Material: Resin
After silicon mold cured, I checked that the silicone mold was clean and no other debris left.Resin preparation:
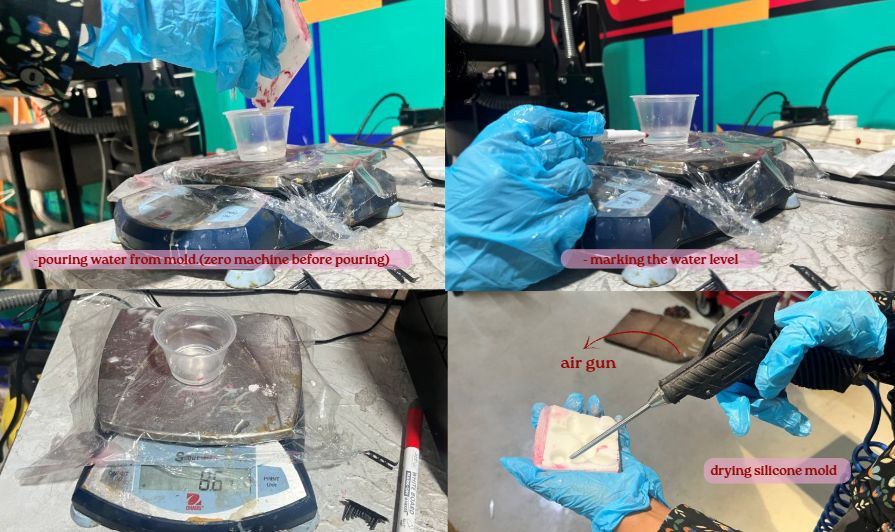
For preparing the resin mix, first estimated the required amount of resin mix by filling the silicone mold with water and pouring it into a transparent cup. I marked the water level, emptied the cup, and dried it completely using a high-pressure air gun.
Material Used:
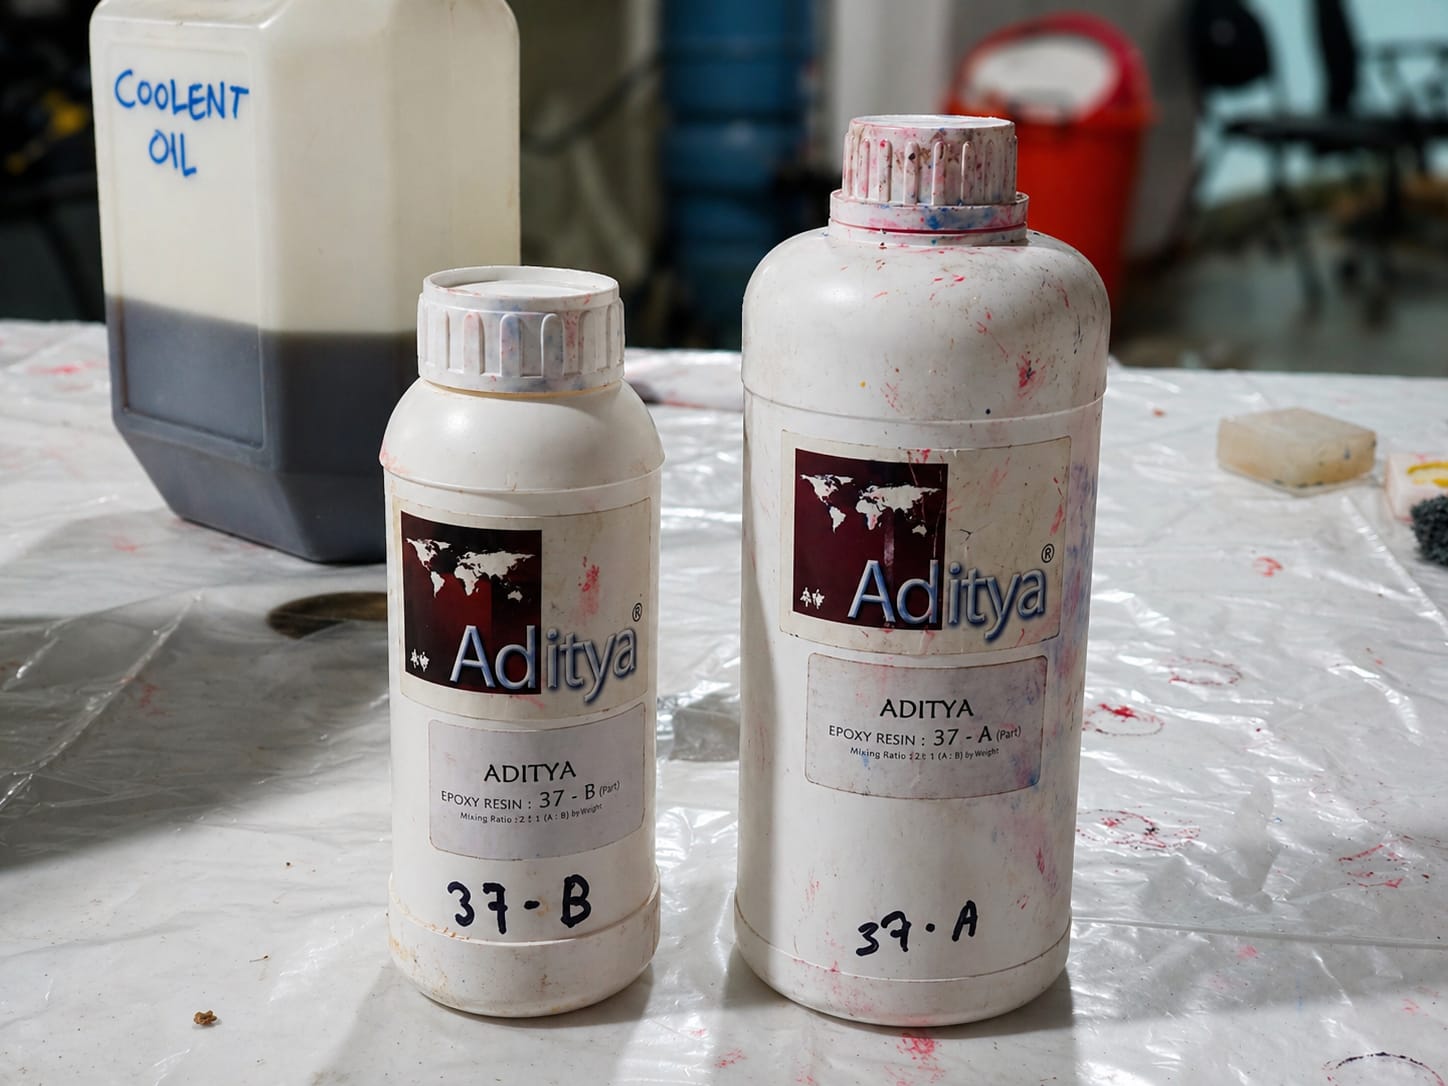
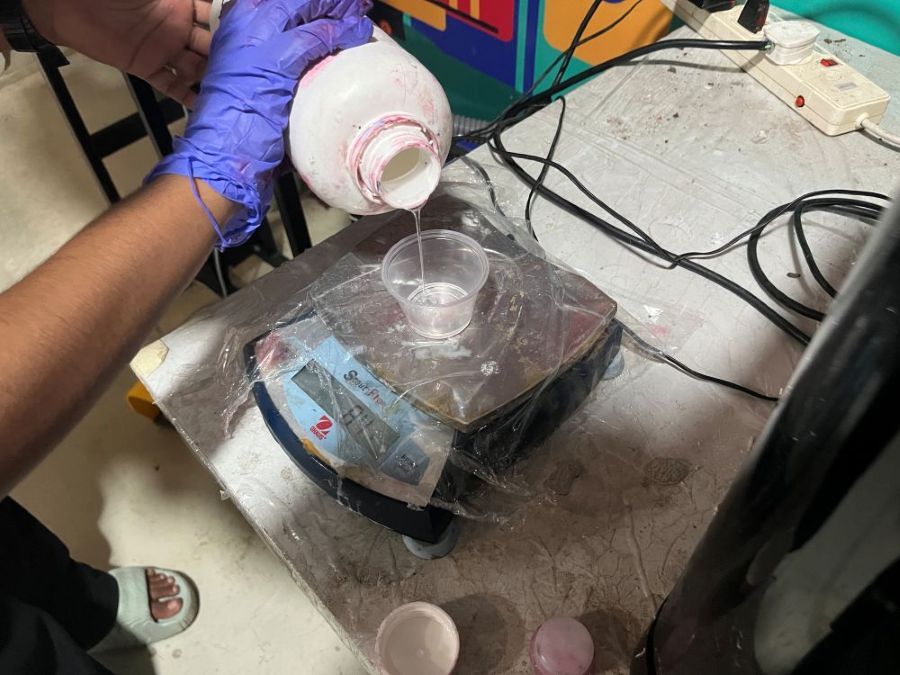
Adityasilicone: Aditya Ultra Clear Cast Epoxy - 37 - 1 Kg
Used Aditya Ultra Clear Cast Epoxy - 37, which consists of two parts: Part A (resin) and Part B (hardener).
These were mixed in a 2:1 ratio, meaning 2 parts of Part A were mixed with 1 part of Part B.
After measuring the required amounts, I mixed the resin slowly to reduce air bubbles.
Adding color/pigments:
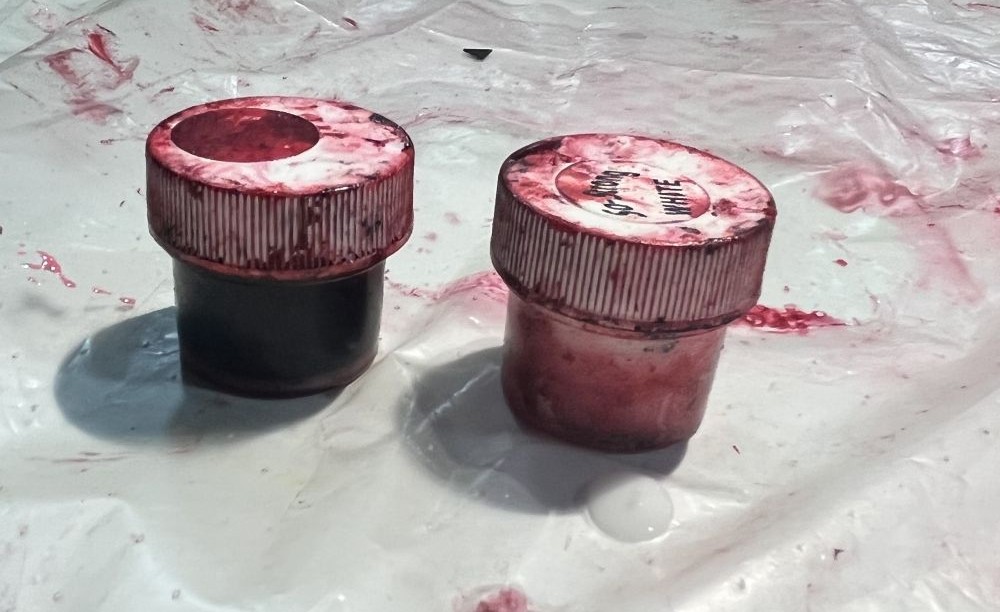
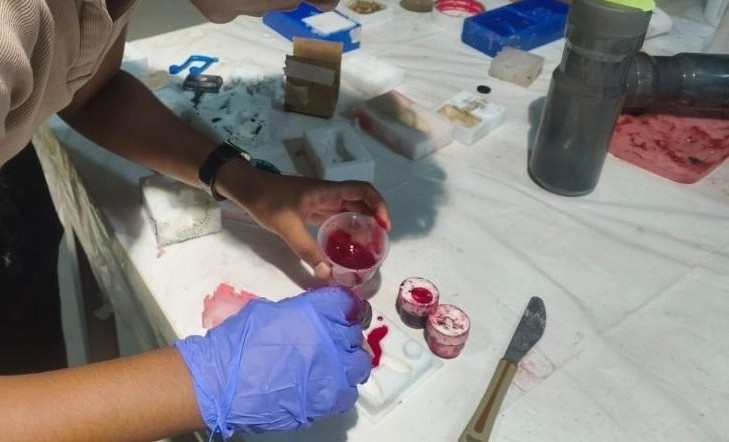
I wanted the cast to have a red base with a marble-like effect,
for that decided to color it pink, by mixing alcohol-based red and white pigments into the resin.
But the white pigment had partially solidified inside the container, so it took some time to mix properly.
Even after mixing, once the resin settled, small white particles were floating on the surface,
that's not what I expected. Anyways, I went ahead with the casting to see how the it would turn out.
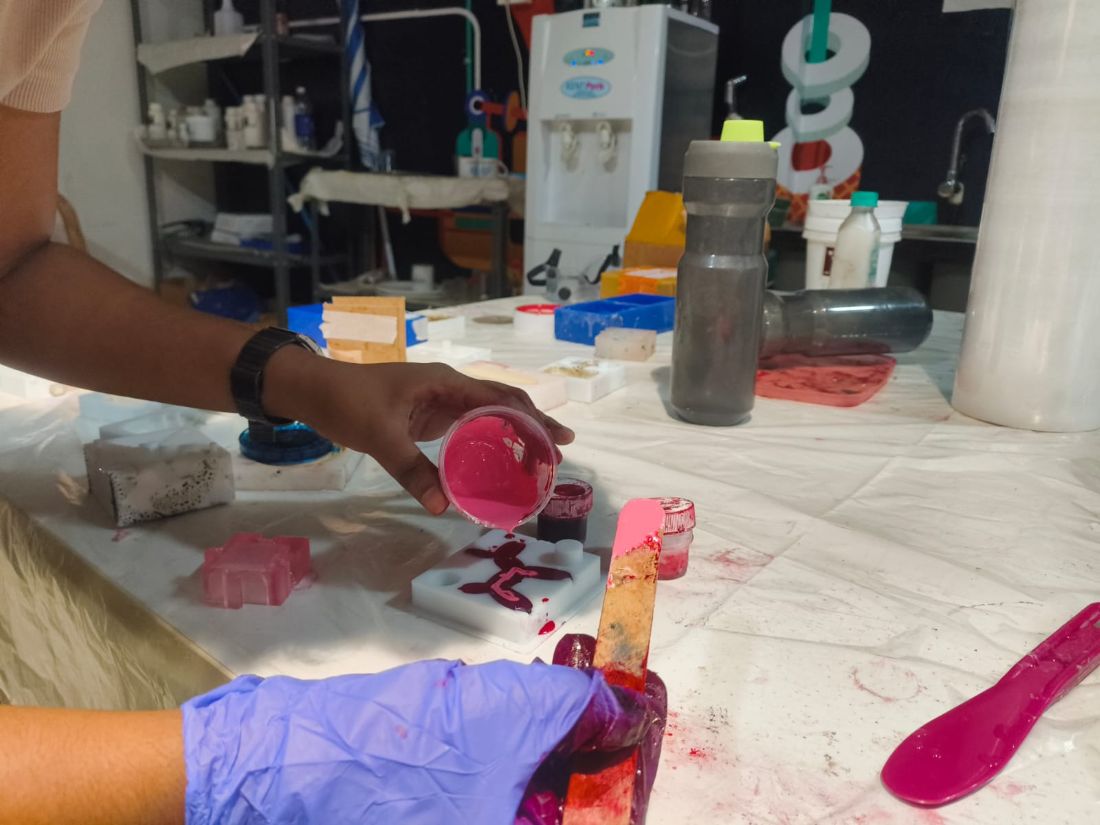
Pouring the mixed resin
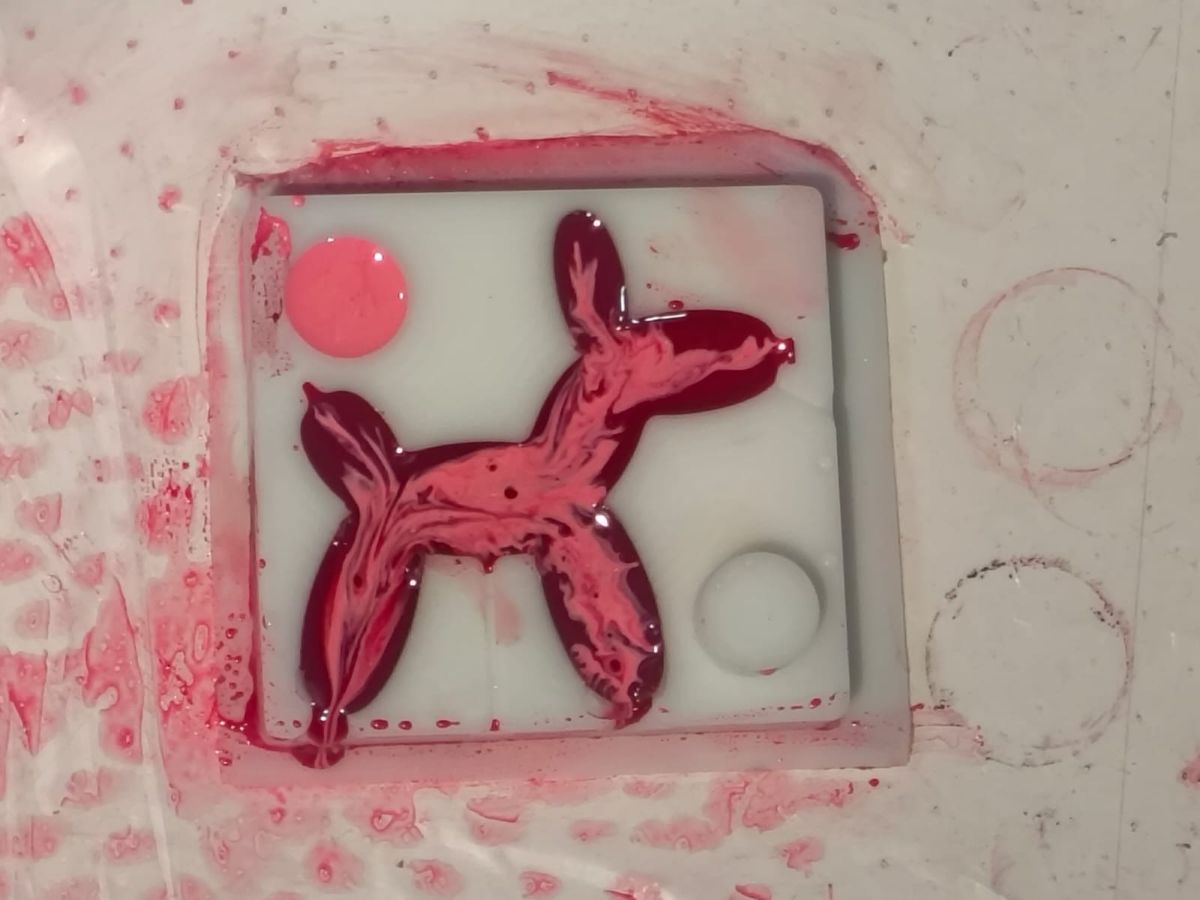
The mixed resin was poured slowly into the silicone mold. Tapped the mold on floor to release the trapped air bubbles.
The mold was left to cure at room temperature for about 18 hours.
Once it hardened, removed the cast from the silicone mold.
It was easy to remove from silicone mold as it's flexible.
Results and observations:
The resin cast was successful, but it had a few defects.
Since the silicone mold was made out of a wax mold and a 3D resin-printed insert,
there was a very small gap between them.
During silicone molding, a small amount of silicone entered this gap, creating a thin line on the silicone mold
which further created a crack on the resin cast.
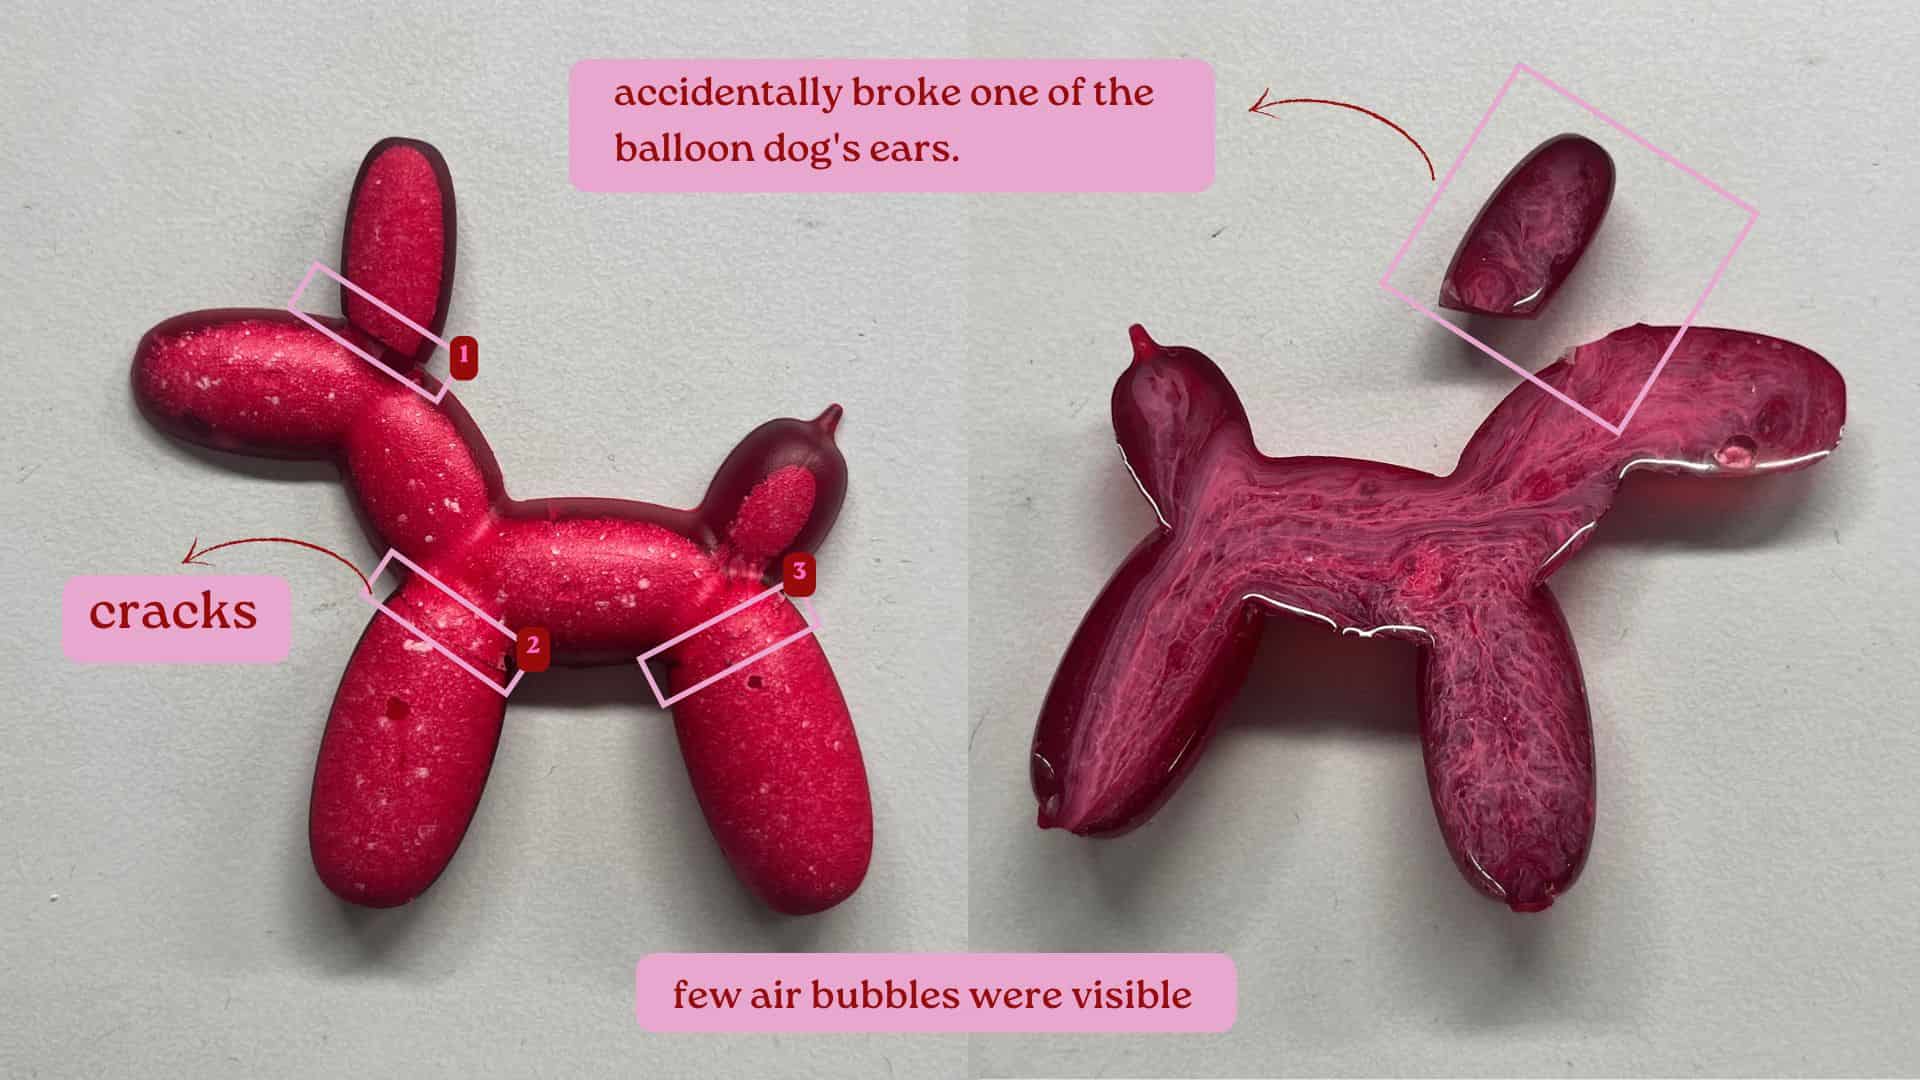
The color was also not what I expected.
The white pigment settled on the red pigment, looking like small white dots on the cast.
On the back of the model, the pigments formed pink vein-like patterns.
A few air bubbles were also visible on the surface.
After taking the cast out of the mold, I was playing with it and ended up breaking the balloon dog's ears.
Again Casting with resin
This time, i decided on only casting with pink shade nothing else, i tried to peel off unwanted small silicone materials.
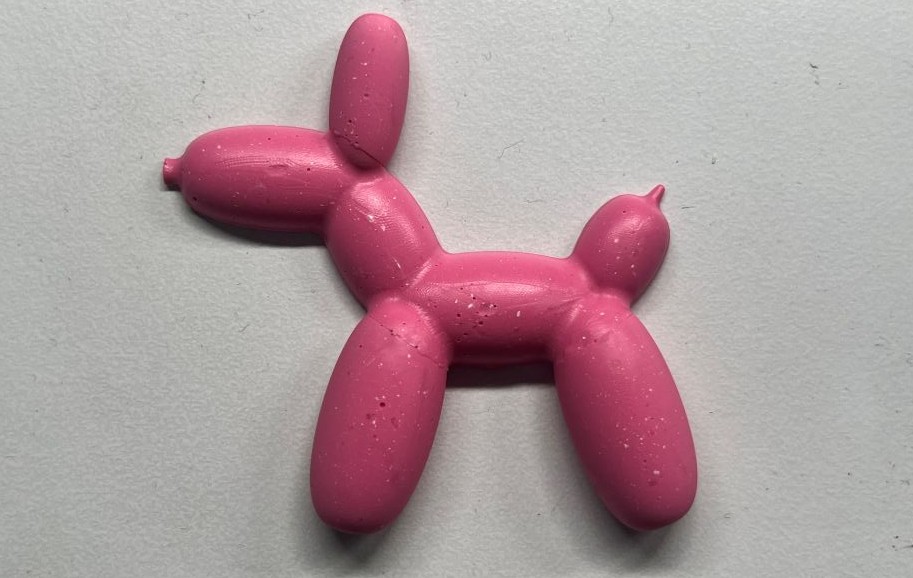
I really liked how the final cast turned out. It reminds me of bubble gum, making me wanted to eat them. However, there are still a few small crack lines are visible near the joint between the wax mold and the 3D-printed insert. There are also a few air bubbles and small white pigment particles that settled on the surface.
Casting Material: Wax
Source: merin-cyriac
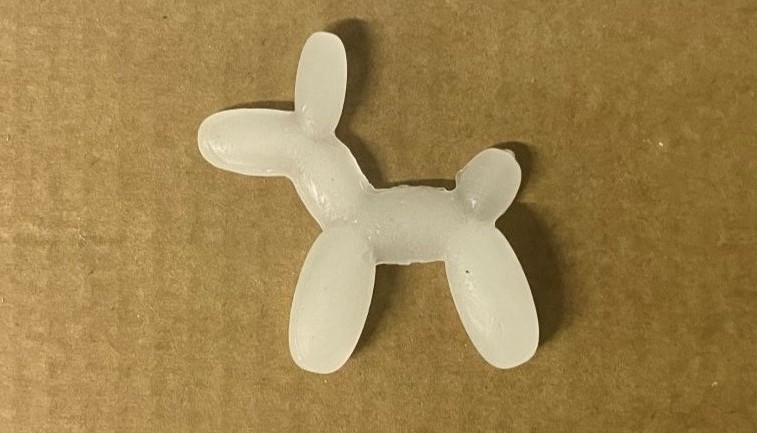
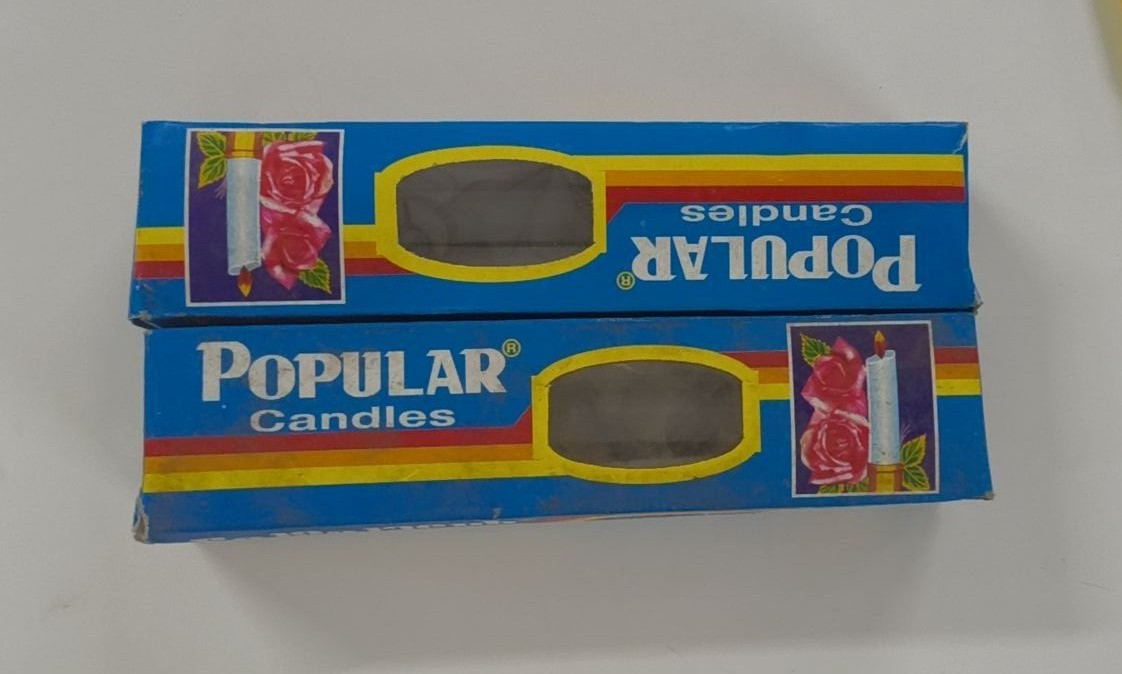
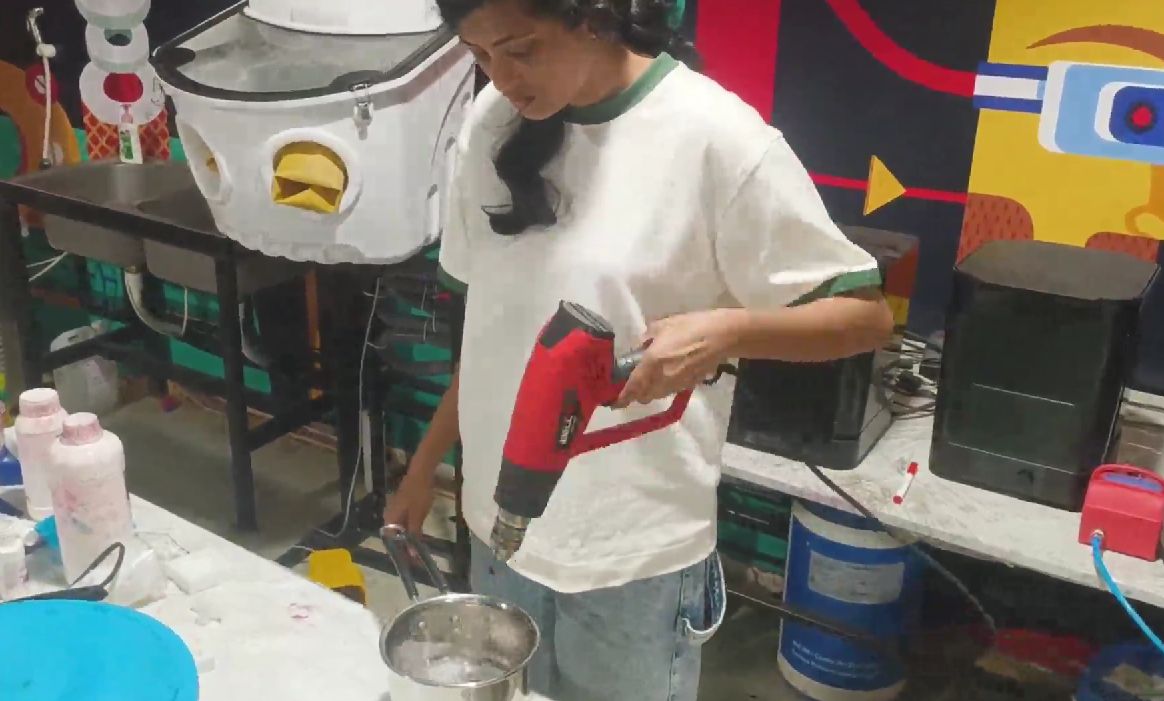
For Merin's casting, she melted wax candle and used it to cast her own mold. She also poured some of the melted wax into my silicone mold, so now i have balloon dog casted out of wax It turned out really smooth surface but i think she forgot to cast it's mouth and tail, wax casting cools down quick and you will get really good results. For more details about the wax casting process, please refer to Merin's documentation.