
Week 14: Interface and Application Programming
Assignments:
Group Assignment
- Compare as many tool options as possible
Individual Assignment
- Write an application that interfaces a user with an input &/or output device that you made
Things to Complete This Week
- Create two designs
- Document process of molding and casting
- Work on Final Project!
Here is my schedule for this week.
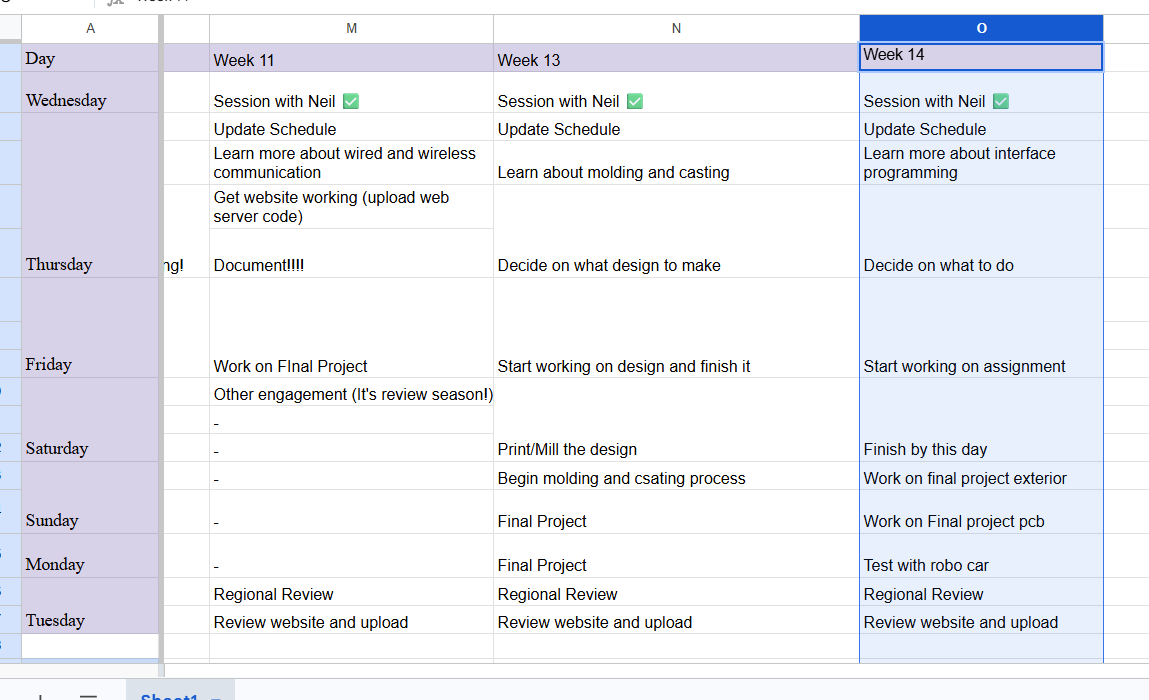
Here is the link to my schedule
Group Assignment
Reflection
Working through these tools for the group assignment helped me see just how much the communication method affects the whole project. Processing and p5.js were quick to get results on screen, while Node-RED felt more powerful for connecting things over WiFi. It really changed my understanding of how hardware and interfaces actually work together in real projects. 😄
You can access our group assignment here.
Individual Assignment
What is an interface?
An interface is the connection that allows your software, user, data, and hardware to talk to each other. There are different types of interfaces:
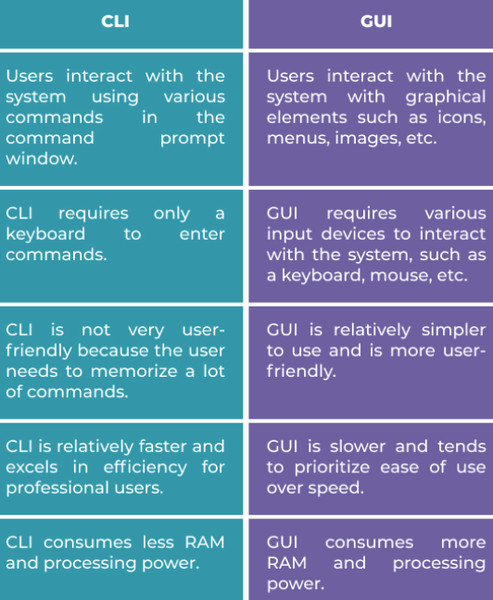
A graphical user interface (GUI) allows the user to interact with a system through visual elements such as buttons, icons, menus, and windows. It is usually easier to understand because the user can click or tap instead of typing commands.
A command-line interface (CLI) allows the user to interact by typing text commands. Instead of clicking buttons, the user enters commands manually and the system responds with text output. It is usually faster for experienced users, but it can be harder to learn because the exact commands need to be remembered. 🥸
Another type is a physical interface, which involves direct interaction with hardware components such as buttons, switches, LEDs, or sensors.
Different interfaces can also work together in one system, just like the button and web page in this assignment.
For this week's assignment, I created a web server interface related to my final project 〜( ̄▽ ̄〜). The application receives distance data from an ultrasonic sensor and displays the readings on a web page, allowing the user to monitor the sensor in real time.
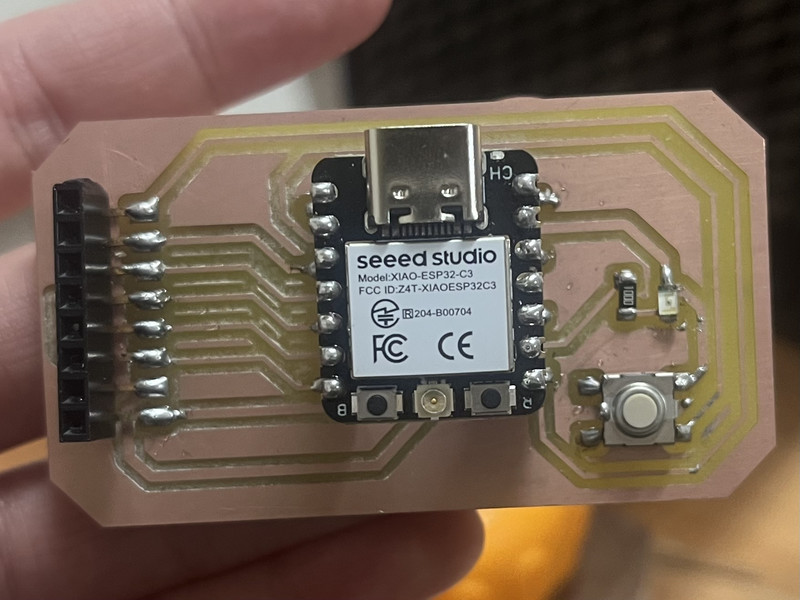
For This, I used the same board that I designed during week 8 🤗
Here are the steps I followed:
I first started by connecting the components. These are the exact connections I made.
Connections
| Component Pin | Connect to XIAO Pin | Type |
|---|---|---|
| Built-in LED | D8 (GPIO 8) | Output |
| Ultrasonic TRIG | D2 (GPIO 4) | Output |
| Ultrasonic ECHO | D3 (GPIO 5) | Input |
| Button | D1 (GPIO 3) | Input (Pull-up) |
| VCC (Ultrasonic) | 3.3V | Power |
| GND | GND | Ground |

I used ChatGPT for the code. This was the prompt that I used: Can you write code for a XIAO ESP32-C3 where pressing a button turns follow mode on and pressing it again turns follow mode off. In follow mode, an ultrasonic sensor should continuously measure distance and show the readings on a web server. When follow mode is turned off, the readings should stop. The built-in LED should blink every time following mode is on. Also can you make the web server lilac?
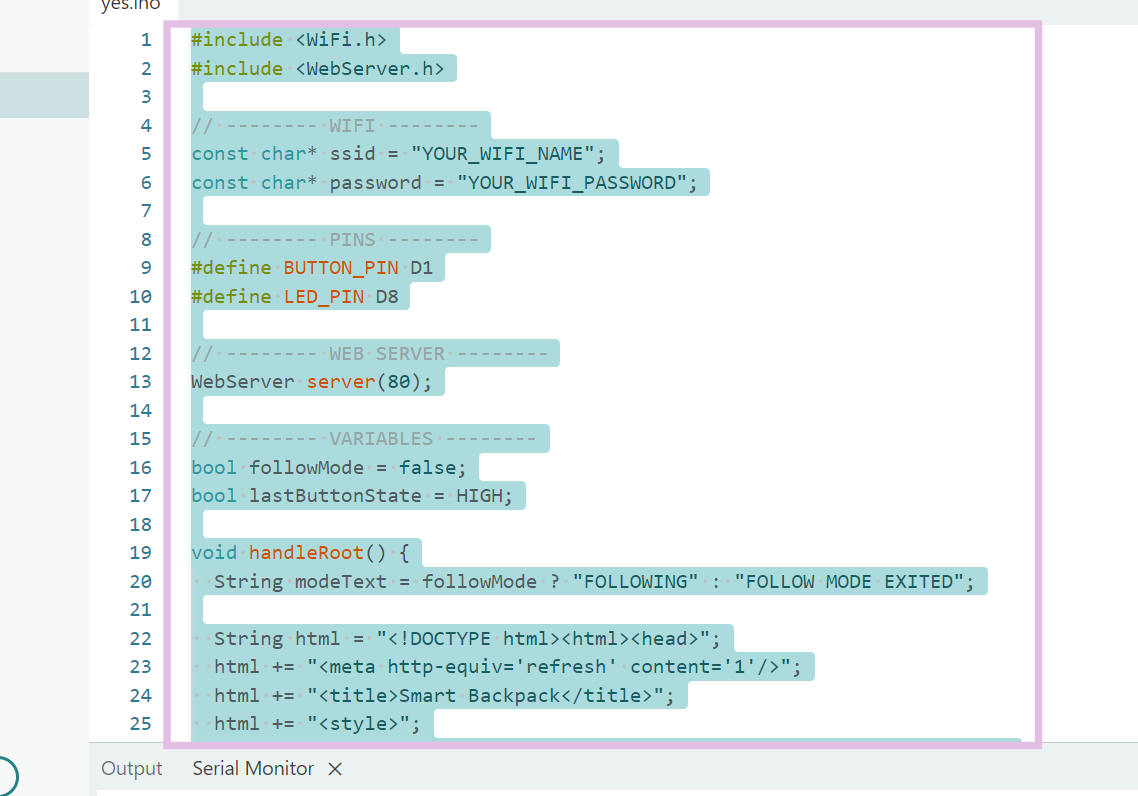
I then entered the Wi-Fi name, Wi-Fi password, and assigned the pins for the LED, button, and ultrasonic sensor myself.
#include <WiFi.h>
#include <WebServer.h>

const char* ssid = "DGI";
const char* password = "dgi@2024!";

#define BUTTON_PIN 3   // D1 on XIAO ESP32-C3 = GPIO3
#define LED_PIN 8      // D8 = GPIO8
#define TRIG_PIN 4     // D2 = GPIO4
#define ECHO_PIN 5     // D3 = GPIO5

WebServer server(80);

bool followMode = false;
bool lastButtonState = HIGH;
float distance = 0;

unsigned long lastSensorRead = 0;
const int SENSOR_INTERVAL = 200;

// Average N readings and discard outliers
float readDistance() {
  const int samples = 5;
  float readings[samples];
  int validCount = 0;

  for (int i = 0; i < samples; i++) {
    digitalWrite(TRIG_PIN, LOW);
    delayMicroseconds(4);
    digitalWrite(TRIG_PIN, HIGH);
    delayMicroseconds(10);
    digitalWrite(TRIG_PIN, LOW);

    long dur = pulseIn(ECHO_PIN, HIGH, 23200);
    if (dur > 0) {
      readings[validCount++] = dur * 0.0343 / 2.0;
    }
    delay(10);
  }

  if (validCount == 0) return -1;

  for (int i = 0; i < validCount - 1; i++) {
    for (int j = i + 1; j < validCount; j++) {
      if (readings[j] < readings[i]) {
        float temp = readings[i];
        readings[i] = readings[j];
        readings[j] = temp;
      }
    }
  }

  return readings[validCount / 2];
}

void handleRoot() {
  String modeText = followMode ? "FOLLOWING" : "FOLLOW MODE EXITED";

  String html = "<!DOCTYPE html><html><head>";
  html += "<meta http-equiv='refresh' content='1'/>";
  html += "<title>Smart Backpack</title>";
  html += "<style>";
  html += "body{font-family:Arial;text-align:center;margin-top:60px;background-color:#C8A2C8;}";
  html += "p{font-size:22px;}";
  html += ".following{color:green;}";
  html += ".exited{color:red;}";
  html += "</style>";
  html += "</head><body>";
  html += "<h1>Smart Backpack Interface</h1>";

  if (followMode) {
    html += "<p class='following'>Mode: " + modeText + "</p>";
    if (distance < 0) {
      html += "<p>Distance: Out of range</p>";
    } else {
      html += "<p>Distance: " + String(distance, 1) + " cm</p>";
    }
  } else {
    html += "<p class='exited'>Mode: " + modeText + "</p>";
  }

  html += "</body></html>";
  server.send(200, "text/html", html);
}

void setup() {
  Serial.begin(115200);

  pinMode(BUTTON_PIN, INPUT_PULLUP);
  pinMode(LED_PIN, OUTPUT);
  pinMode(TRIG_PIN, OUTPUT);
  pinMode(ECHO_PIN, INPUT);

  digitalWrite(LED_PIN, LOW);
  digitalWrite(TRIG_PIN, LOW);

  Serial.println("Connecting to WiFi...");
  WiFi.begin(ssid, password);

  while (WiFi.status() != WL_CONNECTED) {
    delay(500);
    Serial.print(".");
  }

  Serial.println();
  Serial.print("IP: ");
  Serial.println(WiFi.localIP());

  server.on("/", handleRoot);
  server.begin();
}

void loop() {
  server.handleClient();

  if (millis() - lastSensorRead >= SENSOR_INTERVAL) {
    lastSensorRead = millis();

    if (followMode) {
      distance = readDistance();
      if (distance > 0) {
        Serial.print("Distance: ");
        Serial.print(distance, 1);
        Serial.println(" cm");
      } else {
        Serial.println("Out of range");
      }
    } else {
      distance = 0;
    }
  }

  bool buttonState = digitalRead(BUTTON_PIN);
  if (lastButtonState == HIGH && buttonState == LOW) {
    followMode = !followMode;
    digitalWrite(LED_PIN, followMode ? HIGH : LOW);
    Serial.println(followMode ? "Follow ON" : "Follow OFF");

    delay(50);
    while (digitalRead(BUTTON_PIN) == LOW) {
      delay(5);
      server.handleClient();
    }
  }

  lastButtonState = buttonState;
}
What does the code do?
The system is mainly controlled using the button inside the loop() function. When pressed, it toggles between ON and OFF states called “follow mode.” This is handled using a boolean variable followMode. Each press also triggers the LED using digitalWrite(LED_PIN, HIGH/LOW) and prints a message through Serial.println().
Distance measurement is handled by the function readDistance(). This function uses the ultrasonic sensor by sending a pulse through digitalWrite(TRIG_PIN, HIGH) and reading the echo using pulseIn(ECHO_PIN, HIGH). The time is converted into distance in centimeters.
The function below improves accuracy by taking multiple readings and returning a stable value:
float readDistance()
The web interface is created using the function handleRoot(). It builds an HTML page that shows the current mode and distance readings. The page is automatically refreshed every second using:
<meta http-equiv='refresh' content='1'/>
Wi-Fi connection is handled in the setup() function using WiFi.begin(ssid, password), and the web server is started using server.begin(). The server continuously runs inside loop() using server.handleClient().
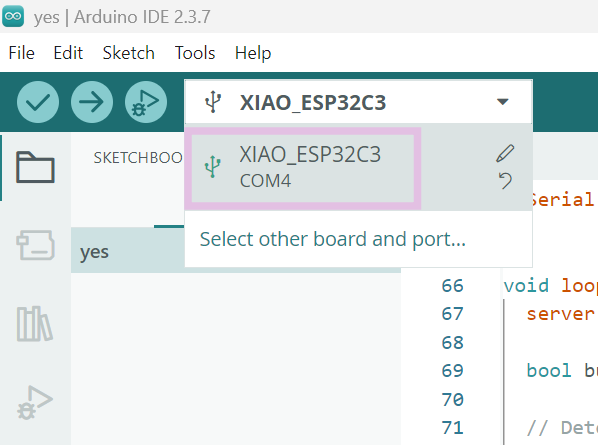
I opened Arduino Ide. After opening it, I selected my board and then the port.
In the serial monitor, it should look like this. I then copy-pasted the IP address and opened it in my browser.
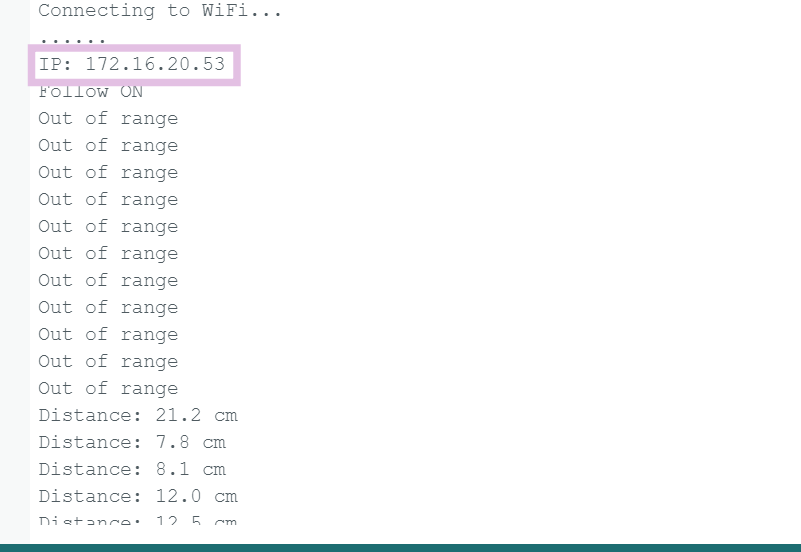
Here is how the server looks!!!

Testing
Problems
I ran into issues with the code because I forgot that you need to use the GPIO pin numbers instead of the digital pin labels 🥸. That’s also why it took me a while to understand why the code wasn’t compiling or uploading properly.