What is MIG Welding?
MIG welding (Metal Inert Gas), also called GMAW (Gas Metal Arc Welding), is a welding process where a continuous solid wire electrode is fed through a welding gun into the weld pool, joining the two base metals together. An externally supplied shielding gas protects the molten weld pool from atmospheric contamination (oxygen and nitrogen in the air would cause porosity and brittleness in the weld).
MIG is one of the most common welding processes because it's relatively easy to learn, fast, and produces clean welds on a variety of metals. The wire feeds automatically at a set speed, so the welder only needs to control the gun position, travel speed, and angle — unlike stick welding (SMAW) where you also have to manage electrode length as it burns down.
Why this isn't covered in other assignments: Fab Academy covers laser cutting, CNC milling, 3D printing, molding/casting, and electronics fabrication — but welding is a completely different process that joins metal through fusion at high temperatures. It requires different equipment, different safety considerations, and different skills than any other week.
CAD Design
I designed the box in Fusion 360 before cutting to plan the dimensions and joint layout. This satisfies the "incorporating computer-aided design" requirement for wildcard week — the part was designed digitally first, then fabricated using the welding process. The CAD model let me verify dimensions and plan the cut list before committing to cutting the steel.
CAD model of the welded box — click and drag to rotate, scroll to zoom
Step 1 — Material Selection
I selected a piece of scrap steel from a box of offcuts I have. Scrap metal is ideal for practice and small projects — it's free, and the slight imperfections (surface rust, mill scale) give you practice with real-world prep work.
Step 2 — Cutting with Angle Grinder
I used an angle grinder with a cutoff wheel to cut the sides and bottom of the box to size. An angle grinder with a thin cutoff disc makes quick work of mild steel — you just need to clamp the piece securely and let the disc do the cutting without forcing it.
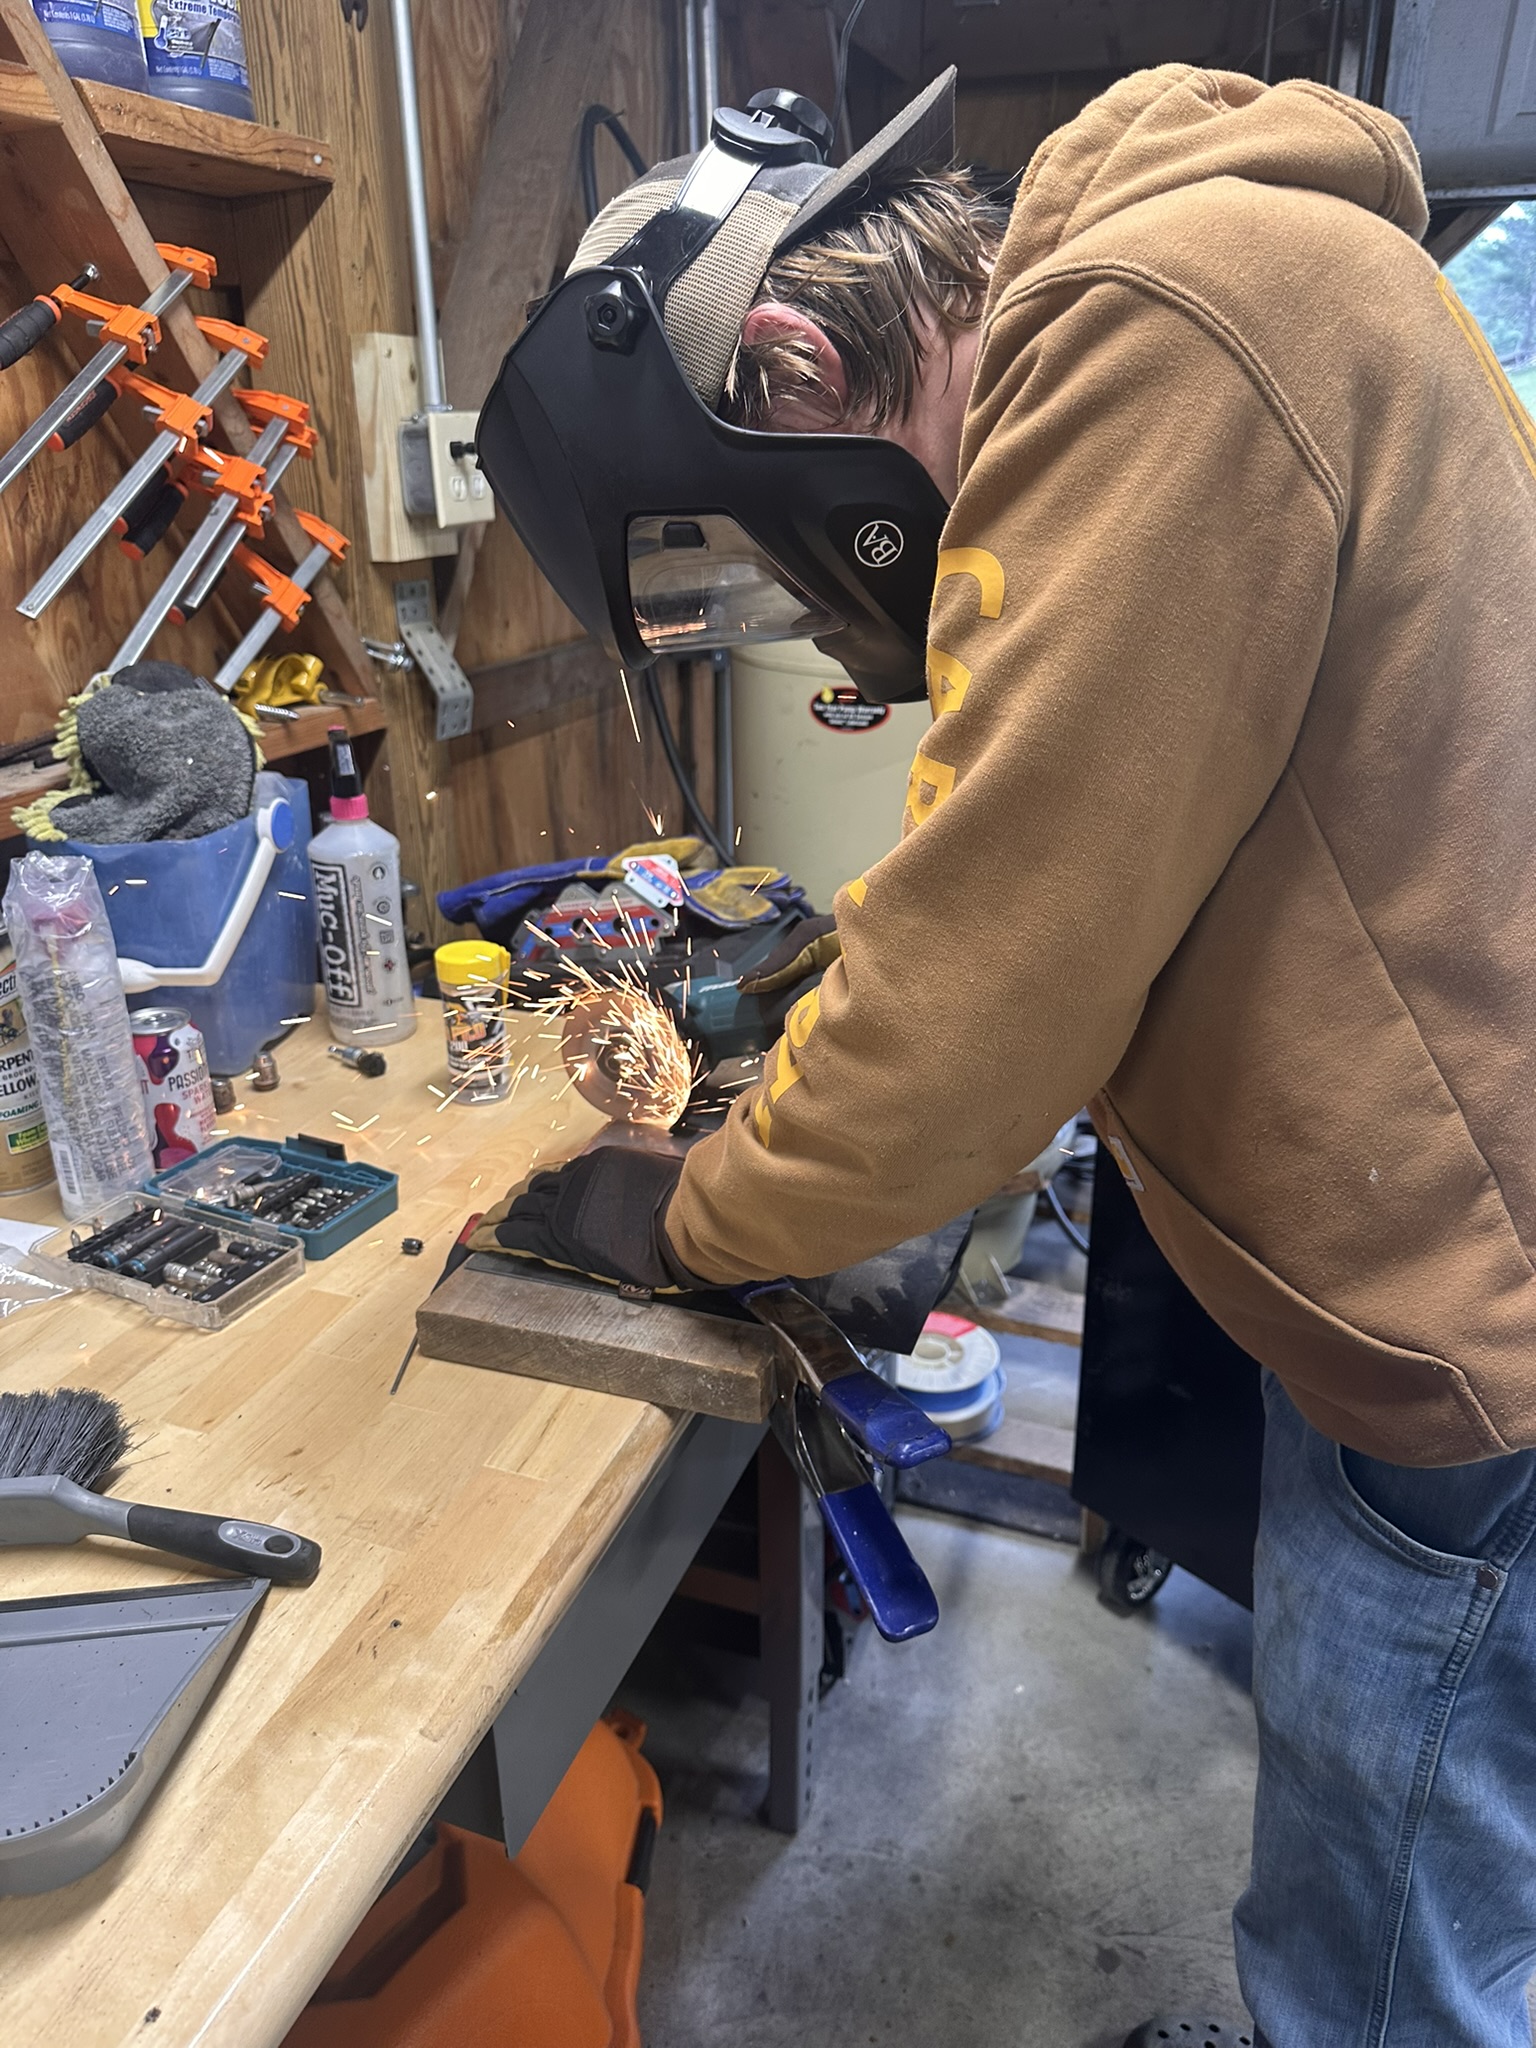
Cutting the steel pieces to size with an angle grinder and cutoff wheel
Step 3 — Surface Prep with Flap Disc
After cutting, I prepped the joint surfaces with the angle grinder fitted with a flap disc. This removes mill scale, rust, and any coating from the weld area. Clean metal is essential for a good weld — contaminants cause porosity and poor fusion. The flap disc leaves a smooth, bright surface ready for welding.
Step 4 — Fixturing with Magnetic Brackets
I used magnetic welding brackets to hold the pieces at 90-degree angles while tack welding. These magnets are strong enough to hold the steel in position but easy to reposition. Getting the angles right before tacking is critical — once you tack, you're committed to that alignment.
Step 5 — Welder Setup
I set the welder settings appropriate for the wire and material thickness, using the shielding gas mix of 75% Argon / 25% CO₂ (C-25). I did a test bead on a scrap piece first to make sure the gas was flowing properly and the wire speed/voltage were balanced.
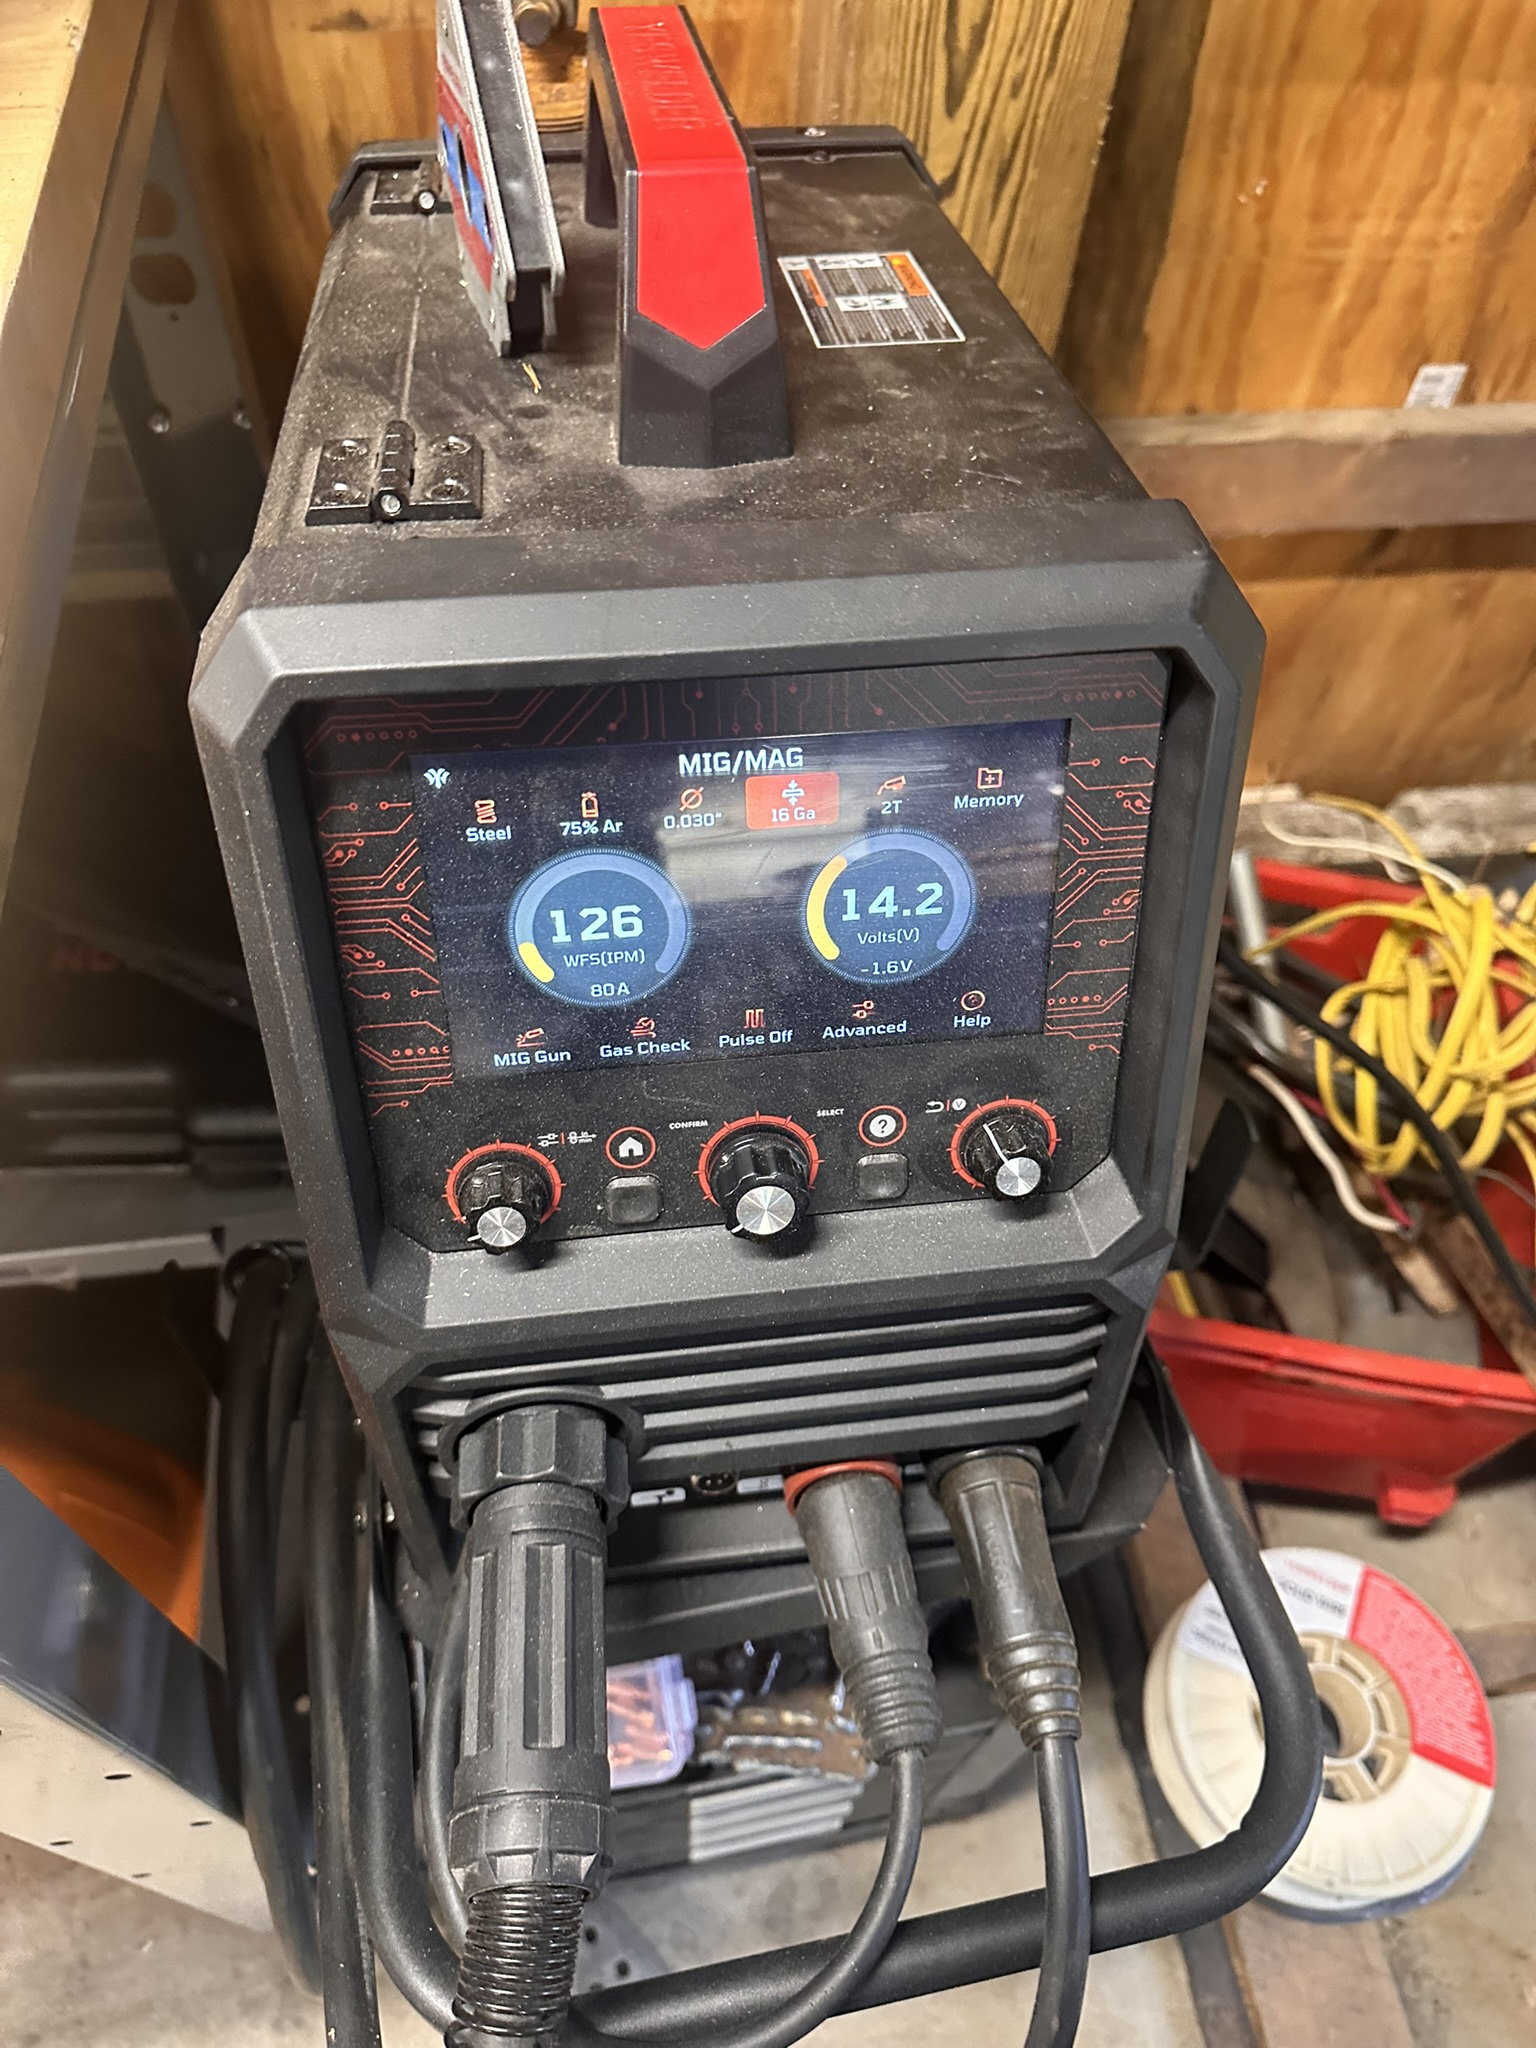
Welder settings — voltage and wire speed configured for the material
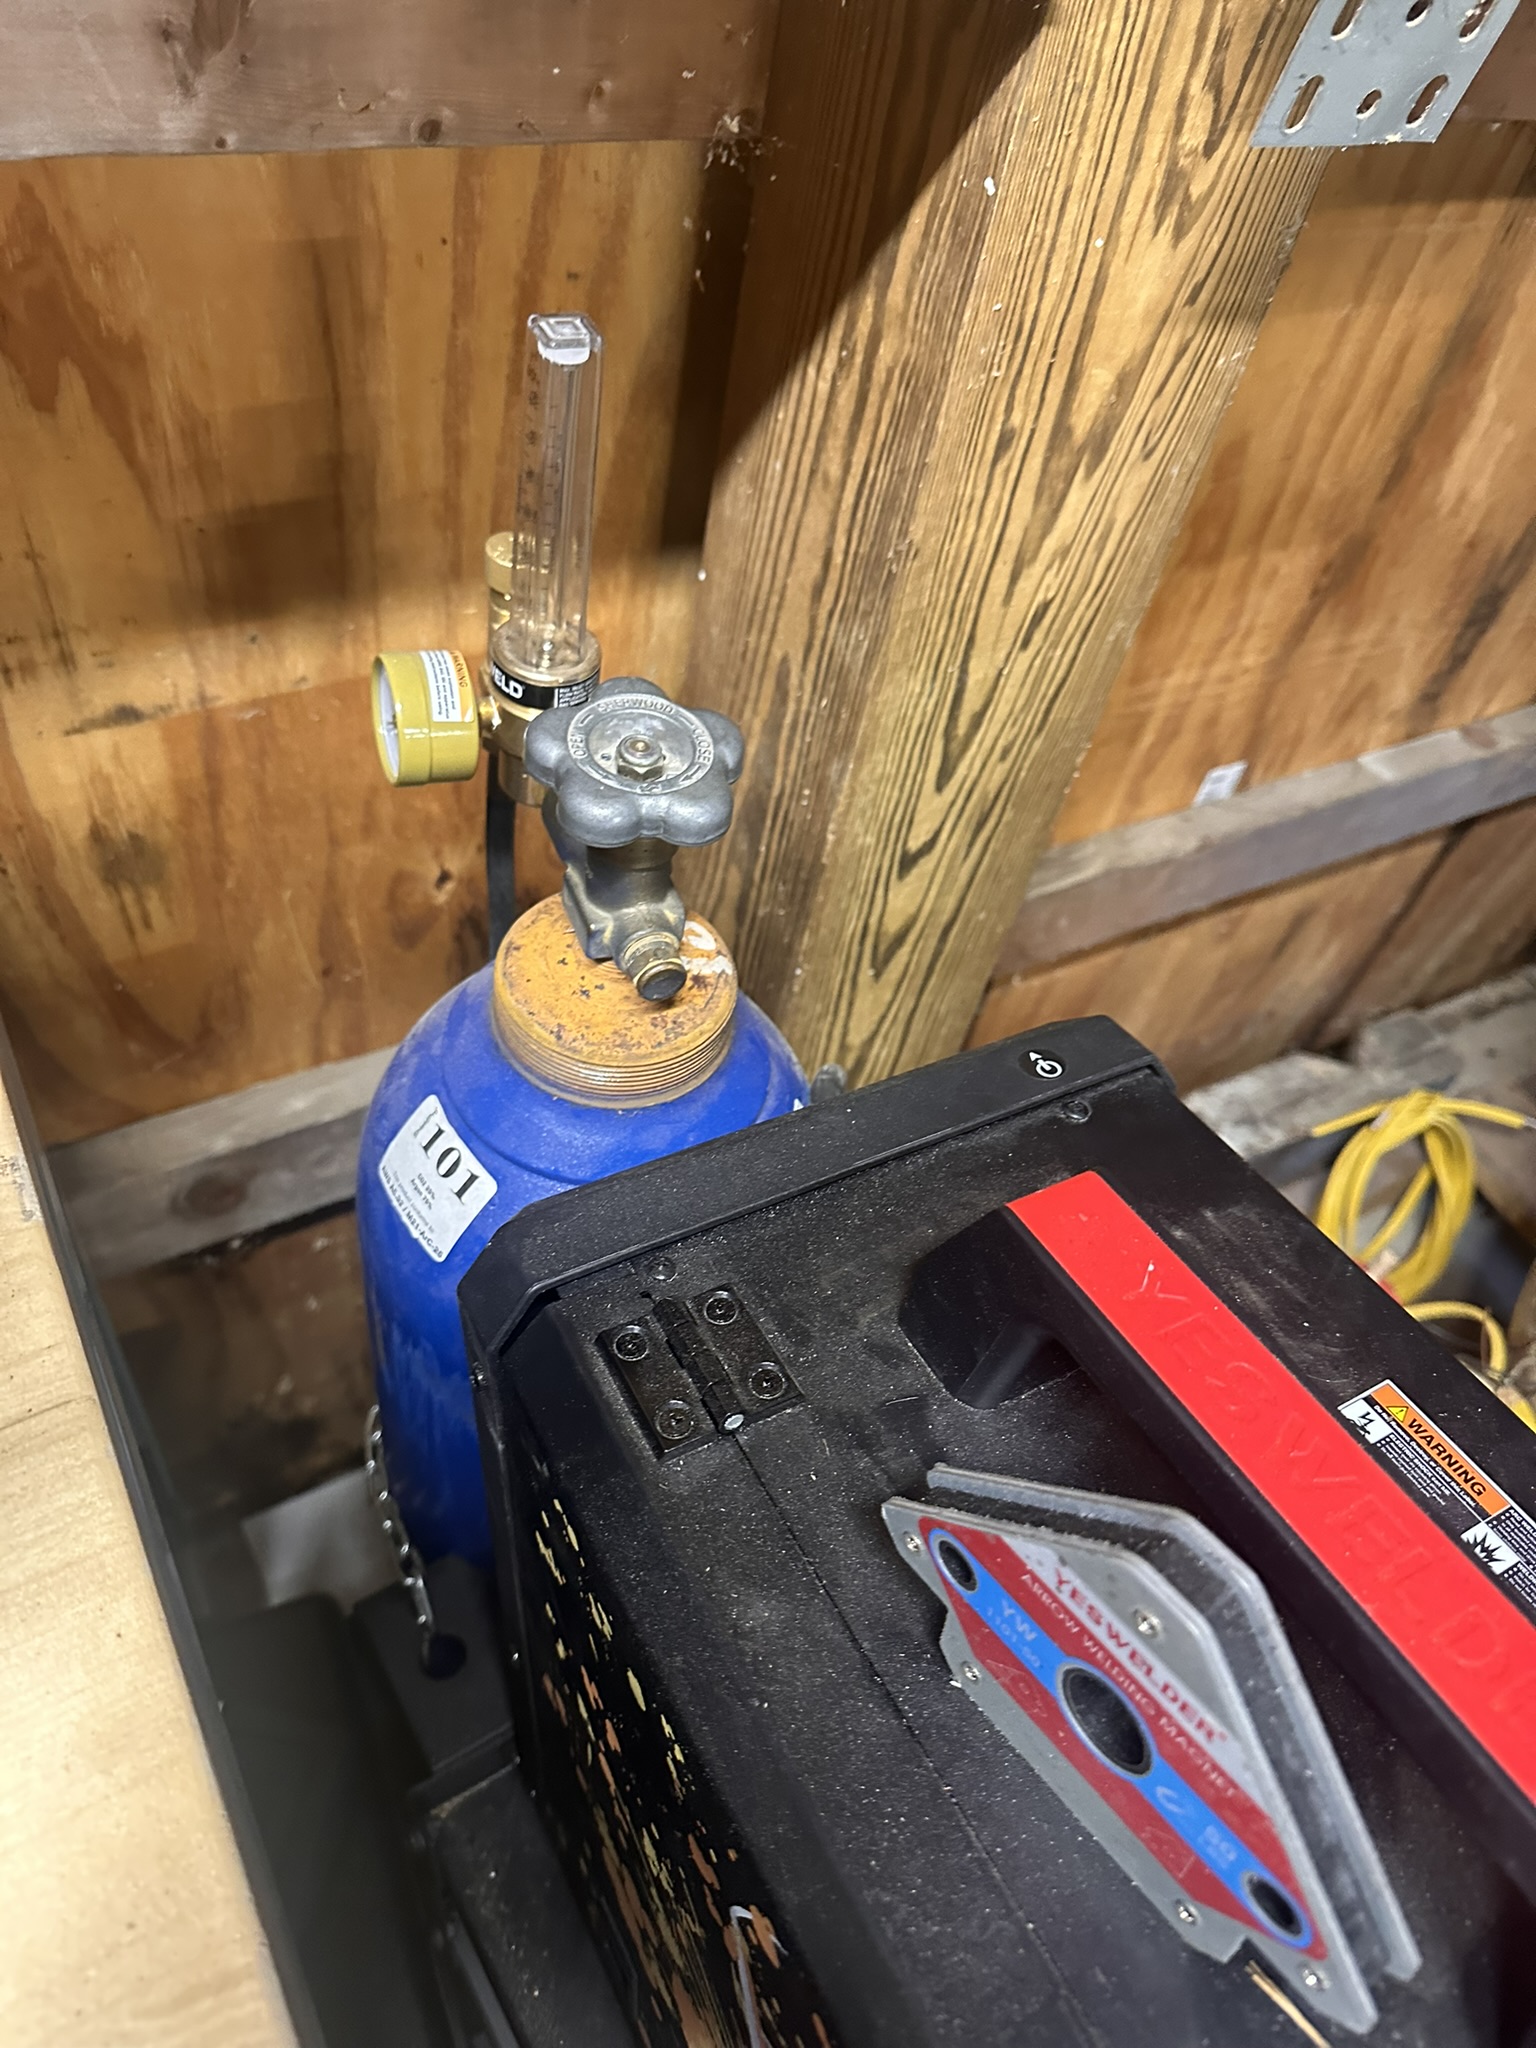
C-25 gas mix (75% Argon / 25% CO₂) — regulator set to ~20-25 CFH
Step 6 — Welding
Once the test bead looked good, I began welding the box together. I tacked all corners first to lock the geometry, then ran full beads along each joint. The key is maintaining consistent travel speed, keeping the nozzle at the right angle (about 15-20° from vertical), and listening to the arc — a steady crackling sound means good settings, a popping sound means something's off.
MIG welding the box — running beads along the joints with C-25 shielding gas
Step 7 — Weld Penetration Check
After welding, I checked the back side of the joints to verify penetration. Good penetration means the weld fused through the full thickness of the metal — you can see it on the back side as a slight raised bead. If there's no penetration visible on the back, the weld is only sitting on the surface and won't be structurally sound.
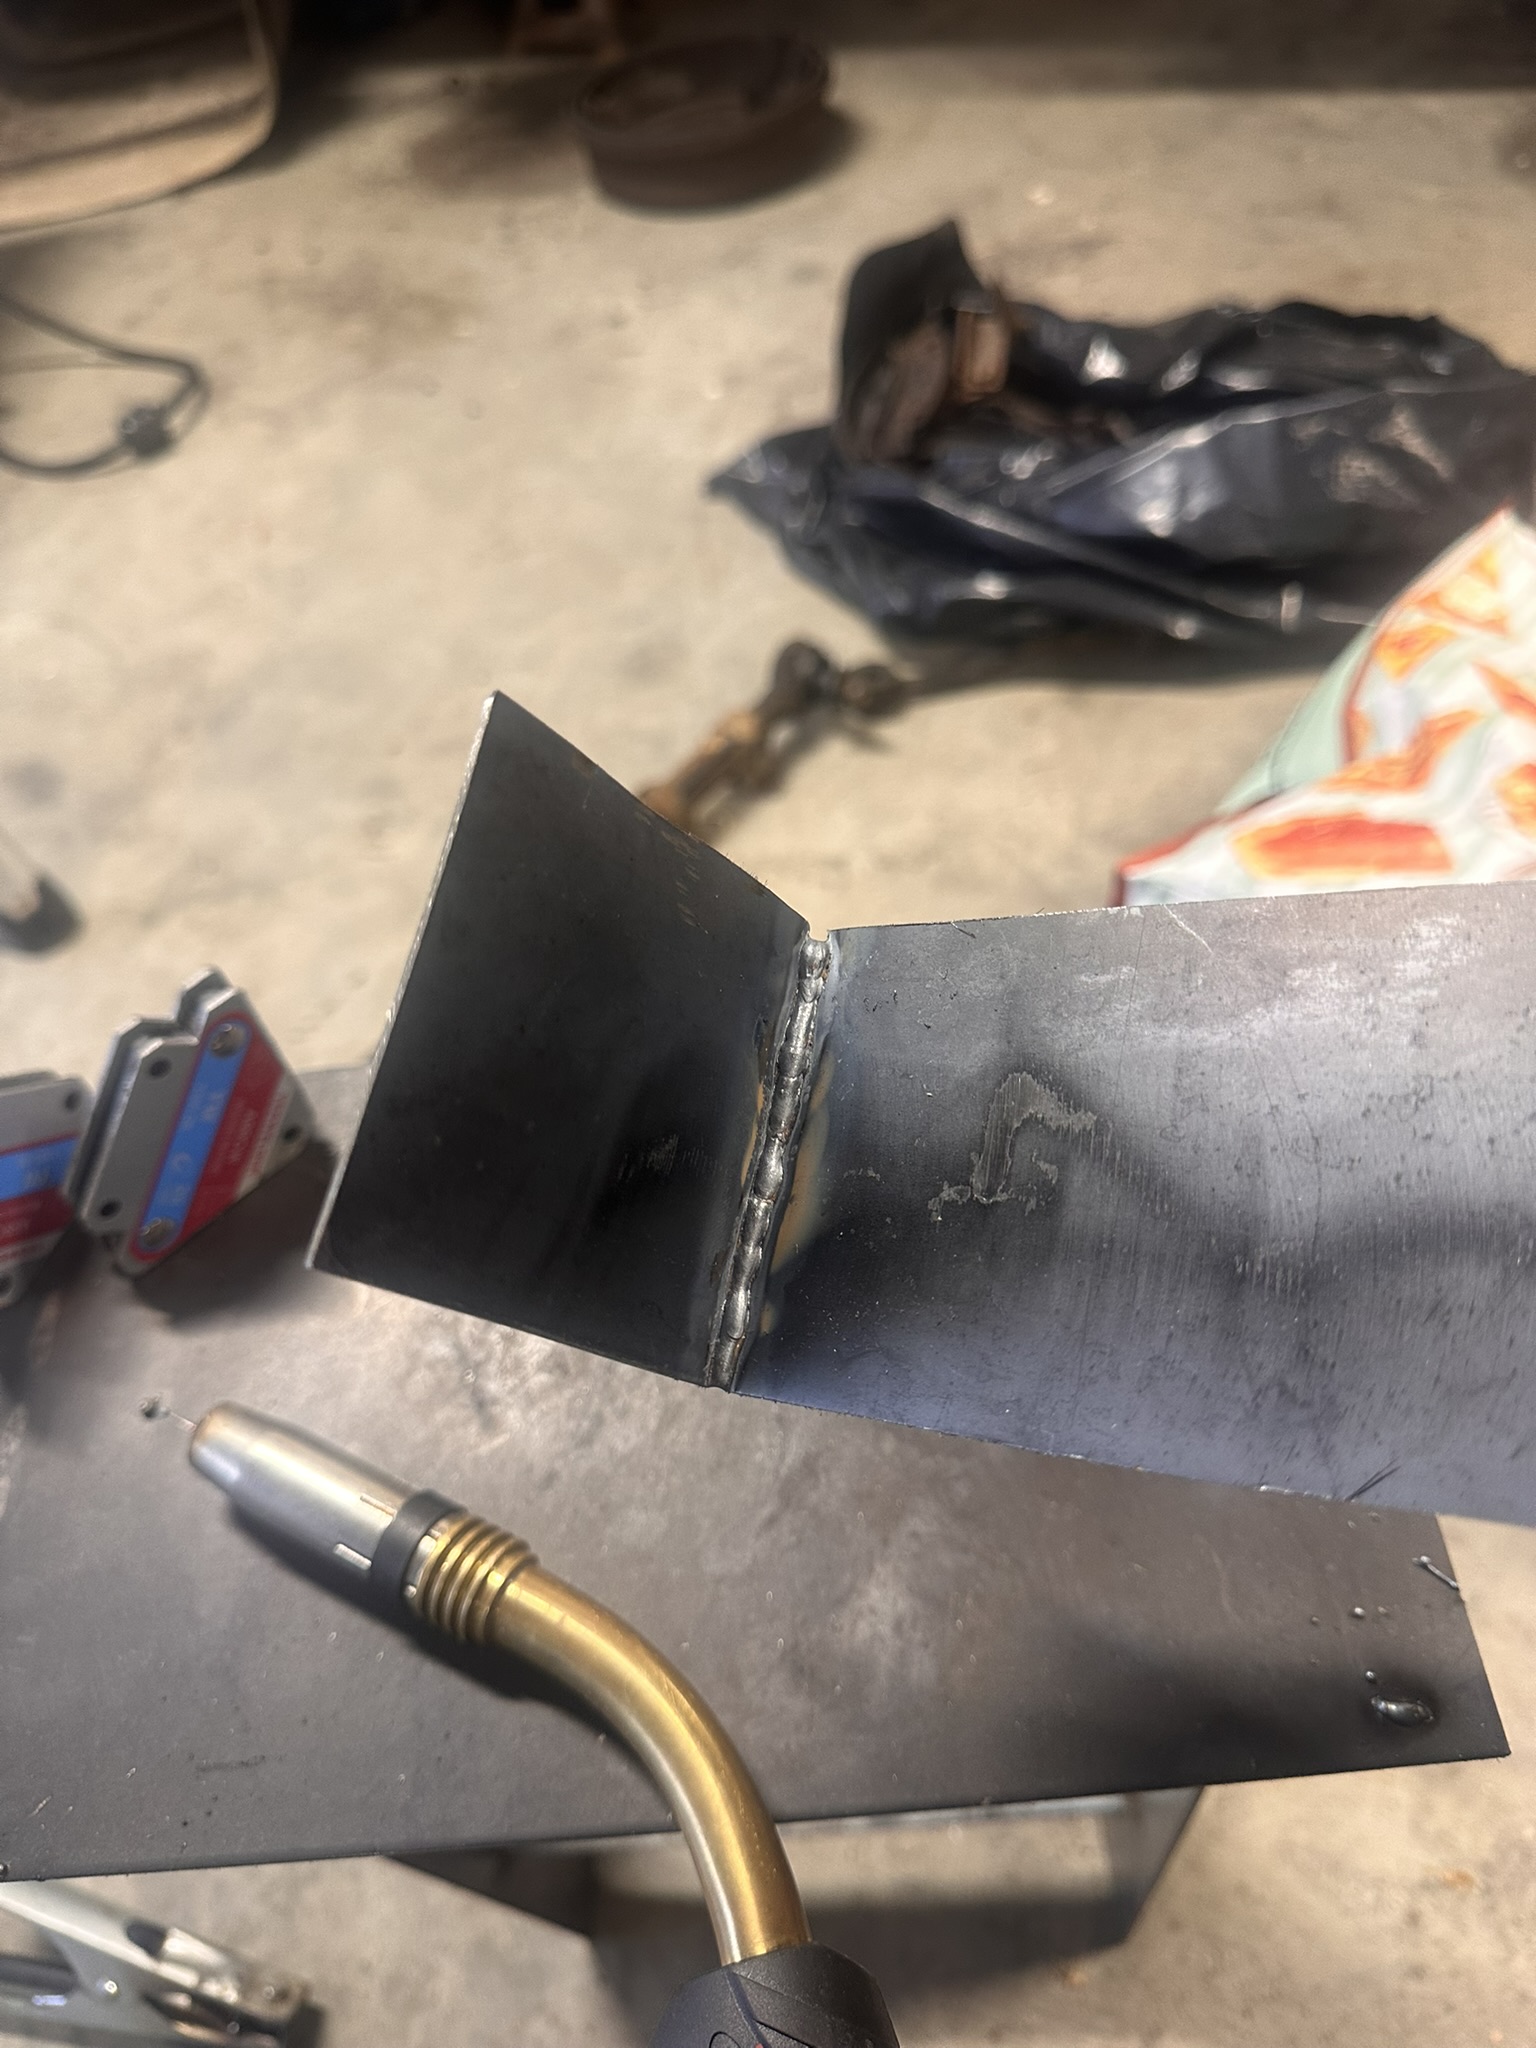
Back side of the weld showing penetration — the weld fused through the full material thickness
Step 8 — Grinding and Finishing
Finally, I used the angle grinder with a flap disc to grind down the welds and make them look clean. This is purely cosmetic — the structural integrity is in the weld itself, not the surface finish. But for a finished product, smooth welds look professional and eliminate sharp edges.
Hero Shot — Finished Box
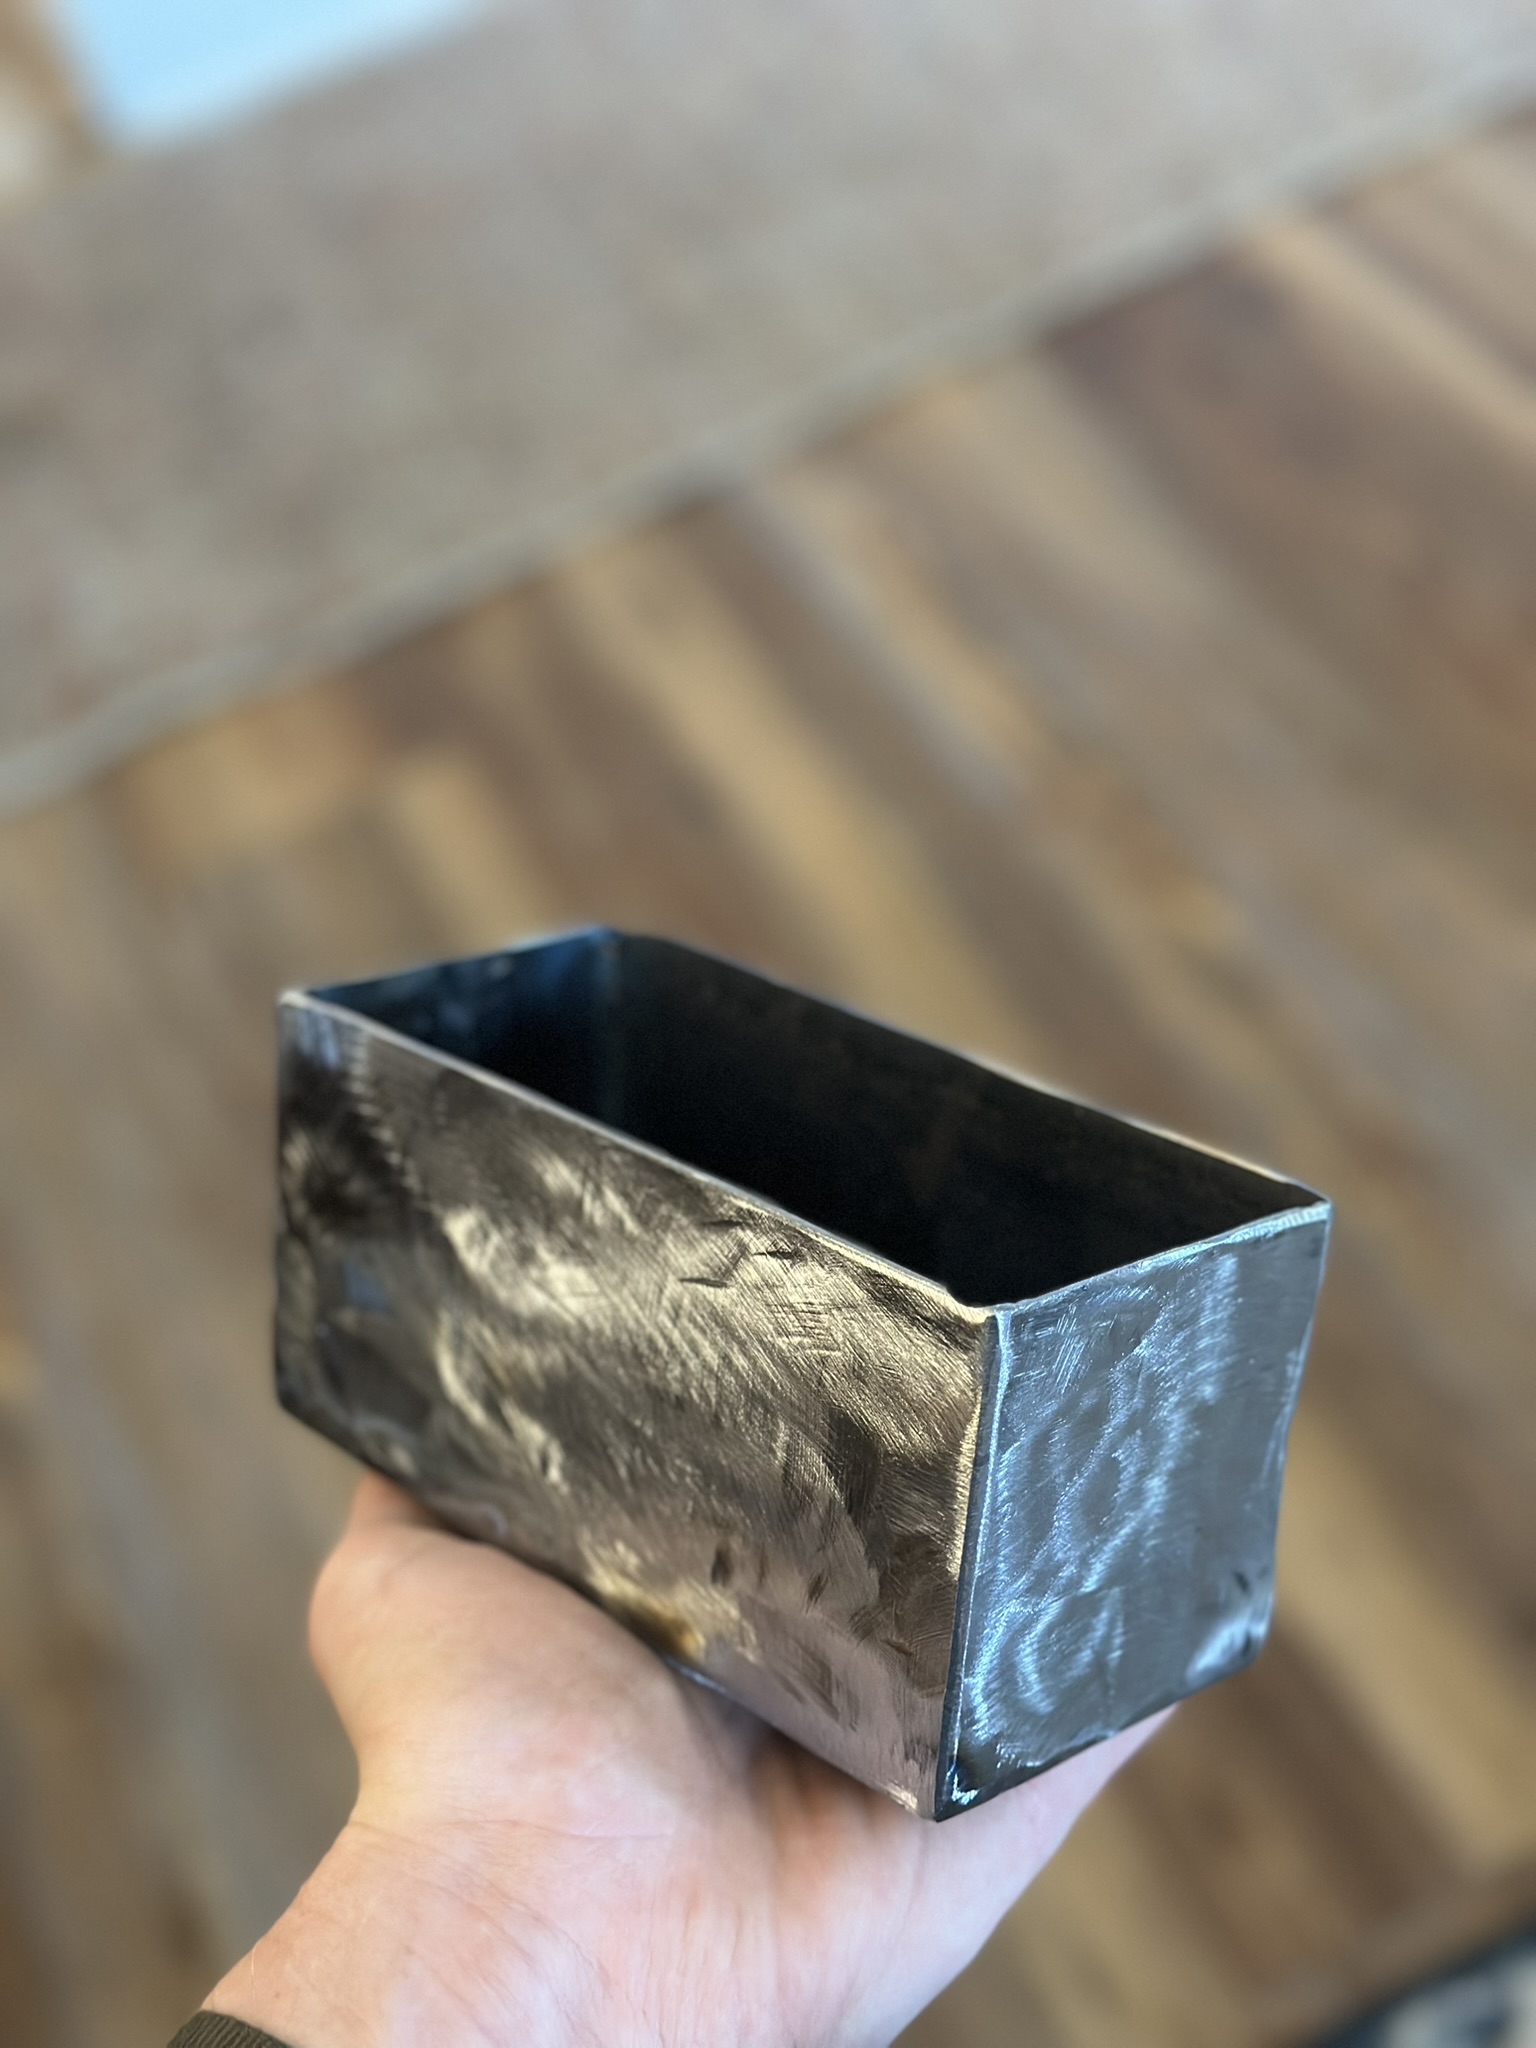
Finished welded steel box — welds ground smooth with a flap disc
Shielding Gas — C-25 Mix (75% Argon / 25% CO₂)
The shielding gas flows out of the nozzle around the wire and creates an inert atmosphere around the weld pool, preventing oxidation and contamination. I use C-25 because it's the standard all-purpose mix for mild steel — the argon provides arc stability and reduces spatter, while the CO₂ adds penetration.
| Gas Mix | Composition | Best For | Characteristics |
|---|---|---|---|
| C-25 (what I use) | 75% Argon / 25% CO₂ | Mild steel, general purpose | Good penetration, minimal spatter, smooth arc, nice bead appearance |
| 100% CO₂ | 100% Carbon Dioxide | Thick steel, outdoor | Deeper penetration but more spatter, rougher arc |
| 100% Argon | 100% Argon | Aluminum, stainless | Very smooth arc, minimal spatter, less penetration on steel |
| 90/10 | 90% Argon / 10% CO₂ | Thin steel, sheet metal | Less heat input, less burn-through risk |
I use C-25 (75% Argon / 25% CO₂) because it's the standard all-purpose mix for mild steel. The argon provides arc stability and reduces spatter, while the CO₂ adds penetration. It's the most common mix you'll find at any welding supply store — often sold as "MIG mix" or "C-25." The tank connects to the back of the welder with a regulator that controls flow rate (typically 20-25 CFH for indoor work).
Why Gas Matters
Without shielding gas, the molten weld pool reacts with oxygen and nitrogen in the air. This causes:
- Porosity — gas bubbles trapped in the weld, weakening it
- Oxidation — the weld turns black and crusty instead of shiny
- Brittleness — nitrogen absorption makes the weld crack-prone
- Poor fusion — the arc becomes unstable and erratic
You can weld without external gas using flux-core wire (FCAW) — the flux inside the wire creates its own shielding gas as it burns. But flux-core produces more spatter, more smoke, and leaves a slag coating that needs to be chipped off. For clean indoor work on mild steel, solid wire + C-25 gas is the way to go.
MIG Welding Equipment
- MIG welder — wire-feed welder with adjustable voltage and wire speed
- Welding wire — ER70S-6 solid wire, 0.030" diameter (most common for thin-to-medium steel)
- Gas tank — C-25 mix (75% Argon / 25% CO₂), with regulator set to 20-25 CFH
- Welding helmet — auto-darkening, shade 10-13
- Welding gloves — leather MIG gloves (thinner than stick welding gloves for better dexterity)
- Angle grinder — for prep work (cleaning mill scale, beveling joints) and post-weld cleanup
- Clamps and magnets — for holding pieces in position during tack welding
- Wire brush — for cleaning between passes
MIG Welding Process — Step by Step
- Design the part — CAD model with dimensions, joint types, and material thickness specified
- Cut the steel — cut pieces to length (angle grinder with cutoff wheel, bandsaw, or plasma cutter)
- Prep the surfaces — grind off mill scale, rust, paint, or any coating at the joint area. Clean metal = good weld. Dirty metal = bad weld.
- Set up the welder — select voltage and wire speed based on material thickness. For 1/8" mild steel with 0.030" wire: roughly 19-20V, wire speed 280-320 IPM
- Set gas flow — open the tank valve, set regulator to 20-25 CFH (cubic feet per hour). Too little gas = porosity. Too much gas = turbulence that pulls in air.
- Tack weld — small spot welds to hold pieces in position. Check alignment with a square before committing to full welds.
- Weld the joints — run beads along the joints. Push or drag technique depending on the joint. Maintain consistent travel speed, work angle (15-20° from vertical), and stick-out (3/8" wire extension from the nozzle tip).
- Inspect — check for undercut, porosity, lack of fusion, excessive spatter. Grind and re-weld if needed.
- Finish — grind welds smooth if appearance matters, wire brush, paint or coat to prevent rust.
Key Parameters
| Parameter | Setting | Effect |
|---|---|---|
| Voltage | 18-22V (for 1/8" steel) | Controls arc length and heat. Higher = hotter, wider bead. |
| Wire speed | 250-350 IPM | Controls how much filler metal is deposited. Must balance with voltage. |
| Gas flow | 20-25 CFH | Shielding coverage. Too low = porosity. Too high = turbulence. |
| Stick-out | 3/8" (10mm) | Wire extension from contact tip. Longer = more resistance = hotter wire. |
| Travel speed | Steady, consistent | Too fast = thin, weak bead. Too slow = excessive buildup, burn-through. |
| Work angle | 15-20° from vertical | Directs heat into the joint. 45° for fillet welds (split between both pieces). |
Safety
- Auto-darkening helmet — protects eyes from UV/IR radiation (arc flash can cause "welder's eye" / photokeratitis)
- Leather gloves and long sleeves — molten spatter burns exposed skin instantly
- Closed-toe leather work boots — do NOT weld in Crocs or open-toed shoes. After reviewing my video footage, I noticed I was wearing Crocs during the weld — this is not safe and not recommended. Molten spatter and hot slag can land on exposed feet and cause serious burns. I won't make this mistake again. Always wear proper leather work boots when welding.
- Ventilation — welding fumes (zinc from galvanized steel is especially toxic) need to be exhausted. Never weld galvanized without a respirator and fume extraction.
- Fire safety — sparks travel 20+ feet. Clear the area of flammables, have a fire extinguisher within reach.
- Grounding — ensure the work clamp has good contact with the workpiece for a stable arc and to prevent electrical shock.
How This Meets the Assignment
| Requirement | How It's Met |
|---|---|
| Digital process with CAD/CAM | Designed the box dimensions, cut pieces to size using measured layout, welded with digitally-controlled wire feed welder |
| Not covered in another assignment | Welding is not part of any other Fab Academy week (laser, CNC, 3D printing, molding, electronics are all separate weeks) |
| Demonstrate workflows | Full workflow documented: material selection → cut → prep → fixture → setup → weld → inspect penetration → grind/finish |
| Select suitable processes and materials | MIG welding with C-25 gas on mild steel scrap — appropriate for structural box joints |
| Include everything to reproduce | Equipment list, gas mix, process steps, photos of each stage, and video of welding included |