Kaz's Project Management
This week I worked on creating my website and getting something presentable that I could show. I also did some research on what I wanted to make for my final project.
Research
I have decideed to work on creating what I have coined a magnetic field generator shield, which uses a small scale electromagnetic generator to create a field that attracts metal projectiles
"Design is intelligence made visible" - Alina Wheeler
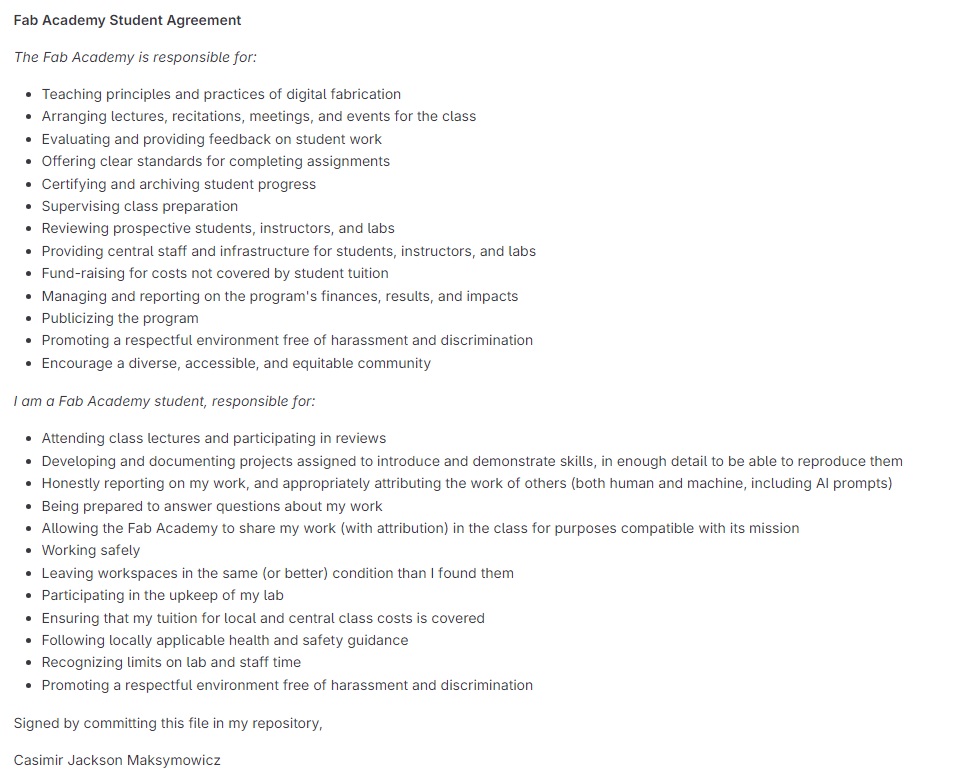
I first started working on my GIT repository by signing the student agreement, which you can find at my git repository.Student Agreement. I signed it by uploading it as a text file then signing my name at the bottom.
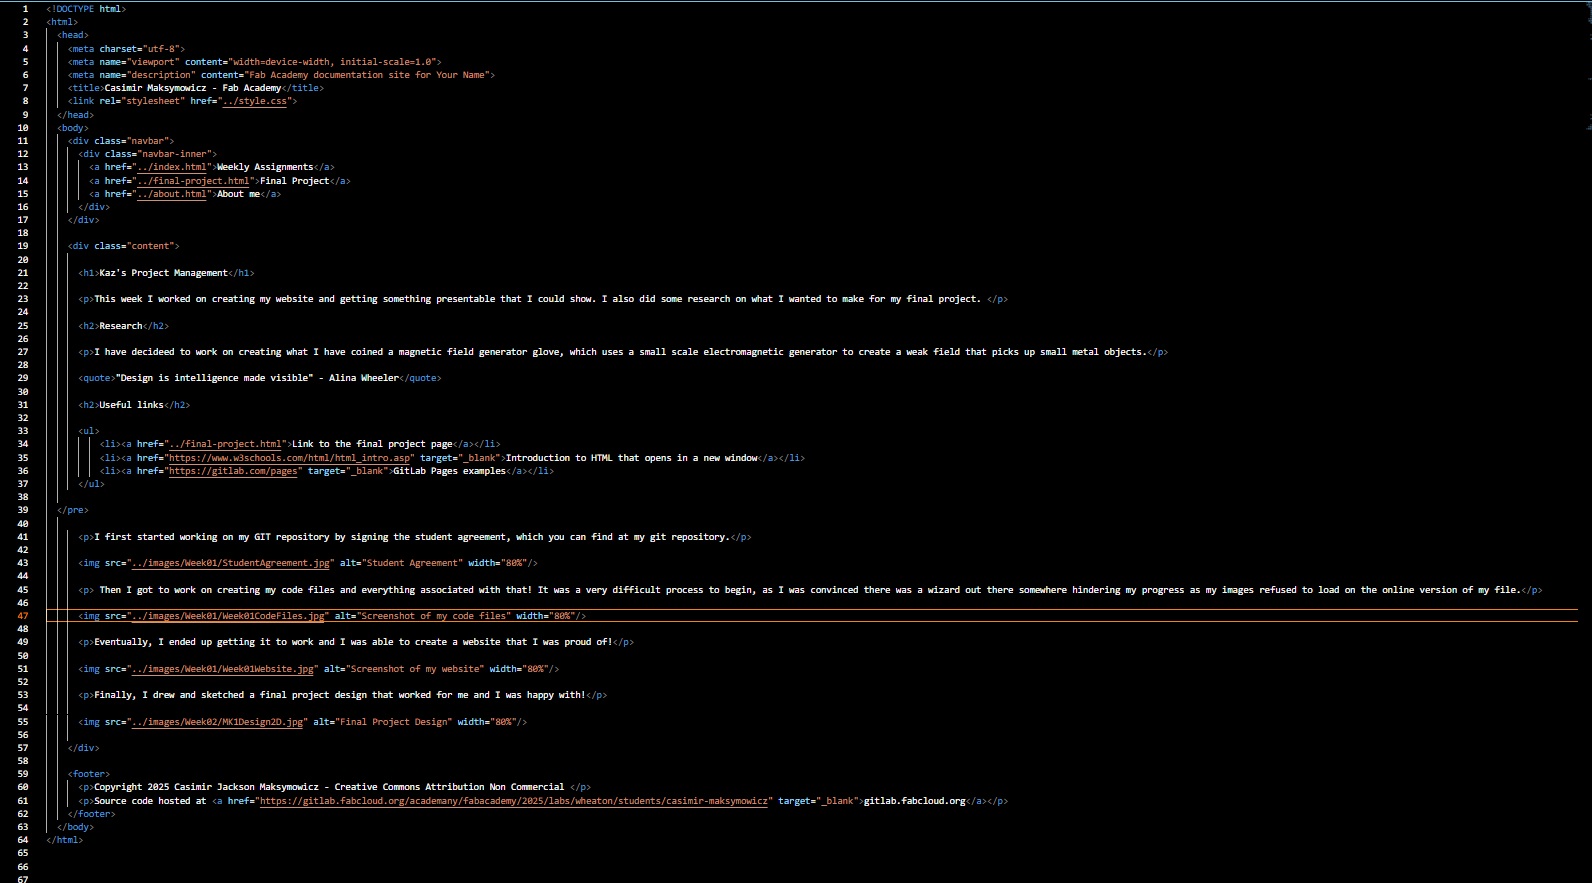
Then I got to work on creating my code files and everything associated with that! I installed GIT and VHS Code Studio, which I decided to use because of its built in git tools, and as I started, I learned that it was a very difficult process to begin, as I was convinced there was a wizard out there somewhere hindering my progress as my images refused to load on the online version of my file. I also had issues understanding with how HTML and CSS worked. I had never coded before, so I might as well have been learning an alien language, but I eventually got the hang of it after lots of help from my professors. I used the templates provided to me by Fab Academy and then just filled in the blanks as appropriate, using "img src" and other code like it to put in my paragraphs, images, and quotes. If you type in most of the code, Co-pilot, VHS Studios built in AI program and my savior, will automatically fill in the rest for you. "img src" refers to the source of an image, which is how the system knows how to find an image. The paragraph commands, "p" and "/p" tell GIT where to start and where to stop a paragraph. Then there was the GIT Commands which I had to learn, "git cd", "git status", "git add", "git commit", and "git push" git cd, which stands for change directory, changes my GIT command files into my file directory, so I edit the right files and not the ones defaulted on my computer. git status checks the branch to see if my code is up to date compared to what is on the cloud. git add adds all the files that were changed in the code to the commit send so that they get updated to the cloud. git commit commits all the files that were added to be ready to be added to the cloud. git push takes all the commited files and sends them to the cloud. This is the final step in the process, and will change how your website appears to everyone else.
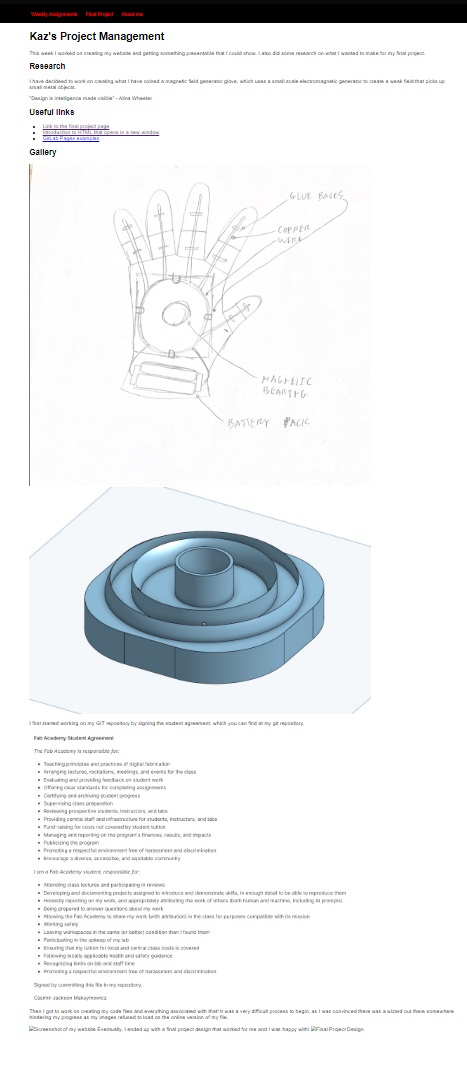
Eventually, I ended up getting it to work and I was able to create a website that I was proud of! I used Co-pilot to create my CSS File, with the simple instruction of "jazz up this css file", which I repeated until I got something that I liked. I did go back and try and understand what Co-pilot actually coded and changed, and I now have a degree of understanding as to how to replicate this process again without Co-pilot. Heres a picture of my website! Here is a link to the CSS file Style.css. In this code, Font family refers to the font I'm using which is Arial. Body refers to all the body paragraphs, which have the background as white, and all the text on them as black. H1,2,3,4,5 refers to Headers 1,2,3,4,5 and they are set to the color red. Each margin code refers to the margins of the respective item they are modifying, such as in the body paragraph where the margins are 0. Button refers to the animation of a button that appears when you hover over my specific navbar finder items, which comes up as red, keeping in theme with the rest of the website.
This is the step by step process that you must undergo in order to push your website to the class archive. 1. First, generate an SSH key on your computer and add it to your gitlab account. Here's a good video explaining on how to do that. Video
2. Then, you need to clone the repository to your computer. You can do this by using the command "git clone" followed by the URL of your repository. This will create a local copy of your repository on your computer.
3. After that, you can make changes to your files locally. You can use any text editor or IDE to edit your files. Like I said earlier, I used VHS because it has built in HTML functionality and the Co-Pilot AI.
4. Once you have made your changes, you need to add them to the staging area using the command "git add" followed by the name of the file you want to add, or if you want to add everything you've worked on, just do "git add .". I highly recommend using this because it saves you a lot of time and effort.
5. After adding your changes, then you can type "git status" to see the status of your changes, and whether they are ready to be commited or not. If they pop up as green, then they are ready to be commited. If they are red, then they are not ready to be commited.
6. Once you are happy with your changes, you can commit them using the command "git commit" followed by a message describing your changes. This message should be short and descriptive, so that others can understand what changes you made.
7. Finally, you can push your changes to the remote repository using the command "git push". This will upload your changes to the remote repository on GitLab, making them visible to others.
8. If you want to see your changes live, you can go to the URL of your repository on GitLab and click on the "Pages" tab. This will show you a preview of your website with the changes you made.
9. If you want to make further changes, you can repeat the process from step 3.
10. Enjoy!
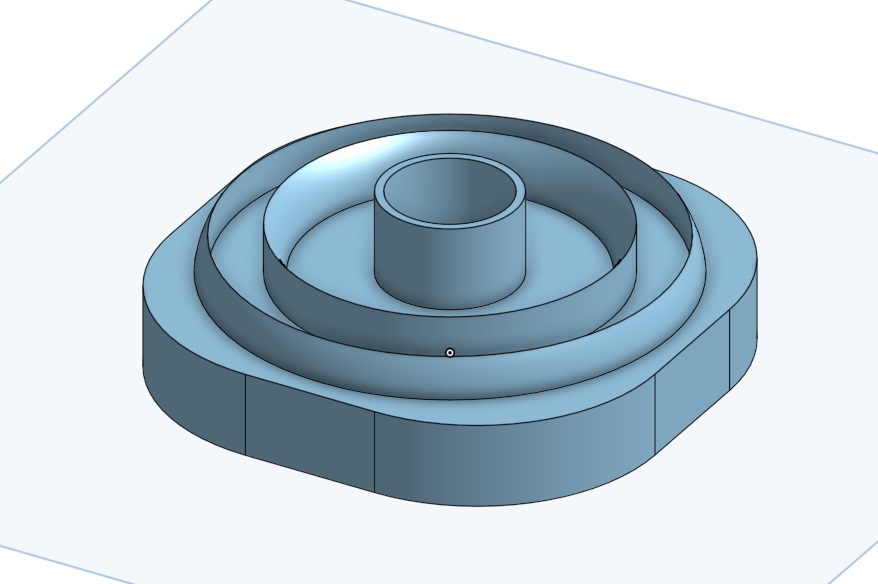
Then I went onto Onshape and designed my electromagnet holder. I show this process of how I made this in my week 2 page, which you can find here Week02.