Week 12 - Mechanical Design, Machine Design
Mechanical Design (part 1 of 2)
Group assignment:
• Design a machine that includes mechanism + actuation + automation + application
• Build the mechanical parts and operate it manually
• Document the group project
Individual assignment:
• Document your individual contribution
Machine Design (part 2 of 2)
Group assignment:
• Actuate and automate your machine
• Document the group project
Individual assignment:
• Document your individual contribution
Group assignment
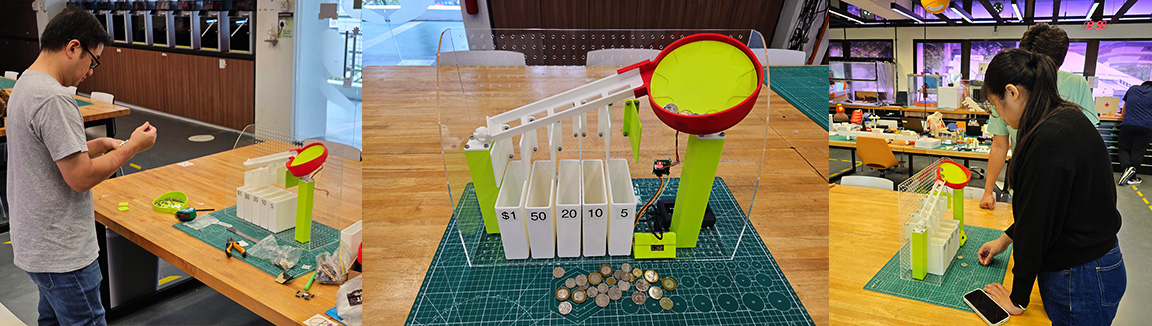
For this week’s Group assignment, I teamed up with my fellow Fab Academy buddy Haw Ren to build a coin sorting machine.
The documentation for our Group assignment can be found here.
Individual Contribution
| Machine Component | My Contribution |
|---|---|
| Pegboard Frame | Designed, laser cut and assembled the pegboard frame |
Deflectors, Containers, and connecting structures (e.g. ball and socket joints, pillars etc) |
Designed, 3D printed and tested these parts |
| Coin-Sorting gates | Designed the first prototype for the coin-sorting gate |
| Documentation | Main person documenting the Group Assignment |
Pegboard Frame
I wanted some sort of housing for the coin-sorting machine, and I thought of a pegboard frame design.
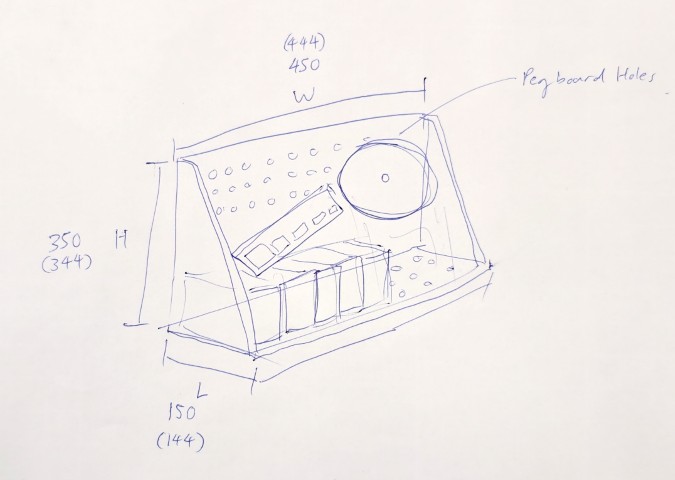
This design will allow us to make it easy for us to mount and test the optimal alignment and slope of the coin feeder/coin sorting gate mechanism. I decided that the laser cutter would be a great tool to use for the pegboard frame as laser cutting can cut out the required pieces quickly and accurately.
Fusion 360 – Sketching/Modelling
I start by sketching out the outline of the 3 different types of parts that I will need in Fusion 360. I will need:
1. Backing pegboard – 1 piece
2. Base pegboard – 1 piece
3. Side frame – 2 pieces

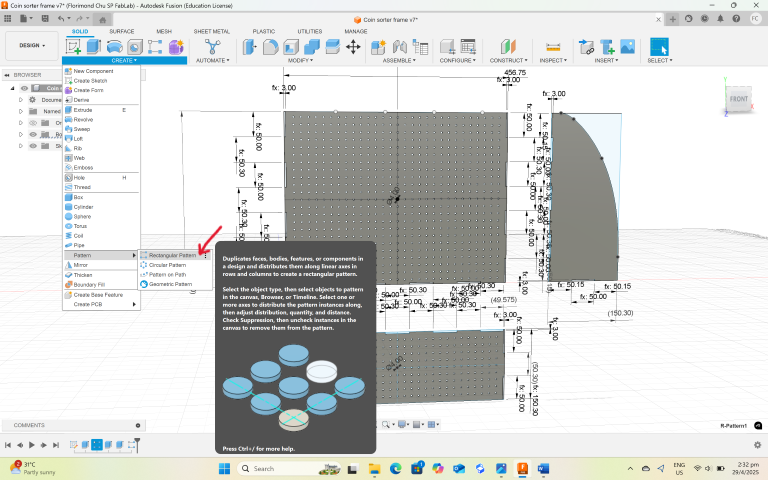
Once the sketch outline is done, I draw a 4-mm diameter pegboard hole and then use the rectangular pattern tool (Create > Pattern > Rectangular Pattern) to propagate the holes across the Backing and the Base pegboards.
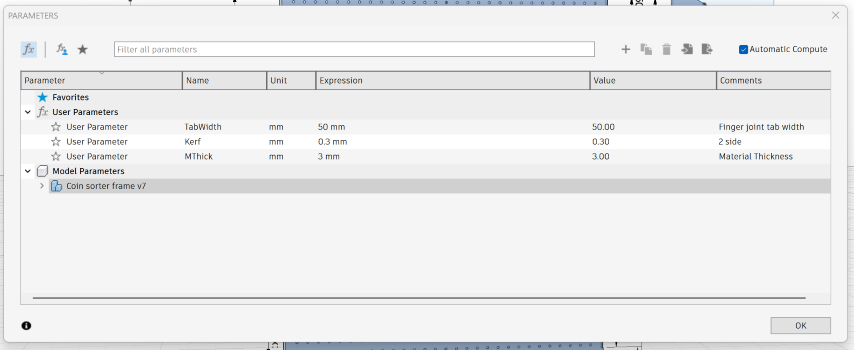
Fit Testing (Kerf)
Next, I must determine the kerf of my laser cutter. I cut a few test strips to test the fit of the finger joints and find out that a kerf value of 0.15mm give a snug fit.
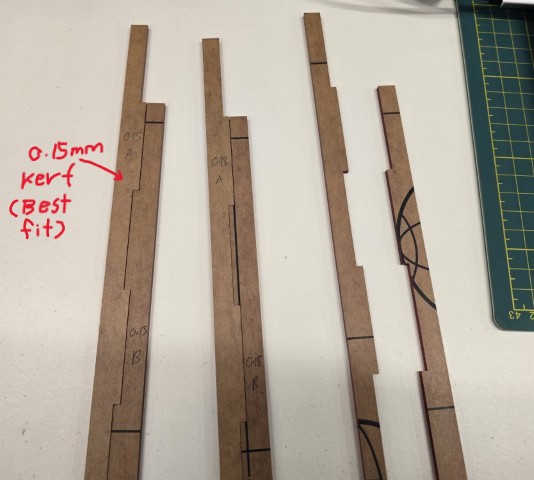
Since I had parametrically set my sketch dimensions, I can update the kerf value (0.15mm on each side so 2 sides, 0.3mm) to ensure that the finger joint tabs fit snugly.
Export to SVG (Shaper Utilities)
Once done, I export the parts as SVGs for laser cutting. I do this using the Shaper utilities tool. I used this tool previously in Week 03’s Laser Cutting assignment, please refer to the link here if you want to know how to use the Shaper Utilities tool.

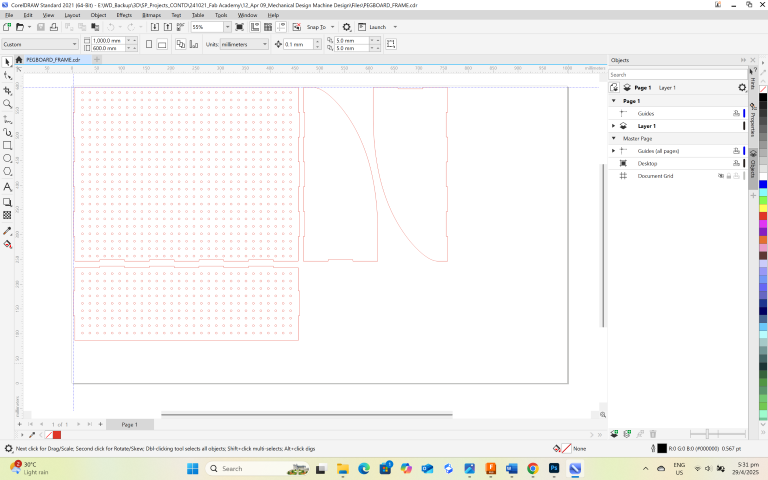
Compiling the SVGs
After I have exported the SVGs of all the individual pieces I need, I bring them all into a single document in CorelDraw. I do this to:
1) Remove and colour fill from the exported SVGs (SVGs exported using Shaper Utilities always have a black fill by default)
2) Arrange the individual pieces to fit the size of my acrylic sheet (one that fits the bed size of my laser cutter).
This also allows me to cut out all the pieces that I need in one job.
Laser Cutting
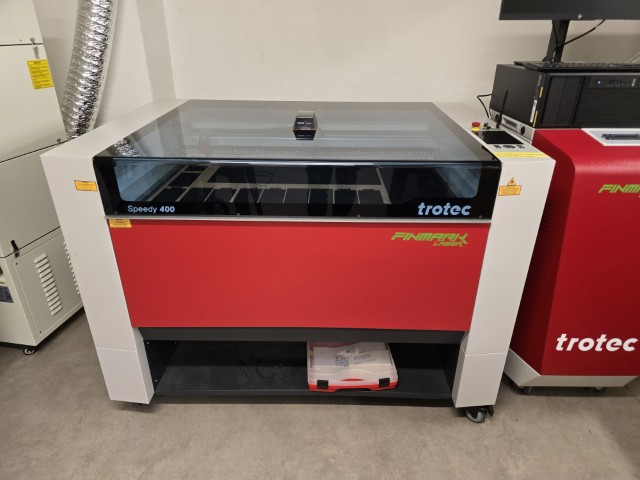
I cut out the pegboard frame pieces with our lab’s Trotec Speedy 400 laser cutter. You can see the process in the video below.
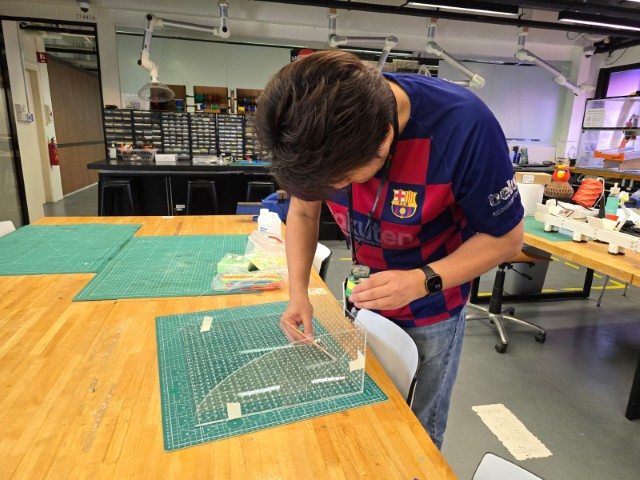
Assembling the Pieces
After putting the pieces together, I realized that the pieces were still a bit loose. This is because I did not make enough finger joint tabs for stronger holding power but our solution to this was just to strengthen the frame’s joints by applying some acrylic glue.
Deflectors, Containers, and connecting structures (e.g. ball and socket joints, pillars etc)
With the frame done, I move on to 3D print some other parts of our coin sorter. These are the Deflectors, Containers, and connecting structures. For these parts, the process is quite similar so I shall cover them together. My process was:
1. Start with a hand sketch of the idea. I make use of the consistent spacing between the pegboard holes to create features to help me attach the part to the frame neatly. For example, I used through holes with M4 screws for the wall mounted parts, and pegs for base attachment.
2. Create the sketch in Fusion 360
3. From the sketch, create the geometry of the part
4. When done, export the geometry as an STL
5. 3D Print one part to test quickly and iterate until the part works well.
6. Once the part performs well, 3D Print copies if required

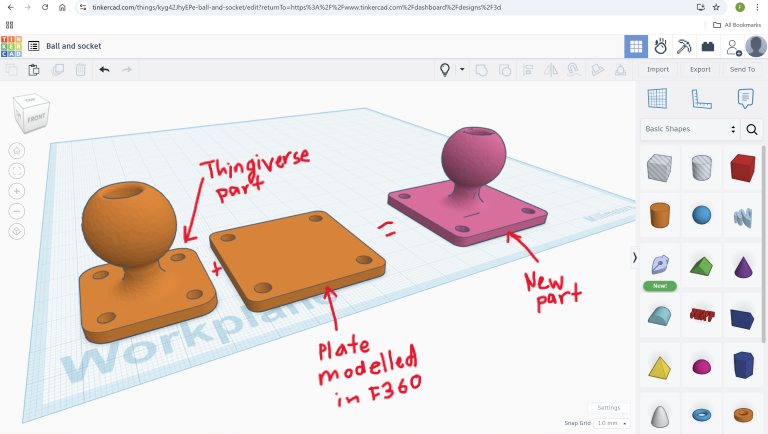
There are some minor deviations to this process. For example, to save time, for the ball-and-socket joint, I did not model my own part but adapted an existing design from Thingiverse.
The Thingiverse ball and socket joint used a mounting plate that was a different size/spacing from that of our pegboard, so I created a new mounting plate, then brought the files into Tinkercad to combine them into a new ball and socket joint.
Coin-Sorting gates
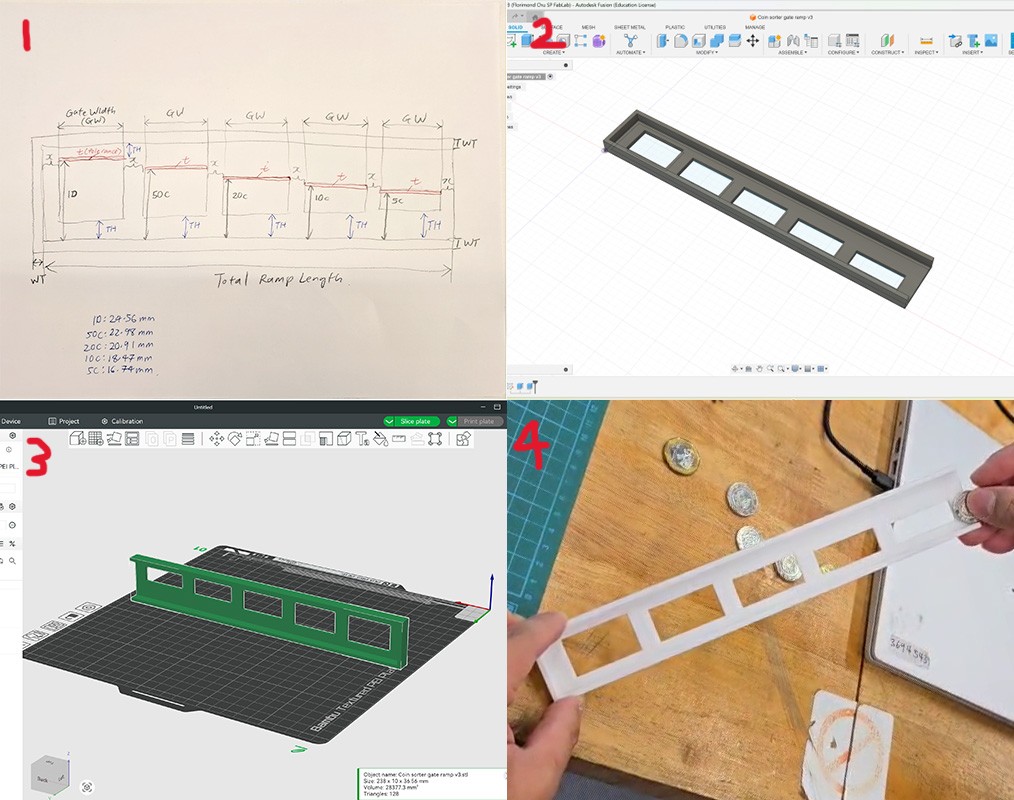
My other contribution to this project is that I modelled the first coin-sorting gate for testing. For this I:
1. Sketched out the initial plan for the coin-sorting gate
2. Modelled it out in Fusion 360
3. Exported the geometry out as STL
4. 3D printed and tested the gate
After creating this coin-sorting gate, my partner took over the further development of this part, such as creating the connection points and integrating with the coin feeder mechanism.
Reflection
As we cross a major Fab Academy milestone (Machine Building), it felt satisfying to be able to complete this project and get it to work. I was also heartened to learn that other people (such as our interns) would naturally be drawn towards our coin sorting machine and use it. As someone with a design background, I am very happy to see people using my creation.
Even with all the challenges, I can say that overall, I had fun building this machine. I also loved using the rectangular pattern tool in Fusion 360 because without it, I would have had to copy and paste a large number of circles to form the pegboard holes.
Design Files
Pegboard frame (Fusion 360, CorelDraw and PDF)
Deflectors, Containers, and connecting structures (Fusion 360, STL s )
Coin-sorting gate (Fusion 360)
This concludes this week’s assignment.