Assignment Overview
In this week’s assignment, we explored how micro-controllers can communicate with each other using wired serial communication protocols. This is essential for building distributed systems where nodes must share data or execute tasks collaboratively. The assignment was divided into a group and an individual.
Group Assignment:- Send messages between two micro-controller-based projects using serial communication.
- Document the group process and results on a shared group page.
- Reflect on the experience and outcomes individually.
- Group Assignment
- From this assignment I have learned different communication protocols how to setup and configure them for ease communication.
Communication Protocols
- Design and build one or more wired or wireless nodes.
- Integrate local input and/or output devices.
- Implement unique network or bus addressing for each node.
Network Projects
Objective of the project
Establish a UART-based communication link between two Seeed XIAO RP2040 micro-controllers, where
- Each board can send messages from the Serial Monitor.
- Messages are transmitted via UART and displayed on the receiving board.
- Each message is labeled with the sender's identity (e.g., "Lesotho says:", "Rwanda says:").
Required Components
- 2 Seeed XIAO RP2040 boards
- 2 USB-C cables
- Jumper wires
- Breadboard for connecting wires
- Computer with Arduino IDE installed
| Board Lesotho Pin | Board Rwanda Pin |
|---|---|
| D6 (TX) | D7 (RX) |
| D7 (RX) | D6 (TX) |
| GND | GND |
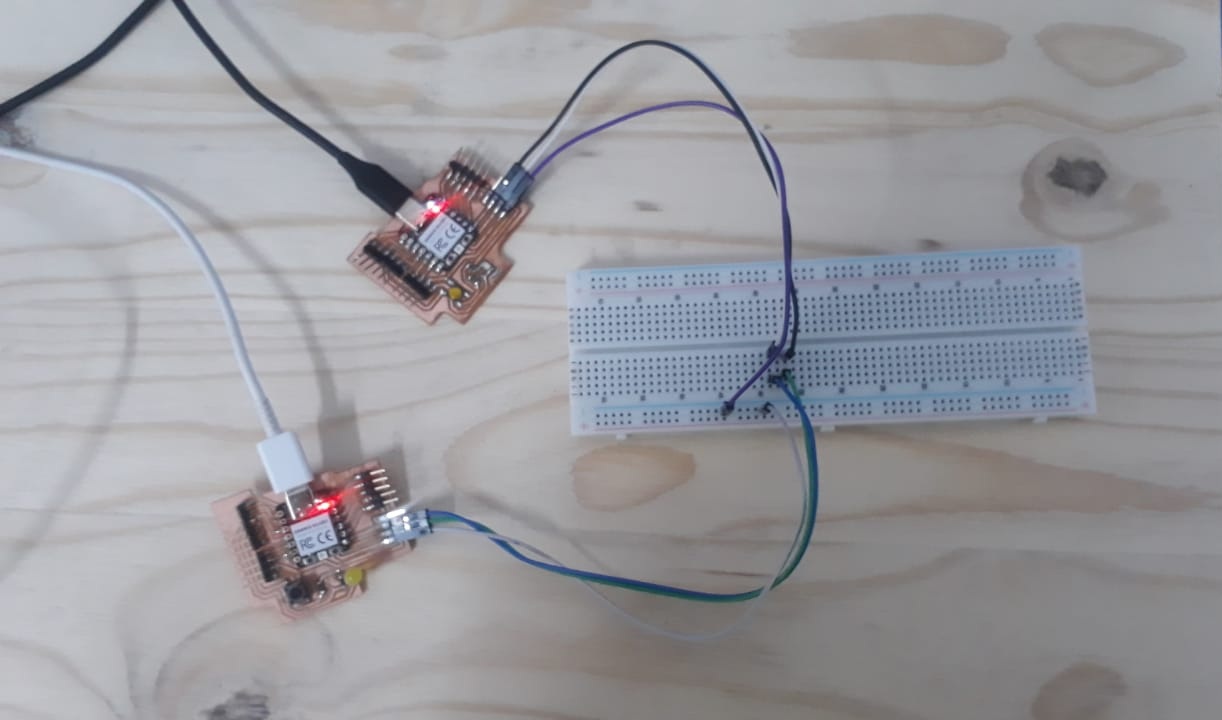
TX of one board goes to RX of the other and vice versa. They must share the same Ground for UART to work.
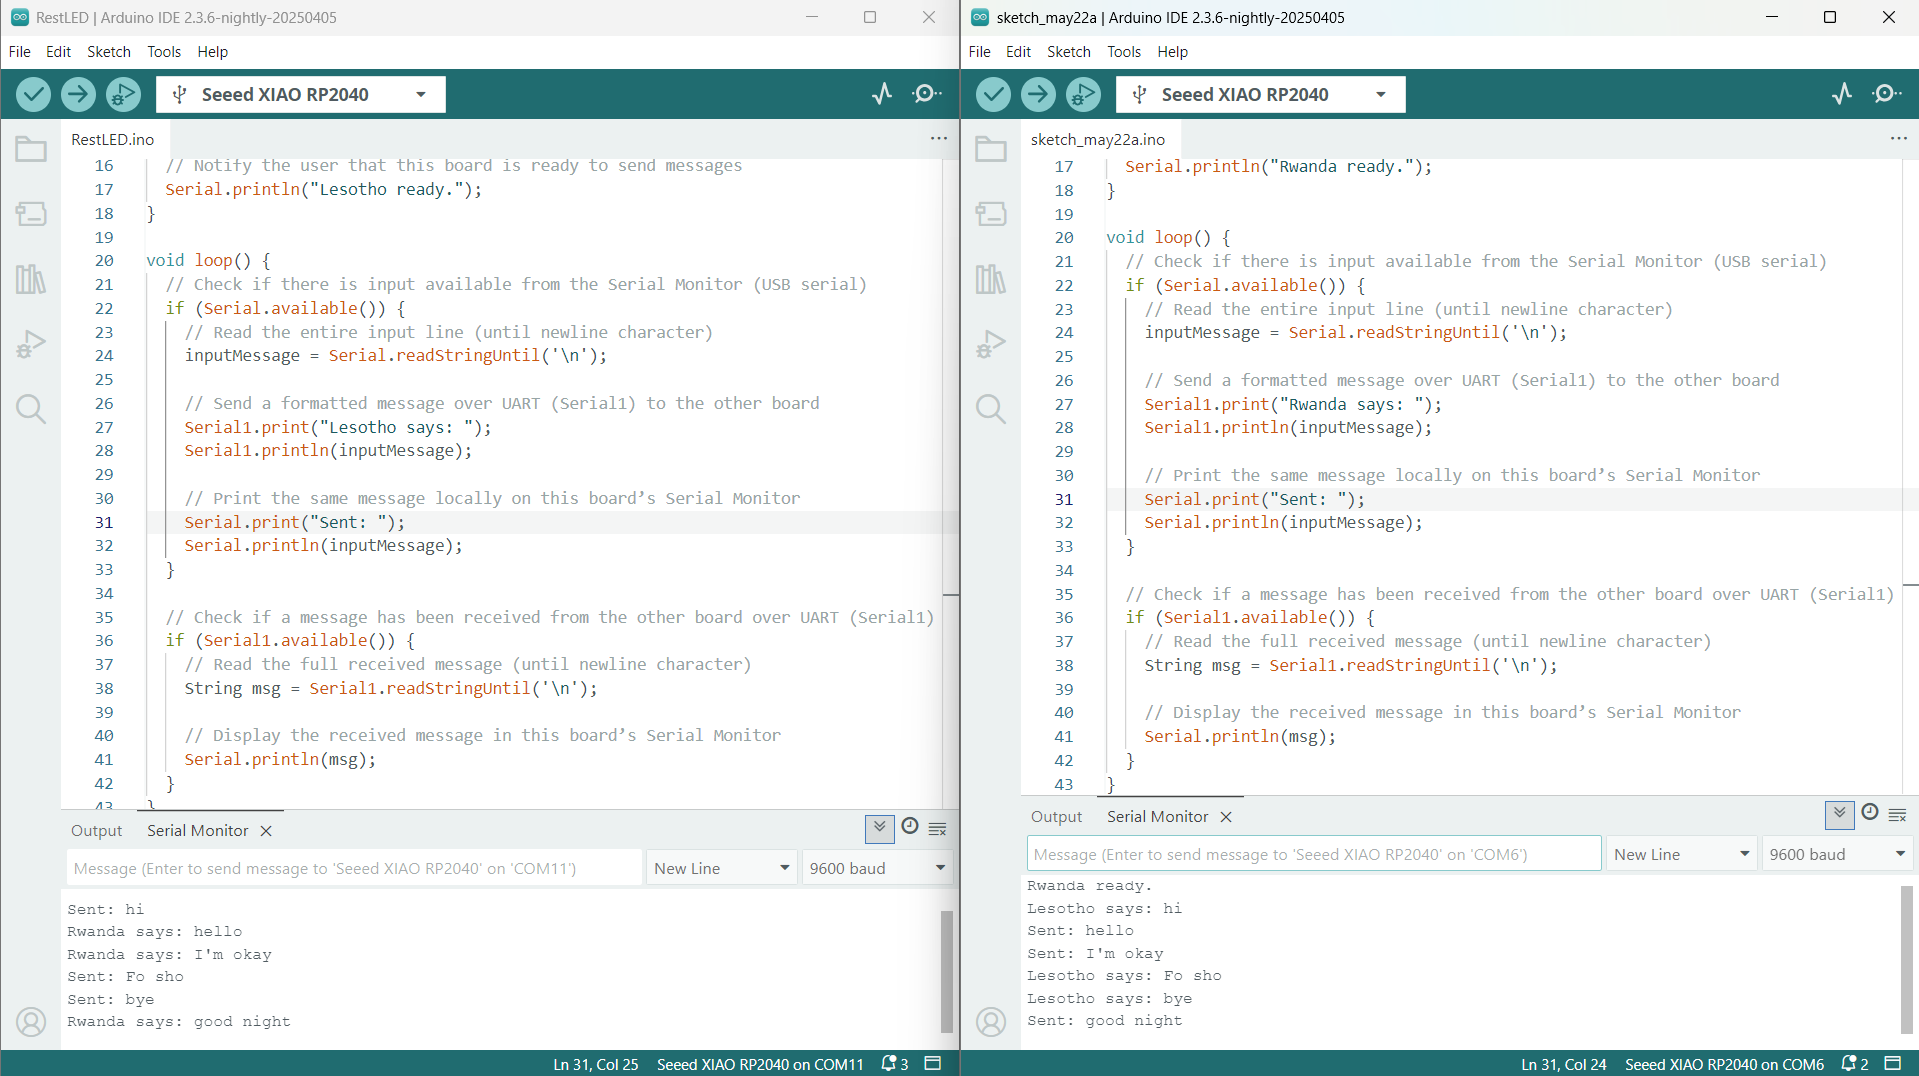
Lesotho board is on COM11 and Rwanda on COM6.
Each board runs nearly identical code, with the only difference being the sender name ("Lesotho" or "Rwanda").
Example Code for Rwanda Board
// Declare a string variable to store user input from the Serial Monitor
String inputMessage = "";

void setup() {
  // Initialize the USB Serial interface for communication with the Serial Monitor
  Serial.begin(9600);

  // Wait for the Serial Monitor to be opened before proceeding
  while (!Serial);

  // Initialize Serial1 (UART) for communication between RP2040 boards
  // On Seeed XIAO RP2040, Serial1 uses
  // TX = D6 (physical pin 6), RX = D7 (physical pin 7)
  Serial1.begin(9600);

  // Notify the user that this board is ready to send messages
  Serial.println("Rwanda ready.");
}

void loop() {
  // Check if there is input available from the Serial Monitor (USB serial)
  if (Serial.available()) {
    // Read the entire input line (until newline character)
    inputMessage = Serial.readStringUntil('\n');

    // Send a formatted message over UART (Serial1) to the other board
    Serial1.print("Rwanda says: ");
    Serial1.println(inputMessage);

    // Print the same message locally on this board’s Serial Monitor
    Serial.print("Sent: ");
    Serial.println(inputMessage);
  }

  // Check if a message has been received from the other board over UART (Serial1)
  if (Serial1.available()) {
    // Read the full received message (until newline character)
    String msg = Serial1.readStringUntil('\n');

    // Display the received message in this board’s Serial Monitor
    Serial.println(msg);
  }
}
For Board Lesotho
Used the same code, but changed "Rwanda says: " to "Lesotho says: " wherever applicable.
- Uploaded the code to both boards, using separate Arduino IDE windows.
- Opened Serial Monitor for each board (set baud rate to 9600).
- Type a message into one board’s Serial Monitor and press Enter.
- The other board will display the message with the sender’s name.
- The chat is back and forth between both boards.
Long-Range Telemetry
LoRa-based remote monitoring system for environmental data collection