Wildcard week
Wildcard Week: Computerized Embroidery
This week’s Fab Academy assignment, known as Wildcard Week, focused on exploring a digital fabrication process that has not been previously covered in the course. The goal was to design and produce something using a new tool or method, integrating computer-aided design (CAD) and computer-aided manufacturing (CAM), and to document the process clearly enough that others could reproduce the result.
For this assignment, I chose to work with computerized embroidery, a digital fabrication technique that transforms vector designs into stitched patterns using thread and fabric. This process combines the precision of CNC-style toolpath control with the artistry of textile design. Instead of subtracting material like a laser cutter or CNC mill, the embroidery machine follows a pre-defined stitch path, guiding fabric beneath a stationary needle to draw the design with thread.
To carry out this project, I converted one of my own CAD illustrations into an embroidery-ready file using Inkscape with the Ink/Stitch extension. This toolset enables precise control over stitch types, direction, and order, effectively turning a 2D vector drawing into a machine-readable embroidery path.
This week was a unique opportunity to experiment with a creative yet technically rich fabrication method that bridges aesthetics, design, and digital manufacturing.
How to Install Ink/Stitch in Inkscape
Requirements
- Latest version of Inkscape
- Ink/Stitch extension (.zip file from the official website)
🔧 Step 1: Install Inkscape
- Go to the official website: https://inkscape.org/
- Download the version for your operating system (Windows, macOS, or Linux).
- Install the application following the standard installation process.
🔌 Step 2: Download Ink/Stitch
- Visit the official Ink/Stitch website: https://inkstitch.org/download/
- Download the ZIP file corresponding to your operating system.
📂 Step 3: Install the Extension
▶️ Windows
- Extract the contents of the downloaded ZIP file.
- Copy all extracted files and folders (e.g.,
inkstitch,params,embroider.py, etc.). - Paste them into the Inkscape extensions folder:
C:\Users\<your_username>\AppData\Roaming\Inkscape\extensions
- You can quickly access this folder by typing
%APPDATA%in the Windows search bar. - Restart Inkscape.
▶️ macOS
- Extract the ZIP file.
- Copy the files and folders into:
~/.config/inkscape/extensions/
- Use Finder > Go > Go to Folder… to paste that path.
- Restart Inkscape.
▶️ Linux
- Extract the ZIP file.
- Copy the contents to your extensions folder:
~/.config/inkscape/extensions/
- You can use the terminal:
cp -r /path/to/inkstitch/* ~/.config/inkscape/extensions/
- Restart Inkscape.
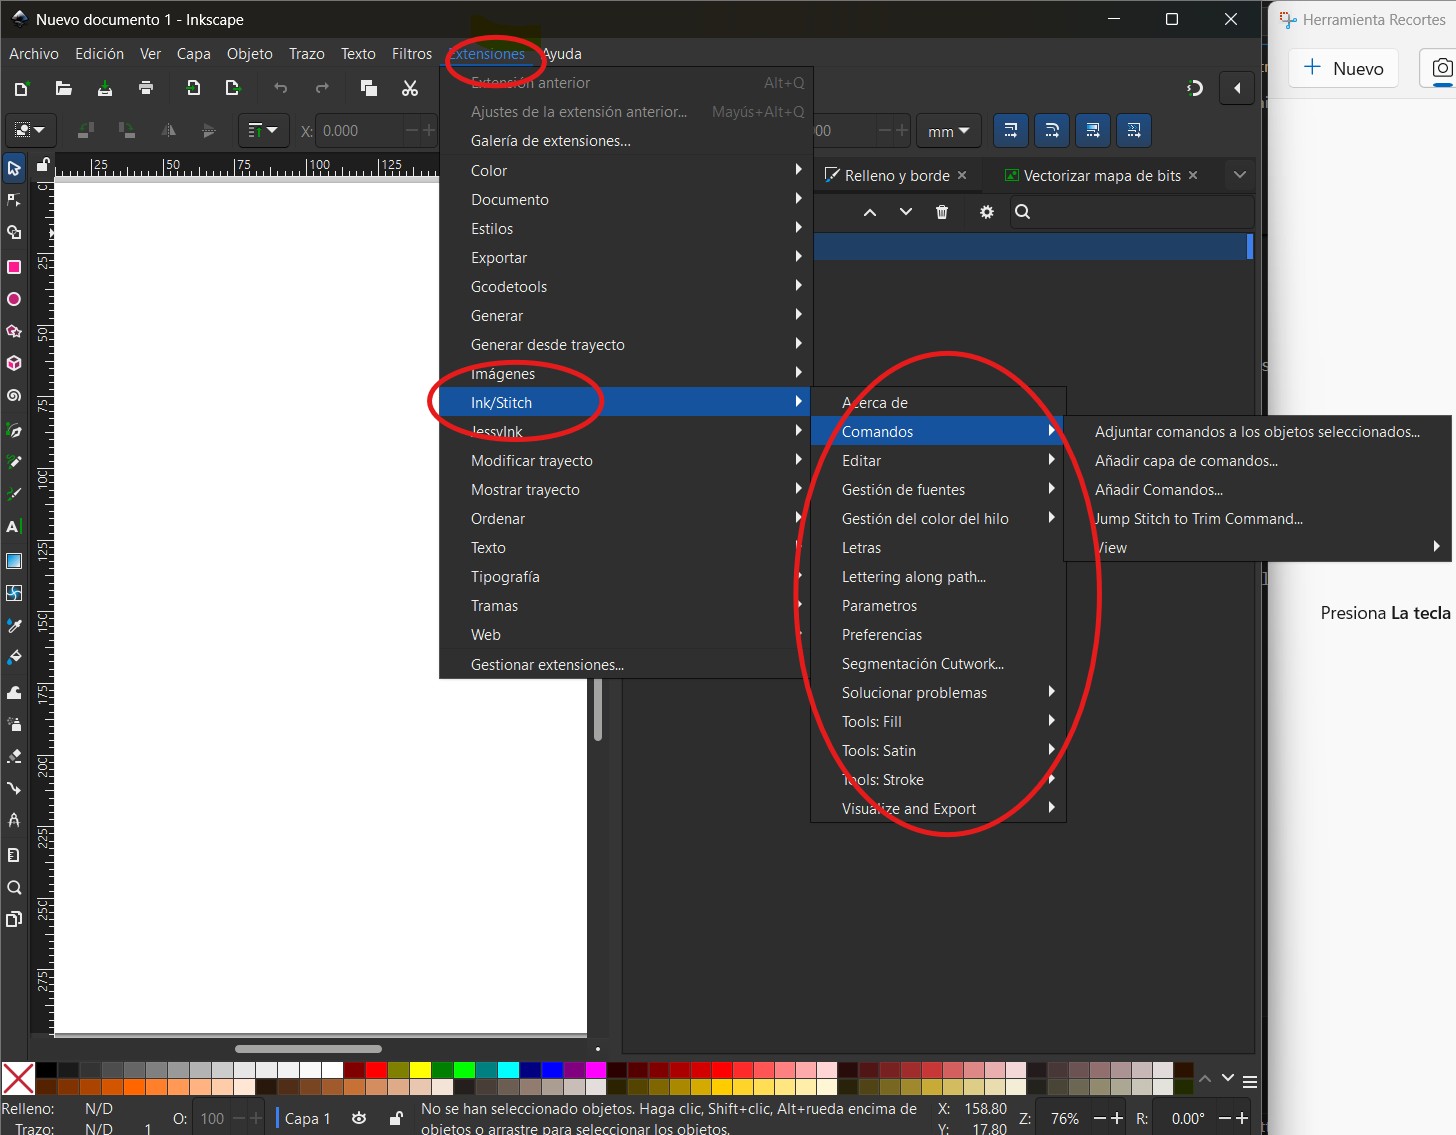
✔️ Step 4: Verify Installation
- Open Inkscape.
- Go to the menu: Extensions > Ink/Stitch
- If you see options like "Simulate", "Params", or "Install fonts", the installation was successful!
🌼 From Raster to Embroidery: Vectorizing a Flower
For this assignment, I applied the vectorization techniques I learned during Week 02: Computer-Aided Design. I started with a PNG image of a flower, which I selected as the base for my embroidery project.
🖼️ Step 1: Importing the Flower Image
- I opened Inkscape and imported the PNG image of the flower using
File > Import. - The image appeared as a raster object (bitmap), so it had to be vectorized before being used with Ink/Stitch.

✏️ Step 2: Vectorizing the Image
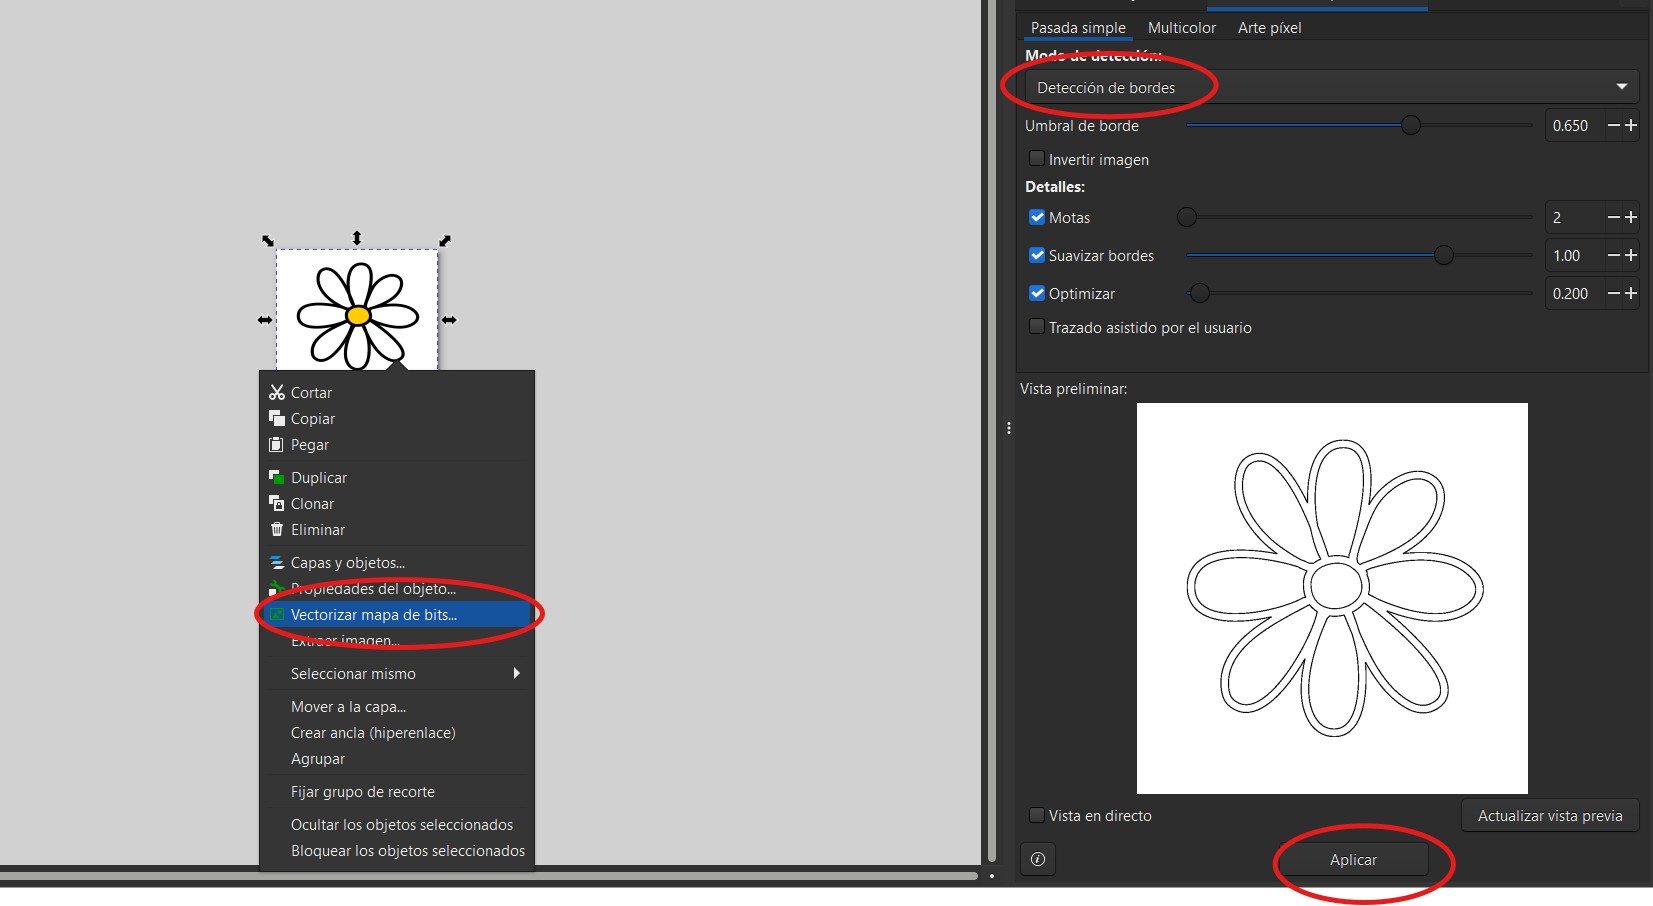
- With the image selected, I went to Path > Trace Bitmap.
- Using the Edge Detection method, I traced the outline of the flower to create a clean vector path.
- After a few adjustments in threshold and smoothing, the flower shape was successfully converted into vector format.
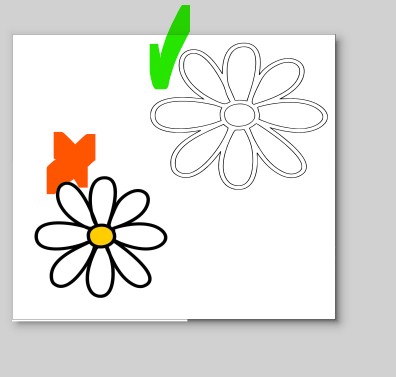
- I deleted the original PNG image, leaving only the traced vector paths.
🧵 Step 3: Preparing the Design for Embroidery
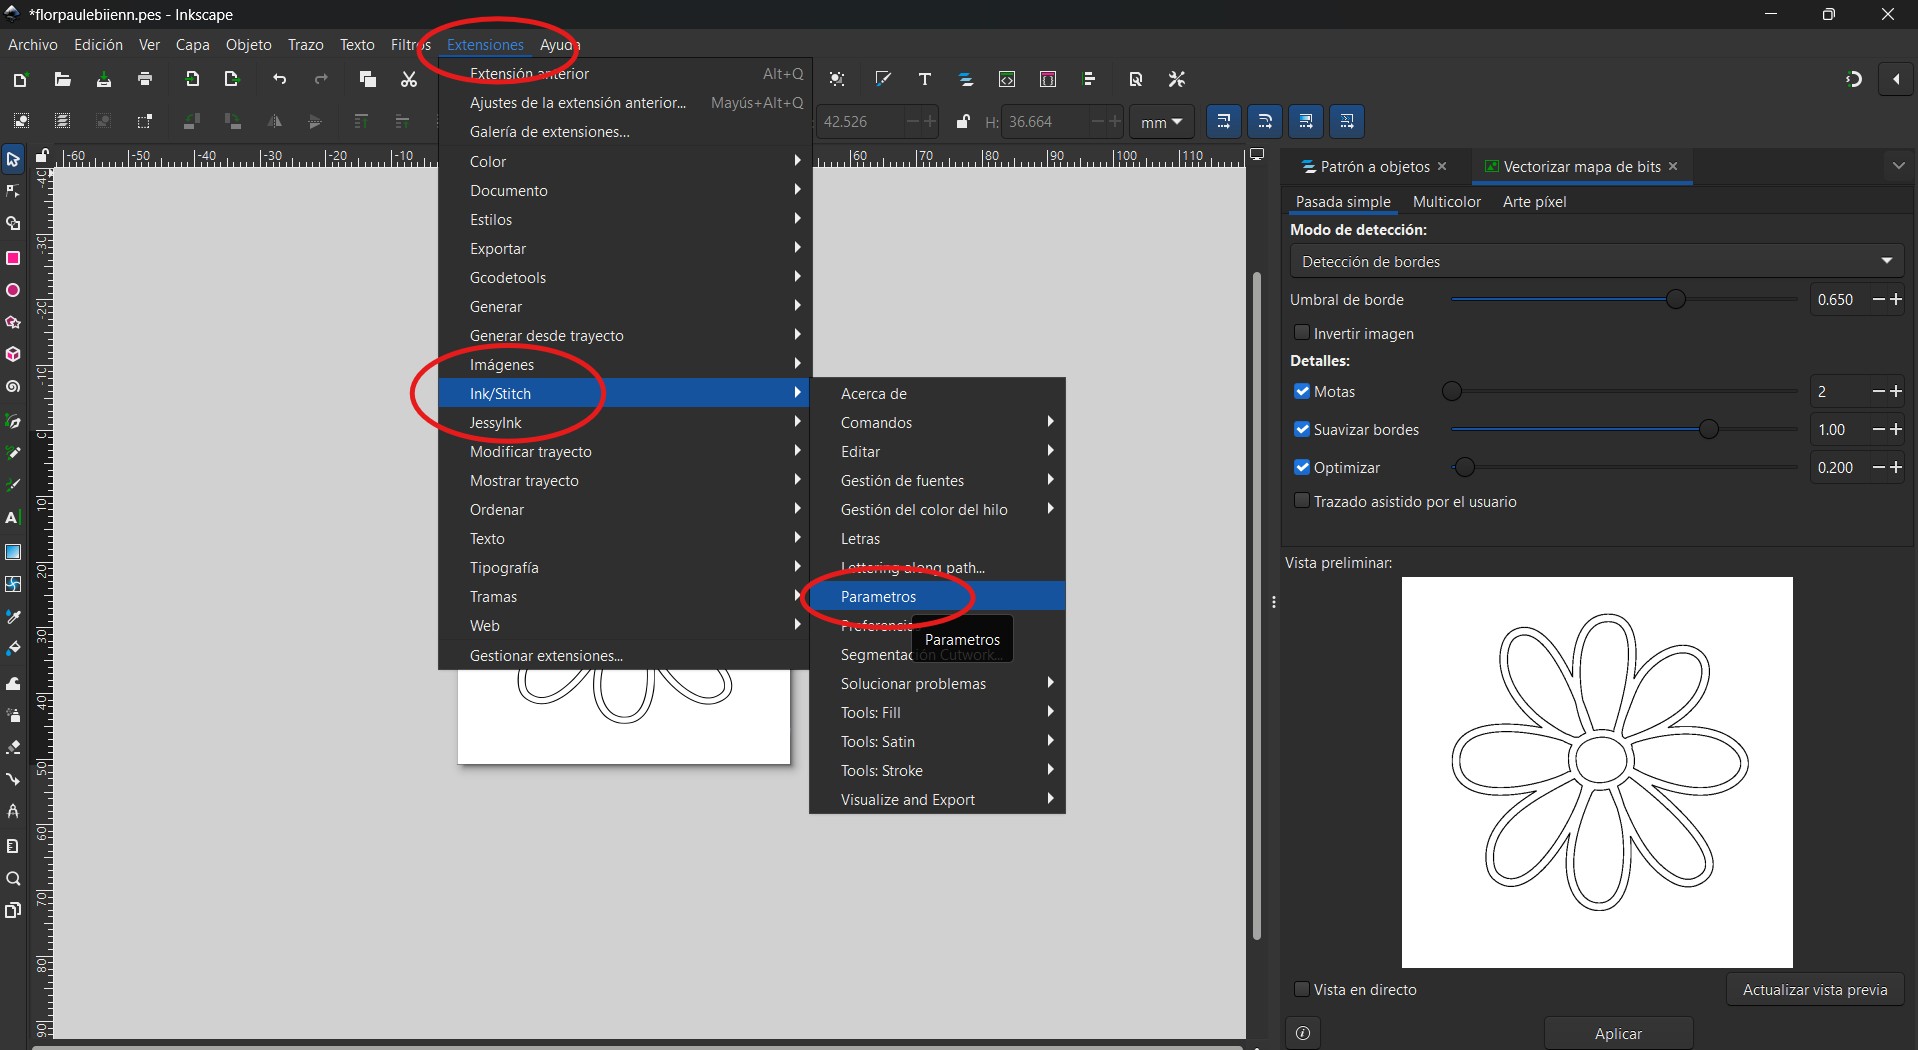
- With the flower vector design finalized, I selected the shape and navigated to Extensions → Ink/Stitch → Params.
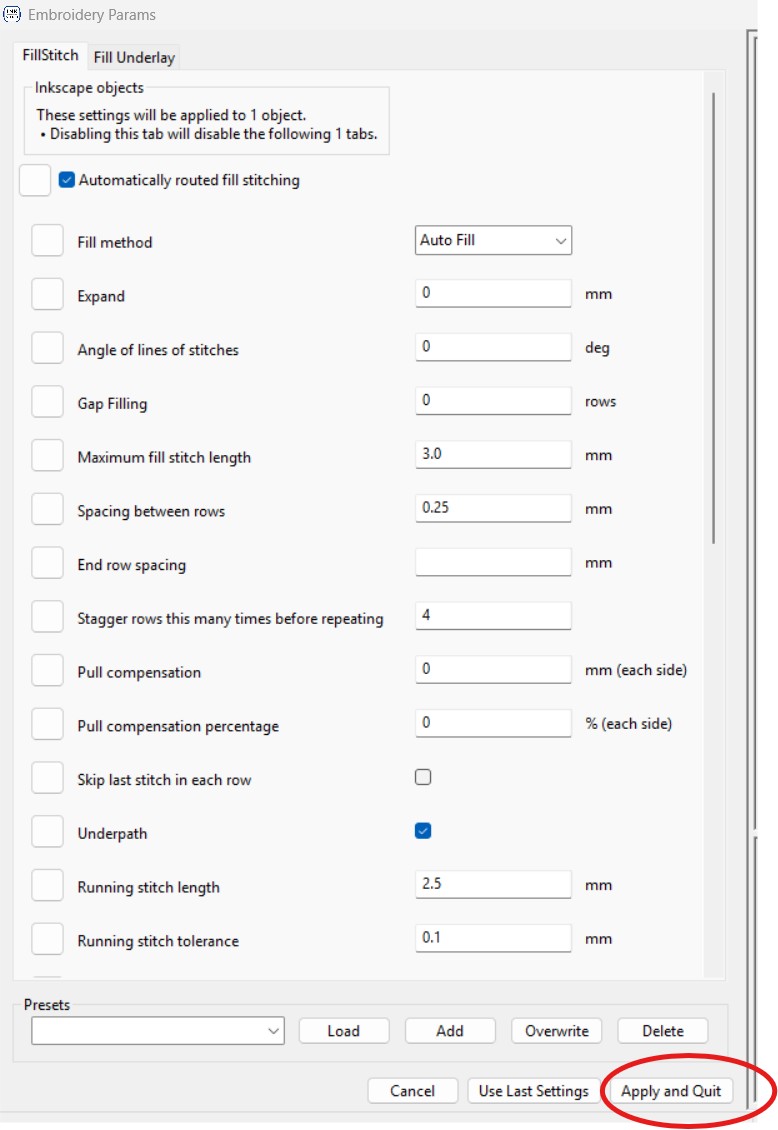
- This menu allows configuration of various embroidery properties for each path, such as stitch style, direction, density, length, and sequence.
- Since this was my first time working with Ink/Stitch and embroidery in general, I decided to keep the default values to reduce the chance of making mistakes or overcomplicating the process.
- On the right side of the Params window, Ink/Stitch provides a real-time preview of how the stitching will proceed. This is extremely helpful to visually check the path logic and stitch flow before exporting.
- Once I was confident that the settings looked correct, I clicked Apply and Quit to finalize the stitch instructions.
👁️ Step 4: Simulating the Embroidery Sequence
- To double-check the output, I used the simulation tool under Extensions → Ink/Stitch → Visualize and Export → Simulator.
- This tool animates the embroidery process step by step, showing how the needle moves and the stitching develops.
- © Copyright 2025 [Paula Rivero Robledo]
- Creative Commons Attribution Non Commercial
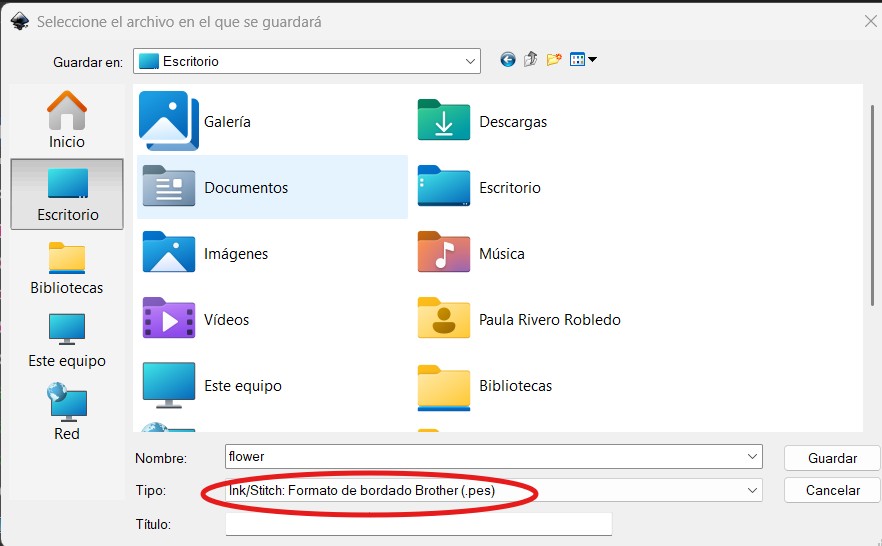
After finalizing the design and running simulations, I returned to the canvas and saved the project in .PES format, which is compatible with the embroidery machine. I then transferred the file to a USB drive. With the design exported and the file properly loaded onto the USB, everything was set to begin t
By using what I learned in Week 02, I was able to transform a simple image into a fully digital embroidery design, integrating CAD techniques with digital fabrication.
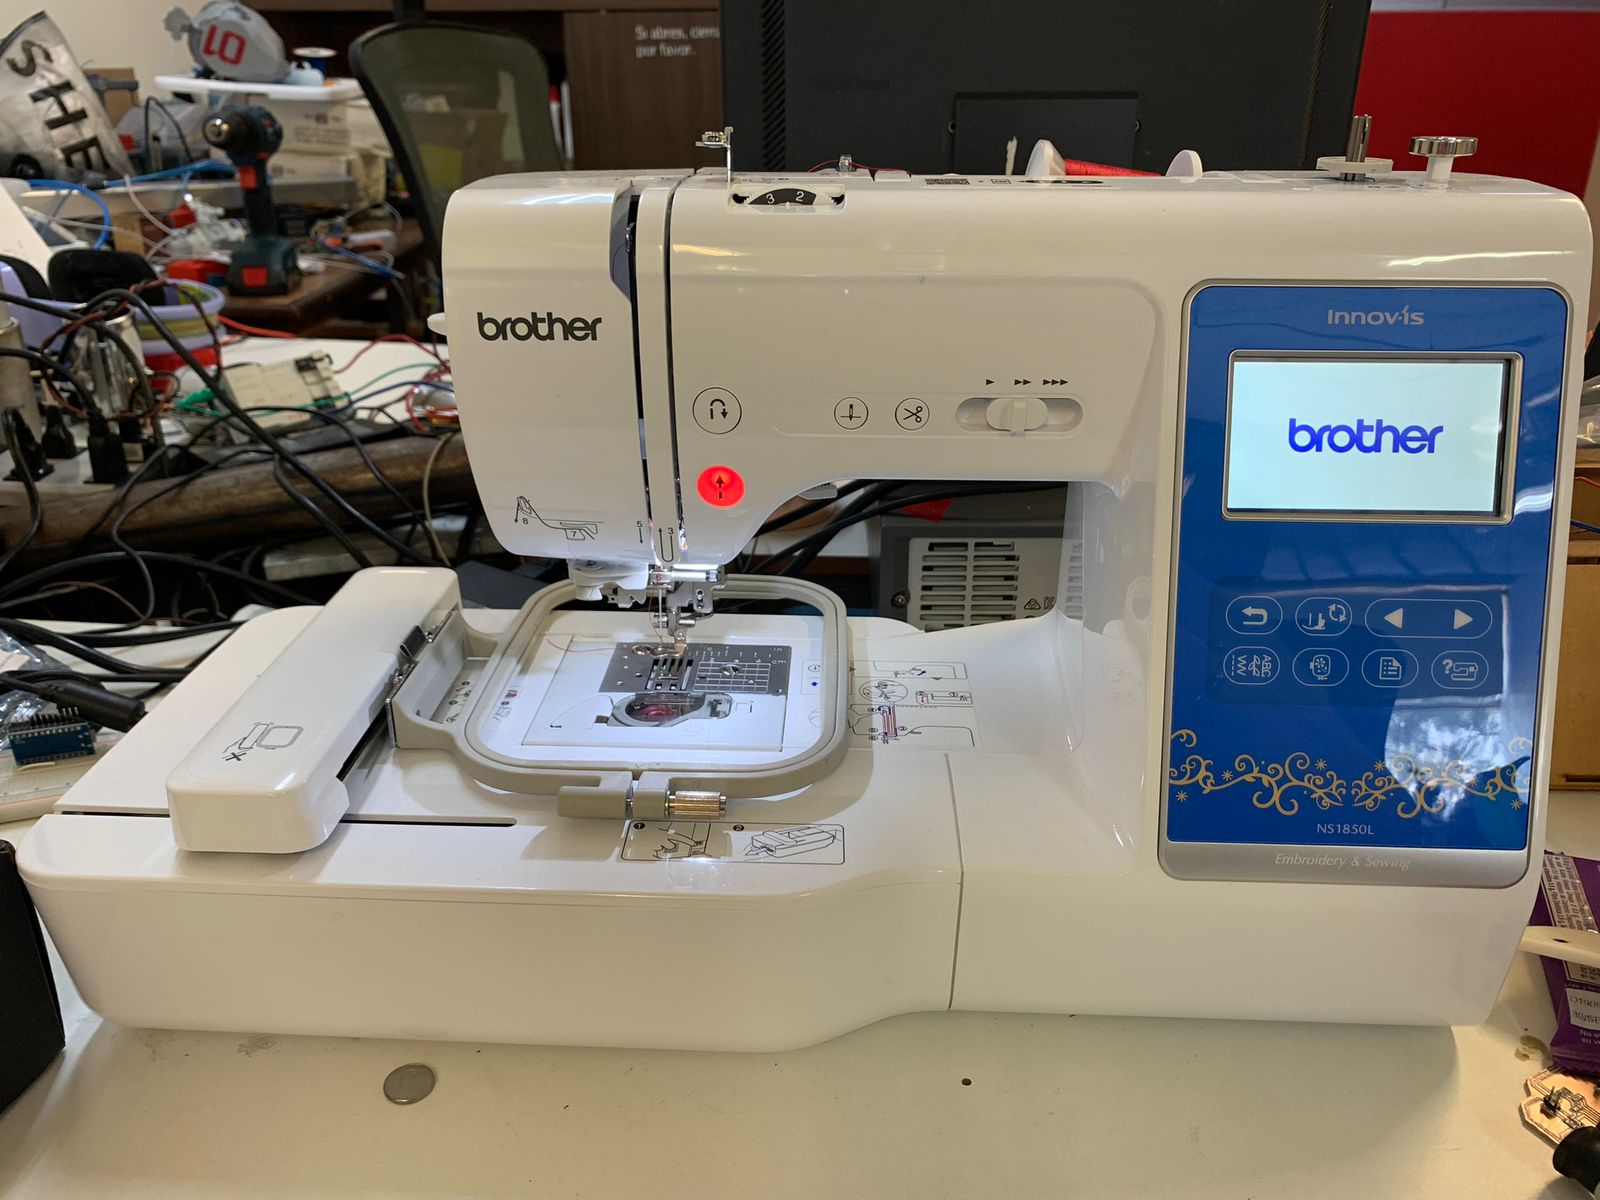
Installing the Thread in the Embroidery Machine
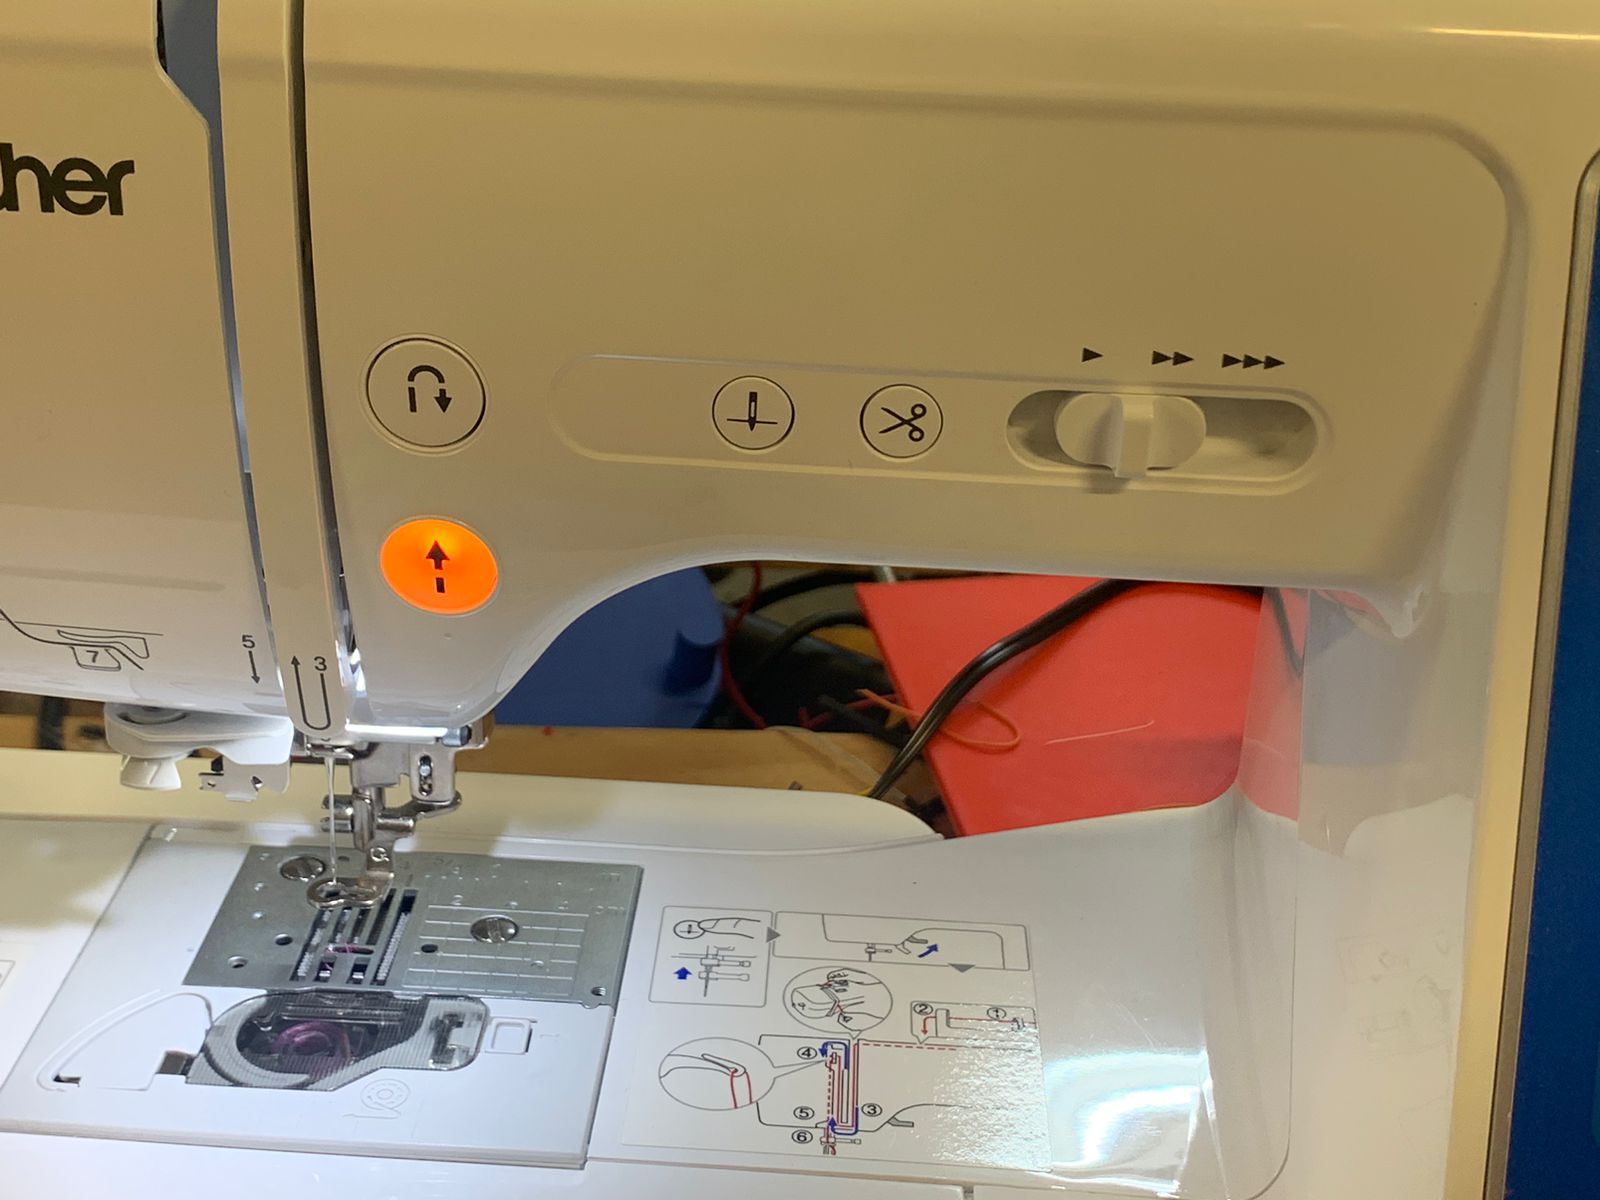
The machine used is the Brother NS1850L Embroidery & Sewing. This machine is quite intuitive, although if it’s your first time doing something like this, it might take you a while — that was the case for me.
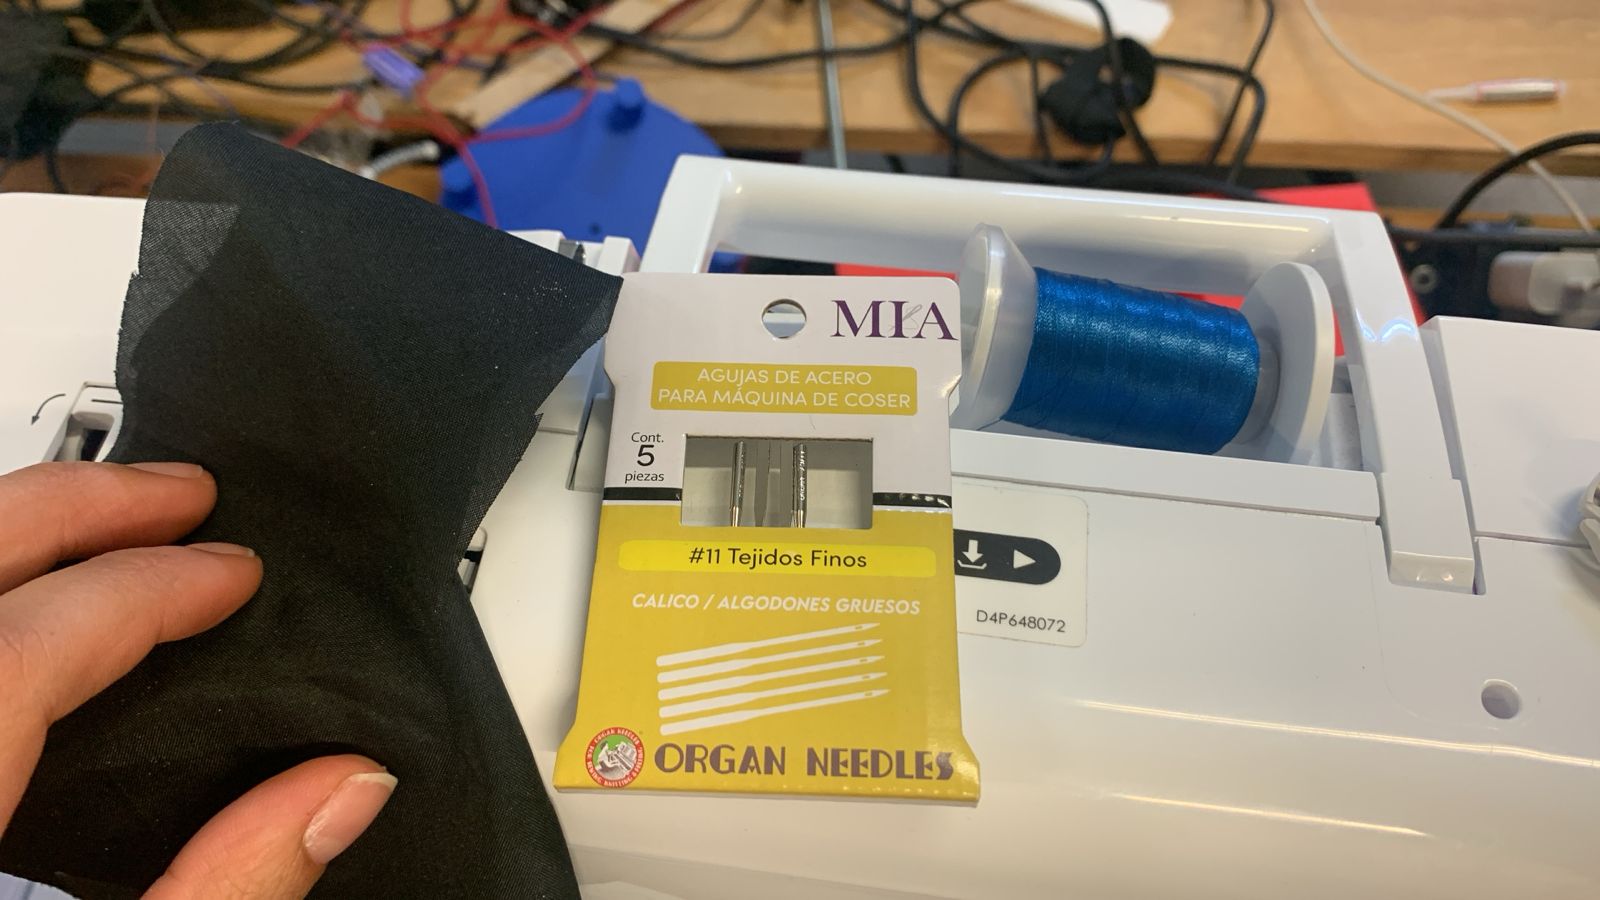
First, choose the thread color and the fabric you'll embroider on. Depending on the fabric, the needle will vary — there are needles for thin fabrics and others for thicker ones like denim. I chose blue thread and a thin fabric for the embroidery, so I used a needle meant for light fabrics.
Preparing the Bobbin
Now it’s time to wind the bobbin, which goes in the lower part of the machine. The machine has steps labeled 1 through 4 to help you insert the bobbin properly:
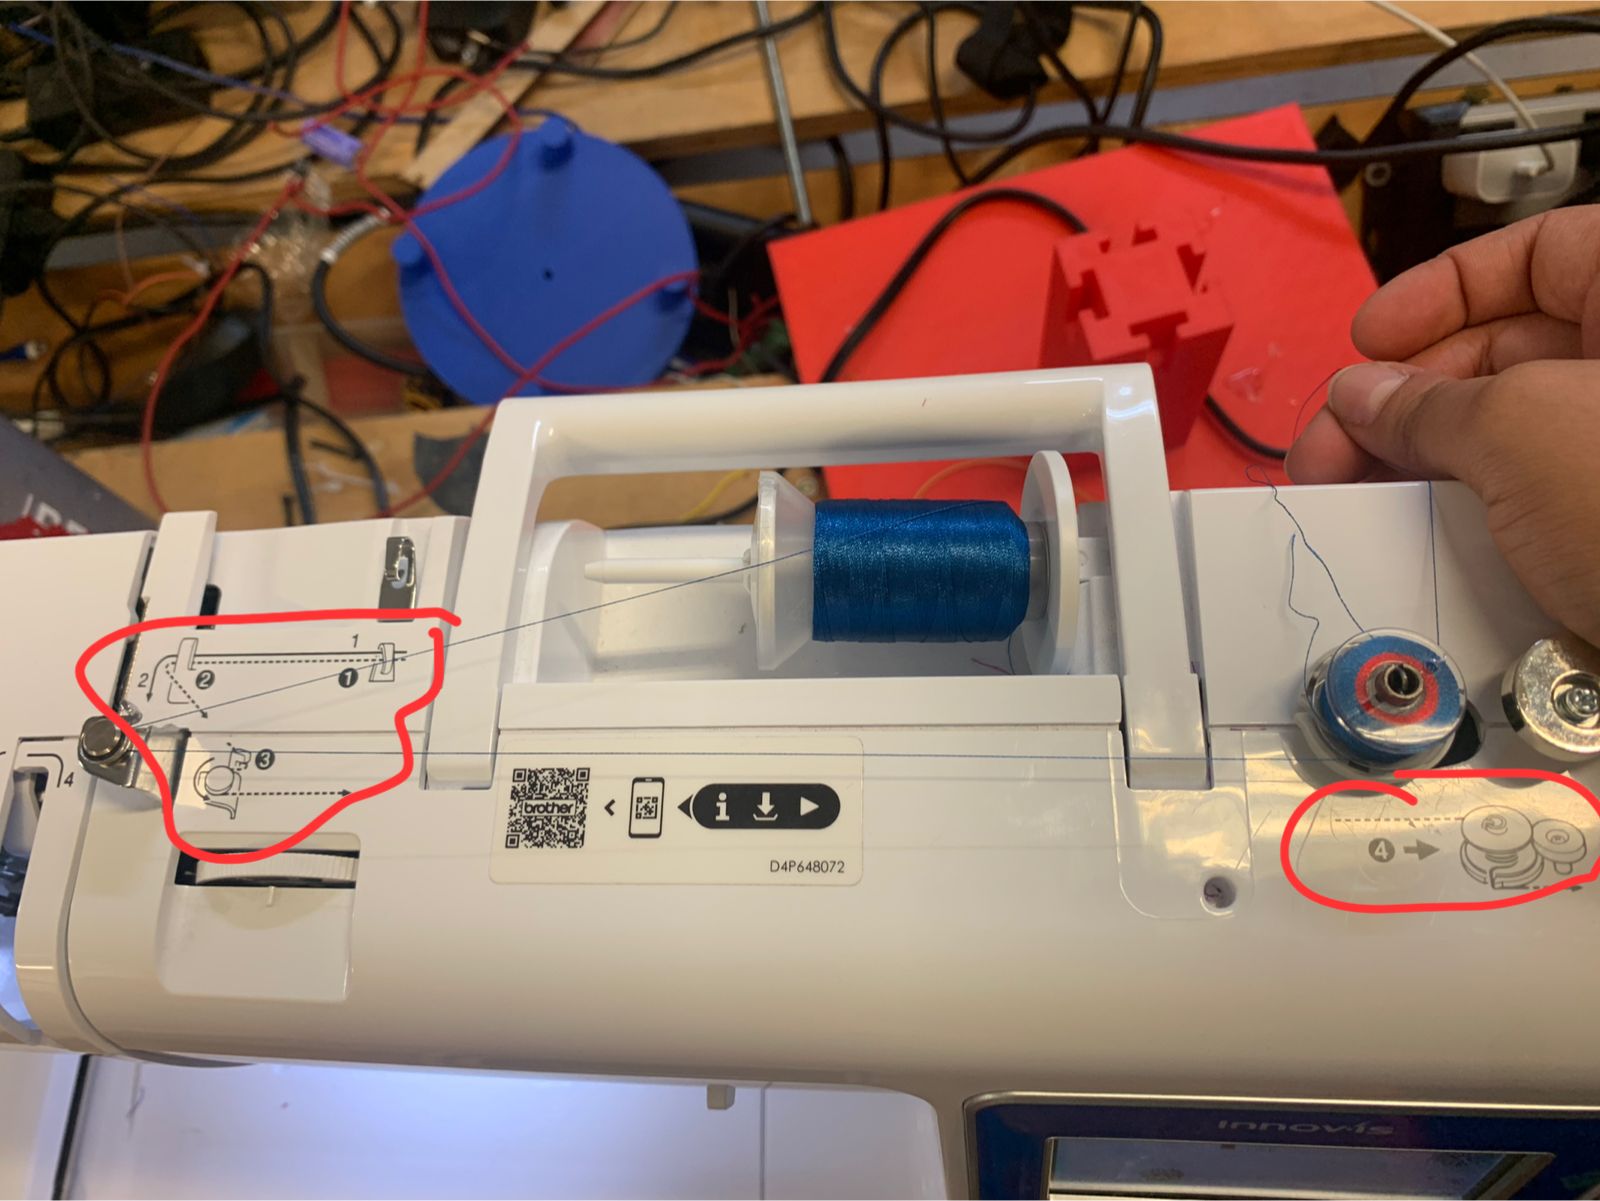
Once inserted, press the orange button and the bobbin will wind automatically.
Inserting the Bobbin
After the bobbin is ready, remove the gray cover and insert the bobbin you just made. Follow the instructions shown on the machine.
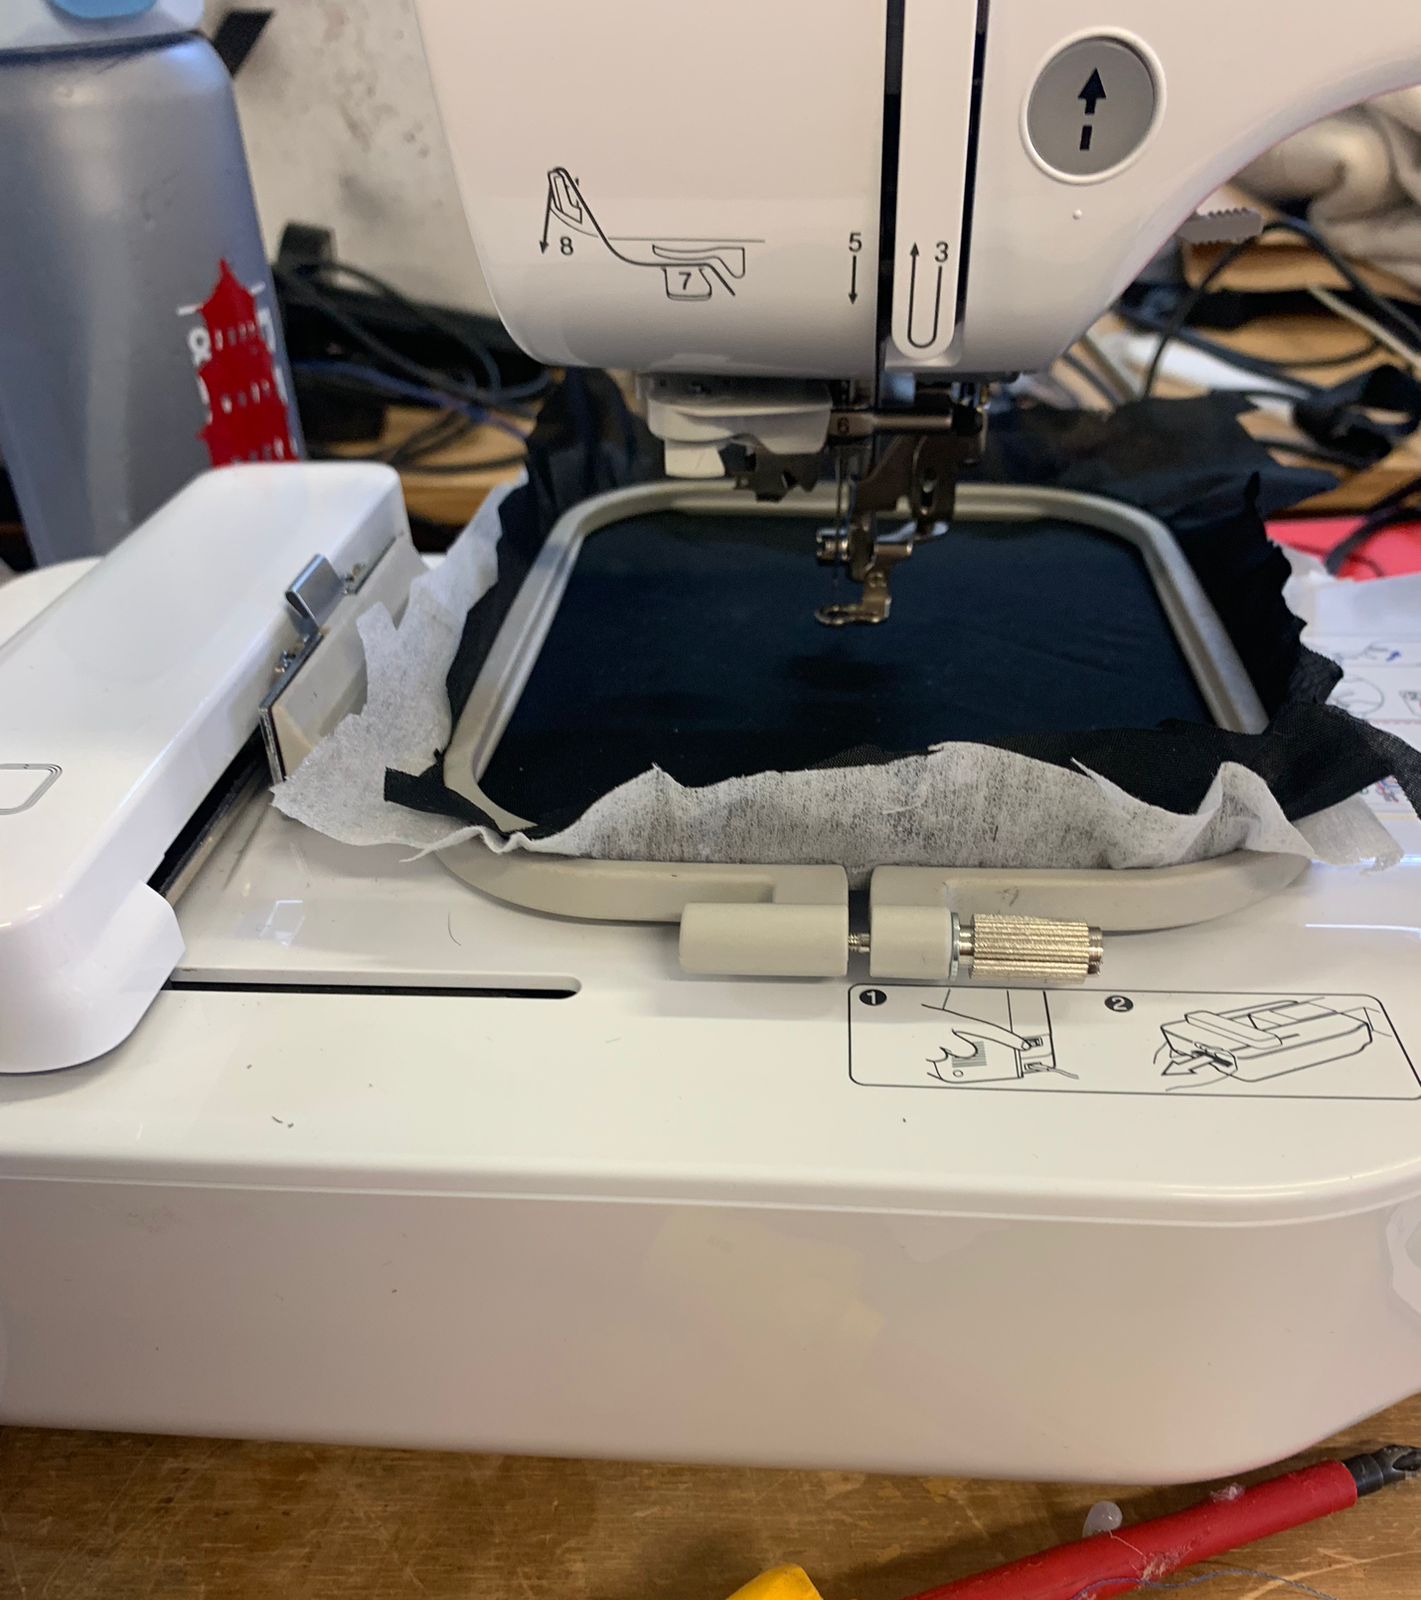
Threading the Needle
Now it’s time to thread the needle. Using the same thread color, follow the on-machine steps again:
Now your thread is ready for embroidery!
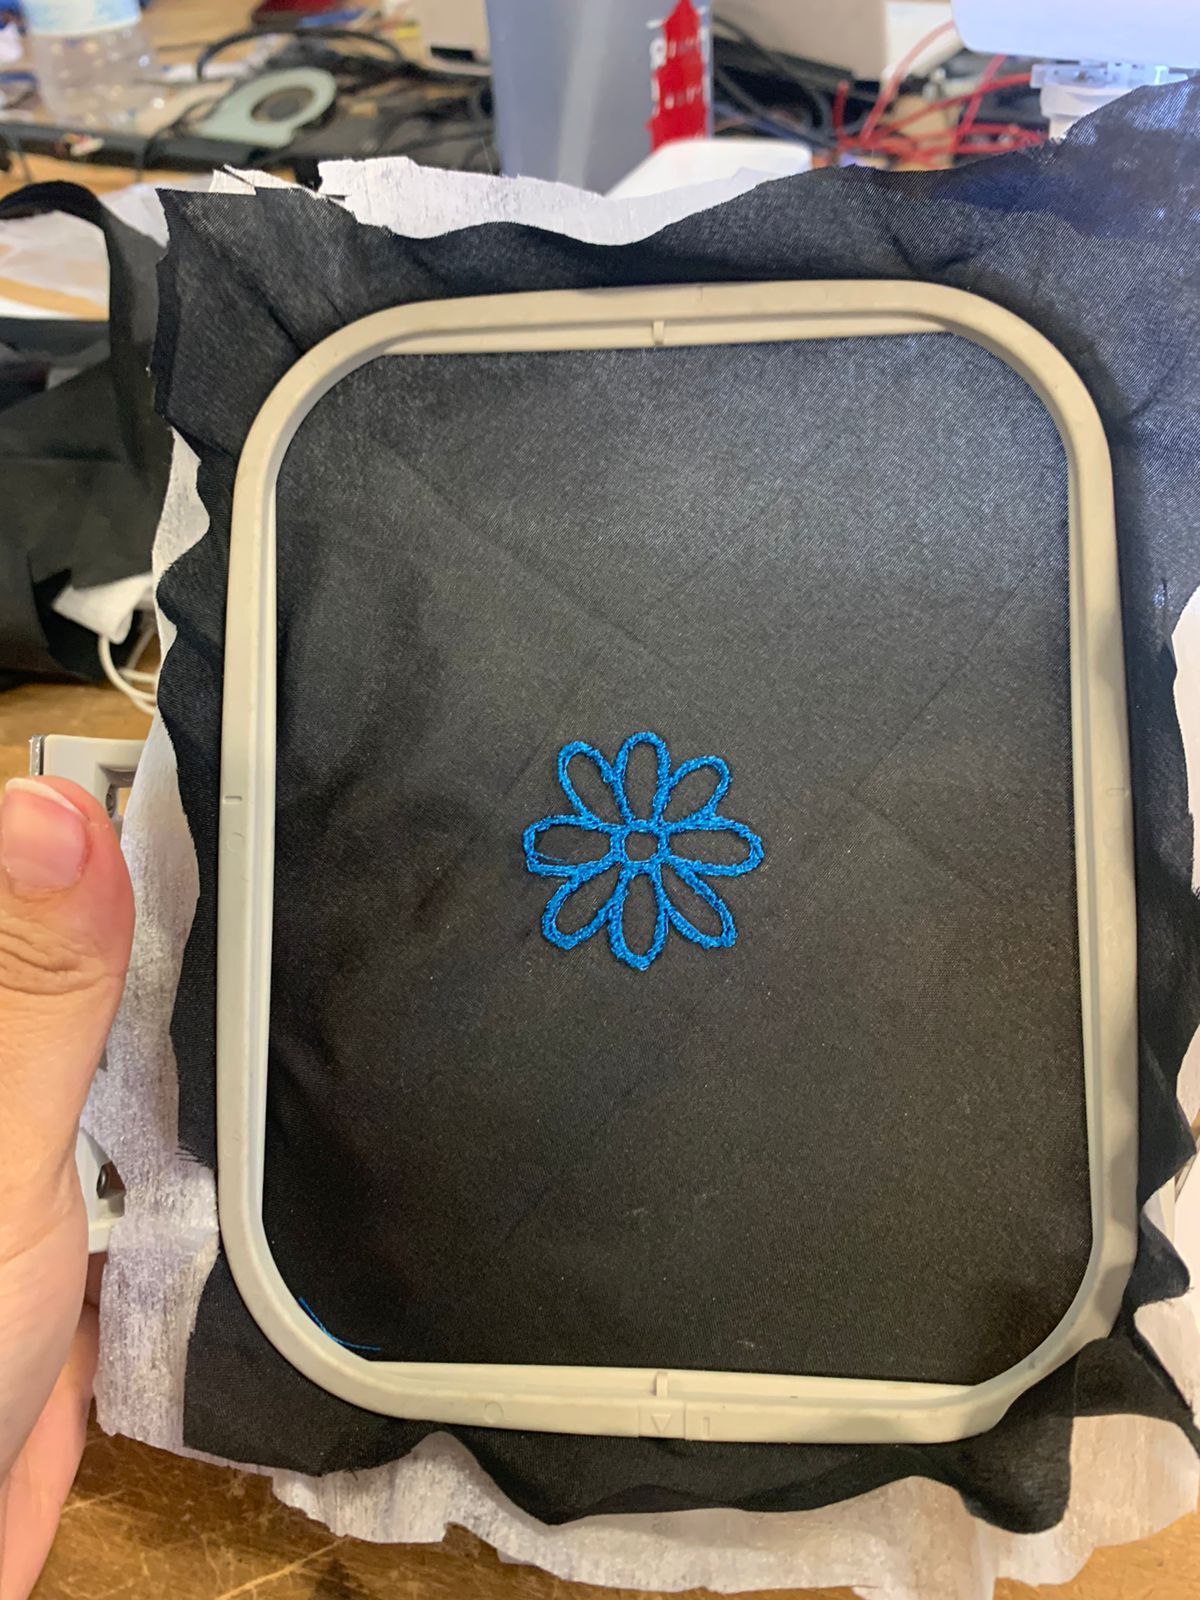
Setting the Fabric
To set the fabric, you need to stretch it tightly in an embroidery hoop. I used a stabilizer underneath and the fabric I wanted to embroider on (cotton) on top.
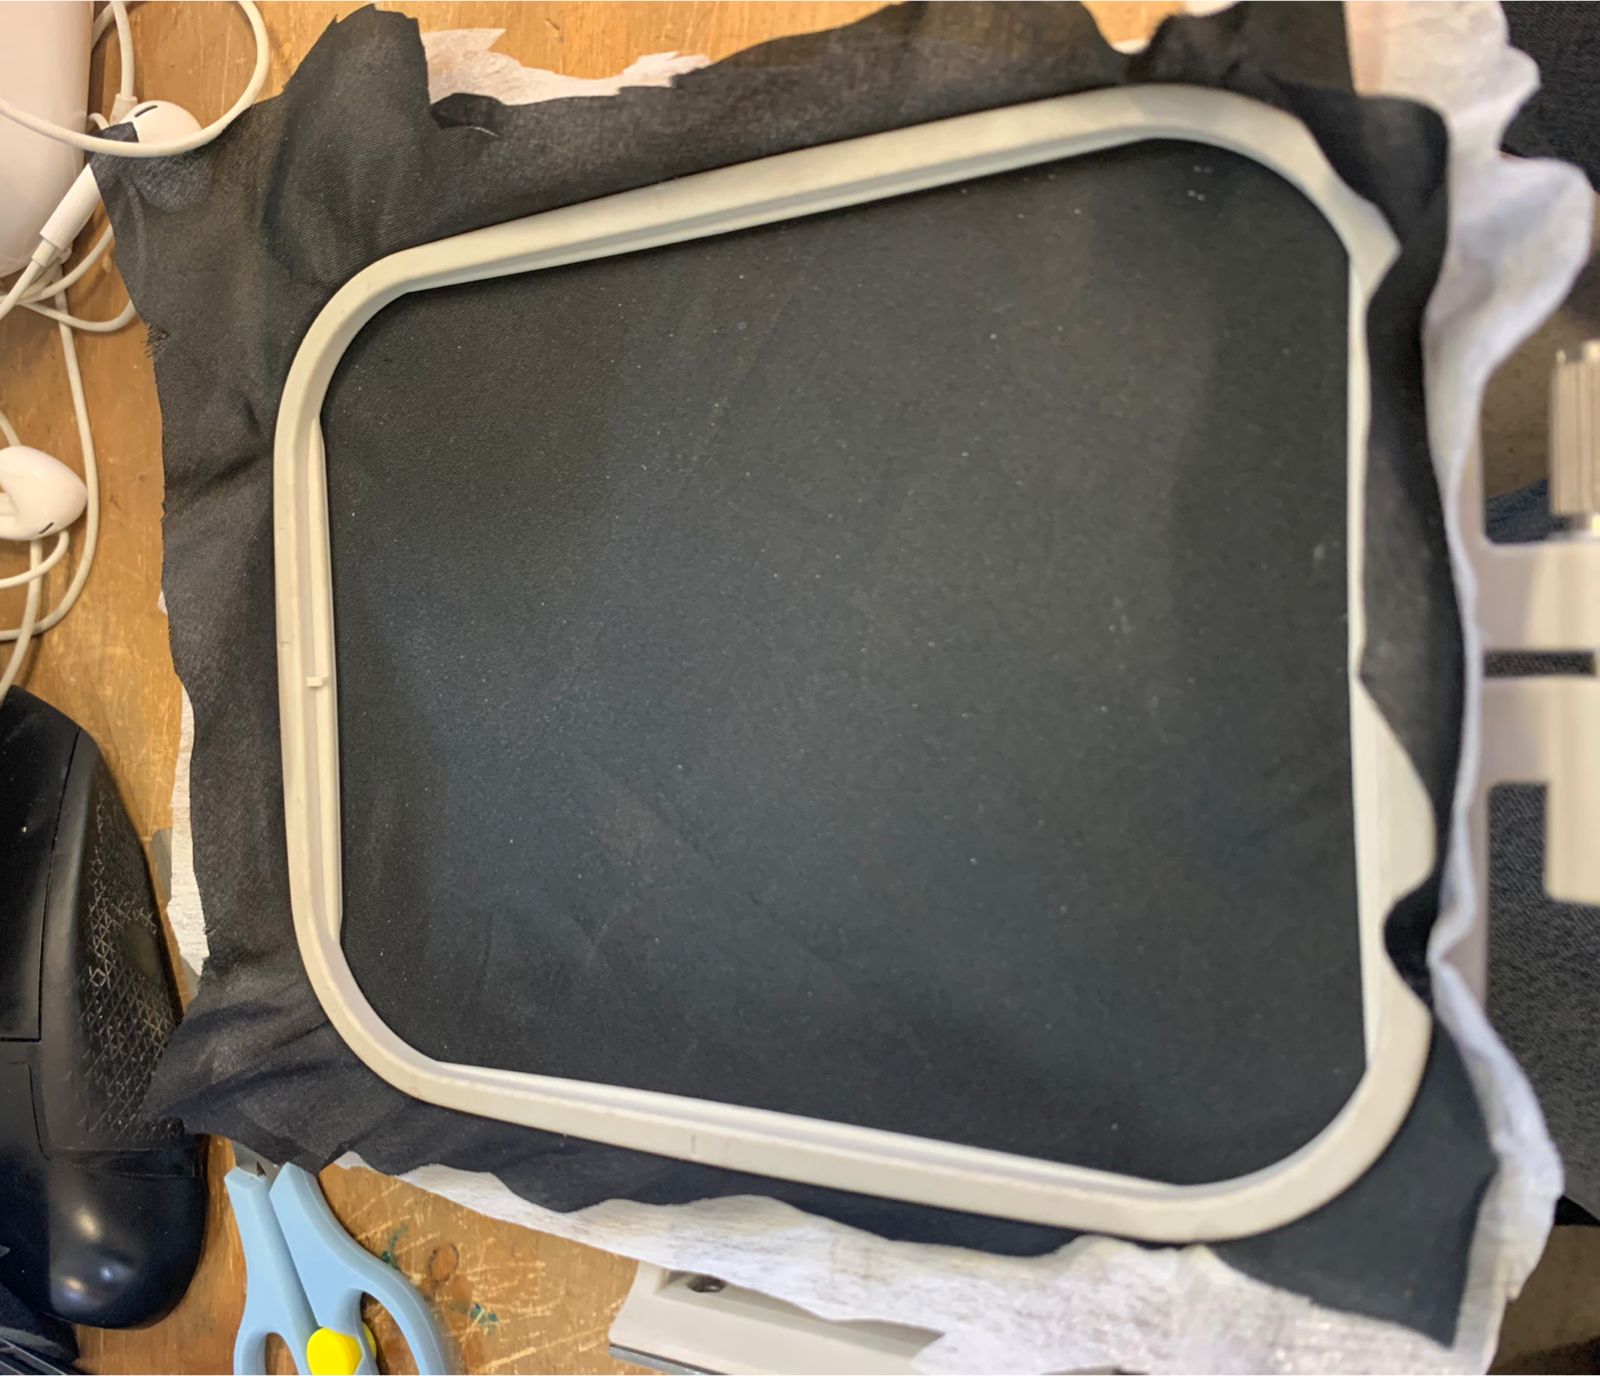
It’s important to cut your fabric slightly larger than the hoop to ensure it stretches properly. Once it’s tight, place it in the machine and you're ready to load your embroidery file.
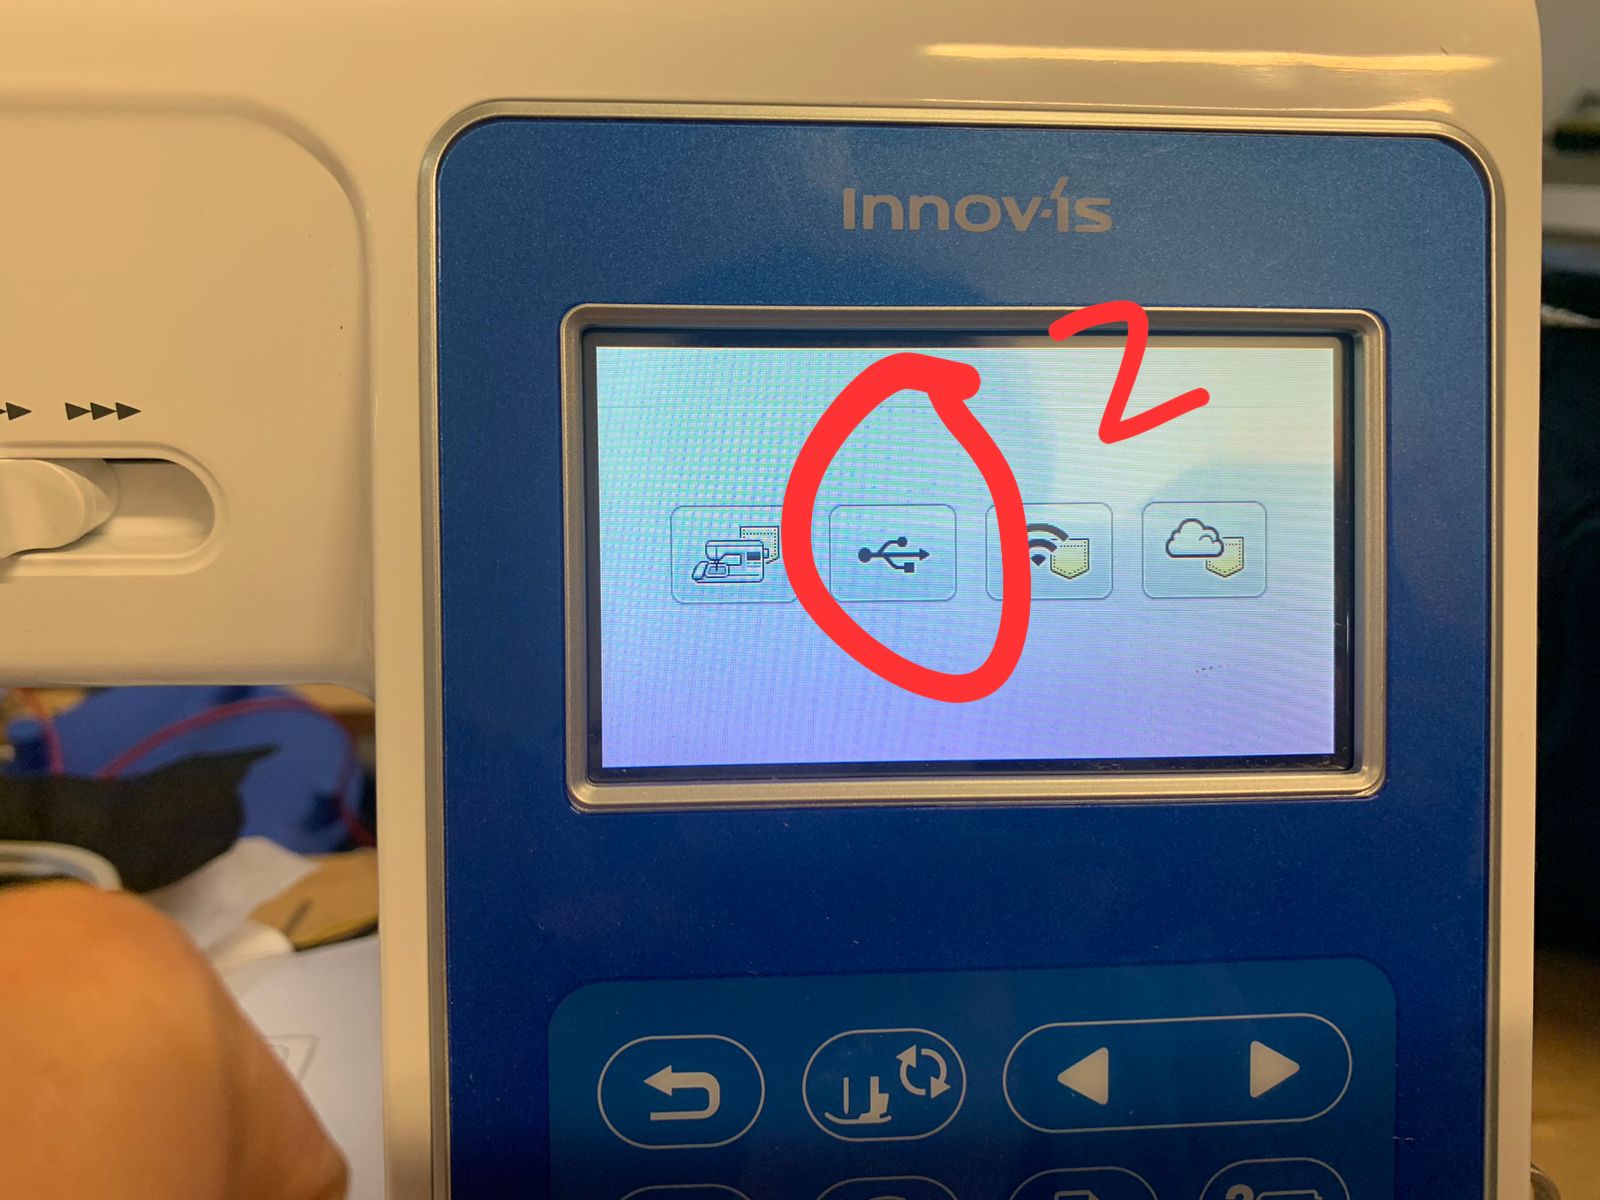
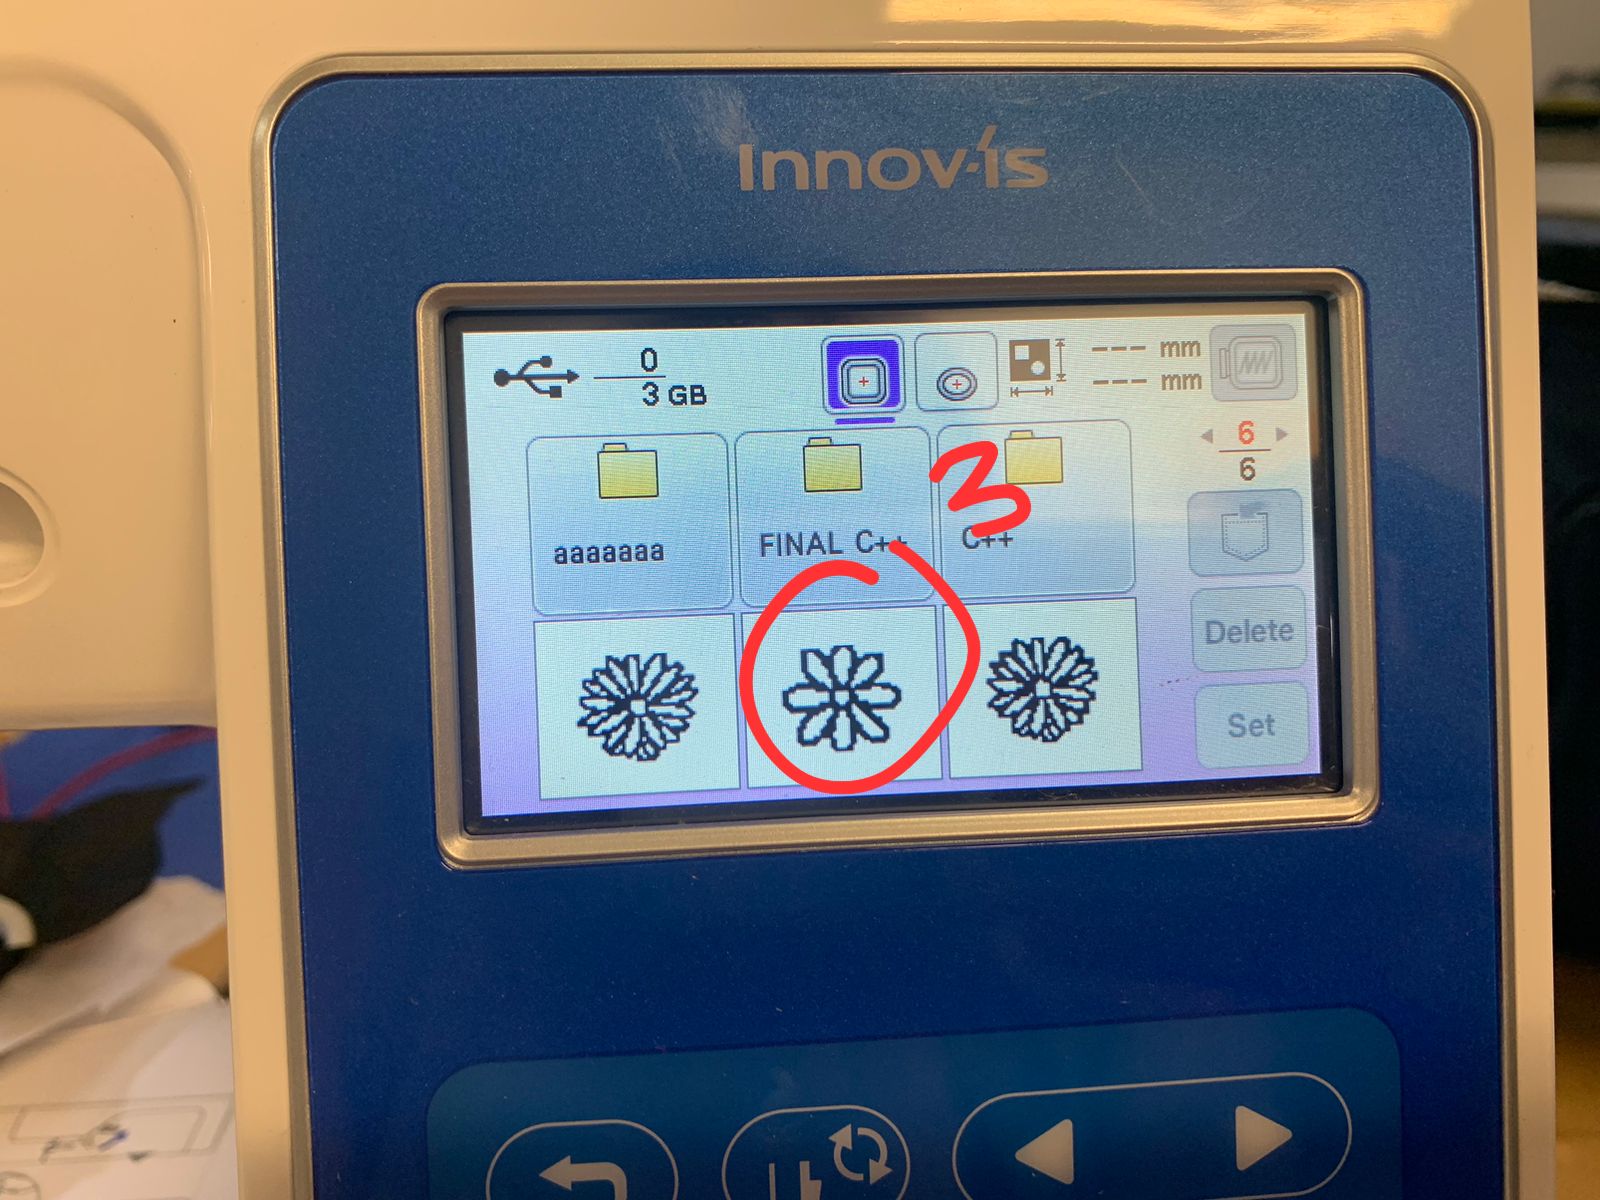
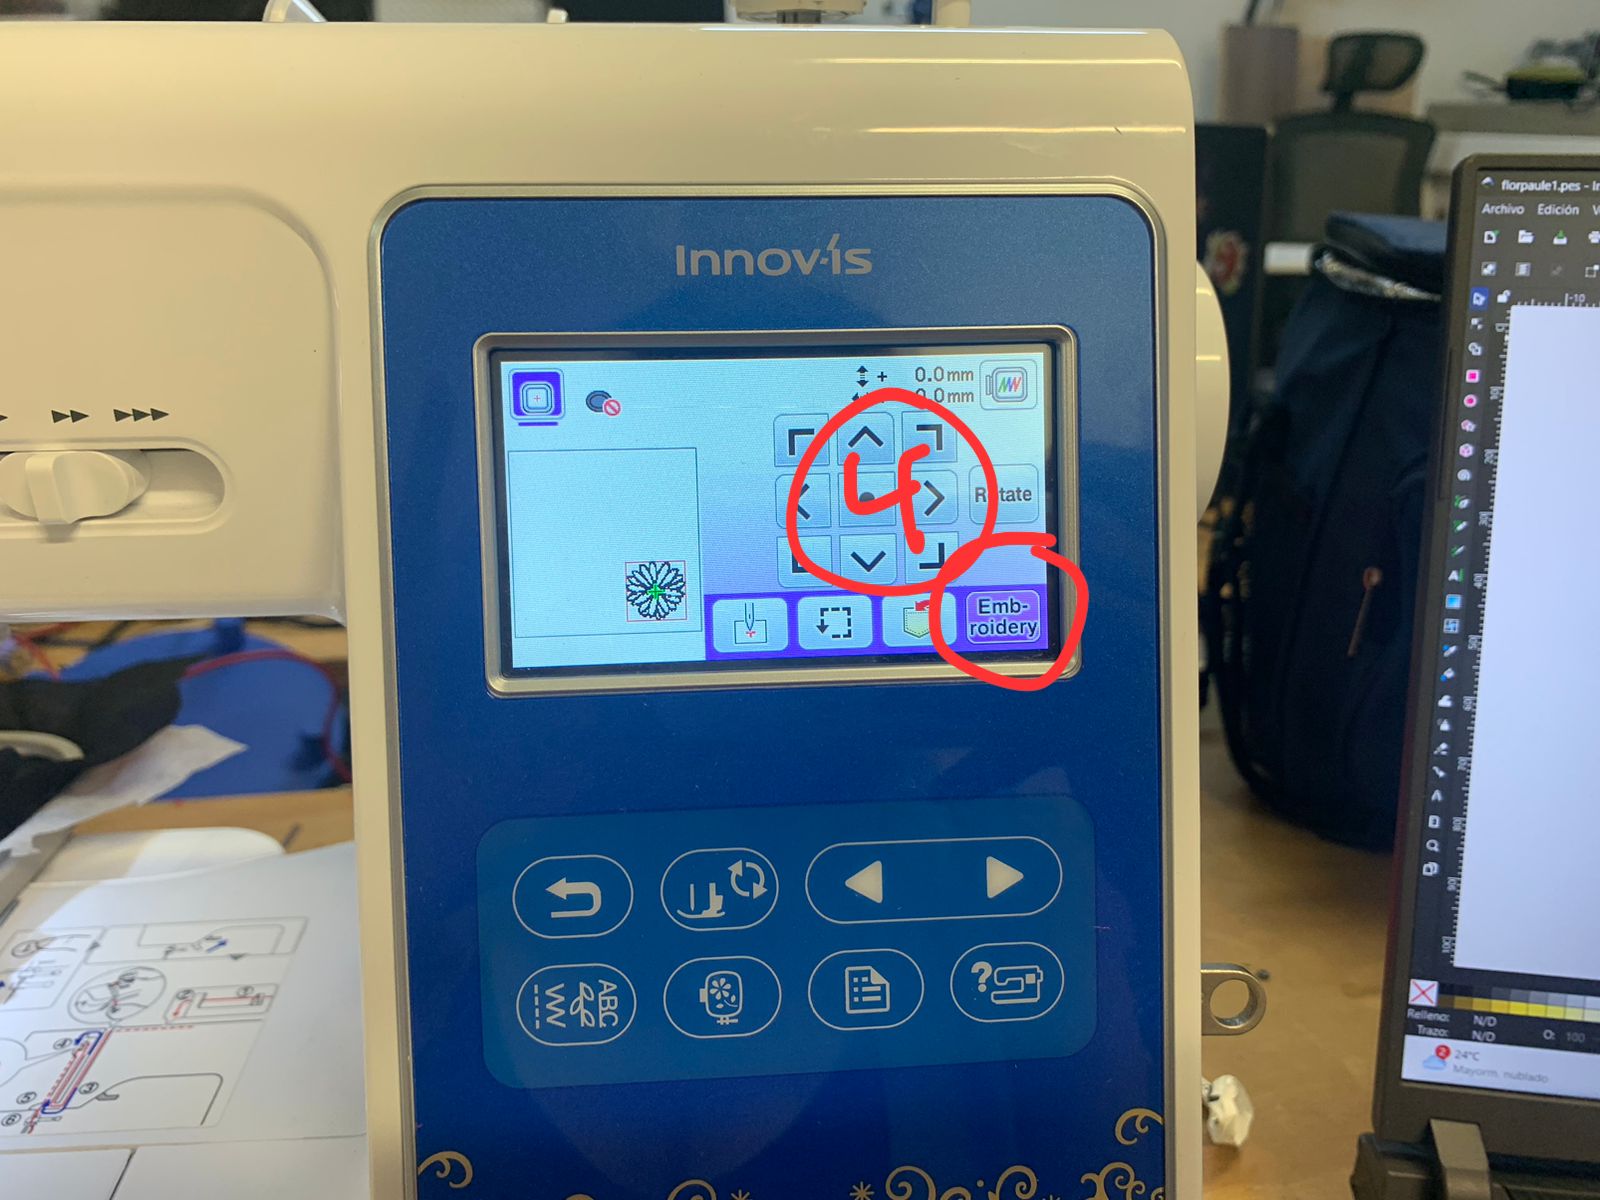
Loading the Inkscape Design
Once your Inkscape design is saved as a .pes file, insert the USB drive and follow these steps:
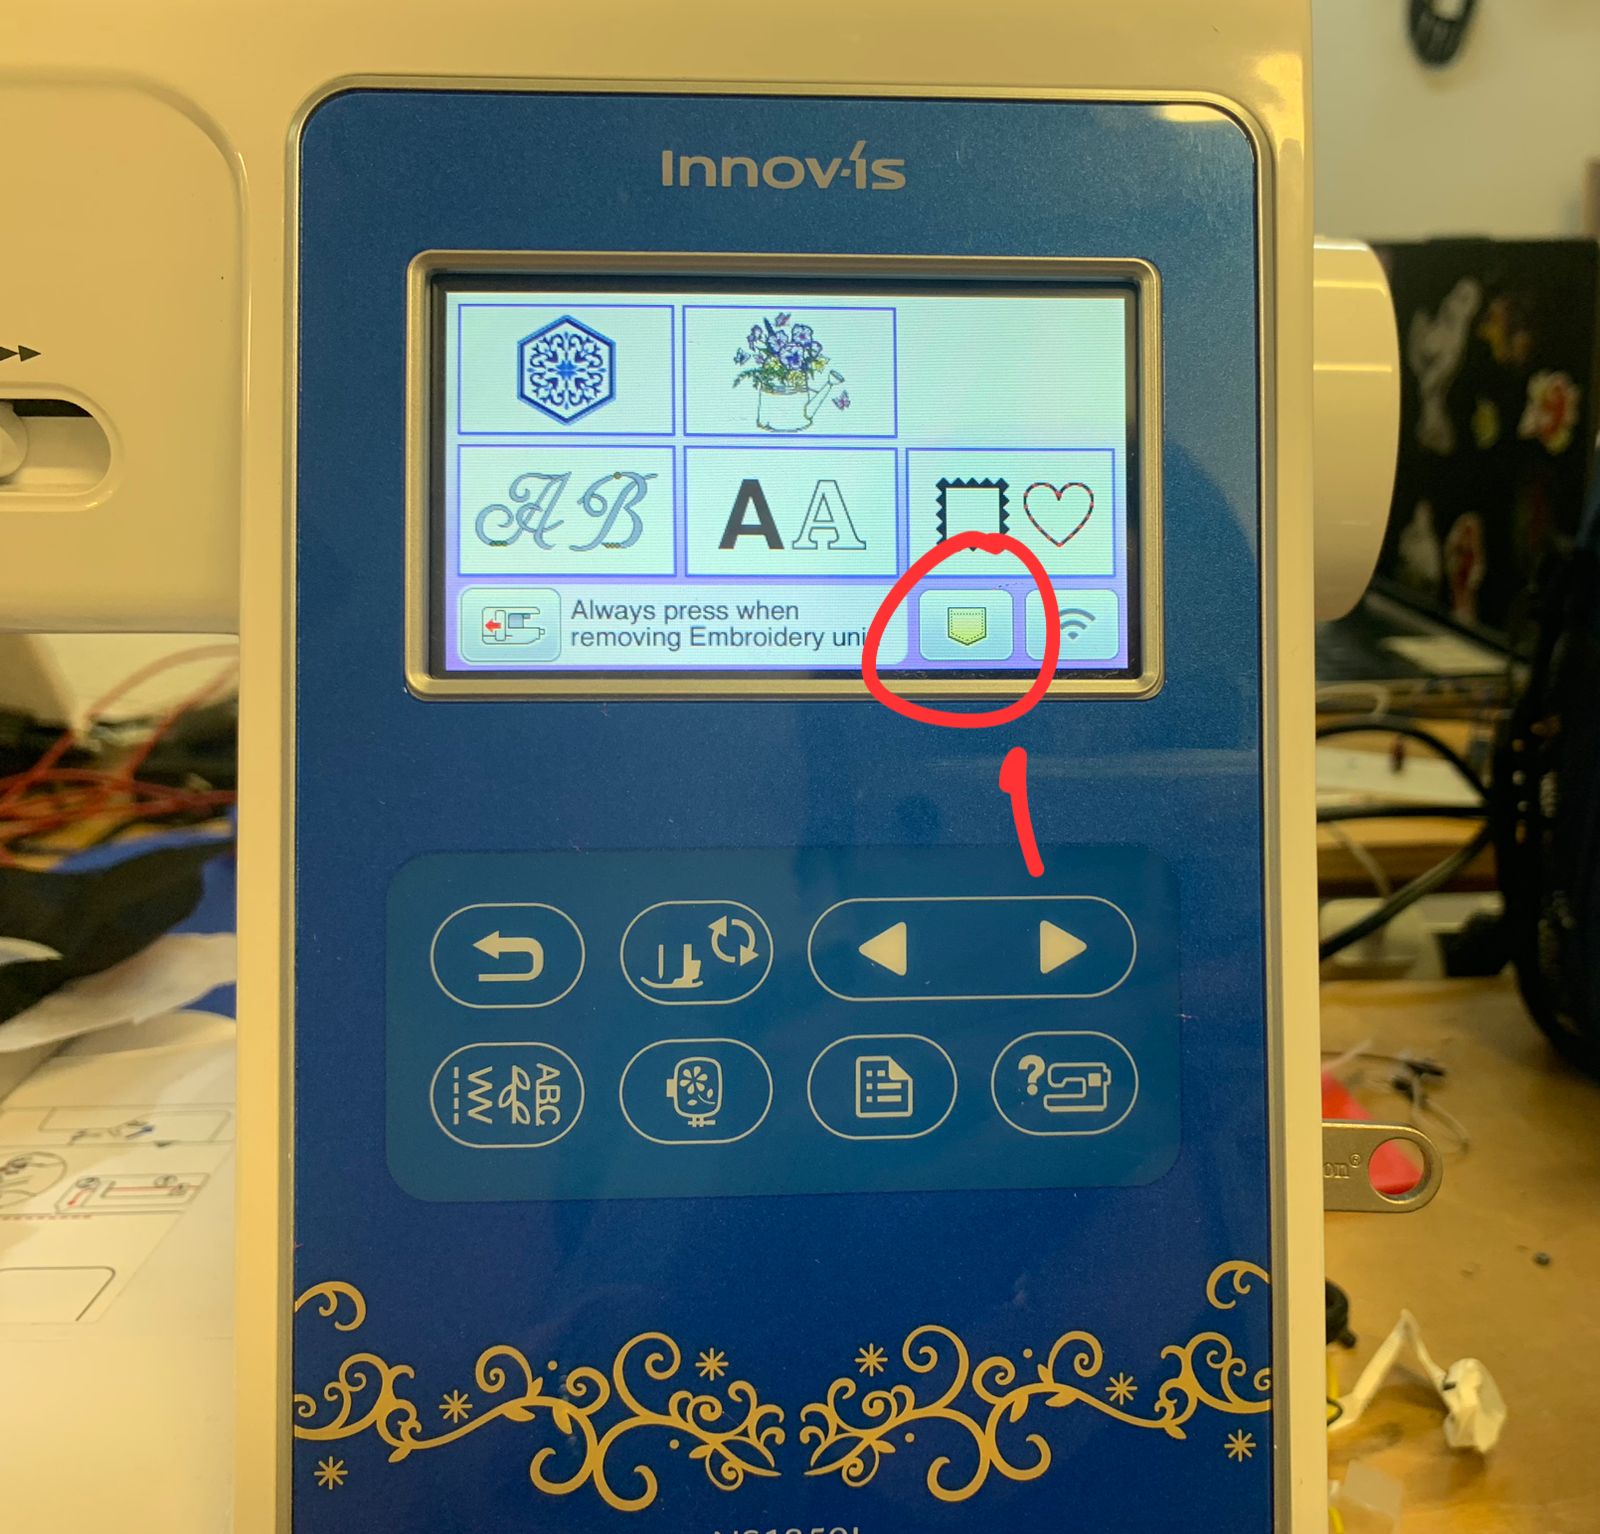
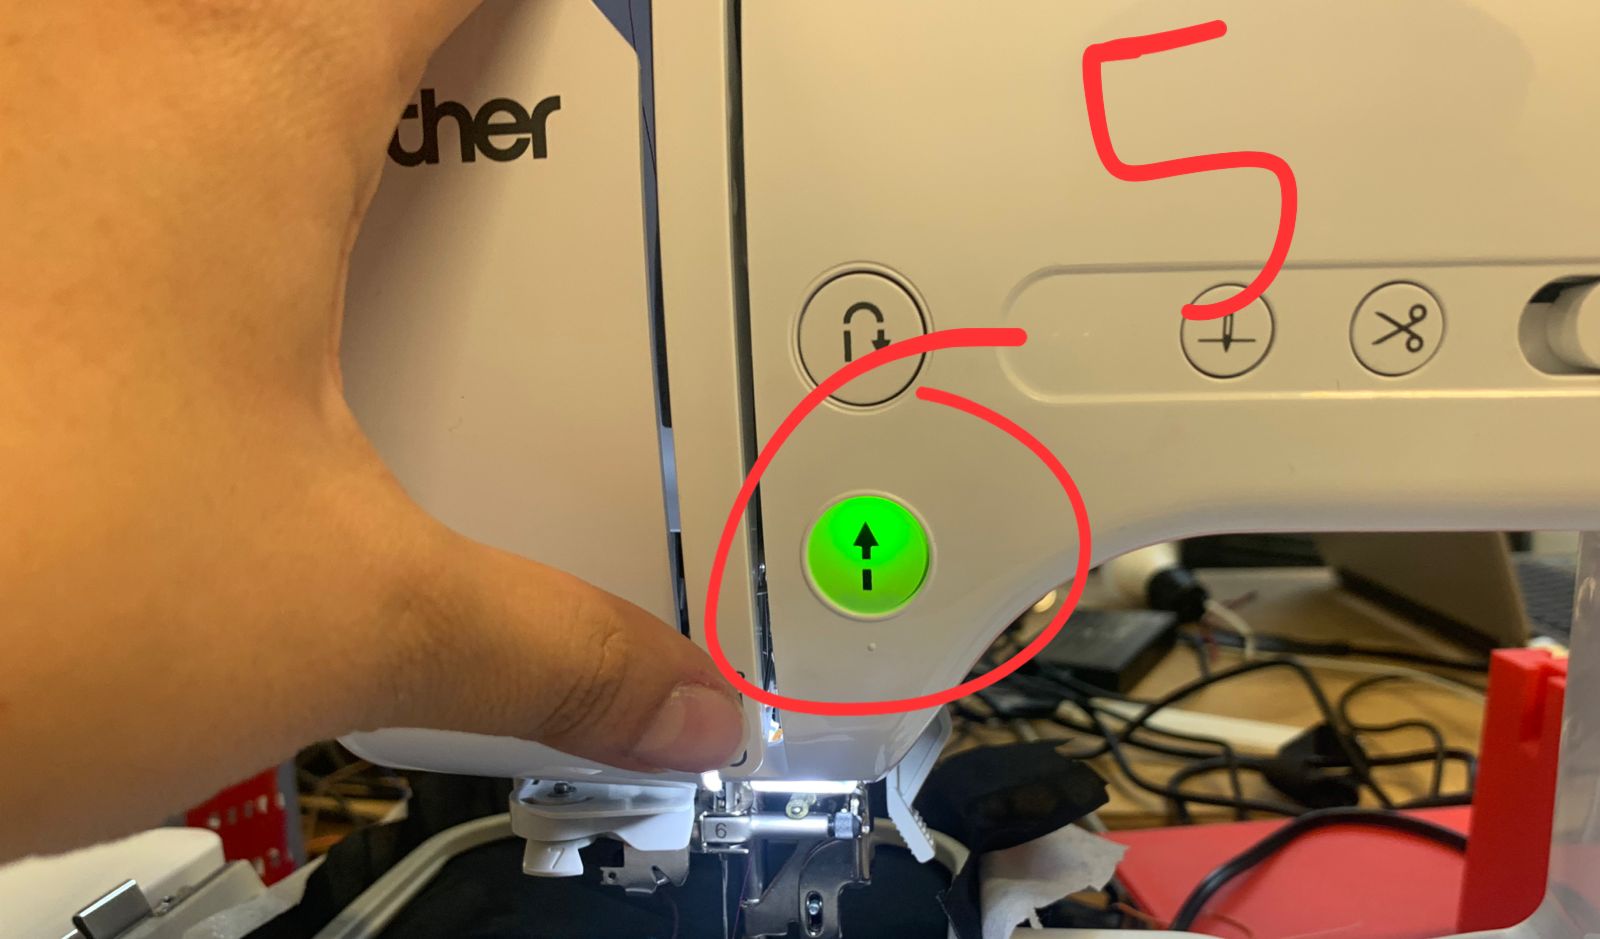
Once the file is loaded, press the green up arrow button and the machine will begin to embroider!
Finishing Up
After the embroidery is complete, remove the hoop from the machine. Important: do not put your hands near the needle while the machine is running.
Learning Outcome
This week was a challenge for me. One might think that sewing is easy, but it actually has a degree of difficulty. Out of all the machines in the Fab Lab, this one took me the most time. However, I was very happy with the result because I learned how to embroider!
It even made me want to get my own embroidery machine. Remember, it's okay not to know everything at once — that’s what this small tutorial is for. And if you still don’t understand it completely, you can check out this Brother tutorial on YouTube, which helped me a lot:
Brother Embroidery Tutorial on YouTube
Good luck with your embroidery!