Version control with Git
To efficiently document the weeks to the repository we learn to use Git. Git is a version control system that could help us to collect all the versions of our prototypes in case something goes wrong, or we want to restore older versions of the project. In order to use git, we need to install Git Bash for our operative system to upload changes to the repository from the following website: Download Git
Concerning the installation, the most significant option we select was to “Use Visual Studio Code as Git's default editor” since Visual Studio is more intuitive and user-friendly.
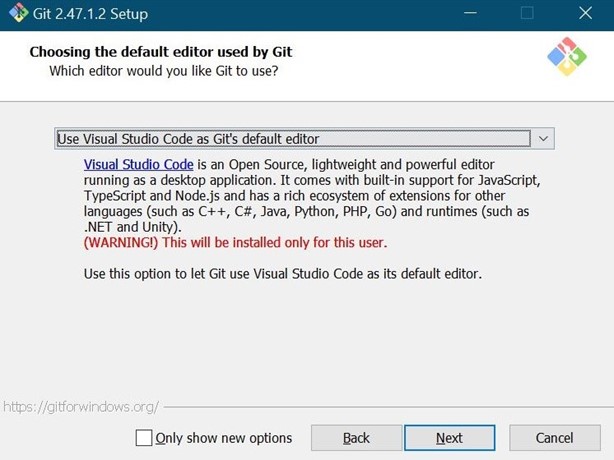
Figure 1: Select to use Visual Studio as the editor.
Once the installation is complete, we can use Git Bash terminal. It can be used as a console and for uploading new changes to the repository. Accordingly, the following are the most essential commands to document our progress:
| Command | Description |
|---|---|
| dir | Opens the list of folders in the current directory. |
| pwd | Shows the current directory you are in. |
| mkdir | Creates a new folder in the current directory. |
| cd | Opens a file or moves into a folder. |
| git clone "url" | Copies a repository to the PC. |
| git status | Shows the last changes made. |
| git add "filename" | Selects a specific file to upload. |
| git add . | Selects all modified files. |
| git commit -m "title" | Packages the selected files. |
| git config --global user.email "myemail@example.com" | Configures Git with your email. |
| git push | Uploads files to the repository. |
First time with Git!
I will show you step by step how to upload data to the repository for the first time.
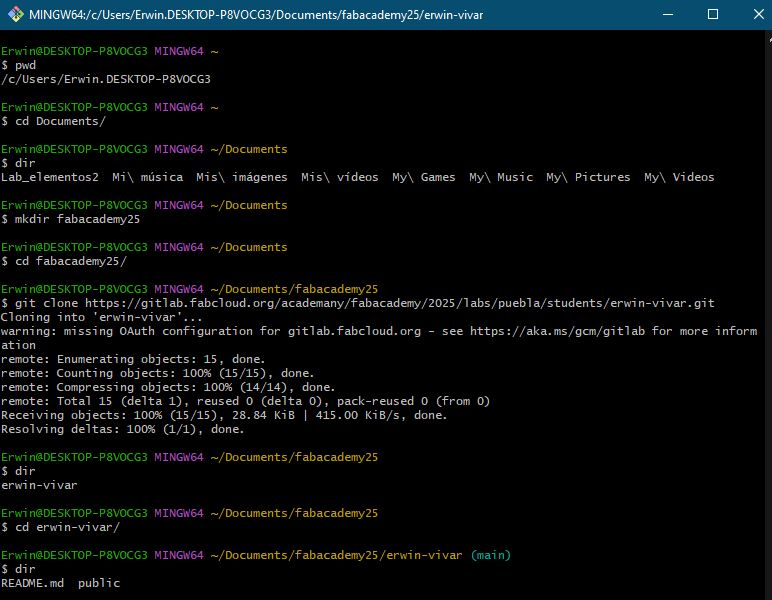
Figure 2: Initial folder setup using Git Bash.
So far, we have only created a folder using the Git Bash terminal. Now, we need to clone the repository's data onto our local machine to begin making changes. Therefore, we will use the git clone command with our repository URL to retrieve the data. During this process, authentication will be required.
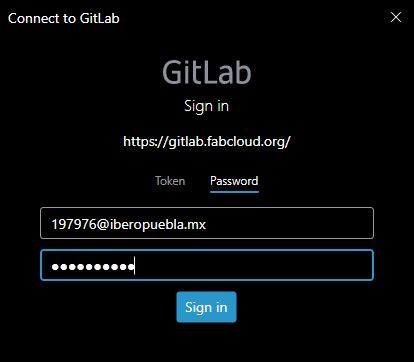
Figure 3: Authentication.
If done correctly, the newly created folder will contain the most up-to-date version of our repository, allowing us to proceed with modifications. As previously noted during the Git Bash installation, the option to use Visual Studio as the default editor was selected. Therefore, we can use the following shortcut to directly launch Visual Studio and begin editing the website.

Figure 4: Shortcut.
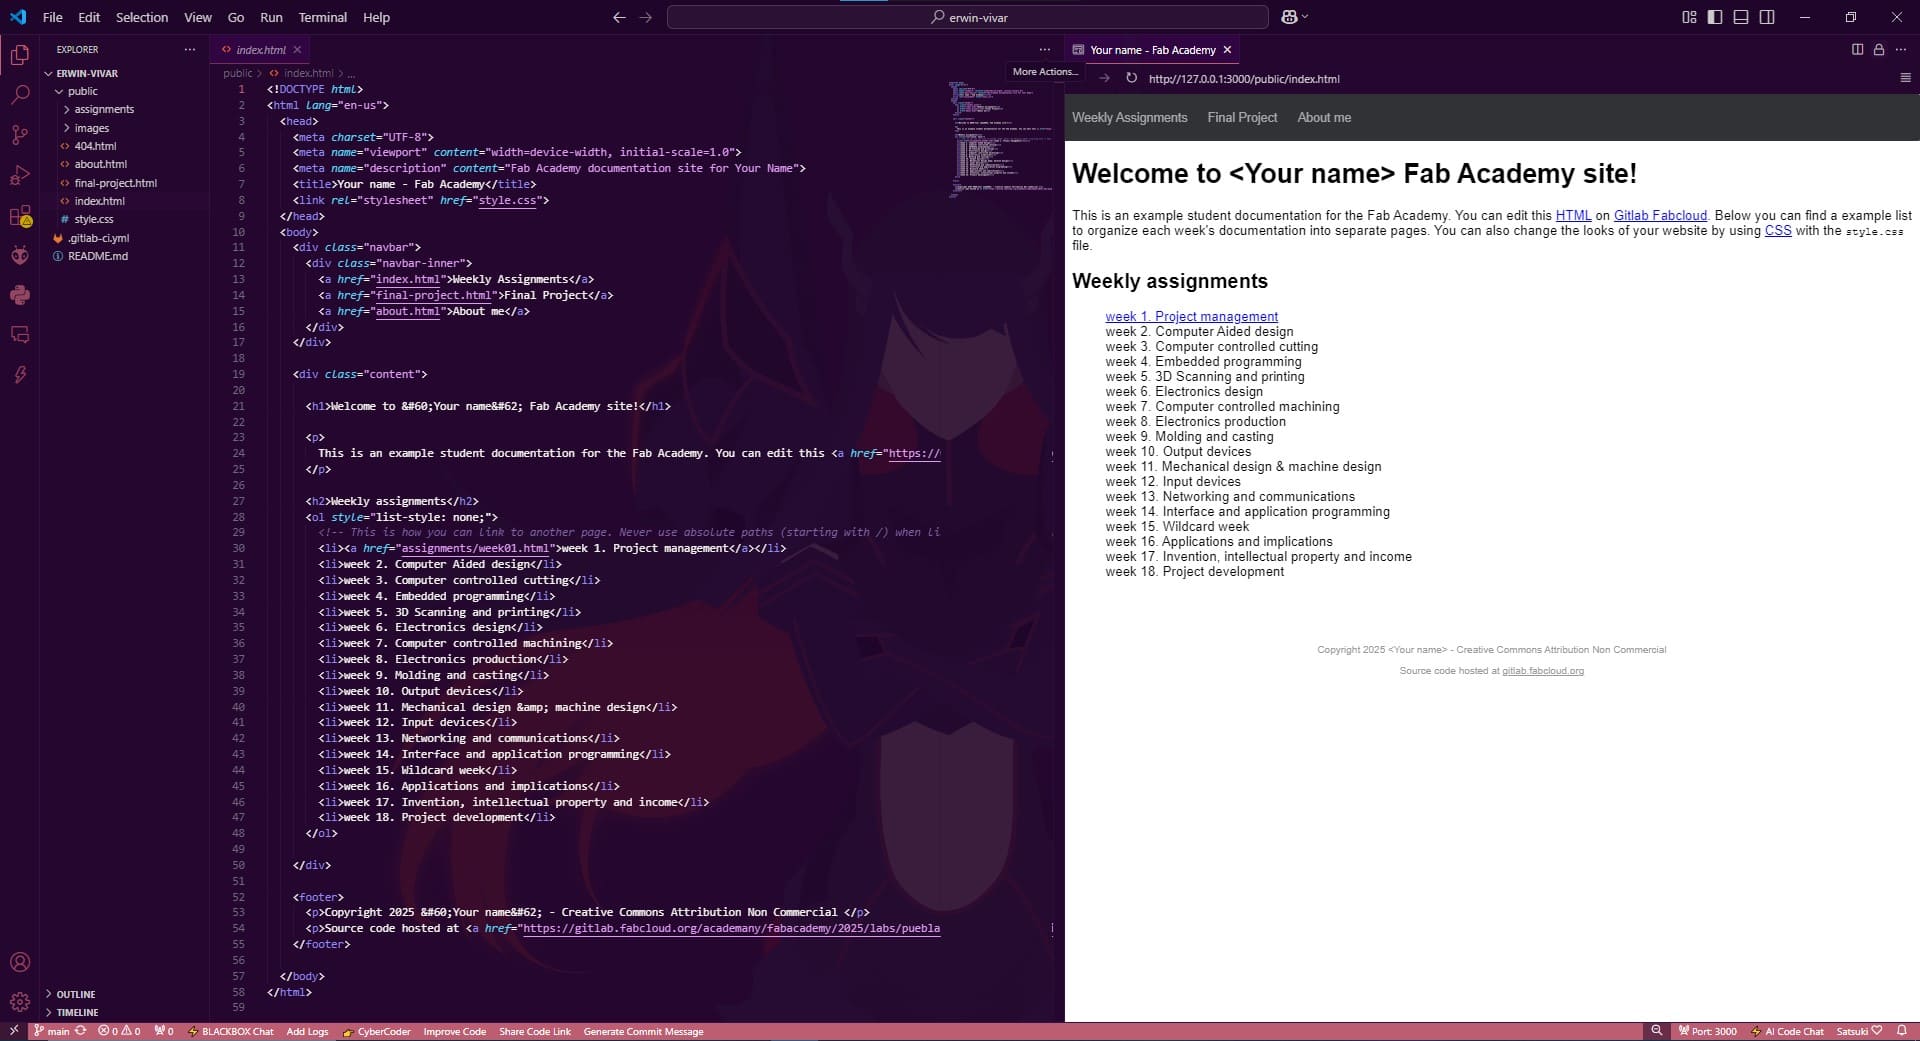
Figure 5: Preliminary configuration outcome in Visual Studio.
One thing I forgot to mention, since I have previously worked with HTML in Visual Studio, I already have some extensions installed. This is why, in Figure 5, you can see a preview of how the web page looks on the right side. Although it is possible to work without any extensions in Visual Studio I highly recommend using Live Server to avoid refreshing the page repeatedly.
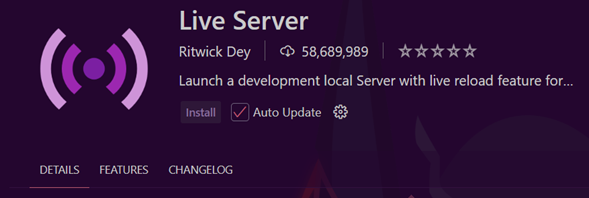
Figure 6: Optional extention
Getting back to the documentation, we can now use Visual Studio to edit the web page. Everything is stored in the "Public" folder (just make sure not to modify the ".Git" file, as that could cause issues when uploading changes to the repository).
Now, there are two types of files we will be working with: HTML and CSS. In simple terms, HTML is the markup language that structures all the content on our page, while CSS is just a cascading style sheet that controls how the page looks and feels.
First commit!
A commit in Git is like taking a snapshot of your project at a specific moment. It saves all the changes you've made to the files and allows you to track modifications over time. Thus, in order to update the repository, we must first introduce a modification to our web page.
Therefore, it is important to understand how the HTML structure works in order to make some changes. An HTML file starts with <!DOCTYPE html>, which tells the browser that it is an HTML document. The main structure consists of two parts: the "head" and the "body". The "head" section contains important information like metadata, links to stylesheets, and scripts, while the "body" section holds everything that appears on the page, such as text, images, and buttons. HTML works like a hierarchy, where elements are placed inside others to organize the content properly.
Thanks to the Live Server extension, tags are more intuitive since we can locate changes quickly and as we program, we understand the structure of HTML better.
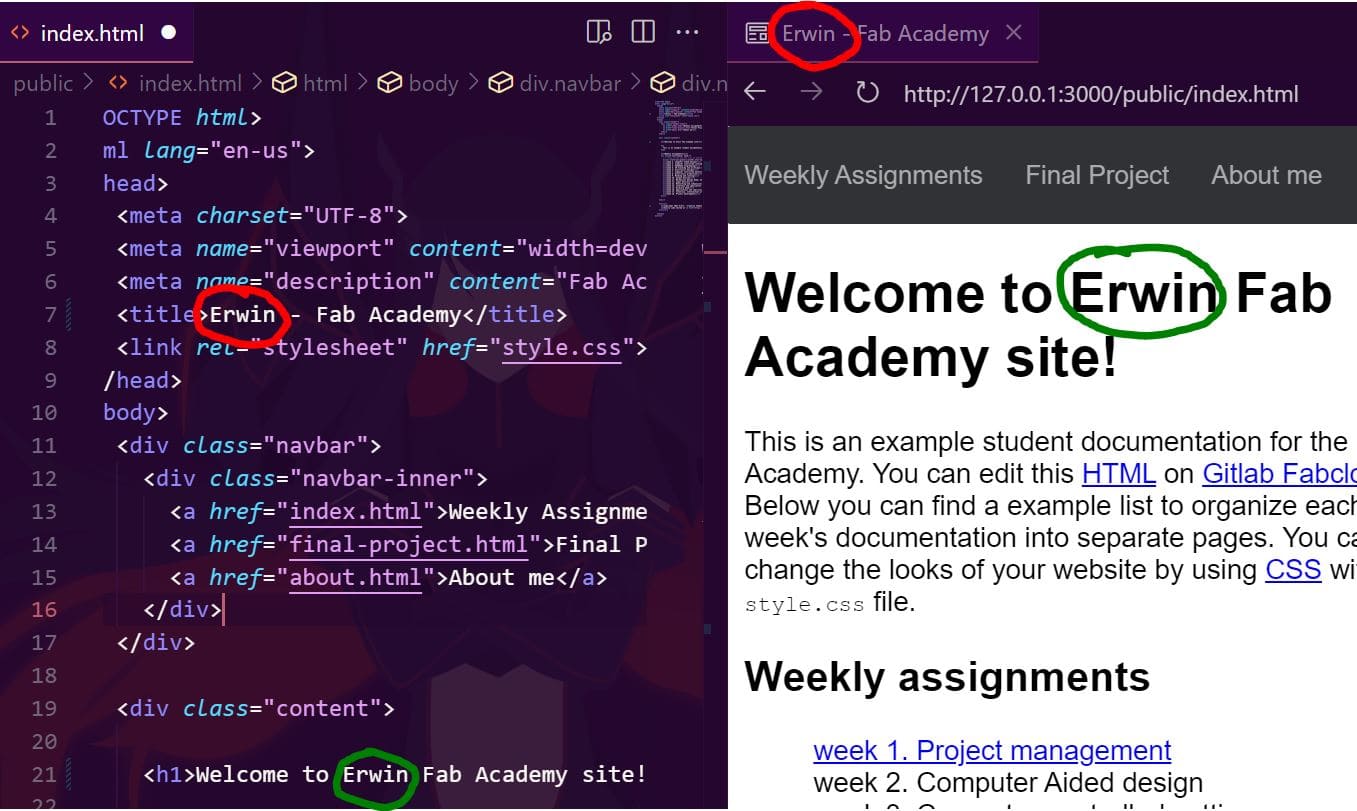
Figure 7: Example of changes made to the web page.
Once a modification has been made, we can review the changes with "git status". Then, we can select the specific files we want to upload using "git add" (either individually or all at once), and, if done corrrectly, we can finalize the process by uploading our documentation to the repository using "git push".
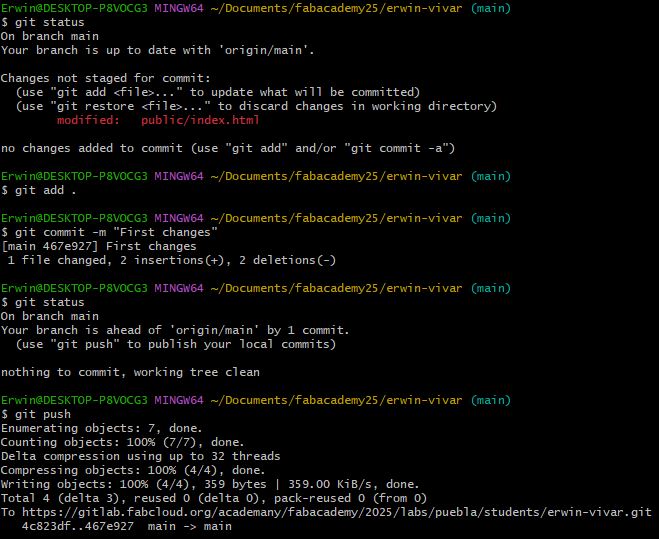
Figure 8: Example of changes made to the web page.
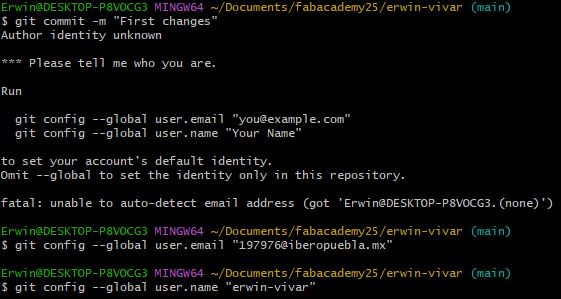
Figure 9: The first time you do this you have to go through an authentication process.
To verify that the changes have been successfully applied to the repository, we can load the web page directly from the repository's hosting platform.
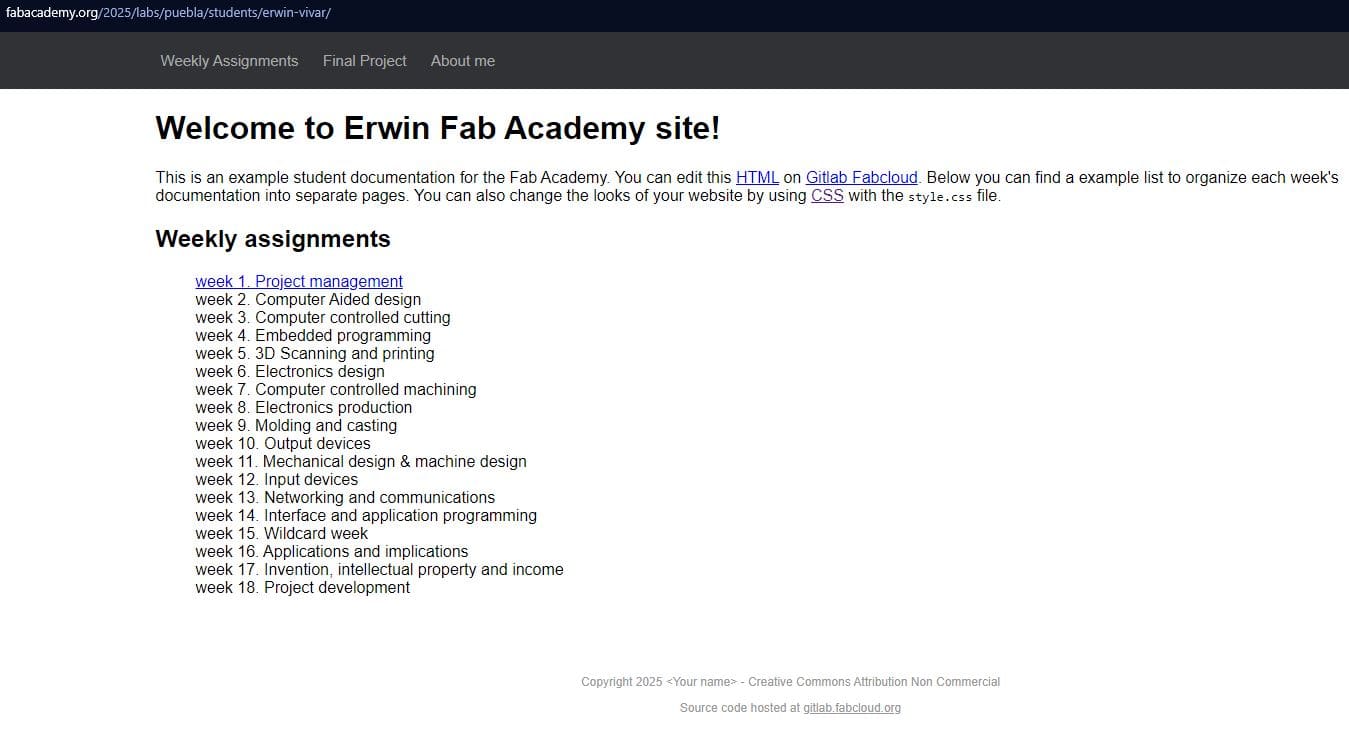
Figure 10: Website successfully modified.
Creating my website...
Since documenting every single step of the process would be overwhelming, I will focus on document my creative process, sharing useful tips, and listing both the essential commands and the ones I use most frequently.
Our advisor, Rafael Pérez, provided us with a website template to work with and customize according to our preferences. However, I wanted to challenge myself by programming my own website from scratch. Using the initial FAB template, my advisor's template, some research on HTML, and some embarrassing questions to ChatGPT to understand what I was doing wrong, I gradually built my site by experimenting with different commands.
Additionally, I have some experience with HTML, and I personally like to keep everything well-organized so I can quickly identify where to make the necessary modifications. That is why from the beginning I propose the creation of multiple CSS that, depending on my needs, function as a quick template. Finally, I should clarify that nearly the entire webpage was built without JavaScript—both as a personal challenge and because the documentation is primarily focused on learning the fundamentals of HTML.
Tips:
- Use Google Font to enhance typography and improve the visual appeal of your webpage by importing suitable font styles.
- Lean on many websites like Color Hunt for the color palette of your page.
- Avoid implementing drastic modifications as excessive changes may introduce unforeseen conflicts that are difficult to track.
- Continuously optimize and refine your CSS as redundant style declarations across multiple sections can lead to unnecessary space consumption.
- Do not attempt to force a rigid design concept, particularly if you are not utilizing JavaScript, as this may lead to impractical implementation challenges.
- Seriously, do your research about html before copying others, then you won't understand what you're really doing.
- Consider converting large files into lighter formats and applying compression techniques to optimize storage and performance without significant quality loss.
Useful commands:
| Command | Description |
|---|---|
| <a> | Creates hyperlinks. |
| <b> | Makes text bold. |
| <body> | Defines the document body. |
| <br> | Inserts a line break. |
| <div> | Defines a section or division. |
| <footer> | Specifies a footer for a section. |
| <h1> - <h6> | Defines headings (h1 being the largest). |
| <hr> | Inserts a horizontal line. |
| <img> | Embeds an image. |
| <p> | Defines a paragraph. |
| color | Defines text color. |
| background-color | Sets the background color. |
| margin | Defines spacing outside an element. |
| padding | Sets inner spacing of an element. |
| border | Defines borders around an element. |
| font-size | Specifies text size. |
| display | Controls the layout behavior. |
| text-align | Aligns text (left, center, right). |
| box-shadow | Applies shadow effects. |
| overflow | Controls content overflow. |
| word-wrap | Handles word breaking. |
| animation | Adds animations to elements. |
| border-radius | Rounds element corners. |
| @keyframes | Defines animations by setting multiple style rules at different points. |
