
Week 11 - Networking and communications
In this week's group assignment, we experimented with wireless ESP-NOW communication between two ESP32-C3 boards. It was eye-opening to see how easy it is to get started with simple communication-based applications, such as smart home or IoT projects.
The individual assignment was to design, build, and connect wired or wireless nodes with network or bus addresses, each with a local input and/or output device. I gained practical experience with both local WebSocket communication and a cloud-based service ThingSpeak.
What will use networking and communication in the final project
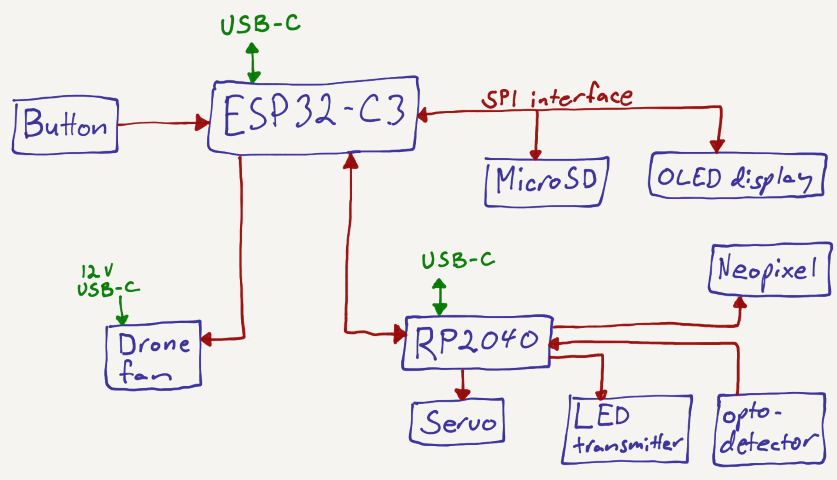
- I'll split the tasks between two microcontrollers that talk to each other. That way, I can work on them separately and get more I/O pins to work with. A dedicated microcontroller at the target loop will detect a ping pong ball passing through an optical gate and control Neopixel lighting for each hit. An ATtiny412 should be sufficient for this task. To prototype quickly, I'll use an RP2040, which is similar to the ESP32-C3 but has a better analog-to-digital converter—potentially useful for the optical gate detector. The ESP32-C3 will serve as the main microcontroller.
- Game scores will be saved on an SD card.
- The final scores will be sent to this web page to display real-time game statistics.
Distributed Microcontroller System
I'm using a two-microcontroller setup. The microcontroller on Board #2 is dedicated to detecting ping pong balls (using synchronous detection). Each time a ball is detected, it lights up the Neopixels and sends a pulse to a GPIO pin on the main microcontroller. The main microcontroller on Board #1 increases the score on the display whenever it receives a pulse (if the game timer hasn't run out). As the communication is unidirectional and limited to a simple pulse signal, this setup only minimally qualifies as networking.
SD card connection
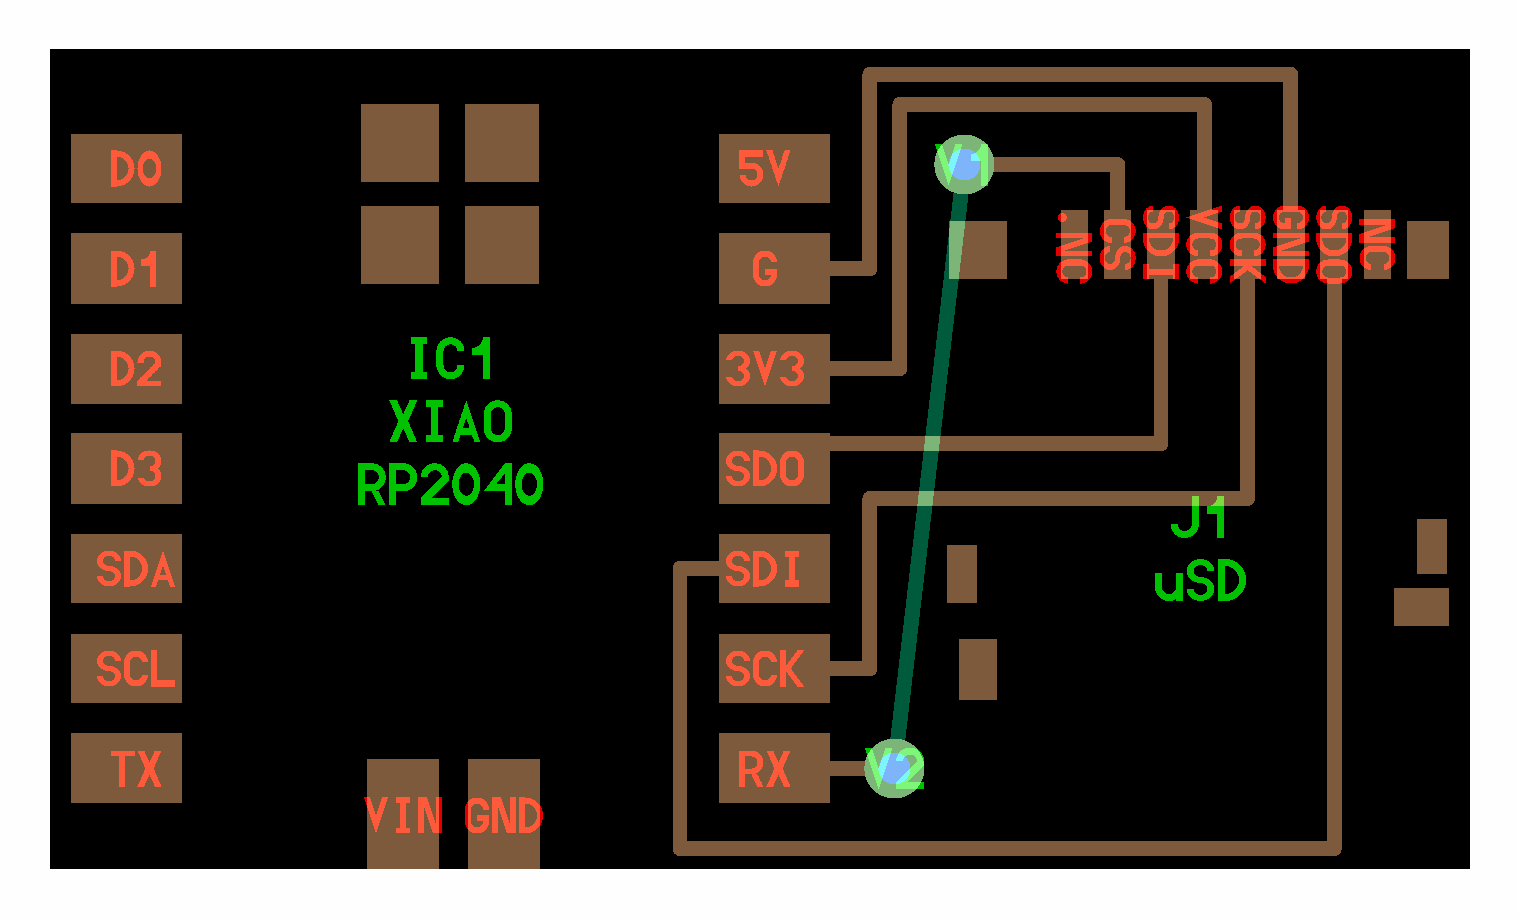
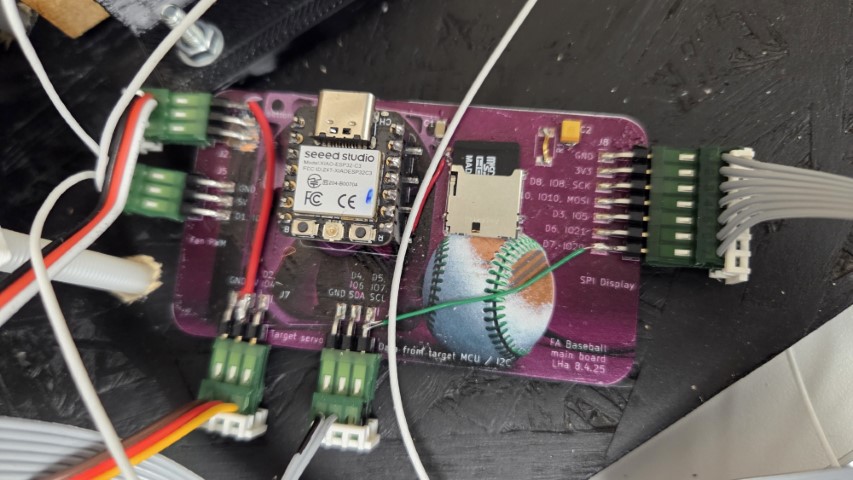
According to Adafruit's SD card tutorial, SD cards are fairly sensitive to signal integrity, so the interface wires should be kept as short as possible. To account for this, I designed another version of the main PCB (Board #1) with the SD card slot placed close to the ESP32-C3.
The Fab Lab inventory includes a MicroSD card reader slot, which I'll use for this project.
For the PCB layout, I followed Neil’s example. Below is the schematic, the KiCAD files can be found in Week 8: Electronics Production documentation. The SPI connection shares the SCK and MOSI lines, while the microSD card and SPI display each require their own chip select (CS) lines.

At first, the microSD card did not work because I had mistakenly connected the SDO and SDI lines the wrong way. This was due to Neil’s example (at the time of writing) appearing to show two wires connected to both the SDO and SDI pins, which was confusing. I verified the correct pinout from this page and corrected the wiring and Arduino IDE program accordingly. The program used to write to and read from the microSD card is included in my Week 4 documentation.
Initially, the OLED display didn't work properly because I had left its CS pin floating. I fixed this by connecting it to GPIO7 of the ESP32-C3 with a jumper wire. I also changed the servo's power source to a 5 V output from the ESC (drone motor controller), since the servo was drawing too much current and interfering with the OLED screen's operation.
Wi-Fi web server & sending scores
It would be nice to send the scores stored on the microSD card via Wi-Fi and display them as a histogram on this web page.
To begin exploring how to do this, I followed this tutorial, which explains how to build a web server using the WebSocket communication protocol.
As part of the tutorial, I first installed the following Arduino libraries:
ESPAsyncWebServerby ESP32AsyncAsyncTCPby ESP32Async
Then, I uploaded the example code from the tutorial, updating the following lines with my own Wi-Fi network SSID and password:
const char* ssid = "REPLACE_WITH_YOUR_SSID";
const char* password = "REPLACE_WITH_YOUR_PASSWORD";
At first, it didn't work. The Serial Monitor just kept printing "Connecting to WiFi..."
To troubleshoot the issue, I asked ChatGPT: “Doing the Random Nerd Tutorial on ESP32 WebSocket Server, I just get ‘Connecting to WiFi..’ in the Serial Monitor.”
The main issues were:
- The Wi-Fi network must be 2.4 GHz — the ESP32-C3 does not support 5 GHz networks.
- The computer accessing the ESP32-C3’s IP address must be connected to the same Wi-Fi network.
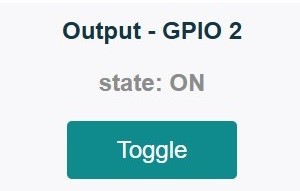
After connecting both the ESP32-C3 and the computer to the same 2.4 GHz Wi-Fi network, the ESP32-C3 connected successfully. I was then able to control a pin on the ESP32-C3 from a web browser.
This was a good starting point, but not yet what I was aiming for.
I asked ChatGPT: "Can the web page be accessible by all or does it need to be on the same Wi-Fi network?" The answer was:
- No — only devices on the same Wi-Fi network (same LAN) can access it.
- Router port forwarding can make the ESP32 publicly accessible, but this exposes the device to security risks.
Another issue is that the Fab Academy GitHub page is a static site, meaning it can't receive live data directly from the ESP32 - there's no backend or server-side code.
As a workaround, ChatGPT suggested using a free cloud service like ThingSpeak, where the ESP32 can send data. The web page can then fetch and display that data.
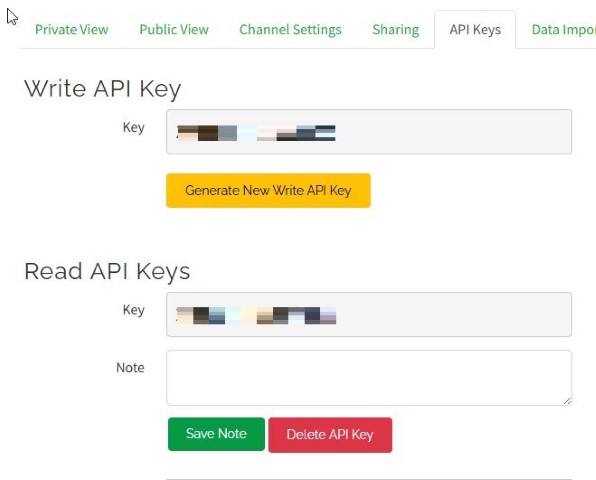
I created a free user account and a new channel on ThingSpeak. I copied my ThingSpeak API key and channel ID from the API Keys tab on the ThingSpeak channels page:
ChatGPT also provided sample code for the ESP32-C3 to send random test data to ThingSpeak every 60 seconds. I modified the code by inserting my wifi SSID and password, as well as the ThingSpeak API key.
Demo code to send data from ESP32-C3 to ThingSpeak every 60 seconds
#include
#include

const char* ssid = ""; //put my own wifi ssid here
const char* password = ""; //wifi password here

// ThingSpeak info
const char* server = "https://api.thingspeak.com/update?api_key=xxxxxxxxxxxxxxxx&field1=0";  //get API key from thingspeak.mathworks.com and replace xxxxxxxxxxxxxxxx with it
const char* apiKey = "xxxxxxxxxxxxxxxx"; //get API key from thingspeak.mathworks.com and replace xxxxxxxxxxxxxxxx with it

void setup() {
	Serial.begin(115200);
	WiFi.begin(ssid, password);
	Serial.print("Connecting to WiFi");
	while (WiFi.status() != WL_CONNECTED) {
	delay(500); Serial.print(".");
	}
	Serial.println("\nConnected!");
}

void loop() {
	int Scores = random(0, 100); // replace with your real scores

	if (WiFi.status() == WL_CONNECTED) {
	HTTPClient http;
	String url = String(server) + "?api_key=" + apiKey +
					"&field1=" + String(Scores);

	http.begin(url);
	int httpCode = http.GET();
	if (httpCode > 0) {
		Serial.println("Data sent!");
	} else {
		Serial.println("Error sending data");
	}
	http.end();
	}

	delay(60000); // wait 60 seconds
}
Now the ESP32-C3 successfully uploads data to the cloud, and the web page can display a visualization of that data by embedding the following iframe-tag in the HTML file, where the src-value needs to be replaced with the public URL obtained from the ThingSpeak website.
<iframe width="450" height="258" style="border: 0px solid #000000;" src="https://thingspeak.mathworks.com/apps/matlab_visualizations/614866"></iframe>
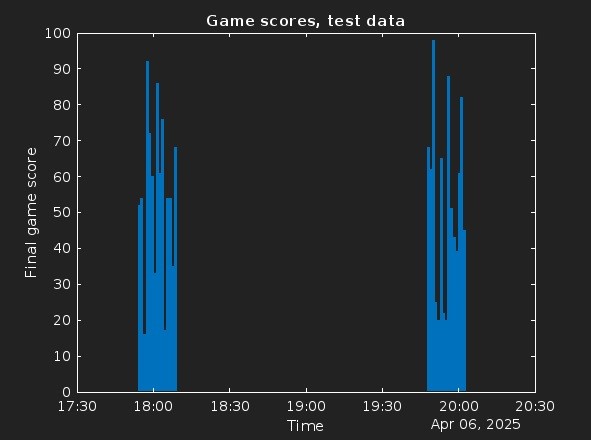
Here are a few such real-time visualizations of the data received from the microcontroller. ThingSpeak is not yet integrated with the final game code (as of June 2025), so only test data from a few time slots is shown here.
If for some reason ThingSpeak is not working, here is an example of how one of the visualizations above should look.
Design files
Code to control a pin on the ESP32-C3 from a web browser
Code to send data from ESP32-C3 to ThingSpeak every 60 seconds