Week 10 - Output devices
In this week's group assignment, we measured the current consumption of an LED strip under different settings. We tested two inexpensive USB current meters, which gave slightly different readings. Both provided enough precision to ensure the power supply current limits are not exceeded. We also installed the necessary libraries to run a servo motor and an OLED display with the microcontroller. I then combined the functionality into a single program in my individual work.
I learned how easy it is to drive these components, although it's also quite easy to exceed the power supply limits if this isn't taken into consideration carefully.
Using OLED display, servo, and Neopixel with the ESP32-C3
In my final project, the output devices I need are a display, a servo motor, some lighting effects and a fan to float the ping pong ball. To get an OLED display, a servo, and a Neopixel light strip working with the ESP32-C3 microcontroller, I first installed these required libraries in the Arduino IDE:
- Adafruit BusIO by Adafruit
- Adafruit GFX Library by Adafruit
- Adafruit NeoPixel by Adafruit
- Adafruit SSD1306 by Adafruit
- ESP32Servo by Kevin Herrington, John K.
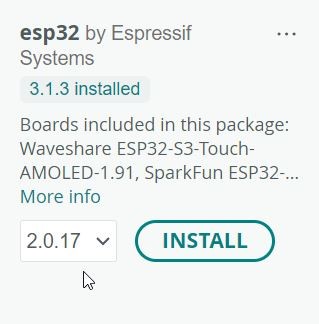
Additionally, the ESP32 library was downgraded to version 2.0.17 to avoid known bugs in the latest version.
OLED display
This OLED display was used with example code from Wokwi. Even though the OLED display has an address selector for I²C address 0x78, it only worked with the default 0x3C address.
OLED display demo code
#include <Wire.h>
#include <Adafruit_GFX.h>
#include <Adafruit_SSD1306.h>

#define SCREEN_WIDTH 128 // OLED width,  in pixels
#define SCREEN_HEIGHT 64 // OLED height, in pixels

// create an OLED display object connected to I2C
Adafruit_SSD1306 oled(SCREEN_WIDTH, SCREEN_HEIGHT, &Wire, -1);

void setup() {
	Serial.begin(9600);

	// initialize OLED display with I2C address 0x3C
	if (!oled.begin(SSD1306_SWITCHCAPVCC, 0x3C)) {
	Serial.println(F("failed to start SSD1306 OLED"));
	while (1);
	}

	delay(2000);         // wait two seconds for initializing
	oled.clearDisplay(); // clear display

	oled.setTextSize(1);         // set text size
	oled.setTextColor(WHITE);    // set text color
	oled.setCursor(0, 2);       // set position to display (x,y)
	oled.println("Fab Academy 2025"); // set text
	oled.display();              // display on OLED
}

void loop() {
}

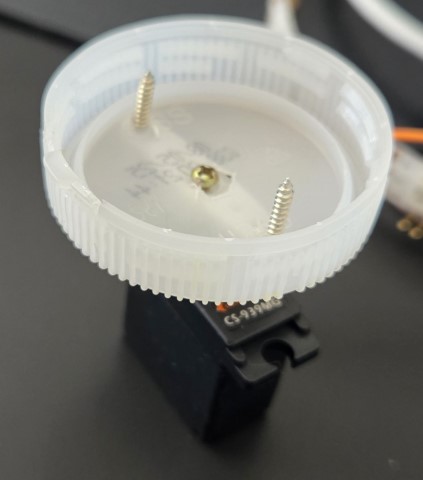
Servo motor
To run a CS-939MG servo motor, I used this example code. The line static const int servoPin = D3; was updated to include the 'D' prefix, required for correctly referencing pin D3 on the ESP32-C3 board.
Servo demo code
/*********
Rui Santos & Sara Santos - Random Nerd Tutorials
Complete project details at https://RandomNerdTutorials.com/esp32-servo-motor-web-server-arduino-ide/
Based on the ESP32Servo Sweep Example
*********/

#include <ESP32Servo.h>

static const int servoPin = D3;

Servo servo1;

void setup() {

Serial.begin(115200);
servo1.attach(servoPin);
}

void loop() {
servo1.write(60);
delay(8000);
servo1.write(180);
delay(8000);
/*********
for(int posDegrees = 0; posDegrees <= 180; posDegrees++) {
	servo1.write(posDegrees);
	Serial.println(posDegrees);
	delay(10);
}

for(int posDegrees = 180; posDegrees >= 0; posDegrees--) {
	servo1.write(posDegrees);
	Serial.println(posDegrees);
	delay(10);
}
*********/
}
Neopixel light strip
The code to run the Neopixel light strip is described on the group work page.
Baseball game output device test
The OLED display, servo motor, and Neopixel were tested individually first. To integrate them into the final project, I drafted the following pseudo code:
Baseball game pseudo code
Setup:
-Initialize Neopixel strip
-Initialize OLED display
-Initialize Servo motor
-Initialize Serial communication
-Set score = 0
-Set timer (e.g., 60 seconds)
-Show "Score: 0" on OLED
-Show timer on OLED
-Set servo to 0°

Loop:
-When ping pong ball is detected:
	-Blink Neopixels
	-Increase score on OLED
	-If servo angle < 90°:
		-Rotate servo slightly (e.g., +1°)
	-Show current ranking
	-Update and display remaining timer
	-if timer == 0:
		-Show final score on OLED
		-Update high score table
		-Send results to web server for statistics
To start testing, I made a simpler version. Here's the simplified pseudo code for the baseball game:
- Setup:
- Initialize Neopixel strip
- Initialize OLED display
- Initialize Servo motor and set servo to 0°
- Initialize Serial communication
- Set score = 0
- Loop:
- When Enter is pressed in Serial Monitor:
- Blink Neopixel
- Increase score on OLED display by 1
- Rotate servo slightly
- When Enter is pressed in Serial Monitor:
Now that I had working code for the OLED display, servo, and Neopixel, it was quite easy to combine them to implement the above pseudo code. In the combined code, I placed all the #include and initialization lines at the beginning and defined the output pins. I also added new variables BASEBALL_SCORE, NEOPIXEL_BRIGHTNESS and SERVO_ANGLE.
In the void setup() section, I set the initial servo angle, cleared the Neopixel values to 0, initialized the OLED display, and displayed:
oled.println("score: " + String(BASEBALL_SCORE));
To get the code working quickly, I asked ChatGPT: "Can the void loop do something when Enter is pressed in the Serial Monitor on XIAO ESP32-C3?" I got the necessary lines to wait for Serial to open in setup() and detect the Enter key in the loop().
For each Enter press, I added an increment to the BASEBALL_SCORE, SERVO_ANGLE, and NEOPIXEL_BRIGHTNESS variables. Each time Enter is pressed, the Neopixel lights up white briefly (5 ms), then fades down to a deep red over 80 ms.
At the end of the code, I added the colorWipe() from the Neopixel example, and updateScore() from the OLED display example code.
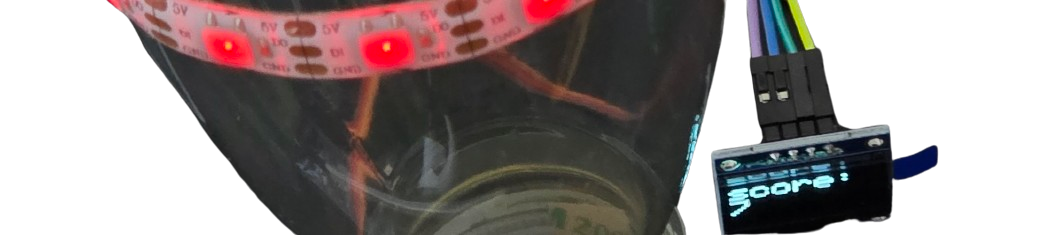
Output device prototype
I made a quick prototype by attaching the servo and the Neopixel strip to a halved bottle. Here is how the servo is attached:
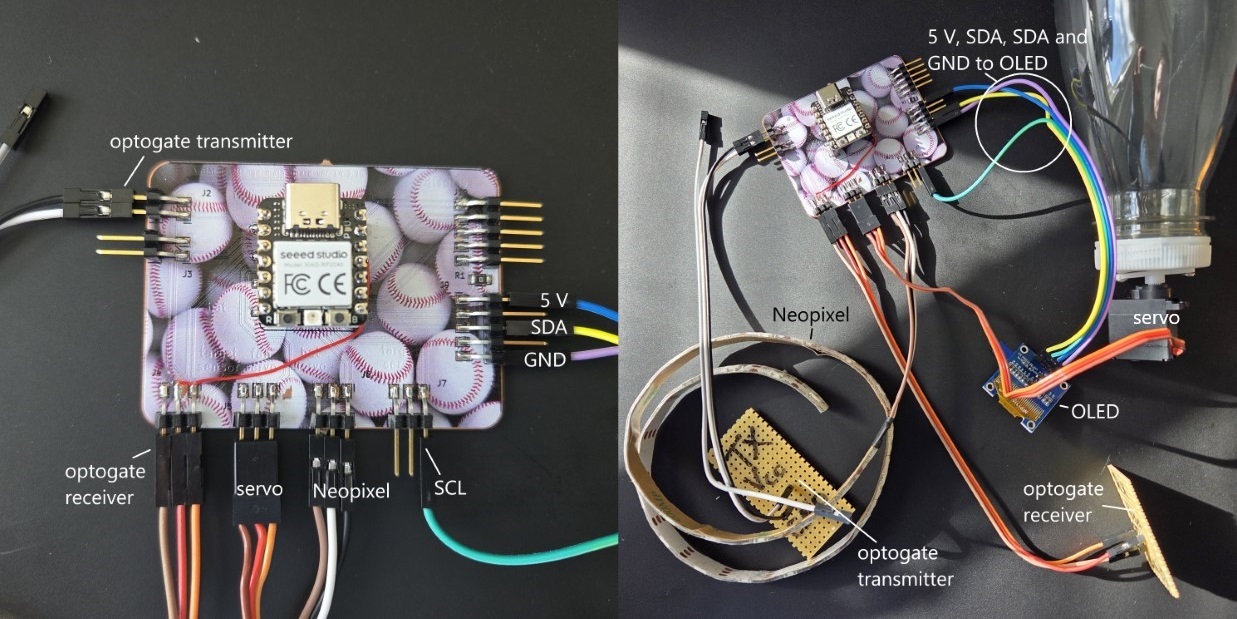
I had to route the devices differently than I originally planned during week 6 and week 8, since I am now using the I²C interface instead of SPI. When using I²C, the SDA and SCL outputs need to be connected to the OLED display:
The following video shows the electronics in action. In this prototype, the target spins incorrectly around its vertical axis. In the final version, the target ring will be attached from the side to a stick that rotates, making the ring spin around its horizontal axis. I’ll probably use an ATtiny to detect when the ping pong ball passes through the loop, sending a signal to the main microcontroller to replace the manual Enter key press. Please note the small OLED screen below the bottle end in the following video. I’ll use a larger screen for the final version.
Updates after week 10:
Fan testing
To test floating a ping pong ball, I tried two fans I had lying around: a 'Sunon MP1208PTS1 DC 12V 0.24A' and an 'AVC DE0715B12U 12V 0.7A'. The former actually drew about 140 mA, and the latter about 80 mA from the 12 V power supply. The latter seemed better, but neither was nearly strong enough to lift a ping pong ball into the air. One option would be to combine multiple fans (as Alfonso did in a previous Fab Academy final project). I decided to order a higher-power 48 W Sunon PFE0381BX-000U-S99 brushless fan. While it was at least able to move the ping pong ball, I don't think it would lift the ball as much as I'd like, even with improved air-shaping mechanics compared to the ones shown here:
I then tested a BR1407 drone motor with a fan attached driven by a Sitela BL20A ESC. Aimed into a tube with an inner diameter of about 4 cm, it was able to move a ping pong ball. However, it drew more current than my power supply could provide (3 A max), so I couldn't fully test its performance. Still, this setup might be sufficient for my final project if I bring the end of the tube close to the bat.
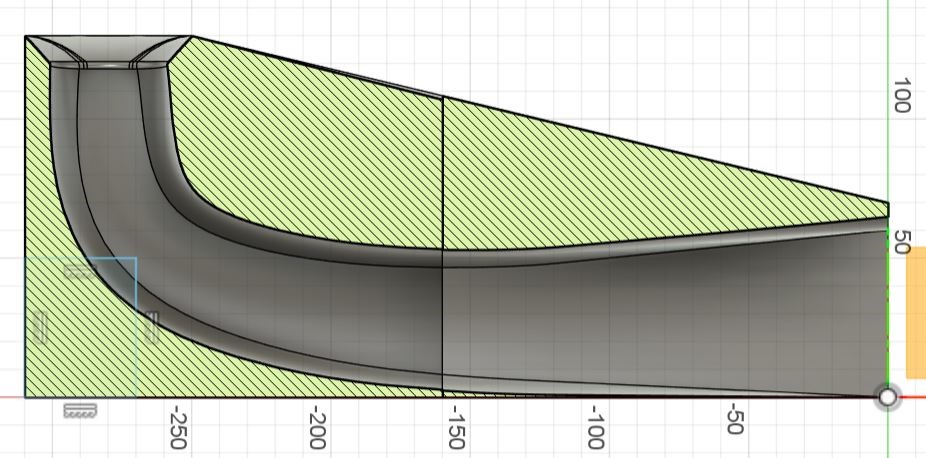
Finally, I settled on a configuration where the ball is blown from the target side and launched upwards:
I designed and 3D-printed a tapered pathway for the ball to be lauched upward with the fan. Here is a side cut view. The model for this body is in the full integration Fusion 360 file below.