Demonstrate and compare the toolchains and development workflows for available
embedded architectures.
Document your work to the group work page and reflect on your individual page what
you learned.
Individual Assignment
Browse through the datasheet for your microcontroller.
Write a program for a microcontroller, and simulate its operation, to interact (with
local input and/or output devices) and communicate (with remote wired or wireless
connection).
Manuel Ayala-Chauvin Institution: Fablab - Universidad Tecnológica Indoamérica Year: 2025
Group Assignment
1. Comprehensive Analysis of Microcontrollers: Arduino Uno vs ESP32-CAM
Team: Manuel Ayala-Chauvin, Sandra Nuñez-Torres Institution: Fablab - Universidad Tecnológica Indoamérica Year: 2025
Introduction
This comparative project explores the key specifications, connectivity features, and performance
differences between Arduino Uno and ESP32-CAM. It includes pinout
analysis, practical implementation, and performance tests to help beginners and makers understand
how to choose the right board for a project.
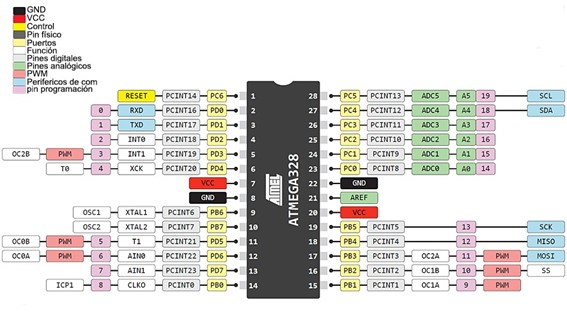
Microcontroller Pinouts
Arduino Uno
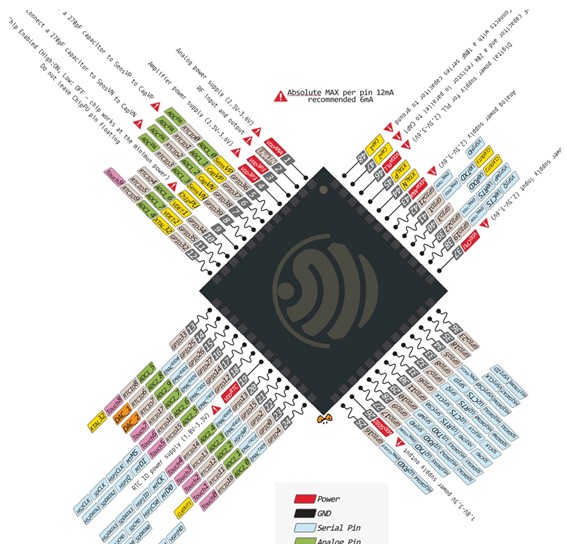
ESP32-CAM
Comparative Table
Feature
Arduino Uno
ESP32-CAM
Microcontroller
ATmega328P
Tensilica Xtensa LX6
Clock Speed
16 MHz
160–240 MHz
WiFi Connectivity
No
Yes
Camera Support
No
Yes (2MP OV2640)
Price
$12.00
$17.00
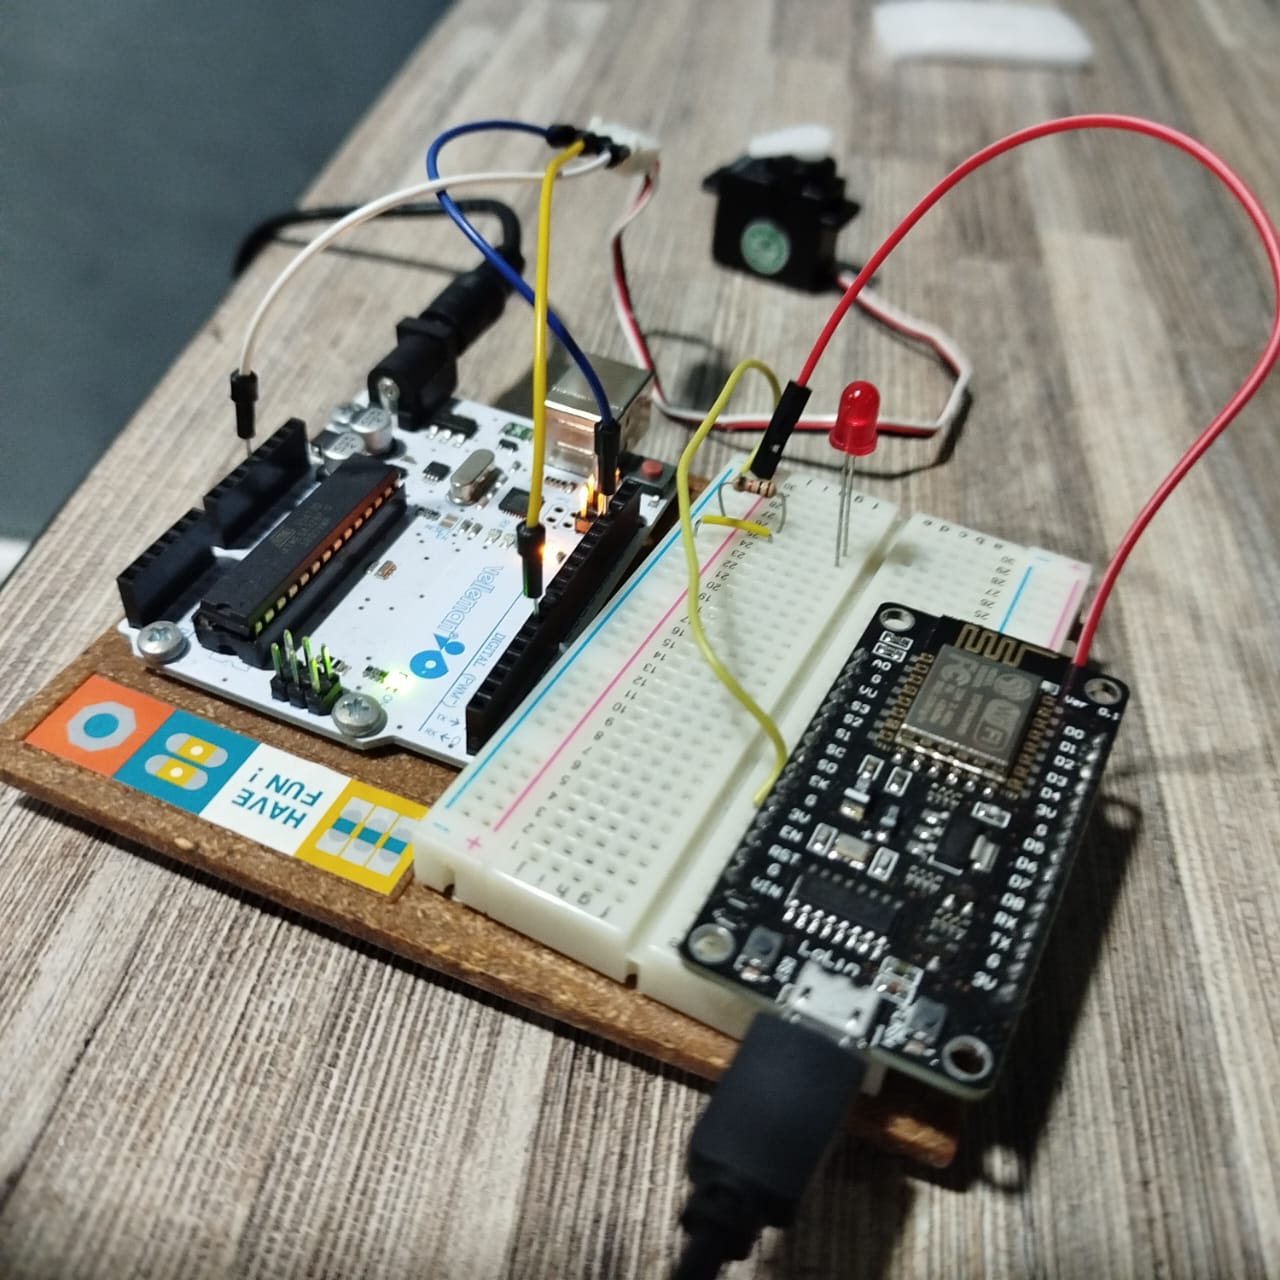
2. Practical Experiment
This experiment involved LED blinking with Arduino Uno and image streaming with ESP32-CAM to
illustrate typical use cases.
Step-by-Step Guide to Replicate the Experiment
Step 1: Materials Required
Arduino Uno + USB cable
ESP32-CAM module + FTDI programmer
LEDs, 220Ω resistors, jumper wires, breadboard
Power supply (5V for Uno, 3.3V for ESP32-CAM)
MicroSD card (for testing ESP32 image capture)
Step 2: Circuit Setup
Arduino Uno: Connect an LED in series with a 220Ω resistor to pin 13.
ESP32-CAM: Connect the FTDI programmer to TX/RX and GND/3.3V. Plug camera
module if not already onboard.
Upload the CameraWebServer example from the Arduino IDE (ESP32 board package must be
installed). Set WiFi credentials in the sketch before uploading. Use GPIO 0
grounded during flashing.
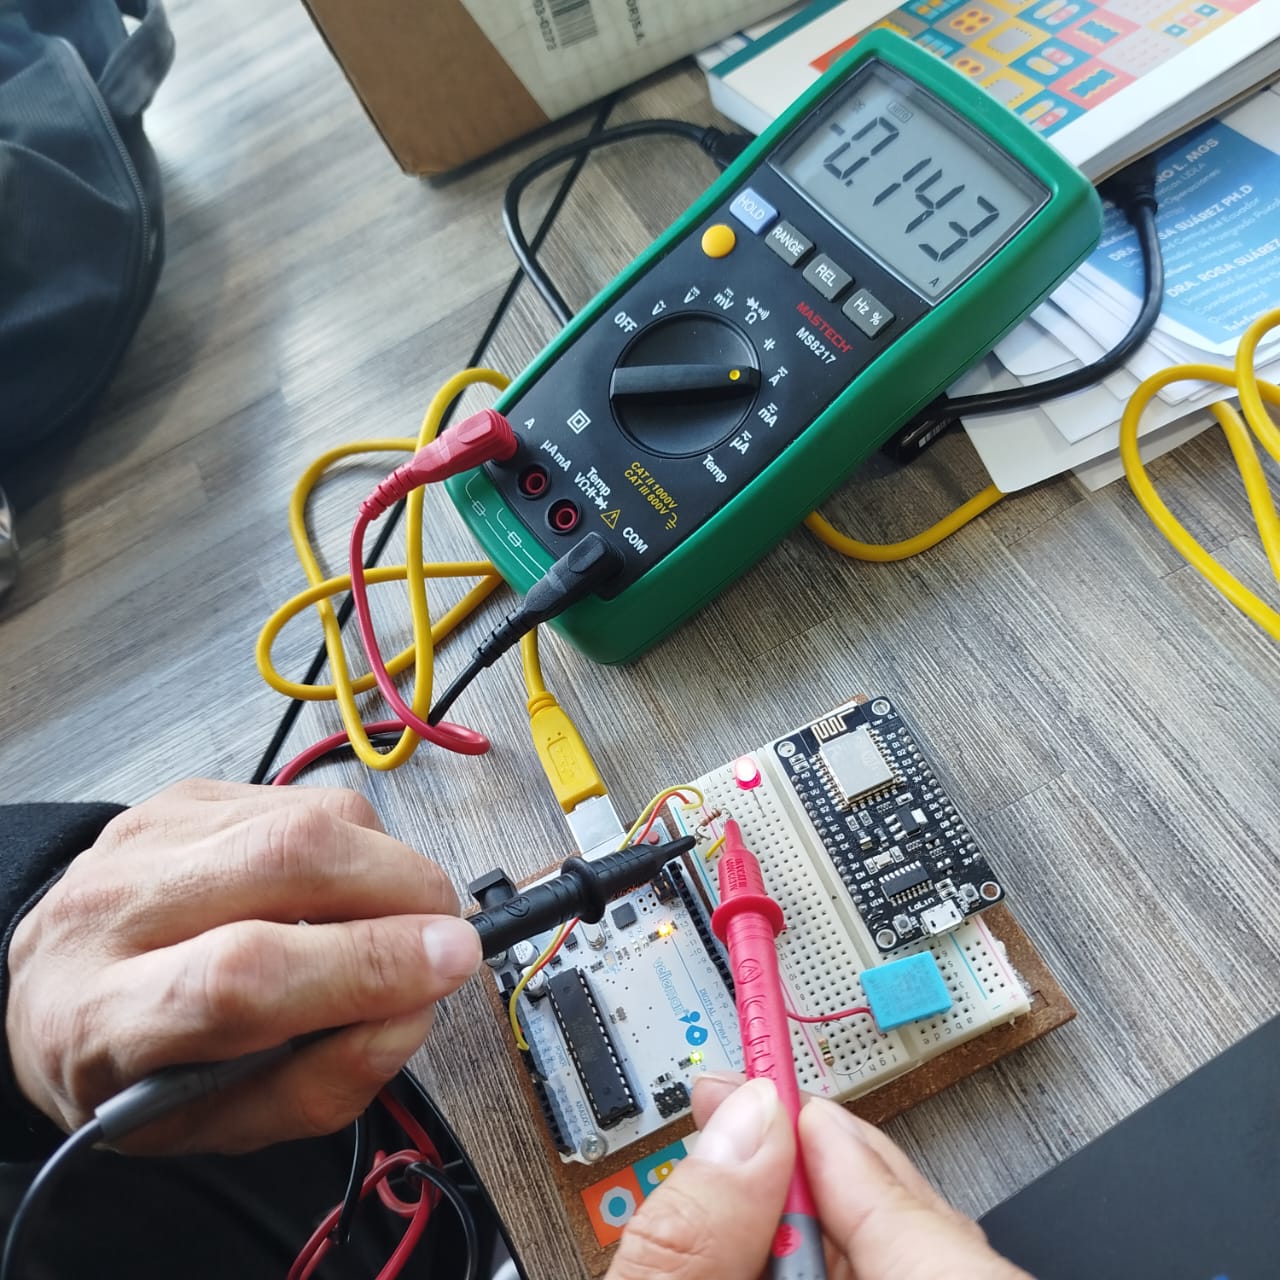
Step 4: Test and Observe
Observe LED blinking with 1s interval on Arduino Uno.
ESP32-CAM opens a web server and streams video. Access the IP shown in Serial Monitor.
Arduino Uno: Reliable for simple, real-time digital I/O. No wireless
capabilities.
ESP32-CAM: Offers wireless connectivity and camera interface but requires more
care in flashing and powering.
Conclusion
While Arduino Uno is excellent for simple embedded projects, ESP32-CAM is more powerful and ideal for
IoT and computer vision tasks. This experiment highlights their differences in use case,
connectivity, and real-world performance.
Individual Assignment
Servo Motor Control with ESP32
Introduction
This project demonstrates how to control a servo motor using an ESP32 microcontroller. We utilize the
ESP32Servo.h library to interface with the servo.
Objective
The goal is to program an ESP32 to control a servo motor, moving it from 0° to 180° in
increments of 10° and resetting to 0°.
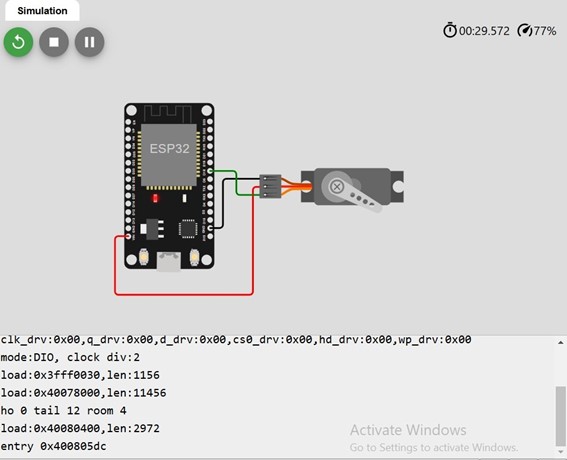
The circuit was tested on Wokwi. The servo motor successfully moves in 10° increments until
reaching 180°, then resets.
ESP32 Servo Control – Code and Setup
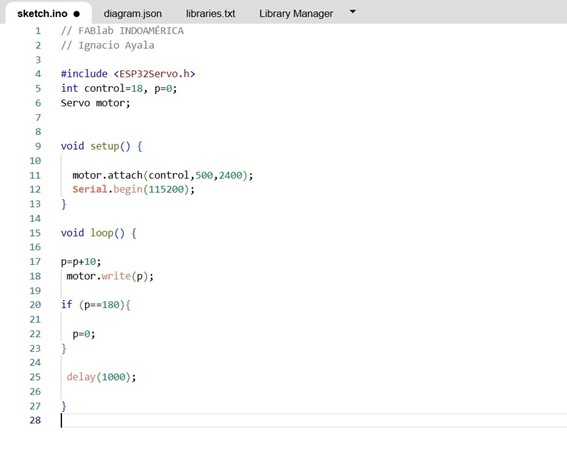
This screenshot shows the Arduino IDE with a simple sketch designed to control a servo motor using an
ESP32 microcontroller. The project is developed within the context of
FabLab INDOAMÉRICA by Ignacio Ayala.
Arduino IDE sketch: ESP32 controlling a servo motor with progressive motion.
Code Explanation
// FABlab INDOAMÉRICA
// Ignacio Ayala

#include <ESP32Servo.h>

int control = 18, p = 0;    // control pin and angle variable
Servo motor;

void setup() {
    motor.attach(control, 500, 2400);  // Attach servo with pulse width range
    Serial.begin(115200);              // Start serial communication
}

void loop() {
    p = p + 10;            // Increase angle by 10 degrees
    motor.write(p);        // Send new position to the servo

    if (p == 180) {
        p = 0;             // Reset to 0° after full sweep
    }

    delay(1000);           // Wait 1 second before next move
}
Behavior
The servo gradually moves in steps of 10° from 0° to 180°.
Once it reaches 180°, it resets to 0° and restarts the cycle.
This cycle creates a smooth, looped motion—ideal for testing rotation limits or creating timed
gestures.
Educational Use
This exercise is a great introduction to PWM control, timing, and servo calibration on the ESP32
platform. It reinforces concepts like incremental movement, pin configuration, and loop logic.
Observations
Current implementation does not return smoothly to 0°.
External power may be needed to avoid jitter.
Conclusion
This project showcases basic servo control with ESP32, which can be further expanded for robotics and
automation.
This week was dedicated to exploring embedded programming, focusing on understanding
microcontrollers, their architectures, and the workflows required to program them effectively.
The Group Assignment allowed for a comparative analysis between the Arduino Uno and ESP32-CAM,
evaluating their specifications, capabilities, and applications. The practical experiment
demonstrated the differences in performance, connectivity, and usability, reinforcing the
importance of selecting the right microcontroller for a given application.
The Individual Assignment provided hands-on experience with programming a microcontroller,
specifically controlling a servo motor using the ESP32. This experiment highlighted key aspects
of embedded systems, such as interfacing with peripherals, signal processing, and power
management considerations
Resource Download
Click the button below to access and download all available materials.